
A2S - Vacuum Cleaner XPower - Free user manual and instructions
Find the device manual for free A2S XPower in PDF.

| Product type | Electric Duster / Air Pump / Pet Hair Dryer |
| Brand | XPower |
| Model | A2S (A-2S) |
| Dimensions (L x W x H) | 17.8 x 9.9 x 18.1 cm |
| Weight | 1.1 kg |
| Voltage / Frequency | 115 V ~ 60 Hz |
| Power | 540 W |
| Amperage | 4.5 A |
| Nominal Airflow | 90 CFM (cubic feet per minute) |
| Speed Control | 2 speeds (I and III) |
| Cord Length | 3 m |
| Safety Certification | ETL / C-ETL |
| Included Accessories (Model A-2S) | Standard Nozzle A, Standard Nozzle B, Instruction Manual, Storage Pouch |
| Filter Maintenance | Clean or replace the filter at the air inlet frequently |
| Nozzle Cleaning | Wash with water, air dry or dry with the unit |
| Safety Precautions | Do not obstruct air intakes/outlets; use away from flammable materials; do not use with a damaged cord; unplug before maintenance; supervise children |
| Warranty | Limited 1 year (United States only) |
| Customer Service | Email: info@xpower.com; Phone: 1-855-855-8868 |
Frequently Asked Questions - A2S XPower
User questions about A2S XPower
0 question about this device. Answer the ones you know or ask your own.
Ask a new question about this device
Download the instructions for your Vacuum Cleaner in PDF format for free! Find your manual A2S - XPower and take your electronic device back in hand. On this page are published all the documents necessary for the use of your device. A2S by XPower.
USER MANUAL A2S XPower
natural_image
Line drawing of a portable electric shaver with handle and spout (no text or symbols)Electric Duster Owner's Manual
Read and save these instructions
WARNING - READ AND SAVE THESE INSTRUCTIONS BEFORE USING THIS PRODUCT.
The user of electrical products may create hazards that include, but are not limited to injury, fire, electrical shock. Failure to follow these instructions may damage and/or impair its operation and void the warranty.
- Before operating, remove all packaging material and check for any damage that may have occurred during shipping or any missing items.
- Check household power supply to ensure it matches the appliance's specification.
- To reduce the risk of electric shock, this appliance has a polarized plug (one blade is wider than the other). This plug is intended to fit into a polarized outlet only one way. If the plug does not fit fully into the outlet, reverse the plug. If it still does not fit, contact a qualified electrician. DO NOT change the plug in any way.
- DO NOT use with damaged cord or plug. If the appliance is not working as it would, or has been dropped, damaged, left outdoors, or dropped into water, return it to a service center.
- DO NOT pull or carry by cord, use cord as a handle, close a door on cord, or pull cord around sharp edges or corners.
- DO NOT run appliance over cord. Keep cord away from heated surfaces.
- The unit's electrical cord cannot be replaced. If the cord is damaged, the appliance should not be used further.
- DO NOT touch this appliance or the plug with wet hands or while standing in water.
- DO NOT allow to be used as a toy. Close attention is necessary when used by or near children.
- DO NOT leave appliance when plugged in. Unplug from outlet when not in use and before servicing.
- Turn off all controls before unplugging. Remove the power cord from the electrical receptacle by grasping and pulling on the power cord plug-end only, DO NOT pull the cord directly.
- Use only as described in this manual. Use only manufacturer's recommended attachments.
- DO NOT put any object into openings. DO NOT use with any opening blocked; keep free of dust, lint, hair, and anything that may reduce air flow.
- Keep hair, loose clothing, fingers and all parts of body away from openings.
- Use extra care when cleaning on stairs.
- If the appliance is damaged or it malfunctions, DO NOT continue to use it. Unplug the product from the electrical outlet. Refer to troubleshooting guide or contact XPOWER.
- Store in a dry indoor area, away from exposure to sunlight, rain, extreme temperature and humidity, or other extreme environments, when not in use.
- An electronic instruction manual can be obtained through manufacturer's website www.xpower.com.
This product is ETL/C-ETL certified.
- The ETL (Electrical Testing Laboratory) Listed Mark is proof that this product has been independently tested and meets the applicable published safety standard of North America.

Eletric Motor Driven Tools:
(1) Sparks
(1.1) Sparks may be visible on occasion due to the electric motor. Various factors may cause this such as prolonged or intensive use, foreign objects or an imbalanced motor.
(1.2) DO NOT use this product around flammable or explosive materials such as gas, oil and chemicals. Sparks can ignite these materials and cause fire.
(1.3) Occasionally small amounts of sparks are safe if away from flammable or explosive materials. Please follow the instructions of the troubleshooting guide. (See Page 12: Troubleshooting Guide)
(1.4) If the amount of sparks exceeds the safe range, a thermal protection fuse will stop this product completely. Please contact XPOWER or other parties authorized by XPOWER for further instructions.
(1.5) If sparks continue or you have a large amount of sparks, we will consider your machine as a defective unit. Please stop using immediately and contact XPOWER or other parties authorized by XPOWER for return or further instructions.
(2) Temperature Level
(2.1) This product generates heated air from the powerful motor. After prolonged use, the airflow and the machine surface can reach high temperature levels.
(2.2) Please be aware that the objects under high temperatures can be damaged. Follow the instructions of the troubleshooting guide. (See Page 12: Troubleshooting Guide)
(2.3) If the temperature exceeds the safe range, a thermal protection fuse will shut down the unit automatically. Please contact XPOWER or other parties authorized by XPOWER for further instructions.
(3) Noise Level
(3.1) This product uses a high RPM (Revolutions Per Minute) motor to provide powerful airflow and can create a high level of noise.
(3.2) Please follow the instructions of the troubleshooting guide. (See Page 12: Troubleshooting Guide)

If you drop this product:
(1) Before the next usage, please point to a safe area and turn on the unit with the low speed setting for 5 minutes. And then switch to the higher speed setting for another 5 minutes.
(2) If you experience abnormal sparks, temperature or noise level occur during the above operation, please immediately stop using and contact XPOWER or other parties authorized by XPOWER for further instructions.
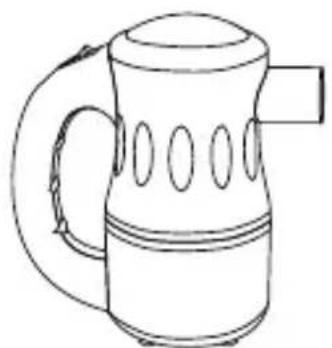
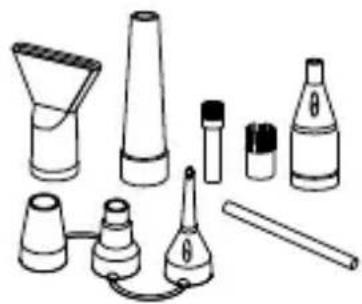
Items Included
natural_image
Line drawing of a kettle with handle and side panel (no text or symbols)• Electric Duster x 1 • Nozzle Attachments
natural_image
Illustration of various laboratory glassware including funnel, conical flask, test tube, and bulb (no text or labels)
- Owner's Manual x 1

- Nozzle Pouch x 1
Parts Description
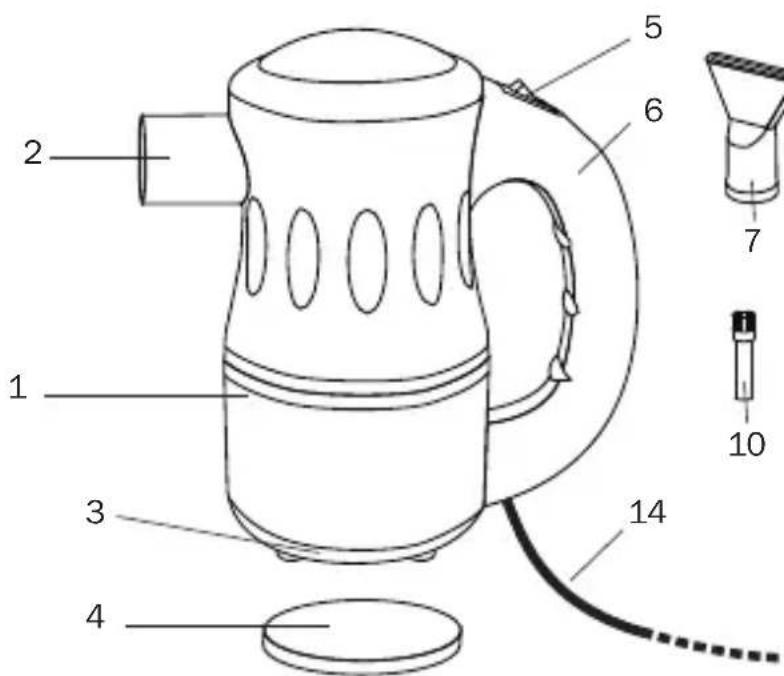
(1) Housing
(2) Air Outlet
(3) Air Inlet
(4) Filter
(5) Speed Switch
(6) Handle
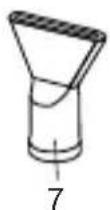
(7) Air Blade Nozzle*
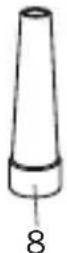
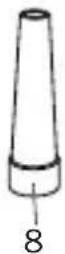
(8) Standard Nozzle*
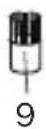
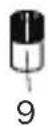
(9) Standard Brush
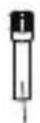
(10) Detail Brush*
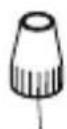
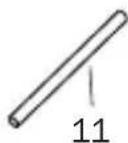
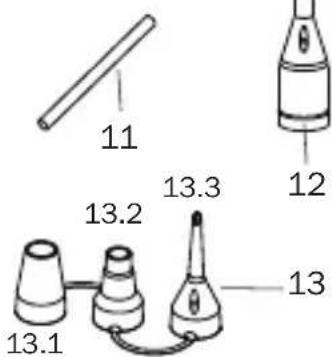
(11) Straw Adapter*
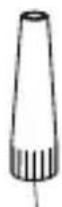
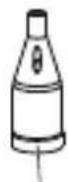
(12) Tapered Flow Nozzle*
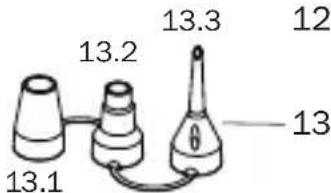
(13) Air Pump Adapter set*
(13.1) Wide Valve Adapter
(13.2) Boston Valve
Adapter
(13.3) Stem Valve Adapter
(14) Power Cord
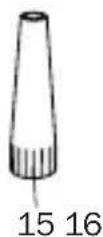
(15) Standard Nozzle A**
(16) Standard Nozzle B**
* Included in model A-2 only.
** Included in model A-2S only.
Electric Duster Introduction
- The XPOWER Electric Duster produces a powerful airflow for endless applications with various nozzle attachments.
- It's ideal to dust, pump air, and dry a variety of surfaces with its power and flexibility.
- With a high pressure airflow, it's also designed to help drying a bathed pet in your home.
natural_image
Line drawing of a portable electric shaver with handle and spout (no text or symbols)Installation and Operation Guide
Nozzle Installation
(See Page 4: Parts Description)
natural_image
Line drawing of a portable electric shaver with handle and spout (no text or symbols)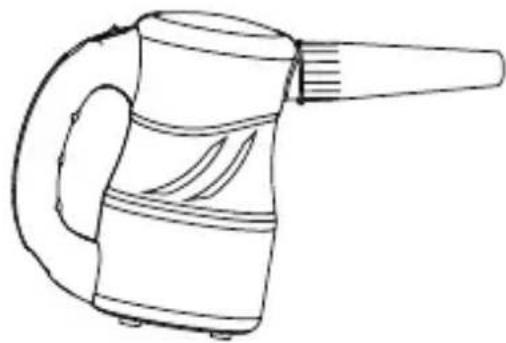
natural_image
Line drawing of a handheld electric shaver with handle and spout (no text or symbols)
natural_image
Line drawing of a portable electric shaver with handle and spout (no text or symbols)Standard Nozzle
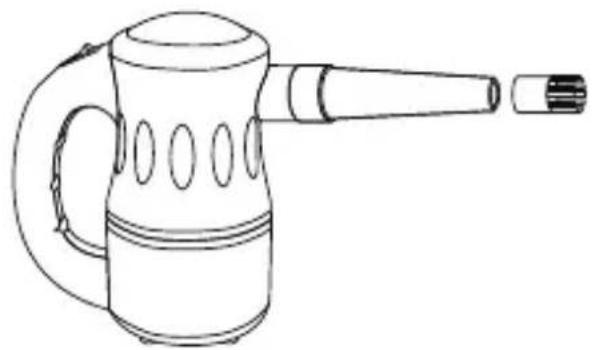
- The standard nozzle can be used alone. Attach the standard nozzle to the air inlet of the electric duster.
- Push and fasten the nozzle.
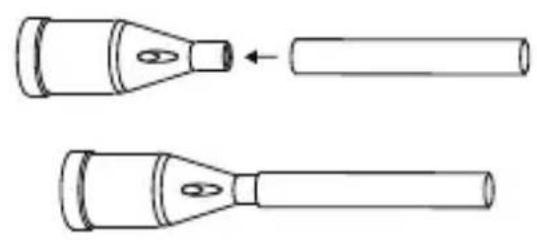
Standard Nozzle A / B
- The Standard Nozzle A / B can be used alone.
- Attach the nozzle to the air inlet of the electric duster. Screw and fasten the nozzle.
natural_image
Line drawing of a portable electric shaver with handle and spout (no text or symbols)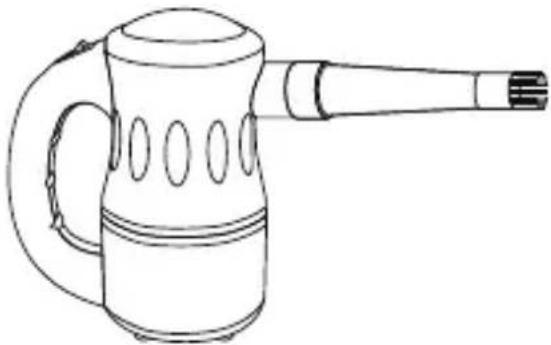
natural_image
Line drawing of a portable electric shaver with handle and spout (no text or symbols)Standard Brush
- The standard brush must be attached onto the standard nozzle or standard nozzle A.
natural_image
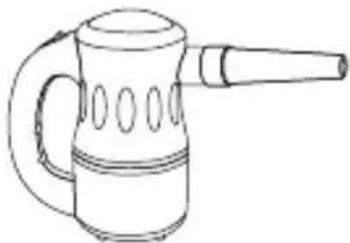
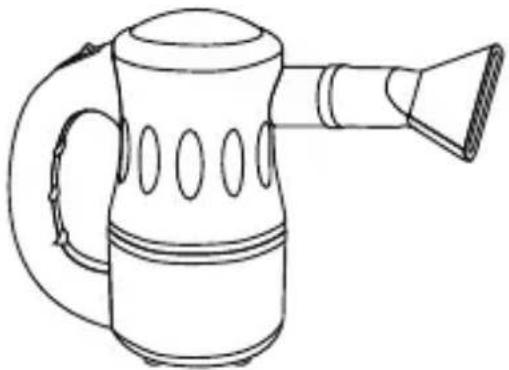
Line drawing of a portable electric kettle with handle and spout (no text or symbols)Air Blade Nozzle
- Simply attach the air blade nozzle to the air inlet of the electric duster.
natural_image
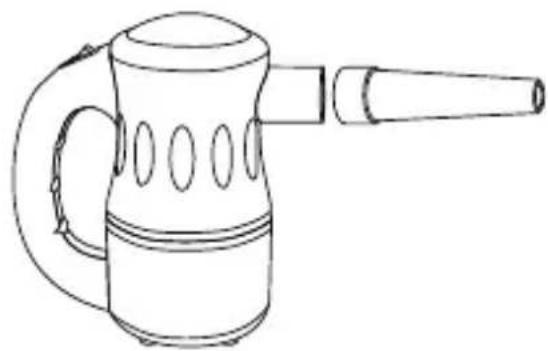
Line drawing of a portable electric kettle with three speakers and a handle (no text or symbols)Air Pump Adapters
- The air pump adapter set consists of three adapters. Each adapter is designed for different kind of inflatable valves.
- Simply attach the desired adapter to the air inlet of the electric duster.
natural_image
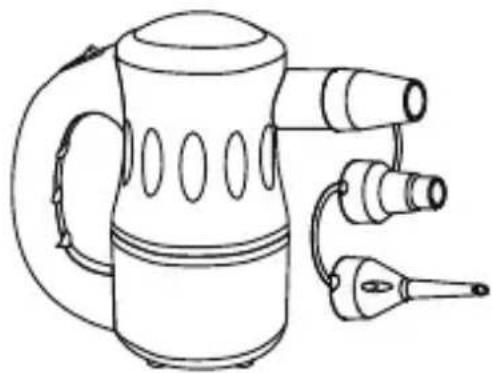
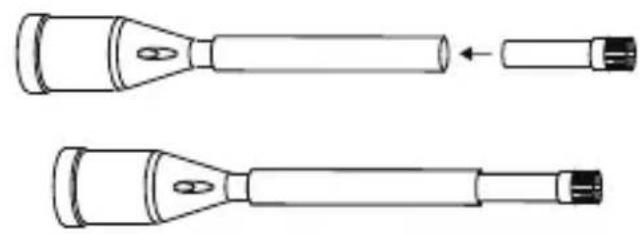
Two handshells with pointed tips and a cylindrical shaft, shown from different angles (no text or symbols)The tapered flow nozzle, straw adapter and the detail brush should be used together.
Tapered Flow Nozzle
- Attach the straw adapter onto the tapered flow nozzle.
natural_image
Two handshells with different tip positions and internal connectors, shown from different angles (no text or symbols)Straw Adapter
- Insert the detail brush inside the other end of the straw adapter.
natural_image
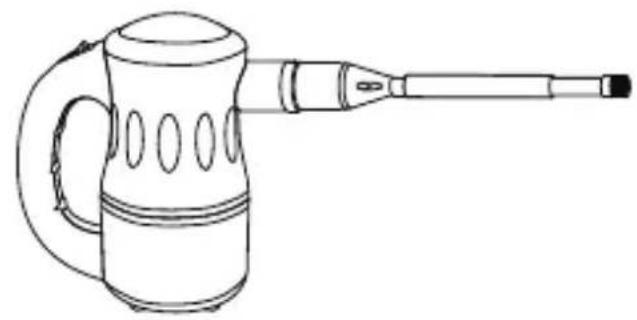
Line drawing of a portable electric shaver with handle and spout (no text or symbols)Detail Brush
- Attach the whole set of the nozzles onto the electric duster.

! WARNING
- Do not tape or block the breathing holes on the tapered flow nozzle and the air pump adapters.
- The breathing holes allow the machine to release the air pressure when the straw adapter or the detail brush is blocked.
- Blocking the breathing holes could cause serious failure on the machine and void the warranty.
Power Supply
Amperage Rating
- This appliance consumes high amperage electricity of 4.5 A (See Page 13: Technical Specifications).
- Make sure you have a power socket with a compatible amperage rating and fuse setting. You should also check if the power circuit of your building can support the total power consumption of all the devices including this appliance.
Speed Switch
natural_image
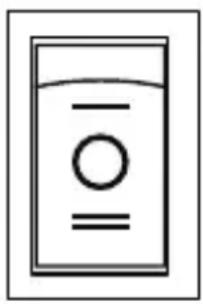
Simple line drawing of a water dispenser with no text or symbols- Switch to “O” position to turn the electric duster OFF. Switch to other positions to turn the electric duster ON.
- There are two speeds settings: I and II. "I" is the lower speed and "II" is the higher speed.
Start Your Job
Before Turning on the Electric Duster:
Please hold the handle tightly and point to a safe area.
Dusting a Computer or Other Devices (See Page 4: Parts Description)
Recommended nozzles: standard nozzle, standard brush, tapered flow nozzle, straw adapter and detail brush.
- Disassemble the computer (or other desired devices) and put the computer (or other desired devices) in a outdoor place (recommended).
- Install the standard nozzle and turn on the electric duster with the higher speed setting. Roughly dust the surface of the computer (or other desired devices).
• Install the standard brush onto the standard nozzle to remove difficult dirt. - Switch to tapered flow nozzle with straw adapter and detail brush installed to clean crawl places.
- Switch to standard nozzle again to dust out the whole surface.
Used As a Hair Dryer for Pet (See Page 4: Parts Description)
Recommended nozzles: standard nozzle and air blade nozzle.
- Force Drying Stage: In this stage, pets have been bathed and are saturated with heavy water. High-pressure airflow can remove the heavy water efficiently. You can achieve high-pressure air by installing the standard nozzle or air blade nozzle and dry at the higher speed setting of the machine.
- Finish Stage: In this stage, most of the heavy water on the pets have been removed in the force drying stage, but there is still some moisture. Heated-temperature and high-
Start Your Job (Continued)
volume soft airflow can help to vaporize the rest of the moisture or to fluff and style. Switch to the lower speed setting and dry. For long coated pets, use the air blade nozzle to prevent knotting in the drying process.
Used As an Air Pump/Inflating (See Page 4: Parts Description)
• Install the matched air pump adapter onto the electric duster.
- Open the valve and insert the adapter into the valve until the adapter cover the whole intake.
- Turn on the machine with the lower speed setting (recommended) and start inflate. Use your hands to feel if there is enough air.
- Turn off the machine when finished. Close the valve.
Stem Valves (Inner diameter ≥ 1/4 inch / 6 mm)
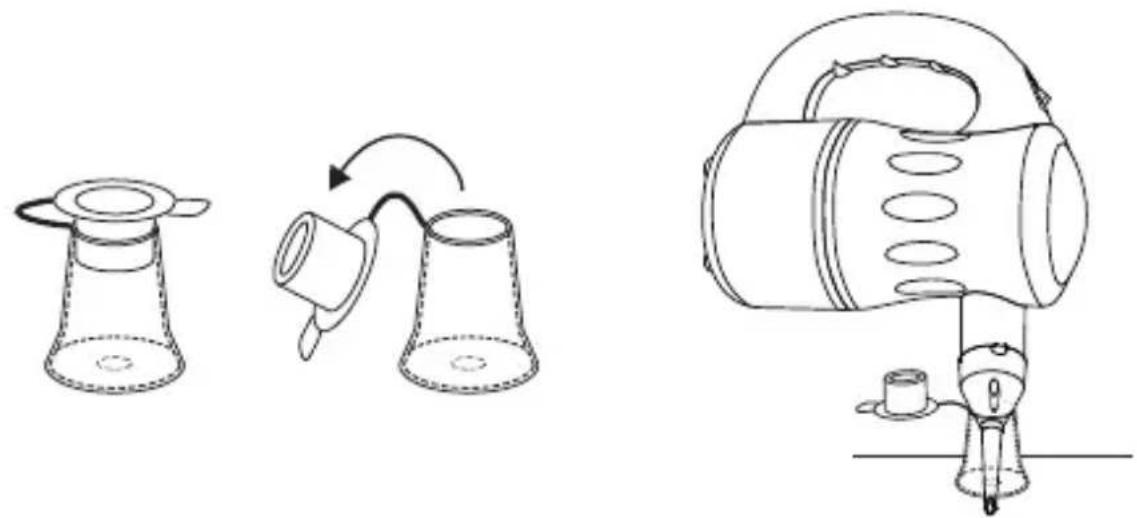
natural_image
Line drawings of three different mechanical devices: a conical cup, a funnel with a handle, and a cylindrical device with a handle (no text or symbols present)Boston Valves (Inner diameter between 12 inch / 12 mm and 78 inch / 22 mm)
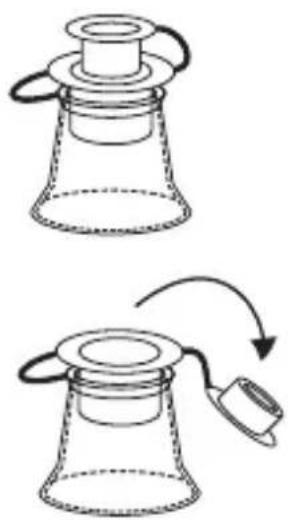
natural_image
Two diagrams showing a conical flask with a lid and a funnel, connected by a curved arrow indicating rotation or movement (no text or symbols)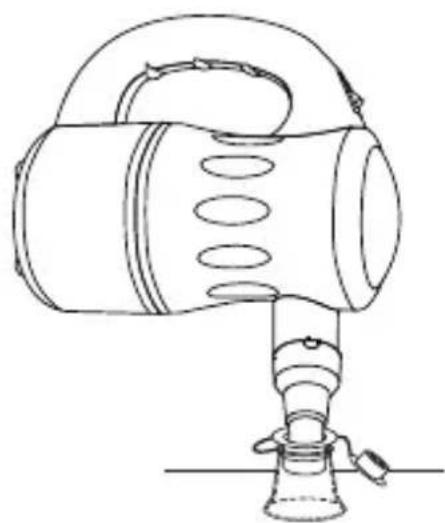
natural_image
Line drawing of a portable radio with handle and base (no text or symbols)Other Valves (Inner diameter between 78 inch / 22 mm and 114 inch / 32 mm)
natural_image
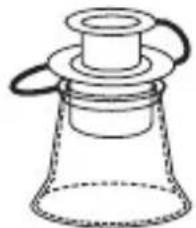
Simple line drawing of a laboratory flask with a stopper and side handles (no text or labels)
natural_image
Simple line drawing of a conical container with a lid and a handle, no text or symbols present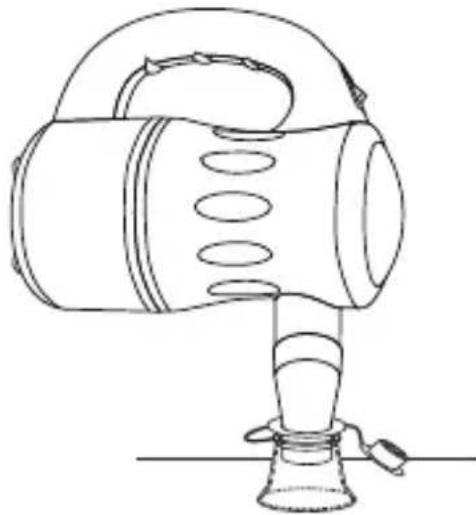
natural_image
Line drawing of a portable flash lamp with handle and base (no text or symbols)
natural_image
Line drawing of a portable kettle with handle and side panel, accompanied by a prohibition symbol (no text or labels)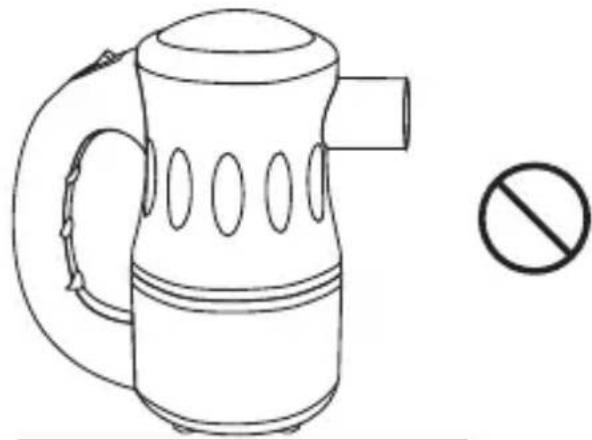
natural_image
Line drawing of a portable kettle with handle and side panel, accompanied by a prohibition symbol (no text or labels)! WARNING
- Do not operate the machine with air inlet or outlet against any flat surface directly.
- This could block the air inlet or outlet and cause serious failure on the machine and void the warranty.
User Maintenance Instructions
Frequent maintenance is recommended on this appliance. Failure to follow the maintenance instructions may cause failure of the appliance and void the warranty.
- When not in use, unplug and store the appliance in a dry and cool indoor place. Make sure it's out of reach of children.
- Before performing any maintenance or cleaning, always disconnect the electric duster from its power source.
- Use a damp cloth to wipe the surface of the housing. Do not clean the unit with water directly.
- Check if the air inlet and outlet are clean. Remove dirt or any other objects that could block the air inlet and air outlet.
Filter Maintenance
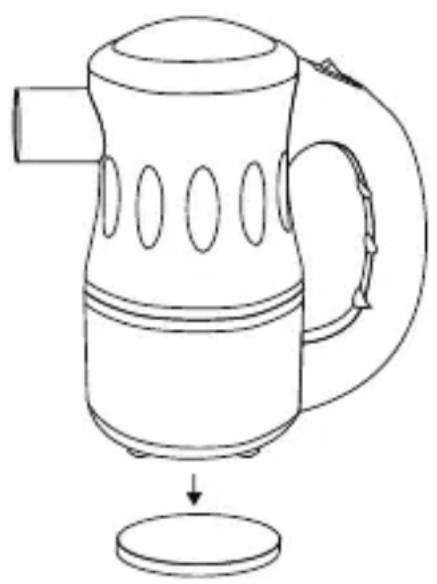
natural_image
Line drawing of a kettle with handle and side panel, showing a drop to a circular base (no text or symbols)There is one filter on the bottom (intake) of the machine. To ensure the best performance, you should clean or replace the filters frequently. (See Also Page 3: Parts Description).
Nozzle Attachment Maintenance
- Use water to remove dirt or any other objects on the nozzle attachments. Pay attention to the possible hidden dirt on the standard brush and detail brush.
- Dry the nozzle attachments in natural wind or with the electric duster.
- Restore the nozzle attachments in the nozzle pouch out of reach of children.
PROBLEM POSSIBLE CAUSE SOLUTION
| Electric duster does not start | No electricity. Check for power supply. | |
| The power cord is not properly plugged in. | Remove and reconnect the power cord. | |
| Unit runs but the speed is abnormal | Air inlet or air outlet is blocked. Remove blockage and clean the filter or nozzle attachment. | |
| Noise This product uses a high RPM motor to provide powerful airflow and could create a certain level of noise. This is a normal sound. | Use a wider opening nozzle attachment, switch to the lower speed setting or operate in a outdoor place. | |
| Abnormal Temperature of the airflow or housing | This product generates powerful motor heated air. After a prolonged use, the airflow and the machine surface might reach a high temperature. | Stop using for at least one hour until fully cooled down. Clean the filter and check if the air inlet or outlet is blocked. Use a glove the isolate the heat coming from the housing. |
| Sparks Occasion | small amount of sparks generated by the motor during normal operation. | This is normal. Use nozzle attachments to arrest most of the occasion sparks along use. |
| Unit works with continuous sparks. | Stop using for at least one hour until the unit cools down. Clean the filter and check if the air inlet or outlet is blocked. Then point to a safe area and turn on the machine for 5 minutes. Spark should disappear. | |
| Nozzle falls off | The nozzle is not properly installed. | Follow the installation guide. Fasten the nozzle before use. |
(See Page 3: Special Instructions)
If troubleshooting does not resolve your problem, please contact XPOWER or other parties authorized by XPOWER for further instructions.
Technical Specification
| MODEL NUMBER A-2 A-2S | ||
| Voltage/Frequency 115 V~60 Hz | ||
| Amperage 4.5 A | ||
| Motor Power 540 W | ||
| Rated Airflow 90 CFM | ||
| Speed Control 2 Speeds | ||
| Cord Length 10 ft. / 3 m | ||
| Unit Dimension (L) x (W) x (H) | 6.75 x 3.82 x 7.22 in. / 17.2 x 9.7 x 18.3 cm | 7.01 x 3.90 x 7.13 in. / 17.8 x 9.9 x 18.1 cm |
| Unit Weight 2.3 lbs. / 1.0 kg 2.3 lbs. / 1.1 kg | ||
| Safety Certification ETL/C-ETL | ||
1 YEAR LIMITED WARRANTY
XPOWER-branded products purchased in the U.S. from authorized distributors include a 1-year limited warranty. Contact XPOWER to confirm warranty information about your product(s).
This limited warranty covers defects in materials and workmanship in your XPOWER-branded products, purchased in the U.S. ONLY. Local warranty policy (if any) in your country will cover products purchased outside the U.S.

IMPORTANT:
(1) Please finish the online warranty registration before usage. Visit www.xpower.com/service-support/warranty-registration.
(2) This Limited Warranty applies with its own timeliness. Contact XPOWER or visit www.xpower.com for more information.
Items mentioned but not limited to below are not covered by warranty:
(1) Power cord, filters or any other components considered as a “consumable parts” by XPOWER.
(2) Normal wear and tear.
(3) Problems that result, directly or indirectly, at XPOWER's sole discretion, from:
(3.1) External causes such as accident, abuse, misuse or problems with electrical power supply.
(3.2) Disassembling, servicing or modification not authorized by XPOWER.
(3.3) Usage that is not accordant with product instructions stated in Owner's Manual.
(3.4) Failure to follow the product instructions or lack of necessary maintenance stated in Owner's Manual.
Before contacting XPOWER, please try one or more of the following:
(1) Consult this Owner's Manual and follow the instructions of troubleshooting guide.
(2) Access www.xpower.com for more advice and information that could be helpful to address your problems.
If you need additional assistance from XPOWER, please:
(1) Email info@xpower.com.
(2) Call XPOWER U.S. Customer Service Department at 855-855-8868 or other numbers provided on www.xpower.com.
(3) Visit XPOWER U.S. Head Office at 668 S. 6th Avenue, City of Industry, CA 91746 or the most current address provided on www.xpower.com.
Please also have your original proof of purchase and the serial number(s) of your product(s) ready when you contact XPOWER.
XPOWER Limited Warranty (USA) (Continued)
If you are instructed to return the unit for service or replacement, please:
(1) Request a RMA (Return-Merchandise-Authorization) number.
(2) Use the original or an equivalent packaging, prepay shipping charges at your own expense to the address provided by XPOWER, with the RMA number on the shipping label or the packaging.
(3) Include all the original parts and components.
XPOWER will inspect, assess and advise the repairs needed and applicable cost, if any. For products under warranty, we will pay to ship the repaired or replaced product(s) to you if you use an address within the Contiguous United States. Otherwise, we will ship the product(s) to you at your own expense.

ADVERTENCIA: LEA Y GUARDE ESTE MANUAL ANTES DE USAR ESTE PRODUCTO.
natural_image
Line drawing of a kettle with handle and side panel (no text or symbols)natural_image
Illustration of various laboratory glassware including funnel, conical flask, test tube, and bulb (no text or labels)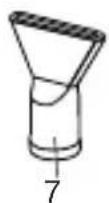
(1) Carcasa
(2) Salida de Aire
(3) Entrada de Aire
(4) Filtro
(5) Interruptor de Velocidad
(6) Manija
(7) Boquilla de la Cuchilla de Aire*
natural_image
Line drawing of a portable electric shaver with handle and spout (no text or symbols)natural_image
Line drawing of a portable electric shaver with handle and spout (no text or symbols)
natural_image
Line drawing of a handheld device with handle and spout (no text or symbols)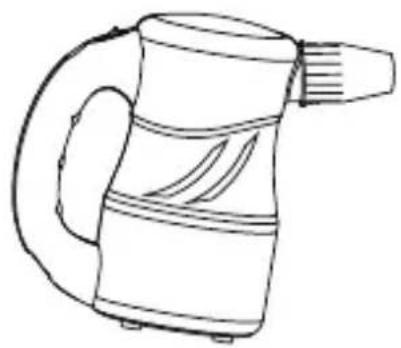
natural_image
Line drawing of a portable electric shaver with handle and spout (no text or symbols)Boquilla Estándar
natural_image
Line drawing of a handheld electric shaver with handle and spout (no text or symbols)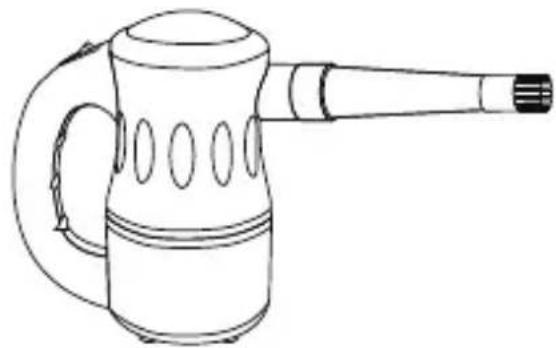
natural_image
Line drawing of a portable electric shaver with handle and spout (no text or symbols)Cepillo Estándar
natural_image
Line drawing of a portable water heater with handle and spout (no text or symbols)natural_image
Line drawing of a portable electric kettle with three speakers and a handle (no text or symbols)natural_image
Two hand-cranked cylindrical devices with pointed tips, one being inserted and the other extended (no text or symbols)natural_image
Diagram of two different types of flashlights with pointed tips and a handle, shown from different angles (no text or symbols present)Adaptador de Paja
natural_image
Line drawing of a handheld electric shaver with handle and spout (no text or symbols)Cepillo de Detalle
natural_image
Simple line drawing of a mechanical component with a cylindrical shaft and flanged end (no text or symbols)natural_image
Simple line drawing of a water level with horizontal and vertical lines (no text or symbols)natural_image
Line drawings of three different types of household appliances: a cup holder, a cup holder with a handle, and a handheld device (no text or symbols present)Válvulas Boston
natural_image
Two diagrams showing a conical flask with a lid and a funnel, connected by a curved arrow indicating process (no text or symbols)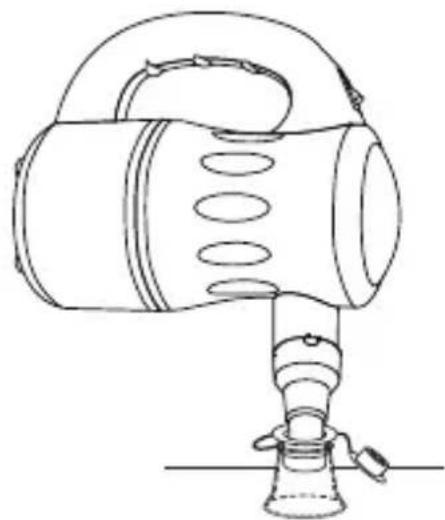
natural_image
Line drawing of a portable electronic device with a handle and spout (no text or symbols)Otras Válvulas
natural_image
Simple line drawing of a laboratory flask with a stopper and side rings (no text or labels)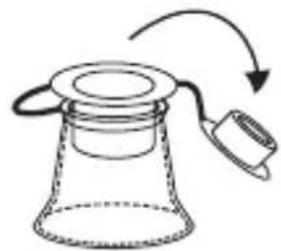
natural_image
Simple line drawing of a funnel-shaped container with an arrow indicating rotation or movement (no text or symbols)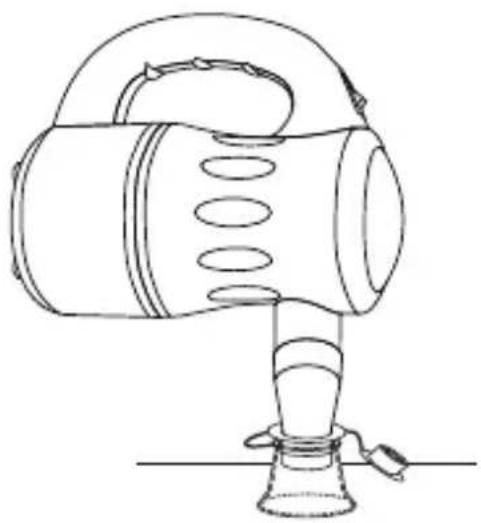
natural_image
Line drawing of a portable lamp with handle and base (no text or symbols)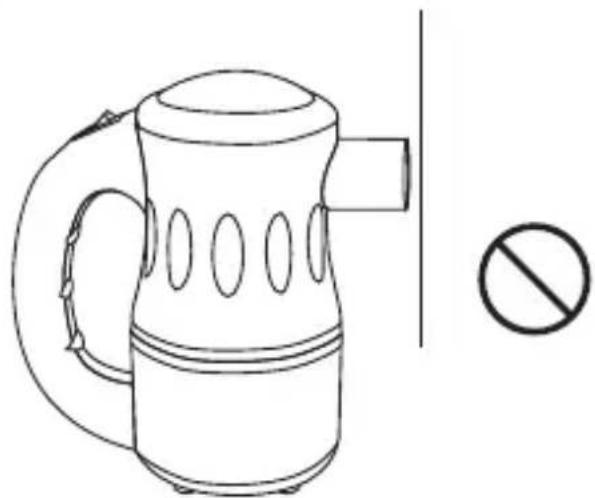
natural_image
Line drawing of a portable kettle with handle and spout, next to a prohibition symbol (no text or labels)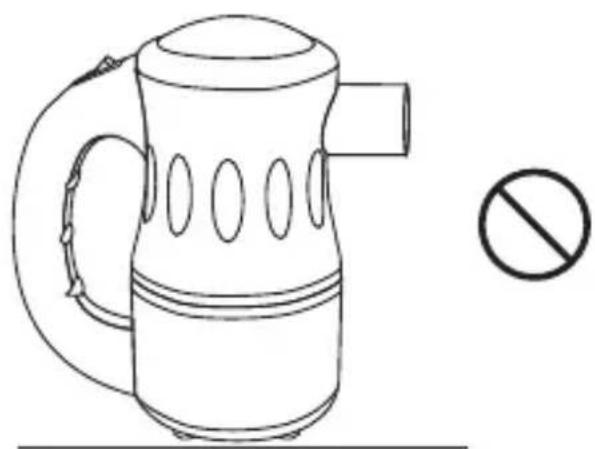
natural_image
Line drawing of a portable kettle with handle and spout, accompanied by a prohibition symbol (no text or labels)! ADVERTENCIA
natural_image
Line drawing of a kettle with a handle and side panel, showing a drop to the base (no text or symbols)natural_image
Line drawing of a kettle with handle and side panel (no text or symbols)natural_image
Illustration of various laboratory glassware including funnel, conical flask, test tube, and beaker (no text or labels)- Buses x 9
(12.2) Adaptateur de clapet large
natural_image
Line drawing of a portable megaphone with handle and spout (no text or symbols)natural_image
Line drawing of a portable electric shaver with handle and spout (no text or symbols)
natural_image
Line drawing of a handheld device with handle and spout (no text or symbols)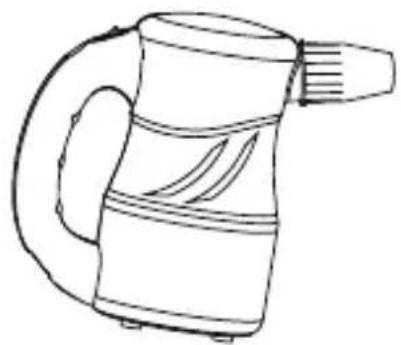
natural_image
Line drawing of a portable electric shaver with handle and spout (no text or symbols)Buse standard
natural_image
Line drawing of a portable electric shaver with handle and spout (no text or symbols)
natural_image
Line drawing of a portable electric shaver with handle and spout (no text or symbols)Brosse standard
natural_image
Line drawing of a portable water heater with handle and spout (no text or symbols)Buse de lame d'air
natural_image
Line drawing of a portable electric kettle with three speakers and a handle (no text or symbols)natural_image
Two hand tools with pointed tips and a cylindrical component, shown from different angles (no text or symbols)natural_image
Diagram of two different types of flashlights with pointed tips and a separate version, shown without any text or symbols.natural_image
Line drawing of a handheld electric shaver with handle and spout (no text or symbols)Brosse détail
natural_image
Simple line drawing of a mechanical component with a handle and base (no text or symbols)Orifice de respiration
! ATTENTION
natural_image
Simple line drawing of a water level with two horizontal lines and a central circle (no text or symbols)natural_image
Line drawings of three different mechanical devices: a conical cup, a funnel with a handle, and a cylindrical device with a handle (no text or symbols present)natural_image
Two diagrams showing a conical flask with a lid and a side arm, connected by an arrow indicating a process or transformation (no text or symbols present)
natural_image
Line drawing of a portable flash lamp with handle and base mount (no text or symbols)natural_image
Simple line drawing of a laboratory flask with a stopper and side handles (no text or labels)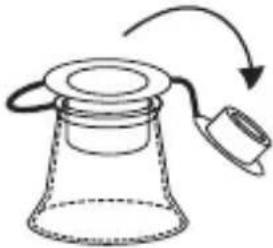
natural_image
Simple line drawing of a conical container with a handle and arrow indicating rotation (no text or symbols)
natural_image
Line drawing of a portable flash lamp with handle and base (no text or symbols)
natural_image
Line drawing of a portable kettle with handle and side panel, accompanied by a prohibition symbol (no text or labels)
natural_image
Line drawing of a portable kettle with handle and side panel, accompanied by a prohibition symbol (no text or labels)! ATTENTION
natural_image
Line drawing of a kettle with handle and side panel, showing a drop to a circular base (no text or symbols)XPOWER Manufacture, INC.
668 S. 6th Avenue
City of Industry, CA 91746 USA
www.xpower.com | 1-(855)-855-8868 | info@xpower.com
Read and save these instructions before use Lea y guarde estas instrucciones antes de usar la unidad Lire et conserver ces instructions avant utilisation