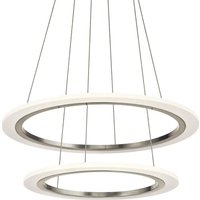
Essex 83337 - Lighting ELAN - Free user manual and instructions
Find the device manual for free Essex 83337 ELAN in PDF.

| Brand | ELAN |
| Model | Essex 83337 |
| Product type | LED pendant light |
| Usage | Indoor |
| Power supply | Included LED driver, 120 V~ |
| Power | Not specified |
| Luminous flux | Not specified |
| Color temperature | Not specified |
| Protection rating | Not specified |
| Main material | Metal |
| Color | Not specified |
| Cable length | Adjustable (via compression fitting) |
| Height | Not specified |
| Diameter | Not specified |
| Weight | Not specified |
| Assembly time | 30 to 60 minutes |
| Required tools | Phillips screwdriver, flat-head screwdriver, wire strippers, electrical tape, ladder, safety glasses, drill with 9/32" bit |
| Mounting | Mounting bracket screwed onto junction box |
| Electrical connection | Neutral (white), live (black), ground (green) |
| Main features | LED lighting, adjustable cable, pendant installation |
| Care and cleaning | Soft damp cloth, non-abrasive soap. Do not use glass cleaners. |
| Safety | Turn off power before installation. Do not touch hot LEDs. Do not stare directly at LEDs. |
| Warranty | 3 years against material and workmanship defects (excluding bulbs and exterior finish) |
| Customer service | 1 855 226-7169, Mon-Fri 8am-4pm EST |
| Replacement parts | Connection cap (WC001), Short metal screws (SCR832X05), Canopy screws (CS83337), Mounting bracket (XBAR83337) |
Frequently Asked Questions - Essex 83337 ELAN
User questions about Essex 83337 ELAN
0 question about this device. Answer the ones you know or ask your own.
Ask a new question about this device
Download the instructions for your Lighting in PDF format for free! Find your manual Essex 83337 - ELAN and take your electronic device back in hand. On this page are published all the documents necessary for the use of your device. Essex 83337 by ELAN.
USER MANUAL Essex 83337 ELAN
Serial Number Purchase Date

Questions, problems, missing parts? Before returning to your retailer, call our customer service department at 1-855-226-7169, 8 a.m. - 4 p.m., EST, Monday - Friday.
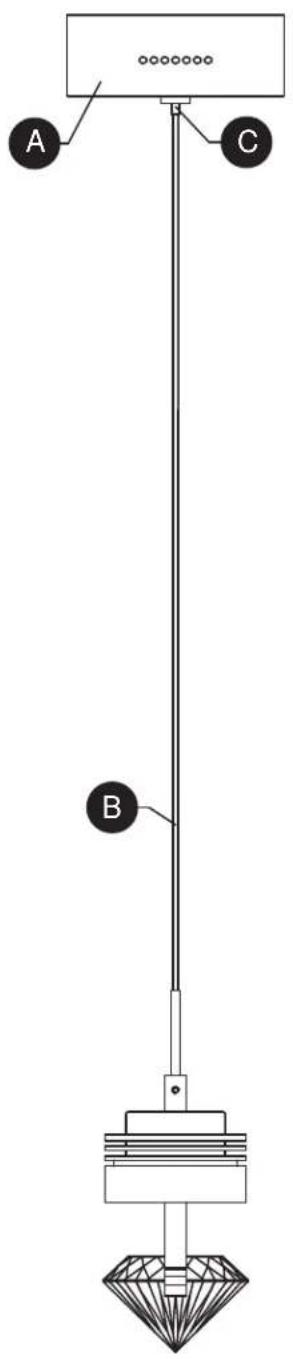
| PART | DESCRIPTION | QUANTITY | |
| A | Canopy | ||
| B | Cable | ||
| C | Compression | Fitting | |

SAFETY INFORMATION
Please read and understand this entire manual before attempting to assemble, operate or install the product.

WARNING
- IMPORTANT: NEVER attempt any work without shutting off the electricity.
- Go to the main fuse box, or circuit breaker, in your home. Place the main power switch in the "OFF" position and unscrew the fuse(s), or switch "OFF" the circuit breaker switch(es), that control the power to the fixture or room that you are working on.
- Place the wall switch in the "OFF" position. If the fixture to be replaced has a switch or pull chain, place those in the "OFF" position.
- Do not touch hot LED.
- The LED light output is strong enough to injure human eyes. Precautions must be taken to prevent looking directly at the LEDs with unaided eyes for more than a few seconds.
WARNING: California Prop 65: This lighting fixture contains chemicals known to the state of California to cause cancer, birth defects, and/or other reproductive harm. Wash hands after use.
CAUTION
- Read and understand all instructions and illustrations completely before proceeding with assembly and installation of this fixture.
- If you have any doubts about how to install this lighting fixture, or if the fixture fails to operate completely, please contact a qualified licensed electrical contractor.
- All parts must be used as indicated in these instructions. Do not substitute any parts, leave parts out, or use any parts that are worn out or broken. Failure to obey this instruction could invalidate the UL listing, C.S.A. certification, and/or ETL listing of this fixture.
- This fixture is intended for installation in accordance with the National Electric Code (NEC) and all local code specifications.
- This lighting fixture is for indoor use only.
- Use ONLY the supplied LED driver to power fixture.
- Driver cable is not intended for use through or concealed behind walls, floors, or ceilings.
- Do NOT operate fixture if any lights are not operating or operating improperly or fixture could be further damaged.
Before beginning assembly of product, make sure all parts are present. Compare parts with package contents list. If any part is missing or damaged, do not attempt to assemble the product.
Estimated assembly time: 30 minutes to 1 hour
Tools Required for Assembly (not included): Phillips screwdriver, flathead screwdriver, wire strippers, electrical tape, ladder, safety glasses.
ASSEMBLY INSTRUCTIONS
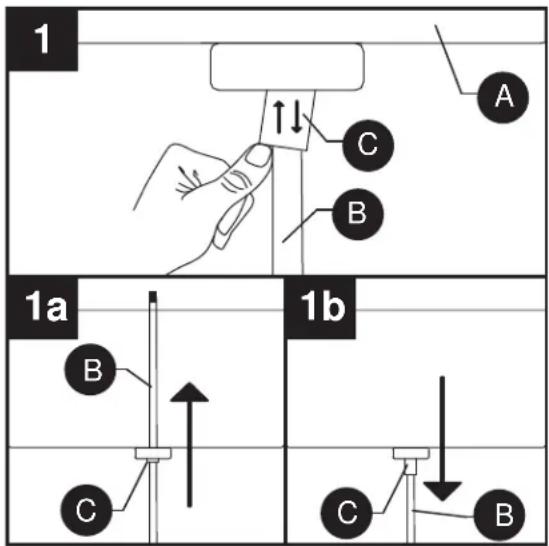
- The hanging length of the cable (B) for this fixture is adjustable. Hold the fixture canopy (A) up against the ceiling to determine the desired length before the entire fixture is assembled.
The cable (B) is held in place by a compression fitting (C). Push up, and hold, the fitting's spring loaded tube (C) to release the cable (B) for adjustment.
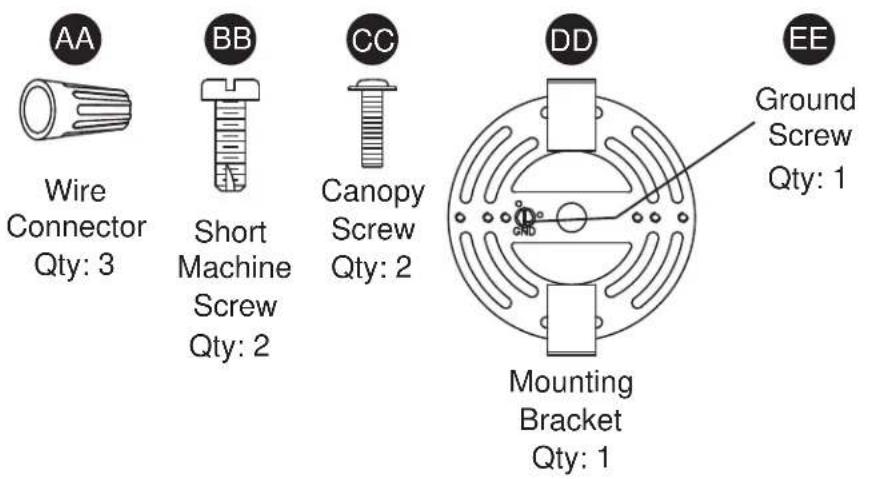
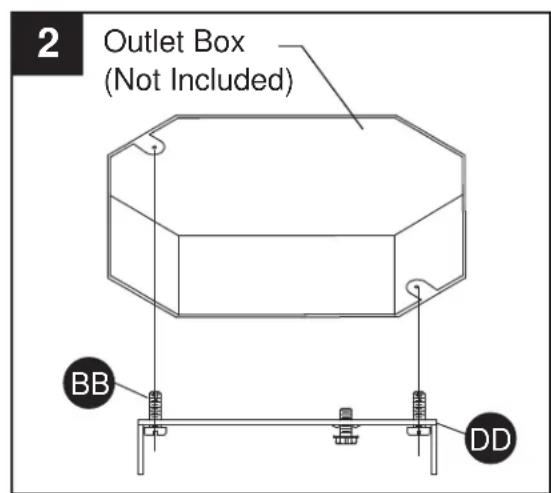
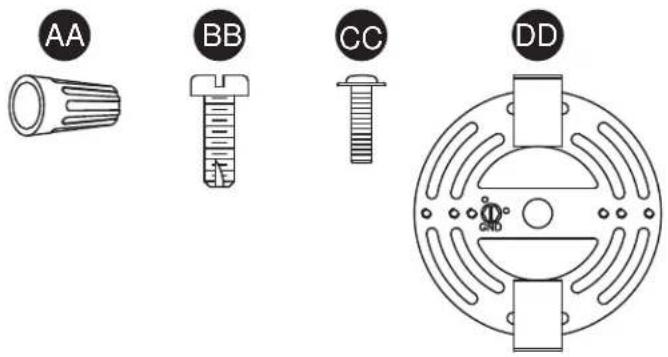
- Connect the mounting bracket (DD) to the outlet box with short machine screws (BB).
Hardware Used

Short Machine Screw

Mounting Bracket

X2

x1
3. Wire connection guide:
Ground wire:
- For installation in the United States: Wrap ground wire from outlet box around ground screw (EE) on mounting bracket (DD) no less than 2 in. from wire end. Tighten ground screw (DD). If fixture is supplied with a ground wire, connect to outlet ground wire with a wire connector (AA).
- For installation in Canada: If fixture is supplied with ground wire, wrap ground wire around ground screw (EE) on mounting bracket (DD). Tighten ground screw EE).
Supply wires:
- Connect the Neutral (White) supply wire from the outlet box to the Neutral fixture wire (White or Parallel Cord "D" shaped and ribbed).
- Connect the Hot (Black) supply wire from the outlet box to the Hot fixture wire (Black or Parallel Cord round and smooth).
NOTE:
Fixture will have 2 wires either Black & White or Parallel Cord SPT-2 lamp wire with one round smooth wire and one "D" shaped ribbed wire.
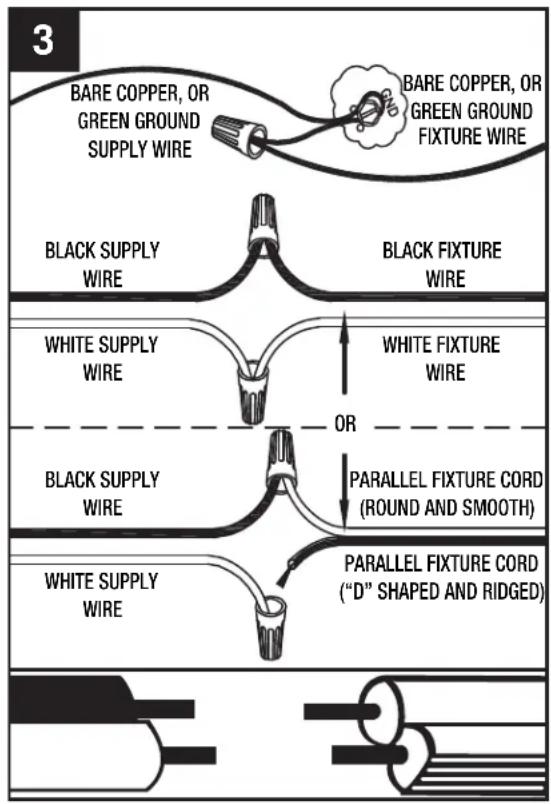
Hardware Used

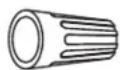
x 3Wire Connector
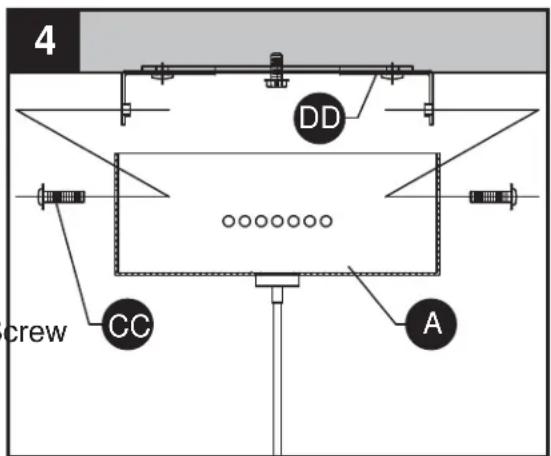
- Connect canopy (A) to mounting bracket (DD) with canopy screws (CC).
Hardware Used


x 2Canopy Sc
- Always be certain that electric current is turned off before cleaning this item.
- Use a soft, moist cloth with mild non-abrasive soap to clean fixture. Never use glass cleaner on fixture, as it will damage the metal finish.
- All glass shades may be washed in a towel-lined sink with warm water and mild soap. Do not wash shades in an automatic dishwasher.
TROUBLESHOOTING
| PROBLEM | POSSIBLE | CAUSE | CORRECTIVE |
| Fixture does not light. | 1. Fixture may be wired incorrectly. | 1. Check wiring. | |
WARRANTY
Distributor warrants products manufactured by it will be free from defects in material and workmanship for three (3) years following the date of shipment. This warranty does not cover bulbs or finish on outdoor product. If any of the warranted products are found by Distributor to be defective, such products will, at Distributor's option, be replaced or repaired at Distributor's cost. The parties hereto expressly agree that Buyer's sole and exclusive remedy against the Distributor shall be for the repair or replacement of defective products as provided herein, or, at the Distributor's sole option, Distributor may refund the purchase price of the products. THE FOREGOING WARRANTY IS IN LIEU OF ALL OTHER WARRANTYES, EXPRESSED OR IMPLIED, INCLUDING THOSE OF MERCHANTABILITY, FITNESS FOR ANY PARTICULAR PURPOSE OR INFRINGEMENT. No affirmation of Distributor, by words or action, other than set forth in this paragraph shall constitute a warranty. Goods which may be sold by Distributor but which are not manufactured by Distributor are not warranted by Distributor, but are sold only with the warranties, if any, of the manufacturer thereof. This warranty does not cover labor or other costs or expenses to remove or install any defective, repaired or replaced product. Distributor's warranty does not apply to any products that have been subjected to misuse, mishandling, misapplication, neglect (including, but not limited to improper maintenance), accident, improper installation, modification (including, but not limited to use of unauthorized parts or attachments), or adjustment or repair.
For replacement parts, call our customer service department at 1-855-226-7169, 8 a.m. - 4 p.m., EST, Monday - Friday.
| PART | DESCRIPTION | PART # | |
| AA | Wire | Connector | WC001 |
| BB | Short Machine Screw | SCR832X050 | |
| CC | Canopy | Screw | CS83337 |
| DD | Mounting Bracket | XBAR83337 |

MINI LUMINAIRE SUSPENDU
MODELE #83337


JOIGNEZ VOTRE REÇU ICI
Vis dupavillon Qte:2