Akso - Hand blender BIGBEN - Free user manual and instructions
Find the device manual for free Akso BIGBEN in PDF.
User questions about Akso BIGBEN
0 question about this device. Answer the ones you know or ask your own.
Ask a new question about this device
Download the instructions for your Hand blender in PDF format for free! Find your manual Akso - BIGBEN and take your electronic device back in hand. On this page are published all the documents necessary for the use of your device. Akso by BIGBEN.
USER MANUAL Akso BIGBEN
Waterloo Office Park/Batiment H
Drive Richelle 161 bte 15 1410 Waterloo, Belgium
Bigben Interactive NEDERLAND b.v.
BELGIQUE, customerservice@bigben-interactive.be
NEDERLAND, customerservice@bigben-interactive.nl
ESPANA, sat@bigbeninteractive.es
ITALIA, support@bigbeninteractive.it
www/bigben.eu
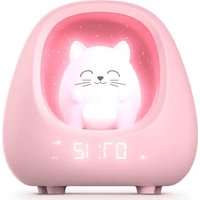
AKSO
SLEEP TRAINER ALARM CLOCK/ LIGHT/MUSIC / USB / AUX IN

OPERATING INSTRUCTIONS
PLEASE READ THIS USER MANUAL CAREFULLY BEFORE
OPERATING THIS UNIT AND RETAIN FOR
FUTURE REFERENCE
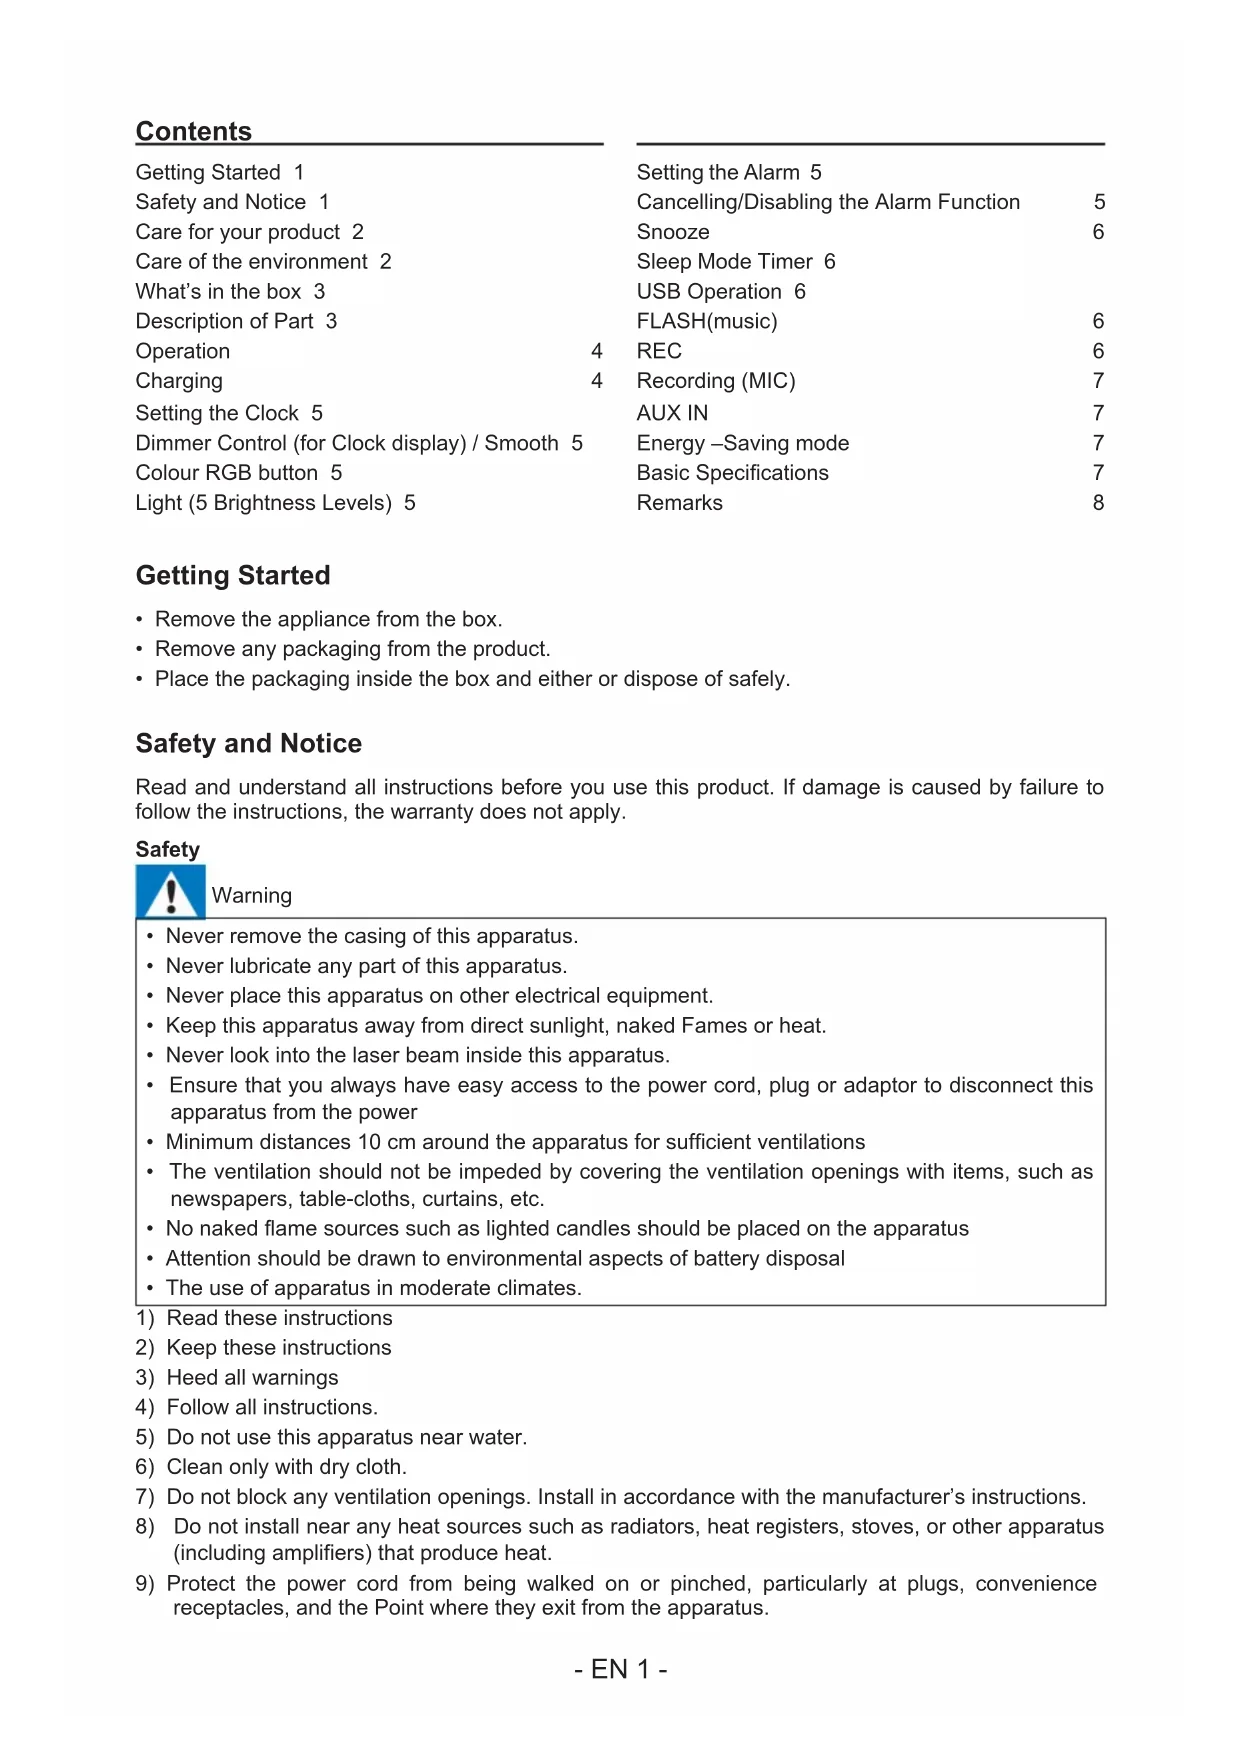
Contents
Getting Started 1
Safety and Notice 1
Care for your product 2
Care of the environment 2
What's in the box 3
Description of Part 3
Operation
Charging
Setting the Clock 5
Dimmer Control (for Clock display) / Smooth 5
Colour RGB button 5
Light (5 Brightness Levels) 5
Setting the Alarm 5
Cancelling/Disabling the Alarm Function 5
Snoopze 6
Sleep Mode Timer 6
USB Operation 6
FLASH(music) 6
REC 6
Recording (MIC) 7
AUX IN 7
Energy-Saving mode 7
Basic Specifications 7
Remarks 8
Getting Started
- Remove the appliance from the box.
- Remove any packaging from the product.
- Place the packaging inside the box and either or dispose of safely.
Safety and Notice
Read and understand all instructions before you use this product. If damage is caused by failure to follow the instructions, the warranty does not apply.
Safety

Warning
- Never remove the casing of this apparatus.
- Never lubricate any part of this apparatus.
- Never place this apparatus on other electrical equipment.
- Keep this apparatus away from direct sunlight, naked Fames or heat.
- Never look into the laser beam inside this apparatus.
- Ensure that you always have easy access to the power cord, plug or adaptor to disconnect this apparatus from the power
- Minimum distances 10 cm around the apparatus for sufficient ventilations
- The ventilation should not be impeded by covering the ventilation openings with items, such as newspapers, table-cloths, curtains, etc.
- No naked flame sources such as lighted candles should be placed on the apparatus
- Attention should be drawn to environmental aspects of battery disposal
The use of apparatus in moderate climates.
1) Read these instructions
2) Keep these instructions
3) Heed all warnings
4) Follow all instructions.
5) Do not use this apparatus near water.
6) Clean only with dry cloth.
7) Do not block any ventilation openings. Install in accordance with the manufacturer's instructions.
8) Do not install near any heat sources such as radiators, heat registers, stoves, or other apparatus (including amplifiers) that produce heat.
9) Protect the power cord from being walked on or pinched, particularly at plugs, convenience receptacles, and the Point where they exit from the apparatus.
10) Only use attachments/accessories specified by the manufacturer.
11) Use only with the cart, stand, tripod, bracket, or table specified by the manufacturer or sold with the apparatus. When a cart is used, use caution when moving the cart/apparatus combination to avoid injury from tip-over.
12) Unplug this apparatus during lightning storms or when unused for long periods of time.
13) Refer all servicing to qualified service personnel. Servicing is required when the apparatus has been damaged in anyway, such as power-supply cord or plug is damaged, liquid has been spilled or objects have fallen into the apparatus, apparatus has been exposed to rain or moisture, does not operate normally, or has been dropped.
14) Apparatus shall not be exposed to dripping or splashing.
15) Do not place any sources of danger on the apparatus (e.g. liquid filled objects, lighted candles).
16) Where the MAINS plug (or AC/DC adaptor) or an appliance coupler is used as the disconnect device, the disconnect device shall remain readily operable.
17) Make sure there is enough free space around the product for ventilation.
18) Batteries (battery pack or batteries installed) shall not be exposed to excessive heat such as sunshine, fire or the like.
19) The rating label is placed on the bottom side of apparatus.
Care for your product
1) Always unplug the appliance when not in use and before cleaning.
2) Do not play music at excessive volume levels as damage to hearing and or the equipment may occur.
3) Do not use this unit in wet or damp conditions.
4) Always disconnect the unit from the mains power supply before cleaning. Clean the appliance with a soft, damp, lint free cloth. Do not use abrasives or harsh cleaners.
Care of the environment

Your product is designed and manufactured with high quality materials and components, which can be recycled and reused.

Your product contains batteries covered by the European Directive 2006/66/EC, which cannot be disposed with normal household waste. Please inform yourself about the local rules on separate collection of batteries because correct disposal helps to prevent negative consequences for the environmental and human health.

When this crossed-out wheeled bin symbol is attached to a product it means that the product is covered by the European Directive 2002/96/EC. Please inform yourself about the local separate collection system for electrical and electronic products. Please act according to your local rules and do not dispose of your old products with your normal household waste. Correct disposal of your old product helps to prevent potential negative consequences for the environment and human health.
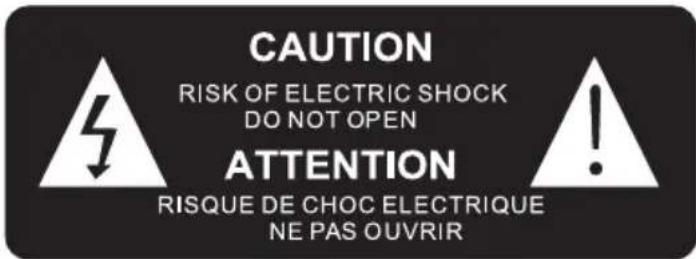
The lightning symbol inside an equilateral triangle warns the user of the presence inside the product of uninsulated hazardous electric voltages powerful enough to represent an electrocution risk.
Battery power:
Be sure that the batteries are inserted correctly to avoid damage to the appliance. Always remove the batteries when appliance will not be used for a long period of time, as this will cause leakage to the batteries and subsequently damage to your set.
Use batteries of the same type. Never use different types of batteries together.
Do not throw the battery into the fire, or exposed to sunshine or the like.
If the liquid contained in the batteries comes in contact with eyes or skin, wash the area immediately and carefully with clear water and consult a doctor
Caution:
Danger of explosion if battery is incorrectly replaced. Replace only with the same or equivalent type. Location of label is at the bottom of product.
What's in the box
Check and identify the contents of your package:
- Main unit
- 1 x user manual
- 1 x aux in 3.5mm cable
- 1 x Micro USB charging cable
- 1 x sticker sheet for AKSO Sleep Trainer's eye
Description of Part
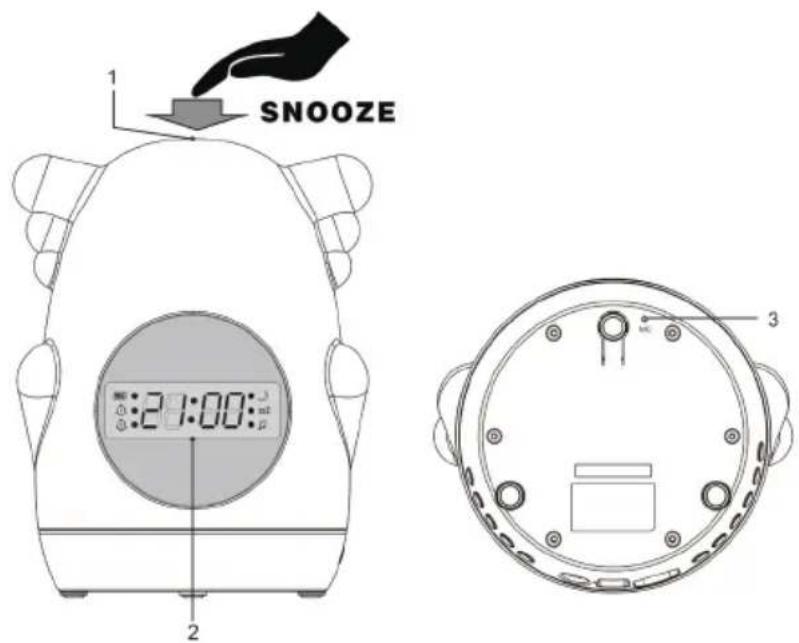
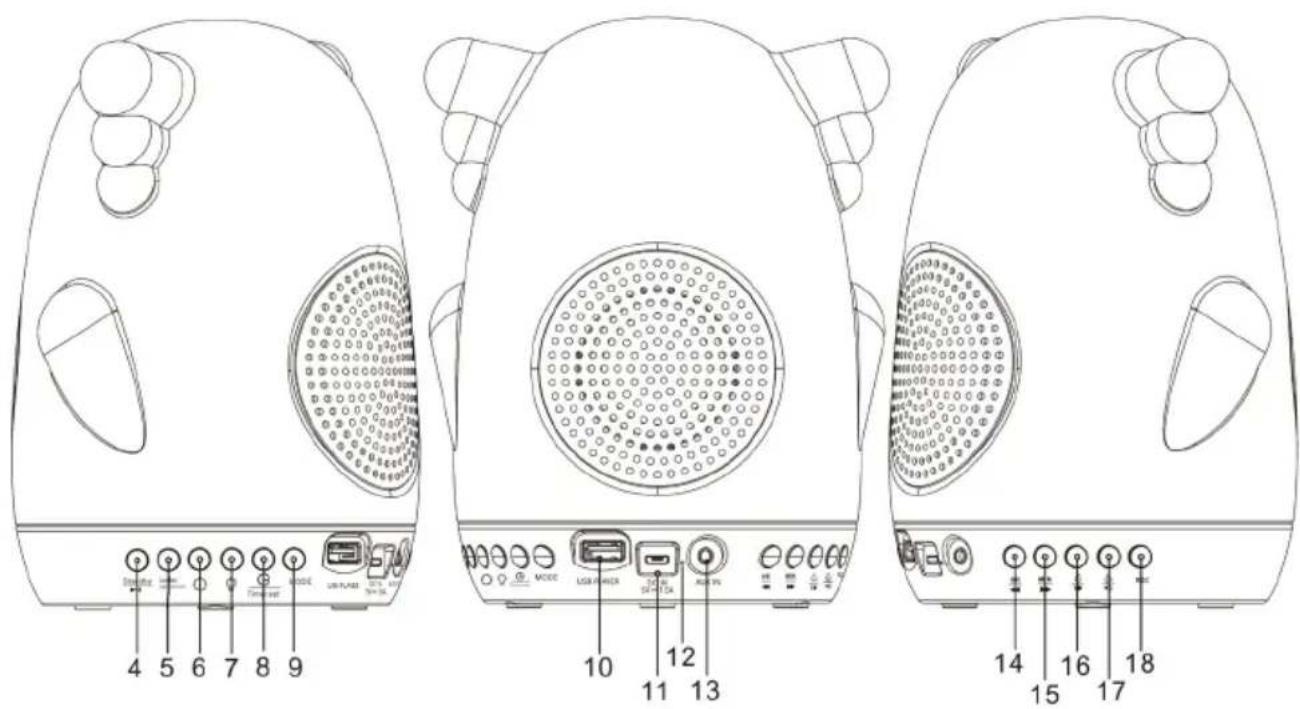
| 1) Snooze 10) USB Player | |
| 2) LCD Display 11) Charging Jack (DC In 5V/1.5A) | |
| 3) MIC (at the bottom) 12) Charging Indicator Light | |
| 4) Standby / Play & Pause (ON/OFF) | 13) Aux In |
| 5) Dimmer / Smooth Light | 14) HR (Hour)/Up Down Button |
| 6) Light Colour | 15) MIN (Minutes)/Up button |
| 7) Light (5 Brightness Levels) | 16) Alarm 1 Volume - |
| 8) Timer Set / Sleep Mode | 17) Alarm 2 Volume + |
| 9) Mode (AUX In / USB / FLASH(Music)/REC 18) | REC (Recording) |
Operation
For initial use, the unit should be fully charged for at least 10 hours.
- The end user may choose their favourite pair of eyes from the included sticker sheet and stick it on the AKSO Sleep Trainer's face.
- Long Press t for 3 seconds to turn on the unit. The display screen will show the function of what user stopped last time. Press MODE to select the functions.
- Long press t for 3 seconds again to turn off the unit. Unit will go to standby mode. Display screen will show the clock time. User can set the time, alarm 1, alarm 2.
- Press the button to start music playback. Press the button again to pause music
Charging
- Plug the Micro USB charging cable into the AKSO Sleep Trainer.
- The red LED indicator light beside the charging jack button will turn ON when charging and turn OFF when fully charged.
- Unplug the USB charging cable when fully charged.
Setting the Clock
- In standby mode, long press the button to enter the time mode.
- Press the H R button to set the hour and minute.
The clock will display in 24-hour format.
Press the button to confirm the time.
Dimmer Control (for Clock display) / Smooth
- Press the button to control the brightness of the LCD display.
There are 3 levels: High (Bright) Low (Dim light) OFF.
- When long pressing, the light colours will change in sequence. Long press the button again to turn off the function.

Colour RGB button
- Press the button to select the desired light colour. You may select from 7 colours.

Light (5 Brightness Levels)
- Users may select from 5 brightness levels. Press the button to choose the level.
Setting the Alarm
- In standby mode, press & hold the button for 2 seconds. The LCD display will flash.
-
Press the button to select the time (Hour/Minutes), then press the button to confirm the time.
As a next step, to set the music, press to choose your preferred option below. -
Alarm output sound: 1) BB - Buzzer
2) USB Music
3) FLASH: Press (to enter FLASH mode. Press to select 6 music(01,02,03,04,05,06)
4) REC (recording sound/music)
-
Press the button to confirm the music setting.
-
Next, set the alarm sound output level setting. Press the HR / MIN button to choose your preferred sound output level.
-
Press the button to confirm the alarm setting.
The indicator light is "ON" on the display. - When the alarm rings, the light is also "ON",
- Press any key to turn off Alarm 1 or 2.
- The alarm clock will resume the function at the same time the next day.
- The unit features a dual alarm. Repeat the above steps to set & select the alarm output.
- Crescendo function: 30 minutes before alarm time set to wake up, light will turn from white to yellow. This function is only for 30 minutes before alarm time.
Cancelling/Disabling the Alarm Function:
- In standby mode, press or to cancel / disable the alarm function.
Snoopze
When the alarm rings, you may press the "AKSO" head to stop the alarm from ringing. There is a snooze button under the base (next to the mic button). The alarm indicator light will flash.
The alarm will ring again every 9 minutes.
- Press any key on the base panel to switch off the alarm ring & the alarm indicator light will stop flashing.

Sleep Mode Timer
- In USB/FLASH(Music)/REC/AUX IN mode, songs and light will turn off after the selected time has elapsed. Press the button to activate sleep mode.
- By default, a 60-minute countdown will start. The user has other sleep timer options: 60, 50, 40, 30, 20, 10 & off.
To cancel the Sleep mode, press the button to select "Off". - If the sleep mode timer is selected, both sound volumes will be reduced and the light will dim gradually.
- Decrescendo function:
When user selects Sleep Mode timer 60/ 50/ 40/ 30/ 20/ 10 minutes before fall asleep. Light will turn from bright white to dark blue. Light will dim gradually & remain 10% brightness.
USB Operation
- Insert the USB plug into the USB jack. Press MODE to select the USB function.
- Press the button to turn on the unit.
- Press the button to skip up / skip down & choose the song to play.
- Adjust the volume button.
- Press the button to turn off the unit.
FLASH(music)
- Press the button to turn on the unit.
- Press the MODE button to select Flash(music) function.
- Press the button to skip up / skip down & choose the song to play.
3 x melody 01/02/03
3 x nature sound 04/05/06 - Adjust the volume button.
- Press the button to turn off the unit.
REC:
- Press the button to turn on the unit.
- Press the MODE to select the REC function.
The unit can only hold one recording at a time. - Adjust the volume button.
- Press the button to turn off the unit.
Recording (MIC)
- Press the button to turn on the unit.
- Press the MODE to select the REC function.
- Then, press the REC button and start to record. For better song quality, speak/sing directly into the mic at the bottom of the unit.
- Press REC again to finish the recording.
The recorded song is saved as the last file in the internal memory. (Please note: you may record for a maximum of 1 minute.)
This unit can only save 1 song at a time. Each new recording will overwrite the previous file.
AUX IN
- Press the button to turn on the unit.
- Press the MODE to select the AUX function.
- Plug one end of the 3.5mm audio cable (included) into the Aux-In socket, and the other end into an external source with a line to play music through the unit's speaker.
- Adjust the volume button.
- Press the button to turn off the unit.
Energy-Saving mode
- For energy saving, long press 2 buttons MODE & HR together for 3 seconds. The display screen will be flashed 1 time and take off the hand. All functions will be Off immediately. Unit will enter energy-saving mode.
- Long press POWER ON for 3 seconds to resume the functions
WARNING! Risk of hearing impairment
- Set a low volume on the playback device before connecting the headphones to the sound source.
- Avoid excessive volume, particularly over extended periods or frequent use. Excessive volume can result in permanent hearing impairment.
Basic Specifications:
Output power: 2 W
Lithium battery: 2000 mAh
Charging: 5V/1.5A
RGB LEDs
Remarks:
- Don't discard the electrical and electronic appliances in the regular waste disposal.
a) Take them to a collection point.
b) Some components in these appliances may be hazardous to health and the environment. - In order to save energy when the unit has no sound output for a while, the unit will be switched to stand-by automatically. It can be switched ON by using the POWER selector again.
- In order to save energy when the unit in USB / Aux-In mode has no sound output for 15 minutes, the unit will be switched to stand-by automatically. It can be switched ON by using the POWER selector again.
- You can find the information on the plate located at the back of the unit.
DECLARATION OF CONFORMITY
The undersigned, Bigben Interactive declares that the radio equipment of the AKSO type complies with the 2014/53/EU directive.
The complete text is available at https://www/bigben-interactive.co.uk/support/
Manufactured by BIGBEN INTERACTIVE SA
396, Rue de la Voyette
CRT2-FRETIN
CS 90414
59814 LESQUIN Cedex - France
www/bigben.eu
Made in China


REACH

Fabricant:BigbenInteractiveFRANCE
396, Rue de la Voyette, C.R.T. 2, Fretin, CS90414 - 59814 Lesquin Cedex, France
Waterloo Office Park/Batiment H
Dreve Richelle 161 bte 15 1410 Waterloo, Belgium
Bigben Interactive NEDERLAND b.v.
BELGIQUE, customerservice@bigben-interactive.be
NEDERLAND, customerservice@bigben-interactive.nl
ESPANA, sat@bigbeninteractive.es
ITALIA, support@bigbeninteractive.it
www/bigben.eu
AKSO
Waterloo Office Park/Batiment H
Drive Richelle 161 bte 15 1410 Waterloo, Belgium
Bigben Interactive NEDERLAND b.v.
BELGIQUE, customerservice@bigben-interactive.be
NEDERLAND, customerservice@bigben-interactive.nl
ESPANA, sat@bigbeninteractive.es
ITALIA, support@bigbeninteractive.it
www/bigben.eu
AKSO
SLEEP TRAINER OROLOGIO SVEGLIA/LUCE/MUSICA/USB/AUX IN

ISTRUZIONI D'USO
PRIMA DI UTILIZZARE L'APPARECCHIO, LEGGERE PER INTERO IL PRESENTE MANUALE E CONSERVARLO PER CONSULTAZIONI FUTURE.
Index
Waterloo Office Park/Batiment H
Drive Richelle 161 bte 15 1410 Waterloo, Belgium
Bigben Interactive NEDERLAND b.v.
BELGIQUE, customerservice@bigben-interactive.be
NEDERLAND, customerservice@bigben-interactive.nl
ESPANA, sat@bigbeninteractive.es
ITALIA, support@bigbeninteractive.it
www/bigben.eu
AKSO
SLEEP TRAINER RELOGIO DESPERTADOR / LUZ / MUSICA / USB / ENTRADA AUXILIAR

Waterloo Office Park/Batiment H
Drive Richelle 161 bte 15 1410 Waterloo, Belgium
Bigben Interactive NEDERLAND b.v.
BELGIQUE, customerservice@bigben-interactive.be
NEDERLAND, customerservice@bigben-interactive.nl
ESPANA, sat@bigbeninteractive.es
ITALIA, support@bigbeninteractive.it
www/bigben.eu
AKSO
SCHLAFFTRAINER WECKER/LAMPE/MUSIK/USB/AUX-IN

BEDIENUNGSANLEITUNG
Waterloo Office Park/Batiment H
Dréve Richelle 161 bte 15 1410 Waterloo, Belgium
Bigben Interactive NEDERLAND b.v.
BELGIQUE, customerservice@bigben-interactive.be
NEDERLAND, customerservice@bigben-interactive.nl
ESPANA, sat@bigbeninteractive.es
ITALIA, support@bigbeninteractive.it
www/bigben.eu
AKSO
SLAAPTRAINER
WEKKER/ LICT/ MUZIEK / USB / AUX IN

HANDLEIDING
GELIEVE DEZE GEBRUKSAANWIJZING GOED DOOR TE NEMEN VOOR U HET TOESTEL IN GEBRUK NEEMT EN BEWAAR HET ZODAT U HET LATER NOG KAN RAADPLEGEN.
Inhoud
Aandeslag1
Waterloo Office Park/Batiment H
Drive Richelle 161 bte 15 1410 Waterloo, Belgium
Bigben Interactive NEDERLAND b.v.
BELGIQUE, customerservice@bigben-interactive.be
NEDERLAND, customerservice@bigben-interactive.nl
ESPANA, sat@bigbeninteractive.es
ITALIA, support@bigbeninteractive.it
www/bigben.eu