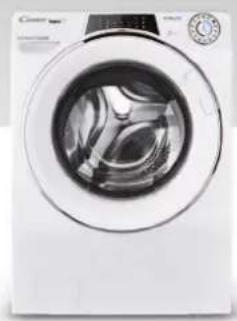
CST G282DM107 - Washing machine CANDY - Free user manual and instructions
Find the device manual for free CST G282DM107 CANDY in PDF.

User questions about CST G282DM107 CANDY
0 question about this device. Answer the ones you know or ask your own.
Ask a new question about this device
Download the instructions for your Washing machine in PDF format for free! Find your manual CST G282DM107 - CANDY and take your electronic device back in hand. On this page are published all the documents necessary for the use of your device. CST G282DM107 by CANDY.
USER MANUAL CST G282DM107 CANDY
ENGLISHEN | REPAIR INSTRUCTIONS
SPANISHES INSTRUCCIONES DE REPARACION
FRENCHFR INSTRUCTIONS DE RÉPARATION
CROATIANHR | UPUTE ZA POPRAVAK
CBAAETe BBLHHTE BNTOBEOT NANTATQ
9.
CBAANE BIAHTOBETe BBB BTPELUHOCTA HA KOPNYCA C TpBBEN KAIOH C BBPTAL MOMENT 7. CBAANE NANTATA
3AKΛΟΥΑΚA HA
BPATATA
HHCTPYKUIN
3AKIOYAAKA HA BPATATA TIN1
INHCTPYMEHTN: OTBEPTKA C KpbCTATA IABA, KAELUN, OTBEPTKA C IAOCKA IABA
1.
OTbopete AIOK-Bpata
2.
U3noA3BouTe
NAOCKATA
OTBepTKa 3a
NOBANrAHeN
CBAAHEHd
BbHLHATACKOa
3.
Korato cko6ata
e CBAAeHa,
MAHWEOTA
yIaBTHHeHneTO,3a
Aa CTnHete A0
BbTpewHOCTTHa
ypeAd
4.
KATO N3N0A3BATE
Taeeyeh KAIIO,
CBAXeTe
3AKPENBATNIPE
KNOING
HGBPQTJG
HOTCHETE
KAEMATAH.
5.
CBAaTe
KAIOQAKATA HA
BPATATA
6.
OTaeAeTe
CKOQATA, B CAYMAN
HA KOHeKTop
TIN "faston
BHHMABGNTE △
He pa3meHnTe
nPABNAHATACTpHa
HA CKOBATA
3AKHOYAANKA HA BPATATA TIN2
INHCTPYMEHTN: OTBEPTKA C KpbCTATA ΓΑΑBA, KAΕΥΙΝ, OTBEPTKA C ΠΑΟΚΑ ΓΑΑBA

1.
OTbopete AIOK-Bpatata
2.
H3noA3BaInTe
NAOCKATA
OTBEPTKa 3a
IOBAnIgHeN
CBAHHEHA
BbHHHATACKO6a
3.
Korato cko6ata
e CBQAeHG,
OTaeAeTe
MAHLIETAOT
yNAbTHeHneTO,3a
A CTNHETAE
BbTpewHOCTTHa
ypeda

4.
Kato H3NOA3BATE
raeeyeh KAOU,
CBAAETe
3aKpenBaluTe
BINTOBEOT
KAIOQAKATA HA
Bpatata
5.
Pa3rao6eTe
paoTHO
PANOCKOCTN
O6AHUOBKNTE
6.
Pa3rAo6eTe
A03aTopa H
THE3OTO

7.
CBQAeTe
KAIOHOAKOTO
HA BPOTATA
8.
CbaaTe BOHn
PpeaD3nTeA

9.
CMeHETE KAOCAKATA
HA BpATato, KATO
BHIMABATE 30
MEXAHHHOTO
Cbbp3BaHE Ha
ABOPNIMHOOTOBOPRHe
nEAEKtpNueCKnTe
Bp3KN
YIΛbTHHTEA HABPATATA
HHCTPyKUIN
YIΛbTHHTEA HA BPATATA
INHCTPYMEHTI: TAEHEH KAIOH, KAEELUN, OTBEPTKA C IAOCKA TAABA, DBA TPbBHN KIAOHA C BbPTTIL MOMEHT 7

1.
OTbopete AIOK-Bpata
2.
N3noA3BaIte
NAOCKATA OTBepTKa
3a NOBAnrAhe
H CBAAHe Ha
BbHHata CKo6a

3.
Korato cko6atae CBAeHa,OTaTeMaHHTAOT yNbTHHeHHeTO,3a Da CTnHETe DO BbTpewHOCTTHaypeaa
4.
Kato n3n0A3BATE naCKa OTBeptka, CBAaTe CkO6aTa Bbpxy MaHweta

5.
Cbaete yNtBHeHneto

6.
IOCTABETEOHOBOTUINBTHENHEKATO BHIMABATE3aPABHANOHOAOXEHHeBAab6HATNHTE
7.
HanbxanTeCKo6ataBbpxyMaHweta

8.
CTerHete
YIaBTHInTeAHata
CKoBa Bbpxy
MAHWeTa C
NOMOuTa Ha
NHCTpyMeHTnte
9.
Hamectete
YnabTHHeHneto Bbpxy
Kopnyca.
IOCTaBeTe BbLHaTa
CKoBa n 3aTeHHeTe
(aKe e HeoBxOAnMo,
C NOMoUta Ha
Kaeu)
YEKMEJXE 3A INEPNAEH INPENAPAT
HHCTPyKUIN
YEKMEXKE 3A IEPNAEH IPEIAPAT
1.
OToBopete YekMeJxKeto 3a nepnAen npenapat

2.
C nOMoUta Ha ABETe pbue ro N3abpnaite CnHO

3.
Otkayete
mackata ot
yekmeaKeTo
3a nepnAeH
npenapat, kato
BHIMABATE Da He CuyNTe KYKITE

DVERE
INSTRUKCE
DVERE TYP 1
NASTROJE: KLIK TORX 25
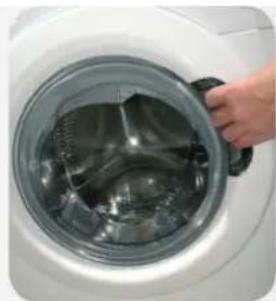
1.
Oteviete dvee
2.
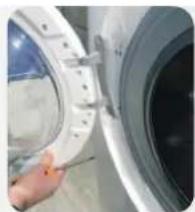
By using the 25 Torx wrench, remove the screws that fix the hinge to the cabinet
3.
Pull the porthole from the top and remove it
PORTHOLE TYPE2
TOOLS: 25 TORX WRENCH, FLEXIBLE 7 PIPE WRENCH
1.
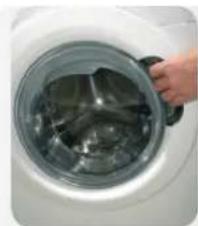
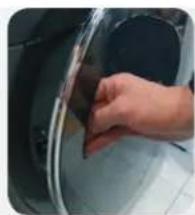
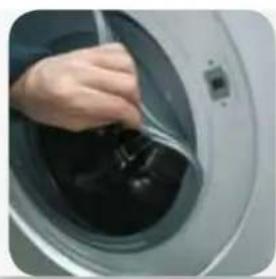
Open the porthole
2.
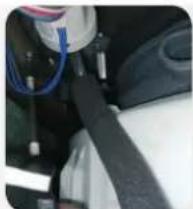
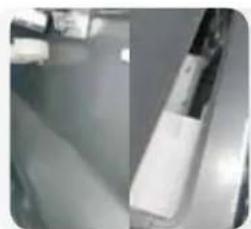
Remove the cover after removed its screw
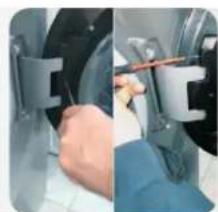
3.
Remove the screws of the plastic hinge
4.
Pull the porthole from the top and remove it
HINGE
INSTRUCTIONS
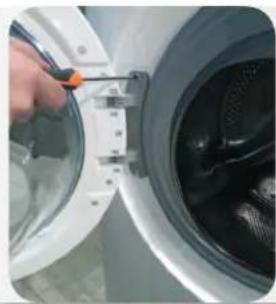
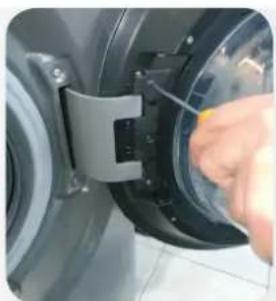
HINGE TYPE 1 TOOLS:25TORX WRENCH
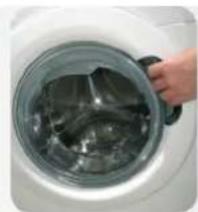
1.
Open the porthole
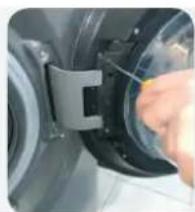
2.
By using the 25 pipe wrench, remove the screws that fix the hinge to the cabinet
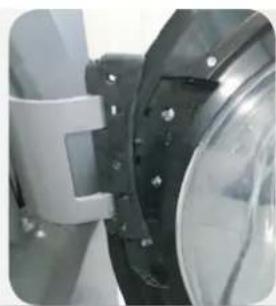
3.
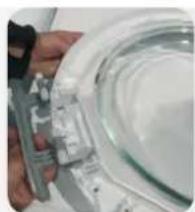
Pull the porthole from the top and remove it
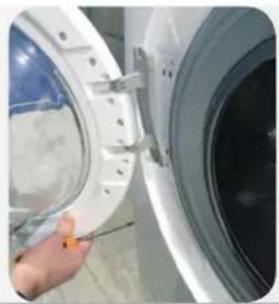
4.
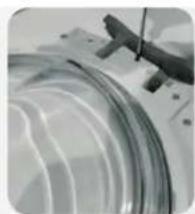
Remove all the screws of the porthole
5.
Separate the frame from the counter frame
6.
Replace the hinge, taking care not to lose the bushes
HINGE TYPE 2 TOOLS:25 TORX WRENCH, FLEXIBLE 7 PIPE WRENCH
1.
Open the porthole
2.
Remove the cover after removed its screw
3.
Remove the screws of the plastic hinge

4.
Pull the porthole from the top and remove it
5.
Remove the pin
6.
Remove the door clip
7.
Once the strap is removed, detach the flap from the gasket, to allow access to the inside of the product
8.
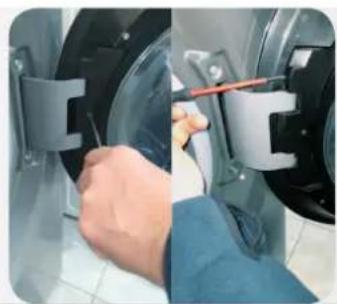
Remove the external screws from the hinge

9.
Remove the screws inside the cabinet with the 7 pipe wrench. Remove the hinge

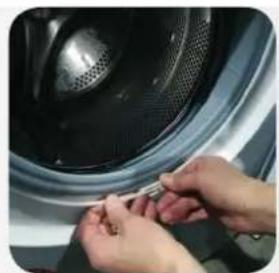
DOOR LOCK
INSTRUCTIONS
DOOR LOCK TYPE 1
TOOLS: CROSS-HEADED SCREWDRIVER, TONG, FLAT SCREWDRIVER
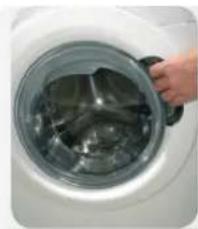
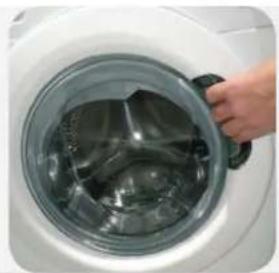
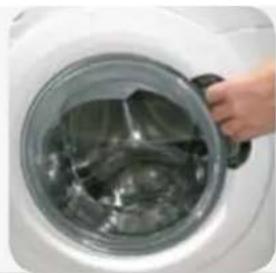
1.
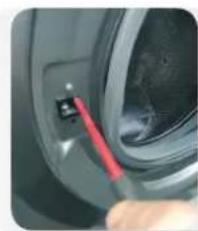
Open the porthole

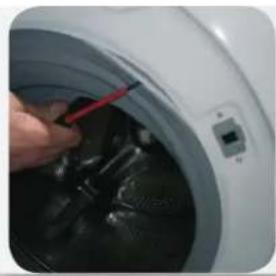
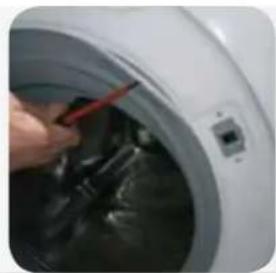
2.
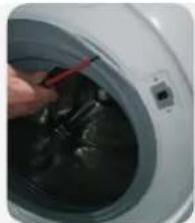
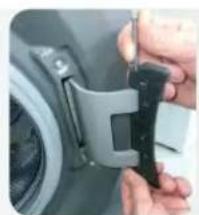
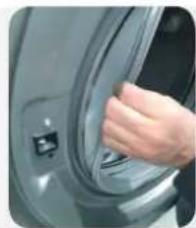
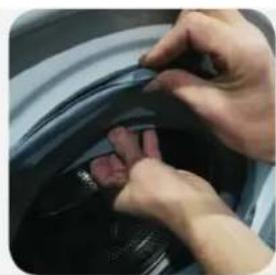
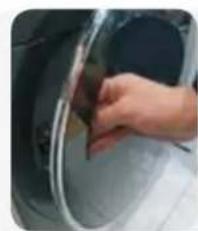
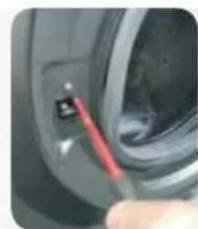
Use the fl at screwdriver for leverage, and remove the external clamp
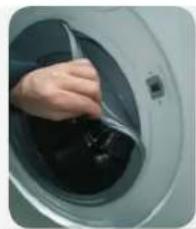
3.
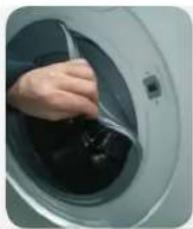
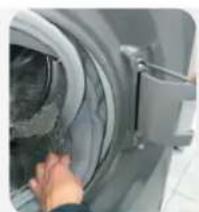
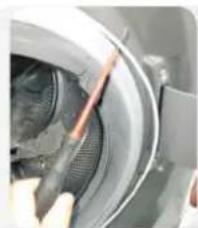
Once the clamp is removed, detach the flap from the gasket, to allow access to the inside of the product
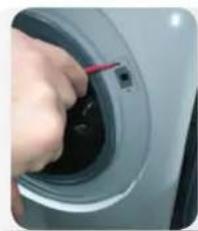
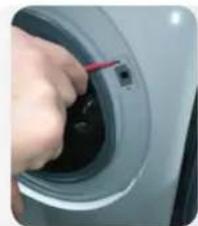
4.
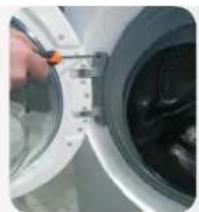
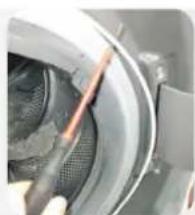
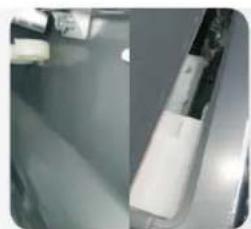
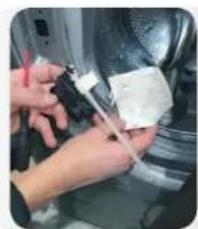
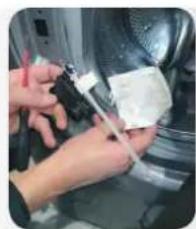
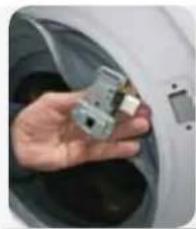
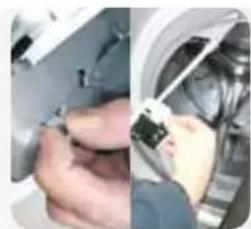
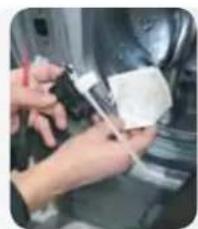
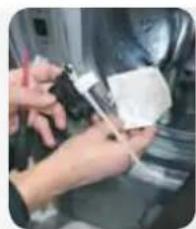
By using Torx wrench, remove the fi xing screws of the door lock, and press its buckle.
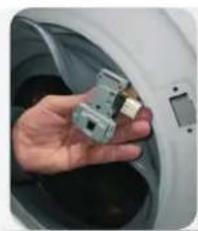
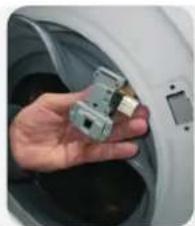
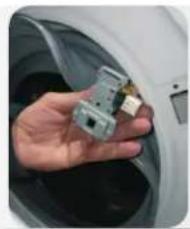
5.
Remove the door lock
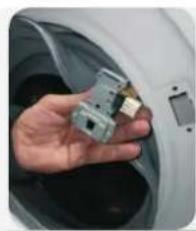
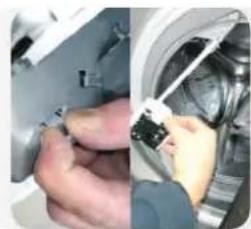
6.
Disconnect the wiring, in case of "faston", pay attention to do not invert the wiring
DOOR LOCK TYPE 2
TOOLS: CROSS-HEADED SCREWDRIVER, TONG, FLAT SCREWDRIVER
1.
Open the porthole
2.
Use the fi at screwdriver for leverage, and remove the external clamp
3.
Once the clamp is removed, detach the flap from the gasket, to allow access to the inside of the product
4.
By using Torx wrench, remove the fi xing screws of the door lock
5.
Disassemble the work top and frims
6.
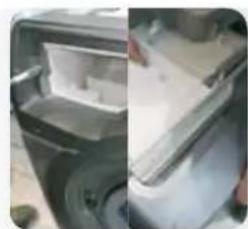
Disassemble the dispenser and bezel
7.
Remove the door lock
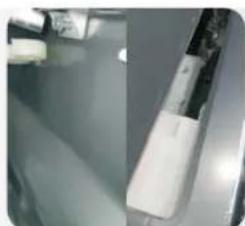
8.
Remove the water protection
9.
Replace the door lock by paying attention to mechanical linkage of emergency opening and electrical connections

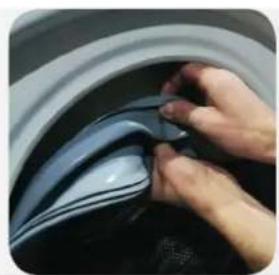
DOOR'S GASKET
INSTRUCTIONS
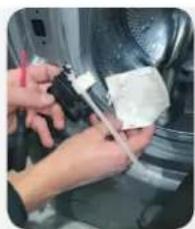
DOOR'S GASKET
TOOLS: TORX WRENCH, TONG, FLAT SCREWDRIVER, TWO 7 PIPE WRENCHES
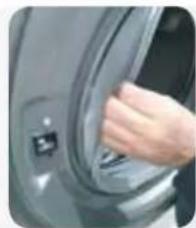
1.
Open the porthole
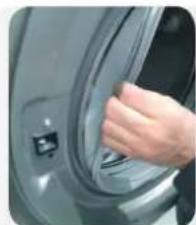
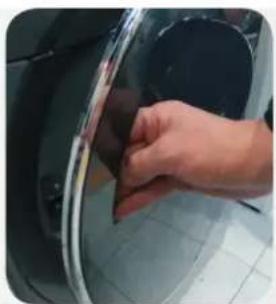
2.
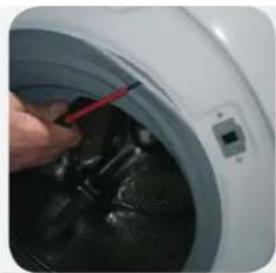
Use the fl at screwdriver for leverage, and remove the external clamp
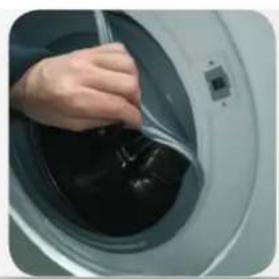
3.
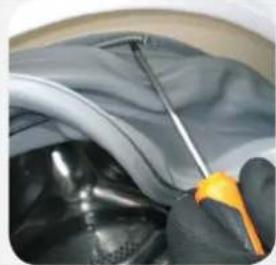
Once the clamp is removed, detach the flap from the gasket, to allow access to the inside of the product
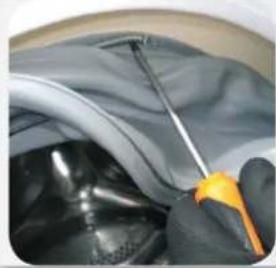
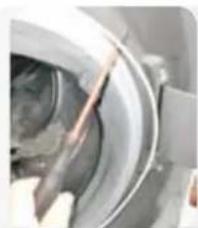
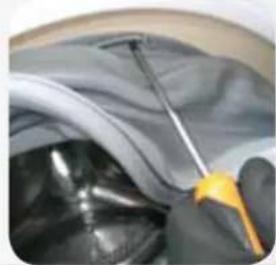
4.
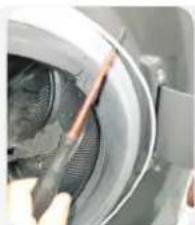
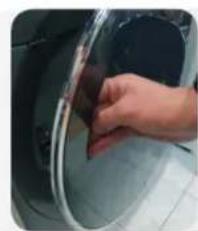
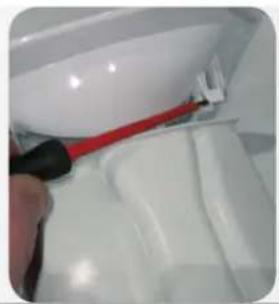
By using fl at screwdriver, remove the clamp on the tube
5.
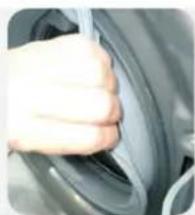
Remove the gasket
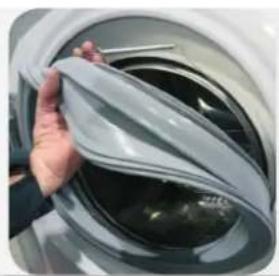
6.
Place the new gasket, paying attention to the positioning notches

7.
Insert wiring clamp on the tube side
8.
Tighten the clamp flush on the tube by using the fooling

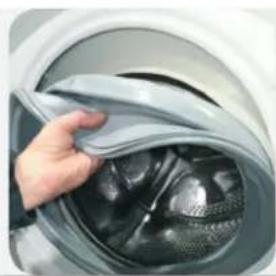
9.
Fit the gasket on the cabinet. Fix the external clamp and tighten it (if needed with tong)
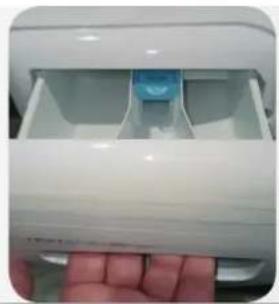
DETERGENT DRAWER
INSTRUCTIONS
DETERGENT DRAWER

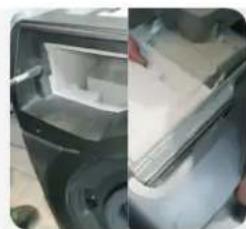
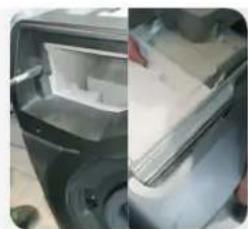
1.
Open the detergent drawer
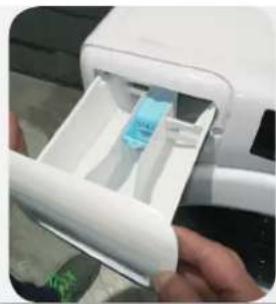
2.
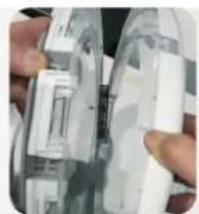
By using two hands, pull it out firmly
3.
Unhook the mask from the detergent drawer, being careful not to break the hooks

PUERTAFRONTAL
INSTRUCCIONES
Uklonite bravu
vrata
6.
Odspojite oizicenje, a u slucaju "faston" priklujcaka, pazite da ne preokrenete oizicenje
BRAVA VRATA TIP 2
ALATI: KRIZNI ODVIJAC, HVATALJKA, RAVNI ODVIJAC
1.
Otvorite prozor
2.
S pomocu
ravnog odvjaca
napravite
polugu i ukonite
vanjsku kopcu
3.
Nakan sto se
kopca ukloni,
odvojite oblogu
od brve kako
biste omogucili
pristup unutrasnjosti
proizvoda
4.
S pomocu Torx kluca ukonite pričvrsne vijke brave vrata
5.
Rastavite gomji radni dia o obrue
6.
Rastavite dozator i okvir
7.
Uklonite bravu vrata
8.
Uklonite zaftu od vode
9.
Zamijenite bravu
vrata i obratite
pozomost na
mehanicki spoj
atvora za slucaj
nuzdige elektricne
prikljuce
BRTVA VRATA
UPUTE
BRTVA VRATA
ALATI: TORX KLJUC, HVATALJKA, ODVIJAC, DVA CIJEVNA KLJUCA 7
1.
Otavorite prozor
2.
S pomocu ravnog odvijača napravite polugu i uklonite vanjsku kopcu
3.
Nakon sto se kopca
ukloni, odvojite
oblogu od brve
kako biste omogucili
pristup unutrasnjosti
proizvoda
4.