Rocketkid 4 - Trampoline Klarfit - Free user manual and instructions
Find the device manual for free Rocketkid 4 Klarfit in PDF.
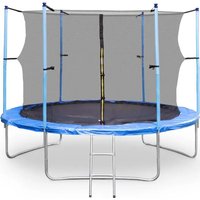
| Product type | Kids trampoline |
| Brand | Klarfit |
| Model | Rocketkid 4 |
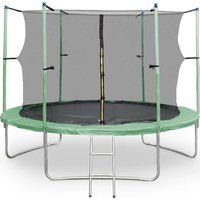
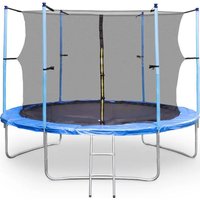
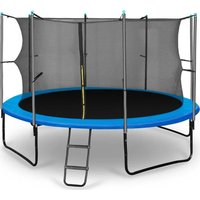
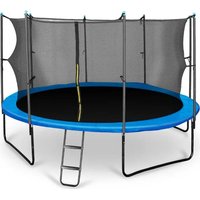
| Diameter | 4 feet (approx. 122 cm) |
| Maximum user weight | 50 kg |
| Net weight | Approximately 20 kg |
| Materials | Steel, polypropylene, foam |
| Number of springs | 30 |
| Safety net | Yes |
| Protective mat | Yes |
| Foam padding on tubes | Yes |
| Recommended use | Outdoor and indoor |
| Clearance required around | Minimum 8 meters |
| Assembly | Required (tool provided: screwdriver) |
| Package contents | 6 legs, 6 upper foam pads, 6 lower foam pads, 6 upper tubes, 6 lower tubes, 4 curved frames, 1 protective mat with net, 1 screwdriver, 30 screws, 1 jumping mat with net and rope, 30 springs |
| Safety standards | EN 957 |
| Manufacturer | Chal-Tec GmbH, Wallstraße 16, 10179 Berlin, Germany |
| Maintenance | Soft cloth, no abrasive or chemical products |
| Repairability | Replace worn or damaged parts |
| Warranty | Not specified in the instructions |
Frequently Asked Questions - Rocketkid 4 Klarfit
User questions about Rocketkid 4 Klarfit
0 question about this device. Answer the ones you know or ask your own.
Ask a new question about this device
Download the instructions for your Trampoline in PDF format for free! Find your manual Rocketkid 4 - Klarfit and take your electronic device back in hand. On this page are published all the documents necessary for the use of your device. Rocketkid 4 by Klarfit.
USER MANUAL Rocketkid 4 Klarfit
Congratulations on purchasing this product. Please read and follow these instructions, in order to avoid damaging the item. We do not cover any damages that may arise from improper use of the item or the disregard of the safety instructions.
Important Safety Instructions
- Read all instructions before using.
- Do not place on or near a hot gas or electric burner or in a heated oven.
- Do not expose the appliance to extreme temperatures. The appliance shall be used in moderate climates.
- The use of attachments that are not recommended by the appliance manufacturer may result in fire, electric shock or personal injury.
- The appliance is not a toy. Do not let the children play with it. Never let children insert foreign objects into the appliance.
- Do not use the appliance for other than intended use. This appliance has been designed solely for domestic use; the manufacturer's liability shall not be engaged in the event of any professional use, by any misuse or by any use not complying with the operating instructions.
- Pregnant or physically injured people should never use the trampoline without prior consultation with a doctor you trust.
- Stop the training immediately when you do not feel comfortable or notice motoric, sensory or mental changes or limitations.
- Adapt your training style always to your personal fitness level and your health.
- Before every training check the operability and safety.
- Make sure before installation that the item works properly and that all safety devices are in function!
- Damages or alterations to the product in the course of the independent modification lead to the exclusion of warranty. For problems resulting from the modification or other restrictions, the seller is not responsible! Any damage must be reported to the seller immediately after delivery, and access before use / installation. Later complaints will not be considered.
- Use only suitable tools for assembly.
- The installation must always be made only by adults.
- In part, the package may consist of plastic bags - make this regard with particular care and attention that this is not out of the reach of children. There is a risk of suffocation!
- Make sure to mount that all connections are securely mounted before releasing the product for use.
- Check all connections at regular intervals for damage, loose elements and other factors that can lead to a loss of sufficient security.
- Let children or people with physical or mental limitations, or people who are not familiar with this device, do not use this trampoline.
- This appliance has been tested and certified according to EN957 and is allowed for domestic use. The user weight must not exceed 50kg .
Please keep in mind that this manual and the safety can only draw your attention to eventual hazard. - Keep this manual. Read all instructions before using.
- Do not place on or near a hot gas or electric burner or in a heated oven.
- Do not use the appliance for other than intended use. This appliance has been designed solely for domestic use; the manufacturer's liability shall not be engaged in the event of any professional use, by any misuse or by any use not complying with the operating instructions.
- Save these instructions.
Parts Overview
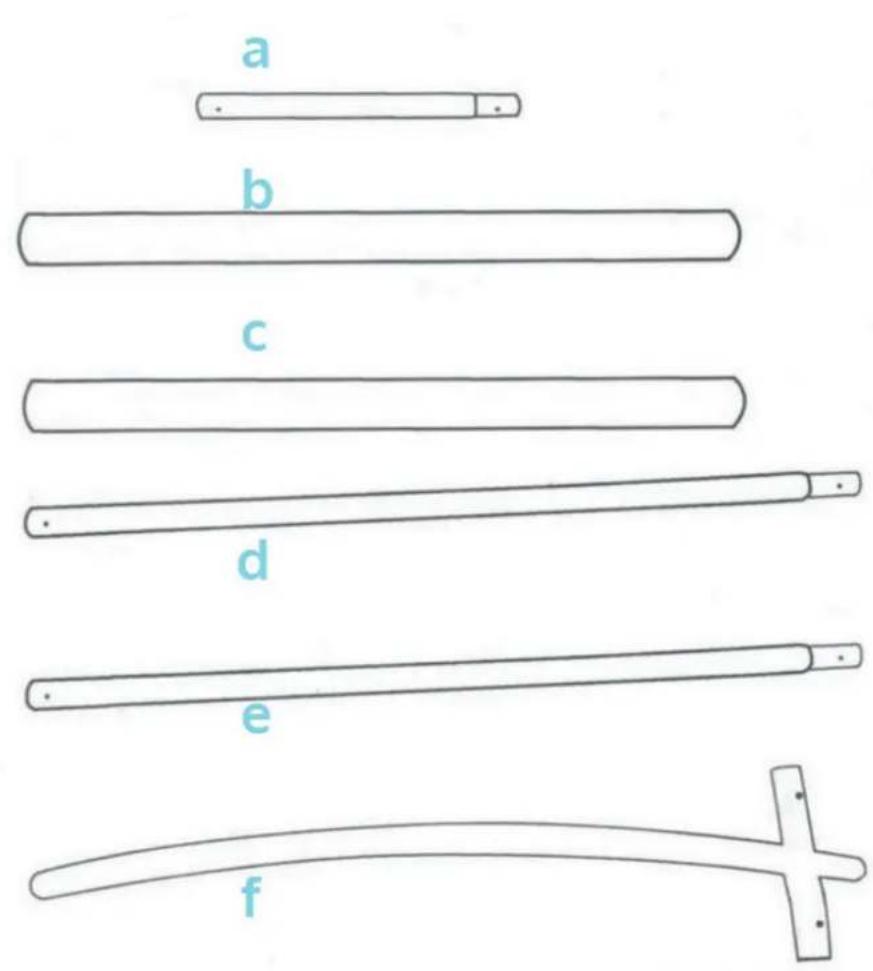
Part description Qty
| a Leg | tubes 6 | |
| b Empossed (upper) foam tube 6 | ||
| c Plain (lower) foam tube 6 | ||
| d Upper enclosure pole 6 | ||
| e Lower enclosure pole 6 | ||
| f Top rail 4 | ||
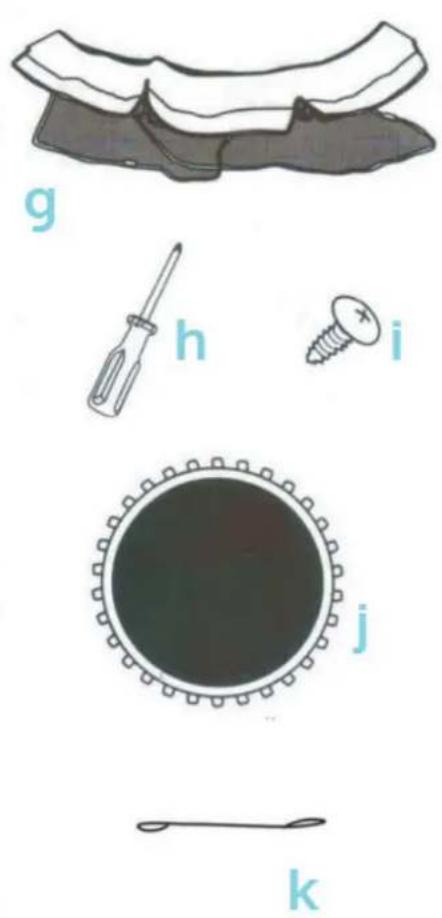
| g Frame cover 1 | ||
| h Screwdriver 1 | ||
| i | Screws | 30 |
| j | Jump mat / safety net / rope | 1 |
| k | Suspension cords | 30 |
Assembly
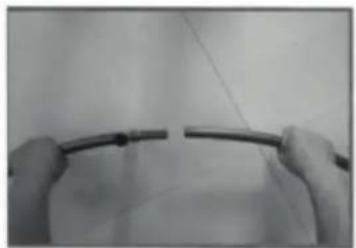
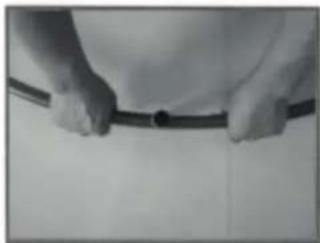
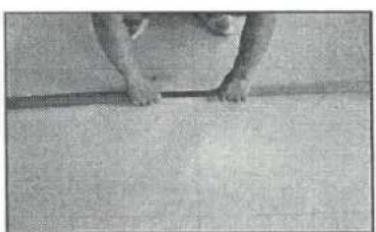
- Put the top rails together so they form a circle.

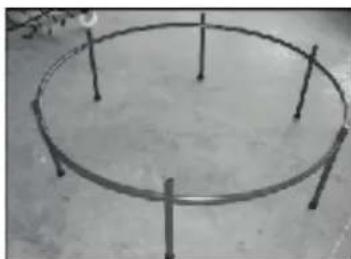
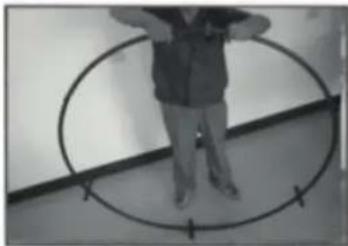
- With the top rail frame connected into a circle, lay it flat on the floor (either side facing up-they are identical). Then insert the tapered end of each of the 6 leg tubes into the 6 leg sockets that are facing up, as shown.
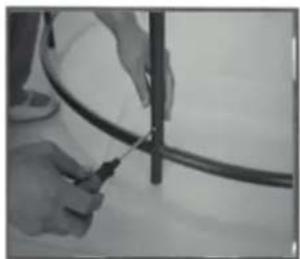
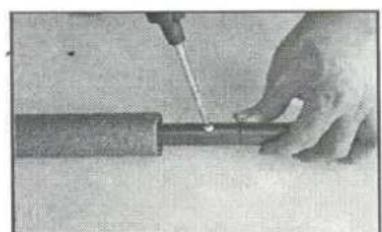
- Align the screw hole in the leg with the hole in the leg socket. Then secure with secure and tighten. DO NOT OVER-TIGHTEN. Repeat this until all 6 legs are securely attached to the top rail frame with screws.
After attaching all 6 of the legs securely to the top rail frame, turn the frame over so that the legs point downward, as shown.
- To ensure that the enclosure mesh connectors will be properly aligned with the enclosure poles, hold up the mesh by one of the nylon patches with grommet and select the nylon loop sewn onto the jump mat that is directly beneath the nylon patch you are holding. The patch at the top, the upper and lower hook & loop fasteners, and the nylon loop on the mat will all be along the same line (sewn to the mat) will be the first one you attach, and MUST be attached to the frame right next to one of the 6 enclosure pole sockets.
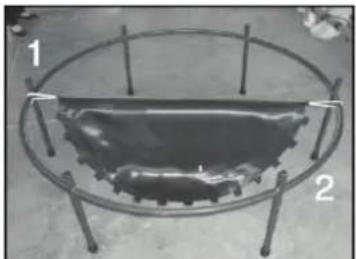
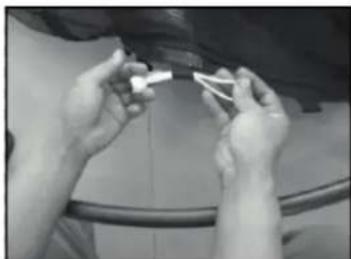
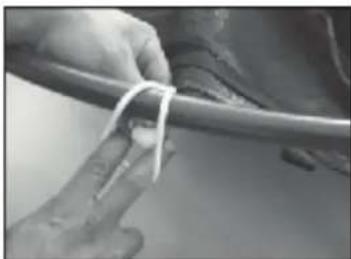
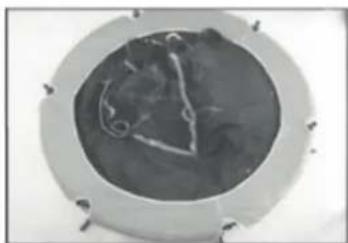
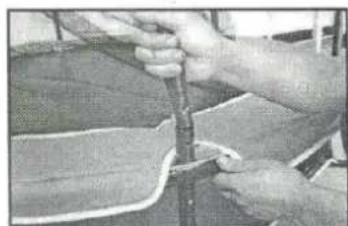
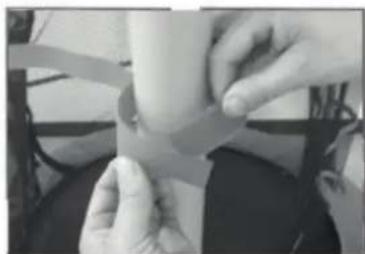
- Lay out the jumping mat in the center of the frame. The slide a suspension cord from left to right through the nylon loop as shown in picture
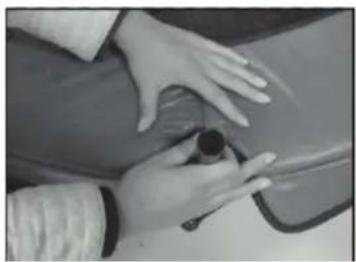
- Use your right hand to stretch the loop end of the cord OVER the top rail and your left hand to pull the "closed" end of cord UNDER the top rail, then pass the closed end through the loop as shown in picture.
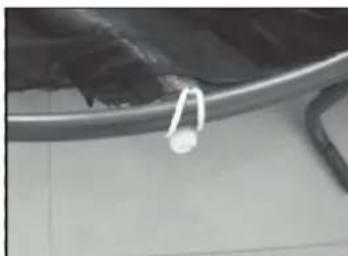
- SLOWLY release the loop end of the cord so that it tightens around the closed end, locking the suspension cord in place. As shown.
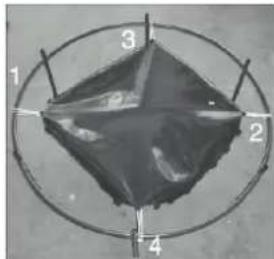
- From the 1st attached cord . count around the jumping mat to the 16th loop and repeat steps 8 10 st attaching the 2nd cord directly across from the 1st . As shown above.
- Next, count back around the jumping mat 8 loops and repeat steps 8 10 attaching the 3rd cord about half way between the 1st and 2nd codes.
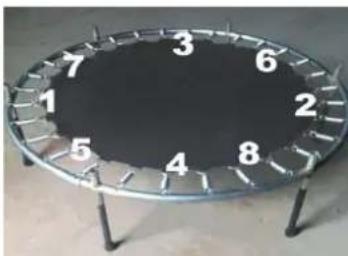
- Then from the 3rd attached cord, count around the jumping mat 16 loops and repeat 8-10 to attach the 4th cord, the number on picture 12 show the approximate position of the first 8 suspension cords, continue connecting the remaining cords as shown in step 8 10 , but always connect a cord, and then switch to the opposite side of the trampoline to connect the next cord.
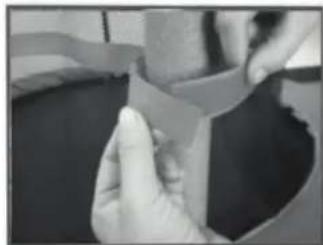
- Lay the pad cover. AirZone printed side up over the suspension cords. Carefully position each of the 6 openings in the pad cover over their corresponding enclosure pole socket, as shown.
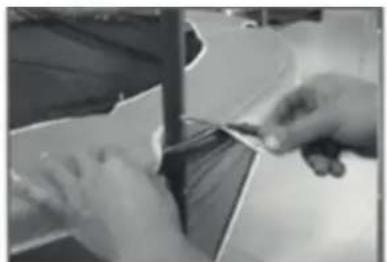
- Carefully work the lower mesh skirt (attached to the pad cover) down, around the entire perimeter of the trampoline, on the outside of the legs.
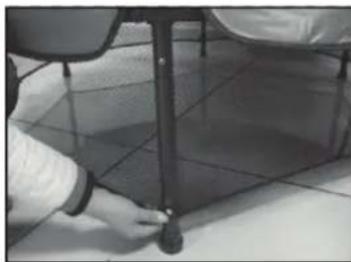
- Align the grommet attached to the bottom of the lower mesh skirt with the hole near the base of the leg and secure with screw. DO NOT OVER-TIGHTEN.
- Repeat Step 9 with the remaining 5gromments in the lower mesh skirt and their corresponding legs.
- Insert the smaller diameter end of an upper enclosure pole into the larger diameter end of a lower enclosure pole and align screw holes. (You may need to slide the preinstalled foam sleeves to gain access to the ends of the pole)
- Insert screw& tighten. DO NOT OVER-TIGHTEN. Repeat steps 1&2 to assemble remaining 5 sets of upper &lower poles.
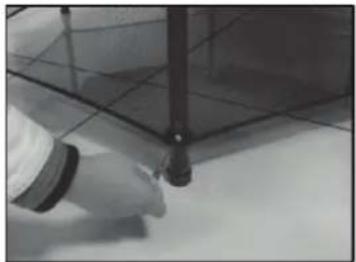
- Insert the bottom end of enclosure pole assembly into the socket on frame, as shown. Align screw holes.

- Insert screw & tighten. DO NOT OVER-TIGHTEN. Repeat steps 3 with the remaining 5 enclosure pole assemblies.
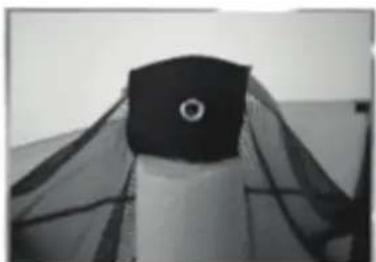
- Locate the 6 nylon patches with grommets that are sewn onto the top edge of the mesh. Select a nylon patch that aligns with a pole. Carefully slip one of the patches over the top of the enclosure pole so that the grommet is aligned with the screw hole in the pole. Use care so that you do not tear the mesh.
- Insert screw & tighten. DO NOT OVER-TIGHTEN. Repeat steps 5 with the remaining 5 patches and poles. When done properly, the enclosure mesh will be hanging on the INSIDE of the enclosure poles. The mesh should hang down somewhat straight and not 'twist'
- Locate the upper and lower sets of hook and loop fasteners sewn to the enclosure mesh, there are 6 upper and 6 lower set of hook &loop fasteners.
- Tightly wrap both the upper & lower hook and loop fasteners around the enclosure pole foam to secure the mesh in place, repeat this with the remaining upper and lower hook & loop fasteners on the other 5 enclosure poles.
Manufacturer
Chal-Tec GmbH, Wallstraße 16, 10179 Berlin, Germany