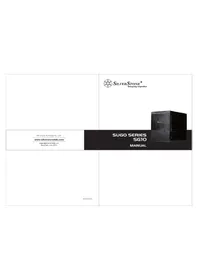
Sugo SG10B - Desktop Computer SILVERSTONE - Free user manual and instructions
Find the device manual for free Sugo SG10B SILVERSTONE in PDF.

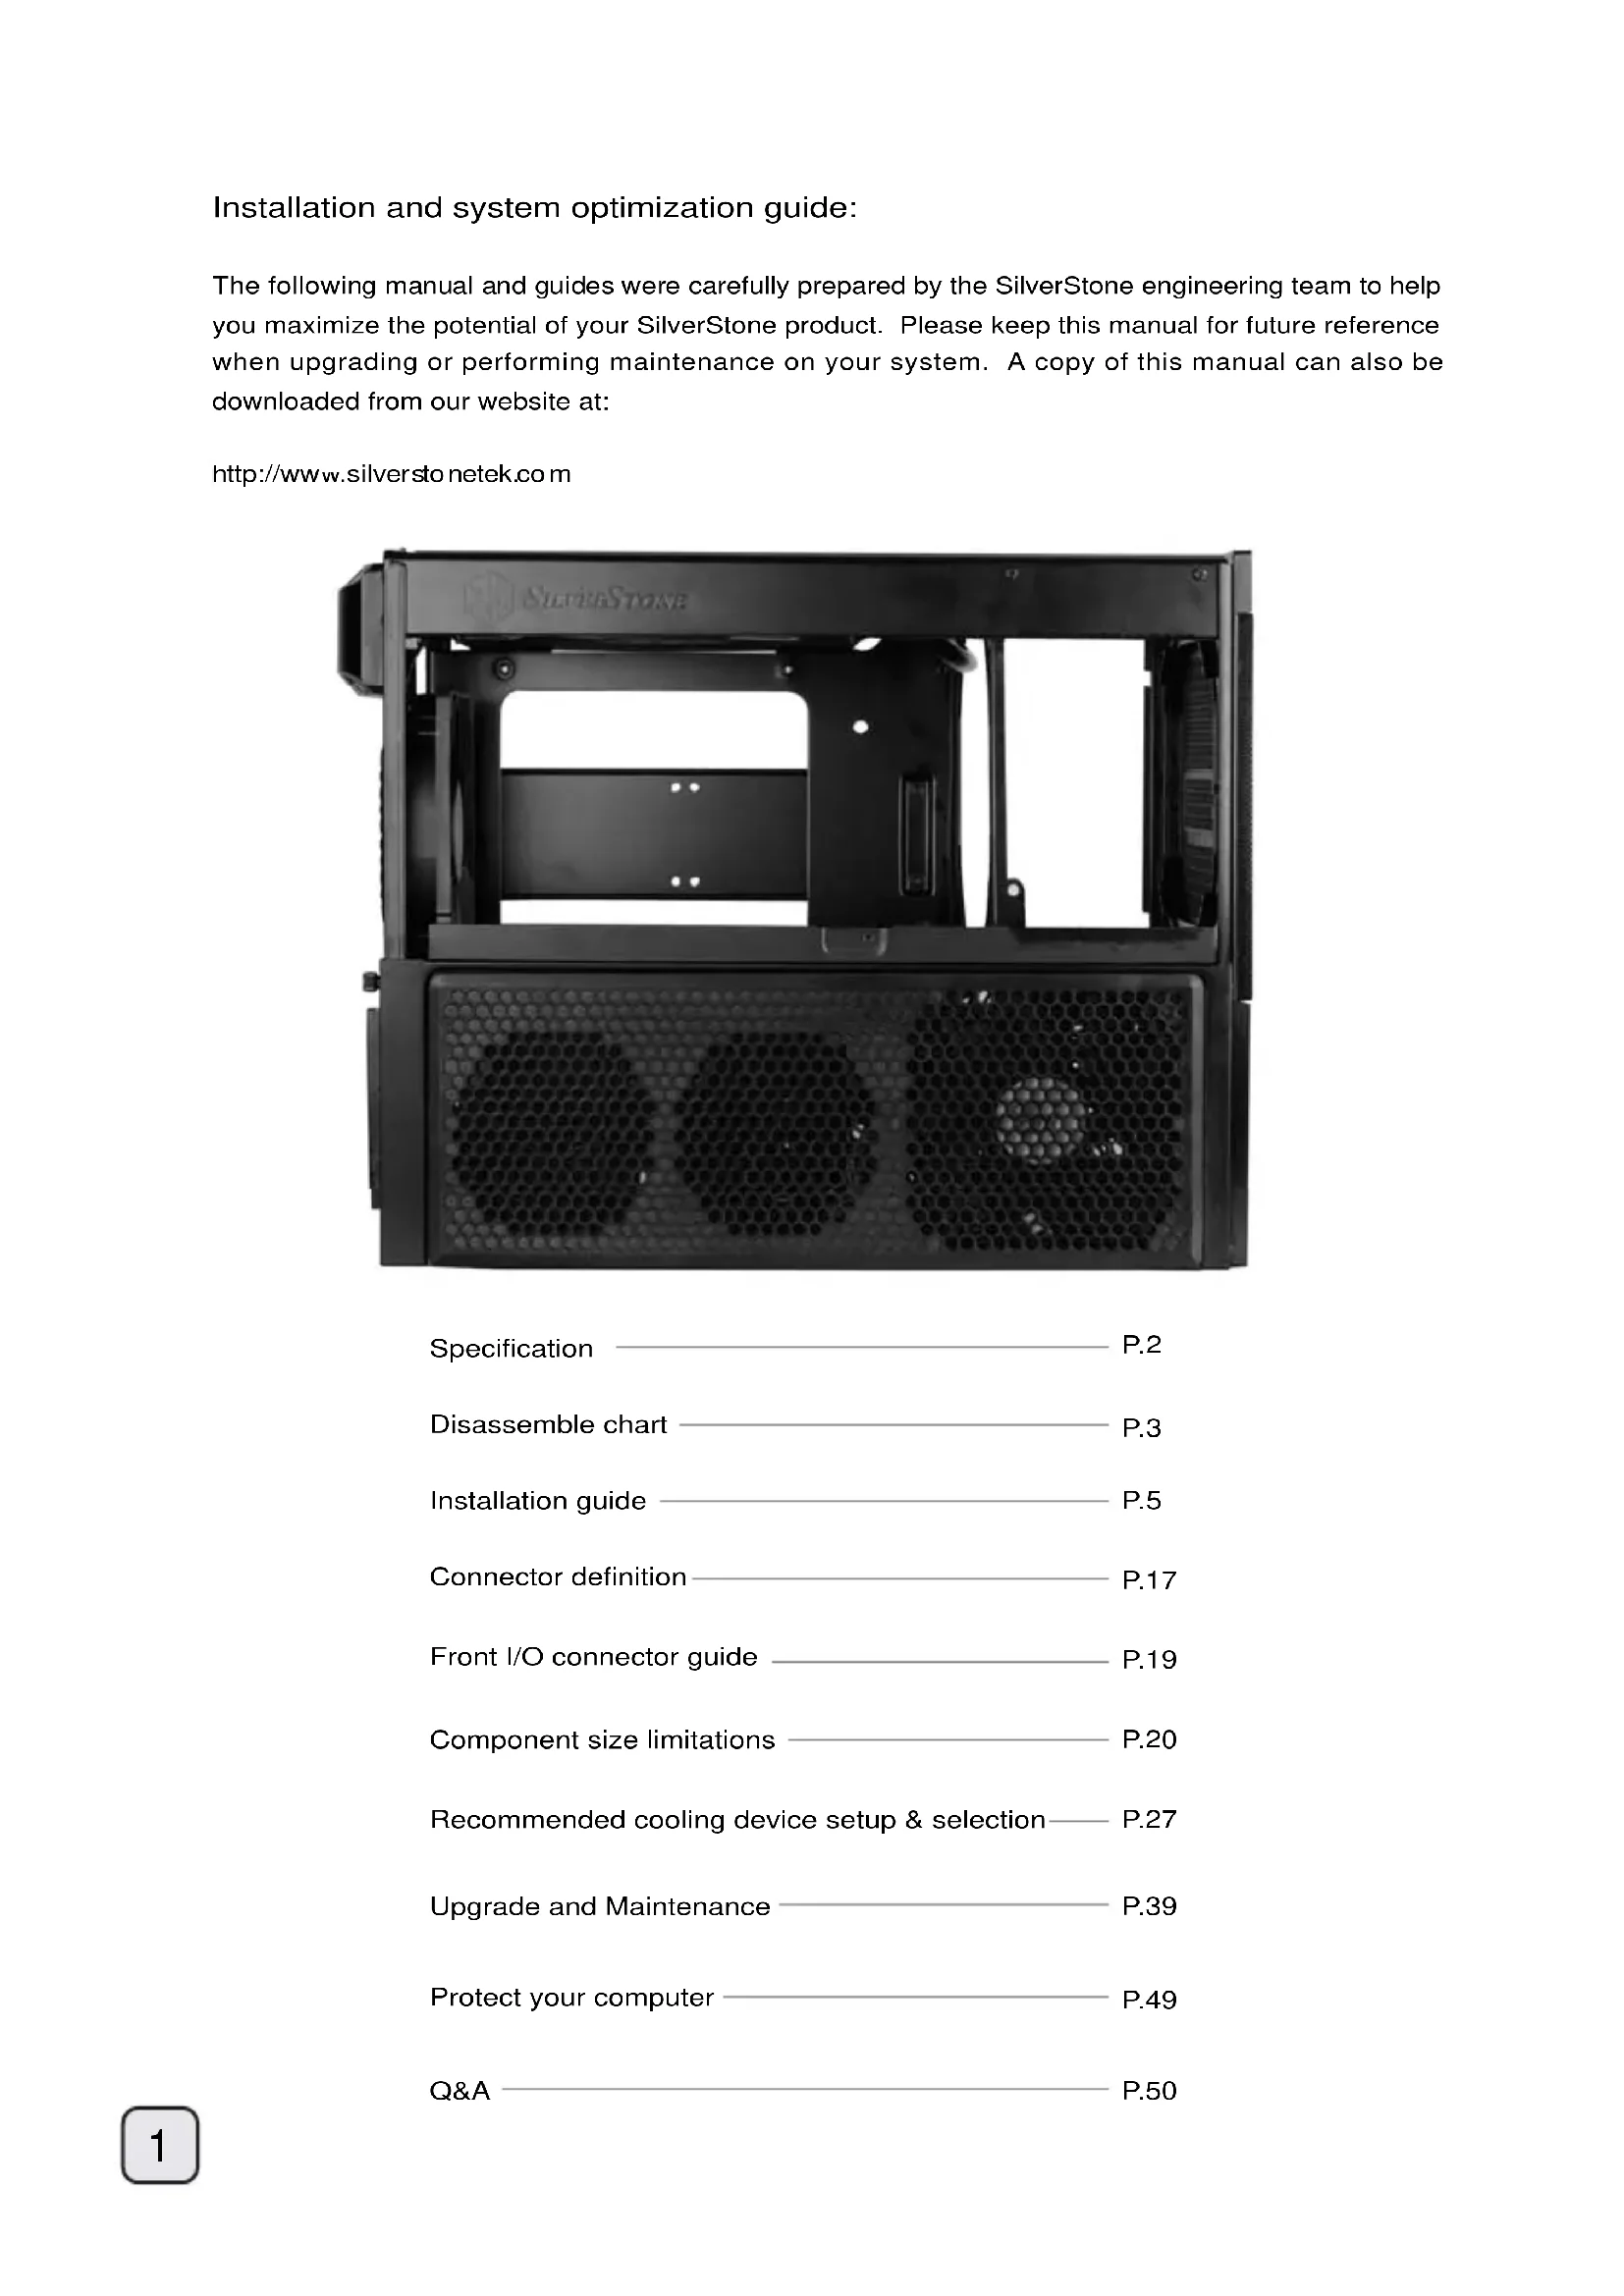

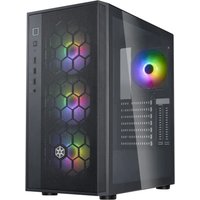
| Product Type | Mini-Tower PC Case (Central Unit) |
| Brand | SilverStone |
| Model | Sugo SG10B |
| Dimensions (approx.) | 220 mm x 295 mm x 285 mm (W x H x D) |
| Weight | Approximately 4.5 kg |
| Material | Steel, plastic |
| Color | Black |
| Compatible Motherboard | Micro-ATX, Mini-ITX |
| Compatible Power Supply | Standard ATX PSU up to 204 mm depth (modular: 180 mm max) |
| Maximum Graphics Card Length | 338 mm (13.3 inches) |
| Maximum CPU Cooler Height | 165 mm |
| Compatible Optical Drive | Slim slot-loading optical drive (12.7 mm or 9.5 mm) |
| Storage Bays | 1x 3.5" (internal) + 1x 2.5" (internal) |
| Expansion Slots | 4 slots |
| Included Fans | 1x 180 mm top, 1x 120 mm rear |
| Additional Fan Slots | 2x 120 mm (left and right sides), 1x 92 mm or 80 mm (lower right side) |
| Dust Filters | Removable fine mesh filters for power supply, side and top air intakes |
| Front I/O Connectivity | USB 3.0, USB 2.0, audio input/output |
| Kensington Lock | Yes (rear) |
| Special Features | Horizontal power supply, positive pressure airflow, SLI/CrossFireX support |
| Maintenance | Clean filters every 3 to 6 months with soft brush, vacuum cleaner, or water |
| Warranty | 1 year (standard) |
Frequently Asked Questions - Sugo SG10B SILVERSTONE
User questions about Sugo SG10B SILVERSTONE
0 question about this device. Answer the ones you know or ask your own.
Ask a new question about this device
Download the instructions for your Desktop Computer in PDF format for free! Find your manual Sugo SG10B - SILVERSTONE and take your electronic device back in hand. On this page are published all the documents necessary for the use of your device. Sugo SG10B by SILVERSTONE.
USER MANUAL Sugo SG10B SILVERSTONE
| SUGO SERIES SG10 MANUAL | |
| NO:G11218131 | |
Installation and system optimization guide:
The following manual and guides were carefully prepared by the SilverStone engineering team to help you maximize the potential of your SilverStone product. Please keep this manual for future reference when upgrading or performing maintenance on your system. A copy of this manual can also be downloaded from our website at:
http://www.silverstonetek.com
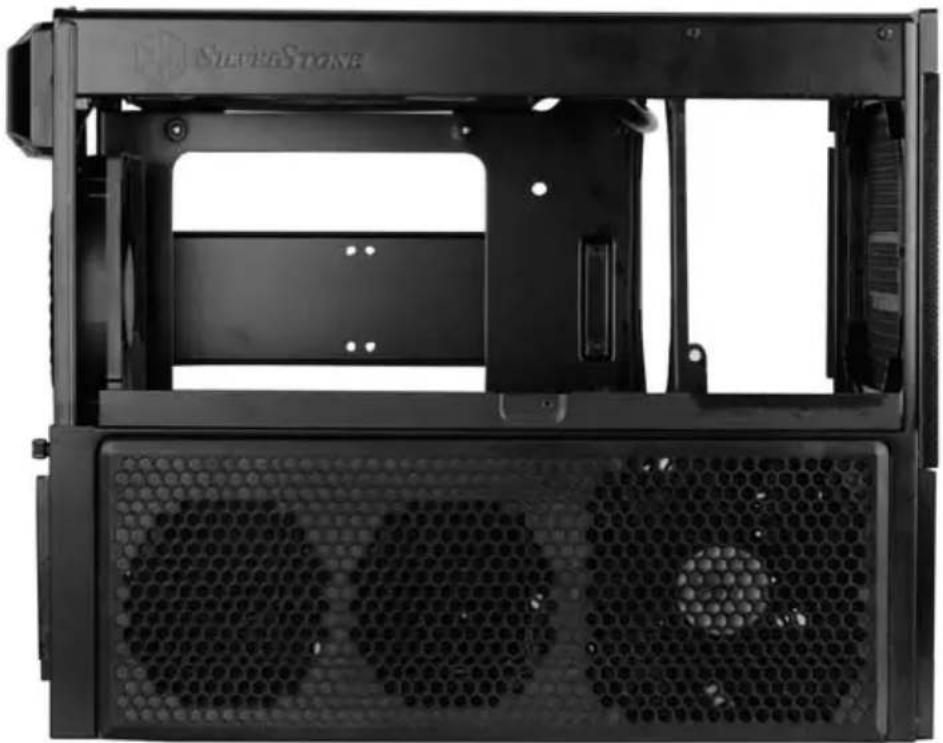
Specification P.2
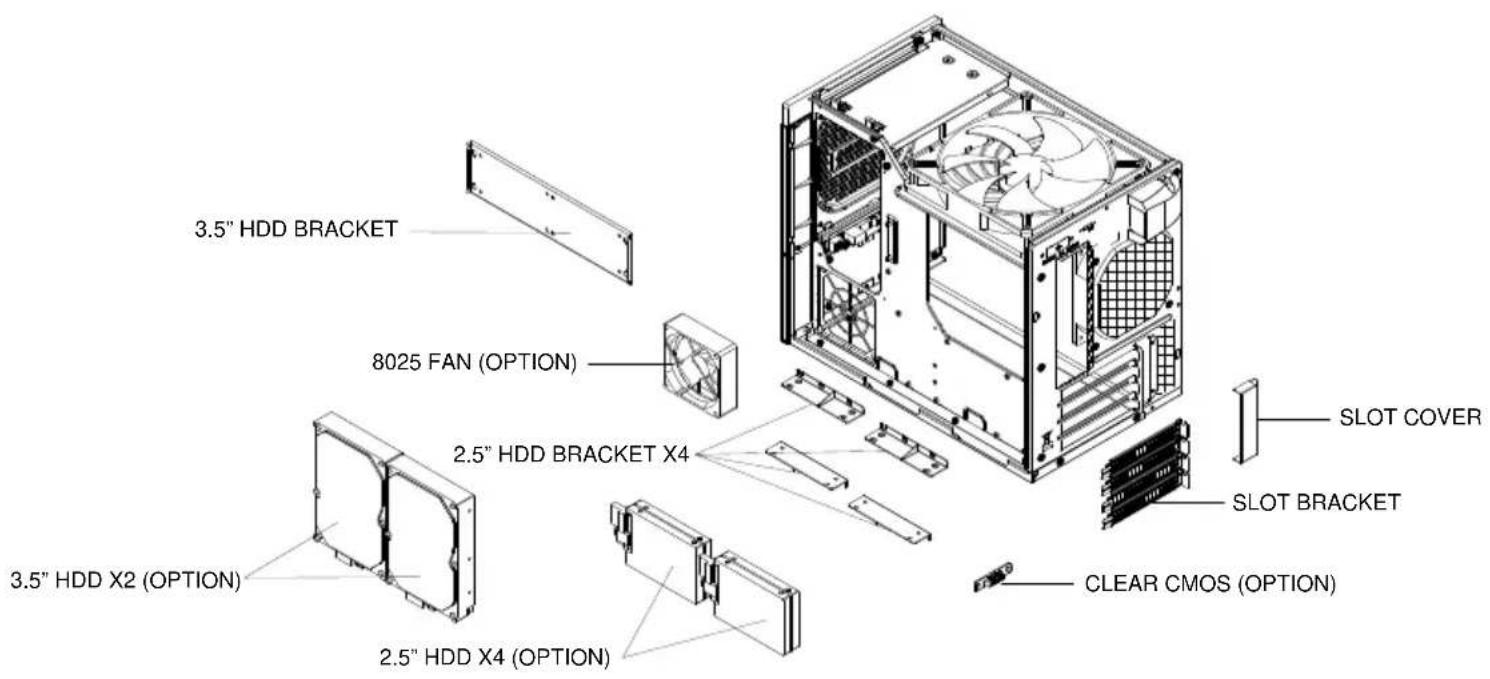
Disassemble chart P.3
Installation guide P.5
Connector definition P.17
Front I/O connector guide P.19
Component size limitations P.20
Recommended cooling device setup & selection P.27
Upgrade and Maintenance P.39
Protect your computer P.49
Q&A P.50
SUGO SGIO
Redefining performance in small form factor computing
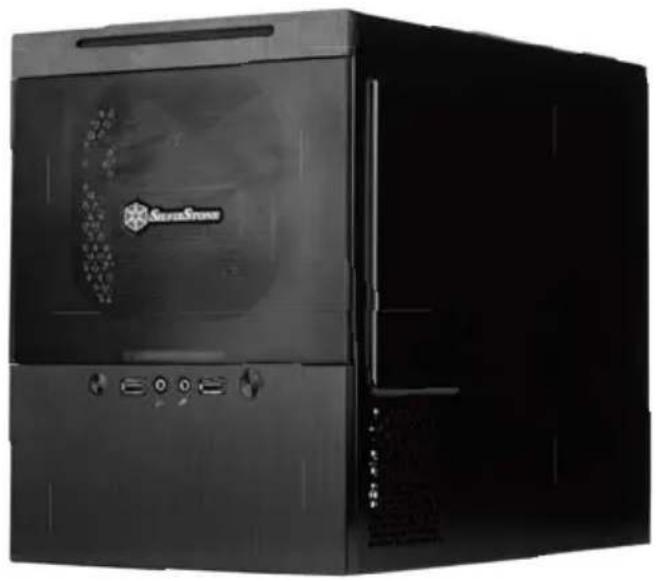

Specification
| Material | Aluminum front panel, Steel body | |
| Model | SST-SG10B (black) | |
| Motherboard | Micro ATX, Mini-DTX, Mini-ITX | |
| Drive Bay | Exposed | 12.7mm/9.5mm slim optical x 1 |
| Internal | 3.5" x 2", 2.5" x4* | |
| Cooling System | Rear | 1 x 120mm 1200rpm 22dBA |
| Top | 180mm Air Penetrator 600/900/1200rpm, 17/25/34dBA (backward compatible with 140mm) | |
| Left | 1 x 120mm 1200rpm 22dBA(backward compatible with 92mm) 2*80/92mm fan slot | |
| Right | 80mm fan slot | |
| Expansion Slot | 4 | |
| Front I/O Port | USB 3.0 x 2、audio x 1、MIC x 1 | |
| Power Supply | Optional standard PS2(ATX) up to 180mm* | |
| Expansion Card | Compatible up to 13.3" long, width restriction-5.70" | |
| Dimension | 354mm (D) x 220mm (W) x 295mm (H), 23 liters | |
| Extra | Support two Kensington locks | |
*If you intend to utilize all hard drive slots, please remove all unused power supply cables.
These unused cables may cause problem with the installation. SSDs are highly recommended in place of hard drives.
- Maximum length for PSU is 180mm, we recommend 160mm due to varying connector locations on PSUs and the unique structure of SG10. We do not promise that all retail PSUs on the market can be installed in the SG10. Please refer the guides provided in this manual to select your PSU.
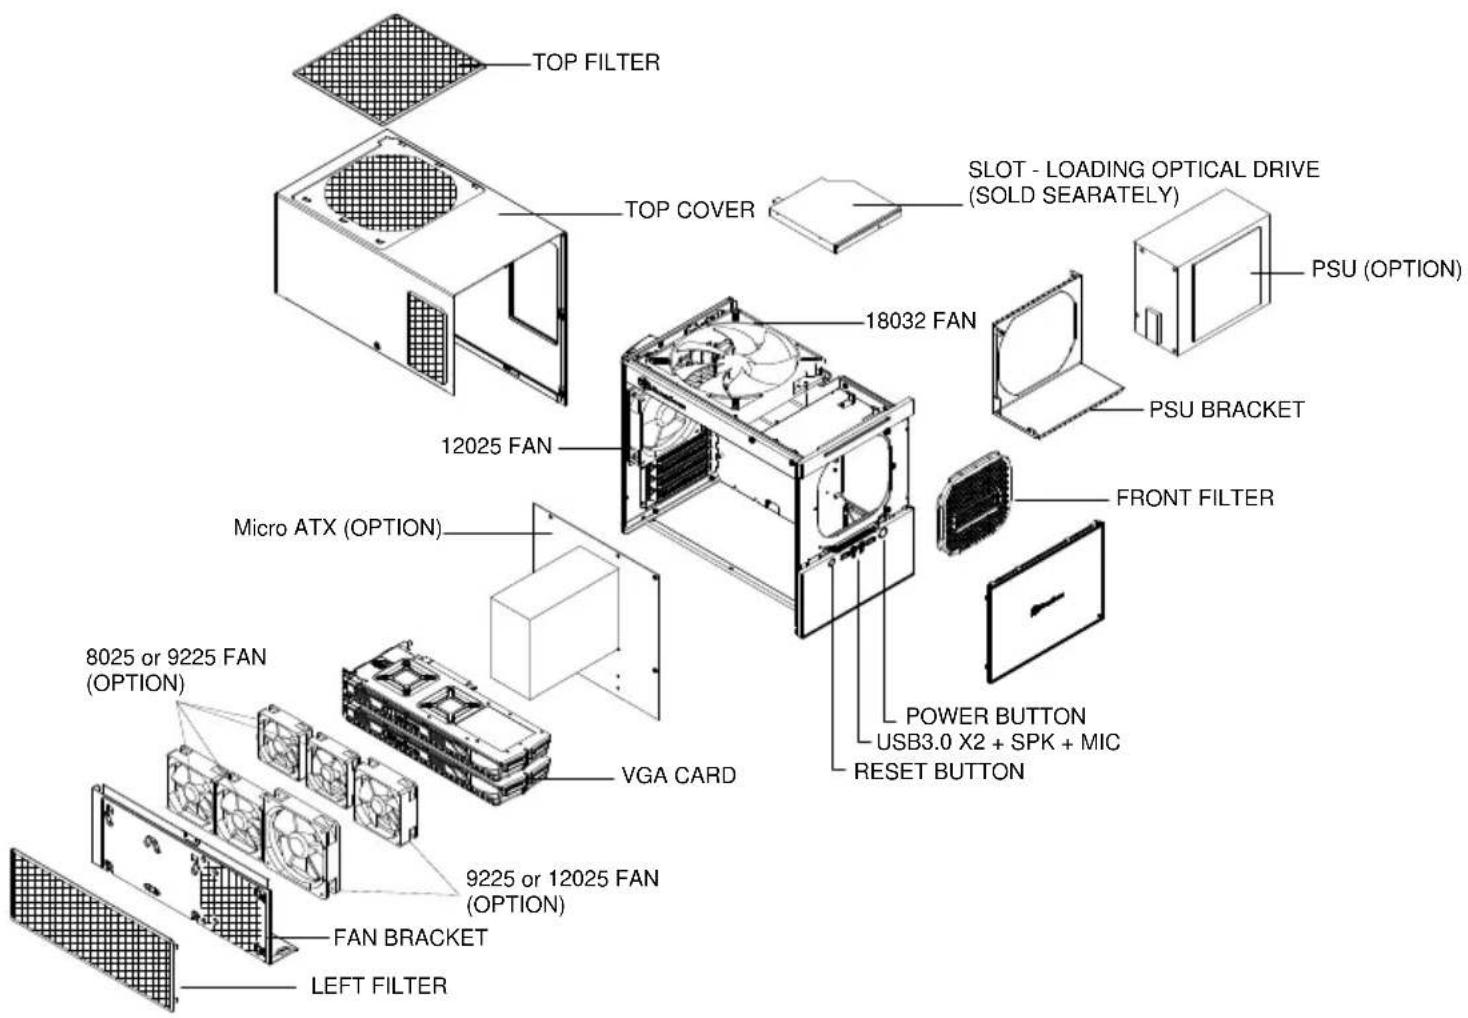
| PICTURE | ITEM | PURPOSE |
| EVA-8025FAN-TO-8032FAN | 80mm fan duct extend 25mm to 32mm | |
| FAN-180-TO-140-BKT | Converter bracket for 140mm fan | |
| PI-SLIM-CDR-BKT | Bracket for securing slim optical drive | |
| SCREW-CROSS-P-M3*4 | Secure slim optical drive bracket, 2.5" drive bracket, and 2.5" drives | |
| SCREW-CROSS-I-632-5 | Secure motherboard, PSU, 3.5" drives, and 140mm fan bracket | |
| STANDOFF-632-65-632-4 | Motherboard standoff | |
| BUNCH-WIRE-TIES | Cable management | |
| COMP-PIN-GOOD-RW3005 | Case foot stands | |
| MANUAL | Installation and maintenance guide | |
| BIG-4P-FEMALE-TO 3*3 P-CONNECTOR | Convert three 3pin fan connector to one 4pin peripheral | |
| COMP-RUBBER-RF1232-KANG-YANG | Adhesive spacer for 9.5mm slim optical drive installation |
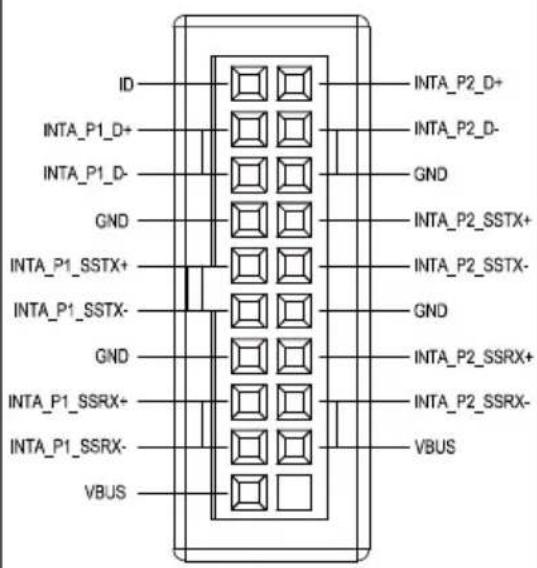
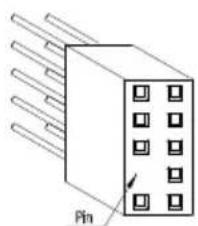
USB 3.0 CONNECTOR
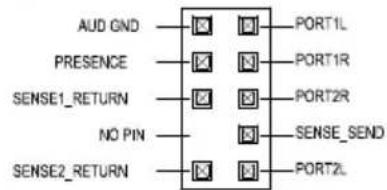
HD CONNECTOR
Installation Guide
Before you begin, please make sure that you.
(1) have all components collected.
(2) check that all components do not have compatibility problems with each other or with the case.
(3) if possible, assemble the components outside the case first to make sure they are working.
(4) keep the motherboard manual ready for reference during installation.
(5) prepare a Philips screwdriver.
1
ENGLISH
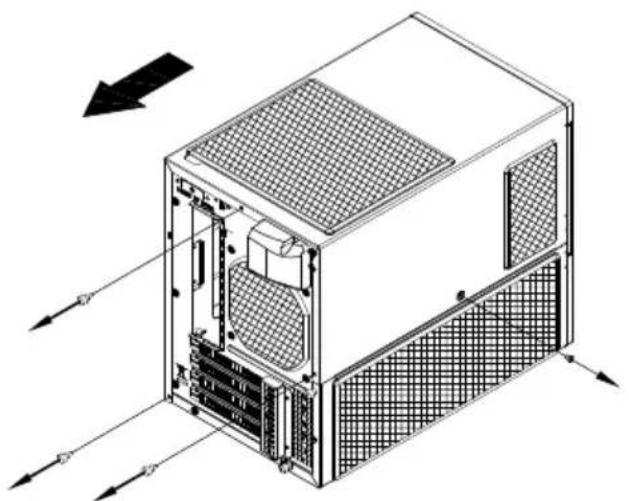
Unscrew screws holding the top cover and then remove it by pulling to the rear and away from the chassis.
DEUTSCH
Loosen the screws from the left bottom panel to remove it.
DEUTSCH
We recommend deciding whether or not to install the right side fan now.
DEUTSCH
Insert the I/O shield included with your motherboard and then install the motherboard into the case.
DEUTSCH
YcTaHOBnTe 3aIyUknyIpa3bEMOB 3aHHe IaHEJMaTePHNckO IIaTbI, npInaraeMyIO K MaTePHNCKO IIaTe, 3aTem YcTaHOBnTe MaTePHNCKO IIaTbY B Kopnyc.
繁體中文
將1/0檔片裝上機殼。
简体中文
将1/0档片装上机壳。
日本語
Secure the standoffs on the motherboard tray as required and install the motherboard.
we recommend connecting ATX12V 4pin or EPS 8pin cables from your power supply to the motherboard now to make installation easier later on.)
DEUTSCH
3aKpeHnTE cTOnKH Ha KpOHHTeHne MaTePHNCKoI IaTHb, KaK Tpe6yETc. YctaHOHTe MaTePHNCKyo IIaTy.
(Ha daHOM 3Tane peKomeHnyer TIOcOeHHHT K MATEpHckoI IATE 4-KoHTaKTHb pa3bEm Ka6eATX 12 B HnB-KoHTaKTHb pa3bEm Ka6eIg EPS or 6IOKA IIITAHN DIn ynpueHH DaIIHeHJero Ipouceca yCTaHOBKn.)
繁體中文
Secure the PSU cage onto the chassis with screws.
DEUTSCH
3aKpEnTe KPOHHTeH 6noka nHTAHNA KOPIYCE C NOMOUBB HNTOB.
繁體中文
將電源架安裝回機殼,鎖回螺絲。
簡体中文
将电源架安装回机壳,锁回螺丝。
日本語
ケーリにPSUケジをネジで固定しま�。
中
LSAHJPSUK1S
9
ENGLISH
Connect the power cord. If there is a power switch on the PSU, be sure it is in the "ON" position.
DEUTSCH
We recommend at this point to start thinking about routing the cables cleanly before connecting them to the motherboard, cables include fan cables, power supply 24pin cable, CPU ATX 4pin/EPS12V 8pin, front panel connectors, and front I/O connectors.
DEUTSCH
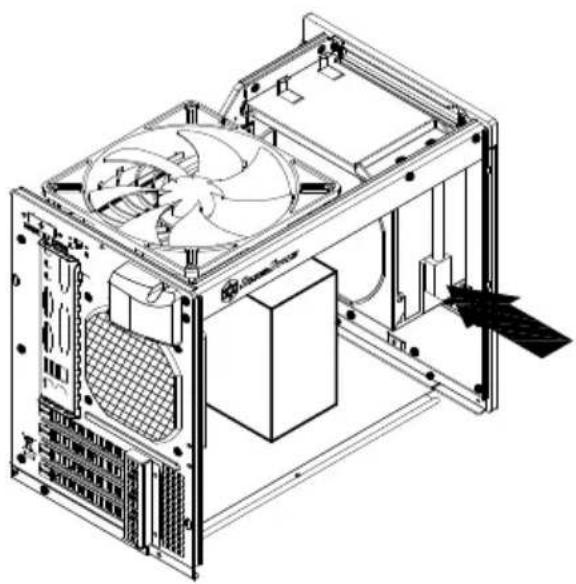
Loosen the 3.5^ hard drive bracket to remove it.
DEUTSCH
OTBHTNTBEHTbKPOHHTeHaD3,5-IOMOBOO XECTKORA DnCKA.
繁體中文
移除3.5”硬碟架螺絲,取下硬碟架。
简体中文
移除3.5”硬盘架螺丝,取下硬盘架。
日本語
3.5"八一卜德式克卜拉伊·
174
中
3.5" hD 2A1H BBAEeB
12
ENGLISH
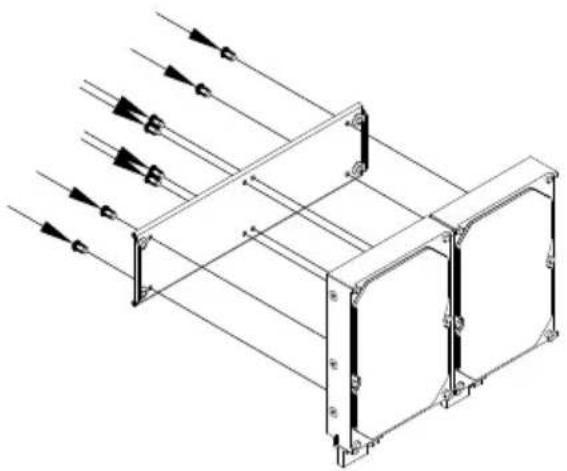
Install and secure the 3.5" hard drive onto the hard drive bracket.
DEUTSCH
YcTaHOBnTe Ha KPOHwTeHH 3aKpeNITe 3,5-DIOHMOBbI JXeCTKN DnCK.
繁體中文
将3.5”硬碟安装至硬碟架。
简体中文
将3.5”硬盘安装至硬盘架。
日本語
Secure the hard drive bracket onto the chassis, make sure the connectors are facing down.
PYCCKNI
3aKpeNTe KPOHHTeH Ha Kopnyce pa3bEmMaM XecTKOrO DnCKA BHN3.
DEUTSCH
PSU K01S的LSA将E01K01S
14
ENGLISH
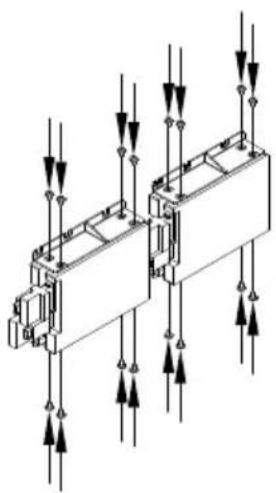
Secure the 2.5" hard drive bracket onto the chassis. Please make sure to install the bottom drive upside down as shown
PYCCKH
3aKpenTe 2.5" KPOHHTeH JecTkoro
DnCKa Ha Kopnyce.
Ioxaanynta ydocToBepbTecb, YTO
DnCKOBd He BBepx HorAMN
INCTaIInpoBaH 6bl, 3deCb TAK BblnAIT.
DEUTSCH
Secure the 2.5^ hard drive bracket onto the chassis.
PYCCKM
3aKpenTe 2.5" KPOHHTeH JeCTKOrO dNcKa Ha Kopnyce.
DEUTSCH
Insert the slot loading optical drive and connect the cables.
If the optical drive is 9.5mm, please use the rubber pad from the spare part box to increase the thickness of the 9.5mm optical drive for installation.
DEUTSCH
BbHNTTE BnHTbI n3 KPOHHTeHa JecTKO DnCKa, TTo6bI ChrTb erO.
EcnTOnuHaOnTueeKOro npuOda 9,5 MM, dna ee yBeHueHn npu yctHOBKe 3TO rO yCTPOcTBa nCNOb3yTe pe3HOByIO npoknadyu n3 KOMIIeKTA 3anaChbix uactei.
繁體中文
Connect all HDD cables and power connectors.
PYCCKNI
IIOKIOHTBE BCE HHTepfeHCHbIE Ka6eHN JECTKHX DNCKOB N Ka6eHN IITAHIN.
DEUTSCH
Remove expansion slot screws to remove expansion slot covers. Install graphics or expansion card into the case then connect any required power cables to the card. Reinstall top expansion slot cover back to the case and secure with screws.
PYCCKM
BbIeBHHTB BHTB CTOB paHHPENH, TIO6b1 CTBB 3aYUHKCIOBT. YCTAOHBITE p4nueckyIO KAPr HIN Nkpy paHHPENH B KOPNc, a 3Atem NOKIOHOHTe K NlTe BCE Heo6XQIMMbE KaEBN INTAHNI. YCTAOHBITE 3aRJyIKy BExHcero CToTa paHHPENH O6pTHOB KOpNc H 3aKpeHHTE BHTAMH.
DEUTSCH
Place the top cover back onto the case and secure with screws.
PYCCKNI
YcTaHOBnTe BepXHIO KpbIuKy o6paTHo HA Kopnyc N3aKpeNTE BNHTAMN.
DEUTSCH
Attach the rubber standoff onto the chassis appropriately as required to complete installation.
PYCCKM
Ia3aBepWeHnC6OpKn npKpEniTe pe3HOBbI 3JeMeENT KecTkOCTN K KopnyCy.
DEUTSCH
Connector definition
(1) Front panel connector installation no polarity, so they can be connected in any orientation.
ENGLISH
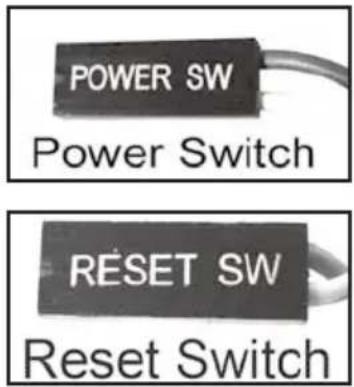
Power switch and reset switch installation guide:
Please refer to the motherboard manuals for the motherboard's "Front Panel Connector" or "System Panel Connector" pin definition.
Power switch and reset switch have no polarity, so they can be connected in any orientation.
DEUTSCH
NoIb3OBaTeJI MaTePnHckO PnTaTb. BbIKIOaTeJI NHTAHN I KHOJa NEpe3arpy3KHe IMeHOT NOJrpoCTN, IO3OMy IN MOXHO IOKIIIOaTbB
HIO60OpNEHTaUN.
繁體中文
Connector definition
ENGLISH
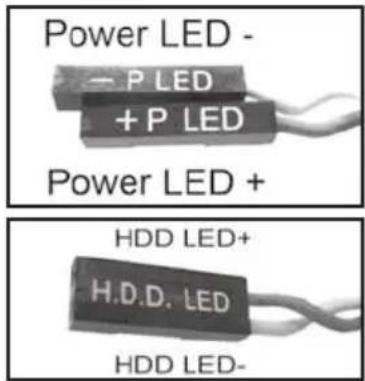
Please refer to the motherboard manuals for the motherboard's "Front Panel Connector" or "System Panel Connector" pin definition; the white/black wires are negative while other colors are positive wires. The Power LED wires are separate pins for compatibility with different motherboard pin definition so please make sure they are connected in the right polarity by referring to your motherboard manual.
DEUTSCH
Front I/O connector guide
ENGLISH
Below are the front I/O connectors pin definition, please also check your motherboard manual to cross reference with motherboard I/O pin headers. SilverStone's I/O connectors are in block type to simplify installation.
DEUTSCH
The SG10 can accommodate all standard size components and even some that are out of spec, please refer to the following guidelines for component selection and future upgrade considerations:
(1) CPU cooler height limitation
ENGLISH
A. The SG10 has 165mm height limitation for CPU cooler.
B. Upper boundary: The cooler can protrude 3mm over the motherboard edge.
C. Lower boundary: If a 92mm fan is installed to cool the graphic card, the distance between the CPU cooler's lower boundary and the motherboard is limited to 157.5mm. If an 80mm fan is installed, the distance between the CPU cooler's lower boundary and the motherboard is limited to 169.5mm.
D. Front boundary: SG10's left intake 120mm fan can be the CPU cooler's front boundary and the distance between the motherboard's rear end is 202mm.
The distance from the fan's upper edge to the motherboard's upper edge is 135mm. Downgrading to a 92mm fan increases the front boundary distance to 227mm and the fan's upper edge to the motherboard's upper edge increases to 149mm.
E. Rear boundary: SG10's rear 120mm fan is the CPU cooler's rear boundary, when a fan with 25mm thickness is used the distance between it and the motherboard's rear boundary is 23mm. When you install a thicker or thinner fan or a fan filter is installed, the distance will then vary accordingly. Notice: The shape of the cooler might not be rectangular so a clear understanding of its dimensions is recommended. As an example, if SilverStone's SST-HE02 is installed facing the front, the front edge will exceed the front boundary's limit of 202mm, but the left 120mm fan will not interfere with the cooler and therefore it can be installed.
DEUTsCH
A. The SG10 supports power supply with depth of up to 204mm. The limitation of power supplies with modular cables is 180mm. We use a specific extension cord for connecting to power supply's AC plug, so it does not support large, specialized plug found in extremely high wattage power supplies (e.g. SilverStone ST1500). If high wattage power supply is required, we recommend the Strider Gold ST1200-G, which conforms to SG10's dimension and extension power cord requirements. We recommend using the PP05 short cable kit in addition to its compatible power supply model to reduce cable clutter during installation.
B. Power cord connector limitation: SG10 is designed for maximum space utilization and because of its size constraints it cannot accommodate all the power supplies on the market. Below diagram marks the allowable area for the power cord connector and the required orientation for the 90 degree power cord connector. If the power cord exceeds the allowable area, then we do not guarantee it will be compatible.
If the power cord exceeds the front panel when it is connected, we recommend you to install the power supply upside down and let the power cord point inside.
C. Recommended cable length: SG10 does not have sufficient room for additional cables. We HIGHLY RECOMMEND the SilverStone PP05 short cable kit for use with SilverStone PSUs as the case was designed in conjunction with the PP05.
DEUTSCH
SilverStone compatible PSU List:
Strider Gold Evolution Series
ST75F-G Evolution / ST85F-G Evolution / ST1000-G Evolution / ST1200-G Evolution
Strider Gold Series
ST55F-G/ST65F-G/ST75F-G/ST85F-G/ST1000-G/ST1200-G
Strider Plus Series
ST60F-P/ST75F-P/ST85F-P/ST1000-P
Strider Essential Series
ST40F-ES/ST50F-ES/ST60F-ES/ST70F-ES
Element Series
ST40EF/ST50EF/ST60EF
Component size limitations
(3) Graphics card/expansion card length limitation
ENGLISH
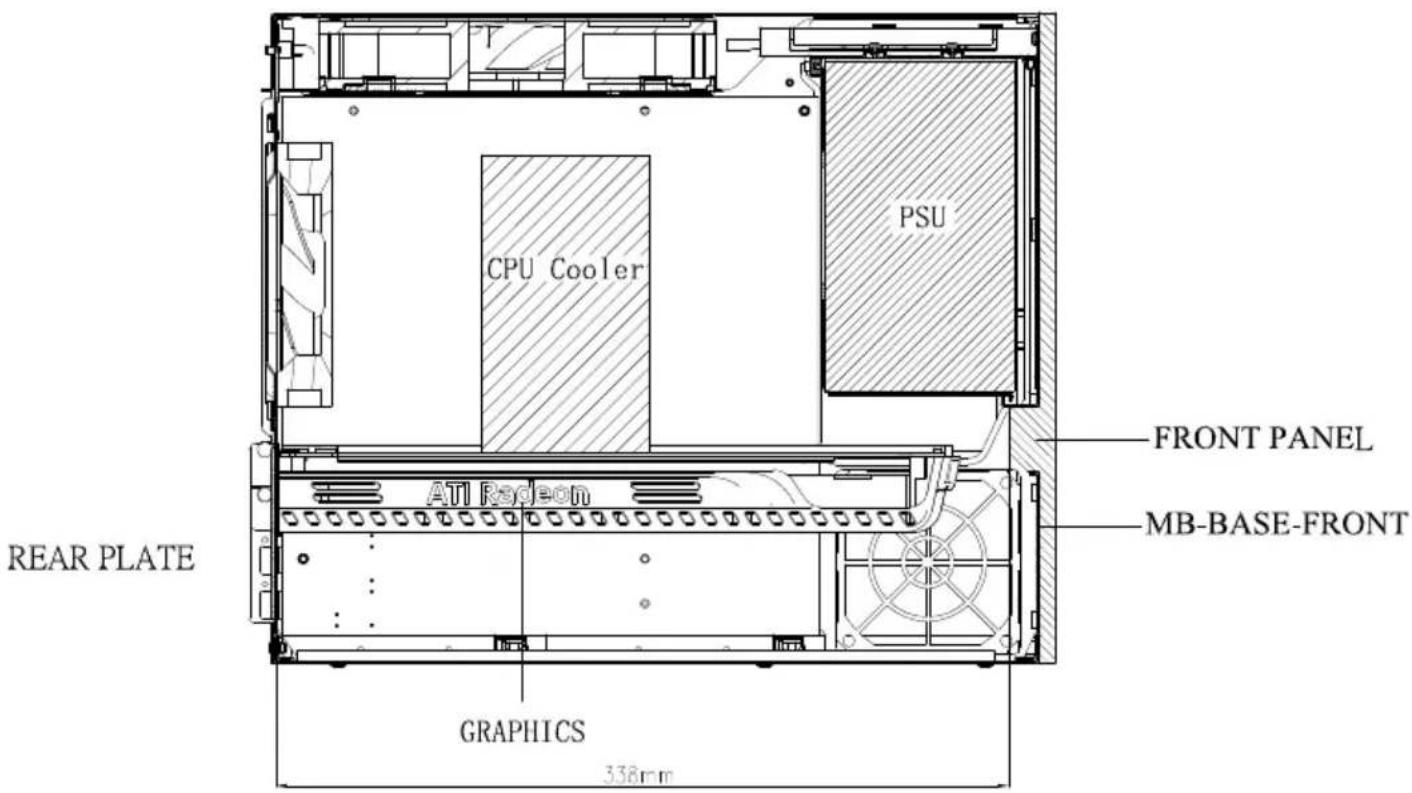
SG10 can support 13.3"(338mm) consumer level graphics cards.
DEUTSCH
(4) Optical drive limitation
ENGLISH
The SG10 only supports slim"slot-loading" optical drives.
Below are examples of 12.7mm and 9.5mm optical drives.
If the optical drive is 9.5mm, please use the rubber pad from the spare part box to increase the thickness of the 9.5mm optical drive for installation.
DEUTSCH
(5) Hard drive cable limitation
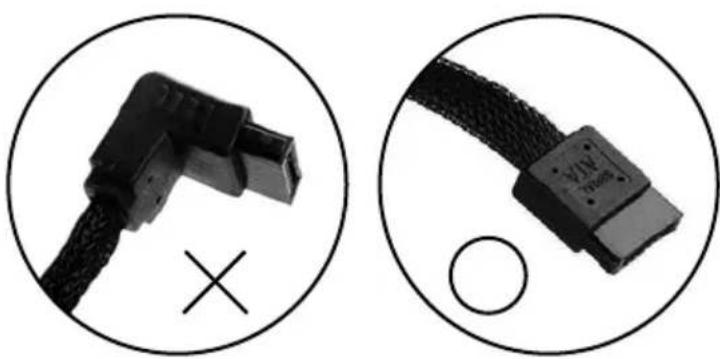
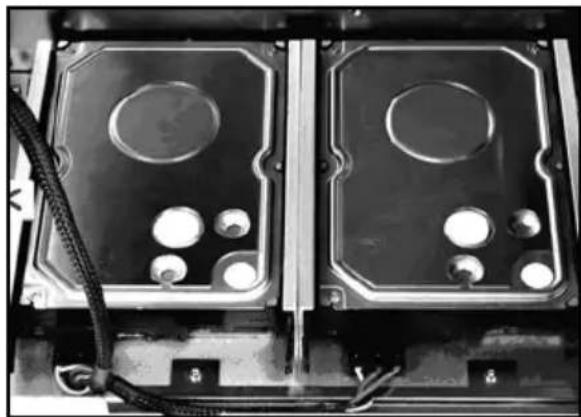
ENGLISH
Most SATA cables have 90 degrees or 180 degrees connectors. Since hard drives installed in the SG10 are placed flat therefore it is not compatible with 90 degrees connectors. Please choose SATA cables with 180 degree connectors on both sides. 90 degree SATA power connectors can be used as they are not as large as SATA data connectors, but for best fit, we recommend using 180 degree SATA power cable included in the PP05.
DEUTSCH
Recommended cooling device setup and selection
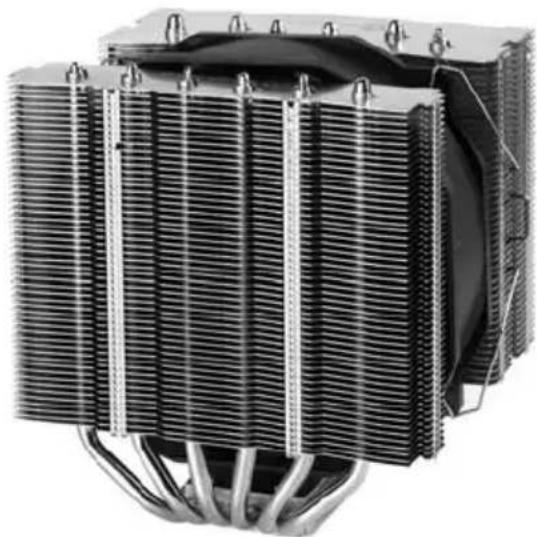
ENGLISH
(1) If you are installing a tower-style CPU cooler, we recommend that the CPU fan blows rearward to work with SG10's overall airflow.
DEUTSCH
Recommended cooling device setup and selection
ENGLISH
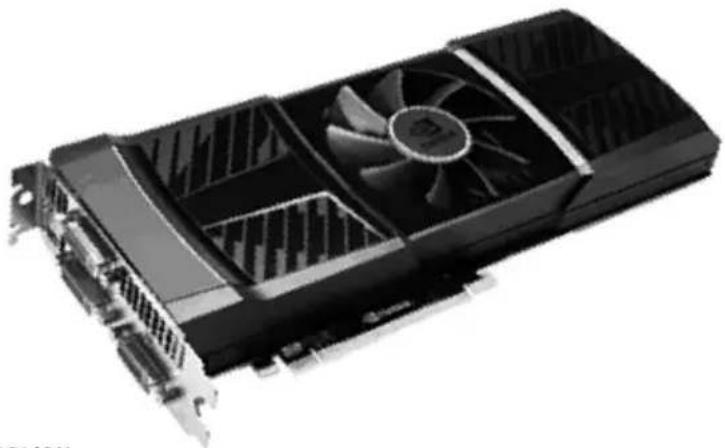
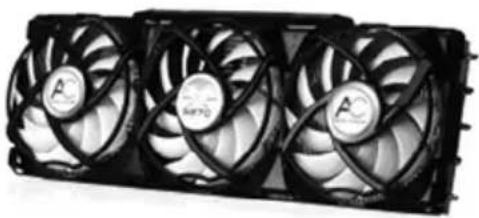
(2) If you use a high wattage graphic card, we suggest you to install additional fans to work with the fan on the graphic card.
DEUTSCH
Recommended cooling device setup and selection
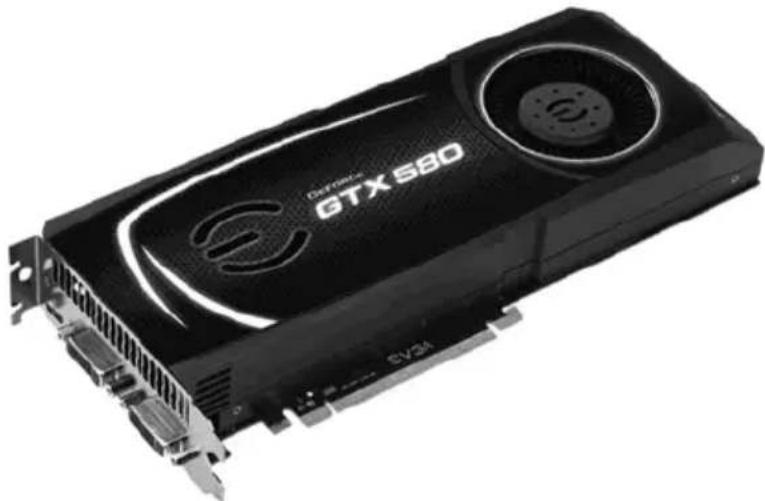
ENGLISH
A. Rear Exhaust type:
Standard fans on the SG10 will be sufficient. You can install an 80mm intake fan on the right if you want to increase cooling performance.
The SG10 does not have a fan filter for this 80mm fan slot, we recommend you to purchase a FF81 or FF122 fan filter.
DEUTSCH
Recommended cooling device setup and selection
ENGLISH
B. Dual exhaust type/open type/other:
To increase cooling performance for these types of graphic cards we recommend you to install the fan on the left as an intake and install an 80mm exhaust fan on the right. Note that the 80mm fan slot on the right can accommodate 32mm thick fans. If you use a 25mm thick fan please use the VGA duct included in the accessories box to prevent heated air from affecting hard drives on the backside.
DEUTSCH
Recommended cooling device setup and selection
(3) Dual graphic card cooling
ENGLISH
When two high wattage graphic cards are used, please read the recommendation below:
A. Please pay attention to the space between the expansion slots. By default, there is some wiggle room between the two slots so please make sure to separate installed graphic cards as much as possible to leave enough breathing room between the cards.
DEUTSCH
Recommended cooling device setup and selection
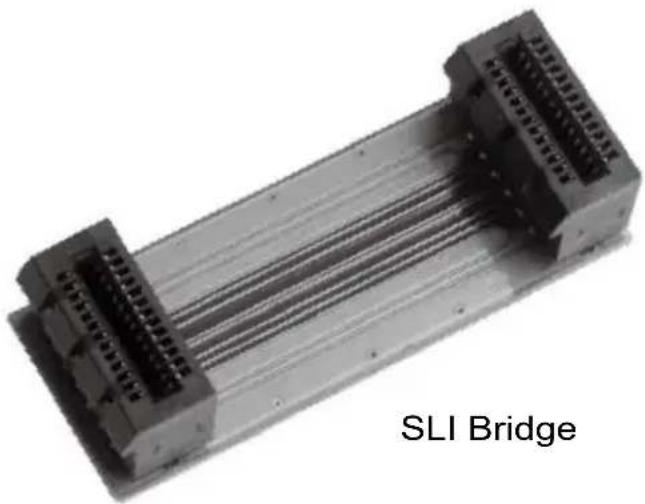
ENGLISH
By using a hard SLI bridge connector, you can also ensure that there is sufficient space between the two graphic cards.
DEUTSCH
Recommended cooling device setup and selection
ENGLISH
B. Space between graphic cards:
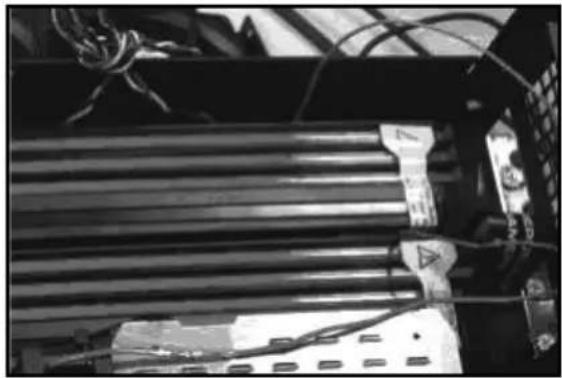
Some graphic cards do not leave enough space for air intake when two cards are installed next to each other so please take note of this when you choose your card.
DEUTSCH
Recommended cooling device setup and selection
ENGLISH
Graphics cards without sufficient space for air intake when installed next to each other.
PYCCKNI
PacctoHHe MExdy DByMg yCTaHoBneHHbIMn PdOM rpaDnueckmK KapTaMn HeOCTaTOHNO.
DEUTSCH
Graphics cards with sufficient space for air intake when installed next to each other.
PYCCKNI
PacToHHe MExKdy DByM yCTaHOBneHHbIMn PraDm rpaΦnueckmN KapTAM NocTaTOUHO.
DEUTSCH
Recommended cooling device setup and selection
Supplemental designs that assist with increasing airflow
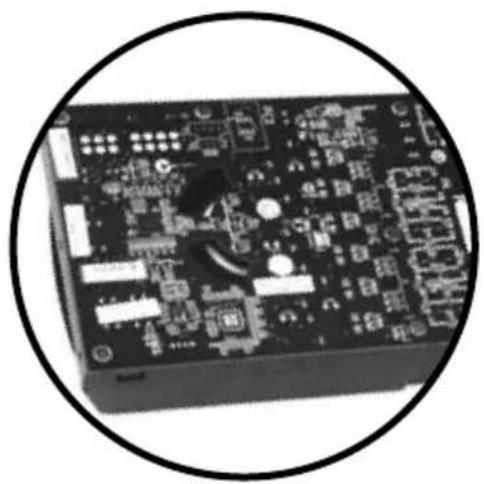
ENGLISH
Intake holes at the backside of the graphic card.
DEUTSCH
Fan blades that protrude the fan bracket, this type of fan can intake air from the side.
DEUTsCH
Frame-less designs, similar to the many Intel boxed fan.
DEUTSCH
Recommended cooling device setup and selection
(4) Tips for cable management
ENGLISH
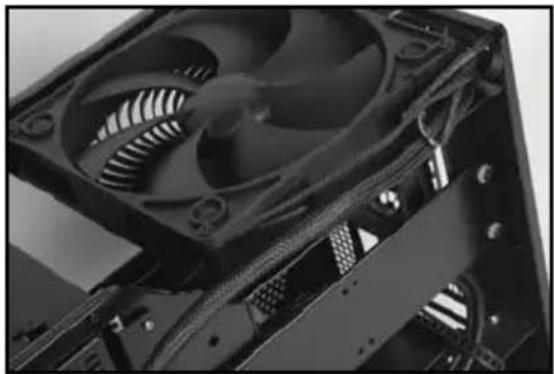
4+4 pin EPS12V/ATX12V connector through right side groove of the fan.
PYCKM
4+4-KoHTaKTHbI pa3beM EPS 12 B/ATX 12B npOBaNTcyepe3 npaBbI na3 BeHTnIaTopa.
A.
DEUTSCH
24-pin motherboard connector, 8/6-pin PCI-E connector, and all the front I/O connectors need to pass through the pass-thru hole below the PSU. We recommend you to route the 24-pin motherboard first, as it is the largest connector.
DEUTSCH
Recommended cooling device setup and selection
PYCCKNI
24-KoHTaKTHbI pa3bEM MaTePHNcKO nnAaTb, 8- nnn 6-KoHTaKTHbI pa3bEm PCl-E n BCE pa3bEmbl NpeDnHx nopTOB BBOda-BbIOda Heo6xoIMNO npOBecTI uepe3 OTBePCTme NOI 6ILOKOM nITaHry. PeKomeHdyeTc Chauana IpoBecTu 24-KoHTaKTHbI pa3bEM MaTePHNcKO nnAaTb, KAK cambl KpyHbI.
繁體中文
The two lowest openings are for I/O and hard drive cables to connect to the motherboard.
DEUTsCH
IbA HxKHNX OTBepCTN IpeHa3aHueHb IIN Ka6eNe I NpOToB BBOda-BbIBoDa INCKOB, INPCoeINHReMbIX K MaTePHNcKoi IIaTe.
繁體中文
Recommended cooling device setup and selection
(5) Fan recommendation
Below table details fan thickness limitations in relation to installed components
| Fan Position | Thickness limitation | Cooling target |
| Top 180mm fan | Support 180mm fan, 32mm thick. Support 140mm fan, 25.4mm thick | CPU, motherboard VRM and hard drives. Hard drives receive airflow from the edge of the fan installed in this area. Downgrading to a 140mm fan will likely result in higher hard drive temperature. |
| Rear 120mm fan | Depending on motherboard layout and CPU cooler size, almost any thickness should be supported. | CPU area |
| Left fan | No fixed limitations. Thick 120mm fans may interfere with graphic card cabling. | Graphic card area |
| Right 80mm fan | Maximum thickness: 32mm | Graphic card |
SilverStone also has three models of 180mm for sale separately for replacement or upgrade:
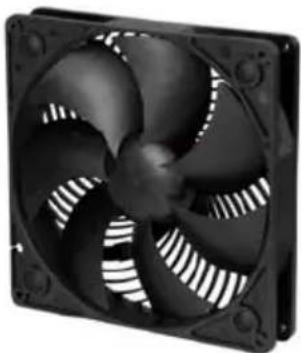
AP181
Air Penetrator AP181 180mm fan, dual speeds at 700rpm and 1200rpm (80/130CFM)
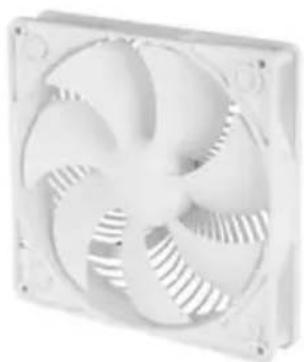
AP182
Air Penetrator AP182 180mm fan with variable speed controller, fan speed ranges from 500rpm to 2000rpm (60~170CFM)
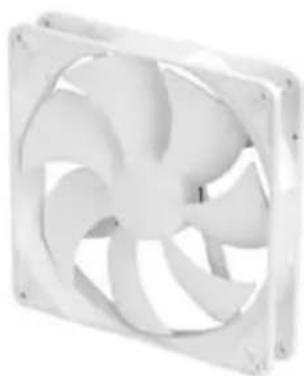
FM181
180mm fan with variable speed controller, fan speed ranges from 500rpm to 1300rpm (65CFM to 150CFM)
Upgrade And Maintenance
(1) Fan filter removal guide
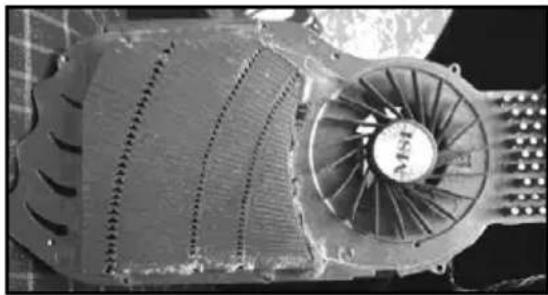
An example of a GPU cooler that is filled with dust and has lost most of its cooling performance.
ENGLISH
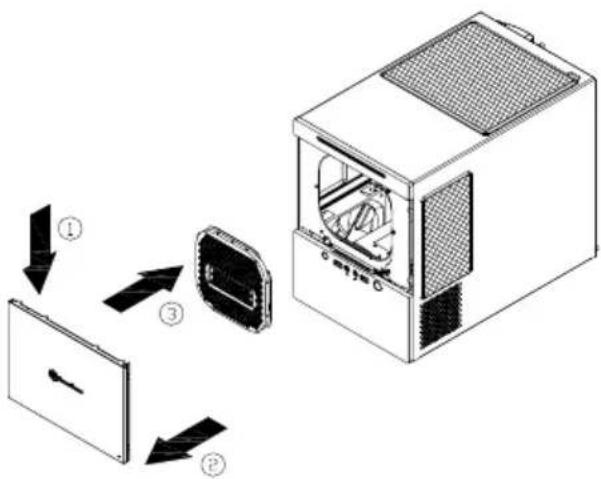
SG10's positive air pressure design is an effective configuration that will reduce dust buildup inside the case. Small air particles or lint will accumulate over time on intake filters instead of on the components inside the case. To maintain SG10's excellent cooling performance for years to come, we recommend to clean all fan filters regularly every three months or half a year (depending on your environment). Below are steps to remove fan filters.
DEUTSCH
Upgrade And Maintenance
ENGLISH
Remove the power supply cover and then remove the power supply filter.
PYCCKNI
CHIMITE Kpbilky 6noka nHTAHNA, 3aTeM CHIMITE pNbTp 6noka nHTAHNA.
DEUTSCH
Upgrade And Maintenance
(2) Cleaning the fan filter
ENGLISH
SG10 uses finer air filters that offer higher airflow ratio. They have the same filtering ability but with increased airflow percentage from 65% to 90% compared to previous generation of nylon filters. However, these finer filters are not as durable so please note of the following precautions when cleaning them.
Methods of cleaning:
- Cleaning with a soft brush
Fan filter can be cleaned using a soft brush. Please DO NOT use a steel brush as it will cause damage to the filter. We recommend you to wear a respirator when cleaning the fan filter to prevent inhaling unnecessary dust.
- Cleaning using a vacuum cleaner
If it is difficult to remove the fan filter, cleaning with a vacuum cleaner is the best method. To prevent the vacuum cleaner from damaging the fan blades, please secure them before cleaning.
- Cleaning with water
Rinsing with water is the cleanest way to cleaning the fan filter. After rinsing the fan filter with water, dry the filter at a well ventilated area out of direct sunlight. DO NOT use a blow dryer, oven or microwave oven...etc to dry the fan filter. This will damage the fan filter.
If you feel the drying process is too time-consuming, we recommend you to keep a spare set of fan filter as backups. DO NOT reinstall the fan filter before it is fully dry, it may cause shorts or damage to other computer components.
Note: As the fan filter material is very thin, please keep it away from any Velcro material as they will cause damages to fan filter.
Purchasing additional fan filter
To purchase a retail fan filter as an upgrade or replacement in the event of loss, damage or simply as a backup, you can search on our website for the nearest resellers or distributor: http://www.silverstonetek.com/wheretobuy_all.php
DEUTSCH
Upgrade And Maintenance
ESPANOL
Upgrade And Maintenance
Upgrade And Maintenance
(3) ClearCMOS
SG10 supports SST-CLEARCMOS installation on a designated part of the case, please see example below:
Upgrade And Maintenance
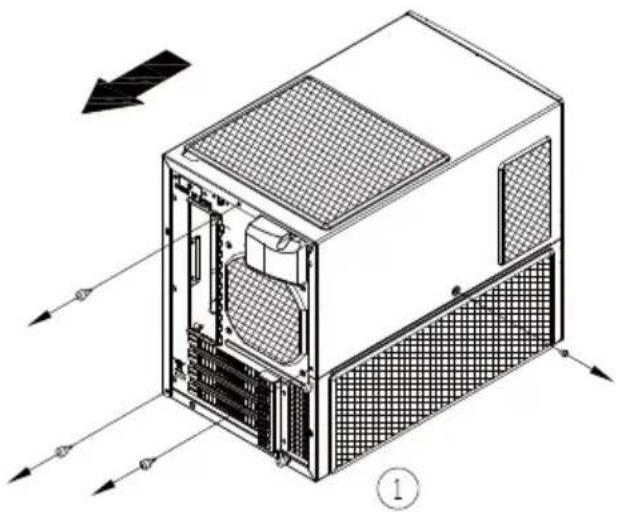
(4) Fan removal guide
A.
ENGLISH
- Take off the top cover.
PYCCKIM
- CHIMNTE BepXHIOKpbIiKy.
DEUTSCH
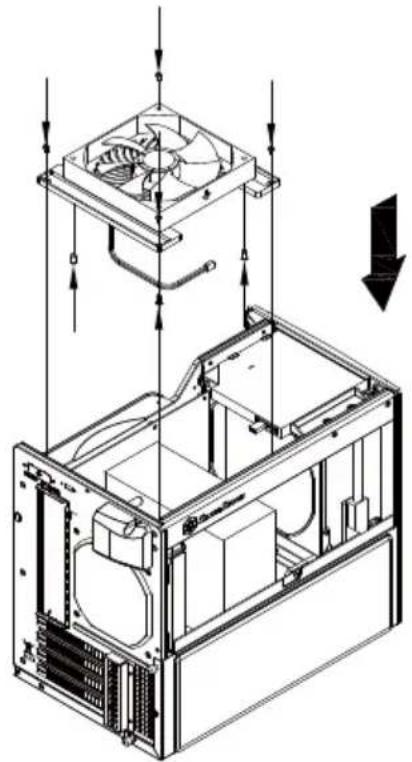
- Remove the four long fan screws.
- Remove the fan controller situated
at the rear of the case (yellow wire side is high speed, red wire side is low speed) and remove the fan.
DEUTSCH
Upgrade And Maintenance
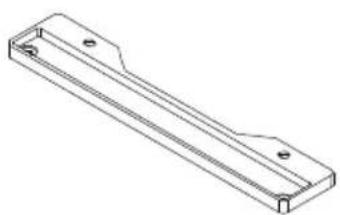
Downgrading to a 140mm fan
FAN-180-TO-140-BKT

SCREW-CROSS-1-632-5
ENGLISH
- Secure the fan using normal fan screws onto the transfer bracket that is included in SG10's accessories box.
- Use the short screw (#6-32) to screw the bracket onto the chassis.
DEUTsCH
Upgrade And Maintenance
B.
ENGLISH
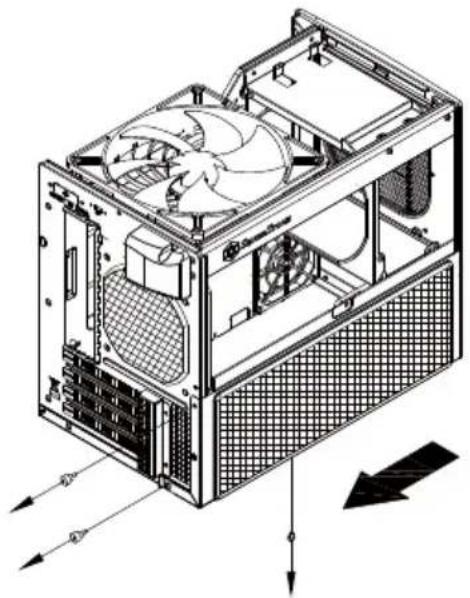
Remove the left bottom cover.
PYCCK
CHIMNTE HIXKHIOI NeByIO KpbilKy.
DEUTSCH
Remove the fan filter and you can install/remove the left side fan.
PYCCKM
CHIMMTEΦNbTpBEHTNtAToPA, NOCNE YERO MOXHO yCTaHOBtB INI CHrTB BEHTNtAToP.
DEUTSCH
Upgrade And Maintenance
C.
ENGLISH
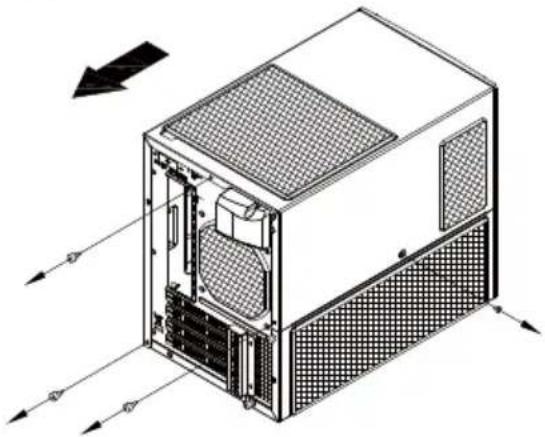
Remove the top cover and left bottom cover.
DEUTSCH
If the graphic is longer than 9.6^ long, remove it first.
DEUTSCH
Place the fan onto right fan slot. Hold the fan with one hand and secure the fan screws with the other. Magnetic screw drivers are recommended.
DEUTSCH
A lock and cable can be purchased on the market for use with the Kensington security slots located on rear of TJ08-E to prevent removal of the entire computer or side panels.
Caution: Please check for compatibility before purchasing the lock and cable for use with TJ08-E's Kensington security slots
DEUTSCH
Q1: If I have a tower-style CPU cooler, is it possible to run it without CPU fan installed?
From the tests we've conducted during development, a quality lower-style cooler can be used without CPU fan and instead rely only on chassis fans to cool CPU up to 130W TDP (Core i7, not overclocked). However, performance may vary depending on the quality of your CPU cooler and other factors, so you will still need to test the limit on your own.
DEUTSCH
Q2: Since hard drives are installed on the backside of the case, how do they dissipate heat?
A2: 3.5" hard drives are cooled by the top 180mm fan.
We recommend using SSD for 2.5" drives as they are more heat tolerant.
DEUTSCH
Q2:hur d raii h a kaiis s of tne n eepn ng, ane nee
A2:3.5" 180 mm
2.5" 3
Q&A
ENGLISH
Q3: Why use a slim slot-loading optical drive?
A3: The total volume of all possible installed fans adds up to 2.4 liters, which is more than the volume of two 5.25" drives.
Since optical drives have the lowest effect on performance, we reasoned that the use of slim optical drive is the best way to reduce the size of SG10.
DEUTSCH
Q4: Will power supply's exhausted air affect the thermal performance of the case?
A4: The top 180mm fan will help to expel power supply's exhausted air out of the case. According to our testing, the PSU heat will not affect case performance.
DEUTSCH
Q5: The extension power cord seems a bit long and thick.
A5: Since there are no standards for power supply's power cord connector location, we provide extra length to ensure compatibility.
The SG10 is also designed to accommodate power supply up to 1200W so we used a thicker 15A cable.
DEUTSCH
Q6: Why is the PSU installed horizontally?
A6: By installing the PSU horizontally, it will take up less depth compared to installing it longitudinally. With traditional PSU installation, the power cord will occupy space behind the case therefore the area taken by the power cord is not part of the case measurement.
DEUTSCH
Q7: I have an entry level liquid cooling system, where should I install the radiator?
A7: Most should fit in this area (rear 120mm fan)
DEUTSCH
Q8: Everything is properly installed, why does it not start up?
A8: If your PSU has an AC switch, make sure the switch is at the "ON" position.
DEUTSCH
Q9: The graphic card overheats, what can I do?
A9: SG10 has four fan slots dedicated for graphic cards and provide top-notch cooling ability. If you have installed all extra fans according to our instruction manual and the graphic card still overheats, please contact the graphics card manufacturer for assistance.
DEUTSCH
Q10: I want to connect all the fans onto the motherboard, what can I do?
A10: The SG10 has 6 fan slots and if you include the fan on the CPU cooler, there are up to 7 fan connectors in total. Currently, there are no motherboards that support this amount of fans, therefore we have included a 1 to 3 fan adapter cable to support more fan connections. Although you can not monitor the fans through your motherboard when connected to the adapter, this is the best way to connect all the fans.
Below is a list of Micro-ATX motherboards that has the most fan connectors:
6 Fan connectors: DFI Lanparty JR Series, ASRock X79 Extreme4-M
5 Fan connectors: ASUS ROG Gene Series
DEUTsCH
Bonpoc: KaK noDknIOuHTb BCE BeHTNJIaTOpbl K MaTePHckO nnate?
OTBeT: Kopnyc SG10 nmeet lecB meC Tny aCTaHOBKn BEHTNIArTOPOB. BMeTe C BeHTNIArTOpOM npOeCCOPHO KyIepa 6ouee YncIO BeHTNIArTOPOB B CnCTeMe CoCTaBnAET cEmb. Ha daHbIM MOMENT MaTePnHCKNX PATA, NOdEPKINBAIOUX NOKJIIOUeHne TAKO I KOINHECTBA BeHTNIArTOPOB, He cyuEeCTByeT, No3TOMY B KOMNKeT NocTaBKN 6bl IN BKNIIOeH nepExoDnIK DnI NOkNIOUeHn Tpx EHTNIArTOPOB. I XOTI pOnpaAdet BO3MOXHOCTb ynpABnTb NODKNIOUeHHbIMn TAKIM ObaP3OM BeHTNIArTOpAMn Upe3 MaTePnHCKyIO PATA, 3TO LyuShm CnOCo6 I NODKNIOUeHn BCex BeHTNIArTOPOB. HJke npNBedeHb MaTePnHCKNe PATAbl TINOpa3Mepa Micro-ATX C Han6OJIbShm IM NCLOM pa3BeMOB I NODKNIOUeHn BEHTNIArTOPOB;
IeCTb pa3bEmOB InRA BeHTnIaTOpOB: DFI Lanparty JR Series, ASRock X79 Extreme4-M
IaTb pa3bEmOB IInRA BeHTnIaTOpOB:ASUS ROG Gene Series
繁體中文
Q11: Does SG10 fit in the Sugo Pack?
A11: Yes it does, with room to spare!
DEUTSCH
F11: Passt das SG10 in das Sugo Pack?
Warranty Information
This product has a limited 1 year warranty in North America and Australia.
For information on warranty periods in other regions, please contact your reseller or SilverStone authorized distributor.
Warranty terms & conditions
- Product component defects or damages resulted from defective production is covered under warranty.
Defects or damages with the following conditions will be fixed or replaced under SilverStone Technology's jurisdiction.
a) Usage in accordance with instructions provided in this manual, with no misuse, overuse, or other inappropriate actions.
b) Damage not caused by natural disaster (thunder, fire, earthquake, flood, salt, wind, insect, animals, etc...)
c) Product is not disassembled, modified, or fixed. Components not disassembled or replaced.
d) Warranty mark/stickers are not removed or broken.
Loss or damages resulted from conditions other than ones listed above are not covered under warranty. - Under warranty, SilverStone Technology's maximum liability is limited to the current market value for the product (depreciated value, excluding shipping, handling, and other fees). SilverStone Technology is not responsible for other damages or loss associated with the use of product.
- Under warranty, SilverStone Technology is obligated to repair or replace its defective products. Under no circumstances will SilverStone Technology be liable for damages in connection with the sale, purchase, or use including but not limited to loss of data, loss of business, loss of profits, loss of use of the product or incidental or consequential damage whether or not foreseeable and whether or not based on breach of warranty, contract or negligence, even if SilverStone Technology has been advised of the possibility of such damages.
- Warranty covers only the original purchaser through authorized SilverStone distributors and resellers and is not transferable to a second hand purchaser.
- You must provide sales receipt or invoice with clear indication of purchase date to determine warranty eligibility.
- If a problem develops during the warranty period, please contact your retailer/reseller/SilverStone authorized distributors or SilverStone http://www.silverstonetek.com.
Please note that: (i) You must provide proof of original purchase of the product by a dated itemized receipt; (ii) You shall bear the cost of shipping (or otherwise transporting) the product to SilverStone authorized distributors. SilverStone authorized distributors will bear the cost of shipping (or otherwise transporting) the product back to you after completing the warranty service; (iii) Before you send the product, you must be issued a Return Merchandise Authorization ("RMA") number from SilverStone. Updated warranty information will be posted on SilverStone's official website. Please visit http://www.silverstonetek.com for the latest updates.
Additional info & contacts
For North America (usasupport@silverstonetek.com)
SilverStone Technology in North America may repair or replace defective product with refurbished product that is not new but has been functionally tested. Replacement product will be warranted for remainder of the warranty period or thirty days, whichever is longer. All power supplies should be sent back to the place of purchase if it is within 30 days of purchase, after 30 days, customers need to initiate RMA procedure with SilverStone Technology in USA by first downloading the "USA RMA form for end-users" form from the below link and follow its instructions.
http://silverstonetek.com/contactus.php
For Australia only (support@silverstonetek.com)
Our goods come with guarantees that cannot be excluded under the Australian Consumer Law.
You are entitled to a replacement or refund for a major failure and for compensation for any other reasonably foreseeable loss or damage.
You are also entitled to have the goods repaired or replaced if the goods fail to be of acceptable quality and the failure does not amount to a major failure.
Please refer to above "Warranty terms & conditions" for further warranty details.
SilverStone Technology Co., Ltd. 12F No. 168 Jiankang Rd., Zhonghe Dist., New Taipei City 235 Taiwan R.O.C. + 886-2-8228-1238
(standard international call charges apply)
For Europe (support.eu@silverstonetek.de)
For all other regions (support@silverstonetek.com)

- SUGO SGIO
- Installation Guide
- 1
- ENGLISH
- DEUTSCH
- 繁體中文
- 简体中文
- 日本語
- 簡体中文
- 中
- 9
- 12
- PYCCKNI
- 14
- PYCCKH
- PYCCKM
- Connector definition
- Front I/O connector guide
- SilverStone compatible PSU List:
- Component size limitations
- Recommended cooling device setup and selection
- PYCKM
- A.
- Upgrade And Maintenance
- ESPANOL
- PYCCKIM
- PYCCK
- Q&A
- Warranty Information
- Warranty terms & conditions
- Additional info & contacts
- For North America (usasupport@silverstonetek.com)
- http://silverstonetek.com/contactus.php
Brand : SILVERSTONE
Model : Sugo SG10B
Category : Desktop Computer