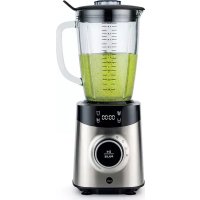
IMMIX BL7SPB1800 - Blender WILFA - Free user manual and instructions
Find the device manual for free IMMIX BL7SPB1800 WILFA in PDF.



| Product type | Blender |
| Brand | Wilfa |
| Model | IMMIX BL7SPB1800 |
| Power | 1800 W |
| Voltage | 220-240 V ~ 50/60 Hz |
| Bowl capacity | 1.8 L (max) |
| Bowl material | Glass |
| Blade material | Stainless steel |
| Speeds | Variable + presets |
| Preset programs | Crushed ice, Full-bowl smoothie, Half-bowl smoothie, Auto clean |
| Pulse function | Yes |
| Pause function | Yes |
| Safety | Safety switch, locked lid, auto shut-off after 2 min |
| Included accessories | Tamper, measuring cap |
| Cleaning | Removable parts dishwasher-safe or hand wash; auto-clean program |
| Dimensions (L x W x H) | 20 x 20 x 45 cm (approx.) |
| Weight | 4.5 kg (approx.) |
| Cable length | 1.2 m (approx.) |
| Usage | Household only |
| Warranty | 5 years |
| Country of origin | Norway (Wilfa) |
Frequently Asked Questions - IMMIX BL7SPB1800 WILFA
User questions about IMMIX BL7SPB1800 WILFA
0 question about this device. Answer the ones you know or ask your own.
Ask a new question about this device
Download the instructions for your Blender in PDF format for free! Find your manual IMMIX BL7SPB1800 - WILFA and take your electronic device back in hand. On this page are published all the documents necessary for the use of your device. IMMIX BL7SPB1800 by WILFA.
USER MANUAL IMMIX BL7SPB1800 WILFA
natural_image
Exterior view of a modern kitchen blender with black handle and digital display (no text or symbols on main body)IMMIX
BL7S-PB1800
EN · Instruction manual
NO · Bruksanvisning
SE · Bruksanvisning
IMPORTANT SAFETY INSTRUCTIONS
- Read this manual thoroughly before using and save it for future reference.
- If the supply cord is damaged, it must be replaced by a special cord or assembly available from the manufacturer or its service agent.
- Care shall be taken when handling the sharp cutting blades, emptying the bowl and during cleaning.
- Always disconnect the appliance from the supply if it is left unattended and before assembling, disassembling or cleaning.
- This appliance shall not be used by children. Keep the appliance and its cord out of reach of children.
- Appliances can be used by persons with reduced physical, sensory or mental capabilities or lack of experience and knowledge if they have been given supervision or instruction concerning use of the appliance in a safe way and if they understand the hazards involved.
• Children shall not play with the appliance. -
Always operate with the lid in place. When processing hot beverages, properly secure the lid and measuring cup to avoid scalding due to spraying of hot liquids.
-
To prevent spillage, do not fill liquid in the blender jug above the MAX line.
- This product is intended for indoor, non-industrial, non-commercial; household use only.
EN
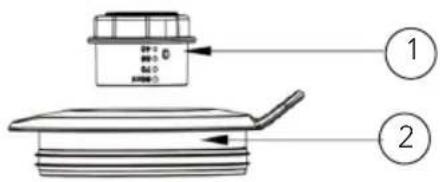
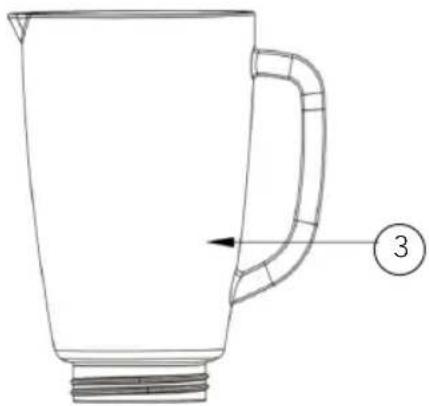
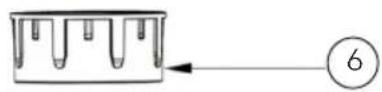
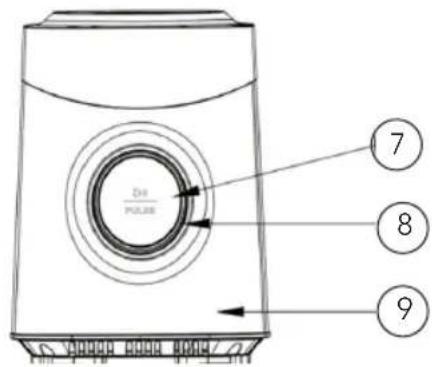
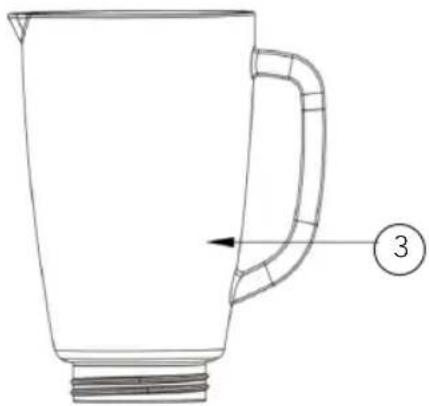
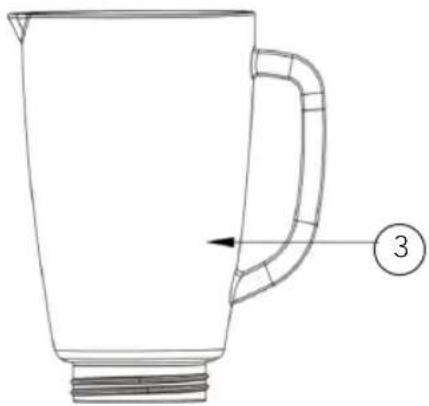
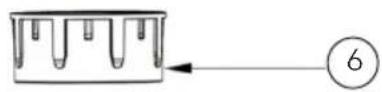
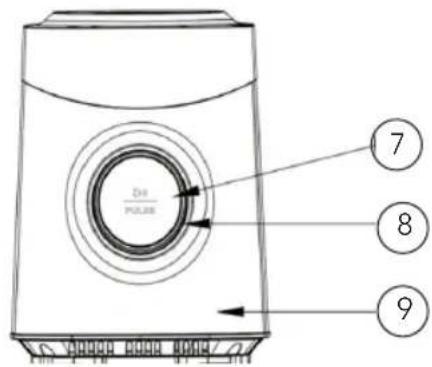
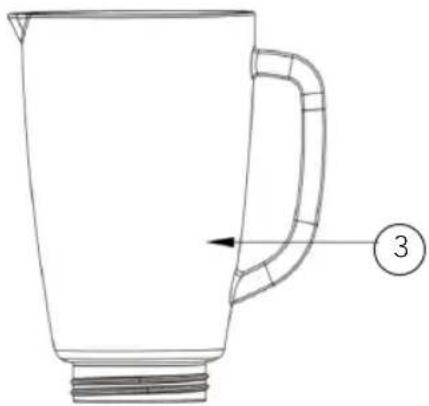
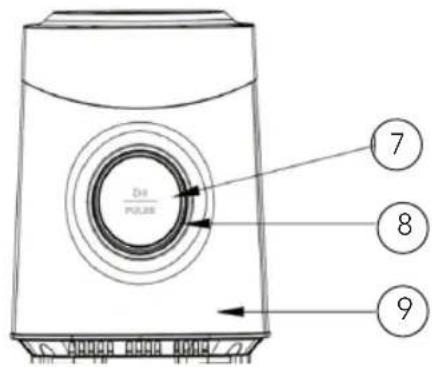
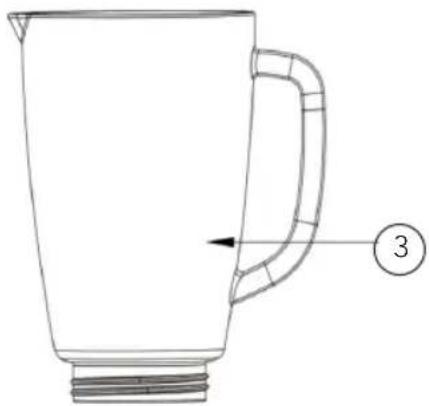
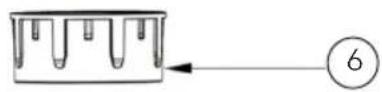
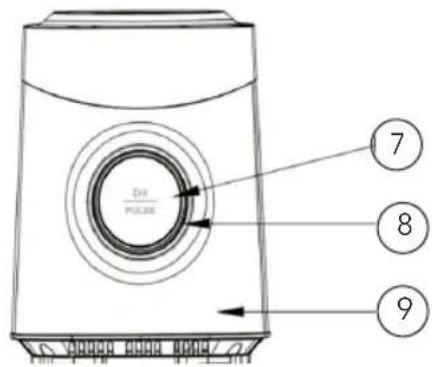
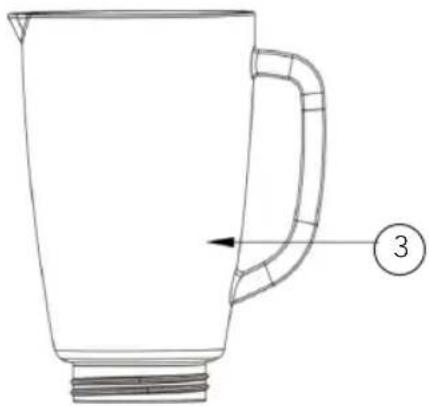
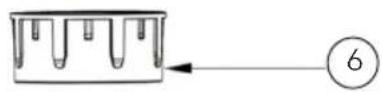
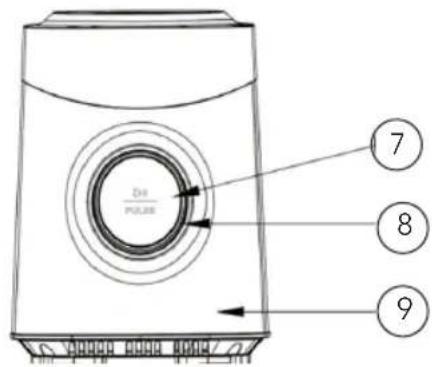
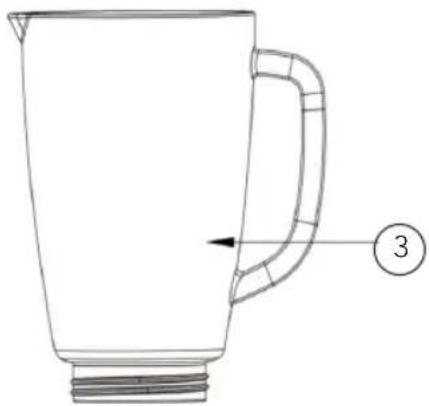
PRODUCT OVERVIEW
natural_image
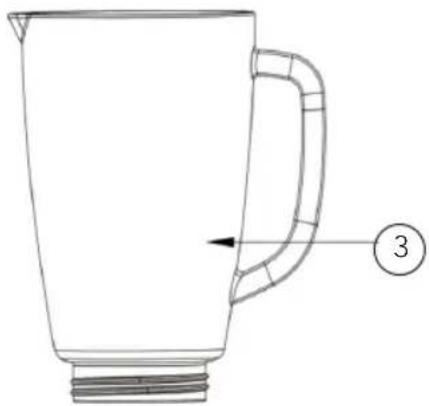
Line drawing of a mug with handle and spout, labeled with number 3 (no text or symbols on the object itself)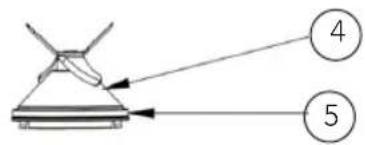
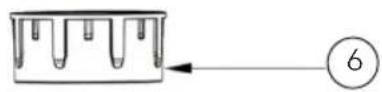
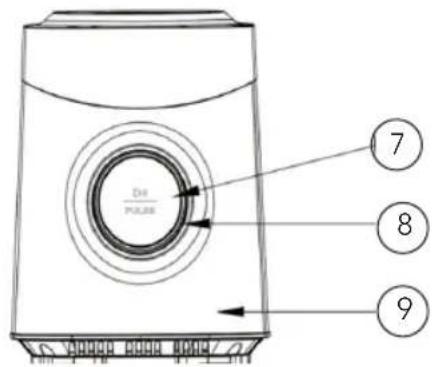
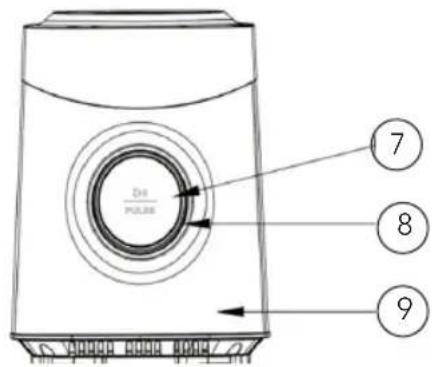
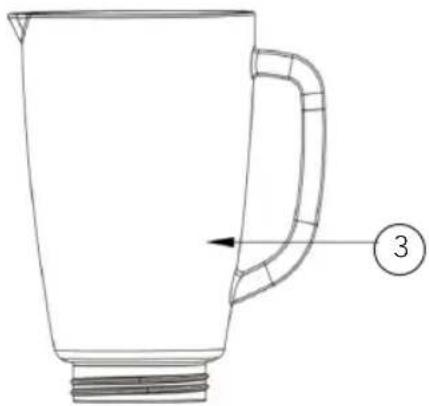
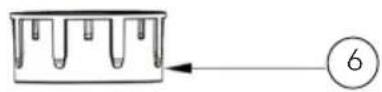
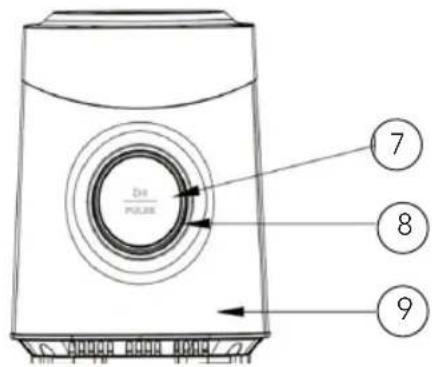
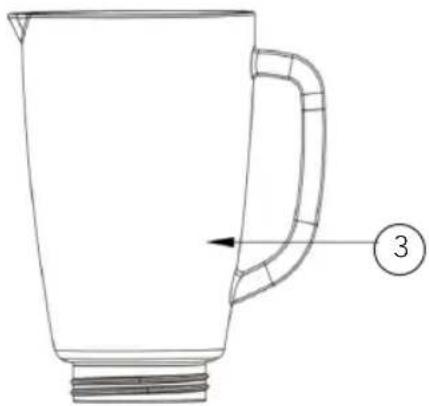
- Measuring lid
- Lid
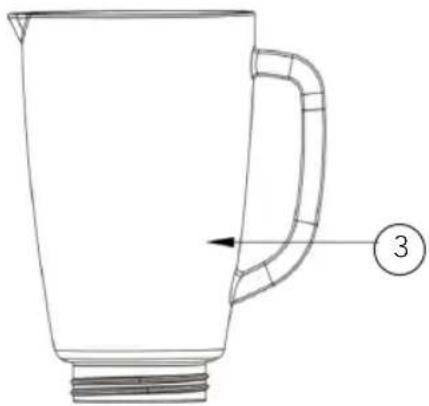
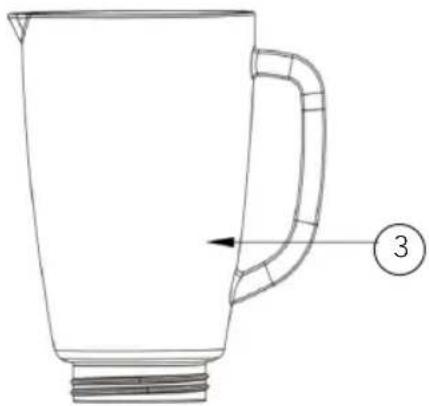
- Jug
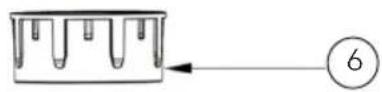
- Blade holder
-
Sealing ring
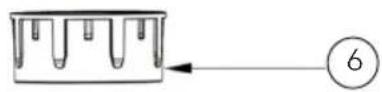
-
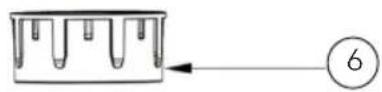
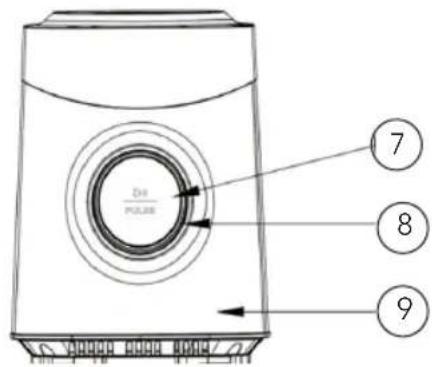
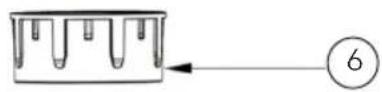
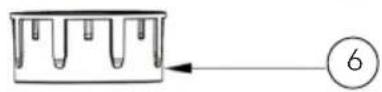
Jug base
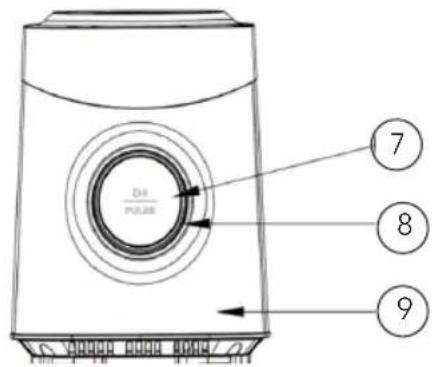
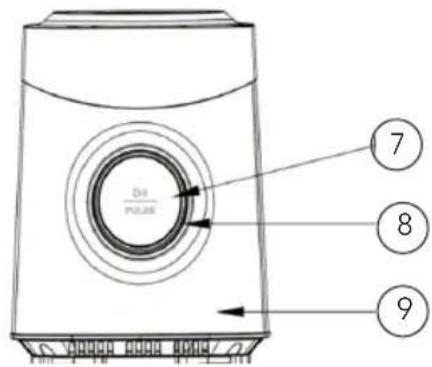
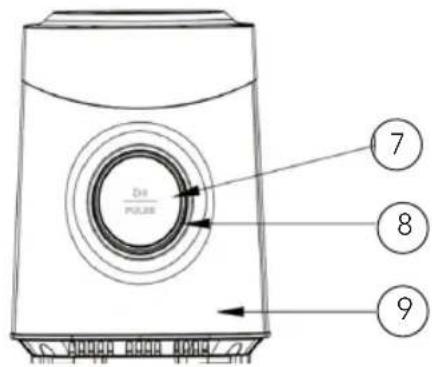
- Button
- Knob
- Main unit
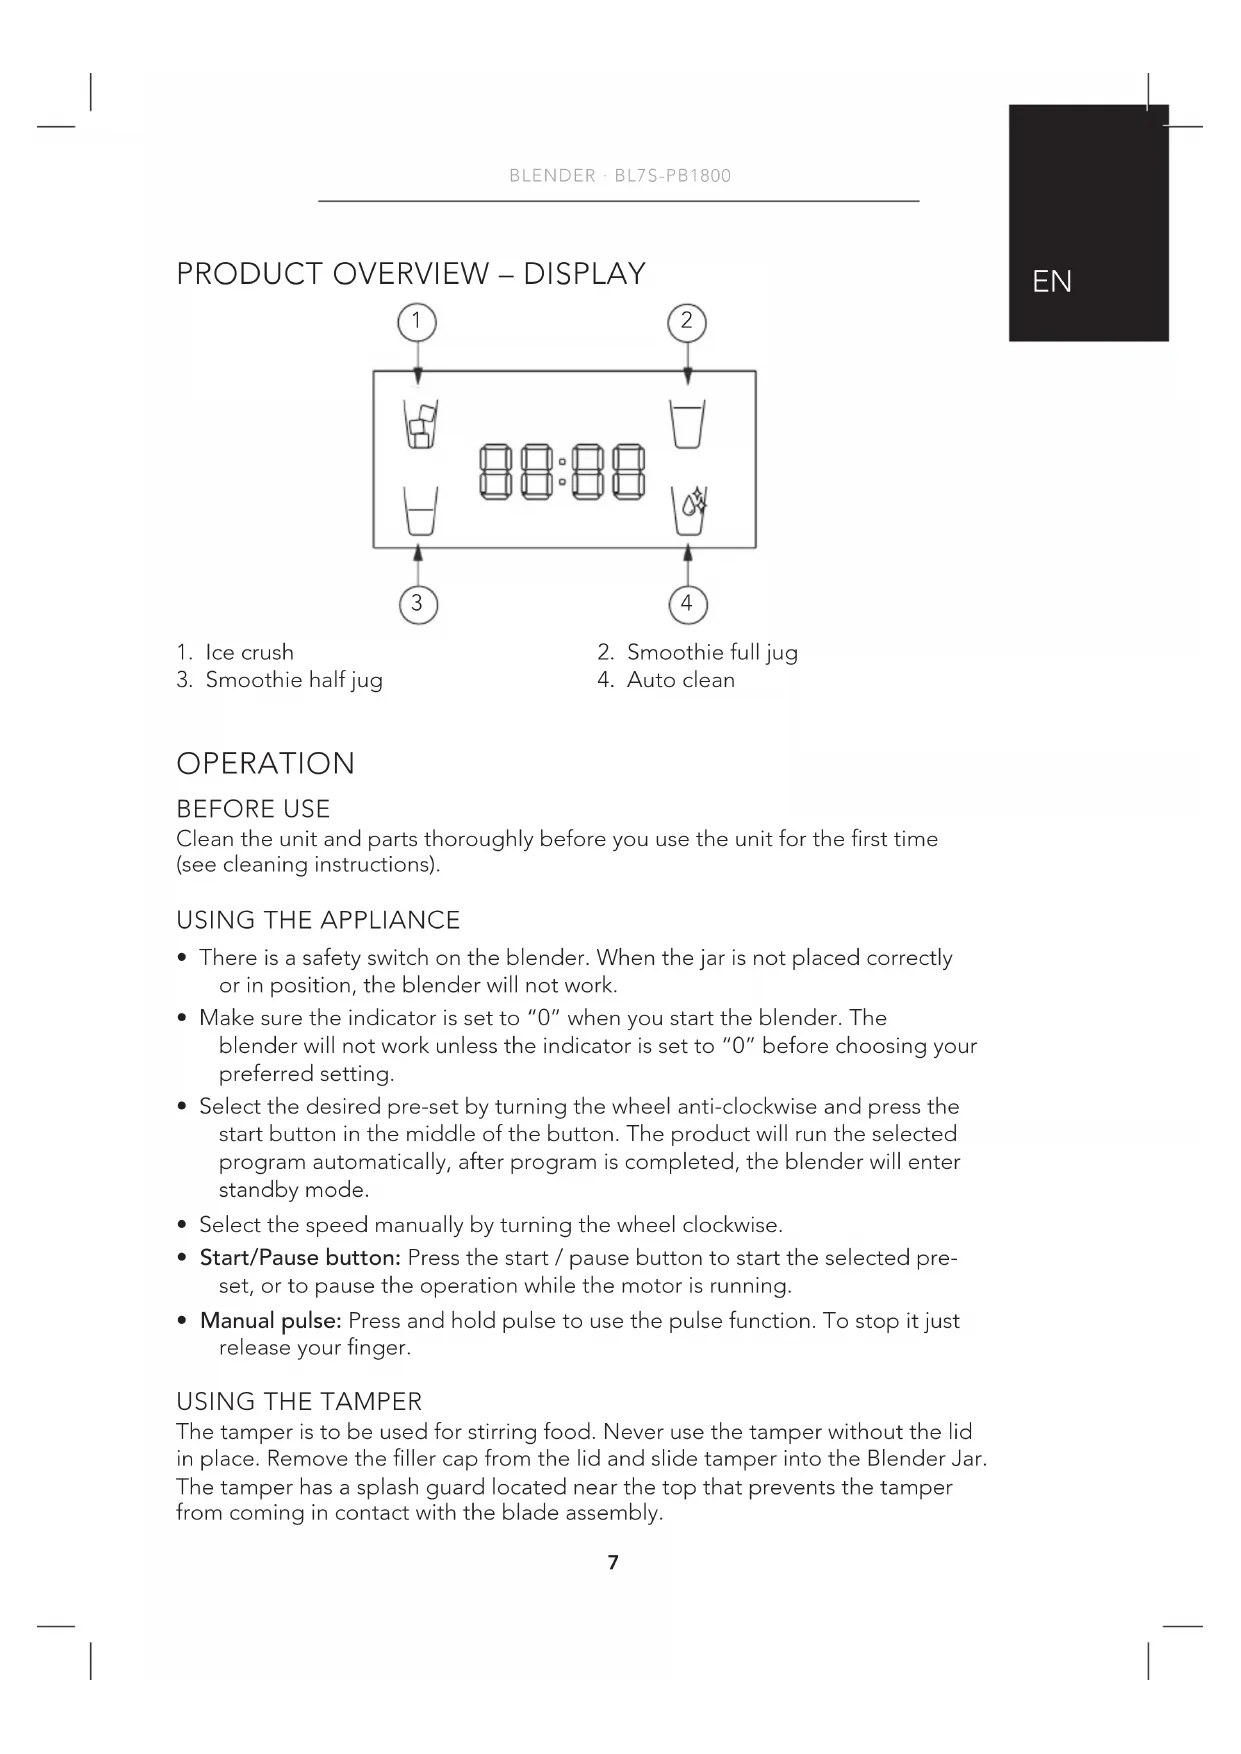
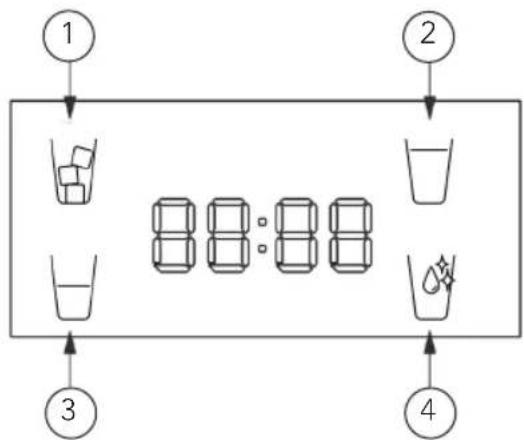
PRODUCT OVERVIEW – DISPLAY
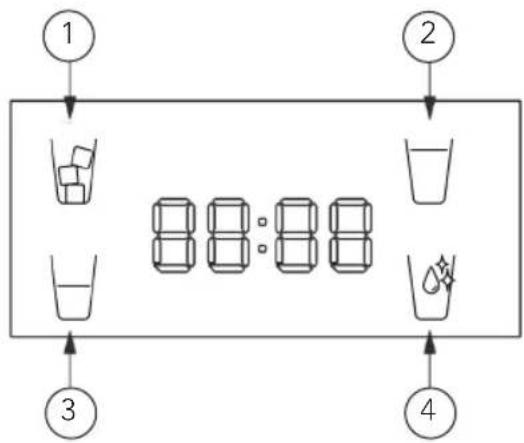
flowchart
graph TD
    1["①"] --> A["Water Bottle"]
    2["②"] --> B["Water Bottle"]
    3["③"] --> D["Water Bottle"]
    4["④"] --> E["Water Bottle"]
-
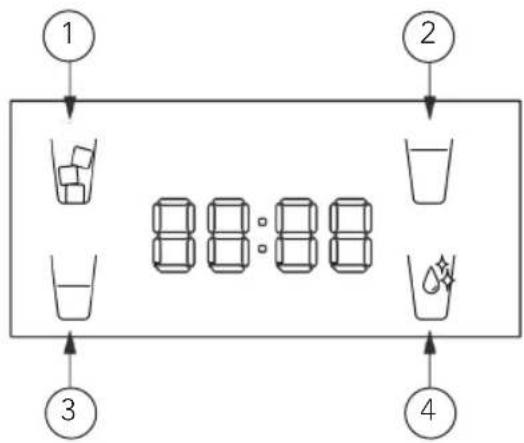
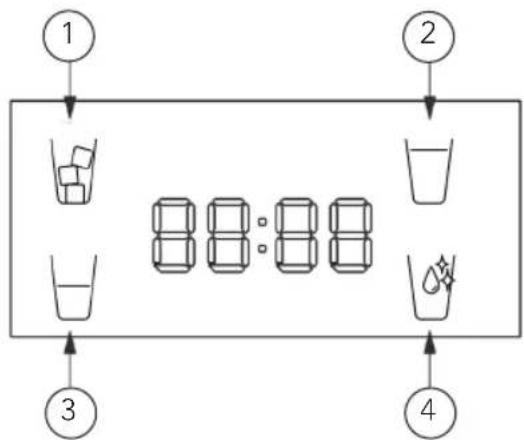
Ice crush
-
Smoothie full jug
-
Smoothie half jug
-
Auto clean
OPERATION
BEFORE USE
Clean the unit and parts thoroughly before you use the unit for the first time (see cleaning instructions).
USING THE APPLIANCE
- There is a safety switch on the blender. When the jar is not placed correctly or in position, the blender will not work.
- Make sure the indicator is set to "0" when you start the blender. The blender will not work unless the indicator is set to "0" before choosing your preferred setting.
- Select the desired pre-set by turning the wheel anti-clockwise and press the start button in the middle of the button. The product will run the selected program automatically, after program is completed, the blender will enter standby mode.
- Select the speed manually by turning the wheel clockwise.
- Start/Pause button: Press the start / pause button to start the selected preset, or to pause the operation while the motor is running.
- Manual pulse: Press and hold pulse to use the pulse function. To stop it just release your finger.
USING THE TAMPER
The tamper is to be used for stirring food. Never use the tamper without the lid in place. Remove the filler cap from the lid and slide tamper into the Blender Jar. The tamper has a splash guard located near the top that prevents the tamper from coming in contact with the blade assembly.
PRESET PROGRAMS
| Function Program Operation cycle | |
| Ice crush Put ice cubes into the jug, not more than 180g ice, and press start. If the ice sticks, add some water. | |
| Smoothie Full jug Use this program when you want a full jug with smoothie. Do not fill over the max line on the jug. | 120 seconds |
| Smoothie Half jug When you are making a smaller batch with smoothie. For half a jug, fill up to 0.9L. | 92 Seconds |
| Auto clean Put 1.8L water into the jug and run this program to clean the jug. | 45 seconds |
TROUBLESHOOTING
| Problem Possible reason Solution | ||
| The blender will not start. | The switch is not set to 0 | Turn the switch to 0. The icons should stop blinking, and you can choose a pre set program or manual speed |
| Is the jug properly placed? | Place the jug correctly onto the base | |
| Blender stops The blender has run more than 2 minutes. | Let the motor cool down | |
| Content does not blend properly | Not enough fluid Use the temper, or consider adding more fluid in the jar to help circulation | |
TIPS AND TRICKS
TIPS ON ICE CRUSHING
- By adding water to the ice, you get a better crushing performance.
- If the ice sticks to the jug during crushing, it should be added some water. You can also try to give the jug a gentle knock to get the ice to fall down to the knives.
TIPS ON BLENDING
- If you like to use hard seeds or other food which is difficult to blend, you should try to blend these ingredients as they are, without fluid. If the blending does not work, add fluid in small portions until it blends well.
- If the ingredients are too dry, the ingredients might not get in good contact with the knives, so the knives don't get hold of all the ingredients. You can help this by add fluid and reduce the speed to minimum and give the jug a gentle knock to help the ingredients to fall down to get in good contact with the knives so the blending will work well.
More tips, recipes and tricks can be found on www.wilfa.com or our local web sites.
CLEANING AND MAINTENANCE
- Disconnect the power from main supply.
- Disassemble all removable parts before cleaning.
• Always clean the removable parts immediately after use. - Clean all removable parts in lukewarm water with dishwashing liquid.
- The blender jug can be rinsed with water. It can also be cleaned by pouring water into the blender jug, closing the lid and then operating the blender in Auto clean. Then pour out the water, rinse with water, and dry with a soft cloth.
- Use dry cloth to clean the main body.
Note: Be careful when cleaning the parts. Avoid touching the sharp blades! After cleaning, repack the appliance and store it in a dry place and avoid sun exposure.

GUARANTEE
Wilfa issues a 5 year guarantee on this product from the day of purchase is done. The guarantee covers production failure or defects that arise during the guarantee period. Your purchase receipt works as proof towards retailer if claiming your guarantee.
The guarantee is valid only for products that are bought and used in private households. The guarantee is not valid if the product is used commercially. The guarantee is not valid if the product is misused, used by negligence, if not following instructions given by Wilfa, if modified or if unauthorized reparation is done. The guarantee is also not valid for normal wear of the product, misuse, lack of maintenance, use of wrong electrical voltage or:
• Overloading of product
- Damage on glass
- Parts which are normally worn down
- Parts you can expect being replaced regularly (e.g. filter, battery etc.)
PRODUCT SPECIFICATIONS
220V\~240V\~50Hz
SUPPORT AND SPARE PARTS
For support please visit us at wilfa.com, and see our customer service/support page. Here you will find frequently asked questions, spare parts, tips and tricks and all our contact information.
RECYCLABILITY
This marking indicates that this product should not be disposed with other household wastes throughout the EU. To prevent possible harm to the environment or human health from uncontrolled waste disposal, recycle it responsibly to promote the sustainable reuse of material resources. To return your used device, please use the return and collection systems or contact the retailer where the product was purchased. They can take this product for environmentally safe recycling free of charge.
NO
NO
INNHOLD
14 VIKTIGE SIKKERHETSANVISNINGER
16 PRODUKTOVERSIKT
17 PRODUKTOVERSIKT - DISPLAY
17 BRUK
18 FORHÅNDSINNSTILTE PROGRAMMER
18 FEILS∅KING
19 TIPS OG TRIKS
19 RENGJ∅RING OG VEDLIKEHOLD
20 GARANTI
21 PRODUKTSPESIFIKASJONER
21 SUPPORT OG RESERVEDELER
21 GJENVINNING
NO
VIKTIGE SIKKERHETSANVISNINGER
natural_image
Line drawing of a mug with handle and spout, labeled with number 3 (no text or symbols on the object itself)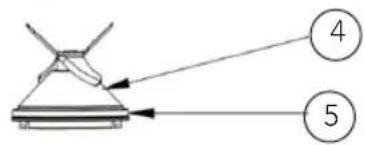
- Målebeger
- Lokk
- Mugge
- Knivholder
-
Pakning
-
Bunndel
- Knapp
- Dreiehjul
- Hovedenhet
PRODUKTOVERSIKT – DISPLAY
flowchart
graph TD
    1["①"] --> A["Water Bottle"]
    2["②"] --> B["Water Cup"]
    3["③"] --> D["Water Bowl"]
    4["④"] --> E["Coffee Cup"]
-
Knust is
-
Smoothie - full mugge
-
Smoothie – halvfull mugge
-
Automatisk rengjøring
BRUK
F∅R BRUK
FORHÅNDSINNSTILTE PROGRAMMER
NO
27 PRODUKTÖVERSIKT – DISPLAY
27 DRIFT
28 FÖRINSTÄLLDA PROGRAM
28 FELSÖKNING
29 TIPS OCH TRICKS
29 RENGÖRING OCH UNDERHÅLL
30 GARANTI
31 PRODUKTSPECIFIKATIONER
31 SUPPORT OCH RESERVDELAR
31 ÅTERVINNINGSBARHET
VIKTIGA SÄKERHETSANVISNINGAR
natural_image
Line drawing of a mug with handle and spout, labeled with number 3 (no text or symbols on the object itself)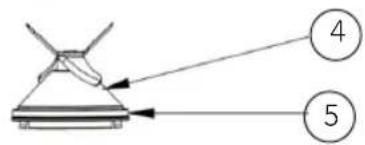
PRODUKTÖVERSIKT – DISPLAY
flowchart
graph TD
    A["1"] --> B["Water Bottle"]
    C["2"] --> D["Water Bottle"]
    E["3"] --> F["Water Bottle"]
    G["4"] --> H["Water Bottle"]
-
Iskross
-
Smoothie full kanna
-
Smoothie halv kanna
-
Automatisk rengöring
DRIFT
FÖRE ANVÄNDNING
natural_image
Line drawing of a pitcher with handle and spout, labeled with number 3 (no text or symbols on the object itself)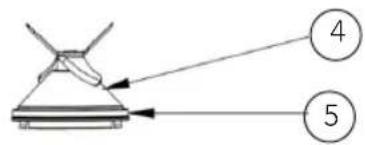
flowchart
graph TD
    A["1"] --> B["Water Bottle"]
    C["2"] --> D["Water Bottle"]
    E["3"] --> F["Water Bottle"]
    G["4"] --> H["Water Bottle"]
-
Isknuser
-
Smoothie fuld kande
-
Smoothie halv kande
-
Automatisk rengøring
BETJENING
F∅R BRUG
natural_image
Line drawing of a pitcher with handle and spout, labeled with number 3 (no text or symbols on the object itself)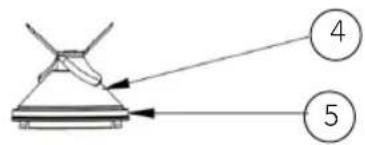
flowchart
graph TD
    A["1"] --> B["Water Bottle"]
    C["2"] --> D["Water Bottle"]
    E["3"] --> F["Water Bottle"]
    G["4"] --> H["Water Bottle"]
natural_image
Line drawing of a pitcher with handle and spout, labeled with number 3 (no text or symbols on the object itself)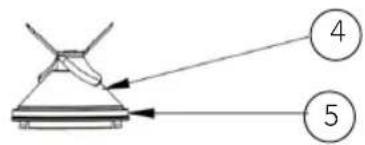
PRODUKTÜBERSICHT – DISPLAY
flowchart
graph TD
    A["1"] --> B["Water Bottle"]
    C["2"] --> D["Water Bottle"]
    E["3"] --> F["Water Bottle"]
    G["4"] --> H["Water Bottle"]
natural_image
Line drawing of a pitcher with handle and spout, labeled with number 3 (no text or symbols on the object itself)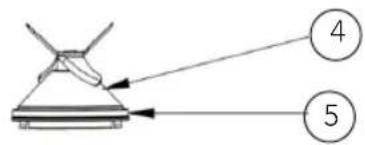
flowchart
graph TD
    A["1"] --> B["Water Bottle"]
    C["2"] --> D["Water Bottle"]
    E["3"] --> F["Water Bottle"]
    G["4"] --> H["Water Bottle"]
natural_image
Line drawing of a pitcher with handle and spout, labeled with number 3 (no text or symbols on the object itself)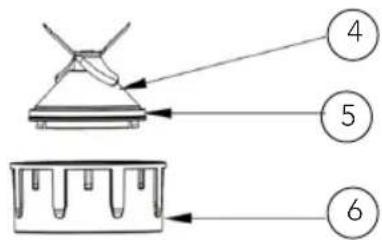
natural_image
Line drawing of a pitcher with handle and spout, labeled with number 3 (no text or symbols on the object itself)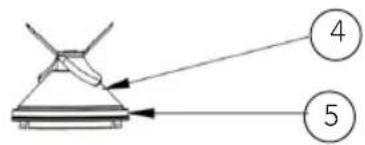
flowchart
graph TD
    A["1"] --> B["Water Bottle"]
    C["2"] --> D["Water Bottle"]
    E["3"] --> F["Water Bottle"]
    G["4"] --> H["Water Bottle"]
- Broyage de glaçons
-
Demi-bol de smoothie
-
Bol plein de smoothie
- Nettoyage auto
FONCTIONNEMENT
AVANT UTILISATION
CARACTÉRISTIQUES DU PRODUIT
220V\~240V\~50Hz
ASSISTANCE ET PIÈCES DÉTACHÉES
natural_image
Line drawing of a pitcher with handle and spout, labeled with number 3 (no text or symbols on the object itself)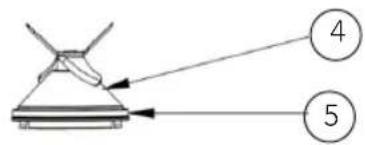
flowchart
graph TD
    A["1"] --> B["Water Bottle"]
    C["2"] --> D["Water Bottle"]
    E["3"] --> F["Water Bottle"]
    G["4"] --> H["Water Bottle"]
natural_image
Line drawing of a pitcher with handle and spout, labeled with number 3 (no text or symbols on the object itself)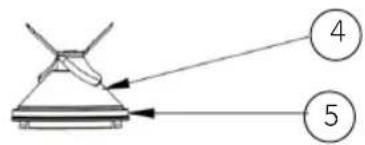
ES
flowchart
graph TD
    A["1"] --> B["Water Bottle"]
    C["2"] --> D["Water Bottle"]
    E["3"] --> F["Truck with Container"]
    G["4"] --> H["Truck with Bag and Bubble"]
natural_image
Line drawing of a pitcher with handle and spout, labeled with number 3 (no text or symbols on the object itself)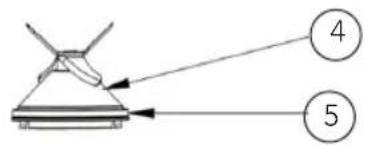
flowchart
graph TD
    A["1"] --> B["Water Bottle"]
    C["2"] --> D["Water Bottle"]
    E["3"] --> F["Water Bottle"]
    G["4"] --> H["Water Bottle"]
BL7S-PB1800_20_01

- IMMIX
- IMPORTANT SAFETY INSTRUCTIONS
- EN
- PRODUCT OVERVIEW
- PRODUCT OVERVIEW – DISPLAY
- OPERATION
- BEFORE USE
- USING THE APPLIANCE
- USING THE TAMPER
- PRESET PROGRAMS
- TROUBLESHOOTING
- TIPS AND TRICKS
- TIPS ON ICE CRUSHING
- TIPS ON BLENDING
- CLEANING AND MAINTENANCE
- GUARANTEE
- PRODUCT SPECIFICATIONS
- SUPPORT AND SPARE PARTS
- RECYCLABILITY
- INNHOLD
- NO
- VIKTIGE SIKKERHETSANVISNINGER
- PRODUKTOVERSIKT – DISPLAY
- BRUK
- F∅R BRUK
- FORHÅNDSINNSTILTE PROGRAMMER
- VIKTIGA SÄKERHETSANVISNINGAR
- PRODUKTÖVERSIKT – DISPLAY
- DRIFT
- FÖRE ANVÄNDNING
- BETJENING
- F∅R BRUG
- PRODUKTÜBERSICHT – DISPLAY
- FONCTIONNEMENT
- AVANT UTILISATION
- CARACTÉRISTIQUES DU PRODUIT
- ASSISTANCE ET PIÈCES DÉTACHÉES
- ES
Brand : WILFA
Model : IMMIX BL7SPB1800
Category : Blender