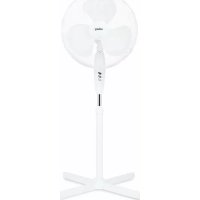
WIND162 - Fan Wëasy - Free user manual and instructions
Find the device manual for free WIND162 Wëasy in PDF.
| Product type | Pedestal fan |
| Brand | Wëasy |
| Model | WIND162 |
| Rated voltage | 220-240 V ~ 50 Hz |
| Rated power | 55 W |
| Protection class | II |
| Number of speeds | 3 (Low, Medium, High) |
| Oscillation function | Yes, button control |
| Height adjustment | Yes, via adjustment ring |
| Blades | Removable, mounted on axle |
| Protective grille | Front and rear grille |
| Intended use | Domestic, indoor |
| Minimum user age | 8 years (under supervision) |
| Cleaning | Soft damp cloth, no solvent |
| Maintenance | Unplug before cleaning; do not immerse |
| Minimum distance to walls | 20 cm |
| Spare parts | Base, motor, grilles, blades, nuts |
| Repairability | Replaceable parts; cable by professional |
| Environment | Recycling at waste disposal center |
Frequently Asked Questions - WIND162 Wëasy
User questions about WIND162 Wëasy
0 question about this device. Answer the ones you know or ask your own.
Ask a new question about this device
Download the instructions for your Fan in PDF format for free! Find your manual WIND162 - Wëasy and take your electronic device back in hand. On this page are published all the documents necessary for the use of your device. WIND162 by Wëasy.
USER MANUAL WIND162 Wëasy
natural_image
Black adjustable air fan with three blades and a black stand (no text or symbols visible)WIND162
Stand Fan Ventilateur sur pied Bodenventilator Staande ventilator Ventilador con pie Ventilatore da pollici
ENGLISH
Safety Information – keep for future use.
When using electrical appliances, basic safety precautions should always be followed including the following:
- This appliance can be used by children aged from 8 years and above and persons with reduced physical, sensory or mental capabilities or lack of experience and knowledge if they have been given supervision or instruction concerning use of the appliance in a safe way and understand the hazards involved.
- Children should be supervised to ensure that they do not play with the appliance.
- Cleaning and user maintenance shall not be made by children without supervision.
- Before connecting the appliance, ensure your mains voltage matches the voltage specified on the rating plate.
- The product is for household use only.
- Only use the appliance indoors and only for the purpose it was designed.
- Never immerse the appliance in water or other liquids; never spray liquids on the appliance.
- Never leave the fan unattended while it is in use. Always turn the product to the OFF position and unplug it from the electrical outlet when not in use.
- Extreme caution should be taken when the fan is used by or near children or persons with impaired mobility.
- Do not operate the fan with a damaged cord or plug, or if the fan malfunctions or has been dropped, or damaged.
If the supply lead is damaged it must be replaced by a competent person using the correct lead.
- Use the fan in a well-ventilated area. When in use, the fan must be kept a minimum distance (no less than 20cm) away from all walls and furniture. Air intakes and exhaust openings should not be blocked unexpectedly.
- Do not insert fingers or place other objects into the fans air vent or grill. Doing so will cause a serious hazard and mechanical danger when in use.
- Use the appliance on a dry, stable and level surface only.
- Prevent children from pulling on the mains cord or knocking the fan.
- Do not run the mains cord under carpeting and do not cover the cord with throw rugs, runners or alike. Place the cord away from pedestrian traffic areas so it will not be tripped over.
- Before use make sure the fan is placed on stable surface.
This appliance may be used by children of at least 8 years of age, as long as they are supervised and have been given instructions about using the appliance safely and are fully aware of the dangers involved.
Cleaning and maintenance should not be carried out by children unless they are at least 8 years of age and are supervised by an adult.
Keep the appliance and its power cord out of reach of children under 8 years of age.
- When using electrical equipment, safety precautions must always be taken to prevent the risk of fire, electric shock and/or injury in the event of misuse.
Make sure that the voltage rating on the typeplate corresponds to your main voltage of your installation. If this
is not the case, contact the dealer and do not connect the unit
The device must not be used if it has been dropped, it obvious signs of damage are visible
Please keep this document at hand and give it to the future owner in case of transfer of your device
This device is not intended for use by persons with reduced capacity on the physical, mental or sensory or lack of experience and knowledge (including children), unless he has them was asked to monitor or if they have
had instructions on the use of the appliance by a person responsible for their safety. Children should be supervised to ensure they do not play with the device.
The device is not intended to be operated by external timer means or a remote control system.
The machine is only used for household and indoor.
Young children, the elderly or suffering people should not be directly exposed to the fan last for a long period of time.
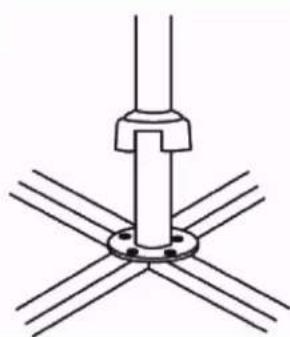
Know Your Stand Fan
General description of main parts Installation
Assembly of your stand fan (for cross base)
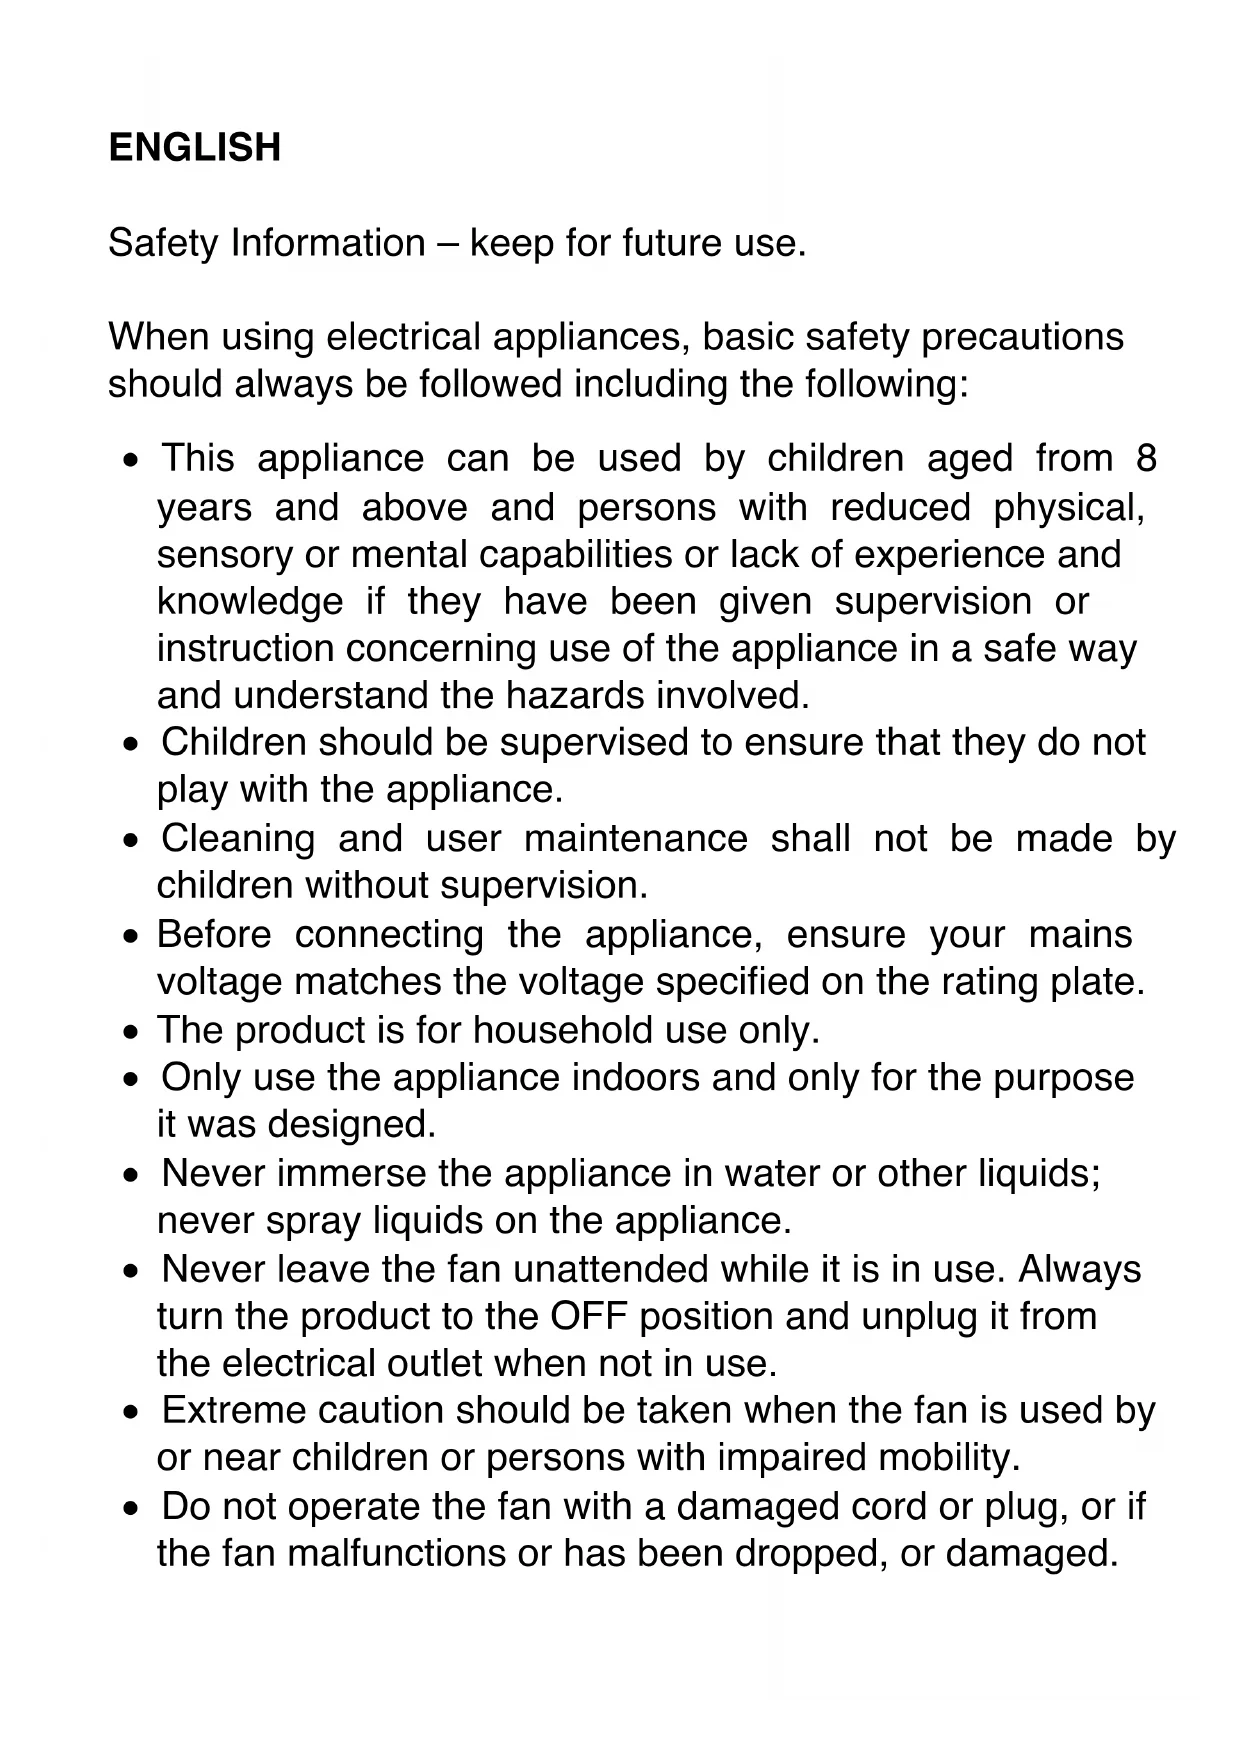
/1. Your stand fan has been boxed unassembled to minimize packaging waste. Each part is designed to fit together and be disassembled easily for cleaning or storage. Assemble the base to the support pole using the fasteners provided.
- Loose the height adjustment ring and extend the support pole to your desired height.
natural_image
Pure technical diagram of a mechanical assembly with intersecting lines and a central shaft (no text or symbols)Retighten the height adjustment ring to prevent slipping, then place the fan assembly onto the pole and tighten the pole screw manually.
-
Fit the motor to the stand pole and secure using the screw.
-
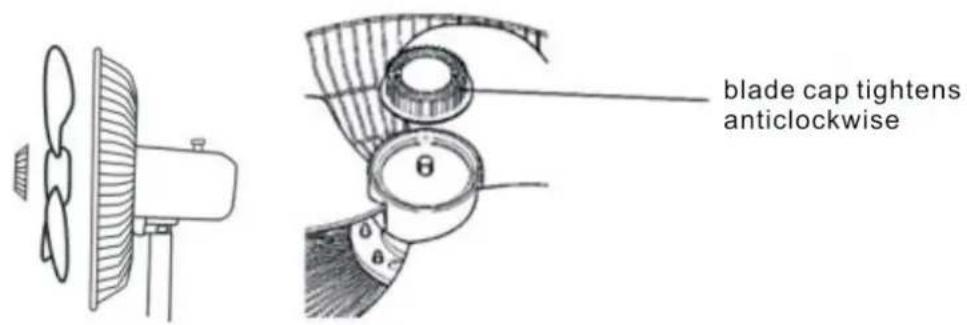
Remove the blade cap by turning it clockwise, then the locking nut by turning is anti-clockwise from the motor axis.
-
Place the rear guard onto the motor through the axis, ensure the rear guard fits onto the locating lugs, correctly, the handle is at the top.
text_image
10 9 7 8 6 5 4 3 2 1 istment Jutif this is done carrying
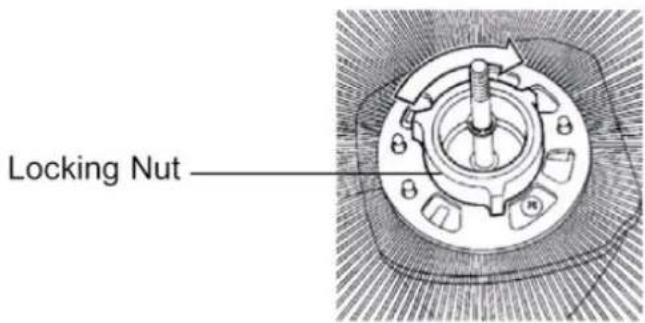
- Fix the rear guard into position by replacing the locking nut.
text_image
Locking Nut- Put the blade through the motor axis, use the blade cap to fasten the blade. The groove in the centre of the fan blade aligns with the T-bar on the motor axis to ensure correct positioning.
text_image
blade cap tightens anticlockwise- Fit the front guard to the rear guard, align both guards and tighten them together using the guard ring.
natural_image
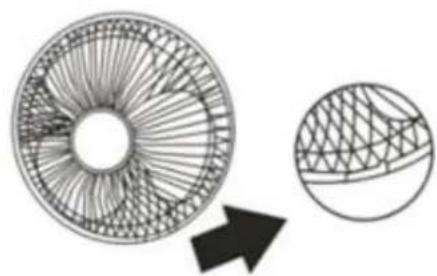
Diagram showing a circular structure with internal grid patterns and an arrow pointing to a textured surface (no text or symbols)Using Your Stand Fan
CAUTION: The fan must be sited on a flat and stable surface.
Before connecting the fan to your mains AC socket, set all the switches to the OFF Position.
Speed
| 0 | OFF |
| 1 | Low |
| 2 | Mid |
| 3 | Hi |
natural_image
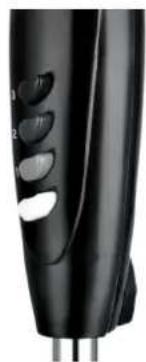
Close-up of a black handheld electronic device with control buttons and a white handle (no visible text or symbols)Oscillating control
The fan can operate in oscillating or stationary mode. Press the oscillation button to activate the oscillating mode. To stop the oscillation mode pull the button back up.
natural_image
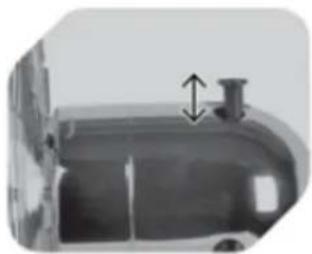
Close-up of a metallic cylindrical container with a small protrusion and a double-headed arrow indicating vertical motion (no text or symbols)Height adjustment
The height of the fan can be easily adjusted. Loosen the adjustment knob (part 3) and slide the stand pile up or down as required. Tighten the knob at the desired position.
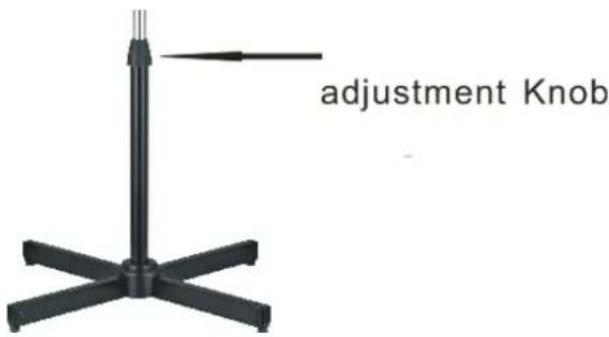
text_image
adjustment KnobCare & Cleaning
CAUTION: Before cleaning, make sure the fan has been switched off, unplugged and allowed to completely stop before cleaning.
Using a soft damp cloth, with or without a mild soap solution, carefully clean the exterior of the product. Never use abrasive cleaning agents or solvents.
Do not allow water or other liquids to enter the interior of the product as this could cause a fire and create an electrical hazard.
Technical Specification
- Rated voltage 220-240V \~ 50Hz
- Rated power input 55W
- Protection Class II
ENVIRONMENT
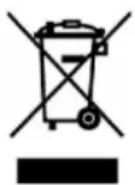
CAUTION:
Do not dispose of this product as it has with other household products. There is a separation of this waste product into communities, you will need to inform your local authorities about the places where you can return this product. In fact, electrical and electronic products contain hazardous substances that have harmful effects on the environment or human health and should be recycled. The symbol here indicates that electrical and electronic equipment should be chosen carefully, a wheeled waste container is marked with a cross.
Adeva SAS / H.Koenig Europe - 8 rue Marc Seguin - 77290 Mitry Mory - France www.hkoenig.com - sav@hkoenig.com - contact@hkoenig.com - Tél: +33 1 64 67 00 05
FRANÇAIS
text_image
Technical diagram of a mechanical device with numbered parts for identification and assembly reference.Fig 1
natural_image
Technical line drawing of a mechanical assembly with mounting flange and support bracket (no text or symbols)natural_image
Pure technical diagram of a mechanical assembly with intersecting lines and a central shaft (no text or symbols)natural_image
Simple line drawing of a wall-mounted device next to a curved panel, with no text or symbols present.natural_image
Diagram showing a circular structure with internal grid patterns and an arrow pointing to a textured circular area (no text or symbols)natural_image
Close-up of a black handheld electric shaver with a white plastic clip (no visible text or symbols)Oscillation
text_image
haire. ute.text_image
Technical diagram of a mechanical device with numbered parts for identification and assembly reference.Installation
natural_image
Technical line drawing of a mechanical assembly with mounting flange and support bracket (no text or symbols)natural_image
Pure technical diagram of a mechanical assembly with intersecting lines and a central shaft (no text or symbols)natural_image
Simple line drawing of a ventilation system with a fan and pump (no text or symbols)natural_image
Diagram showing a circular structure with internal grid patterns and an arrow pointing to a textured circular region (no text or symbols)Bedienungsanleitung
natural_image
Close-up of a black handheld electronic device with a white scroll wheel and control buttons (no visible text or symbols)natural_image
Close-up of a metallic cylindrical object with a small protrusion and a double-headed arrow pointing upward (no text or symbols visible)Schwenk-Kontrolle
text_image
Technical diagram of a wind turbine with numbered parts for identification and assembly reference.Installatie
natural_image
Technical line drawing of a mechanical assembly with mounting flange and support brackets (no text or symbols)natural_image
Pure technical diagram of a mechanical assembly with intersecting lines and a central shaft (no text or symbols)natural_image
Simple line drawing of a ventilation system with a fan and pump (no text or symbols)natural_image
Diagram showing a circular structure with internal grid patterns and an arrow pointing to a separate circular section (no text or symbols)natural_image
Close-up of a black handheld electronic device with a white scroll wheel and metallic pins (no visible text or symbols)natural_image
Close-up of a mechanical component with a double-headed arrow indicating upward motion (no visible text or symbols)Verstelling hoogte
text_image
Technical diagram of a tire assembly with numbered parts for identification and assembly reference.natural_image
Technical line drawing of a mechanical assembly with mounting flange and support brackets (no text or symbols)natural_image
Pure technical diagram of a mechanical assembly with intersecting lines and a central shaft (no text or symbols)natural_image
Simple line drawing of a lamp and a wall-mounted device (no text or symbols)natural_image
Technical diagram of a mechanical component with no visible text or symbolsnatural_image
Line drawing of a propeller and fan assembly (no text or symbols)
natural_image
Technical illustration of a mechanical component with labeled parts (no readable text or symbols)natural_image
Diagram showing a circular structure with internal grid patterns and an arrow pointing to a separate circular section (no text or symbols)USO DEL VENTILADOR
natural_image
Close-up of a black handheld electronic device with a white circular button and metallic pins (no visible text or symbols)natural_image
Close-up of a metallic cylindrical container with a small vise and upward arrow indicator (no text or symbols)Ajuste de altura:
natural_image
Black metal stand with five arms and a pointer, no text or symbols visibleTuerca de ajuste