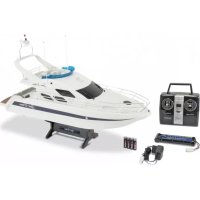
Saint Princess - Remote control toy Carson - Free user manual and instructions
Find the device manual for free Saint Princess Carson in PDF.



| Product type | Radio-controlled boat |
| Brand | Carson |
| Model | Saint Princess |
| Boat power supply | NiMH 7.2V battery (included) |
| Battery capacity | 700 mAh |
| Charging time | Approximately 6 hours with standard charger |
| Runtime | Approximately 15 minutes |
| Transmitter power supply | 2 AA batteries (not included) |
| Operating frequency | 2.4 GHz |
| Maximum range | Approximately 50 meters |
| Boat dimensions | Approximately 40 x 15 x 12 cm |
| Boat weight | Approximately 400 g |
| Driving functions | Forward, reverse, left, right |
| Hull material | ABS plastic |
| Recommended age | From 8 years |
| Box contents | Boat, transmitter, battery, charger, user manual |
| Maintenance | Empty and dry the boat after use in water |
| Safety | Not suitable for children under 3 years. Risk of suffocation and strangulation. |
| Spare parts | Available from Carson or authorized dealers |
| Regulatory information | Compliant with directive 2014/53/EU. Recyclable (do not dispose of in household waste). |
Frequently Asked Questions - Saint Princess Carson
User questions about Saint Princess Carson
0 question about this device. Answer the ones you know or ask your own.
Ask a new question about this device
Download the instructions for your Remote control toy in PDF format for free! Find your manual Saint Princess - Carson and take your electronic device back in hand. On this page are published all the documents necessary for the use of your device. Saint Princess by Carson.
USER MANUAL Saint Princess Carson
RC Motoryacht Saint Princess
Achtung - Attention - Attention
Attenzione - Atención - Pas op 02
Before using your product for the first time or ordering any spare parts, check that your manual is fully up-to-date. This manual contains the technical appendices, important instructions for correct start-up and use and product information, all fully up-to-
date before going to press. The contents of this manual and the technical data of the product can change without prior notice.
For the latest version of your manual, see: www.carson-modelsport.com
FR // Remarque importante
natural_image
Technical line drawing of a mechanical device with internal components and directional arrows indicating assembly or operation (no text or symbols present)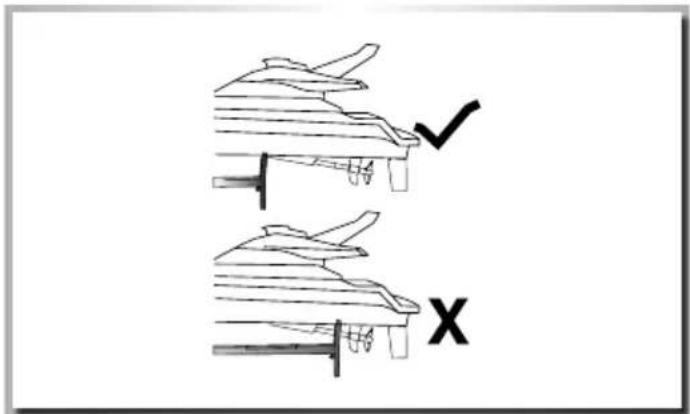
flowchart
graph TD
    A["Top: Initial component"] --> B["Step ①: Internal part"]
    B --> C["Step ②: Component inside boat"]
    C --> D["Step ③: Outer part"]
Anmerkung:
natural_image
Illustration of hands connecting a battery to a connector with an inset showing two connected components (no text or symbols)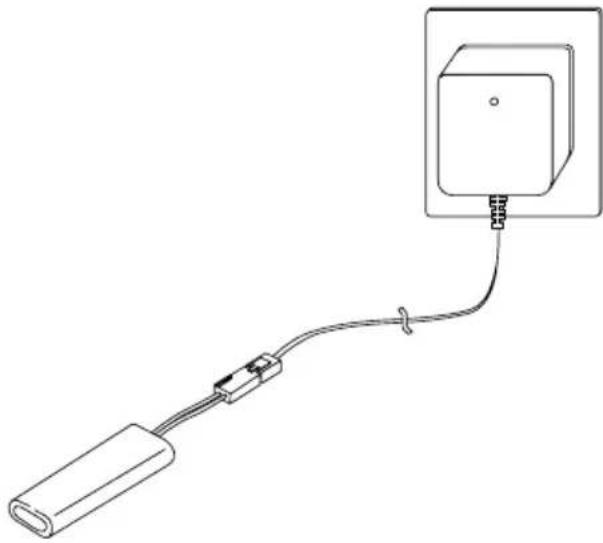
natural_image
Pure electrical circuit lines without any symbolsBINDING
flowchart
graph TD
    A["Top: Air intake device with control panel"] --> B["Arrow pointing to air intake device"]
    B --> C["Bottom: Air intake device with control panel"]
    C --> D["Arrow pointing to car body"]
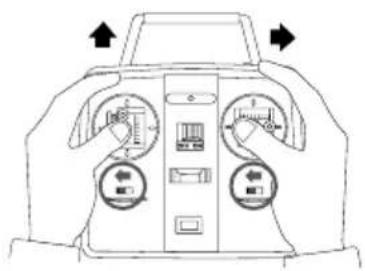
- Vorwärts
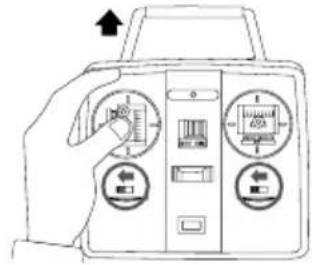
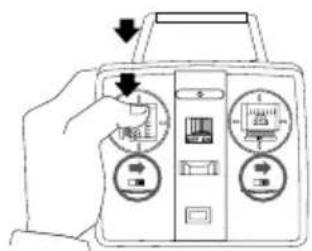

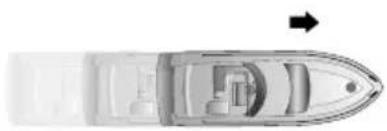
natural_image
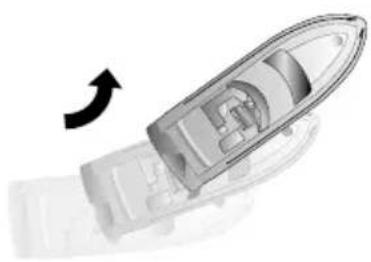
Top-down view of a boat's interior layout with no visible text or symbols- Links
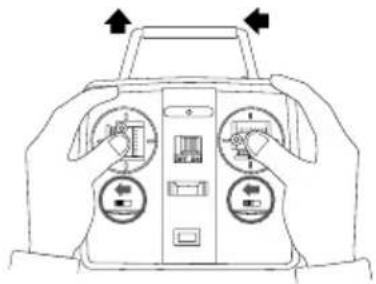
natural_image
Line drawing of a car dashboard with two rotary controls and directional arrows indicating orientation (no text or symbols)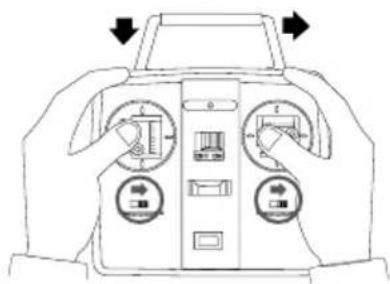
natural_image
Line drawing of a car dashboard with two rotary gauges and directional arrows indicating orientation (no text or symbols)
natural_image
Cross-sectional diagram of a boat showing internal components and a curved arrow indicating rotation (no text or symbols)- Rechts
natural_image
Front view of a car dashboard with two gauges and directional arrows indicating orientation (no text or symbols)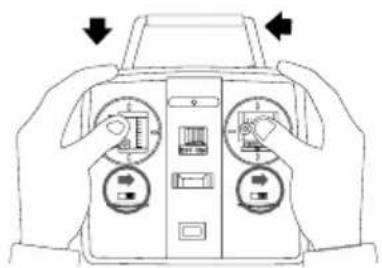
natural_image
Line drawing of hands operating a car dashboard with control knobs and buttons (no text or symbols)
natural_image
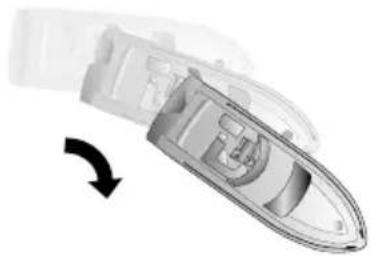
Diagram of a mechanical component with a curved arrow indicating rotation or movement (no text or symbols present)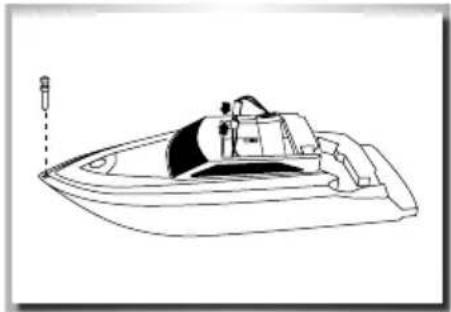
natural_image
Line drawing of a speedboat with visible hull, side-mounted mast, and side-mounted rig (no text or symbols)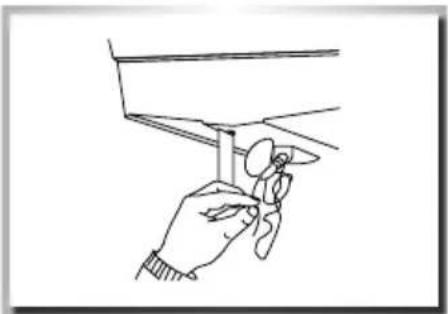
natural_image
Line drawing of a hand holding a small object near a vertical structure (no text or symbols)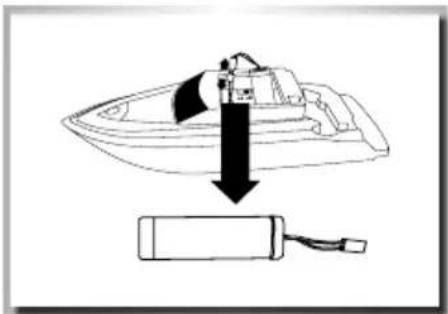
natural_image
Line drawing of a boat being lifted by a battery (no text or symbols)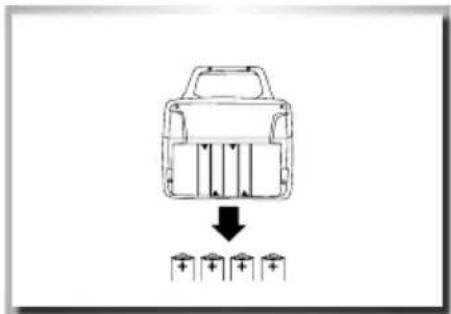
natural_image
Line drawing of a person using a jet ski pod to lift water (no text or symbols)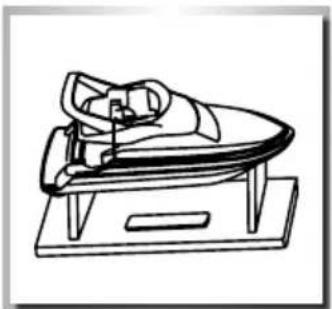
natural_image
Line drawing of a person using a handheld device on a table (no text or symbols)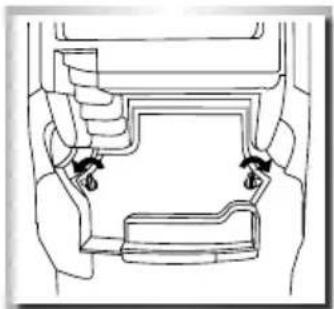
natural_image
Diagram of a vehicle's rearview and side view showing engine, dashboard, and seat components (no text or labels)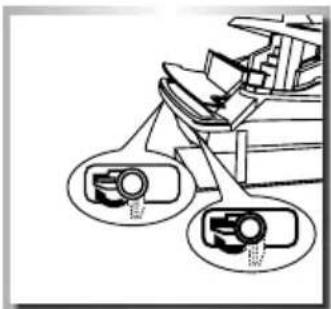
natural_image
Technical diagram of a mechanical assembly with two circular components labeled 'R2' (no text or symbols present)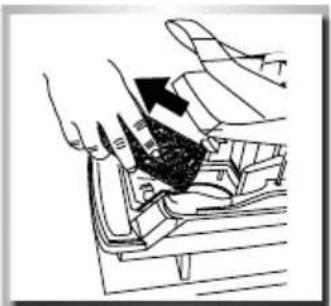
natural_image
Diagram of a hand pressing down on a car seatbelt with an arrow indicating the force or direction (no text or symbols present)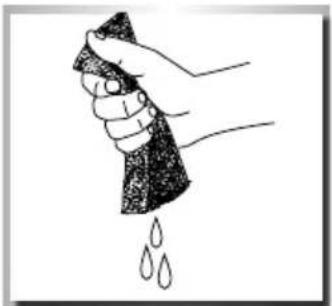
natural_image
Hand holding a sponge with water droplets falling (no text or symbols)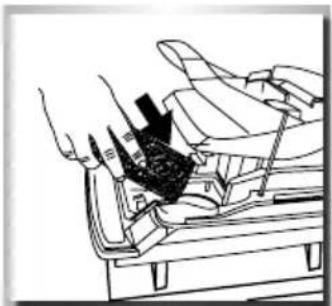
natural_image
Technical line drawing of a mechanical assembly with no visible text or symbols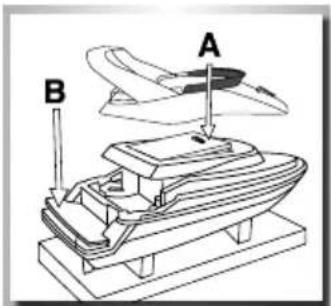
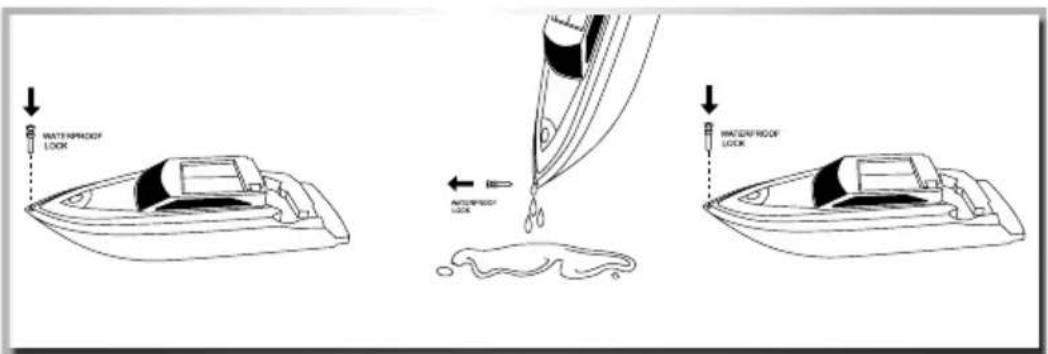
Wichtig!
natural_image
Cartoon illustration of a speedboat on clouds with a large 'X' symbol and a cross symbol above it, under stormy sky (no text or symbols)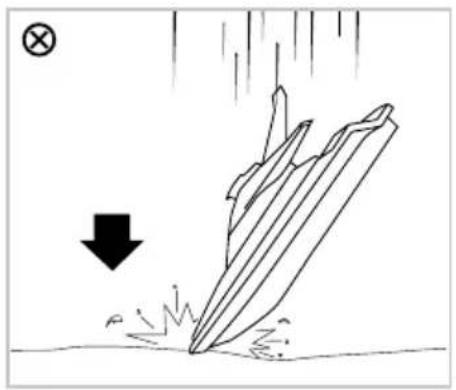
natural_image
Illustration of a ship launching from water with a downward arrow indicating impact (no text or symbols)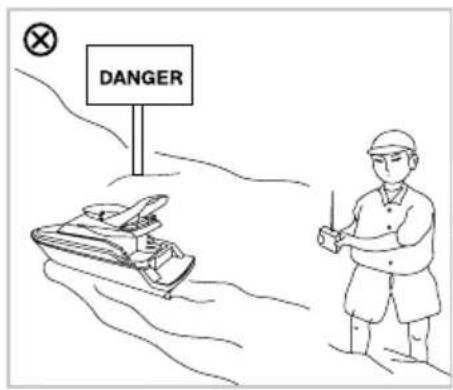
natural_image
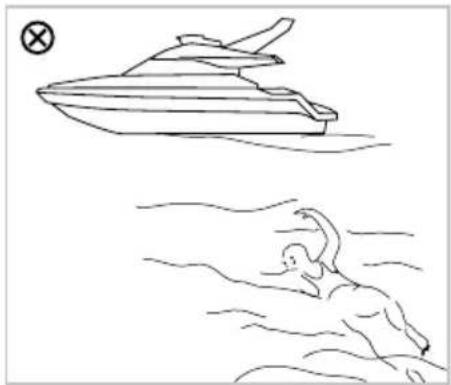
Line drawing of a speedboat and a person swimming in water (no text or symbols)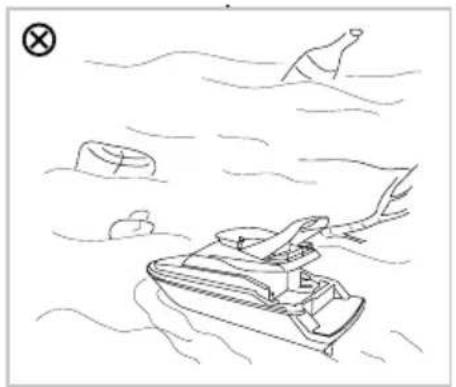
natural_image
Line drawing of a speedboat on water with floating objects and a flag (no text or symbols)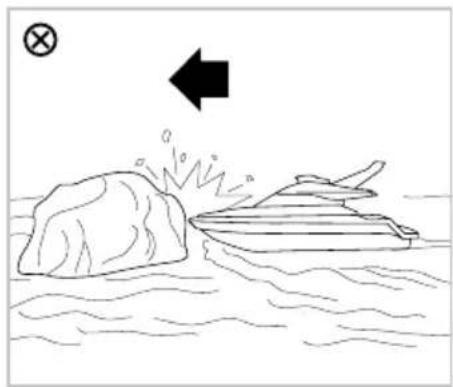
natural_image
Simple line drawing of a boat surfacing rocks on water, with an arrow indicating direction (no text or symbols)Achtung!!!!
natural_image
Hand holding a pair of eyeglasses with directional arrows indicating rotation (no text or symbols)
We congratulate you for buying this CARSON product, which is designed and manufactured using state of the art technology.
According to our policy of continued development and product improvement we reserve the right to make changes in specifications regarding equipment, material and design at any time without notice.
Specifications or designs of the actual product may vary from those shown in this manual or on the box.
The manual forms part of this product. Should you ignore the operating and safety instructions, the warranty will be void.
Keep this guide for future reference.
Limited Warranty
This product is warranted by CARSON against manufacturing defects in materials and workmanship under normal use for 24 months from the date of purchase from authorised franchisees and dealers. In the event of a product defect during the warranty period, return the product along with your receipt as proof of purchase to any CARSON store.
CARSON will, at its option, unless otherwise provided by law:
(a) Correct the defect by repairing the product without charging for parts and labour;
(b) Replace the product with one of the same or similar design.
All replacement parts and products, and products on which a refund is made, become the property of CARSON. New or reconditioned parts and products may be used in the performance of warranty services.
Repaired or replaced parts and products are warranted for the remainder of the original warranty period. You will be charged for repair or replacement of the product made after the expiration of the warranty period.
The Warranty does not cover:
- Damage or failure caused by or attributable to acts of God, abuse, accident, misuse, improper or abnormal usage, failure to follow instructions, improper installation or maintenance, alteration, lightning or other incidence of excess voltage or current;
- Damage caused by losing control of your model;
- Any repairs other than those provided by a CARSON authorised service facility;
- Consumables such as fuses or batteries;
- Cosmetic damage;
- Transportation, shipping or insurance costs; or
- Costs of product removal, installation, set-up service adjustment or reinstallation;
- Any changes to plugs and cables, open the housing and damage the sticker.
This warranty gives you specific legal rights, and you may also have other rights which may vary according to the country of purchase.
Declaration of conformity
TAMIYA-CARSON Modellbau GmbH & Co. KG hereby declares that the radio equipment type 500108007 conforms to Directive 2014/53/EU. The complete text for the EU declaration of conformity is available at the following Internet address.
The explanation of the symbol on the product, packaging or instructions: Electronic devices are valuable products and should not be disposed of with the household waste when they reach the end of their service life! Help us to protect the environment and respect our resources by delivering this appliance to the relevant recycling point.

We wish you a lots of fun using your CARSON product!
Before use, read this manual carefully!
SAFETY PRECAUTIONS NIMH BATTERIES
1. General
Nickel-metal hydride (NiMH) batteries (accumulators) are energy storage devices with a high energy density and can present risks. For this reason, particular care is needed when charging, discharging, storing and handling.
Read these instructions very carefully before first using the battery. Do not fail to take note of the warning notices and instructions for use.
Misuse can lead to risks such as explosion, overheating or fire.
Failure to observe the instructions for use leads to early failure and other defects.
The instructions should therefore be kept in a safe place and it is essential that they are handed over to the second user if the batteries are passed on.
2. Warning notices
- Avoid short-circuits. A short-circuit may well destroy the product. Cables and connections must be well insulated.
- It is essential when connecting the battery to ensure that the polarity is correct.
- Original plug connectors and cables may not be cut off or changed (if need be, use an adapter cable).
- Do not expose the battery to excessive heat or cold or to direct sunlight. Do not throw in the fire. Do not place the battery in contact with water or other liquids.
- Charge the battery only with charging units intended for the purpose. Before charging, always first allow the battery to cool to ambient temperature. Never charge while hot.
- When charging, place the battery on a non-flammable, heat-resistant support. There should be no flammable or readily ignited objects in the vicinity of the battery.
- During charging or operation, never leave the battery unsupervised.
- Do not fail to keep to the recommended charge/discharge current. Under no circumstances exceed these maxim values.
- The battery casing must not be damaged. It is essential to avoid damage by sharp objects such as knives or the like, from dropping, impact, bending etc. Damaged batteries may no longer be used.
- Batteries are not toys. They should be kept away from children.
3. Charging instructions
Before they are first used, NiMH batteries must always be charged. The first charge should not be carried out in rapid charge mode, otherwise the battery may not reach its full capacity. We recommend a charging current of 1/10 of its capacity, i.e. charging at the 10-hour rate.. The maximum charging current for the battery is 1C (C=nominal capacity of the battery, e.g. for a battery with a nominal capacity of 2700 mA, the maximum charging current for the battery is 2700 mA (2.7 A)). Exact information for the charging current will be marked on the battery.
Charging should be stopped immediately if there is a significant rise in battery temperature. !!
Completely avoid deep discharge - in no event should the cell voltage be allowed to fall below 0.9 V.
It is not necessary to always fully discharge the battery before each charge. Occasionally (e.g. after every 10th charge), however, or if it has not been used for a long time, it should be discharged before charging.
Never charge several batteries together from a single charger. Differing states of charge and capacities can lead to overcharging and destruction.
4. Storage instructions
Batteries should never be stored at too high a temperature, otherwise accelerated self-discharge will occur. Cool and dry storage conditions are also important to avoid contact corrosion, which leads to poor contact and high contact resistance.
Batteries should never be stored fully discharged.
5. General terms of guarantee
There is a legal guarantee for production and material faults as applicable at the time of dispatch. No liability is accepted for normal wear and tear. This guarantee does not apply for defects attributable to improper use, inadequate maintenance, third-party interference or mechanical damage. This applies, in particular, to used batteries and batteries clearly showing signs of use.
Damage and loss of performance due to improper handling and/or overload are not product faults. Batteries are consumables and subject to a certain ageing. This is influenced by factors such as the charge/discharge currents, the charging procedure, the operating and storage temperatures and the state of charge during storage. The ageing shows itself in, among other things, an irreversible loss of capacity. In the model field, where batteries are frequently used to supply motors, very high currents can flow from time to time.
6. Exclusion of liability
Since we are unable to have any control over charge/discharge, handling, compliance with assembly and operating instructions, battery replacement and its care and maintenance, TAMIYA / CARSON can accept no liability for loss, damage or costs incurred. Any claim for damages that may result from operation, failure or faulty operation or that is in any way related thereto will therefore be refused. We accept no liability for personal injury or material damage and their consequences that arise from our delivery.
7. Disposal instructions
Batteries are hazardous waste. Damaged or unusable cells must be disposed of in the correct manner.
No liability for printing errors, we reserve the right to make changes!
SAFETY PRECAUTIONS (KEEP IN A SAFE PLACE!)
Safety precautions (please keep!) CAUTION!

Not suitable for children under 3 years. A danger of choking exists due to small parts that might be swallowed! Due to the cable, there is a danger of
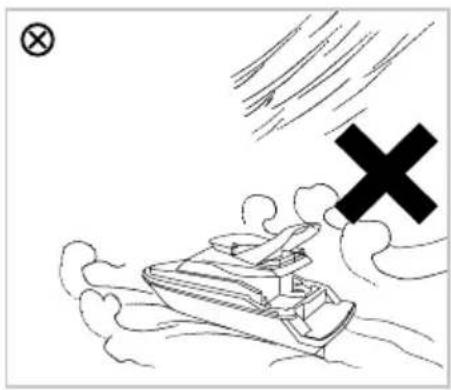
strangulation. CAUTION: Do not touch the running propeller! Please keep these instructions for possible correspondence. We reserve the right to change colours or make technical changes. Help from adults is required to remove the transport protection. Please do not operate the boat in strong winds, in waves or with strong currents. Please note that a boat with run-down batteries can only be controlled to a limited extent. This toy may only be operated in a fully assembled state and in water, according to the instructions. For hygienic reasons, we recommend that you completely drain and dry the toy after use. Use only the specified
batteries! Insert the batteries so that the positive and negative poles are in the correct position! Do not throw used batteries in the household rubbish — take them to a collection point or dispose of them at a hazardous waste depot. Flat batteries must be removed from the toy. Do not attempt to charge non-rechargeable batteries. If the
design allows, rechargeable batteries must be removed from the toy before charging. Rechargeable batteries must only be
recharged under adult supervision. Do not use different types of battery, and do not insert new and used batteries at the same time. Do not short-circuit the connecting webs. Do not mix old and new batteries. Do not mix alkaline, standard (carbon-zinc) and rechargeable batteries. To ensure optimum operation, we recommend that only rechargeable or alkaline batteries should be used for the vehicle. Please do not insert any cables into plug-in socket connections. Not suitable for operation in salt water! The toy may only be connected to class II devices that are marked with the following symbol:

TECHNICAL DATA
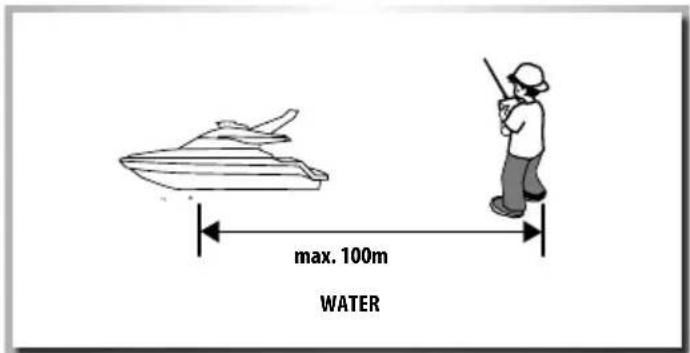
- Model with 2.4 GHz 3 channel RC system (max. transmitter power 10 mW)
• Transmitter operating voltage: 4.8-6 V
• Vehicle operating voltage 8.4 V
• Function: Move forwards/left/right
SCOPE OF DELIVERY
-
RC model
-
Remote Control
-
8.4V/2000mAh rechargeable NiMH battery
-
DC 10.5V/500mA, plug-in charger
-
Operating Instructions
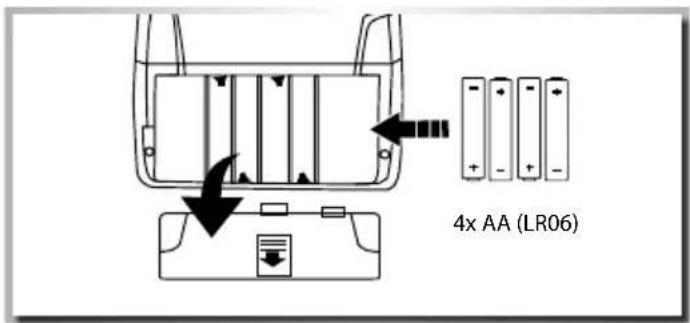
INSERT THE BATTERY IN THE REMOTE CONTROL
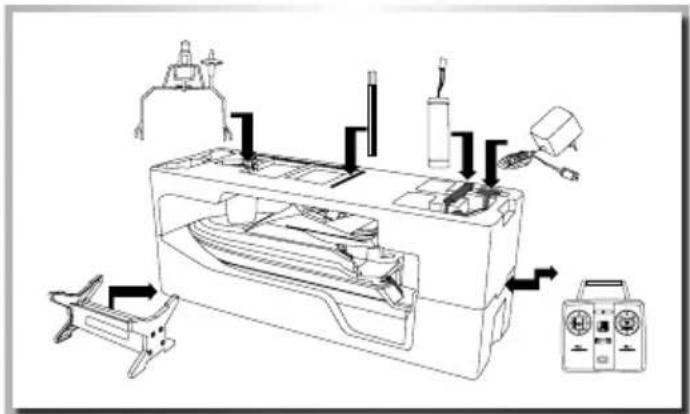
- Open the battery compartment lid on the reverse of the transmitter.
-
Insert 4 fully charged rechargeable batteries or new AA batteries observing the correct polarity.
-
Close the cover on the battery compartment again. Ensure that the cover clicks properly into place. Check that it is in its correct position.
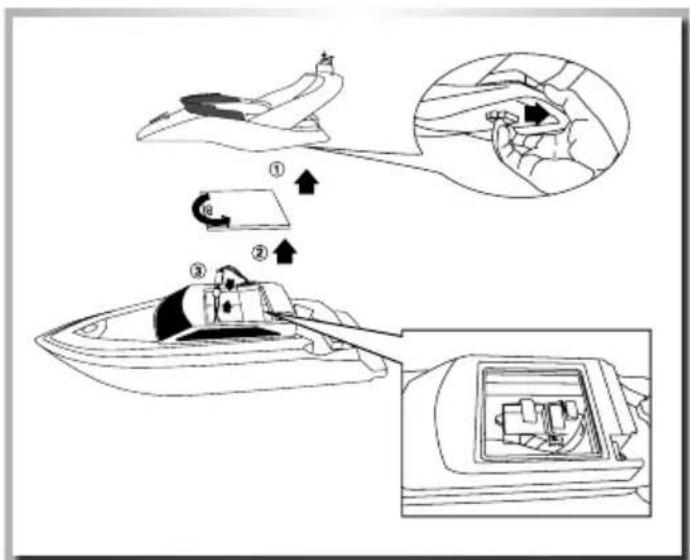
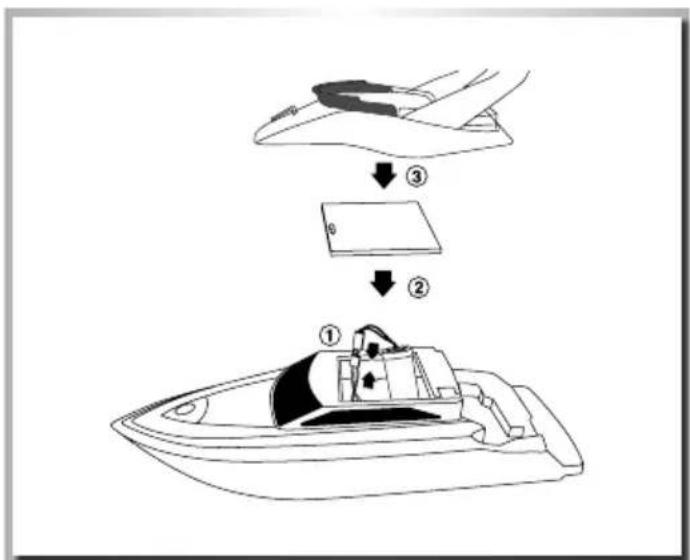
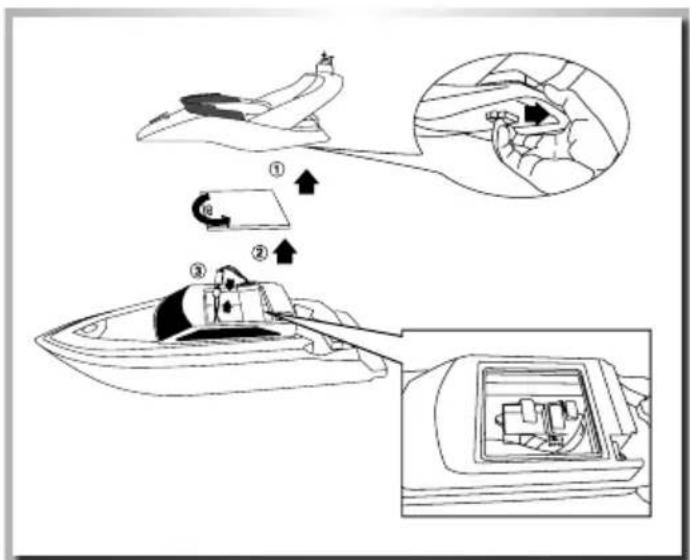
PREPARATION AND INSERT THE BATTERIES
natural_image
Technical line drawing of a mechanical device with internal components and directional arrows indicating assembly or operation (no text or symbols present)
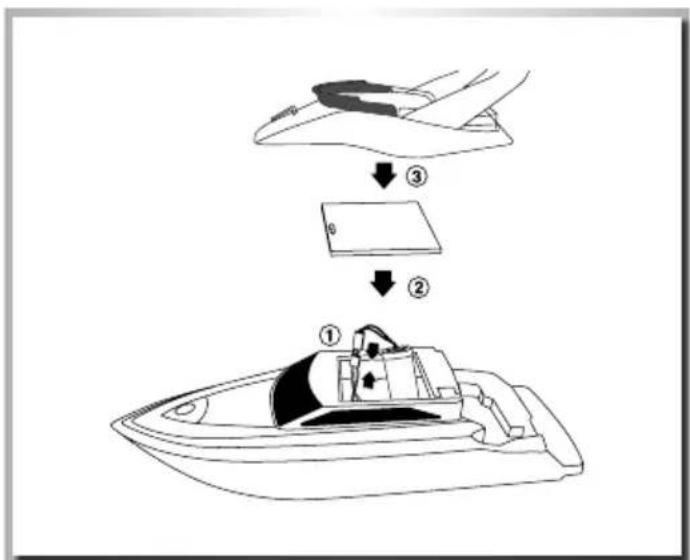
flowchart
graph TD
    A["Top: Initial component"] --> B["Step ①: Internal part"]
    B --> C["Step ②: Component inside boat"]
    C --> D["Step ③: Outer part"]
Note:
Charge the battery for the first time 6 hours, up from the second time 4.5 hours.
Charging instructions: Attention!!!!
Important information about your rechargeable 8.4V NiMH Battery pack. (See drawing)
- The charging time for these 8.4V NiMH Battery pack is max. 4.5 hours, an overload damage it and shortens the life.
- Let the charger and the battery during charging never unattended.
- If the speed / performance of your RC model decreases or even stops, immediately stop operation and charge the battery (Note the charge time: point 1) again.
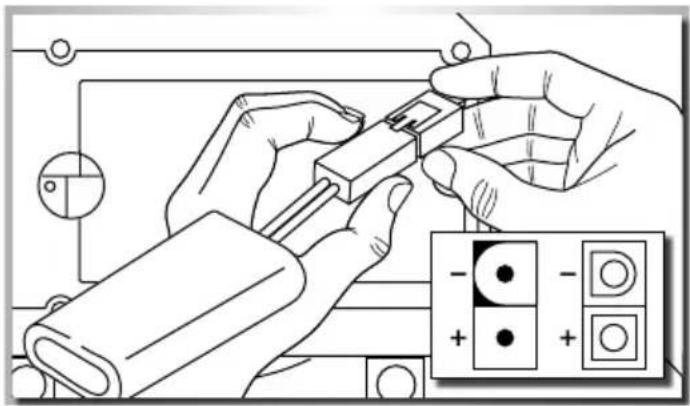
natural_image
Illustration of hands connecting a battery to a connector with an inset showing two output terminals (no text or symbols)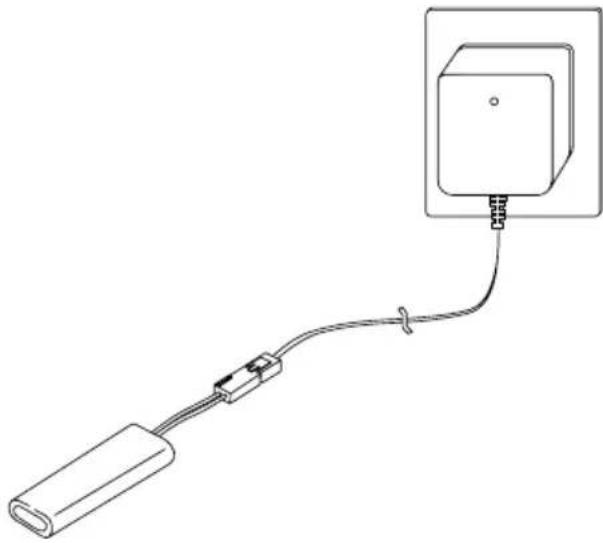
natural_image
Pure electrical circuit lines without any symbolsBINDING
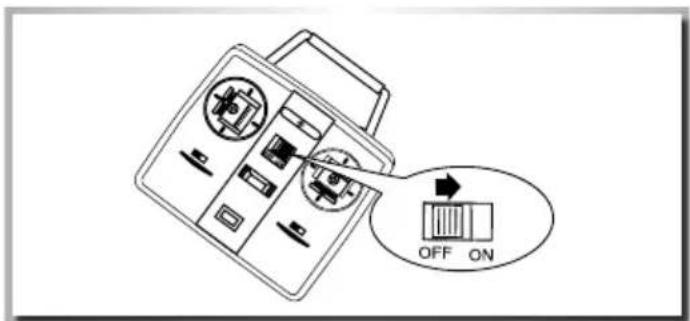
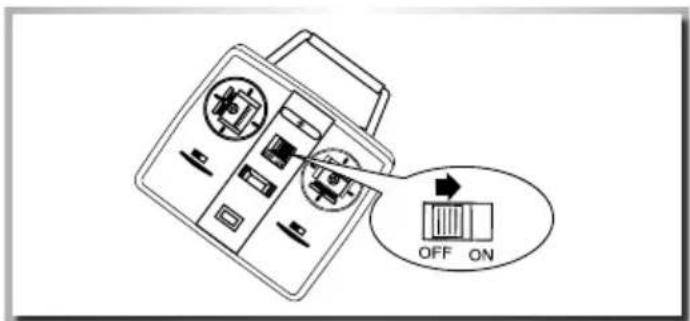
- Switch on the model.
-
Now switch on the transmitter. The red LED should begin to flash.
-
Now actuate a joy stick. When the LED is lit continuously, the binding process is complete.
-
The RC system is ready for use.
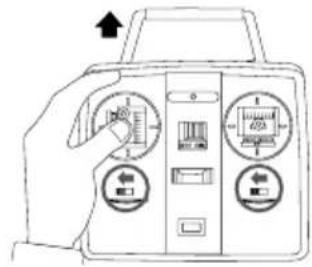
STEERING YOUR MODEL
CAUTION! To avoid loss of control: ALWAYS move the controls S-L-O-W-L-Y! Attention!! The model has no reverse function.
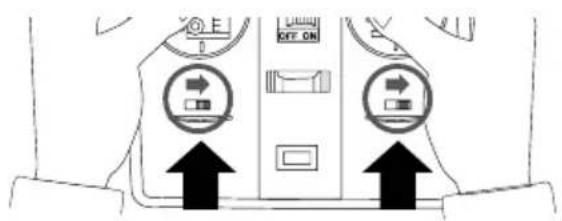
- Trim
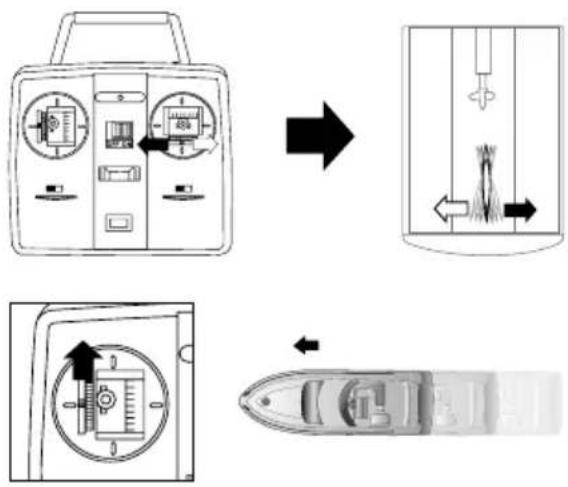
flowchart
graph TD
    A["Device Control Panel"] --> B["Transfer Fuel Outlet"]
    B --> C["Delivery Fuel Outlet"]
    D["Device Display Panel"] --> E["Delivery Fuel Outlet"]
„Reverse“ function
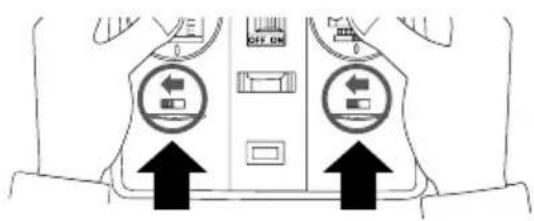
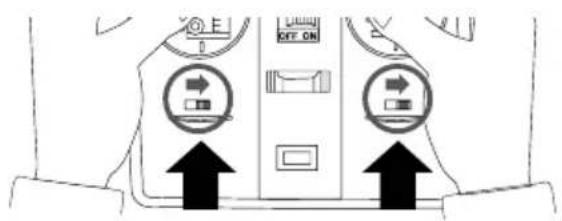
- Forward
natural_image
Line drawing of a vintage analog device front panel with control buttons and a directional arrow (no text or symbols)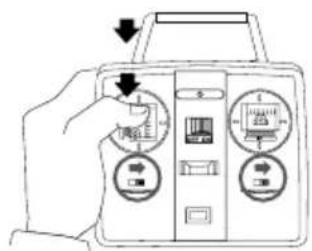

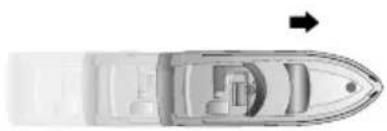
natural_image
Top-down view of a boat's interior layout with no visible text or symbols- Left
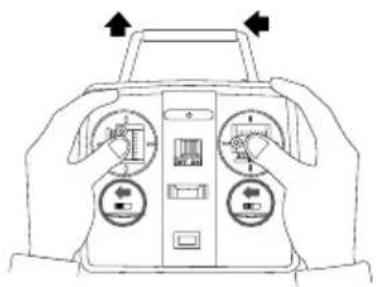
natural_image
Line drawing of a hand holding a device with two rotary buttons and a display panel (no text or symbols)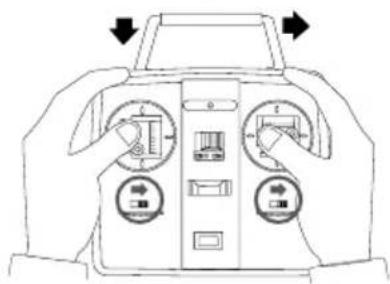
natural_image
Line drawing of a car dashboard with two rotary gauges and directional arrows indicating left and right (no text or symbols)
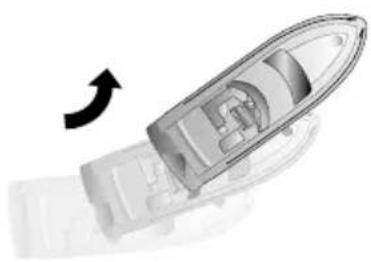
natural_image
Cross-sectional diagram of a boat showing internal components and a curved arrow indicating rotation (no text or symbols)- Right
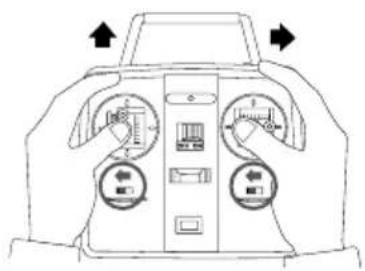
natural_image
Front view of a car dashboard with two gauges and directional arrows indicating orientation (no text or symbols)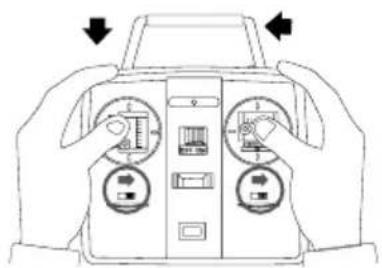
natural_image
Line drawing of hands operating a car dashboard with control knobs and buttons (no text or symbols)
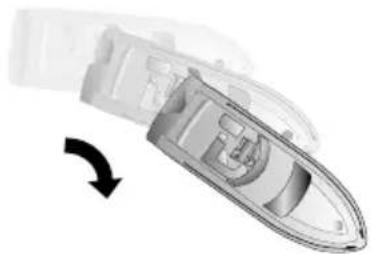
natural_image
Diagram of a car interior showing a curved arrow indicating rotation or change (no text or symbols present)AFTER FINISHING THE JOURNEY
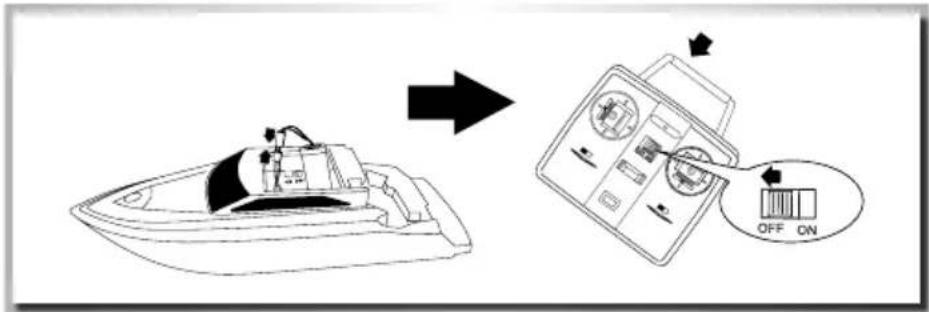
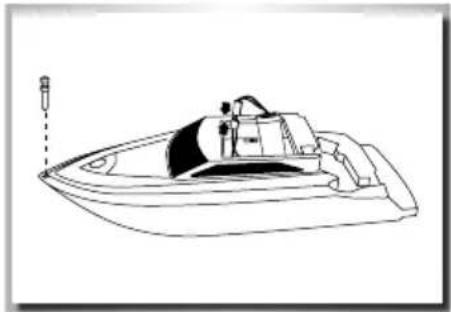
natural_image
Line drawing of a speedboat with visible hull, side-mounted mast, and side-mounted rig (no text or symbols)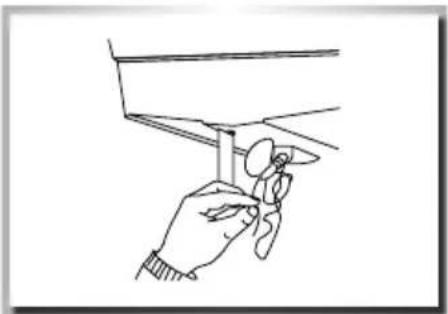
natural_image
Line drawing of a hand holding a small object near a vertical structure (no text or symbols)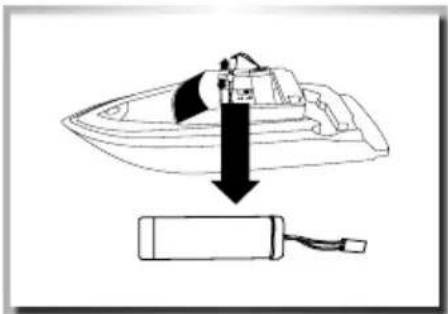
natural_image
Diagram showing a boat being lowered into a battery (no text or symbols present)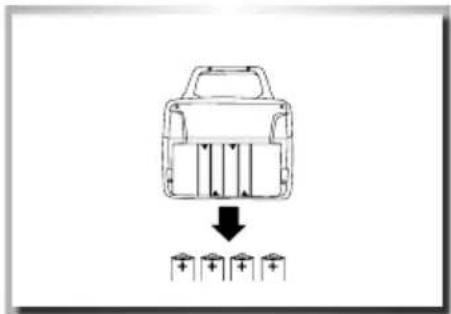
CLEANING THE MODEL
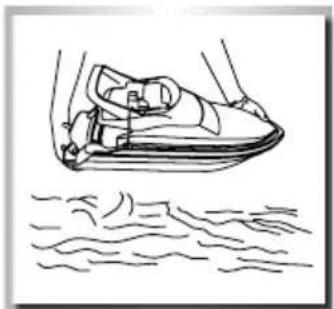
natural_image
Line drawing of a person using a jet ski pod to lift water (no text or symbols)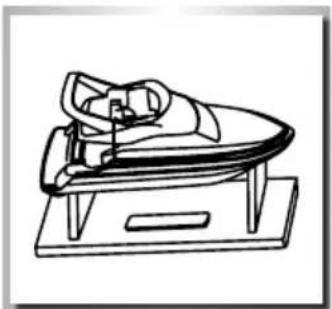
natural_image
Line drawing of a person using a handheld device on a table (no text or symbols)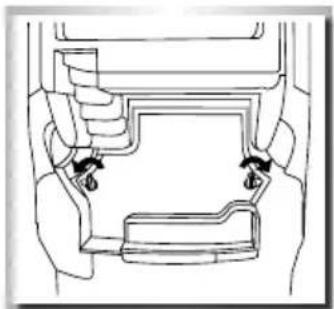
natural_image
Diagram of a vehicle interior showing dashboard and steering wheel (no text or labels)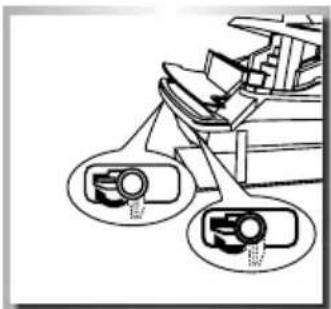
natural_image
Technical diagram of a mechanical assembly with two circular components labeled 'R2' (no text or symbols present)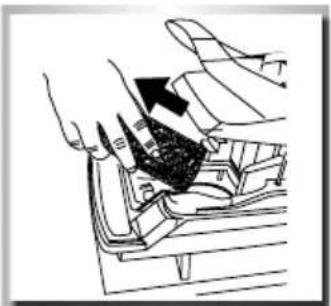
natural_image
Diagram of a hand pressing down on a car seatbelt with an arrow indicating the force or direction (no text or symbols present)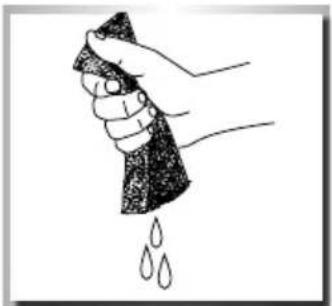
natural_image
Hand holding a sponge with water droplets falling (no text or symbols)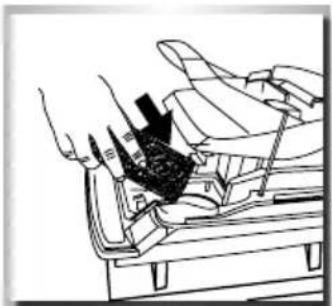
natural_image
Technical line drawing of a mechanical assembly with no visible text or symbols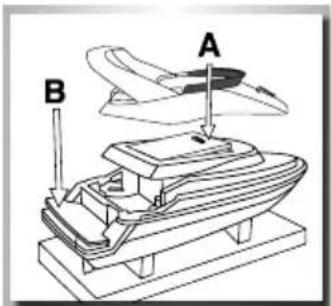
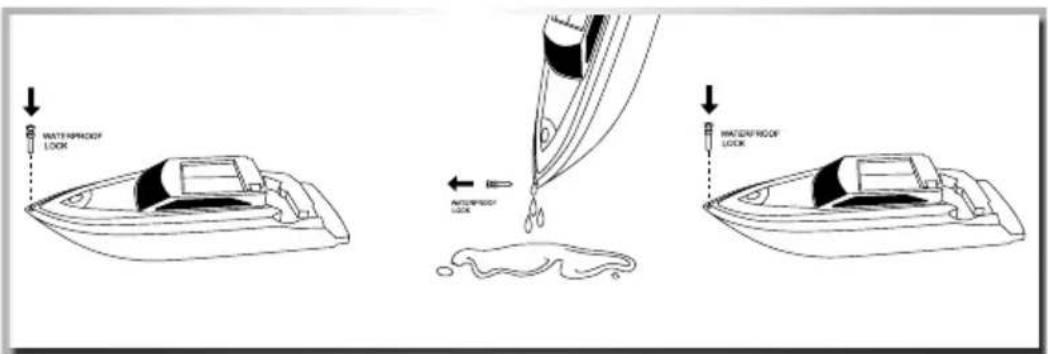
IMPORTANT!
Close the seal again after cleaning.

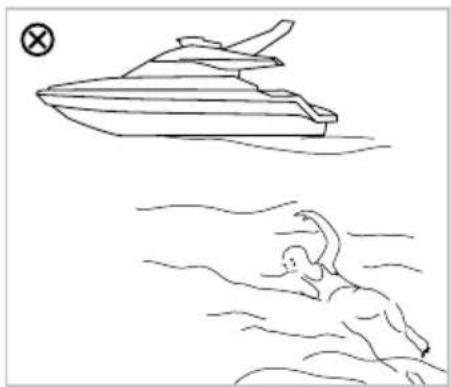
Attention!!!!
natural_image
Cartoon illustration of a speedboat on clouds with a large 'X' symbol and a cross symbol above it, under stormy sky (no text or symbols)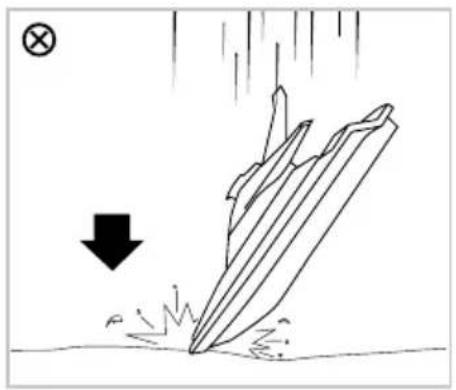
natural_image
Illustration of a ship launching from water with a downward arrow indicating impact (no text or symbols)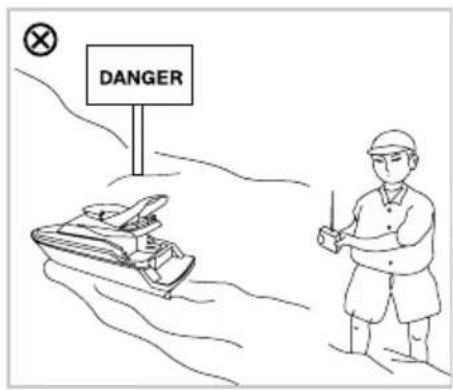
natural_image
Line drawing of a speedboat and a person swimming in water (no text or symbols)
natural_image
Line drawing of a speedboat on water with floating objects and a flag (no text or symbols)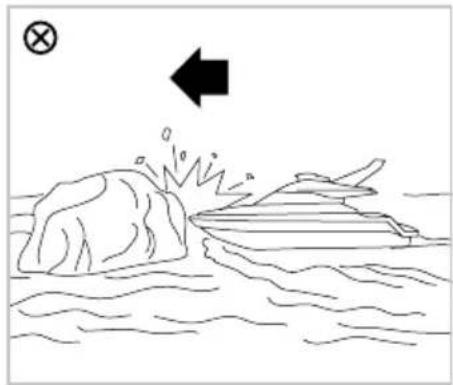
natural_image
Simple line drawing of a boat crashing against rocks in water, with an arrow indicating direction (no text or symbols)Attention!
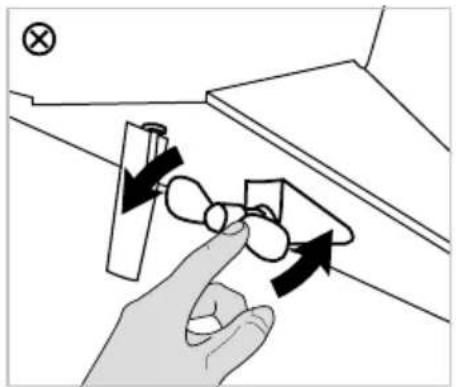
Never touch the propeller when the model is switched on.
This can lead to serious injuries.
natural_image
Hand holding a pair of eyeglasses with directional arrows indicating rotation (no text or symbols)
TROUBLESHOOTING
-
Check the battery connections on the remote control or replace the depleted battery with a freshness.
-
Check the battery connector in the battery compartment of the model or charge the new battery.
Cher client
- RC Motoryacht Saint Princess
- FR // Remarque importante
- Anmerkung:
- BINDING
- Wichtig!
- Achtung!!!!
- Limited Warranty
- The Warranty does not cover:
- Declaration of conformity
- SAFETY PRECAUTIONS NIMH BATTERIES
- General
- Warning notices
- Charging instructions
- Storage instructions
- General terms of guarantee
- Exclusion of liability
- Disposal instructions
- SAFETY PRECAUTIONS (KEEP IN A SAFE PLACE!)
- Safety precautions (please keep!) CAUTION!
- TECHNICAL DATA
- SCOPE OF DELIVERY
- INSERT THE BATTERY IN THE REMOTE CONTROL
- PREPARATION AND INSERT THE BATTERIES
- Note:
- Charging instructions: Attention!!!!
- STEERING YOUR MODEL
- IMPORTANT!
- Attention!!!!
- Attention!
- TROUBLESHOOTING
- Cher client
Brand : Carson
Model : Saint Princess
Category : Remote control toy