
Chefzone Double - Electric cooktop OneConcept - Free user manual and instructions
Find the device manual for free Chefzone Double OneConcept in PDF.
| Product type | Induction hob |
| Brand | oneConcept |
| Model | Chefzone Double |
| Article number | 10030852 |
| Power supply | 230 V ~ 50 Hz |
| Total power | 3400 W (2 zones: 1400 W + 2000 W) |
| Number of cooking zones | 2 |
| Control type | Touch keys |
| Functions | Power adjustment (200-1400 W / 200-2000 W), temperature adjustment (80-270 °C), timer (1 min - 3 h) |
| Safety | Overheat protection, fault shutdown, tempered glass surface |
| Surface material | Vitroceramic |
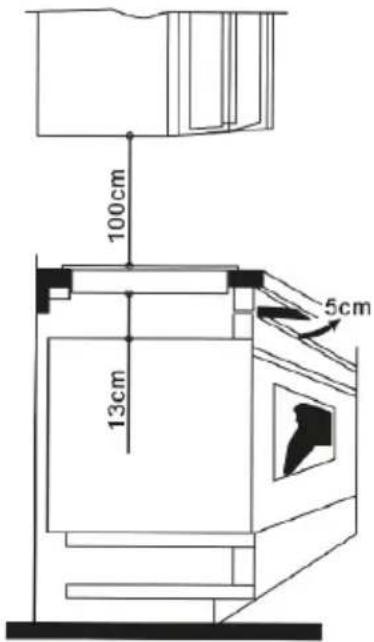
| Dimensions (approx.) | 100 x 13 x 5 cm (according to manual) |
| Recommended pot type | Magnetic base (induction compatible), max weight 7 kg |
| Maintenance | Clean with damp sponge, non-abrasive products, vacuum air vents |
| Repairability | Do not repair yourself, contact customer service |
| Standards | CE, compliance with European directives |
Frequently Asked Questions - Chefzone Double OneConcept
User questions about Chefzone Double OneConcept
0 question about this device. Answer the ones you know or ask your own.
Ask a new question about this device
Download the instructions for your Electric cooktop in PDF format for free! Find your manual Chefzone Double - OneConcept and take your electronic device back in hand. On this page are published all the documents necessary for the use of your device. Chefzone Double by OneConcept.
USER MANUAL Chefzone Double OneConcept
natural_image
Exterior view of a dual black electric stove with two circular top lamps and control buttons (no text or symbols visible)10030852
text_image
Diagram of a two-whe� electric stove with labeled components and electrical connectionsBedienfeld
text_image
OW O°C OT 38:88 DOWN UP TIMER HEAT POWER ON/OFFInstallation

text_image
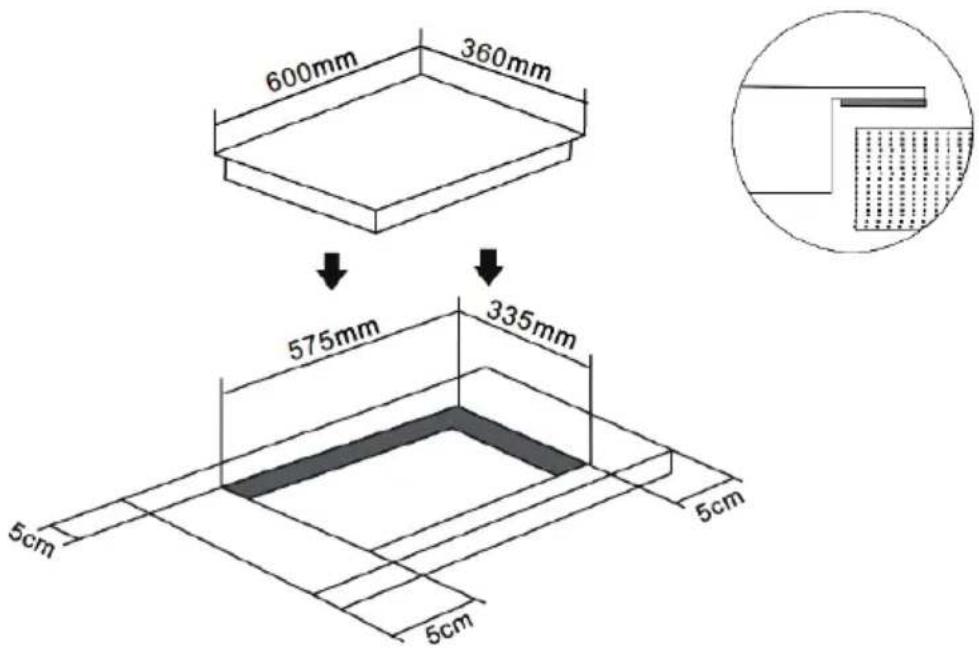
600mm 360mm 575mm 335mm 5cm 5cm 5cmnatural_image
Three schematic diagrams showing mechanical or electrical components with arrows indicating direction (no text or symbols)natural_image
Symbol of a trash bin crossed with a diagonal line, no text or numbers presentCongratulations on purchasing this equipment. Please read this manual carefully and take care of the following hints to avoid damages. Any failure caused by ignoring the mentioned items and cautions mentioned in the instruction manual are not covered by our warranty and any liability.
Contents
Technical Data 8
Safety Instructions 8
Product Description 9
Installation 10
Use and Operation 11
Cleaning and Care 12
Troubleshooting 12
Hints on Disposal 13
Declaration of Conformity 13
Technical Data
| Item number 10030852 | |
| Power supply 230 V ~ 50 Hz | |
| Power consumption 1400 W + 2000 W |
Safety Instructions
- Because the hob can generate very high temperature, please use a pot resistant to a temperature of over 200^ C.
- If the supply is damaged, it must be replaced by the manufacture, its service agent or similarly qualified persons in order to avoid a hazard.
- A dedicated power protection air switch must be incorporated in the fixed wiring in accordance with the wiring rules.
- Never use the induction cooker hob in high temperature environment.
• cooker hob with water directly. - Steam cleaner is not to be used. This appliance can be used by children aged from 8 years and above and persons with reduced physical, sensory or mental capabilities or lack of experience and knowledge if they have been given supervision or instruction concerning use of the appliance in a safe way and understand the hazards involved.
• Children shall not play with the appliance. -
Cleaning and user maintenance shall not be made by children unless they are older than 8 years and supervised.
-
Keep the appliance and its cord out of reach of children less than 8 years.
- The appliance is not intended to be operated by means of an external timer or separate remote-control system.
- Never have the cooker to work without food in pot, otherwise its operational performance
- may be affected and danger may happen.
- For sealed foods such as canned goods, please do not heat them before opening their covers so as to avoid any dangers of explosion due to heating expansion.
- Do not place rough or uneven appliances, which may damage the ceramic surface.
- If the surface is cracked, pull out the plug to avoid the possibility of electric shock.
- Do not put any detergents of flammable materials in the equipment installed under the ceramic cooker hob.
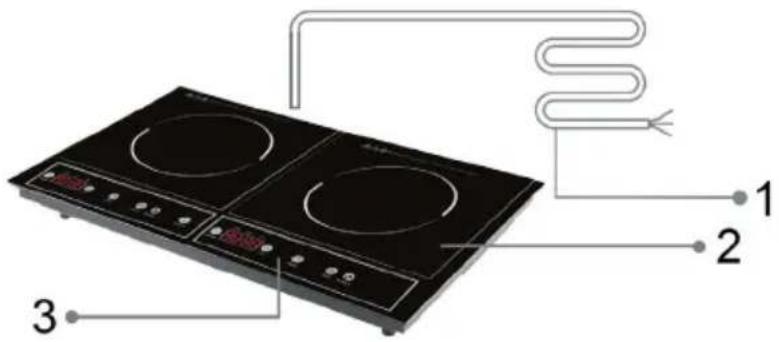
Product Description
Product Description
1 Supply cord
2 Glass Plate
3 Control Panel
text_image
Diagram of a two-whe� electric stove with labeled components and electrical connectionsControl Panel
text_image
OW O°C OT 38:88 DOWN UP TIMER HEAT POWER ON/OFFInstallation
text_image
600mm 360mm 575mm 335mm 5cm 5cm 5cm-
Drill hole on the table surface according to the size shown in the drawing. For the purpose of installation and use, a minimum of 50 mm space shall be preserved around the hole. Be sure the thickness of the table surface is at least 30mm, please select heat-resistant table material to avoid larger deformation caused by the heat radiation from the cooker.
-
Owing to the high temperature inside the infrared cooker, make sure good ventilation is provided to assure its normal operation.
Important Hints
- The electric hob is recommended to be installed by professional.
- Please never conduct the operation by yourself.
- The wall and heating area above the table surface shall withstand heat.
- To avoid danger the ceramic cooker hob must be installed into the cabinet before use.
- Applicable cabinet material: wood, marble resin etc.
natural_image
Three schematic diagrams showing mechanical or electrical components with no visible text, numbers, or symbols.Use and Operation
Connect the stove with power supply, ALL LED lights will shine, and off. Then a dot of LED lights. Put the pot in the center of the heating zone.
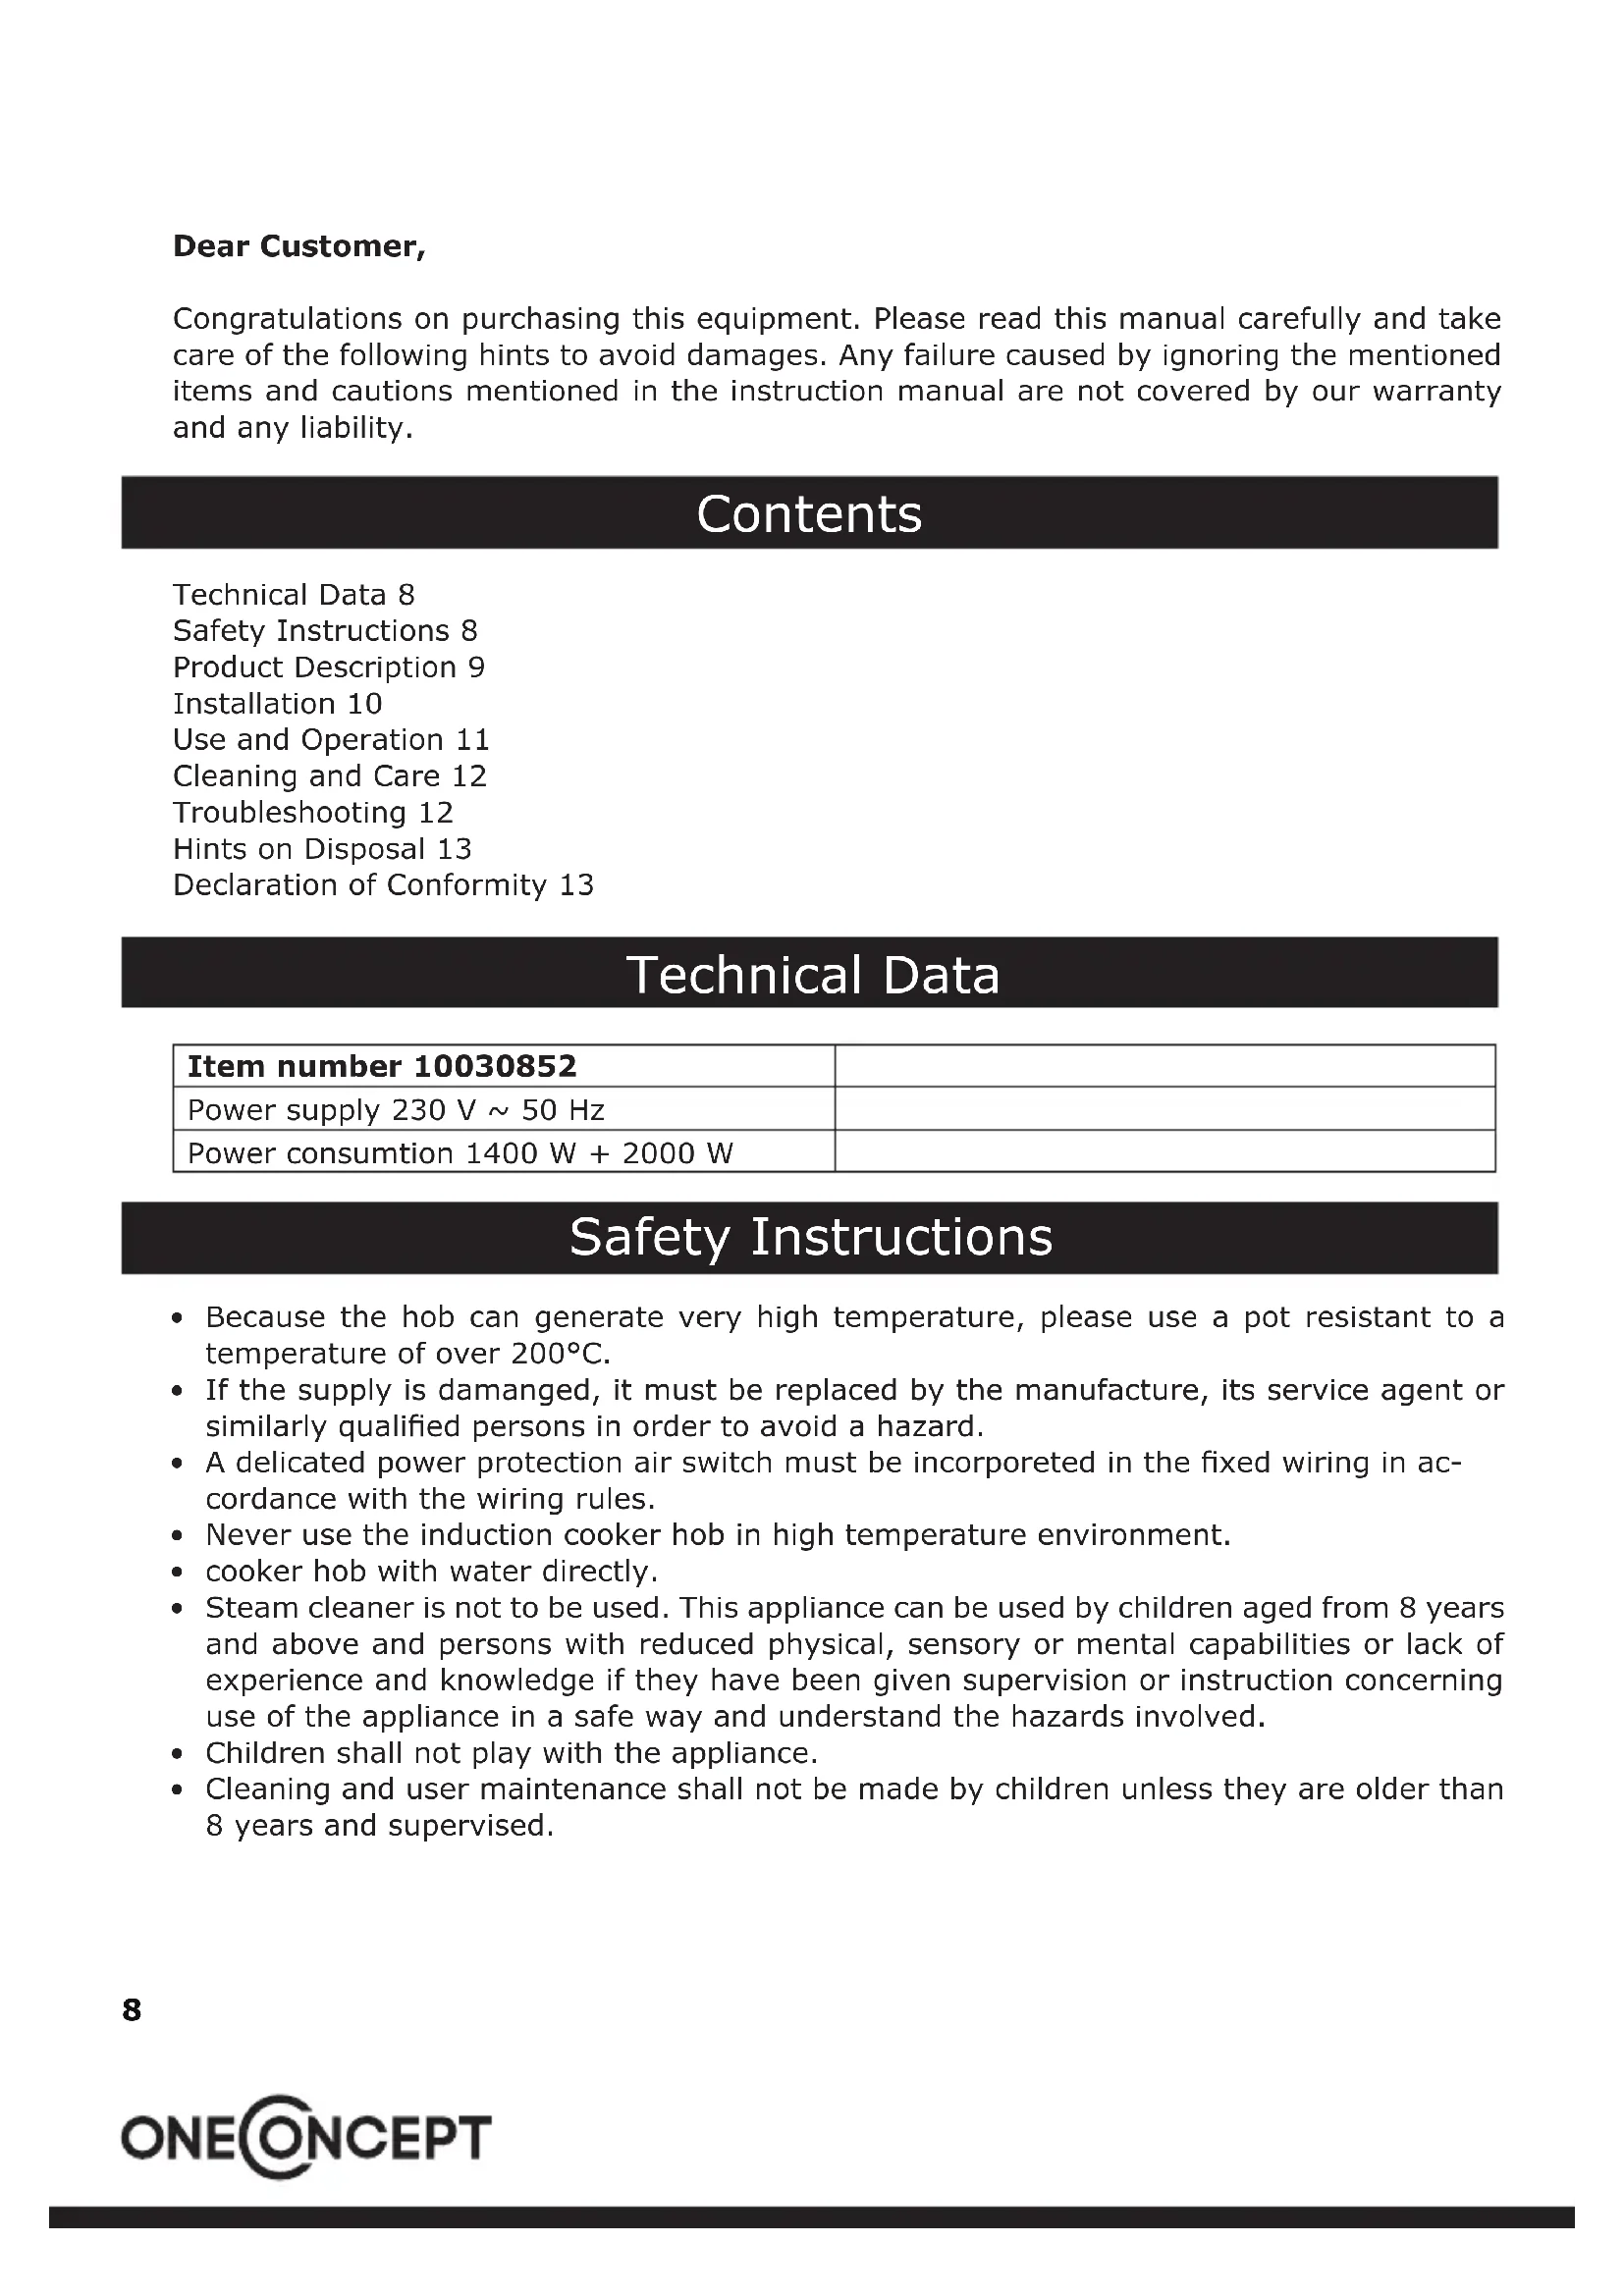
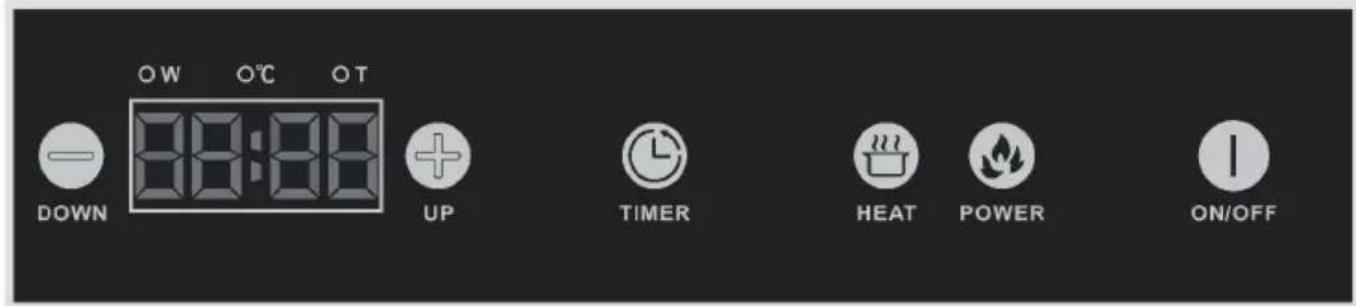
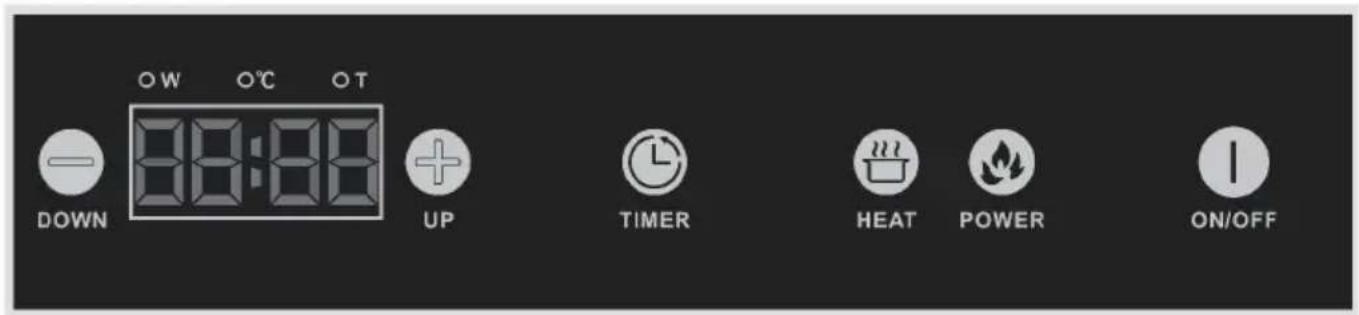
Control Panel and Functions
 ON/OFF ON/OFF | Touch button, the stove will be in stand by mode, with the indicator shows “on”. |
 HEAT HEAT | Touch button, “W” LED light on, the indicator displays “1000/1300”. Touch “+” “-” to adjust power from 200-1400 W / 200-2000 W. |
 TIMER TIMER | Touch button, “T” LED ligh on, the indicator displays “0:00”. Touch “+” “-” to adjust from 0:01 minutes to 3:00 hours. Touch+ the time will increase 10 min, and - will decrease 10 min. |
 POWER POWER | Touch button, the “C” LED ligh on, touch “+” “-” to adjust temp from 80°C to 270°C. |
 ON/OFF ON/OFF | Touch button again, it will recover time set function. |
Switch off
 ON/OFF ON/OFF | When the induction cooker is working, touch button, both of left cooker and right cooker will be switch off. |
 DOWN DOWN | Decrease any single cooker to min. power/temp, one more time press button, the cooker will switch off. |
Usable Pans
• Magnetic flate bottom pots.
- Please limit your food within 7 kg.
Cleaning and Care
- Please shut off the power and pull out the plug before cleaning of the appliance.
- Clean the appliance until it cools down completely.
- To remove dirt, please select litmusless detergent.
• After removing dirt, please use neat wet cloth to clean the unit. - Don not clean by water directly, water gets inside may cause malfunction.
- Keep the ceramic plate and pan clean before cook, otherwise, dirt after charring is very difficult to clean and the plate may get discoloration.
- You may clean air vent/air entry's dirt by vacuum cleaner to suck up, if there is dirt with oil, add a little litmusless detergent with toothbrush to clean.
- Don't use caustic impregnates to clean. It may damage the cooker by chemical reaction. Do not use benzine, scrubbing brush or polishing powder to clean the induction cooker.
Troubleshooting
| No Indicator light when Power “on”. | Cable/terminal block is loose. |
| Broken circuit or blown fuse. | |
| Power supply stopped. | |
| If there is “buzz” noise, and the “on/off ” light flash, no heating. | Please check if the pot is available. |
| If the pot is in the centre of the ceramic plate. | |
| Appliance suddenly stops heating During operation. | Air entrance or outlet blocked. |
| Over-heating protection activated. | |
| Please check if the temperature around is too high. | |
| If the working time over defaulted working time, or the timer finish | |
| No response for the key. Please check the plug is in right place. | |
| The led display shows “E0” or such code together with alarm. | Please check if the voltage is too low or too high. Cut off the power and restart after several minutes. |
| Please check if the temperature is too high. | |
Please do not open and repair the unit yourself avoid getting hurt and other risks. If you fail to identify the problem, contact the after-sales service without delay.
Hints on Disposal
natural_image
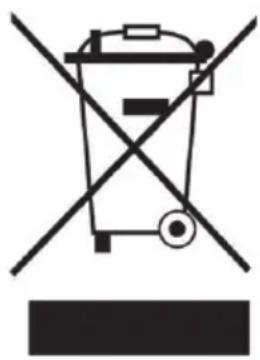
Symbol of a trash bin crossed with a diagonal line, no text or numbers presentAccording to the European waste regulation 2002/96/EG this symbol on the product or on its packaging indicates that this product may not be treated as household waste. Instead it should be taken to the appropriate collection point for the recycling of electrical and electronic equipment. By ensuring this product is disposed of correctly, you will help prevent potential negative consequences for the environment and human health, which could otherwise be caused by inappropriate waste handling of this product. For more detailed information about recycling of this product, please contact your local council or your household waste disposal service.
Declaration of Conformity
CE
Producer: Chal-Tec GmbH, Wallstraße 16, 10179 Berlin, Germany.
This product is conform to the following European Directives:
2014/30/EU (EMC)
2014/35/EU (LVD)
2011/65/EU (RoHS)
Estimado cliente,
text_image
Diagram of a two-whe� electric stove with labeled components and electrical connectionsPanel de control
text_image
OW O°C OT 38:88 DOWN UP TIMER HEAT POWER ON/OFFInstalación

text_image
600mm 360mm 575mm 335mm 5cm 5cm 5cmnatural_image
Three schematic diagrams showing mechanical or electrical components with arrows indicating direction (no text or symbols)natural_image
Symbol of a trash bin crossed with a diagonal line, no text or numbers presenttext_image
Diagram of a two-corn electric stove with labeled components and electrical connectionsPanneau de commande
text_image
OW O℃ OT DOWN 38:38 UP TIMER HEAT POWER ON/OFFInstallation
