
CMEBL30382 - Blower Craftsman - Free user manual and instructions
Find the device manual for free CMEBL30382 Craftsman in PDF.
| Product Type | Electric Blower |
| Brand | Craftsman |
| Model | CMEBL30382 |
| Power Supply | 120 V~, 60 Hz |
| Motor Type | Double Insulated |
| Number of Speeds | 2 |
| Intended Use | Outdoor Household |
| Blower Tube | Lockable, Removable |
| Cord Wrap Hook | Built-in |
| Starting | 2-Position Sliding Switch |
| Protection | Double Insulated |
| Warranty | 2-Year Limited |
| Maintenance | Clean with compressed air and damp cloth |
| Repairs | Authorized Craftsman Service Center Only |
| Recommended Accessories | Craftsman Replacement Parts |
Frequently Asked Questions - CMEBL30382 Craftsman
User questions about CMEBL30382 Craftsman
0 question about this device. Answer the ones you know or ask your own.
Ask a new question about this device
Download the instructions for your Blower in PDF format for free! Find your manual CMEBL30382 - Craftsman and take your electronic device back in hand. On this page are published all the documents necessary for the use of your device. CMEBL30382 by Craftsman.
USER MANUAL CMEBL30382 Craftsman
Thank you for choosing CRAFTSMAN!
PLEASE READ BEFORE RETURNING THIS PRODUCT FOR ANY REASON.
If you have a question or experience a problem with your CRAFTSMAN purchase, go to www.craftsman.com
If you can't find the answer or do not have access to the Internet, call 888-331-4569 from 8 a.m. to 5 p.m. EST Mon. - Fri. to speak with an agent. Please have the catalog number available when you call.
SAVE THIS MANUAL FOR FUTURE REFERENCE.
English (original instructions) 1
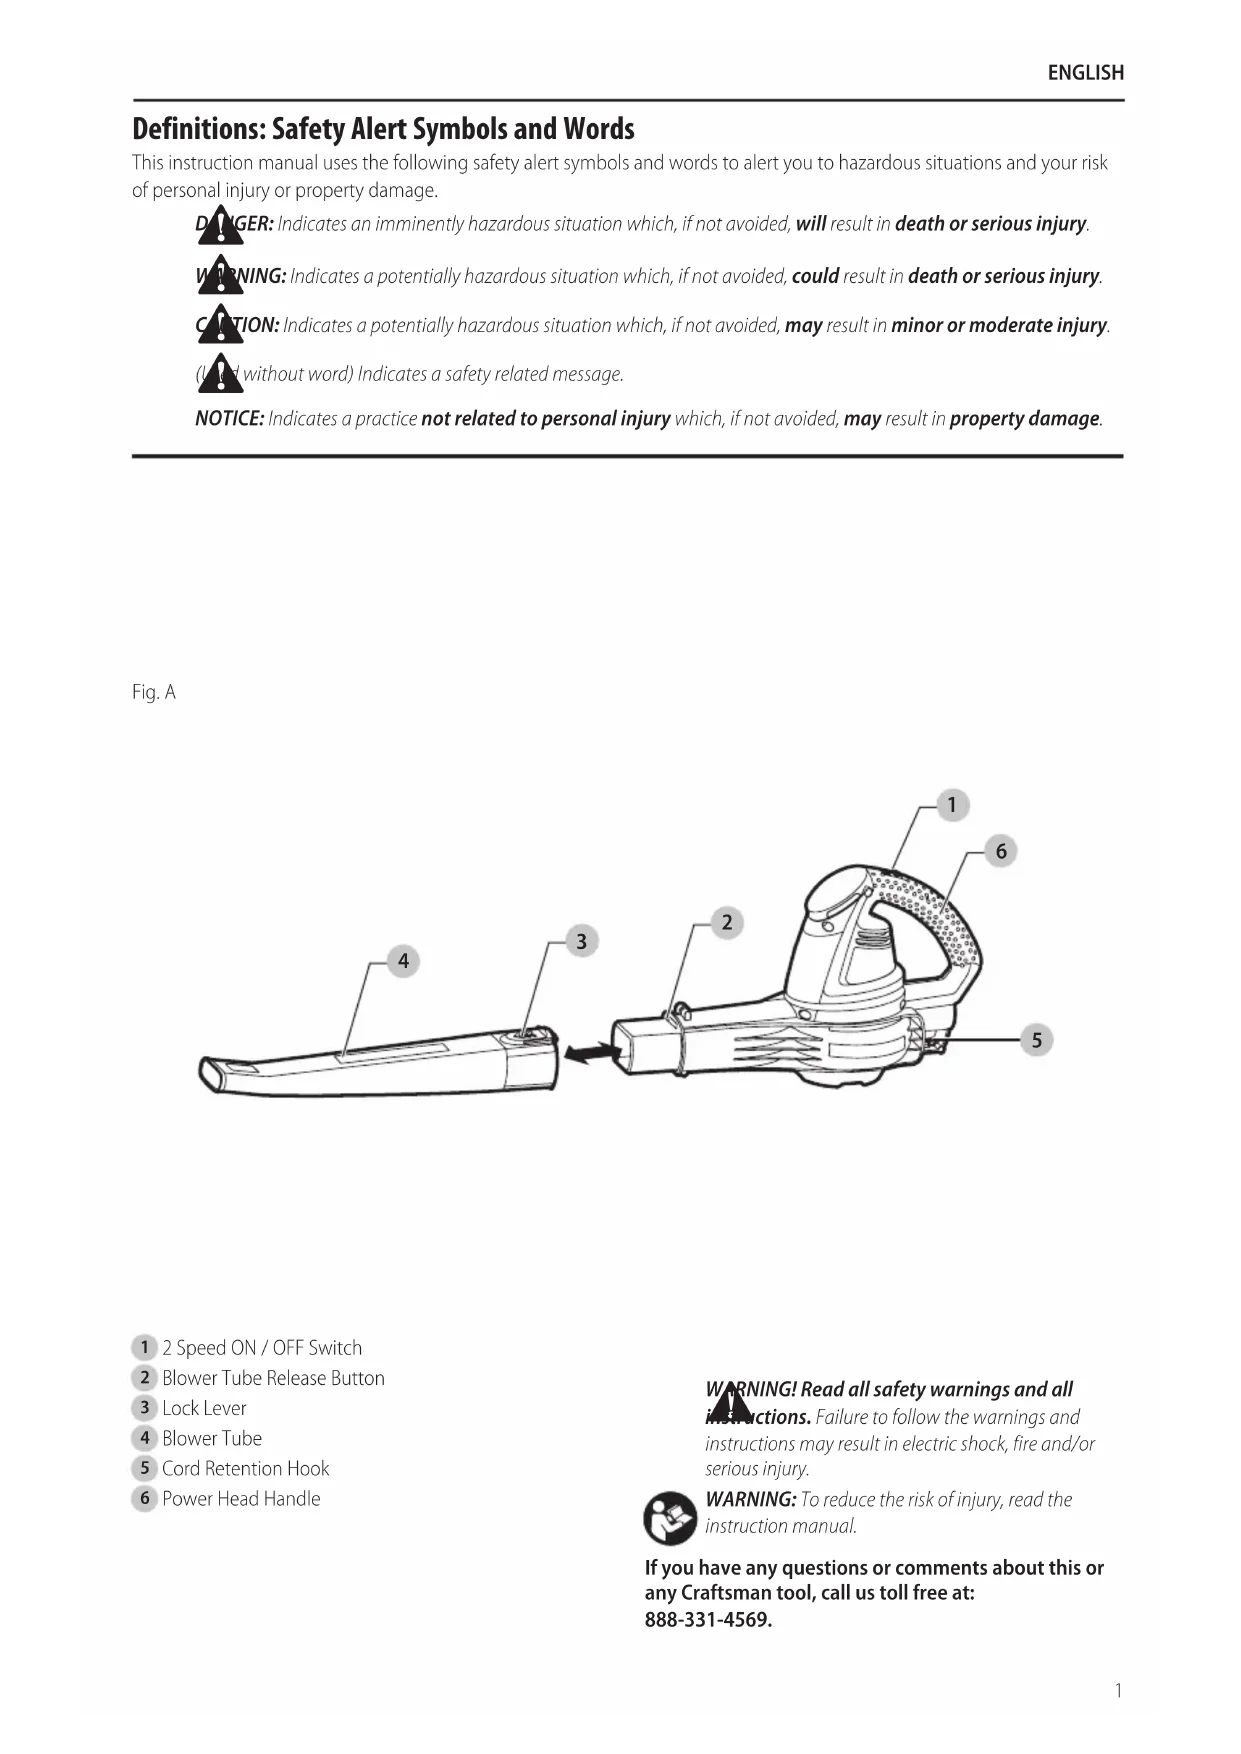
Definitions: Safety Alert Symbols and Words
This instruction manual uses the following safety alert symbols and words to alert you to hazardous situations and your risk of personal injury or property damage.
NOTICE: Indicates a practice not related to personal injury which, if not avoided, may result in property damage.
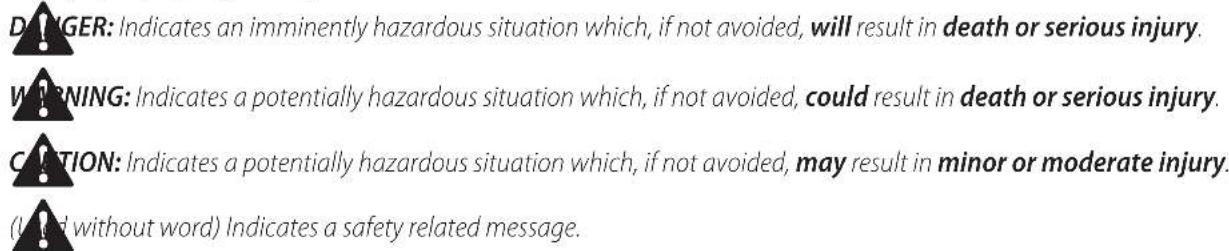
Fig. A
1 2 Speed ON / OFF Switch
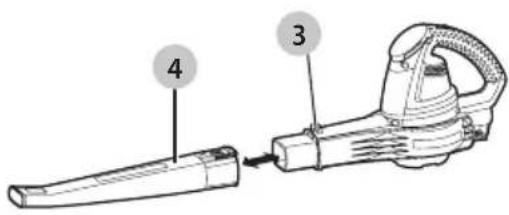
2 Blower Tube Release Button
3 Lock Lever
4 Blower Tube
5 Cord Retention Hook
6 Power Head Handle
WARNING! Read all safety warnings and all instructions. Failure to follow the warnings and instructions may result in electric shock, fire and/or serious injury.

WARNING: To reduce the risk of injury, read the instruction manual.
If you have any questions or comments about this or any Craftsman tool, call us toll free at: 888-331-4569.
English
IMPORTANT SAFETY INSTRUCTIONS
WARNING: When using an electric tool, basic safety precautions should always be followed to reduce risk of fire, electric shock, and personal injury, including the following.
WARNING: To reduce the risk of fire, electric shock, or injury:
- Before any use, be sure everyone using this unit reads and understands all safety instructions and other information contained in this manual.
- Save these instructions and review frequently prior to use and in instructing others.
- Do not point unit discharge at self or bystanders.
- Keep long hair and loose clothing away from openings and moving parts.
• This appliance is intended for household use.
WARNING: Some dust created by this product contains chemicals known to the State of California to cause cancer, birth defects or other reproductive harm. Some examples of these chemicals are:
- compounds in fertilizers
- compounds in insecticides, herbicides and pesticides
- arsenic and chromium from chemically treated lumber
To reduce your exposure to these chemicals, wear approved safety equipment such as dust masks that are specially designed to filter out microscopic particles.
READ ALL AND UNDERSTAND ALL INSTRUCTIONS BEFORE USING THIS APPLIANCE
- DO NOT place outlet of blower near eyes or ears when operating.
- STORE IDLE UNITS. When not in use, the unit should be stored in a dry, high or locked-up place - out of reach of children.
- DON'T OVERREACH. Keep proper footing and balance at all times.
- MAINTAIN UNIT WITH CARE. Keep unit clean for best and safest performance. Follow instructions for proper maintenance.
- DO NOT attempt to repair the blower. To assure product safety and reliability, repairs, maintenance, and adjustments should be performed by Craftsman service centers or authorized service centers, always using Craftsman replacement parts.
- DO NOT operate blower in a gaseous or explosive atmosphere. Motors in these units normally spark, and the sparks might ignite fumes.
- AVOID DANGEROUS ENVIRONMENTAL CONDITIONS – Do not use electric units in damp or wet locations. Don't use the unit in the rain.
- STAY ALERT - Watch what you are doing. Use common sense. Do not operate unit when you are tired.
- USE THE RIGHT UNIT – Do not use this unit for any job except that for which it is intended.
• USE EXTRA CARE when cleaning on stairs. - DO NOT allow to be used as a toy. Close attention is necessary when used by or near children. Not recommended for use by children.
-
DO NOT attempt to clear clogs from unit without first unplugging.
-
DO NOT use to pick up flammable or combustible liquids, such as gasoline, or use in areas where they may be present.
- DO NOT pick up anything that is burning or smoking, such as cigarettes, matches, or hot ashes.
- USE ONLY as described in this manual. Use only manufacturer's recommended attachments.
- DO NOT put any objects into openings. Do not use with any opening blocked; keep free of dust, lint, hair and everything that may reduce air flow.
- KEEP hair, loose clothing, fingers, and all parts of body away from openings and moving parts.
- DO NOT immerse any part of the unit in liquid.
- KEEP CHILDREN, BYSTANDERS AND ANIMALS AWAY from the work area a minimum of 30 feet (10 meters) when starting or operating the unit.
• INSPECT THE AREA before using the unit. Remove all debris and hard objects such as rocks, glass, wire, etc. that can ricochet, be thrown, or otherwise cause injury or damage during operation.
- DO NOT leave appliance when plugged in. Unplug from outlet when not in use and before servicing.
- DO NOT use with damaged cord or plug. If appliance is not working as it should, has been dropped, damaged, left outdoors, or dropped into water, return it to a service center.
- DO NOT pull or carry by cord, use cord as a handle, or pull cord around sharp edges or corners. Keep cord away from heated surfaces.
- DO NOT unplug by pulling on cord. To unplug, grasp the plug, not the cord.
- Do not handle plug or appliance with wet hands.
- Turn off all controls before unplugging.
- This appliance is provided with double insulation. Use only identical replacement parts. See instructions for Servicing of Double-Insulated Appliances.
• To reduce the risk of electric shock, use only with an extension cord intended for outdoor use, such as SJW or SJTW.
- Make sure your extension cord is in good condition and is the correct size for your appliance. The Minimum Gauge for Cord Sets chart below shows the correct size to use depending on cord length and nameplate ampere rating. If in doubt, use the next heavier gage. The smaller the gage number, the heavier the cord. An undersized extension cord will cause a drop in line voltage resulting in loss of power and overheating
- Maintain Appliance With Care – Inspect extension cords periodically and replace if damaged.
- To reduce the risk of disconnection of appliance cord from the extension cord during operating:
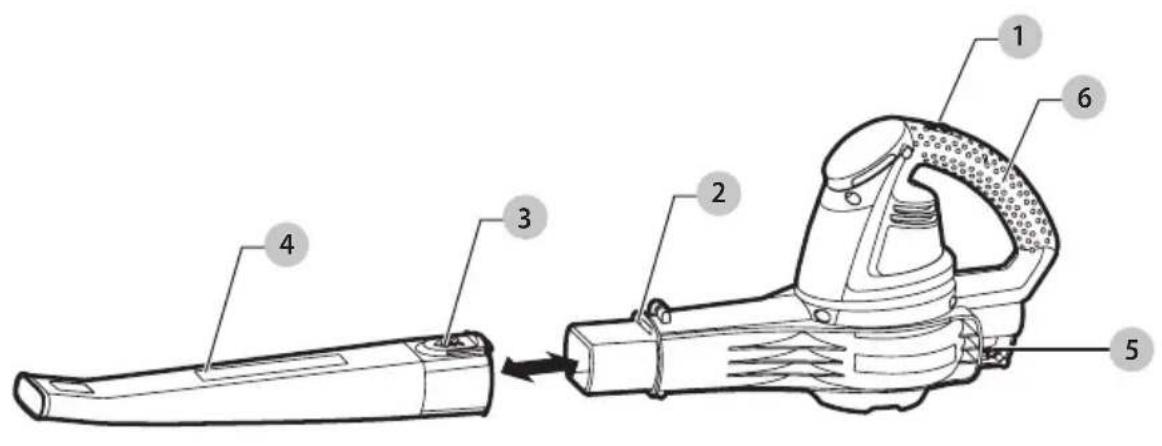
i) Make a knot as shown in figure B; or
ii) Use one of the plug-receptacle retaining straps or connectors described in this manual.
OR
iii) Secure the extension cord to the appliance plug as shown or described in the Operating Instructions.
Fig. B
natural_image
Line drawing of a mechanical connector with coiled wires (no text or symbols)WARNING: To reduce the risk of personal injury due to choose electrical connection between the appliance's plug and extension cord, firmly and fully attach the appliance plug to the extension cord. Periodically check the connection while operating to ensure it is fully attached. Do not use an extension cord that provides a loose connection. A loose connection may result in overheating, fire, and increases the risk of a burning.
WARNING: Always wear proper personal hearing action that conforms to ANSI S12.6 (S3.19)
during use. Under some conditions and duration of use, noise from this product may contribute to hearing loss.
WARNING: ALWAYS use safety glasses. Everyday cyclo-glasses are NOT safety glasses. Also use face or dust mask if operation is dusty. ALWAYS WEAR CERTIFIED SAFETY EQUIPMENT:
- ANSI Z87.1 eye protection (CAN/CSA Z94.3),
- ANSI S12.6 (S3.19) hearing protection,
- NIOSH/OSHA/MSHA respiratory protection.
WARNING: To reduce the risk of electrical shock; do not expose to rain. Store indoors.
WARNING: Cut Hazard. Turn off and unplug unit, wait until fan stops or at least 10 seconds before removing the blower tube assemblies.
Servicing of Double Insulated Appliances
A double-insulated appliance is marked with one or more of the following: The words "DOUBLE INSULATION" or "DOUBLE INSULATED" or the double insulation symbol
Your Blower is double-insulated to give you added safety. In a double insulated appliance, two systems of insulation are provided instead of grounding. No grounding means is provided on a double insulated appliance, nor should a means for grounding be added to the appliance. Servicing a double insulated appliance requires extreme care and knowledge of the system and should be done only by qualified service personnel. Replacement parts for a double insulated appliance must be identical to the parts they replace. A double insulated appliance is marked with the words double insulated or "double insulation". The symbol (square within a square) may also be marked on the appliance.
Safety Rules and Instructions: Extension Cords
Double insulated tools have 2-wire cords and can be used with 2-wire or 3-wire extension cords. Only round jacketed extension cords should be used, and we recommend that they be listed by Underwriters Laboratories (U.L.) (C.S.A. in Canada). If the extension will be used outside, the cord must be suitable for outdoor use. Any cord marked as outdoor can also be used for indoor work.
An extension cord must have adequate wire size (AWG or American Wire Gauge) for safety, and to prevent loss of power and overheating. The smaller the gauge number of the wire, the greater the capacity of the cable, that is 16 gauge has more capacity than 18 gauge. When using more than one extension to make up the total length, be sure each individual extension contains at least the minimum wire size. Before using an extension cord, inspect it for loose or exposed wires, damaged insulation, and defective fittings. Make any needed repairs or replace the cord if necessary.
Minimum Gauge for Cord Sets
| Volts | Total Length of Cord in Feet (meters) | ||||
| 120 V 25 (7.6) | 50 (15.2) 100 (30.5) 150 (45.7) | ||||
| 240 V 50 (15.2) | 100 (30.5) 200 (61.0) 300 (91.4) | ||||
| Ampere Rating | American Wire Gauge | ||||
| More Than | Not More Than | ||||
| 0 6 18 | 16 16 14 | ||||
| 6 10 18 | 16 14 12 | ||||
| 10 12 16 | 16 14 12 | ||||
| 12 16 14 | 12 Not Recommended | ||||
Safety Rules and Instructions: Polarized Plug
To reduce the risk of electric shock, this equipment has a polarized plug (one blade is wider than the other). This equipment must be used with a suitable polarized 2 wire or 3 wire extension cord. Polarized connections will fit together only one way. Make sure that the receptacle end of the extension cord has large and small blade slot widths. If the plug does not fit fully into the extension cord, reverse the plug. If it still does not fit, obtain a suitable extension cord. If the extension cord does not fit fully into the outlet, contact a qualified electrician to install the proper outlet. Do not change the tool plug or extension cord in any way.
The label on your tool may include the following symbols. The symbols and their definitions are as follows:
V....volts
Hz hertz
min ...... minutes
- - - - or DC.....direct current
Class I Construction (grounded)
.../min.....per minute
BPM.....beats per minute
sfpm ....surface feet per minute
SPM ...... strokes per minute
A.....amperes
W.....watts
\~ or AC......alternating current
or AC/DC....alternating or direct current
Class II
Construction (double insulated)
no ....no load speed
n ......rated speed
± ......earthing terminal
⚠️ ____ safety alert symbol
△......visible radiation
wear respiratory
protection
......wear eye
protection
O....wear hearing protection
SAVE THESE INSTRUCTIONS FOR FUTURE USE
COMPONENTS (FIG. A)
WARNING: Never modify the power tool or any part of it. Damage or personal injury could result.
English
Refer to Figure A at the beginning of this manual for a complete list of components.
INTENDED USE
This appliance is designed for household outdoor blower applications.
DO nOT use under wet conditions or in presence of flammable liquids or gases.
DO nOT let children come into contact with the tool.
Supervision is required when inexperienced operators use this tool.
ASSEMBLY AND ADJUSTMENTS
WARNING: To reduce the risk of serious personal injury, turn unit off and unplug before making any adjustments or removing/installing attachments or accessories. An accidental start-up can cause injury.
WARNING: Before attempting any of the assembly step below, ensure product is switched off and disconnected from the power supply.
ASSEMBLY FOR BLOW MODE
Blow Tube Assembly (Fig. C)
NOTE: Ensure the blower is switched off and disconnected from the power supply before attaching or removing the blower tubes. The tube assembly must be assembled to the housing before use.
• To attach the blower tube 4 to the blower, line up the arrows on the tube with the blower housing as shown in figure A. Push the tube into the blower housing until the lock lever 3 engages the lock hole in the blower tube.
• To remove the tube depress the lock button and slide the tube off the blower housing.
Fig. C
OPERATION
WARNING: Do not operate blower without blow tube. Securely in place. Never reach down into housing through tube hole.
USE AS A BLOWER
WARNING: Always wear safety glasses. Wear a filter if the operation is dusty, use of rubber gloves and substantial footwear is recommended when working outdoors. For household use only.
WARNING: Cut Hazard. When turning the tool off for tube installation or any other reason, wait 10 seconds for the fan to stop rotating before disassembly.
• Always switch off and remove the plug from the electrical supply when:
- The power supply cord has become damaged or entangled.
- You leave blower unattended.
- Checking, adjusting, cleaning or working on blower.
- Use blower only in daylight or good artificial light.
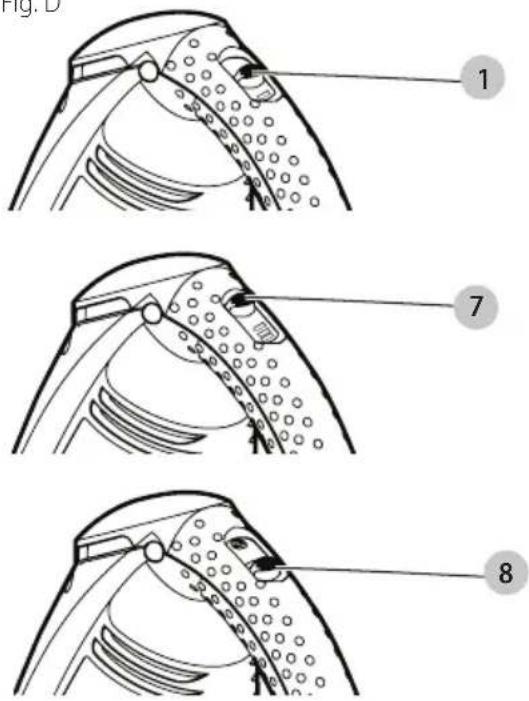
Switching On/Off (Fig. D)
WARNING: Use both hands to grip the product firmly when switching on.
CAUTION: Do not point unit discharge at self or bystanders.
WARNING: Cut Hazard. When turning the tool off for installation or any other reason, wait 10 seconds for the fan to stop rotating before disassembly.
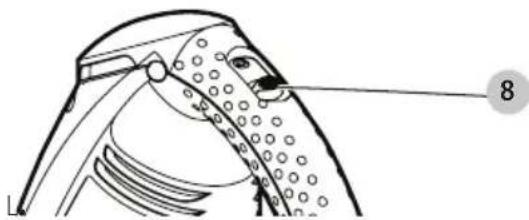
Your blower is fitted with a 2 speed ON/OFF switch located on the top of the power head handle 6.
- To switch the blower on, slide the ON/OFF forward as shown in Fig. L.
- For more power, push power button forward to the second position 7.
• To switch the blower off, slide the ON/OFF 8 switch back as shown in Fig. D.
Fig. D
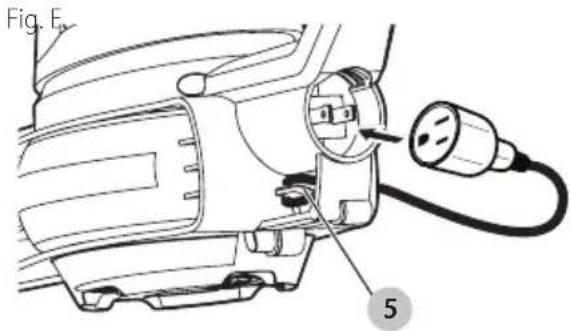
Cord Retainer (Fig. E)
A cord retention hook is incorporated into the rear of the power head.
- To use the cord retention hook 5 as shown in Fig. E, insert the extension cord into the cord retainer housing from the side.
- Loop the extension cord around the retainer so it rests in the hook of the cord retainer.
- Then plug the cord from the power head into the extension cord.
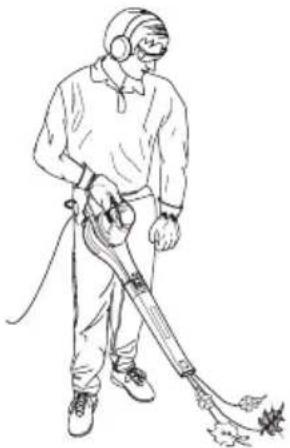
Use As A Blower (Fig. F)
WARNING: Ensure product is switched off and connected from the power supply.
CAUTION: Always wear safety glasses. Wear a filter of the operation is dusty. Use of gloves, long pants and substantial footwear is recommended. Keep long hair and loose clothing away from openings and moving parts. This BLOWER is FOR hOUsEhOLD UsE Only.
NOTE: Ensure the blower is switched off and disconnected from the power supply before attaching or removing the blower tube. The blower tube must be assembled to the housing before use.
- Hold the blower steady and sweep from side to side with the nozzle several inches above the surface as shown in Fig. F.
- Slowly advance, keeping the accumulated pile of debris in front of you.
Fig. F
natural_image
Line drawing of a person using a spray gun, no text or symbols presentMAINTENANCE
WARNING: To reduce the risk of serious personal injury, turn unit off and unplug before making any adjustments or removing/installing attachments or accessories. An accidental start-up can cause injury.
Cleaning
WARNING: Blow dirt and dust out of all air vents with clean, dry air at least once a week. To minimize the risk of eye injury, always wear ANSI Z87.1 approved eye protection when performing this.
WARNING: Never use solvents or other harsh chemicals for cleaning the non-metallic parts of the tool. These chemicals may weaken the plastic
English
materials used in these parts. Use a cloth dampened only with water and mild soap. Never let any liquid get inside the tool; never immerse any part of the tool into a liquid.
WARNING: TURN OFF AND UNPLUG TOOL! (Unplug extension cord at power source.)
Use only mild soap and a damp cloth to clean the tool. Never let any liquid get inside the tool; never immerse any part of the tool into a liquid. Clean out any clippings which may have accumulated in the Blower. WARNING: SHOCK HAZARD. DO NOT POUR OR SPRAY WATER ON THE TOOL IN AN ATTEMPT TO CLEAN.
Do not store the tool on or adjacent to fertilizers or chemicals. Such storage can cause rapid corrosion of the metal parts.
iIMPORTAnT: To assure product SAFETY and RELIABILITY, repairs, maintenance and adjustment should be performed by qualified service organizations, always using identical replacement parts.
Accessories
WARNING: Since accessories, other than those offered by CRAFTSMAN, have not been tested with this product, use of such accessories with this tool could be hazardous. To reduce the risk of injury, only Craftsman recommended accessories should be used with this product.
Recommended accessories for use with your tool are available from your local dealer or authorized service center. If you need assistance regarding accessories, please call: 888-331-4569.
Repairs
WARNING: To assure product SAFETY and RECEPTIBILITY, repairs, maintenance and adjustment (including brush inspection and replacement) should be performed by a Craftsman factory service center or a Craftsman authorized service center. Always use identical replacement parts.
ENGLISH
TWO-YEAR LIMITED WARRANTY
Craftsman (U.S.) Inc. warranties this product to be free from defects in material or workmanship for a period of two (2) years following the date of purchase, provided that the product is used in a home environment. This limited warranty does not cover failures due to abuse, accidental damage or when repairs have been made or attempted by anyone other than qualified service organizations. A defective product meeting the warranty conditions set forth herein will be replaced or repaired at no charge:
Return the product to the retailer from whom it was purchased (provided that the store is a participating retailer). Returns should be made within the time period of the retailer's policy for exchanges. Proof of purchase may be required. Please check with the retailer for its specific return policy regarding time limits for returns or exchanges.
This warranty does not apply to accessories. This warranty gives you specific legal rights and you may have other rights which vary from state to state. This product is not intended
for commercial use, and accordingly, such commercial use of this product will void this warranty. All other guarantees, express or implied, are hereby disclaimed.
LATIN AMERICA: This warranty does not apply to products sold in Latin America. For products sold in Latin America, check country specific warranty information contained in the packaging, call the local company or see the website for such information.
Imported by
Craftsman Tool Co.,
701 East Joppa Rd.
Towson, MD 21286 U.S.A.
TROUBLESHOOTING
For assistance with your product, visit our website www.craftsman.com for the location of the service center nearest you or call the Craftsmanhelp line at: 888-331-4569.
Problem Possible Cause Possible Solution
| Unit will not start. Cord not plugged in. | Plug tool into a working outlet. | |
| Circuit fuse is blown. | Replace circuit fuse. (If the product repeatedly causes the circuit fuse to blow, discontinue use immediately and call the Craftsman help line at 888-331-4569.) | |
| Circuit breaker is tripped. | Reset circuit breaker. (If the product repeatedly causes the circuit breaker to trip, discontinue use immediately and call the Craftsman help line at 888-331-4569.) | |
| Cord or switch is damaged. | Call the Craftsman help line at 888-331-4569 or have cord or switch replaced. |
natural_image
Simple line drawing of a plug with wires, no text or symbols presentFONCTIONNEMENT

natural_image
Line drawing of a person wearing a hooded shirt and holding a long tool, spraying water with a leaf (no text or symbols)MAINTENANCE
natural_image
Simple line drawing of a plug with wires, no text or symbols presentOPERACIÓN
natural_image
Line drawing of a person using a spray gun, no text or symbols presentMANTENIMIENTO
701 East Joppa Road, Towson, MD 21286
Part No. N557612
CMEBL30382
AUG 2017


- Definitions: Safety Alert Symbols and Words
- English
- IMPORTANT SAFETY INSTRUCTIONS
- READ ALL AND UNDERSTAND ALL INSTRUCTIONS BEFORE USING THIS APPLIANCE
- WARNING: Always wear proper personal hearing action that conforms to ANSI S12.6 (S3.19)
- Servicing of Double Insulated Appliances
- Safety Rules and Instructions: Extension Cords
- Safety Rules and Instructions: Polarized Plug
- SAVE THESE INSTRUCTIONS FOR FUTURE USE
- INTENDED USE
- ASSEMBLY AND ADJUSTMENTS
- ASSEMBLY FOR BLOW MODE
- Blow Tube Assembly (Fig. C)
- OPERATION
- USE AS A BLOWER
- Switching On/Off (Fig. D)
- Cord Retainer (Fig. E)
- Use As A Blower (Fig. F)
- MAINTENANCE
- Cleaning
- Accessories
- Repairs
- TWO-YEAR LIMITED WARRANTY
- TROUBLESHOOTING
- FONCTIONNEMENT
- OPERACIÓN
- MANTENIMIENTO
Brand : Craftsman
Model : CMEBL30382
Category : Blower