
AC24BQ - Air conditioner LG - Free user manual and instructions
Find the device manual for free AC24BQ LG in PDF.
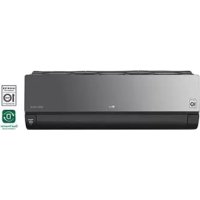



| Product type | Wall-mounted air conditioner (fixed) |
| Brand | LG |
| Model | AC24BQ |
| Installation | Wall mounting, indoor + outdoor unit |
| Operating modes | Cooling, Heating, Dehumidification, Fan, Automatic (AI), Auto swing |
| Jet Mode function | Rapid cooling or heating for 30 minutes |
| Remote control | Wireless with display, AAA batteries (1.5 V) |
| Timer | Programmable on/off, simple timer (sleep up to 7 h) |
| Fan speed | High, Medium-High, Medium, Medium-Low, Low, Natural |
| Airflow direction | Adjustable vertical and horizontal (Swing) |
| Silence function | Reduces outdoor unit noise |
| Auto cleaning | Removes residual moisture inside the unit |
| Connectivity | Wi-Fi 2.4 GHz via LG ThinQ app (smartphone) |
| Smart diagnosis | Smart Diagnosis™ by sound or via the app |
| Air filter | Washable, clean every 2 weeks |
| Ionizer (optional) | Improves air quality with ions |
| Energy control | Power reduction up to 60% (in steps) |
| Display | Digital screen (temperature, timer, indicators) |
| Auto restart | Restores settings after a power outage |
| Safety | Flammable refrigerant R32, child lock, grounding |
| Maintenance | Filter cleaning by user; technical maintenance by professional |
Frequently Asked Questions - AC24BQ LG
User questions about AC24BQ LG
0 question about this device. Answer the ones you know or ask your own.
Ask a new question about this device
Download the instructions for your Air conditioner in PDF format for free! Find your manual AC24BQ - LG and take your electronic device back in hand. On this page are published all the documents necessary for the use of your device. AC24BQ by LG.
USER MANUAL AC24BQ LG
Read this owner's manual thoroughly before operating the appliance and keep it handy for reference at all times.
TYPE: WALL MOUNTED
Original instruction
EN ENGLISH
FR FRANÇAIS
EL EAAHNIKA
NL NEDERLANDS
PL POLSKI
HU MAGYAR
BG BbIgAPCKN
HR HRVATSKI
CZ CESTINA
ET EESTI
MT MALTI
RO ROMÁNA
SK SLOVENCINA
SL SLOVENSČINA
LV LATVIEŠU
LT LIETUVIŲ
GA GAEILGE
SR SRPSKI
MK MAKEDONSKI
SQ SHQIP
BS BOSANSKI
TABLE OF CONTENTS
This manual may contain images or content different from the model you purchased.
This manual is subject to revision by the manufacturer.
SAFETY INSTRUCTIONS 3
IMPORTANT SAFETY INSTRUCTIONS 4
OPERATION 11
Notes for Operation 11
Parts and Functions 11
Wireless Remote Control 12
Restarting the Air Conditioner Automatically 17
Using the Mode Function 17
Using the Jet Mode Function 20
Using the Fan Speed Function 21
Using the Air Flow Direction Function 21
Setting the On/Off Timer 22
Using the Sleep Function (Optional) 23
Using the Simple Timer Function (Optional) 23
Using the Energy Display Function (Optional) 24
Using the Light Off Function (Optional) 24
Using the Comfort Air Function (Optional) 24
Using the Energy Control Function (Optional) 25
Using Special Functions 25
SMART FUNCTIONS 27
LG ThinQ Application 27
Smart Diagnosis 29
MAINTENANCE 30
Clean the Air Filter 32
TROUBLESHOOTING 33
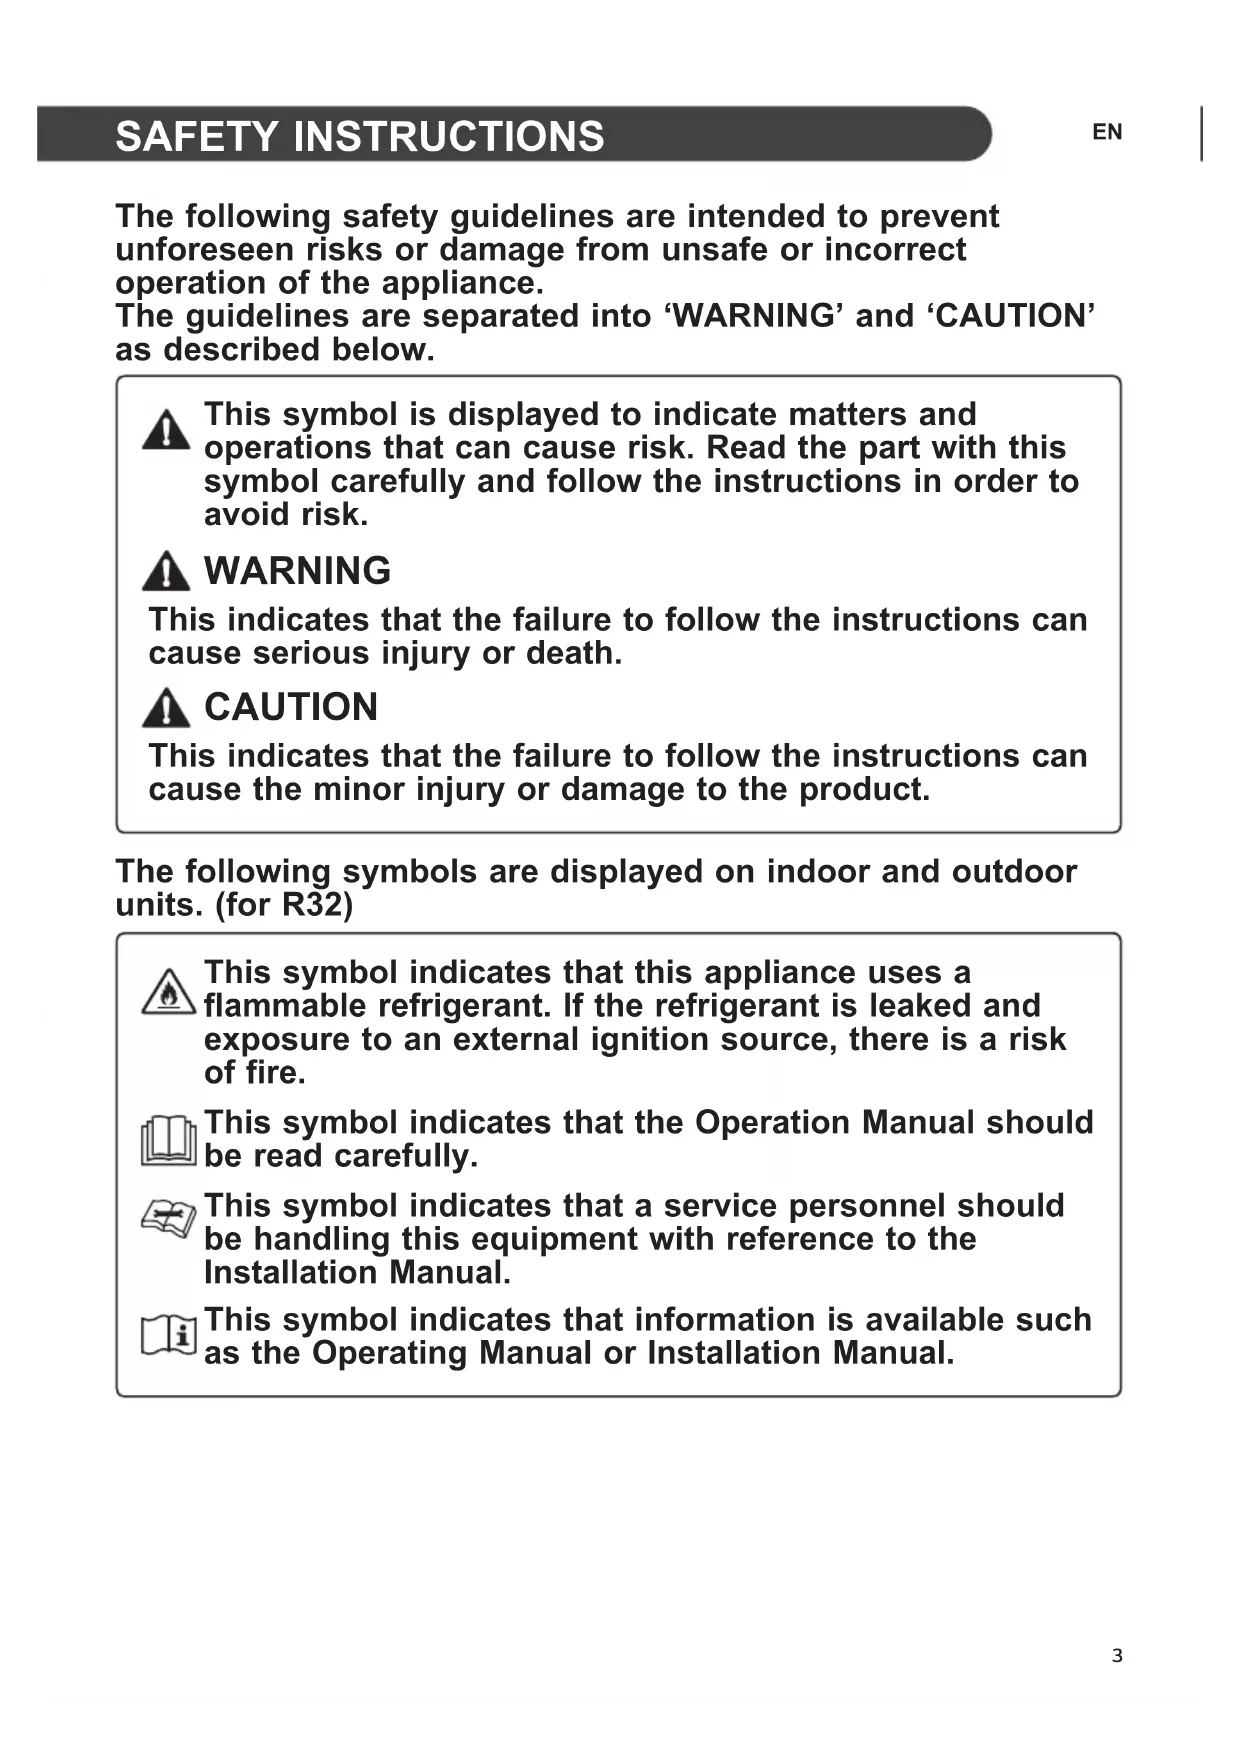
The following safety guidelines are intended to prevent unforeseen risks or damage from unsafe or incorrect operation of the appliance.
The guidelines are separated into 'WARNING' and 'CAUTION' as described below.

This symbol is displayed to indicate matters and operations that can cause risk. Read the part with this symbol carefully and follow the instructions in order to avoid risk.

WARNING
This indicates that the failure to follow the instructions can cause serious injury or death.

CAUTION
This indicates that the failure to follow the instructions can cause the minor injury or damage to the product.
The following symbols are displayed on indoor and outdoor units. (for R32)

This symbol indicates that this appliance uses a flammable refrigerant. If the refrigerant leaks and is exposed to an external ignition source, there is a risk of fire.

This symbol indicates that the Operation Manual should be read carefully.

This symbol indicates that service personnel should handle this equipment with reference to the Installation Manual.

This symbol indicates that information is available, such as the Operating Manual or Installation Manual.
IMPORTANT SAFETY INSTRUCTIONS

WARNING
To reduce the risk of explosion, fire, death, electric shock, injury, or scalding to persons when using this product, follow basic precautions, including the following:
Children in the Household
This appliance is not intended for use by persons (including children) with reduced physical, sensory, or mental capabilities, or lack of experience and knowledge, unless they have been given supervision or instruction concerning use of the appliance by a person responsible for their safety. Children should be supervised to ensure that they do not play with the appliance.
For use in Europe:
This appliance can be used by children aged from 8 years and above and persons with reduced physical, sensory, or mental capabilities or lack of experience and knowledge if they have been given supervision or instruction concerning use of the appliance in a safe way and understand the hazards involved. Children shall not play with the appliance. Cleaning and user maintenance shall not be made by children without supervision.
Installation
- Do not install the air conditioner on an unstable surface or in a place where there is a danger of it falling.
- Contact an authorized service center when installing or relocating the air conditioner.
- Install the panel and the cover of the control box safely.
- Do not install the air conditioner in a place where flammable liquids or gases such as gasoline, propane, paint thinner, etc., are stored.
- Make sure that the pipe and the power cable connecting the indoor and outdoor units are not pulled too tight when installing the air conditioner.
- Use standard circuit breaker and fuse that conform to the rating of the air conditioner.
- Do not input air or gas into the system except with the specific refrigerant.
- Use non-flammable gas (nitrogen) to check for leak and to purge air; using compressed air or flammable gas may cause fire or explosion.
- The indoor/outdoor wiring connections must be secured tightly, and the cable should be routed properly so that there is no force pulling the cable from the connection terminals. Improper or loose connections can cause heat generation or fire.
- Install dedicated electric outlet and circuit breaker before using the air conditioner.
- Do not connect the ground wire to a gas pipe, a lightning rod, or a telephone ground wire.
- Keep any required ventilation openings clear of obstruction. (for R32)
- Means for disconnection must be incorporated in the fixed wiring in accordance with the wiring rules.
Operation
- Be sure to use only those parts listed in the service parts list. Never attempt to modify the equipment.
- Make sure that children do not climb on or hit the outdoor unit.
- Dispose of the batteries in a place where there is no danger of fire.
- Use only the refrigerant specified on the air conditioner label.
- Cut off the power supply if there is any noise, smell, or smoke coming from the air conditioner.
- Do not leave flammable substances such as gasoline, benzene, or thinner near the air conditioner.
- Contact an authorized service center when the air conditioner is submerged by flood waters.
- Do not use the air conditioner for an extended period of time in a small place without proper ventilation.
- In the event of a gas leak (such as Freon, propane gas, LP gas, etc.) ventilate sufficiently before using the air conditioner again.
- To clean the interior, contact an authorized service center or dealer. Using harsh detergents may cause corrosion or damage to the unit.
- Be sure to ventilate sufficiently when the air conditioner and a heating appliance such as a heater are used simultaneously.
- Do not block the inlet or outlet of air flow.
- Do not insert hands or other objects through the air inlet or outlet while the air conditioner is operating.
- Make sure that the power cable is neither dirty, loose, nor broken.
- Never touch, operate, or repair the air conditioner with wet hands.
- Do not place any objects on the power cable.
- Do not place a heater or other heating appliances near the power cable.
- Do not modify or extend the power cable. Scratches or peeling insulation on the power cables may result in fire or electric shock, and should be replaced.
- Cut off the power supply immediately in the event of a blackout or a thunderstorm.
- Take care to ensure that power cable could not be pulled out or damaged during operation.
- Do not touch refrigerant pipe, water pipe and any internal parts while the unit is operating or immediately after operation.
Maintenance
- Do not clean the appliance by spraying water directly onto the product.
- Before cleaning or performing maintenance, disconnect the power supply and wait until the fan stops.
Technical Safety
- Installation or repairs made by unauthorized persons can pose hazards to you and others.
- Any person who is involved with working on or breaking into a refrigerant circuit should hold a current valid certificate from an industry-accredited assessment authority, which authorizes their competence to handle refrigerants safely in accordance with an industry recognized assessment specification. (for R32) Servicing shall only be performed as recommended by the equipment manufacturer. Maintenance and repair requiring the assistance of other skilled personnel shall be carried out under the supervision of the person competent in the use of flammable refrigerants. (for R32)
- The information contained in the manual is intended for use by a qualified service technician who is familiar with the safety procedures and equipped with the proper tools and test instruments.
- Failure to read and follow all instructions in this manual can result in equipment malfunction, property damage, personal injury and/or death.
- The appliance shall be installed in accordance with national wiring regulations.
- When the power cord is to be replaced, the replacement work shall be performed by authorized personnel using only genuine replacement parts.
- This appliance must be properly grounded to minimize risk of electric shock.
- Do not cut or remove the grounding prong from the power plug.
- Attaching the earth wire to the power outlet cover screw does not ground the appliance unless the cover screw is metal, uninsulated, and the power outlet is grounded through house wiring.
- If you have any doubt whether the air conditioner is properly grounded, have the power outlet and circuit checked by a qualified electrician.
- The refrigerant and insulation blowing gas used in the appliance require special disposal procedures. Consult a service agent or a similarly qualified person before disposing of them.
- If the supply cord is damaged, it must be replaced by the manufacturer, its service agent or similarly qualified person in order to avoid a hazard.
- The appliance shall be stored in a well-ventilated area where the room size corresponds to the room area as specified for operation. (for R32)
- The appliance shall be stored in a room without continuously operating open flames (for example an operating gas appliance) and ignition sources (for example an operating electric heater). (for R32)
- The appliance shall be stored so as to prevent mechanical damage from occurring. (for R32)

CAUTION
To reduce the risk of minor injury to persons, malfunction, or damage to the product or property when using this product, follow basic precautions, including the following:
Installation
- Do not install the air conditioner in an area where it is directly exposed to sea wind (salt spray).
- Install the drain hose properly for the smooth drainage of water condensation. Exercise caution when unpacking or installing the air conditioner.
- Do not touch the leaking refrigerant during installation or repair.
- Transport the air conditioner with two or more people or use a forklift.
- Install the outdoor unit such that it is protected from direct sunlight. Do not place the indoor unit in a place where it is directly exposed to sunlight via the windows.
- Safely dispose of packing materials such as screws, nails or batteries using proper packaging after installation or repair.
- Install the air conditioner in a place where the noise from the outdoor unit or the exhaust fumes will not inconvenience the neighbors. Failure to do so may result in conflict with the neighbors.
Operation
- Remove the batteries if the remote control is not to be used for an extended period of time.
- Make sure that the filter is installed before operating the air conditioner.
- Be sure to check if there is a refrigerant leak after installing or repairing the air conditioner.
- Do not place any object on the air conditioner.
- Never mix different types of batteries, or old and new batteries for the remote control.
- Do not let the air conditioner run for a long time when humidity is very high or when a door or a window has been left open.
- Stop using the remote control if there is a fluid leak in the battery. If your clothes or skin are exposed to the leaking battery fluid, wash off with clean water.
- Do not expose people, animals, or plants to the cold or hot wind from the air conditioner for extended periods of time.
- If the leaking battery fluid has been swallowed, rinse the inside of the mouth thoroughly and consult a doctor.
- Do not drink the water drained from the air conditioner.
- Do not use the product for special purposes, such as preserving foods, works of art, and etc. It is an air conditioner for consumer purposes, not a precision refrigeration system. There is risk of damage or loss of property.
- Do not recharge or disassemble the batteries.
Maintenance
- Never touch the metal parts of the air conditioner when removing the air filter.
- Use a sturdy stool or ladder when cleaning, maintaining, or repairing the air conditioner at a height.
- Never use strong cleaning agents or solvents when cleaning the air conditioner or spray water. Use a smooth cloth.
OPERATION
Notes for Operation
Suggestion for Energy Saving
- Do not over-cool the space. This may be harmful to your health and may consume more electricity.
- Block sunlight with blinds or curtains while operating the air conditioner.
- Keep doors or windows closed tightly while operating the air conditioner.
- Adjust the direction of the air flow vertically or horizontally to circulate indoor air.
- Speed up the fan to cool or warm indoor air quickly, within a short period of time.
- Open windows regularly for ventilation. Indoor air quality may deteriorate if the air conditioner is used for long durations.
- Clean the air filter once every 2 weeks. Dust and impurities collected in the air filter may block air flow or reduce unit performance.
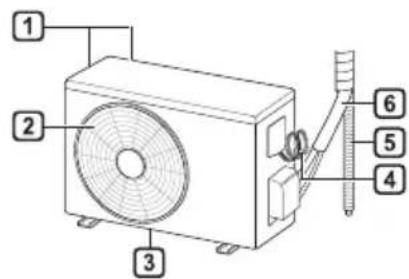
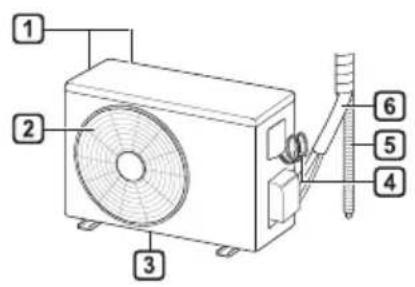
Parts and Functions Indoor Unit Outdoor Unit
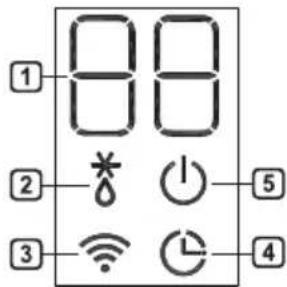
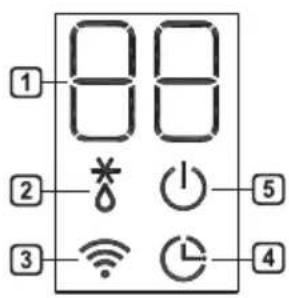
Indoor Unit Display
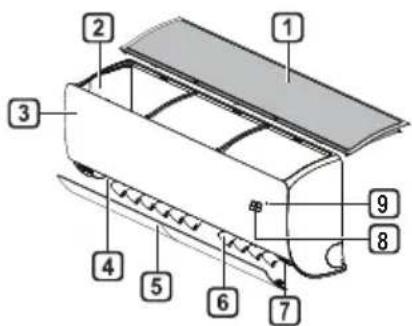
1 Air Filter 2 Air Intake 3 Front Cover 4 Air Outlet 5 Air Deflector (Horizontal Vane) 6 Air Deflector (Vertical Louver) 7 On/Off Button 8 Display 9 Signal Receiver
Air Intake Vents Air Outlet Vents 3 Base Plate 4 Power Supply Cable 5 Drain Hose 6 Refrigerant Pipes
1 Set-Point / Room Temperature 2 Defrost / Pre-Heat Operation 3 Wi-Fi 4 Timer 5 On/Off
NOTE
- The number and location of operation lamps may vary according to the model of the air conditioner. The feature may be changed according to the type of model.
Wireless Remote Control Inserting Batteries
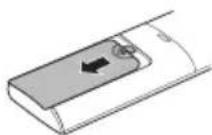
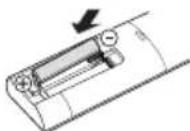
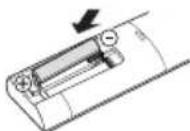
If the display screen of the remote control begins to fade, replace the batteries. Insert AAA (1.5 V) batteries before using the remote control.
1 Remove the battery cover.
2 Insert the new batteries and make sure that the + and - terminals of the batteries are installed correctly.
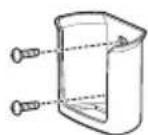
Installing the Remote Control Holder
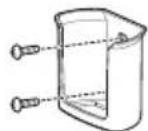
To protect the remote control, install the holder where there is no direct sunlight.
1 Choose a safe and easily accessible location. Fix the holder by fastening 2 screws firmly with a screwdriver.
Operating Method
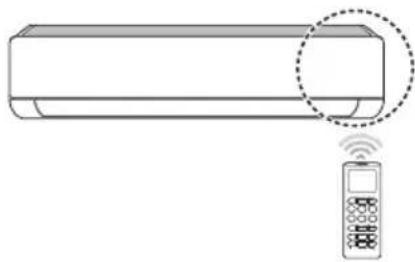
Point the remote control towards the signal receiver at the right side of the air conditioner to operate it.
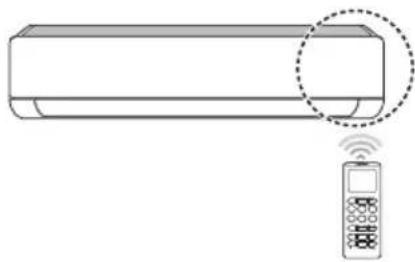
NOTE
- The remote control may operate other electronic devices if it is directed towards them. Make sure to point the remote control towards the air conditioner signal receiver.
- For proper operation, use a soft cloth to clean the signal transmitter and receiver. In case of a function not provided in the product, no buzzer sound occurs from the product when a button for such function on the remote control is pressed except for Air Flow Direction (SWING), Energy Display (kW[3s]), Air Purification function
Setting the Current Time
1 Insert batteries.
- The icon below blinks at the bottom of the display screen.

2 Press or button to select the minutes. 3 Press SET/CANCEL button to finish.
NOTE
- The On/Off Timer is available after setting the current time.
Using the °C/°F Conversion Function (Optional)
This function changes the unit between °C and °F.
Press and hold the button for about 5 seconds.
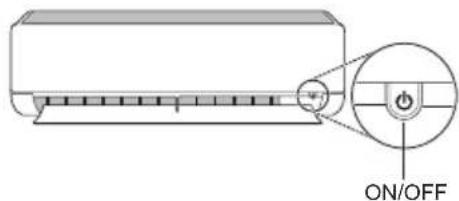
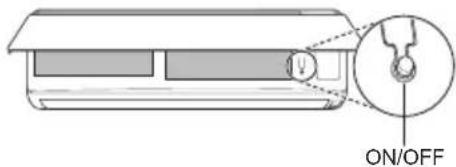
Operating the Air Conditioner without the Remote Control
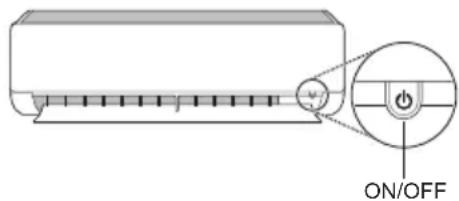
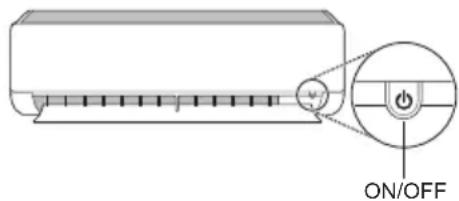
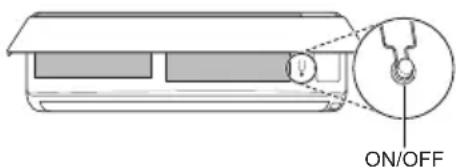
You can use the ON/OFF button of the indoor unit to operate the air conditioner when the remote control is unavailable.
1. Open the front cover (Type 2) or horizontal vane (Type 1). 2. Press the ON/OFF button.
Type 1
Type 2
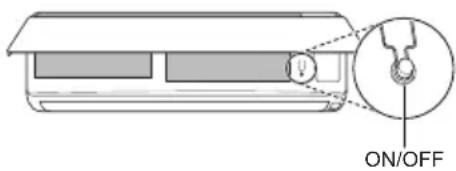
NOTE
- The stepping motor may be broken if the horizontal vane opens rapidly. The fan speed is set to high. The feature may be changed according to the type of model.
- The temperature cannot be altered when using this emergency ON/OFF button.
- For cooling & heating models, the temperature is set from 22°C to 24°C.
Using Wireless Remote Control
You can operate the air conditioner more conveniently with the remote control.
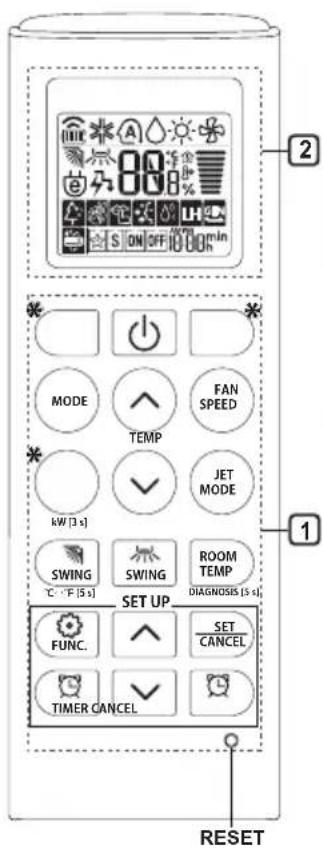
| 1Button | 2DisplayScreen | Description | Available Function | |
| SingleSplit | Multi | |||
| - | To turn on/off the air conditioner. | ○ | ○ | |
| TEMP | 88°C | To adjust the desired room temperature in cooling, heating or auto changeover mode. | ○ | ○ |
| MODE | ※ | To select the cooling mode. | ○ | ○ |
| ○ | To select the heating mode. | ○ | ○ | |
| ○ | To select the dehumidification mode. | ○ | ○ | |
| ○ | To select the fan mode. | ○ | ○ | |
| ○ | To select the auto changeover/auto operation mode. | ○ | ○ | |
| JET MODE | Po | To change room temperature quickly. | ○ | ○ |
| FAN SPEED | || | To adjust the fan speed. | ○ | ○ |
| SWING SWING | To adjust the air flow direction vertically or horizontally. | ○ | ○ | |
NOTE
- Buttons may change depending on the model.
- When connected to the Multi Outdoor unit, the Energy Display, Energy Control, Silent, and Smart Diagnosis functions may not be supported.
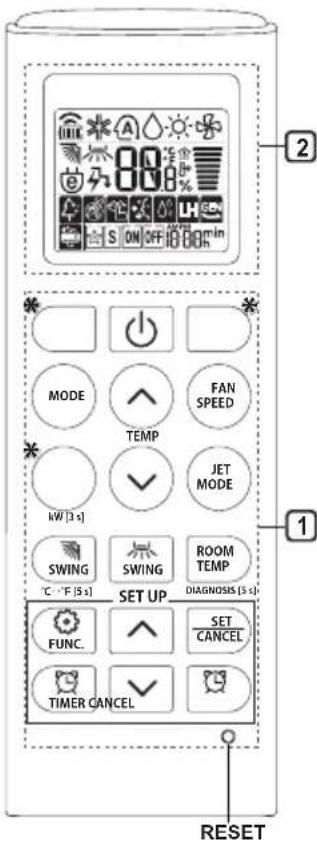
| 1Button | 2DisplayScreen | Description | Available Function | |
| SingleSplit | Multi | |||
| ON OFF | To turn on/off air conditioner automatically at desired time. | ○ | ○ | |
| SET/CANCEL | - | To set/cancel the special functions and timer. | ○ | ○ |
| - | To cancel the timer settings. | ○ | ○ | |
| - To adjust time. ○○ | ||||
| *LIGHTOFF | - | To set the brightness of the display on the indoor unit. | ○ | ○ |
| ROOMTEMP | To display the room temperature. | ○ | ○ | |
| °C←°F[5 s] | °C°F | To change unit between °C and °F | ○ | ○ |
| *COMFORTAIR | To adjust the air flow to deflect wind. | ○ | ○ | |
| kW[3 s] | - | To set whether or not to display information regarding energy. | ○ | × |
| *ENERGYCTRL | 88 x | To bring the effect of the power saving. | ○ | × |
| DIAGNOSIS[5 s] | - | To conveniently check maintenance information of a product. | ○ | × |
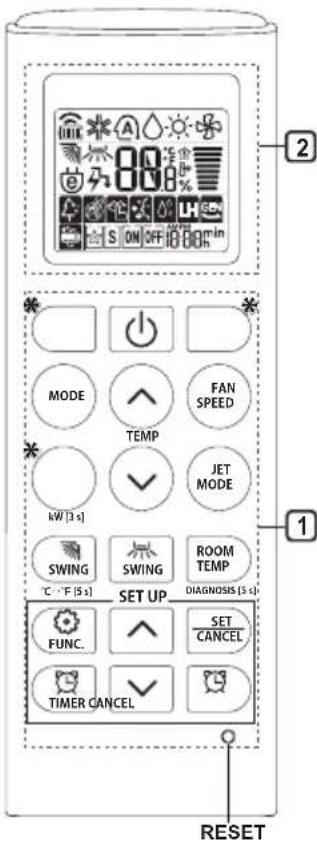
| 1 Button | 2 Display Screen | Description | Available Function | |
| Single Split | Multi | |||
| FUNC. | 4 | The Ion generator uses millions of ions to help improve indoor air quality. | O (Optional) | O (Optional) |
| 5 | To reduce noise from outdoor units. | O | X | |
| 6 | To remove moisture generated inside the indoor unit. | O | O | |
| RESET - | To initialize the remote control settings. | O | O | |
NOTE
- Some functions may not be supported, depending on the model.
- Buttons may change depending on the model.
- Press the SET/CANCEL button to operate the selected function.
Restarting the Air Conditioner Automatically
When the air conditioner is turned on again after a power failure, this function restores the previous settings.
Disabling Auto Restart
1. Open the front cover (Type 2) or horizontal vane (Type 1).
2. Press and hold the ON/OFF button for 6 seconds. The unit will beep twice and the lamp will blink twice, 4 times.
To re-enable the function, press the ON/OFF button and hold it for 6 seconds. The unit will beep twice and the lamp will blink 4 times.
Type1
Type2
NOTE
The feature may be changed according to the type of model.
- If you press and hold the ON/OFF button for 3-5 seconds, instead of 6 seconds, the unit will switch to the test operation. In the test operation, the unit blows out strong cooling air for 18 minutes and then returns to factory default settings.
Using the Mode Function
This function allows you to select the desired function.
| * | Cooling Mode |
| ↓ | |
| A | Auto Changeover Mode / Auto Operation(Al) Mode |
| ↓ | |
| Dehumidification Mode | |
| ↓ | |
| Heating Mode | |
| ↓ | |
| Fan Mode | |
Cooling Mode
1. Turn the appliance on.
2. Press the MODE button repeatedly to select the Cooling Mode.
- is displayed on the display screen.
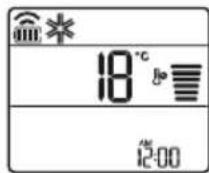
3. Press the or button to set the desired temperature.
Auto Operation (Artificial Intelligence)
Multi Model
In this operation mode, the system is automatically operated by the electronic controls.
1 Turn the appliance on. 2 Press MODE button repeatedly to select the Auto Operation.
A is displayed on the display screen.
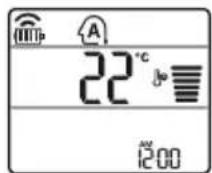
3 Press or button to set the desired temperature. 4 Press FAN SPEED button to adjust the fan speed.
Auto Changeover Mode
Single Split Model
This mode changes the mode automatically to maintain the set temperature at ±2°C
1 Turn the appliance on. 2 Press MODE button repeatedly to select the Auto Changeover Mode.
A is displayed on the display screen.
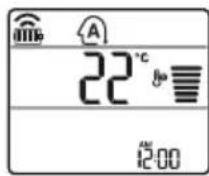
3 Press or button to set the desired temperature. 4 Press FAN SPEED button to adjust the fan speed.
Dehumidification Mode
This mode removes excess moisture from a highly humid environment or during the rainy season, in order to prevent mildew from setting in. This mode adjusts the room temperature and the fan speed automatically to maintain the optimal level of humidity.
1 Turn the appliance on.
2 Press MODE button repeatedly to select the Dehumidification Mode.
is displayed on the display screen.
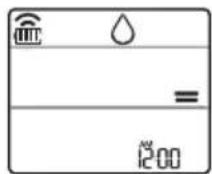
NOTE
- In this mode you cannot adjust the room temperature, it is adjusted automatically.
- The room temperature is not displayed on the display screen.
- In the dehumidification mode, compressor and indoor fan may not operate when the room temperature is below 24°C
Heating Mode
1 Turn the appliance on. 2 Press MODE button repeatedly to select the Heating Mode.
is displayed on the display screen.
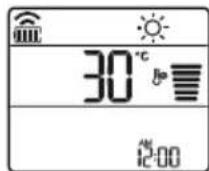
3 Press or button to set the desired temperature.
NOTE
will be displayed on the indoor unit when defrosting is operating.
- Furthermore, this indication will be displayed on the indoor unit:
- When preheating is operating.
- When the room temperature has been reached to the set temperature.
Fan Mode
This mode only circulates the indoor air without changing the room temperature.
1. Turn the appliance on.
2. Press the MODE button repeatedly to select Fan Mode.
The fan mode icon is displayed on the display screen.
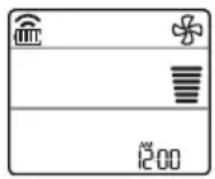
3. Press the FAN SPEED button to adjust the fan speed.
Using the Jet Mode Function to Change Room Temperature Quickly
This function allows you to cool indoor air quickly during the summer or warm it quickly during winter.
- The Jet Mode function is available with Cooling, Heating, and Dehumidification modes.
1. Turn the appliance on. 2. Press the MODE button repeatedly to select the desired mode. 3. Press the JET MODE button.
The Jet Mode icon is displayed on the display screen.
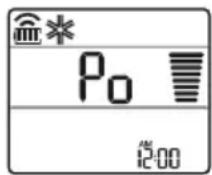
NOTE
- Jet Heating Mode is not available on some models.
- In Jet Cooling Mode, strong air blows out for 30 minutes. After 30 minutes, the set temperature is maintained at 18°C. If you want to change the temperature, press
the or button to set the desired temperature.
- In Jet Heating Mode, strong air blows out for 30 minutes. After 30 minutes, the set temperature is maintained at 30°C. If you want to change the temperature, press
the or button to set the desired temperature.
- This function may operate differently from the remote control display.
Using the Fan Speed Function
Adjusting the Fan Speed
- Press the FAN SPEED button repeatedly to adjust the fan speed.
| Display Screen Speed | |
| High | |
| Medium - High | |
| Medium | |
| Medium - Low | |
| Low | |
| - Natural Wind | |
NOTE
- The fan speed of Natural Wind adjusts automatically.
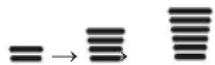
- The fan speed icons are displayed on some indoor units.

- On some models, the indoor unit display is shown for only 5 seconds and then returns to the set temperature.
Using the Air Flow Direction Function
This function adjusts the direction of the air flow vertically (horizontally).
- Press the SWING button repeatedly and select the desired direction.
-Select ( ) to adjust the direction of the air flow automatically.
NOTE
- Adjusting the air flow direction horizontally may not be supported, depending on the model.
- Adjusting the air deflector arbitrarily may cause product failure.
- If you restart the air conditioner, it starts to operate with the previously set direction of air flow, so the air deflector may not match the icon displayed on the remote control. When this occurs, press SWING or SWING button to adjust the direction of the air flow again.
- This function may operate differently from the remote control display.
Setting the On/Off Timer
This function sets the air conditioner to turn on/ off automatically at desired time.
On/Off Timer can be set together.
Setting the On Timer
1 Press button repeatedly.
- The icon below blinks at the bottom of the display screen.
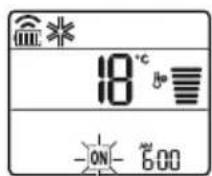
2 Press Yr button to select the minutes.
3 Press SET/CANCEL button to finish.
After setting the timer, current time and ON icon are displayed on the display screen indicating that the desired time is set.
Canceling the On Timer
1 Press button repeatedly.
The icon below blinks at the bottom of the display screen.
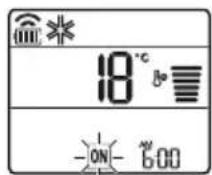
2 Press SET/CANCEL button to cancel the setting.
Setting the Off Timer
1 Press button repeatedly.
- The icon below blinks at the bottom of the display screen.
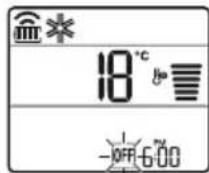
2 Press or button to select the minutes.
3 Press SET/CANCEL button to finish.
After setting the timer, current time and OFF icon are displayed on the display screen indicating that the desired time is set.
NOTE
- This function is disabled when you set Simple Timer.
Canceling the Off Timer
1 Press button repeatedly.
- The icon below blinks at the bottom of the display screen.
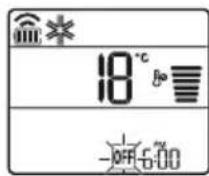
2 Press SET/CANCEL button to cancel the setting.
Canceling the Timer Setting
- Press button to cancel all timer settings.
Using the Sleep Function (Optional)
This function turns off the air conditioner automatically when you go to sleep.
1 Turn the appliance on.
2 Press button repeatedly.
- The icon below blinks at the bottom of the display screen.
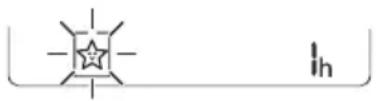
3 Press Yr button to select the hour (up to 7 hours). 4 Press SET/CANCEL button to finish. is displayed on the display screen.
NOTE
is displayed on some indoor units.
- Indoor unit display is displayed from 1H to 7H which is displayed only 5 seconds and then return to the setting temperature.
- In the Cooling and Dehumidification Mode, the temperature increases by 1°C after 30 minutes and additional 1°C after another 30 minutes for a more comfortable sleep.
- The temperature increases up to 2°C from the preset temperature.
- Although the remark for fan speed on the display screen may be changed, the fan speed is adjusted automatically.
Using the Simple Timer Function (Optional)
This function turns off the air conditioner automatically when you go to sleep.
1 Turn the appliance on. 2 Press button repeatedly.
- The icon below blinks at the bottom of the display screen.
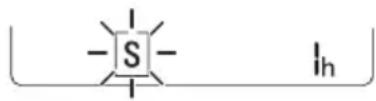
3 Press or button to select the hour (up to 7 hours). 4 Press SET/CANCEL button to finish. S is displayed on the display screen.
NOTE
- This function is disabled when you set Off Timer.
Using the Energy Display Function (Optional)
This function displays the amount of electricity generated on the indoor display as the product operates.
Display the Current Energy Usage
1 Turn the appliance on.
2 Press the button and hold it for about 3 seconds.
The instantaneous power consumption (BB) is displayed for a while on some indoor units.
NOTE
It is not displayed on the wireless remote control. The unit of the displayed value is kW. If it is more than 99 kW, which is the range of expression, maintain it as 99 kW. - Display wattage under 10 kW with 0.1 kW unit, and display one over 10 kW with 1 kW unit. - The actual power may differ from the power displayed. - When connected to the Multi Outdoor unit, this function may not be supported.
Using the Light Off Function (Optional)
Display Screen Brightness
You can set the brightness of the indoor unit display screen.
- Press the LIGHT OFF button.
NOTE
- Turn on/off the display screen.
Using the Comfort Air Function (Optional)
Comfort Vane Operation
This function conveniently sets the vane to a preset position to deflect the supply air away from blowing directly onto the occupants in the room.
1. Turn the appliance on. 2. Press the COMFORT AIR button repeatedly and select the desired direction.
or displayed on the display screen.
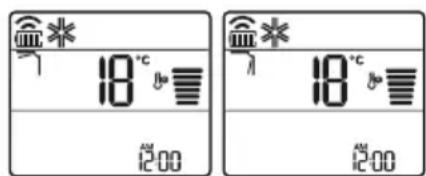
NOTE
or Lis displayed on some indoor units. This function is disabled when you press the MODE or JET MODE button. - This function is disabled and auto swing of vertical direction is set up when you press the
SWING button.
- When this function is off, the horizontal vane operates automatically depending on the set mode.
Using the Energy Control Function (Optional)
1. Turn the appliance on.
2 Press ENERGY CTRL button.
- Press ENERGY CTRL button repeatedly to select each step.
- 1 step : The power Input is decreased by 20 % compared to rated power input. 80 is displayed on the display screen.
- 2 step : The power Input is decreased by 40 % compared to rated power input. 60 is displayed on the display screen.
- 3 step (Optional): The power Input is decreased by 60% compared to rated power input. 40 is displayed on the display screen. 80 (1 step), 60 (2 step), (3 step) is displayed on some indoor units. (1 step), (2 step) is displayed on some indoor units.)
- This function is available with Cooling Mode.
- Capacity may decrease when Energy Control mode is selected.
- Desired temperature is displayed about 5 seconds if you press FAN SPEED, or button.
- Room temperature is displayed about 5 seconds if you press ROOM TEMP button.
- When connected to the Multi Outdoor unit, this function may not be supported.
Using Special Functions
1 Turn the appliance on. 2 Press FUNC button repeatedly to select the desired function. 3 Press SET/CANCEL button to finish.
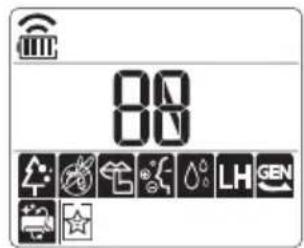
| Display Screen | Description |
| The Ion generator uses millions of ions to help improve indoor air quality. | |
| To reduce noise from outdoor units. | |
| To remove moisture generated inside the indoor unit. |
NOTE
Some functions may not be supported, depending on the model. Some functions may operate differently from the remote control display.
Canceling Special Functions
1 Press FUNC button repeatedly to select the desired function. 2 Press SET/CANCEL button to cancel the function.
Using the Air Purification Function
These functions supply clean and fresh air by ion particles and the filter.
| Function Display Description | |
| Ionizer | Ion particles from lonizer sterilize the aerial bacteria and other harmful substances. |
| Plasma | It removes microscopic contaminants from the intake air completely to supply clean and fresh air. |
NOTE
- You can use this function without turning the air conditioner on.
- Both the plasma lamp and the cooling lamp light up while Smoke Away/Plasma is in operation on some models.
- Do not touch ionizer during operation.
- This function may operate differently from the remote control display.
Using the Silent Function
This function prevents potential claims by neighbors, reducing noise from outdoor units.

is displayed on the display screen.
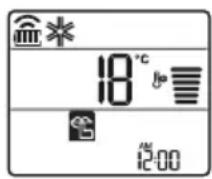
NOTE
- This function is disabled when you press MODE or ENERGY CTRL or JET MODE button.
- This function is available with Cooling, Heating, Auto Changeover, Auto Operation Mode.
- When connected to the Multi Outdoor unit, this function may not be supported.
Using the Auto Clean Function
In the Cooling and Dehumidification Mode, moisture is generated inside the indoor unit. This function removes such moisture.

is displayed on the display screen.
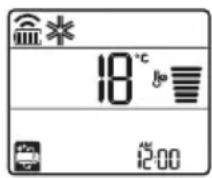
NOTE
- Some functions cannot be used while the Auto Clean function is in operation.
- If you turn off the unit, the fan continues to run for 30 minutes and cleans the inside of the indoor unit.
LG ThinQ Application
This feature is only available on models with the or ThinQ logo.
The LG ThinQ application allows you to communicate with the appliance using a smartphone.
LG ThinQ Application Features
Communicate with the appliance from a smartphone using the convenient smart features.
Smart Diagnosis
- If you experience a problem while using the appliance, this smart diagnosis feature will help you diagnose the problem.
Settings
- Allows you to set various options on the appliance and in the application.
NOTE
If you change your wireless router, internet service provider, or password, delete the registered appliance from the LG ThinQ application and register it again. - The application is subject to change for appliance improvement purposes without notice to users. - Functions may vary by model.
Before Using LG ThinQ Application
1 Check the distance between the appliance and the wireless router (Wi-Fi network).
- If the distance between the appliance and the wireless router is too far, the signal strength becomes weak. It may take a long time to register or installation may fail.
2 Turn off the Mobile data or Cellular Data on your smartphone.
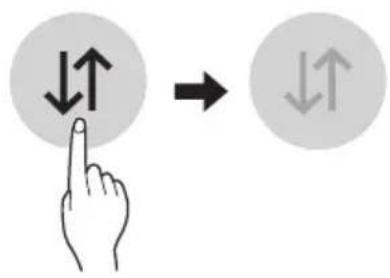
3 Connect your smartphone to the wireless router.
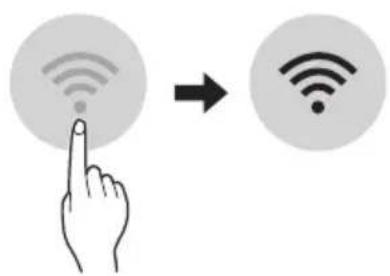
NOTE
To verify the Wi-Fi connection, check that the Wi-Fi icon on the control panel is lit.
- The appliance supports 2.4 GHz Wi-Fi networks only. To check your network frequency, contact your Internet service provider or refer to your wireless router manual.
- LG ThinQ is not responsible for any network connection problems or any faults, malfunctions, or errors caused by network connection.
- If the appliance is having trouble connecting to the Wi-Fi network, it may be too far from the router. Purchase a Wi-Fi repeater (range extender) to improve the Wi-Fi signal strength.
- The Wi-Fi connection may not connect or may be interrupted because of the home network environment.
- The network connection may not work properly depending on the Internet service provider.
- The surrounding wireless environment can make the wireless network service run slowly.
- The appliance cannot be registered due to problems with the wireless signal transmission. Unplug the appliance and wait about a minute before trying again.
- If the firewall on your wireless router is enabled, disable the firewall or add an exception to it.
- The wireless network name (SSID) should be a combination of English letters and numbers. (Do not use special characters.)
- Smartphone user interface (UI) may vary depending on the mobile operating system (OS) and the manufacturer.
- If the security protocol of the router is set to WEP, you may fail to set up the network. Please change it to other security protocols (WPA2 is recommended) and register the product again.
Installing the LG ThinQ Application
Search for the LG ThinQ application from the Google Play Store or Apple App Store on a smartphone. Follow instructions to download and install the application.
Open Source Software Notice Information
To obtain the source code under GPL, LGPL, MPL, and other open source licenses, that is contained in this product, please visit http:// opensource.lge.com.
In addition to the source code, all referred license terms, warranty disclaimers and copyright notices are available for download.
LG Electronics will also provide open source code to you on CD-ROM for a charge covering the cost of performing such distribution (such as the cost of media, shipping, and handling) upon email request to opensource@lge.com. This offer is valid for a period of three years after our last shipment of this product. This offer is valid to anyone in receipt of this information.
Smart Diagnosis
This feature is only available on models with the or logo.
Use this feature to help you diagnose and solve problems with your appliance.
NOTE
- For reasons not attributable to LGE's negligence, the service may not operate due to external factors such as, but not limited to, Wi-Fi unavailability, Wi-Fi disconnection, local app store policy, or app unavailability.
- The feature may be subject to change without prior notice and may have a different form depending on where you are located.
Using LG ThinQ to Diagnose Issues
If you experience a problem with your Wi-Fi equipped appliance, it can transmit troubleshooting data to a smartphone using the LG ThinQ application.
- Launch the LG ThinQ application and select the Smart Diagnosis feature in the menu. Follow the instructions provided in the LG ThinQ application.
Using Audible Diagnosis to Diagnose Issues
Follow the instructions below to use the audible diagnosis method.
- Launch the LG ThinQ application and select the Smart Diagnosis feature in the menu. Follow the instructions for audible diagnosis provided in the LG ThinQ application.
Plug the power plug in the outlet properly. 2 Place the mouthpiece of your smartphone close to the or logo. 3 Press and hold the DIAGNOSIS [5 s] button for 5 seconds or longer while holding the smartphone mouthpiece to the logo until the data transfer is complete.
- Keep the smartphone in place until the data transfer has finished. Time remaining for data transfer is displayed. 4 After the data transfer is complete, the diagnosis will be displayed in the application.
NOTE
- For best results, do not move the phone while the tones are being transmitted.
- Be sure to keep ambient noise to a minimum or the phone may not correctly receive the buzzer beeps from the indoor unit.

WARNING
- Before cleaning or performing maintenance, disconnect the power supply and wait until the fan stops.
If the air conditioner will not be used for an extended period of time, dry the air conditioner to maintain it in best condition. Clean the product regularly to maintain optimal performance and to prevent possible breakdown.
- Dry the air conditioner in Fan mode for 3 to 4 hours and disconnect the power. There may be internal damage if moisture is left in its components.
- Before using the air conditioner again, dry the inner components of the air conditioner in Fan mode for 3 to 4 hours. This will help to remove the odor generated from moisture.
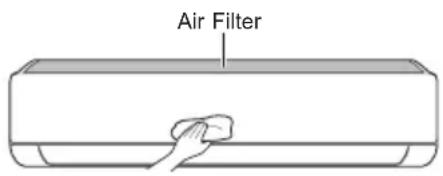
The feature may be changed according to the type of model.
| Type Description Interval | ||
| Air filter Clean with a vacuum or hand wash. 2 weeks | ||
| Ionizer (Optional) | Use dry cotton bud to remove any dust. Every 6 months | |
| Indoor unit | Clean the Indoor unit surface by using a soft, dry cloth. Regularly | |
| Have a professional clean the condensate drain pan. Once a year | ||
| Have a professional clean the condensate drain pipe. Every 4 months | ||
| Replace the remote control batteries. Once a year | ||
| Outdoor unit | Have a professional clean the heat exchanger coils and the panel vents. (Consult with technician.) | Once a year |
| Have a professional clean the fan. Once a year | ||
| Have a professional clean the condensate drain pan. Once a year | ||
| Have a professional verify that all the fan assembly is firmly tightened. | Once a year | |
| Clean the electric components with air. Once a year | ||
NOTE
- Never use water that is higher than 40°C when you clean the filters. It may cause deformation or discoloration.
- Never use volatile substances when you clean the filters. They may damage the surface of the product.
Clean the Air Filter
Clean the air filters once every 2 weeks, or more, if necessary.
NOTE
The air filter can be broken when it is bent. - When the air filter is not assembled correctly, dust and other substances can enter into the indoor unit.
Type1
If you look at the indoor unit from above, you can assemble the top filter easily.
1 Turn off the power to the unit. 2 Hold the knobs of the air filter, lift it up slightly.
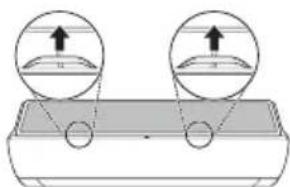
3 Remove it from the indoor unit.
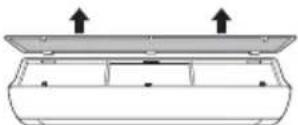
4 Clean the filter with a vacuum cleaner or with lukewarm water with neutral detergent. 5 Dry the filter in the shade. 6 Insert the hooks of the air filter into the front cover.
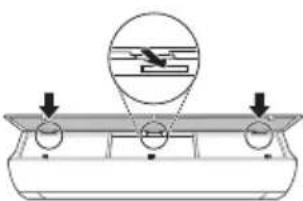
7 Push down hooks to assemble the air filter.
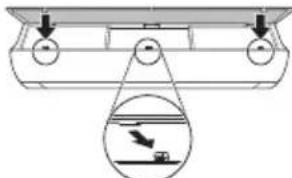
8 Check the side of the front cover for correct assembly of the air filter.
Type2
1 Turn off the power to the unit. 2 Open the front cover.
- Lift up both sides of the cover slightly.
3 Hold the knobs of the air filters, pull them down slightly and remove them from the indoor unit.
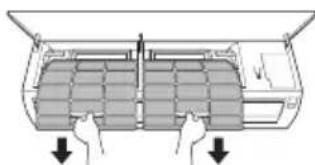
4 Clean the filters with a vacuum cleaner or with lukewarm water with neutral detergent. 5 Dry the filters in the shade. 6 Insert the hooks of the air filters into the front cover.
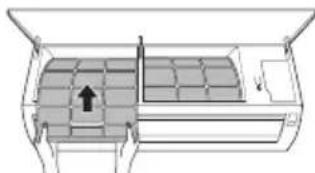
7 Check the side of the front cover for correct assembly of the air filters.
Self-diagnosis Function
This product has a built-in self-diagnosis function. If an error occurs, the lamp of the indoor unit will blink in 2 second intervals. If this occurs, contact your local dealer or service center.
Before Calling for Service
Please check the following before you contact the service center. If the problem persists, contact your local service center.
| Symptoms Possible Causes & Solution | |
| The air conditioner does not work normally. | Burning smell and strange sounds are coming from the unit. ·Turn off the air conditioner, switch OFF, or disconnect the power supply, and contact the service center. |
| Water leaks from the indoor unit even when the humidity level is low. ·Turn off the air conditioner, switch OFF, or disconnect the power supply, and contact the service center. | |
| The power cable is damaged or it is generating excessive heat. ·Turn off the air conditioner, switch OFF, or disconnect the power supply, and contact the service center. | |
| A switch, a circuit breaker (safety, ground), or a fuse is not operated properly. ·Turn off the air conditioner, switch OFF, or disconnect the power supply, and contact the service center. | |
| The unit generates an error code from its self-diagnosis. ·Turn off the air conditioner, switch OFF, or disconnect the power supply, and contact the service center. | |
| The air conditioner does not work. | The air conditioner is unplugged. ·Check whether the power cord is plugged into the outlet or the power isolators are switched on. |
| A fuse exploded, or the power supply is blocked. ·Replace the fuse or check if the circuit breaker has tripped. | |
| A power failure has occurred. ·Turn off the air conditioner when a power failure occurs. ·When the power is restored, wait 3 minutes, and then turn on the air conditioner. | |
| The voltage is too high or too low. ·Check if the circuit breaker has tripped. | |
| The air conditioner was turned off automatically at a preset time. ·Turn the air conditioner on. | |
| The battery setting in the remote controller is incorrect. ·Make sure that the batteries are inserted correctly in your remote controller. ·If the batteries are placed correctly, but the air conditioner still does not operate, replace the batteries and try again. | |
| Symptoms Poss | ble Causes & Solution |
| The air conditioner does not emit cool air. | Air is not circulating properly. • Make sure that there are no curtains, blinds, or pieces of furniture blocking the front of the air conditioner. |
| The air filter is dirty. • Clean the air filter once every 2 weeks. • See “Clean the Air Filter” for more information. | |
| The room temperature is too high. • In summer, cooling the indoor air fully may take some time. In this case, select the Jet Mode to cool the indoor air quickly. | |
| Cold air is escaping from the room. • Make sure that no cold air is escaping through the ventilation points in the room. | |
| The desired temperature is higher than the current temperature. • Set the desired temperature to a level lower than the current temperature. | |
| There is a heating source nearby. • Avoid using heat generators like electric ovens or gas burners while the air conditioner is in operation. | |
| Fan Mode is selected. • During Fan Mode, air blows from the air conditioner without cooling or heating the indoor air. • Switch the operation mode to cooling operation. | |
| Outside temperature is too high. • The cooling effect may not be sufficient. | |
| The fan speed cannot be adjusted. | The Jet Mode, or Auto Operation Mode is selected. • In some operation modes, you cannot adjust the fan speed. Select an operation mode in which you can adjust the fan speed. |
| The temperature cannot be adjusted. | The Fan Mode or Jet Mode is selected. • In some operation modes, you cannot adjust the temperature. Select an operation mode in which you can adjust the temperature. |
| The air conditioner stops during operation. | The air conditioner is suddenly turned off. • The Timer Function may have timed out, which turns the unit off. Check the timer settings. |
| A power failure has occurred during operation. • Wait for the power to come back. If you have the Auto Restart function enabled, your unit will resume its last operation several minutes after power is restored. | |
| Symptoms Possible Causes & Solution | |
| The indoor unit is still operating even when the unit has been turned off. | The Auto Clean function is being operated. ·Allow the Auto Clean function to continue since it removes any remaining moisture inside the indoor unit. If you do not want this feature, you can turn the unit off. |
| The air outlet on the indoor unit is discharging mist. | The cooled air from the air conditioner makes mist. ·When the room temperature decreases, this phenomenon will disappear. |
| Water leaks from the outdoor unit. | In the heating operations, condensed water drops from the heat exchanger. ·This symptom requires installing a drain hose under the base pan. Contact the installer. |
| There is noise or vibration. | A clicking sound can be heard when the unit starts or stops due to movement of the reversing valve. Creaking sound: The plastic parts of the indoor unit creak when they shrink or expand due to sudden temperature changes. Flowing or Blowing sound: This is the flow of refrigerant through the air conditioner. ·These are normal symptoms. The noise will stop. |
| The indoor unit gives off an odor. | Odors (such as cigarette smoke) may be absorbed into the indoor unit and discharged with airflow. ·If the smell does not disappear, you need to wash the filter. If this does not work, contact the service center to clean your heat exchanger. |
| The air conditioner does not emit warm air. | When Heating Mode starts, the vane is almost closed, and no air comes out, even though the outdoor unit is operating. ·This symptom is normal. Please wait until the unit has generated enough warm air to blow through the indoor unit. |
| The outdoor unit is in Defrosting Mode. ·In Heating Mode, ice/frost is built up on the coils when the outside temperature falls. This function removes a layer of frost on the coil, and it should finish in approximately 15 minutes. | |
| Outside temperature is too low. ·The heating effect may not be sufficient. | |
| Your home appliance and smartphone is not connected to the Wi-Fi network. | The password for the Wi-Fi that you are trying to connect to is incorrect. ·Find the Wi-Fi network connected to your smartphone and remove it, then register your appliance on LG ThinQ. |
| Mobile data for your smartphone is turned on. ·Turn off the Mobile data of your smartphone and register the appliance using the Wi-Fi network. | |
| The wireless network name (SSID) is set incorrectly. ·The wireless network name (SSID) should be a combination of English letters and numbers. (Do not use special characters.) | |
| The router frequency is not 2.4 GHz. ·Only a 2.4 GHz router frequency is supported. Set the wireless router to 2.4 GHz and connect the appliance to the wireless router. To check the router frequency, check with your Internet service provider or the router manufacturer. | |
| The distance between the appliance and the router is too far. ·If the distance between the appliance and the router is too far, the signal may be weak and the connection may not be configured correctly. Move the location of the router so that it is closer to the appliance. | |
NOTE
- Some functions may not be supported, depending on the model.
OWNER'S MANUAL
AIR CONDITIONER

Smart Diagnosis 29
MAINTENANCE 30
LG ThinQ Application
Smart Diagnosis
Smart Diagnosis
INSTRUCTIONS FOR SAFETY. 3
IMPORTANT SAFETY INSTRUCTIONS.
OPERATION 11
IMPORTANT SAFETY INSTRUCTIONS
I GENERAL WARNINGS
To reduce the risk of fire, electric shock, or injury to persons when using the product, basic safety precautions should always be followed, including the following:
6 Refrigerant pipe
WARNING
- The position of the indicator lights for operation may vary depending on the model of the air conditioner.
-The function may vary depending on the model.
WIRELESS REMOTE CONTROL
Installing the batteries
If the remote control is not working properly, replace the batteries. Insert AAA (1.5V) batteries, making sure the polarity is correct.
1 Slide the cover of the battery compartment.
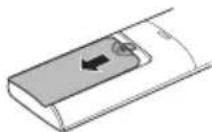
2 Insert new batteries with the correct polarity, observing the ^+ and - signs.
Mounting the remote control holder
To protect the remote control, mount the holder in a place that is not exposed to direct sunlight.
1 Choose a safe and easily accessible location.
2 Secure the holder with stable fixation using the two screws and a screwdriver.
Usage instructions
Point the remote control receiver at the indoor unit to control it.
NOTE
- The remote control can be used to control other electronic devices if pointed at them. Make sure to point the remote control at the receiver of the indoor unit.
For proper operation, use a soft cloth to clean the signal receiver.
In case a function is not provided in the product, the product will emit a beep when the button for such function on the remote control is pressed. The functions for air swing direction, energy saving (kW[3s]), and air purification (
Setting the current time
1 Insert the batteries.
- The icon at the bottom right part of the display.

2 Press the button to select the minutes. 3 Press the SET/CANCEL button to finish the setting.
NOTE
Press the ON/OFF button to set the current time.
Using the function for converting ° C / ° F (optional)
This function converts values from °C to °F.
Press and hold the button for about 5 seconds.
Controlling the air conditioner without the remote control
You can use the ON/OFF button on the indoor unit to control the air conditioner when the remote control is not available.
1 Open the front panel (Type 2) or the horizontal louver (Type 1). 2 Press the ON/OFF button.
Type 1
Type 2
CAUTION
- The horizontal louver may be damaged if forced. The fan speed is fixed at high. - The function may vary depending on the model. The temperature cannot be adjusted when using this ON/OFF button (power button) for emergency situations. For models designed for cooling and heating, the temperature is set between 22°C and 24°C.
Using the wireless remote control
You can control the air conditioner with the remote control for greater comfort.
Press the Swing button several times to select the desired air direction.
- Select to adjust the air flow direction automatically.
- The regulator on the air flow direction horizontally may not be adjusted depending on the model.
- Adjusting the air flow
- The deflector may damage the product.
- If you adjust the climate, it is recommended to work with the last adjusted air flow direction, so the air deflector may not correspond to the icon shown on the remote control. When this happens, press the SWING or SWING button to adjust the air flow direction again. This function may differ when using the remote control.
Turning the timer on and off
This function allows the climate to be turned off/on automatically at a set time.
The timer for on/off can be set together with this.
Setting the timer for turning on
1 Press the TIMER button several times.
- The icon below the display will flash.
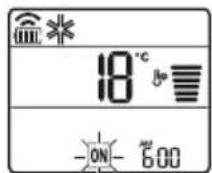
2 Press the or button to select the minutes.
3 Press the SET/CANCEL button to finish the setting.
The timer setting will be displayed on the screen, showing the desired time has been set.
Canceling the timer for turning on
Press the button several times.
- The icon will appear in the lower part of the display.
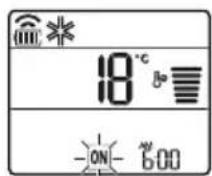
2 Press the SET/CANCEL button to cancel the setting.
Setting the timer for switching off
1 Press the TIMER button several times.
- The icon will appear in the lower part of the display.
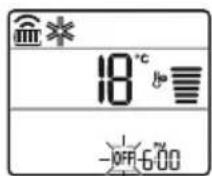
2 Press the + or - button to select the minutes.
3 Press the SET/CANCEL button to finish the setting.
The setting of the timer is shown in the current time display, which shows that the desired time has been set.
DELAY
This function is disabled when you set the "Standard timer".
Cancelling the timer for switching off
1 Press the TIMER button several times.
- The icon will appear in the lower part of the display.
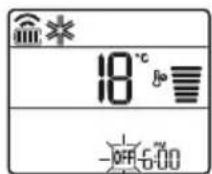
2 Press the SET/CANCEL button to cancel the setting.
Reset timer settings
Press the button to reset all timer settings.
Using the sleep function (optional)
This function turns off the air conditioner automatically when you sleep.
1 Turn on the unit.
Press the TIMER button several times.
- The icon will appear on the display.
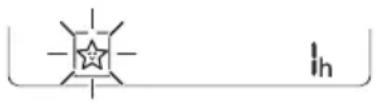
Press the UP or DOWN button to select the time (up to 7 hours). 4 Press the SET/CANCEL button to finish the setting.

It will be shown on the screen.
NOTE

It will be shown on the display for a few seconds.
- The display of the set temperature shows from 1 to 7, which is visible only for 5 seconds, after which it returns to the temperature setting.
Cooling time: the temperature increases by 1 °C every 30 minutes and decreases by 1 °C every 30 minutes for a more comfortable sleep. - The temperature can rise by up to 2 °C from the previously set temperature. - Despite the fan speed being adjustable, the fan speed is regulated automatically.
Using the standard timer function (optional)
This function turns off the air conditioner automatically when you sleep.
1 Turn on the device. 2 Press the button repeatedly.
- The room is slowly warming up to the set temperature.
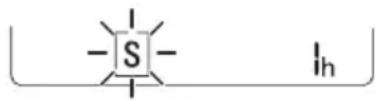
Press the button to select the hour (minutes). 4 Press the SET/CANCEL button to finish the setting.
It is displayed on the screen.
NOTE
- This function is disabled when setting the timer for shutdown.
Using the function to display consumed energy (optional)
This function shows the amount of consumed electrical energy on the display of the indoor unit while the product is operating.
Displaying current energy consumption
1 Turn on the device.
2 Press and hold the button for about 3 seconds.
The current power consumption (kW) is displayed briefly on the display of some indoor unit models.
NOTE
It is not displayed on the remote control. - The unit of measurement for the value shown on the display is kW. - If it exceeds 99 kW, which is the maximum allowed range, it will display 99 kW. - Power is shown in increments of 0.1 kW up to 10 kW, and in increments of 1 kW above 10 kW. - The actual power may differ from the displayed power. - When connected to an outdoor unit of a multi-system, this function may not be supported.
Using the function to turn off the lighting (optional)
Characteristics of the sound in models with the logo
Use this function to diagnose and resolve issues with your device.
TROUBLESHOOTING
- Due to reasons not related to LG, the service may not be active depending on external factors such as, but not limited to, lack of Wi-Fi, Wi-Fi connection issues, local app store policy, or unavailability of the application. The characteristics may also be applied remotely without prior notice, and there may be different forms depending on the location.
Using LG ThinQ to diagnose problems
If problems occur with your Wi-Fi-equipped appliance, you can send diagnostic data for opening and resolving issues to a smartphone via the LG ThinQ application.
Start the LG ThinQ application and select the Smart Diagnosis feature from the menu. Follow the instructions provided in the LG ThinQ application.
Using Audible Diagnosis to diagnose problems
Follow the instructions below to use the audible diagnosis method.
Start the LG ThinQ application and select the Smart Diagnosis feature from the menu. Follow the instructions for sound diagnosis provided in the LG ThinQ application.
1 Turn on the appliance. 2 Place the smartphone's microphone near the logo. 3 Press and hold the DIAGNOSIS [5 s] button for 5 seconds or more, while simultaneously holding the smartphone's microphone to the logo until data transmission is complete.
- Hold the smartphone to the logo until data transmission is complete. After that, the remaining time for data transmission will be displayed.
4 After data transmission is complete, the diagnosis will be shown in the application.
TROUBLESHOOTING
For best results, do not move the phone while tones are being transmitted. - Make sure the ambient noise is at a minimum so that the phone can receive the sound signals without problems from the external environment.
- Before cleaning and replacing the surface filter, turn off the appliance and unplug it.
If the air conditioner will be used for a prolonged period of time, dry the air conditioner to check it in the best possible condition. Clean the product regularly to check optimal performance and prevent possible damage.
- Dry the air conditioner in fan mode for 3-4 hours and turn off the power. Damage may occur if there is residual moisture in the components. - Before storing the air conditioner, dry the internal components of the air conditioner in fan mode for 3-4 hours. This will help prevent mold and odors generated by moisture.
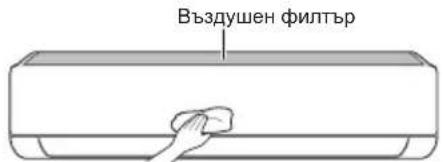
-The function may vary depending on the model.
| Тип Иструкшим Истравли | ||
| Въздуши фелтур | Почисте с прахосмужа ини поимлел ръчно. 2 седши | |
| Ионистор (по истор) | Изольайе сух有很大уен тамунота остразнывае на праха. | Ha БSEК 6 месда |
| Въстшко Тяло | Почисте поьъхостта на Въстшото Тяло, като исторы мека, сух Кърna. | Рeditовно |
| Оставе пофесионалостда посту ванчкatable на дренийkoюн的眼ер. | Вedlyж в говината | |
| Оставе пофесионалostда посту Trьбatable на дренийков的眼ер. | Ha БSEК 4 месда | |
| Смене батерпіte на дисс韫очионо. Beendьж в говината | ||
| Въшко Тяло | Оставе пофесионалostда посту Робиитe на тоглобменики в вентлaitони лесху. (Консултыраіte ce с Textник.) | Вedlyж в говината |
| Оставе пофесионалostда посту вентлaitорa. Beendьж в говината | ||
| Оставе пофесионалostда посту ванчкatable на дренийков的眼ер. | Вedlyж в говината | |
| Оставе пофесионалostда с уberи, чь в сичк мodyлі на вентлaitорa с заразв осянати. | Вedlyж в говината | |
| Почисте селическіte komпонецс в вьздух. Beendьж в говината |
CARE AND MAINTENANCE
- Never use water with a temperature above 40°C when cleaning the filters. This may cause deformation or damage to the product.
- Never use volatile substances when cleaning the filters. They may damage the surface of the product.
3 Remove the air filter from the indoor unit.
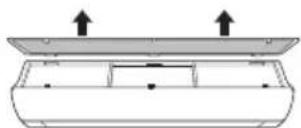
4 Clean the filter with a vacuum cleaner or with lukewarm water with a neutral cleaning agent. 5 Dry the filter in the shade. 6 Insert the air filter into the front panel.
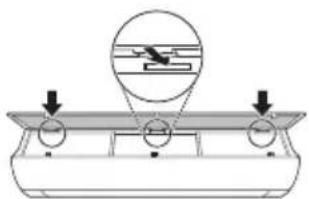
7 Press the tab to install the air filter.
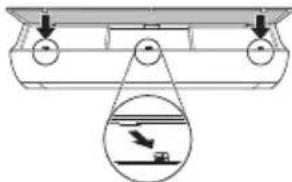
8 Check from the side of the panel that the air filter is correctly installed.
Type 2
1 Turn off the power and unplug the power cord. 2 Open the front panel.
- Remove the filters from the panel.
3 Place the filters on the air inlet, the front ones and the rear ones, and remove them from the inside.
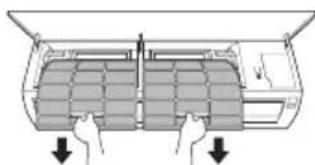
4 After each filter cleaning with a vacuum cleaner or with cold water, dry the filter thoroughly. 5 Dry the filter in the shade. 6 Insert the filters into the air inlet guides in the correct position.
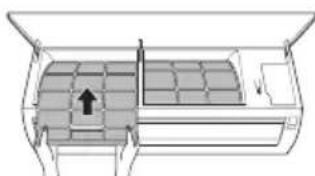
7 Check from the side of the appliance that the filters are correctly positioned.
Self-diagnosis function
This product has a built-in self-diagnosis function. If a malfunction occurs, the indicator on the indoor unit will start flashing at intervals of 2 seconds. If this happens, contact your local distributor or service center.
Before contacting the service center
Check the following before contacting the service center. If the problem persists, contact your local service center.
IMPORTANT SAFETY INSTRUCTIONS

WARNING
To reduce the risk of explosion, fire, death, electric shock, injury, or burns to persons when using this product, follow basic precautions, including the following:
Children in the household
This appliance should not be used by persons (including children) with reduced physical, sensory, or mental capabilities, or lack of experience and knowledge, unless they are supervised or instructed in the use of the appliance by a person responsible for their safety. Children should be supervised to ensure that they do not play with the appliance.
For use in Europe:
Important safety instructions 4
USE 11
Important Safety Instructions

DANGER
Noti ghat-Thaddim 11
Remote Control Bla Wajar 12
Terga' Tixghel il-Kundizzjonatur tal-Arja Awtomatikament. 17
L-Uzu tal-Funzoni tal-Modalita 17
L-Uzu tal-Funzoni tal-Modalita Propulsiva (Jet Mode Function) 20
L-uzu tal-Funzjoni tal-Velocita tal-Fann 21
Remote Control Bla Wajar
Meta Ddahhal il-Batteriji
Jekk I-iskrin tal-wiri tar-remote control jibda jicara, ibdel il-batteriji. Dahhal batteriji AAA (1.5 V) qabel ma tuza r-remote control.
1 Nehni I-ghatu tal-batteriji.
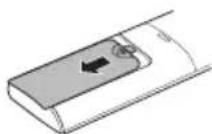
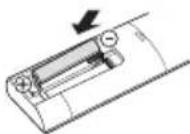
2 Daññal il-batteriji l-godda u aghmel cert li t-terminals + u - tal-batteriji huma installati tajbeb.
Installazzjoni tal-Holder tar-Remote Control
Biex tipprotegi r-remote control, installa I-holder fejn ma hemmx dawl tax-xemx dirett.
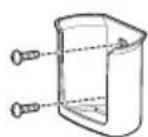
1 Choose a location where it is easily accessible.
2 Secure the holder with two screws, tightening them well with a screwdriver.
Operating method
Point the remote control at the signal receiver on the right side of the air conditioner to operate it.

NOTE
- The remote control can operate other electronic devices if pointed at them. Make sure you are pointing the remote control at the signal receiver of the air conditioner. For proper operation, use a soft cloth to clean the transmitter and the signal receiver. If a function is not provided in the product, no sound signal will be emitted from the product when a button for such a function on the remote control is pressed, except for the Air Flow Direction (SWING), Energy Display ( ) , Air Purification functions.
3 Connect the smartphone to the wireless router.
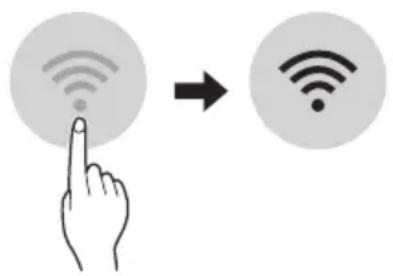
NOTE
- To verify the Wi-Fi connection, check that the icon on the control panel is lit. This device supports only 2.4GHz Wi-Fi networks. To check the router frequency, contact your internet service provider or refer to the wireless router manual.
LG ThinQ is not responsible for network connection problems, damages, or malfunctions caused by the network connection.
- If the device is far from the router, it may not be able to connect to the Wi-Fi network. Purchase a Wi-Fi repeater (range extender) to improve the Wi-Fi signal strength.
- The Wi-Fi connection may be interrupted or fail due to the home network environment.
- The network connection may not work properly due to the internet service provider.
- The surrounding wireless environment may cause the wireless network service to operate slowly.
- The device cannot be registered due to problems with wireless power transmission. Disconnect the device and wait about a minute before trying again.
- If the firewall on your wireless router is enabled, disable the firewall or make an exception for this.
- The wireless network name (SSID) should be a combination of English letters and numbers. (Do not use special characters)
- The smartphone user interface (UI) may vary as it depends on the mobile operating system (OS) and the manufacturer.
- If the router's security protocol is set to WEP, you may not be able to operate the network. Please change it to other security protocols (WPA2 is recommended) and re-register the product.
How to install the LG ThinQ Application
TROUBLESHOOTING 33
"Smart Diagnosis" 29
MAINTENANCE 30
Cleaning the filter 32
TROUBLESHOOTING 33
"LG ThinQ" app features
Connect the appliance to your smartphone using convenient smart functions.
Smart Diagnosis
OWNER'S MANUAL
AIR CONDITIONER

Read this owner's manual before operating the device and keep it nearby at all times.
Display Brightness
The brightness of the indoor unit's display can be adjusted.
- Press the LIGHT OFF button.
NOTE
Turns the display screen on/off.
Using the Comfort Air function (optional)
Comfort Air Operation
This function easily sets the louver to a preset position to deflect the supplied air from blowing directly onto people in the room.
1 Turn the device on. 2 Press the COMFORT AIR button several times to select the desired direction.
or as shown on the display.
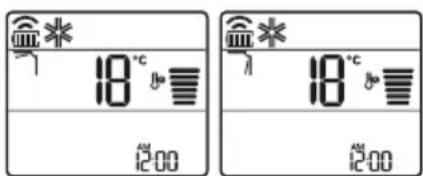
NOTE
-7 or as shown by several indoor units. - This function is disabled when MODE or JET MODE is pressed. - This function is disabled and the automatic vertical louver swing is set when SWING is pressed. - When this function is off, the horizontal louver operates automatically according to the set mode.
Using the energy control function (optional)
1 Turn the device on.
2 Press the ENERGY CTRL button.
- Press the ENERGY CTRL button several times to select each step.
| Céim 1 Céim 2 Céim 3 | ||
| 80 % | 60 % | 40 % |
| 200 | 200 | 200 |
NOTE
- Step 1: The power input is reduced by 20% compared to the power input at 80, as shown on the screen.
- Step 2: The power input is reduced by 40% compared to the power input at 60, as shown on the screen.
- Step 3 (optional): The power input is reduced by 60% compared to the power input at 40, as shown on the screen. 80 (1 step), 60 (2 step), (Step) as shown by some units inside. (1 step), (2 step) as shown by some units inside.)
- This function is available with the Cooling Mode. The capacity may be reduced when the Power Control mode is selected. The desired temperature will be displayed for 5 seconds if FAN SPEED is pressed, or the desired temperature will be displayed for 5 seconds if ROOM TEMP is pressed. This function may not be supported with some connected devices in a multi-unit system.
Using special functions
1 Turn the device on. 2 Press the FUNC button several times to select the desired function. 3 Press SET/CANCEL to finish.
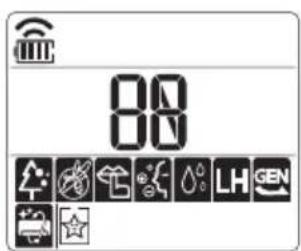
| Scáthlán C | ur sios |
| A | Baineann an gineadóir ian leas as na milliuin ian chun cuidiú le feabhsú na hearcháilíochta laistigh. |
| Chun torann a isliú on aonad amuigh. | |
| Chun tais ginithe taobh istigh den aonad laistigh a bhaint. |
NOTE
Some functions may not be available depending on the model. This function may operate differently from the remote control screen.

Safety instructions
Participation in maintenance and repair activities must be carried out by qualified personnel.
Participation in periodic inspections by the manufacturer.
Safety of participation 3
Important safety instructions 4
Operation 11
Instructions for operation 11
Functions 11
Safety and control devices 12
Automatic restart after power failure 17
Use of the timer function 17
Use of the sleep mode function 20
Use of the quick defrost function 21
Use of the air flow direction function 21
Setting the timer for on/off switching 22
Using the change function (optional) 23
Using the standby time function (optional) 23
Using the energy calculation function (optional) 24
Using the night lighting function (optional) 24
Using the air supply function (optional) 24
Using the electric heating control function (optional) 25
Using special functions 25
REMOTE FUNCTIONS 27
LG ThinQ application 27
Smart Diagnosis 29
MAINTENANCE 30
Cleaning the air filter 32
TROUBLESHOOTING 33
Read the safety instructions carefully before use to prevent risks and injuries from unsafe or improper use of the product. The instructions are divided into 'WARNING' and 'CAUTION' as described below.

This symbol indicates items and activities that may cause risk. Read it carefully with this symbol and follow the instructions to avoid risk.

Failure to follow the instructions may cause serious injury or death.

WARNING
This indicates that failure to follow the instructions may cause minor injury or damage to the product.
The following symbols are shown on the inside and outside of the unit. (For R32)

This symbol indicates that the appliance uses a flammable refrigerant. If the refrigerant is leaked and exposed to an external ignition source, there is a risk of fire.

This symbol indicates that the operator's manual should be read carefully.

This symbol indicates that service personnel should handle this equipment in accordance with the installation manual instructions.

This symbol indicates that information is available in the operator's manual or installation manual.
VALID INSTRUCTIONS
I GENERAL SAFETY
To reduce the risk of fire, electric shock, or injury when using the product, the following basic safety precautions should be followed, including the following.
Children
This appliance is not intended for use by persons (including children) with reduced physical, sensory or mental capabilities, or lack of experience and knowledge, unless they have been given supervision or instruction concerning use of the appliance by a person responsible for their safety. Children should be supervised to ensure that they do not play with the appliance.
For use in Europe:
This appliance can be used by children aged from 8 years and above and persons with reduced physical, sensory or mental capabilities or lack of experience and knowledge if they have been given supervision or instruction concerning use of the appliance in a safe way and understand the hazards involved. Children shall not play with the appliance. Cleaning and user maintenance shall not be made by children without supervision.
INSTALLATION
Do not install the air conditioner on an unstable surface or in a place where there is a danger of falling. - Contact the authorized service center for installation or relocation of the air conditioner. - Install the unit on a flat surface of the control box.
Do not install the air conditioner in places where flammable gases or liquids, such as gasoline, propane, or paint thinner, are stored. - Ensure that the piping and power cable connecting the indoor and outdoor units are not stretched during installation of the air conditioner. - Use standard tools and equipment that are compatible with the specifications of the air conditioner. - Do not introduce air or gas into the system, except with specially designed equipment. - Use non-flammable gas (nitrogen) to check for leaks and to purge the air; use of compressed air or flammable gas may cause fire or explosion. Indoor/outdoor wiring connections must be securely fastened, and the cable must be properly sized to avoid any strain on the connection terminals. Improper or loose connections may cause overheating or fire. - Install the dedicated electrical outlet and circuit breaker before using the air conditioner. Do not connect the grounding wire to the gas pipe, lightning rod, or telephone grounding wire. - Provide the necessary ventilation openings without any obstructions in front of them. (For R32) The refrigerant must be recovered into the closed system in accordance with the regulations.
OPERATION
- Ensure that you use only those parts listed in the spare parts list. Never attempt to modify the equipment.
- Ensure that children do not climb or play on the outdoor unit. - Install the unit in a place where there is no danger of fire.
- Use only the power supply cord that is specifically indicated on the rating label of the air conditioner.
- Do not use the air conditioner for purposes other than its intended use, such as preserving food, plants, animals, or works of art, as this may damage the unit. - Contact an authorized service center if the air conditioner malfunctions. Do not use the air conditioner for long periods in small, unventilated spaces. - In case of gas leakage (such as refrigerant, propane, LP gas, etc.), ventilate the room thoroughly before reusing the air conditioner. For cleaning the interior, contact an authorized service center or distributor. The detergent used may cause corrosion or damage to the unit. - Ensure that the room is well ventilated during use of the air conditioner and any heating appliance. Do not block the air inlet or outlet. Do not place any objects near the air inlet or outlet while the air conditioner is operating. - Ensure that the power cord is not damaged, frayed, or cut. - Never repair, service, or adjust the air conditioner with wet hands. Do not place any objects on the power cord. Do not place heaters or other heating appliances near the power cord. - Do not modify or extend the power cord. Damaged or worn insulation on the power cord can lead to fire or electric shock and must be replaced. - In case of malfunction or abnormal operation, disconnect the power supply immediately.
- Ensure that the power cord cannot be pulled out or damaged during operation. Do not pull the cord with any means, the water pipe, or any of the internal parts, during operation of the unit, or otherwise.
Operation
Indoor unit / Outdoor unit
Remote control display
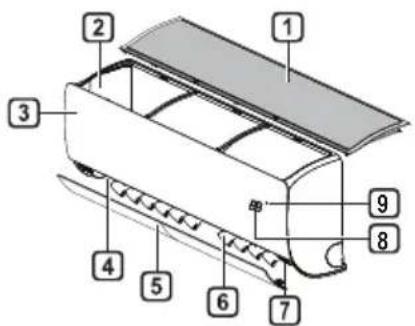
1 Air filter 2 Air inlet 3 Front panel 4 Air outlet 5 Air deflector (horizontal louver) 6 Air deflector (vertical louver) 7 On/Off button 8 Display 9 Signal receiver
1 Air inlet (outdoor) 2 Air outlet (outdoor) 3 Base pan 4 Power cord 5 Refrigerant piping 6 Drain hose
1 Set temperature / Room temperature 2 Cooling/Heating 3 Wi-Fi 4 Timer 5 On/Off
NOTE
-The number and location of the indicator lights may vary depending on the model of the air conditioner. -The function may vary depending on the model type.
Remote control
Installing batteries
If the remote control display becomes faint, replace the batteries. Install AAA (1.5 V) batteries before using the remote control.
1 Remove the cover of the battery compartment.
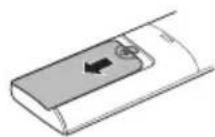
2 Insert new batteries and ensure that the + and - poles of the batteries are correctly placed.
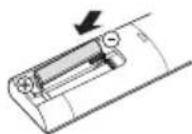
The remote control is intended for remote control.
For the remote control, point it at the appliance to ensure there is no direct sunlight.
1 Choose a safe and sufficiently clear place. 2 Hold the remote control firmly with 2 turns, by turning.
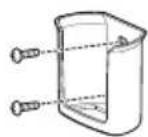
Method of operation
Point the remote control receiver at the front side of the device to control it.
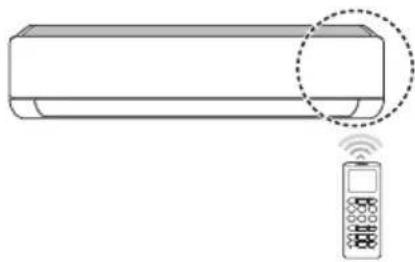
NOTE
The remote control can control other electronic devices if pointed at them. Make sure you point the remote control at the signal receiver of the device. For proper functioning, use the code for setting the transmitter and receiver of the signal. In case the function is not provided for the product, there should be no sound signal from the product when using that function on the remote control, except for the air direction (SWING), the energy saver (kw[3s]), the air purifying function
Setting the current time
1 Set the battery
- The icon that appears at the bottom will flash on the display screen.

2 Press the button to select the minutes. Press the SET/CANCEL button to finish.
NOTE
- Turning on/off the time measure will become available after you set the current time.
Using the °C / °F conversion function (optional)
This function changes the unit of measure between °C and °F
- Press and hold the ON/OFF button for 5 seconds.
Operation with the remote control without remote control
You can use the ON/OFF button on the indoor unit for operation with the remote control when the remote control is not available.
1 Open the front panel (Tn2) or the horizontal louver (Tn1). 2 Press the ON/OFF button.
Tn1
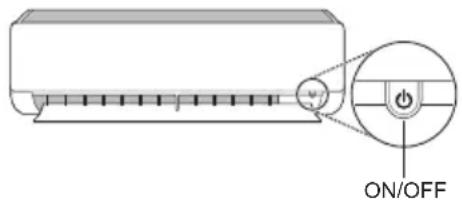
Tn2
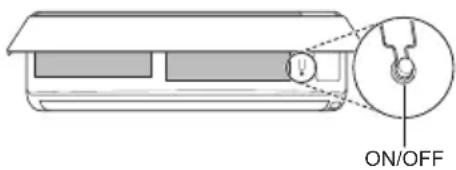
NOTE
- The fan motor may be damaged if the horizontal louver is opened forcibly.
- The fan speed is set to High.
- The function may vary depending on the model type.
- The temperature cannot be changed when using this ON/OFF button. For cooling and heating models, the temperature is set from 22°C to 24°C.
Use of the wireless remote control
You can conveniently operate with the remote control by using the remote control.
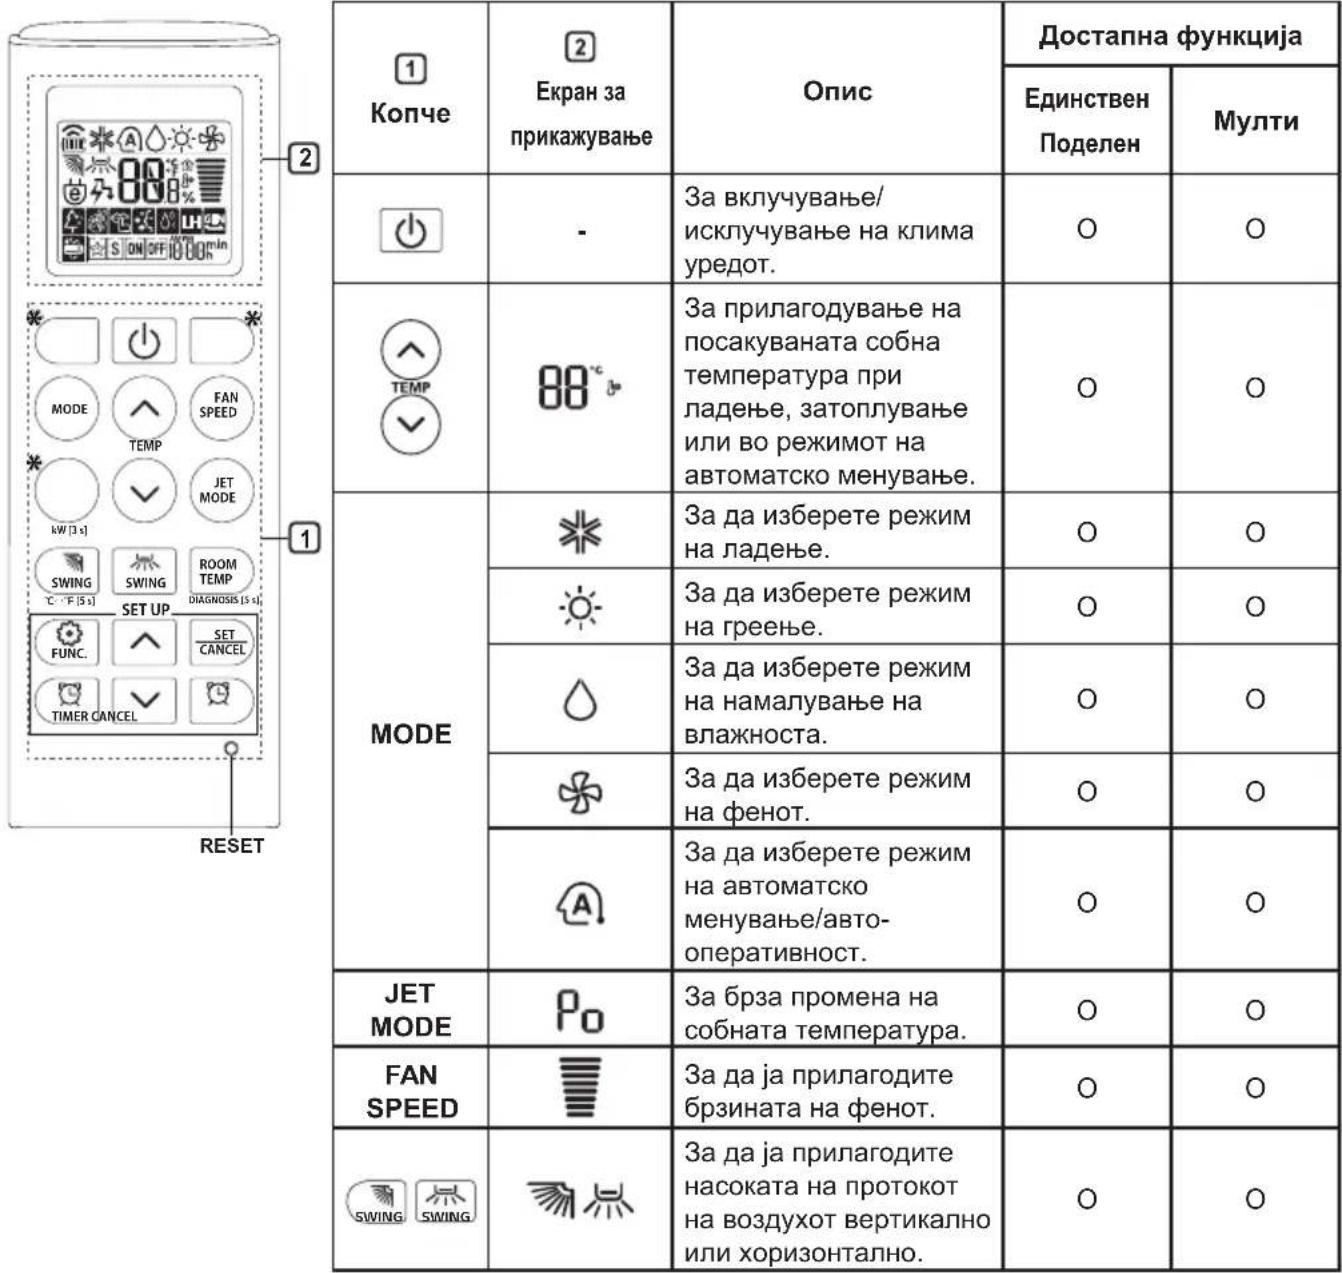
NOTE
* The functions may vary depending on the model type. When connected to the multi outdoor unit, the energy display, energy control, and the quiet function and smart diagnosis may not be supported.
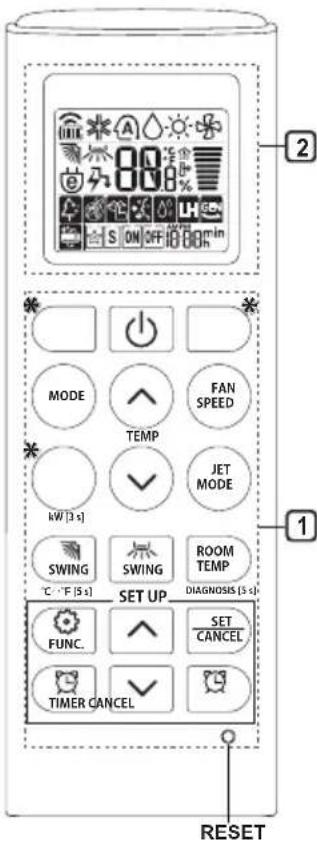
This mode automatically adjusts the mode to maintain the set temperature within ±2°C.
1 Turn on the device.
2 Press the MODE button repeatedly to select the automatic mode.
It is displayed on the display screen.
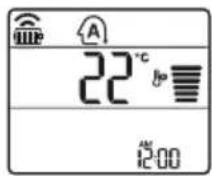
3 Press the button to set the desired temperature.
4 Press the FAN SPEED button to adjust the fan speed.
Dehumidification mode
This mode removes excess moisture from highly humid environments, especially during the rainy season, to prevent mold growth. This mode automatically adjusts the temperature and fan speed to maintain the optimal humidity level.
1 Turn on the device. 2 Press the MODE button repeatedly to select the dehumidification mode.
It is displayed on the display screen.
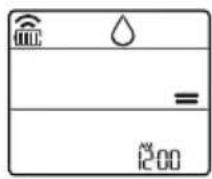
NOTE
In this mode, you cannot adjust the temperature; it is automatically adjusted. The temperature is not displayed on the display screen. In dehumidification mode, the compressor and indoor fan may not operate until the room temperature reaches 24°C.
Heating mode
1 Turn on the device. 2 Press the MODE button repeatedly to select the heating mode.
This is displayed on the screen for adjustment.
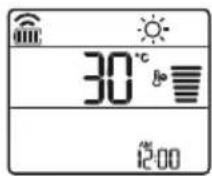
Use the buttons to set the desired temperature.
NOTE
The internal unit will be displayed when the defrosting operation is in progress.
- The display will show the internal unit:
When preheating is in operation. When the water temperature reaches the set temperature.
Regulation
It recirculates the internal air without changing the room temperature.
1 Turn on the device. 2 Press the MODE button repeatedly to select the operating mode.
It is displayed on the display screen.
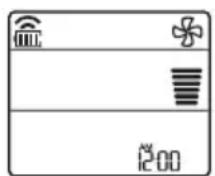
3 Press the FAN SPEED button to adjust the fan speed.
Using the SLEEP mode function
Adjusting the fan speed
- Press the FAN SPEED button repeatedly to adjust the fan speed.
Using the air purification function
This unit is designed for use in dry, well-ventilated areas. Do not use it outdoors or in humid environments.
| ФункциjaЕранОпис | |
| JOHIN3atop | JOHSCNITe ЧECTИСКИ OД JOHN3aTOpOT ВРшТ СтетПИЗAZUJIЯ на ВОЗДУSHINITE БаKTерNi N ДруГЛТЕ ШТETHN МATEPNI. |
| ПлаЗмA | |
| Целочно Г OTСТРANΥВА МИКРOSCКОПСКЛТЕ ЗагдуВачи OД ВUCEцAHNOT ВОЗДУХ,Здд обeЗбени чinctи СВЕЖ ВОЗДУХ. |
NOTE
- You can use this without connecting it to your air conditioning unit.
- The plasma lamp and the lamp for disinfection are activated while the unit is operating. Do not touch the ionizer during operation.
- This function may work differently depending on the remote control.
Use this function only.
This function prevents potential problems with the unit, such as the accumulation of dust on the heat exchanger.

It is applied to the display for indication.
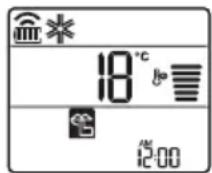
NOTE
- This function will be available when you press the MODE button in ENERGY CTRL or JET MODE.
- This function is available in the heating, cooling, and automatic mode change modes. When connected to the outdoor unit, this function may not be available.
Using the automatic cleaning function
During the heating and humidity control modes, condensation forms inside the unit. This function removes the accumulated moisture.

It is applied to the display for indication.
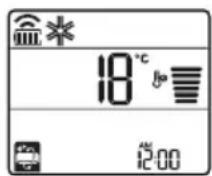
NOTE
They cannot be used if the automatic system is turned off. If you disable the use, the device will continue to work for 30 minutes, then the interior of the indoor unit will be cleaned.
LG ThinQ Application
This function is available only on models with the ThinQ logo.
The LG ThinQ application allows you to communicate with the device using a smartphone.
Features of the LG ThinQ Application
Communicate with the device through your smartphone, using convenient features.
Smart Diagnosis
If you experience a problem while using the application, the diagnostic feature will help you diagnose the problem.
Processing
You can set different options on the device and in the application.
NOTE
- If you change your wireless router, internet service, or password, select the registered device from the LG ThinQ application and register it again. The application will notify you of any changes to the device without prior notice to users.
- Features may vary depending on the model.
Before using the LG ThinQ application
1 Check the distance between the device and the wireless router (Wi-Fi connection).
As you move the appliance away from the wireless router, the signal may weaken. It may take some time for registration, or it may lead to unsuccessful installation.
2 Turn off the mobile data or internet on your smartphone.
3 Connect your smartphone to the wireless router.
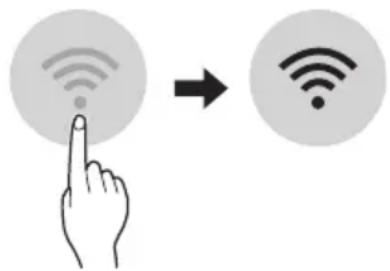
NOTE
To confirm that you are connected to Wi-Fi, check the LED indicator on the control panel. The appliance supports only 2.4 GHz Wi-Fi networks. To check the frequency of your network, contact your internet service provider or the administrator of your wireless router.
LG ThinQ is not responsible for any network connection problems or any faults, defects, or errors caused by the network connection. - If the appliance has problems connecting to the Wi-Fi network, it may be due to the router. Move the Wi-Fi router closer to improve the Wi-Fi signal strength. The Wi-Fi connection may not connect or may be interrupted due to the home network environment. - The connection may not work - depending on the internet service provider. - The wireless connection may - require the wireless network service to - work properly.
The appliance cannot be registered, there are problems with the wireless signal transmission. Unplug the cable from the appliance and wait about a minute before reconnecting. - If the firewall is enabled on your wireless router, disable it or add an exception for it. - The name of the wireless network (SSID) should be a combination of English letters and numbers. (Do not use special characters) - The smartphone user interface (UI) may vary depending on the mobile operating system (OS) and manufacturer. - If the security protocol of the router is set to WEP, you may not be able to connect to the network. You can change to other security protocols (WPA2 is recommended) and register the product again.
Installing the LG ThinQ application
Download the LG ThinQ application from the Google Play Store & Apple App Store via your smartphone. Follow the instructions for downloading and installing the application.
Open Source Software Notice
To obtain the source code under GPL, LGPL, MPL, and other open source licenses that are used in this product, please visit the website http://opensource.lge.com. In addition to the source code, all referred license terms, warranty disclaimers, and copyright notices are available for download.
LGE will also provide you with the open source code on CD-ROM for a charge covering the cost of performing such distribution (such as the cost of media, shipping, and handling) upon email request to opensource@lge.com. This offer is valid for a period of three years after the last shipment of this product. This offer is valid to anyone in receipt of this information.
Smart Diagnosis
This function is available only on models with the logo.
You can use the descriptions to troubleshoot problems with your appliance.
NOTE
- If it is determined that this is not a malfunction of the LG, the service may not work due to external factors, such as, but not limited to, Wi-Fi unavailability, Wi-Fi connection loss, provider's app policy, or app unavailability.
- This function may be subject to change and may have different forms depending on how you use it.
Using LG ThinQ to troubleshoot problems
If you experience problems with your appliance connected via Wi-Fi, you can transmit data about the problem to your smartphone through the LG ThinQ app.
- Launch the LG ThinQ app and select the Smart Diagnosis option from the menu. Follow the instructions in the LG ThinQ app.
Using Sound Diagnosis to troubleshoot problems
Follow the instructions below to use the Sound Diagnosis method.
Launch the LG ThinQ app and select the Smart Diagnosis option from the menu. Follow the instructions for Sound Diagnosis given in the LG ThinQ app. 1 Correctly plug the power cord into the outlet. 2 Place the phone's mouthpiece over the logo. 3 Press and hold the DIAGNOSIS [5 s] button for 5 seconds while holding the phone's mouthpiece over the logo until the data transfer is complete.
Do not move the phone until the data transfer is complete. The time required for data transfer is displayed.
4 Once the data transfer is complete, the diagnosis will be displayed in the app.
NOTE
For best results, do not move the phone while the tones are being transferred. - Make sure to keep the ambient noise to a minimum, otherwise the phone may not receive the sound signals from the internal unit properly.
- Clean the filter regularly, except for filling and emptying. The pump should not stop working.
If the appliance will not be used for a long period, clean it to keep it in the best condition. Regularly clean the product to maintain optimal performance and prevent possible defects.
- Clean the appliance in a mild detergent solution for 3 to 4 hours, then rinse it. Internal damage may occur if moisture remains in its components.
- Dry the internal components of the appliance using a mild detergent solution for 3 to 4 hours before reuse. This will help prevent the formation of mold caused by moisture.
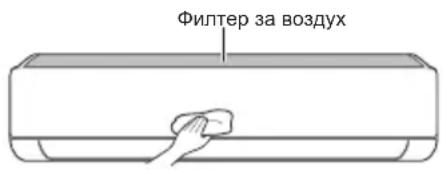
-Function may vary depending on the model type.
| Тип Опис Иntервал | |
| Фильпер 3а ВОЗдух | Исучтete со правосмICALа ил рачно Исторе. 2 недени |
| JOизатор(оштоналho) | УлOTребete сУВа пamyчна вata за ща оТстразиныепрашината. |
| Виатрешина edиница | Исучтete ja повшинatable на Виатрешина т endиниca, користей мека, сУВа крna. |
| Пробесноално Исучтete го садот каде ШTO се собра konданзигрathа влara. | |
| Пробесноално Исучтete ja севкatingа пою кожашTO се собра konданзигрathа влara. | |
| Заменete Гьбатерп海内外 на далочинскnot уравувач.Еднош.To endишо | |
| Надворецна edиница | Пробесноално Исучтete ГьКалемпente 3a oДдва.TableТоллina и Таблata со OTвори. (Посobетувajte се сco texнчар.) |
| Пробесноално Исучтete ГфенOT.Еднош.To endишо | |
| Пробесноално Исучтete ГадOT каде ШTO се собра konданзигрathа влara. | |
| Пробесноално Лиге НЕКNotВрди ДЕКСоCTавнITE DeLOВИ на pheHOT сецрсто зATERгани. | |
| Исучтete ГьЕКТричнite komпоненти со ВОЗдух.Еднош.To endишо |
NOTE
- Never use water with a temperature higher than 40°C when cleaning the filters. This may cause deformation or discoloration.
- Never use abrasive materials when cleaning the filters. They may damage the surface of the product.
Cleaning the filter
Check the air filter every 2 weeks, and replace it if necessary.
NOTE
- The air filter may be damaged if it is bent. If the air filter is not properly installed, dust and other materials may enter the internal unit.
Type 1
If you remove the front panel of the internal unit, you can easily install the top filter.
1 Clean the filter and unplug the power cord. 2 Hold the handle of the air filter and pull it out.
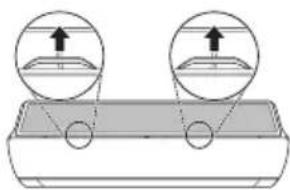
3 Remove the filter from the inner unit.
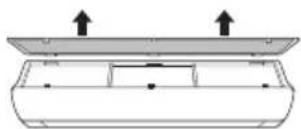
4 Clean the filter with a vacuum cleaner or with lukewarm water containing a neutral detergent. 5 Rinse the filter. 6 Insert the air filter into the front panel.
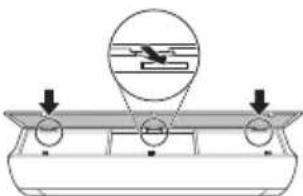
7 Press the button to assemble the air filter.
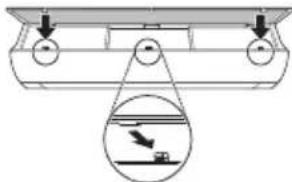
8 Check the front panel side for correct assembly of the air filter.
Type 2
1 Turn off the appliance and unplug the power cord. 2 Open the front panel.
- Hold the panel and pull it towards you.
Hold the filter handles, lift the panel up and remove it from the inner unit.
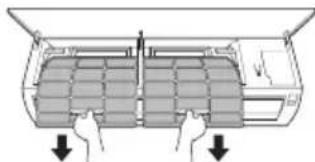
4 Clean the filters with a vacuum cleaner or with lukewarm water containing a neutral detergent. 5 Rinse the filters in the shade. 6 Insert the filter handles into the front panel.
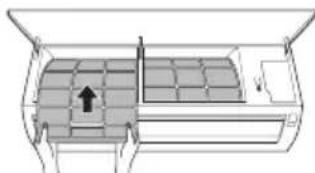
7 Check the front panel side for correct assembly of the filters.
Self-diagnosis function
This product has a self-diagnosis function. If any error occurs, the lamp on the inner unit will blink at intervals of a few seconds. If this happens, contact your local distributor or service center.
Before calling for service
Please check the following before contacting the service center. If the problem persists, contact your local service center.
| Симптоми можни | Прочны и рeshенье |
| Клиma урекот неpbотиHopмлно. | Мирзба на ИЗrogenи и чуdenи 3Вуци доа fraат od endinhiцatura.IСклчete ro Клиma урекot, ИЗваде тг кабелOT 3a стура щьдунійсяхучete roИЗворOT на НANOювалье, a NOTOA KOТАКТИРAJte ro СерВИСНOT ueHTAP.Teue ВODа OD BHaTpeшнATER eDINHIца, KORA HIBOTO Na BλajxHOCSTa e HNCKO.IСклчete ro Клиma урекot, ИЗваде тг кабелOT 3a стура щьдунійсяхучete roИЗворOT на НANOювалье, a NOTOA KOТАКТИРAJte ro СерВИСНOT ueHTAP.KabelenOT 3a STpyja e Owtetehи псекуmerpa nToIIInha.IСклчete ro Клиma урекot, ИЗваде тг кабелOT 3a стура щьдунійсяхучete roИЗворOT на НANOювалье, a NOTOA KOТАКТИРAJte ro СерВИСНOT ueHTAP.PrpcKinHyBaYOT,пhecKinHyBaYauHа STpyjHOTOKO (6e36eDnHocTa,3a3emJyBaJIteTo), пь OCINrpyBaYauOT He paBOSTAT npabUInHO.IСклчete ro Клиma урекot, ИЗваде тг кабелOT 3a стура щьдунійсяхучete roИЗворOT на НANOювалье, a NOTOA KOТАКТИPajte ro СерВИСНOT ueHTAP.EdinHicata co3dAba KaD na TpeShka od conctBeHOTOCamodnjarHocTHnCIPaHbe.IСклчete ro Клиma урекot, ИЗваде тг кабелOT 3a стура щьдунійсяхучete roИЗворOT на НANOювалье, a NOTOA KOТАKТИPajte ro СерВИСНOT ueHTAP. |
| Клиma урекот неpbоти. | Клиma урекOT He e PrinckLuyen.IproBepete Далу КабелOT 3a НANOювалье e BmETHaT BO prpKlnyOcOT 3a STpyja, пь мОжеби се ВКлчeHiи ИЗолatopinte 3a НAnOH. |
| Има ИЗбиEN ocNryupauch, пь e 6blokupaNo HanojUBAheto co Stpyja.3aMeHete ro ocNryupaChOT пьproBepete Далу prpeKlnHyBaYauOT ha STpyjHOTOKO ce BKNyUnI. | |
| Се StPyu IIpxKIN Ha eNeEkpTprUHATA eHepRnJa.IСклчete ro Клиma урекOTacoKoTЯCOeStpyuHa eNeEkpTprUHATA eHepRnJa.Kora HANOjuBaJIbeto nobTOpHKe ce BocnoCTaBn, noceKajTe 3 MInHUTn, naNotOA BKNyUeTeTo Klinma upeDor. | |
| ВontaxaTa e ПлпmpHOrу BnCoka, пьmpHOrу HnCka.IproBepete Далу сe BKNyUnI pxeknHyBaYauOT ha STpyjHOTOKO. | |
| Клиma урекOT ABTomatckn Ce IscKluyu Bo OBOJ Moment.T.BknulyeTo ro Klinma upeDor. | |
| БatePrtite Bo daleuHscknOT ynpaBvBaYauHe ce npabUInHo HameCTeni.IOscyrpete ce Deka batePrtite ce npabUInHO BmETHaTn BO BAsHOT daLeuHscknUnpaBvBaYau.Ако batePrtite ce npabUInHO HameCTeni, a Klinma урекOT и NOHaTamy Hepbots,TorgaS 3aMeHete Гь batePrtite и obidete ce NOBtOho. | |
| СимпTomи Рожни | Прочны и рeshенье |
| Клиma уреот не ( искneyта ладен Воздун. | Воздунот не циркулера правлино. • Осирطete се дeca Нем за вescи, ралетни, ялдегов од мебел, Што го бл_OKираат п%; празденил.del на Клиma уреот. |
| Фиртетор 3a ВОздун e Валкан. •Чиртete се дeca Нем за вescи Edнаш на секон 2 Недел. • Вirdete BO "Чиртетор" 3a поевке Инфомату. | |
| Собна Т EMпература e п%; • 3a сеньocно ладене на ВНатrelшниот ВОздун BO Летно Вөрeme e п; Вөрeme. Бархы счүaj, Изberete се Mлэshниот ржим 3a поьрзо ладене ньнатrelшниот ВОздун. | |
| Ладно ВОздун ИЗлergува од собата. • Осирطete се дeca Нем за вescи Ильгувае на Ладно ВОздун п%; ВECHINALIOHITE TOOKI OД собATA. | |
| ПосakУванatura Temпература e nobисока од сeraшнatura Temпература. • Поставete ja посakУванatura Temпература на понико НИВО од сeraшнatura tempepatура. | |
| Во SFиЗинам Има ИЗВор на толлпа. • Изberнунайда koportstite Изberop Na толлпа, касо StTo ce elektpruchнite пechулллг trachnte пламенц, ДODEka pa? Ба? Iordno Iordno Iordno Iordno Iordno Iordno Iordno Iordno Iordno Iordno Iordno Iordno Iordno Iordno Iordno Iordno Iordno Iordno Iordno Iordno Iordno Iordno Iordno Iordno Iordno Iordno | |
| Изberan e ржимот на сpen. • 3a Вөрeme на сpen ржимот од Клиma уреот Dува ВОздун, кojшTO HHTU ro лади, НИТу ro 3a? Iрeфрлente ro ржимот на р? Ба? Iordno Iordno Iordno Iordno Iordno Iordno Iordno Iordno Iordno Iordno Iordno Iordno Iordno Iordno Iordno Iordno Iordno Iordno Iordno Iordno Iordno Iordno Iordno Iordno | |
| Надворшнatura Temпература e п%; Ефektot на падене може на He bide doволен. | |
| Брзинatable на сpenot небе до се прилагди. | Изberan e млалзнот ржимллр; • Вөнkon ржимп на р? Ба? Iordno Iordno Iordno Iordno Iordno Iordno Iordno Iordno Iordno Iordno Iordno Iordno Iordno Iordno Iordno Iordno Iordno Iordno Iordno Iordno Iordno Iordno Iordno Iendno Iordno Iordno Iordno Iordno Iordno Iordno Iordno Iordno Iordno Iordno Iordno Iordno Iordno Iordno Iordno Iordno Iordno Iordno Iordno Iordno Iordno Iordno Iordno Iordno Iendno Iordno |
| Temпература на не може до сibe прилагди. | Изberan e сpen peximotллр mлалзнot ржим. • Вөнkon ржимп на р? Ба? Iordno Iordno Iordno Iordno Iordno Iordno Iordno Iordno Iordno Iordno Iordno Iordno Iordno Iordno Iordno Iordno Iordno Iordno Iordno Iordno Iordno 1ordno Iordno Iordno Iordno Iordno Iordno Iordno Iordno Iordno Iordno Iordno Iordno Iordno Iordno Iordno Iordno Iordno Iordno Iordno Iordno Iordno Iordno Iordno Iordno Iordno 1ordno Iordno Iordno Iordno |
| Клиma уреот зараз за вөрeme на раobotа. | Клиma уреот неаide joно с: • Можеби с; • Поставete с. Поверete с. Поставete с. Поставete с. Поставete с. Поставete с. Поставete с. Поставete с. Поставete с. Поставete с. Поставete с. Поставete с. Поставete с. Поставete с. Пostaf; Поставete с. Пostaf; Пostавete с. Пostавete с. Пostавete с. Пostавete с. Пostавete с. Пostавete с. Пostавete с. Пostавete с. Пostавete с. Пostавete с. Пostавete с. Пostавete с. Пostавete с. Пostавete с. Пostавete с. Пostавete с. Пostавete с. Пostав Pete с. Пostавete с. Пostавete с. Пostавete с. Пostавete с. Пostавete с. Пostавete с. Пostавete с. Пostавete с. Пostавete с. Пostавete с. Пostавete с. Пostавete с. Пostавete с. Пostавete с. Пostавete с. Пostавete с. ПOSTAVTE C PONJYKU MInytni OTKAKO Ke CE BpATN STpyjata. |
| Симпоми можни | Прочны и ршени |
| Внатршна сеница сенихе ке работи, дури и по пекинот на сеньточна сеньточна. | РавOTи Функцилajata abTomatско чincte. Добалente и на Функцилajata abTomatско чincte до лpopолжи, сдддддддддддддддддддддддддддддддддддддддддддддддддддддддддддддддддддддддддддддддддддддддддддддддддддд徳. Ако не ща садате obaa Функцилajа, можete до ща ИскпунITE Едн��ида. |
| Излесот за воздух на внатршна сеница сnellyста магл. | ЛадноТ ВОЗдух od Клиma у畴ето сизда вогla. Оьо phelenomen ce cnilyba kora doaara do ha mamalnuваъе Ha coobnata tempepatура. |
| Истува вoda od наюршна сеница. | За вре'mе Н ореташип'tе на гqueebetdoау'dо кал'te Na Kon'deнзпраha Вoda od emityvaayot Ha TOnlina. Оьо симптOM bapa Инсталларые Ha oDBoIDNo utpeBO IOd b3HNot caI. Кontaktnapajte ja liuHocHTa 3a Инсталлары. |
| Постон buchab'a пл вибраци. | Звук Н кLINKHyBaHb'e може до ceчу кORA edinHicauTa 3anOChyBa Пл ЗапURA, зардд ДвижевTo Ha obparTNOT BeHTIN. Звук Н shkpinte: Пл acttuynite DeIOBnHa BA HATpeShHaTa edinHicca шkpinta KORA doaara do HNBHO CTechyBaHb'e ПлproширУВa'be 3apadi ненаджnte TepepatуprHn npomeni. Звук Н teuehbe пл duBaHb'e Toa e teueheto Ha cpeCTBOTO 3a Laidehbe НИЗ Клиma у畴ет. Тoa ce HopmalnizсimптOM.Бuchavata Ke 3anpe. |
| Внатршна сеница сизда вибраци. | Мирзбп'te (како на primeper Ha idmOT od zuigapr) можат DA bndat ancopbupahn BO BHaTpeShHaTa edinHicza И da ce ocnoobodyaat co празokOT Ha Bo3dUxOT. Ако мрзб? Кontaktnpajte ro copBvichnOT ueHTAP, 3a DA go ICNUCTITe emtepot HA TOnlina. |
| Клиma у畴ету He nspuyta толл bo3dUnx. | КORA pexIMOT Ha rpeeHb'e Ke 3anoCHe, OTBOPOT e ckopo 3aTbopeHn requcH нлэгува bo3dUnx, наco haboBpeShHaTa edinHicpa pabotn. Toa e Hopmalen симптOM. Be monime noчekajte сde doDEka edinHicata Ha COnDADE DOBOHNO TOnl BO3dUnx, kojsto Ke ce duBa HN3 BHaTpeShHata edinHicua. |
| Надворшна сеница e BO pexIMOT 3a Odmp3HyBaHb'e. КORA uyeodet e BO pexIMOT Ha rpeeHb'e, leedOT/mpa3OT ce sobupaat Br3 Калемп'te, akо dojde do nafahbe Ha habdpoeeHnata Tempepatур. Оваа Функциja ro otstpanhyBa сlogenot od mpa3 kojsto ce hao'ra Br3 kaLemot, iv 6i Травларно за zabPsn 3a okolny 15 mInuty. | |
| Надворшна Tempepatура e premhory nisck. Ефektot Ha rpeeHb'e можe до He nbide doboJeH. | |
| Симпоми можни | Прочны и рeshени |
| Вашnot Кужен anapatи смартфонот He ce порзано co Wi-Fi мрека. | Лоб生态系统а 3a Wi-Fi на кoeшто ce обидуне дуа ce поврзete, e неточна. • Нajдente ja Wi-Fi мрека kojaшто e поврзана co вшиот смартфони отстранete ja, a noToa Perinctprapajte ro вшиот anapat на LG ThinQ. |
| Мышино падатои 3a вшиот смартфонс ce вклучeni. • Исклучete Ги Мышино падатои на вшиот смартфони ренистррajte ro anapatot, korpinctejectki ja Wi-Fi мрека. | |
| И métета на бeзшинаха мрека (SSID), He e правлино поесен. • И métета на bезшинаха мрека (SSID) trpebaда bide komби国有资产 und antrinskii bukbi и bpoebn. (He corpinctete Ги спецьалнite karakterи) | |
| Ф��евеньижа на рутетор He e 2,4 GHz. • Повлжана ecame 2,4 GHz Ф��евеньижа на рутетор. Поставete ro bезшино рутетор 2,4 GHz и порstete ro anapatot co bезшино рутет. 3aда ja пobерпite Ф��евеньижа на рутетор, пobерпete кaj вшиот снабдувач на Interpnet услуги, ип кaj пoinizbodnitelot на рутетор. | |
| Пэрелеме e pactojahнeto noméгу anapatot и рутетор. • Ако e пэрелеме pactojahнeto noméгу anapatot и рутетор, сигналot можеда bide сади кoneckижа можеда He bide правлино konфигурирана. Поменete ja lokaцижа на рутетор, зада bide поblickу do anapatot. |
NOTE
USER MANUAL
AIR CONDITIONER

IMPORTANT SAFETY INSTRUCTIONS

WARNING
To reduce the risk of explosion, fire, death, electric shock, injury, or burns to persons when using this product, follow basic precautions, including the following:
Children in the household
This appliance is not intended for use by persons (including children) with reduced physical, sensory, or mental capabilities, or lack of experience and knowledge, unless they are under constant supervision or have been instructed on the use of the appliance by a person responsible for their safety. Children should be supervised to ensure that they do not play with the appliance.
- TABLE OF CONTENTS
- SAFETY INSTRUCTIONS
- OPERATION
- SMART FUNCTIONS
- MAINTENANCE
- TROUBLESHOOTING
- IMPORTANT SAFETY INSTRUCTIONS
- WARNING
- CHILDREN IN THE HOUSEHOLD
- FOR USE IN EUROPE
- INSTALLATION
- TECHNICAL SAFETY
- CAUTION
- NOTES FOR OPERATION
- SUGGESTION FOR ENERGY SAVING
- PARTS AND FUNCTIONS INDOOR UNIT OUTDOOR UNIT
- INDOOR UNIT DISPLAY
- NOTE
- WIRELESS REMOTE CONTROL INSERTING BATTERIES
- INSTALLING THE REMOTE CONTROL HOLDER
- OPERATING METHOD
- SETTING THE CURRENT TIME
- USING THE °C/°F CONVERSION FUNCTION (OPTIONAL)
- OPERATING THE AIR CONDITIONER WITHOUT THE REMOTE CONTROL
- TYPE
- USING WIRELESS REMOTE CONTROL
- RESTARTING THE AIR CONDITIONER AUTOMATICALLY
- DISABLING AUTO RESTART
- USING THE MODE FUNCTION
- COOLING MODE
- AUTO OPERATION (ARTIFICIAL INTELLIGENCE)
- MULTI MODEL
- AUTO CHANGEOVER MODE
- SINGLE SPLIT MODEL
- DEHUMIDIFICATION MODE
- HEATING MODE
- FAN MODE
- USING THE JET MODE FUNCTION TO CHANGE ROOM TEMPERATURE QUICKLY
- USING THE FAN SPEED FUNCTION
- ADJUSTING THE FAN SPEED
- USING THE AIR FLOW DIRECTION FUNCTION
- SETTING THE ON/OFF TIMER
- SETTING THE ON TIMER
- CANCELING THE ON TIMER
- SETTING THE OFF TIMER
- CANCELING THE OFF TIMER
- CANCELING THE TIMER SETTING
- USING THE SLEEP FUNCTION (OPTIONAL)
- USING THE SIMPLE TIMER FUNCTION (OPTIONAL)
- USING THE ENERGY DISPLAY FUNCTION (OPTIONAL)
- DISPLAY THE CURRENT ENERGY USAGE
- USING THE LIGHT OFF FUNCTION (OPTIONAL)
- DISPLAY SCREEN BRIGHTNESS
- USING THE COMFORT AIR FUNCTION (OPTIONAL)
- COMFORT VANE OPERATION
- USING THE ENERGY CONTROL FUNCTION (OPTIONAL)
- USING SPECIAL FUNCTIONS
- CANCELING SPECIAL FUNCTIONS
- USING THE AIR PURIFICATION FUNCTION
- USING THE SILENT FUNCTION
- USING THE AUTO CLEAN FUNCTION
- LG THINQ APPLICATION
- LG THINQ APPLICATION FEATURES
- SMART DIAGNOSIS
- SETTINGS
- BEFORE USING LG THINQ APPLICATION
- INSTALLING THE LG THINQ APPLICATION
- OPEN SOURCE SOFTWARE NOTICE INFORMATION
- USING LG THINQ TO DIAGNOSE ISSUES
- USING AUDIBLE DIAGNOSIS TO DIAGNOSE ISSUES
- CLEAN THE AIR FILTER
- SELF-DIAGNOSIS FUNCTION
- BEFORE CALLING FOR SERVICE
- OWNER'S MANUAL
- AIR CONDITIONER
- INSTRUCTIONS FOR SAFETY
- I GENERAL WARNINGS
- WIRELESS REMOTE CONTROL
- INSTALLING THE BATTERIES
- MOUNTING THE REMOTE CONTROL HOLDER
- USAGE INSTRUCTIONS
- USING THE FUNCTION FOR CONVERTING ° C / ° F (OPTIONAL)
- CONTROLLING THE AIR CONDITIONER WITHOUT THE REMOTE CONTROL
- USING THE WIRELESS REMOTE CONTROL
- TURNING THE TIMER ON AND OFF
- SETTING THE TIMER FOR TURNING ON
- CANCELING THE TIMER FOR TURNING ON
- SETTING THE TIMER FOR SWITCHING OFF
- DELAY
- CANCELLING THE TIMER FOR SWITCHING OFF
- RESET TIMER SETTINGS
- USING THE STANDARD TIMER FUNCTION (OPTIONAL)
- USING THE FUNCTION TO DISPLAY CONSUMED ENERGY (OPTIONAL)
- DISPLAYING CURRENT ENERGY CONSUMPTION
- USING THE FUNCTION TO TURN OFF THE LIGHTING (OPTIONAL)
- USING LG THINQ TO DIAGNOSE PROBLEMS
- USING AUDIBLE DIAGNOSIS TO DIAGNOSE PROBLEMS
- CARE AND MAINTENANCE
- BEFORE CONTACTING THE SERVICE CENTER
- USE
- DANGER
- REMOTE CONTROL BLA WAJAR
- META DDAHHAL IL-BATTERIJI
- INSTALLAZZJONI TAL-HOLDER TAR-REMOTE CONTROL
- HOW TO INSTALL THE LG THINQ APPLICATION
- LG THINQ" APP FEATURES
- DISPLAY BRIGHTNESS
- COMFORT AIR OPERATION
- SAFETY OF PARTICIPATION
- REMOTE FUNCTIONS
- VALID INSTRUCTIONS
- I GENERAL SAFETY
- CHILDREN
- INDOOR UNIT / OUTDOOR UNIT
- REMOTE CONTROL DISPLAY
- REMOTE CONTROL
- INSTALLING BATTERIES
- THE REMOTE CONTROL IS INTENDED FOR REMOTE CONTROL
- METHOD OF OPERATION
- SET THE BATTERY
- USING THE °C / °F CONVERSION FUNCTION (OPTIONAL)
- OPERATION WITH THE REMOTE CONTROL WITHOUT REMOTE CONTROL
- TN
- USE OF THE WIRELESS REMOTE CONTROL
- REGULATION
- USING THE SLEEP MODE FUNCTION
- USE THIS FUNCTION ONLY
- USING THE AUTOMATIC CLEANING FUNCTION
- FEATURES OF THE LG THINQ APPLICATION
- PROCESSING
- BEFORE USING THE LG THINQ APPLICATION
- OPEN SOURCE SOFTWARE NOTICE
- USING LG THINQ TO TROUBLESHOOT PROBLEMS
- USING SOUND DIAGNOSIS TO TROUBLESHOOT PROBLEMS
- CLEANING THE FILTER
- USER MANUAL
Brand : LG
Model : AC24BQ
Category : Air conditioner