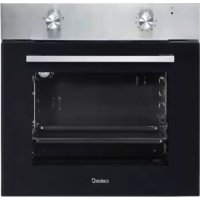
SE 6204 X - Oven CATA - Free user manual and instructions
Find the device manual for free SE 6204 X CATA in PDF.



| Product type | Built-in oven |
| Brand | CATA |
| Model | SE 6204 X |
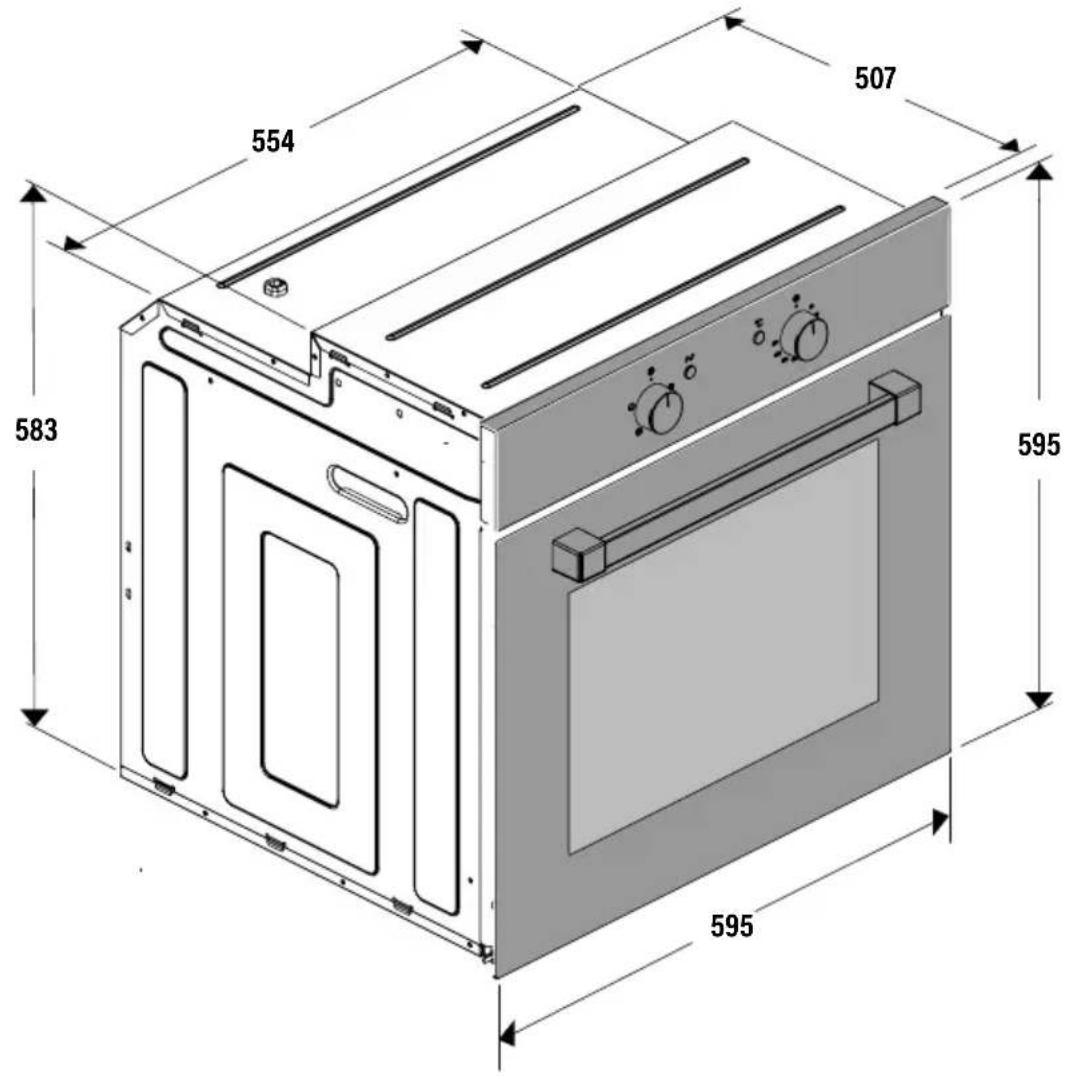
| Dimensions (W x H x D) | 595 x 595 x 550 mm (approx.) |
| Power supply | 230 V, 13 A, 50/60 Hz |
| Protection class | Class I (mandatory grounding) |
| Total power | ~2500 W (estimation) |
| Oven capacity | 65 L (estimation) |
| Number of functions | 8 cooking modes |
| Cooking modes | Convection, top element, bottom element, circular with fan, bottom with fan, convection with fan, grill, maxi-grill, grill with fan, defrost |
| Control type | Rotary knobs + electronic programmer |
| Interior lighting | Halogen bulb G9 |
| Supplied accessories | Grid, tray, side guides (telescopic slides) |
| Cleaning system | AquaSmart (steam cleaning) |
| Door | Removable for cleaning, rear glass removable |
| Safety | Programmed automatic shut-off, child safety (supervision required), lock not specified |
| Maximum temperature | 250 °C |
| Timer | Independent alarm, semi-automatic and automatic cooking (duration and end of cooking) |
| Maintenance | Regular cleaning with warm water and soap; avoid abrasives |
| Reparability | Bulb and door replaceable by user; other repairs by professional |
Frequently Asked Questions - SE 6204 X CATA
User questions about SE 6204 X CATA
0 question about this device. Answer the ones you know or ask your own.
Ask a new question about this device
Download the instructions for your Oven in PDF format for free! Find your manual SE 6204 X - CATA and take your electronic device back in hand. On this page are published all the documents necessary for the use of your device. SE 6204 X by CATA.
USER MANUAL SE 6204 X CATA
natural_image
Line drawing of a standard open oven with control knobs and door (no text or symbols)
Operating and maintenance instructions for built-in ovens

INSTALACIÓN
natural_image
Technical line drawing of a kitchen oven with screw and washer components, showing internal structure and mounting detail (no text or symbols)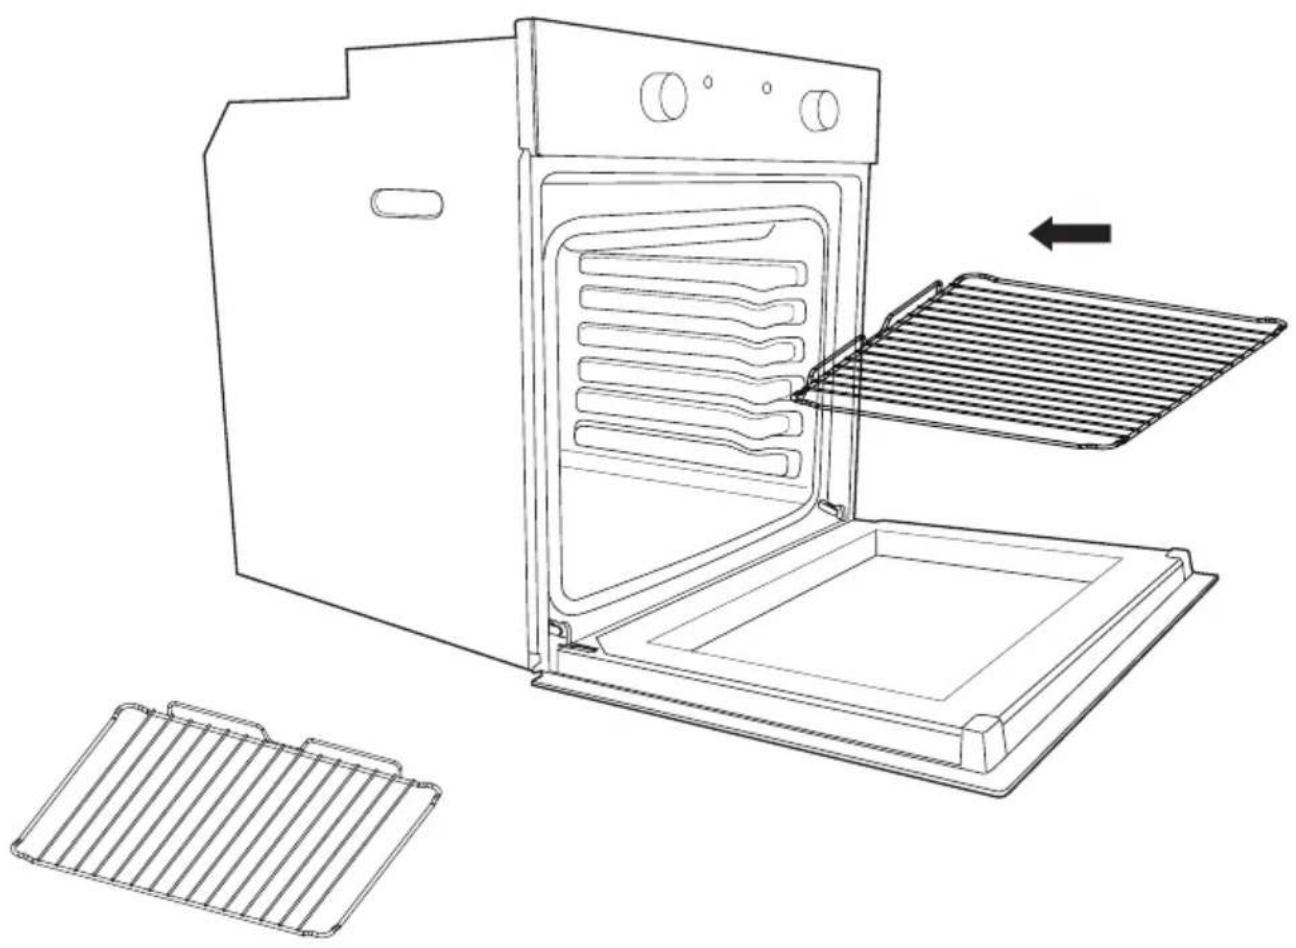
natural_image
Line drawing of an oven with a rack, showing internal compartments and a right-hand panel (no text or symbols)ANTES DE EMPEZAR
natural_image
Diagram showing a mechanical assembly being processed into a cylindrical component, with no visible text or symbols.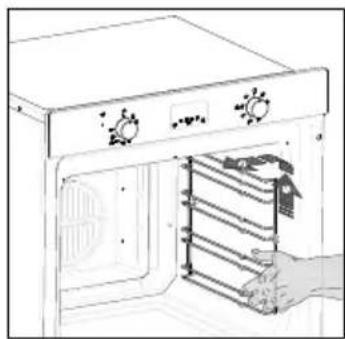
natural_image
Line drawing of an oven with a hand inserting a rack into the door (no text or symbols)Limpieza
natural_image
Line drawing of a door with a gridded metal grille inside, no text or symbols present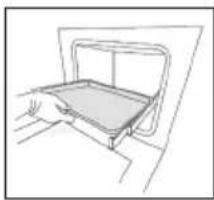
natural_image
Line drawing of a hand opening a tray with a rectangular frame (no text or symbols)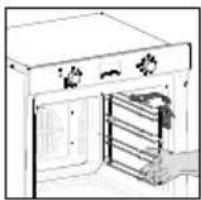
natural_image
Line drawing of a kitchen appliance with a door open and a hand inserting a rack (no text or symbols)natural_image
Simple line drawing of a hand inserting a small object into a container (no text or symbols)chemical
Two molecular orbital diagrams showing electron density distributions around a central atomchemical
Two molecular structures with central atoms and electron density indicatorschemical
Two molecular structures with labeled atoms and bonds, possibly representing a resonance or electron configuration diagramnatural_image
Line drawing of a microwave oven with a circular inset showing the interiormost oven and its internal rotation arrow (no text or symbols)25 W, 300 °C, Tipo G9
natural_image
Simple icon of a bottle with an 'X' mark and a cross symbol, no text or labels present.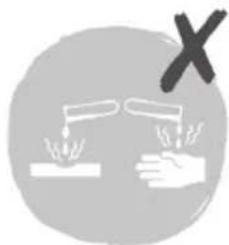
natural_image
Symbolic illustration of a hand holding test tubes with a 'X' mark, no text or labels present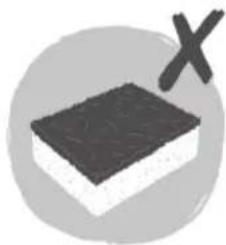
natural_image
Simple 3D illustration of a rectangular block with a cross mark, no text or symbols presentINSTALLATION
natural_image
Technical line drawing of a kitchen oven with screw and washer components, showing internal structure and mounting detail (no text or symbols)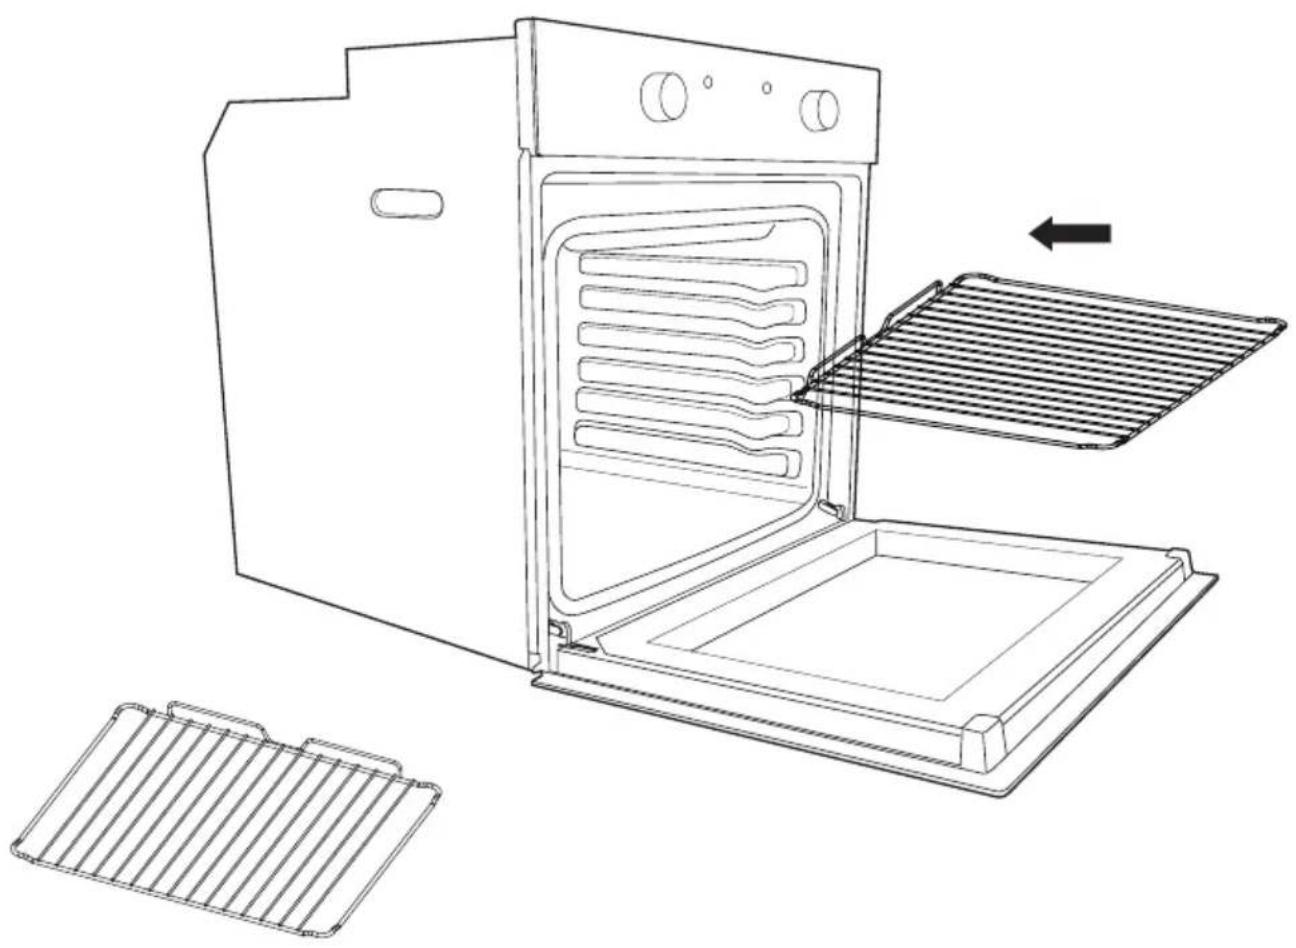
natural_image
Line drawing of an oven with a rack and ventilation grates, showing internal structure and cooling mechanism (no text or symbols)VOR DEM START
natural_image
Line drawing of a door with a gridded interior and handle, no text or symbols present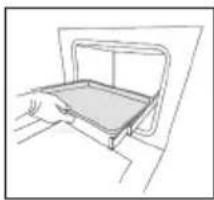
natural_image
Line drawing of a hand opening a tray with a rectangular frame (no text or symbols)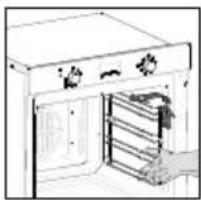
natural_image
Line drawing of a cabinet with shelves and doors, no text or symbols presentnatural_image
Simple line drawing of a hand placing a small object into a container (no text or symbols)chemical
Two molecular orbital diagrams showing electron density distributions with spin arrows and charge symbolschemical
Two molecular orbital diagrams showing electron density distributions around a central atomchemical
Two molecular orbital diagrams showing electron density distributions with labeled orbitals and spin directionsnatural_image
Line drawing of a microwave oven with control knobs and a circular diagram showing the interiormost pan (no text or symbols)25 W, 300 °C, Tipo G9
natural_image
Technical line drawing of a rectangular electronic component with mounting feet and a separate labeled section (no text or symbols present)
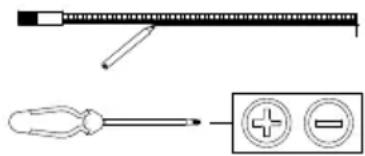
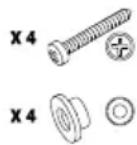
INSTALLATION
natural_image
Technical line drawing of a kitchen oven with screw and washer components, showing internal structure and mounting detail (no text or symbols)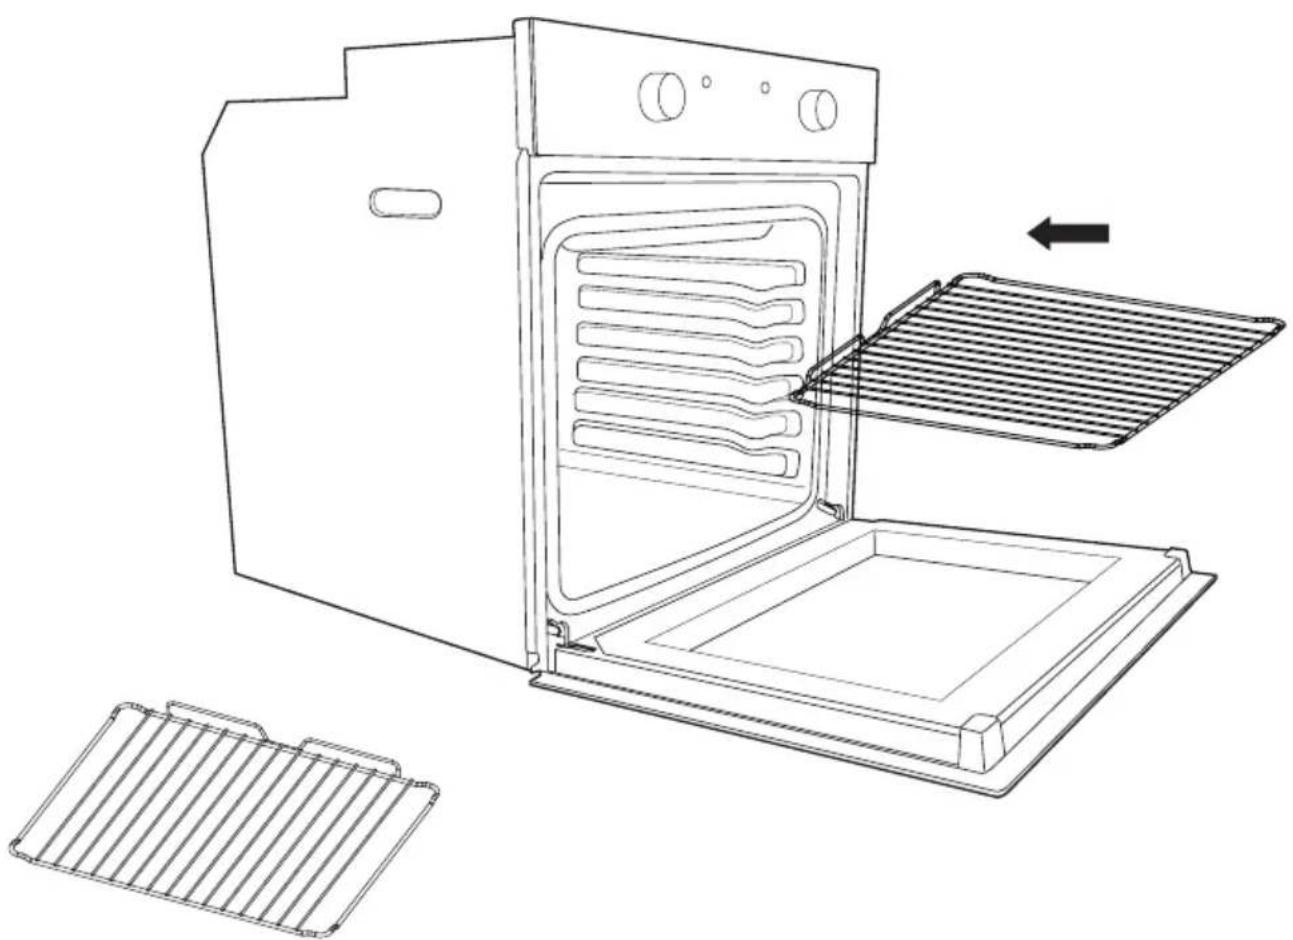
natural_image
Line drawing of an oven with a rack and ventilation grates, showing internal structure and cooling mechanism (no text or symbols)AVANT DE COMMENCER
natural_image
Diagram showing a mechanical assembly being processed into a cylindrical component, with no visible text or symbols.natural_image
Line drawing of an oven with a hand inserting a rack into the door (no text or symbols)Nettoyage
natural_image
Line drawing of a door with a gridded metal grille inside, no text or symbols present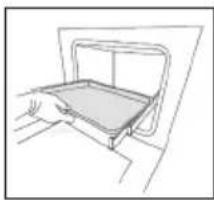
natural_image
Line drawing of a hand opening a tray with a rectangular frame (no text or symbols)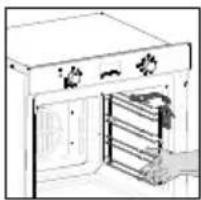
natural_image
Line drawing of a kitchen appliance with a door, drawer, and shelf (no text or symbols)natural_image
Simple line drawing of a hand placing a small object into a container (no text or symbols)chemical
Two molecular orbital diagrams showing electron density distributions with spin arrows and atomic positionschemical
Two molecular orbital diagrams showing electron density distributions around a central atomchemical
Two molecular orbital diagrams showing electron density distributions with labeled orbitals and spin directionsnatural_image
Line drawing of a microwave oven with a circular inset showing the interiormost oven and fan (no text or symbols)25 W, 300 °C, Tipo G9
natural_image
Technical line drawing of a rectangular electronic device with mounting feet and a separate labeled component (no text or symbols present)RÉSOLUTIONS DES PANNES
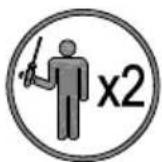
These instructions are for your safety. Please read the following instructions carefully before proceeding with the installation and use of this appliance. Keep the instruction manuals for future reference.
Warning: All installation work must be carried out by a suitably qualified person, strictly following local building regulations and these instructions.
To avoid the risks that are always present when you use an electrical appliance it is important that this oven is installed correctly and that you read the safety instructions carefully to avoid misuse and hazards. After unpacking the oven please check that it is not damaged. If in doubt, do not use the appliance but contact Customer Services or
Check the package and make sure you have all of the parts listed and decide upon the appropriate location for your product. If this product contains glass please take care with fitting or handing to prevent personal injury or damage to the product. The specification plate shown on this appliance displays all the necessary identification information for ordering replacement parts. If you sell the appliance, give it away, or leave it behind when you move house, please ensure that you pass on this manual so that the new owner can become familiar with the appliance and its safety warnings.
SAFETY
All installation work must be carried out by a suitably qualified person, strictly following local building regulations and these instructions.
- Warning: Ensure that the appliance is switched off at the fused spur before replacing the lamp to avoid the possibility of electric shock.
- Warning: Accessible parts may become hot during use. Children should be kept away.
- Warning: If the door or door seals are damaged, the oven must not be operated until it has been repaired. Contact Customer Services for advice.
- During installation do not allow the supply cord to touch the hot parts of the appliance.
- Make sure that the supply cord is not caught under or in the appliance and avoid damage to the supply cord.
- Do not install the appliance outdoors in a damp place or in an area which may be prone to water leaks such as under or near a sink unit. In the event of a water leak allow the machine to dry naturally. Do not use and contact Customer Services for advice.
- Please dispose of the packing material carefully.
- Do not use flammable sprays in close vicinity to the appliance. Warning: This appliance can be used by children aged from 8 years and above and persons with reduced physical, sensory or mental capabilities or lack of experience and knowledge if they have been given supervision or instruction concerning use of the appliance in a safe way and understand the hazards involved. Children shall not play with the appliance.
- Cleaning and user maintenance shall not be made by children without supervision. Keep the appliance and its supply cord out of the reach of children less than 8 years old.
- If the supply cord becomes damaged, it must be replaced by the manufacturer, its service
agent or similarly qualified persons in order to avoid a danger or injury.
- The appliance is not intended to be operated by means of an external timer or separated remote control system.
- The appliance is for domestic use only and only for cooking food. Do not use this appliance as a source of heat.
- The manufacturer declines all liability for personal or material damage as a result of misuse or incorrect installation of this appliance.
- Danger of burns! During use the appliance becomes hot. Care should be taken to avoid touching heating elements inside the oven.
- Do not lean on the door or place any objects on the door of the appliance. This can damage the door hinges.
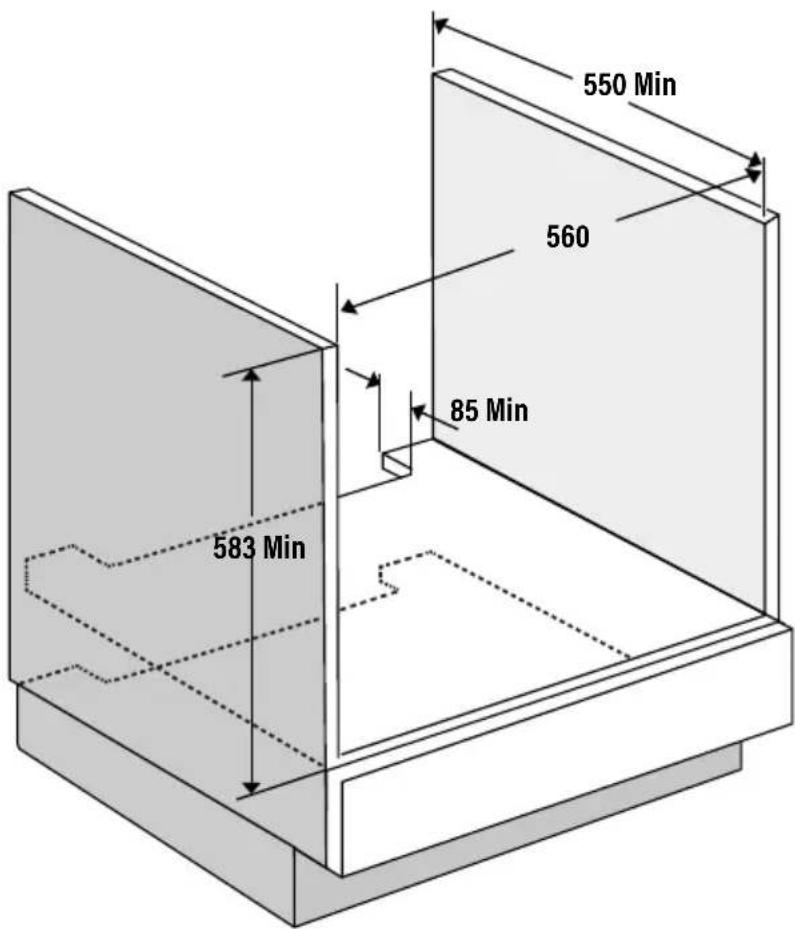
- The oven must be installed in accordance with installation instructions and all dimensions must be followed.
- Before connecting the appliance to the power supply, check that the power supply voltage and current rating corresponds with the power supply details shown on the appliance rating label.
- Never use a damaged appliance! Disconnect the appliance from the electrical outlet and contact your retailer if it is damaged.
- Danger of electric shock! Do not attempt to repair the appliance yourself. In case of malfunction, repairs are to be conducted by qualified personnel only.
- To avoid damaging the cord, do not squeeze, bend or chafe it on sharp edges. Keep it away from hot surfaces and open flames.
- Lay out the cord in such a way that no unintentional pulling or tripping over it is possible. Keep the appliance and its cord out of reach of children. Do not operate the appliance with wet hands or while standing on a wet floor. Always turn the appliance off before disconnecting it from the power supply.
- Disconnect the oven from the power supply when not in use and before cleaning.
- Warning: This appliance is supplied with a three core supply cord and must be connected direct to the mains electricity supply via a omni-polar or double pole switch having a 3mm minimum contact gap on each connector.
- The fused spur should be installed in an easily reachable place so that in case of emergency the appliance can be disconnected from power immediately.
- The fixed wiring must be protected against heat surfaces.
- Do not hang any objects on the handle of the oven door.
- Caution: Do not cover the bottom of the oven with aluminium foil or other objects. There is a risk of fire and damage to the enamel in the oven!
- Do not allow aluminium foil, plastic, paper or fabric contact with heating elements. Never leave the appliance unattended during use, especially when cooking with flammable substances (e.g. hot oil, fat, etc.).
-
Do not store or never use harsh chemicals, sprays, flammable or non-food in or near the oven.
-
This oven is designed specifically for heating or cooking food. The use of corrosive chemicals in heating or cleaning will damage the unit and may cause injury.
- Should any food inside the oven catch fire, keep the door closed. Switch the oven off and disconnect the power supply. Always exercise caution when opening the door.
- Move to the side, and open the door slowly to vent the hot air and/or steam. Make sure your face is away from the opening and make sure there are no children or pets near the oven.
- 5 Only use utensils that are suitable for use in this type of oven.
- 5 The oven should be cleaned regularly and any food deposits removed.
- Do not use harsh abrasive cleaners or sharp metal scrapers to clean the oven door glass. They can scratch the surface, which may result in shattering of the glass.
- A steam cleaner is not to be used.
- Warning: The appliance and its accessible parts become hot during use. Care should be taken to avoid touching heating elements.
- Children less than 8 years of age shall be kept away unless continuously supervised.
- The appliance must not be installed behind a decorative door in order to avoid overheating.

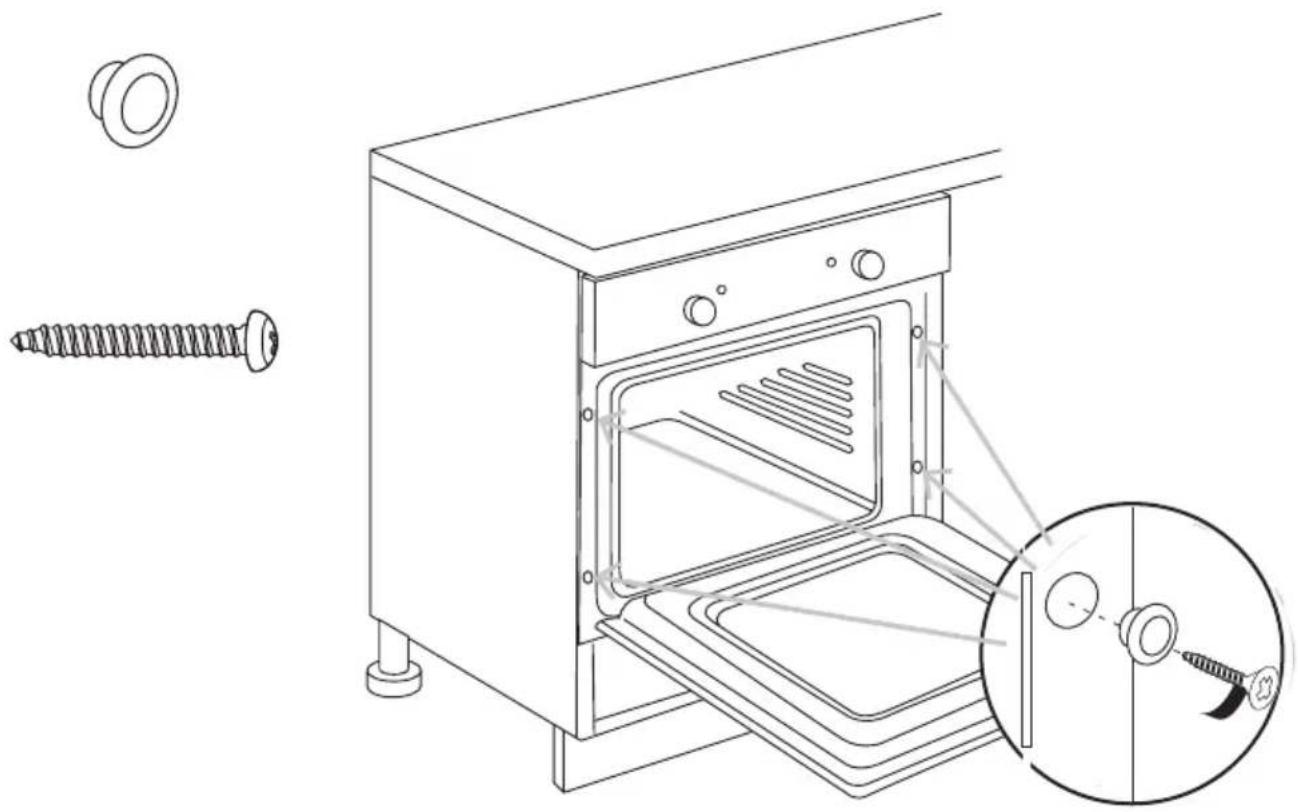
INSTALLATION
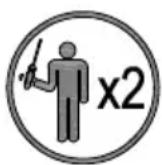
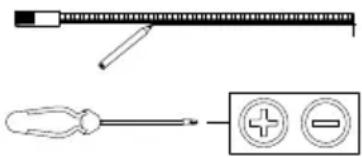
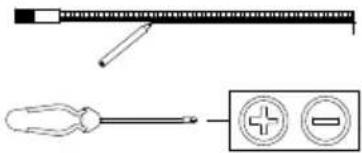
All installation must be carried out by a competent person or qualified electrician. Before connecting the mains supply ensure that the mains voltage corresponds to the voltage on the rating plate.
Direct Connection
This appliance must be connected directly to the mains using an omnipolar circuit breaker with a minimum opening of 3 mm between contacts.
The installer must ensure that the correct electrical connection has been made and that it complies with the wiring diagram.
The cable must not be bent or compressed.
Regularly check the power cord for damage. If the supply cord becomes damaged, it must be replaced by the manufacturer, its service agent or similarly qualified persons in order to avoid a hazard.
Warning: This is a Class i appliance and MuST be earthed.
This appliance is supplied with a 3 core mains cable coloured as follows:
- Brown = L or Live
- Blue = N or Neutral
- Green and Yellow = E or Earth
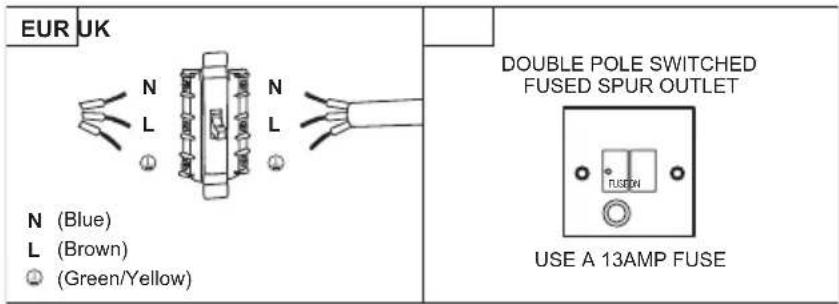
The fuse must be rated at 13 amps.
To avoid the risks that are always present when you use an electrical appliance it is important that this appliance is installed correctly and that you read the safety instructions carefully to avoid misuse and hazards. Please keep this instruction booklet for future reference and pass it on to any future owners. After unpacking the appliance please check that it is not damaged. If in doubt, do not use the appliance but contact Customer Services.
The manufacturer declines all liability for damage caused to persons and objects due to incorrect
or improper installation of the appliance. Any permanent electrical installation must comply with the latest wiring regulations applicable to your country and for your own safety a qualified electrician or contractor should undertake the electrical installation.
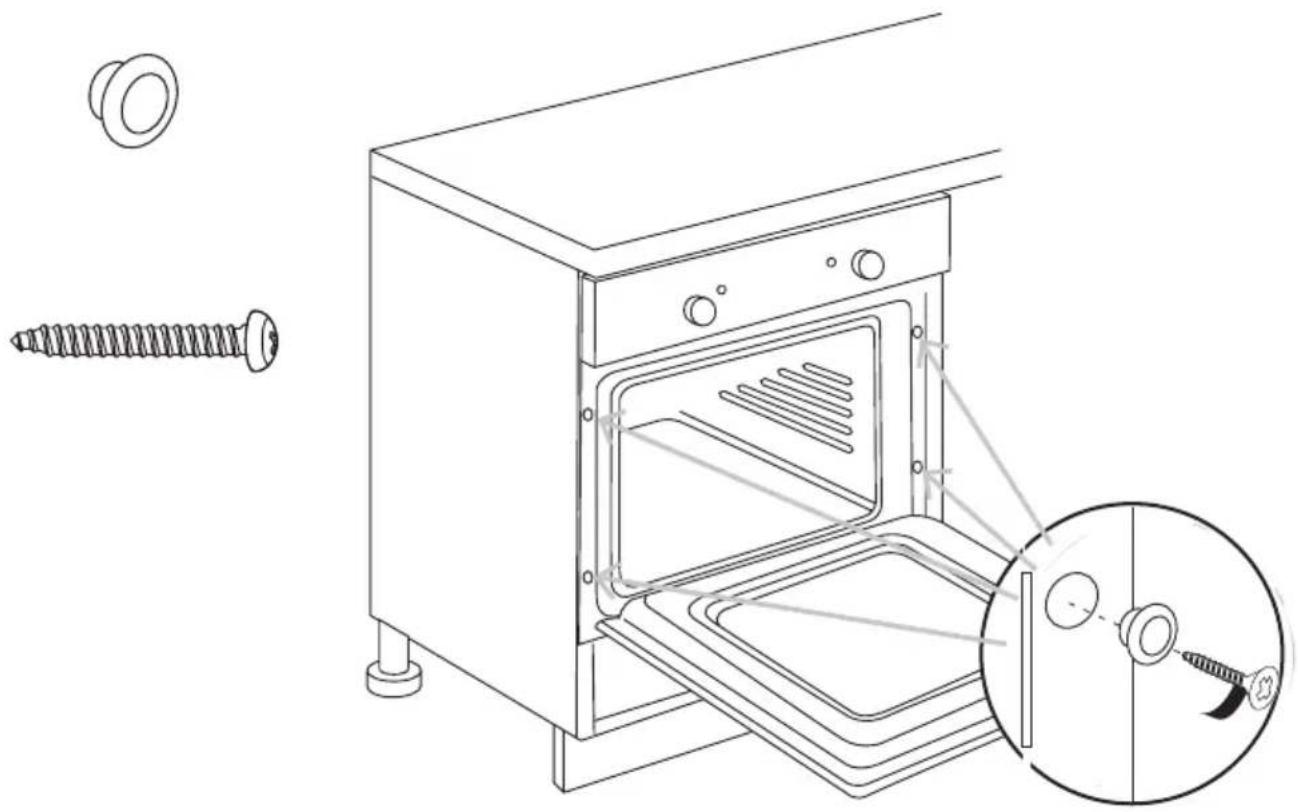
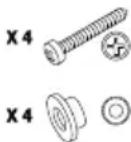
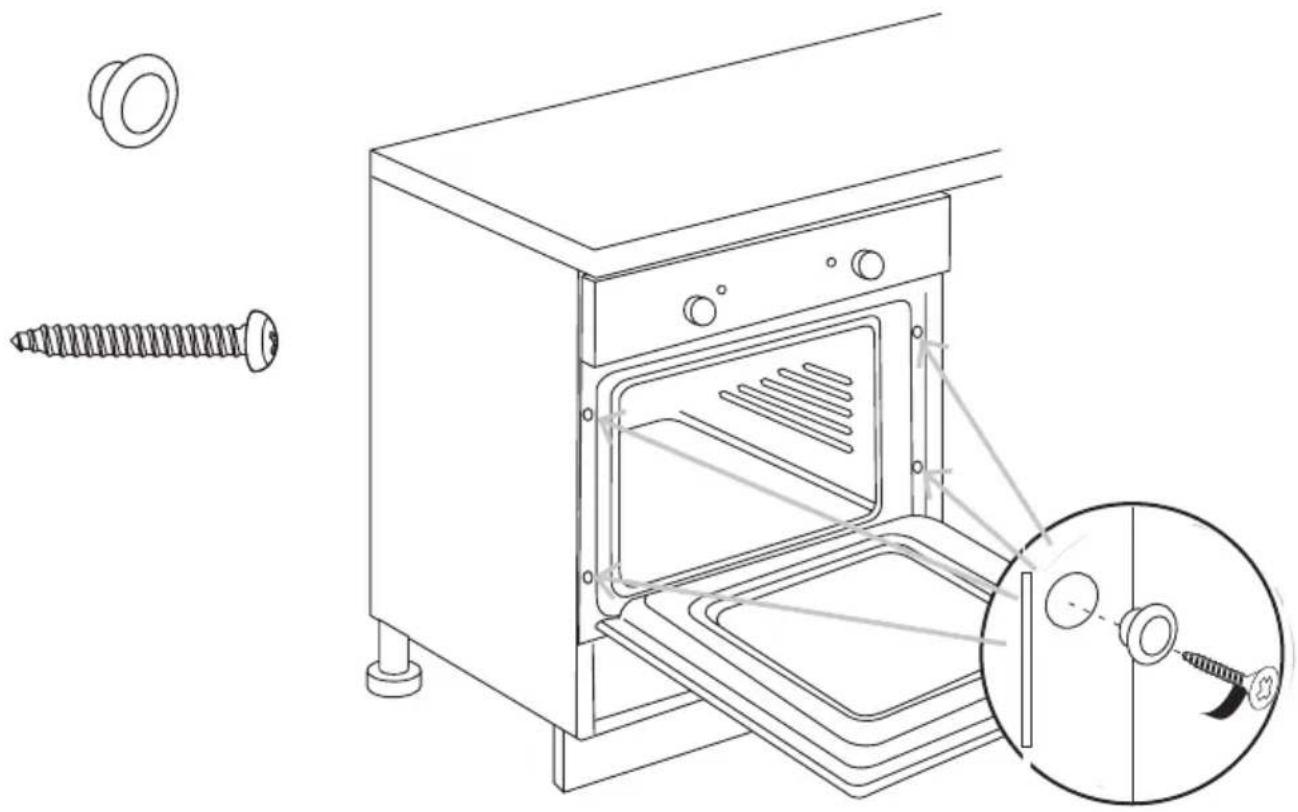
Installation
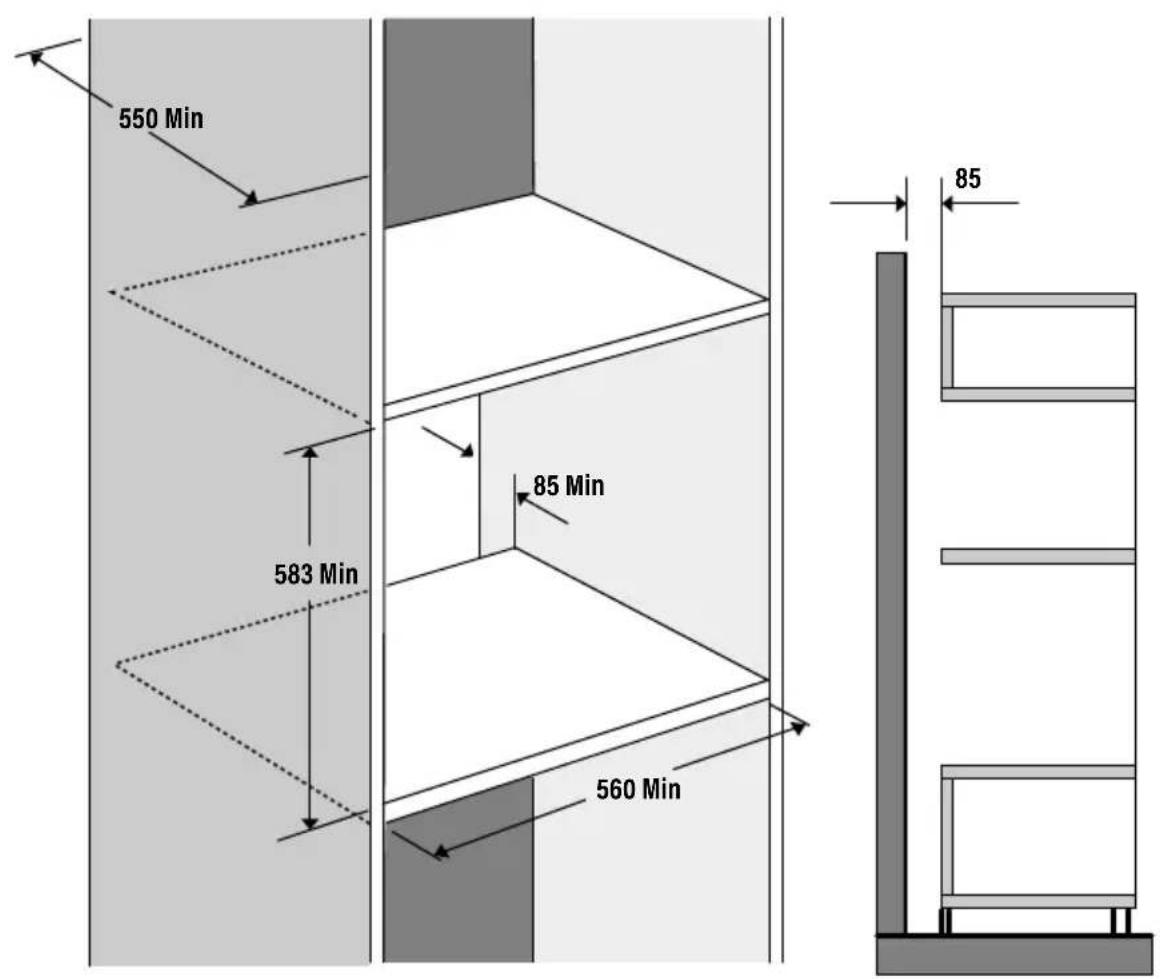
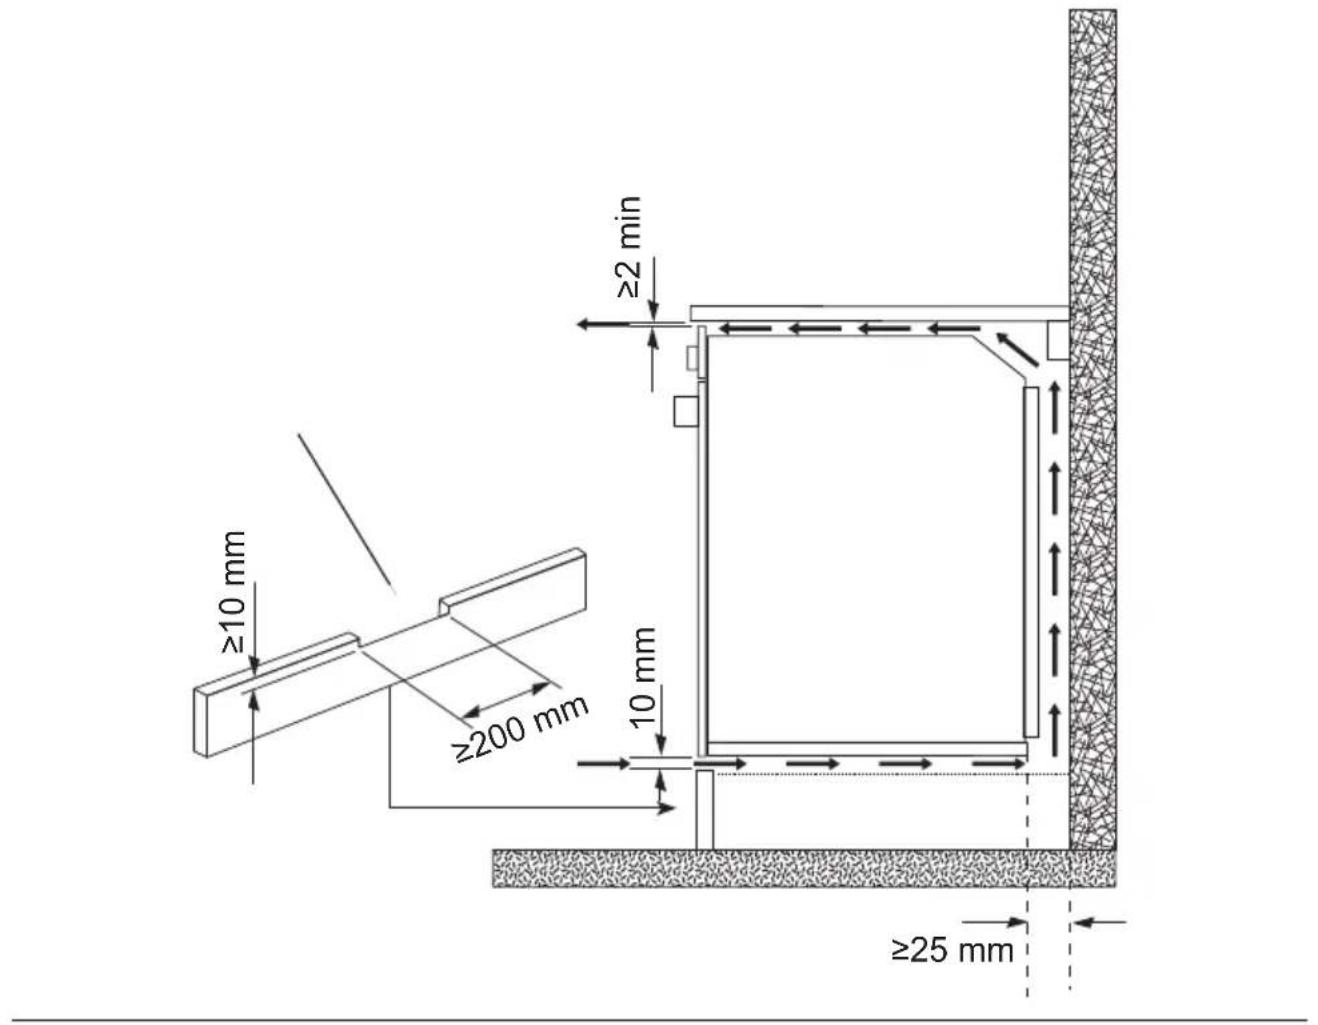
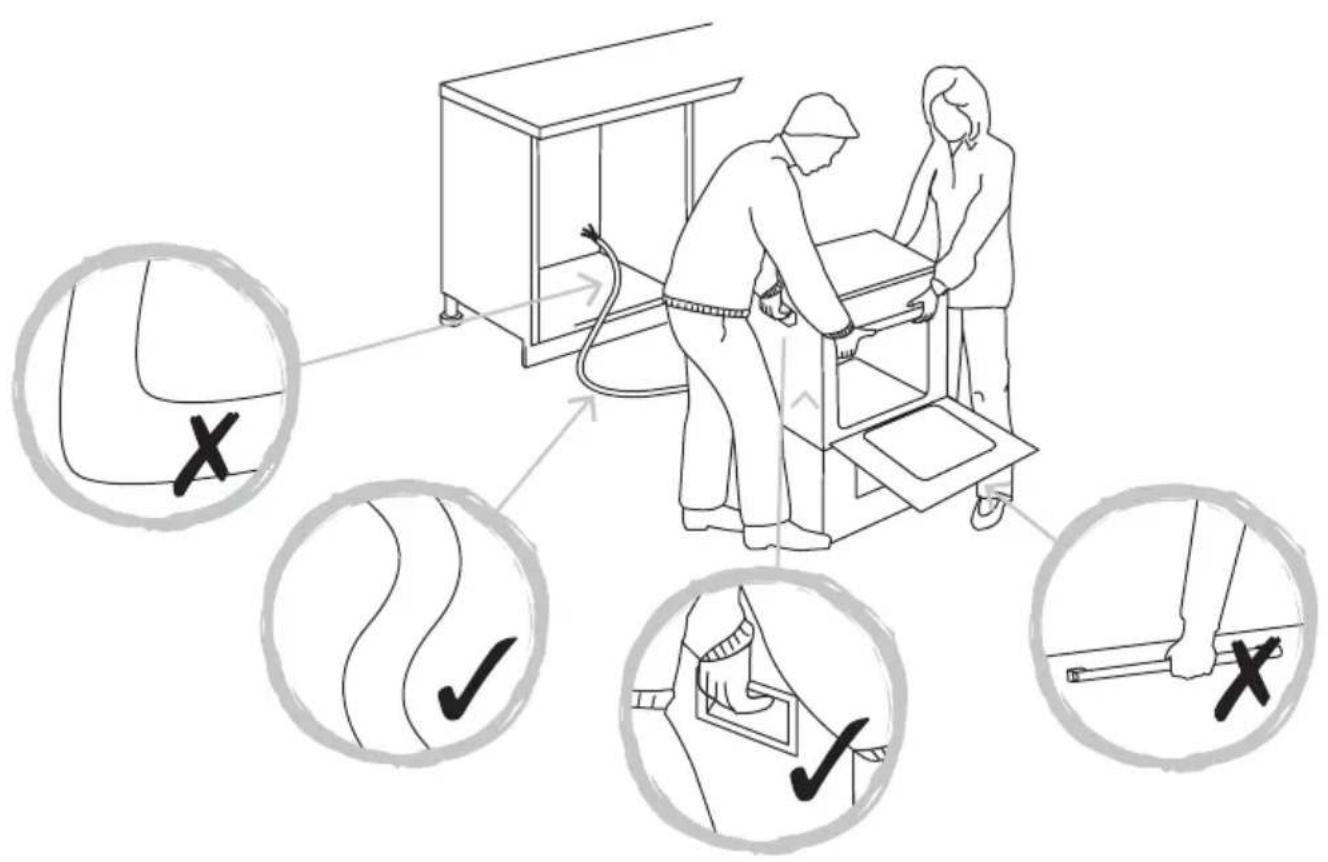
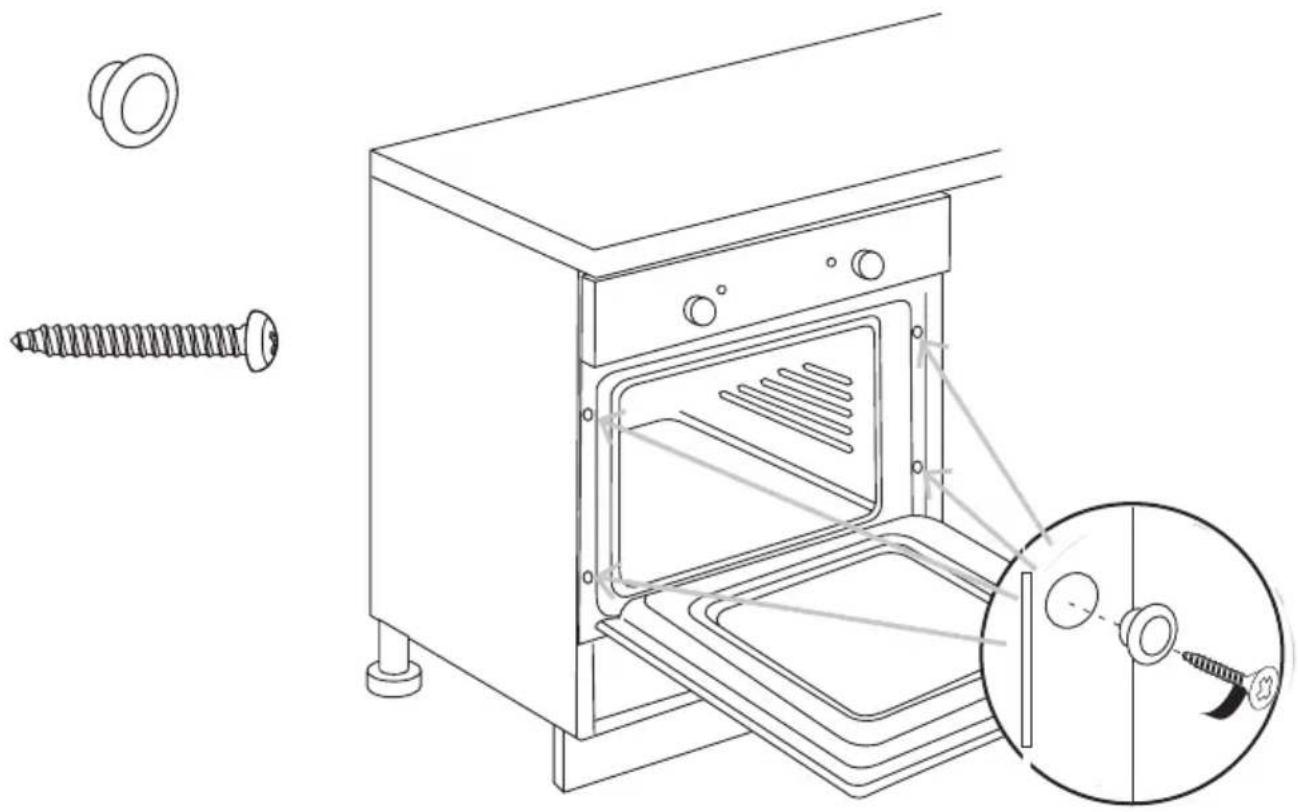
natural_image
Technical line drawing of a kitchen oven with screw and washer components, showing internal structure and mounting detail (no text or symbols)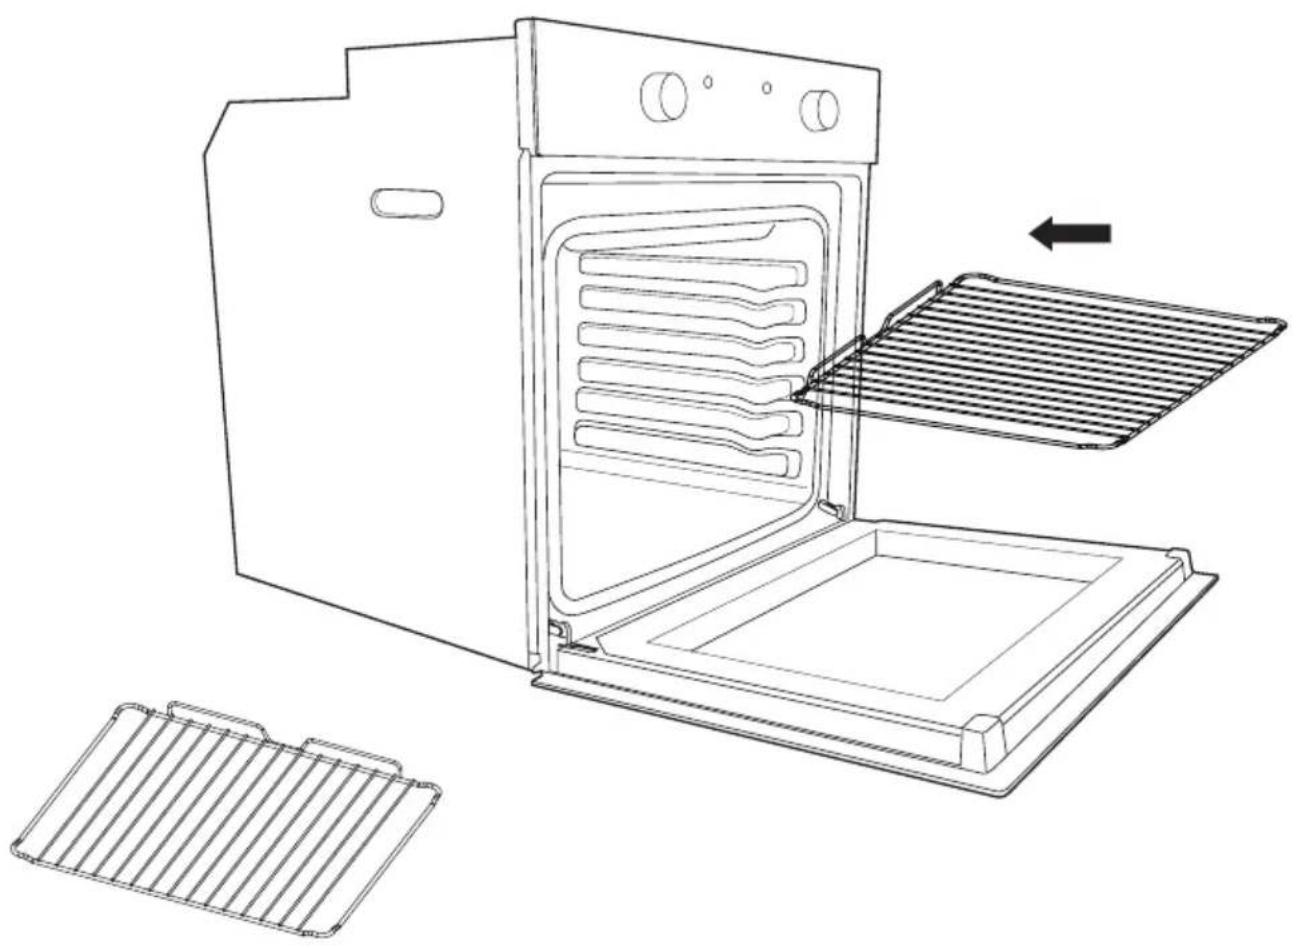
natural_image
Line drawing of an oven with a rack and ventilation grates, showing internal structure and cooling mechanism (no text or symbols)BEFORE YOU START
Switch on the appliance at the switched fused connection unit. The appliance is ready for use.
WARNING: Read the instructions before using the appliance.
Check the package and make sure you have all of the parts listed. Decide on the appropriate location for your product. This product contains glass, please take care when fitting or handling to prevent personal injury or damage to the product.
If you sell the appliance, give it away, or leave it behind when you move house, make sure you also pass on this manual so that the new owner can become familiar with the appliance and its safety warnings.
Note! Before using the oven for the first time we recommend that the oven is switched on and set to its highest temperature. Keep the oven door closed and leave the appliance on for 1.5 hours with nothing in it.
Ensure adequate ventilation during this process by opening doors and windows in the room. Any odours created during this operation are due to the evaporation of substances used to protect the appliance during storage prior to installation.
FUNCTION & SETTINGS
| ICON FUNCTION DESCRIPTION | ||
 | OVEN LIGHT | Automatic when selecting the cooking mode for all models. The oven light remains on when using the oven. |
 | CONVECTION MODE | Provides traditional cooking with heat from the upper and lower elements. |
 | UPPER ELEMENT MODE | For gentle cooking, browning or keeping cooked dishes warm. |
 | LOWER ELEMENT MODE | For slow cooking and heating food. |
 | FAN-ASSISTED CIRCULAR ELEMENT MODE | Provides uniform heating with the fan and allows different dishes to be cooked at the same time on different levels. |
 | FAN-ASSISTED LOWER ELEMENT MODE | This provides heating by semi-convection with the lower element for delicate dishes. |
 | FAN-ASSISTED CONVECTION MODE | This provides convection heating of the upper and lower elements for uni-form cooking. |
 | GRILL | For gratinating and browning food. |
 | MAXI-GRILL | As above, but the grill element provides a larger area for roasting. |
 | FAN-ASSISTED GRILL | This provides fast browning so that food remains juicy. For convection baking, this is the most energy-efficient function. |
 | THAWING MODE | The fan works without heat to reduce the thawing time for frozen food. |
| Food | Programme and temperature | Time Position Preheat Accessories | ||||||
| meat and poultry | Beef 1,5 Kg 190°C  | 50 - 60 m |  no no | [HK6B] |  | |||
Pork 1,5 Kg 150°C  | 85 - 95 m |  no no |  |  | ||||
Lamb 1,5 Kg 200°C  | 40 - 50 m |  no no |  |  | ||||
Turkey 4 Kg 170°C  | 115 - 125 m |  | 1 no |  | [2467] | |||
| Chicken 1,25 Kg | 210°C |  50 - 60 min 1 no 50 - 60 min 1 no |  |  | ||||
| vegetables | Roasted red peppers 1,25 Kg | 190°C |  30 - 40 min 2 no 30 - 40 min 2 no |  |  | |||
| Stuffed tomatoes 4 servings | 200°C |  15 - 19 min 2 no 15 - 19 min 2 no |  |  | ||||
| fish and seafood | Baked Hake/Cod 1,5 Kg | 210°C |  7 - 9 min 7 - 9 min |  yes yes |  | |||
| Roasted lobster 1 Kg | 220°C |  240°C 240°C | 4 - 5 min |  4 4 | yes |  | ||
| sundry | Pizza | 200°C |  220°C 220°C | 18 - 22 min |  1 1 | yes |  | |
| Defrosting, all types of food | 75°C |  |  2 no 2 no |  | ||||
| Fermenting dough for bread/cakes | 40°C |  40°C 40°C | 25 - 30 min 0 no |  | ||||
| PERFORMANCE TESTING ACCORDING TO STANDARD IEC/EN60350 | 8.4.1 Butter cookies |  |  175°C 175°C | 22 min |  3 3 | yes | De  ay ay | |
| 8.4.2 Fairy Cakes |  |  185°C 185°C | 23 min |  2 2 | yes | De [BC83]ay | ||
 |  * 160°C * 160°C | 45 min |  3 1 3 1 | no | De [7W7G]ay/st  d d | |||
| 8.5.1 Fat-free sponge cake |  |  180°C 180°C | 25 min |  1 no 1 no | Mou  grill grill | |||
 |  * 180°C * 180°C | 40 min |  3 1 3 1 | no | 2 m grills  sleep sleep | |||
| 8.5.2 Apple tart |  |  185°C 185°C | 40 -45 min 2 no |  |  | |||
|  * 180°C 50 - 55 min * 180°C 50 - 55 min |  3 1 3 1 | no | 2 m grills  sleep sleep | ||||
| 9.1 Surface browning |  |  * 250°C 2 - 3 min * 250°C 2 - 3 min |  4 4 | Pre-heat for 5 min | Cool min. (8645) | |||
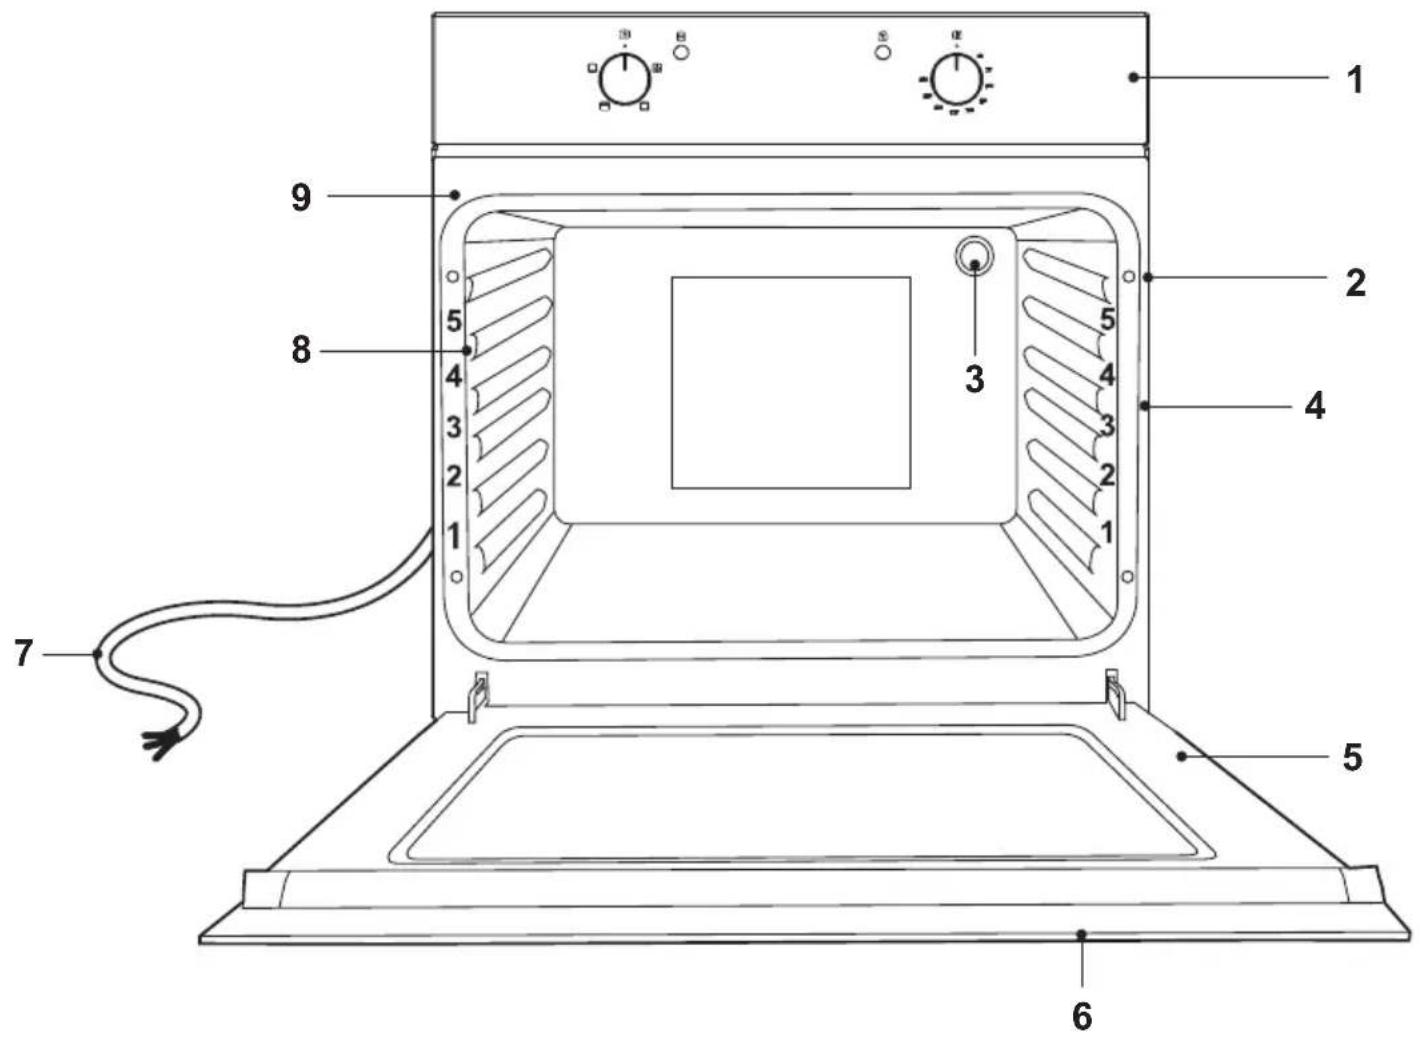
- Control panel.
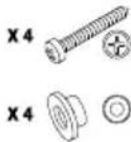
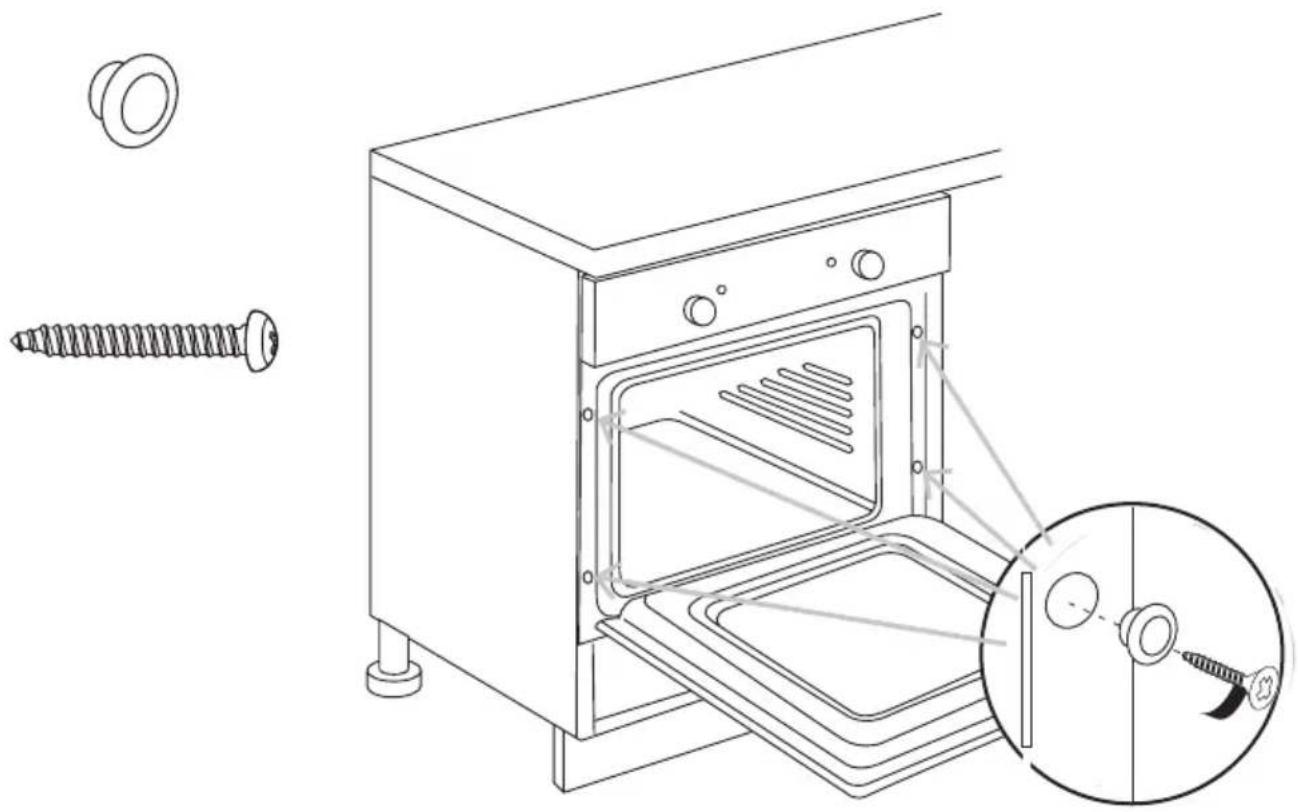
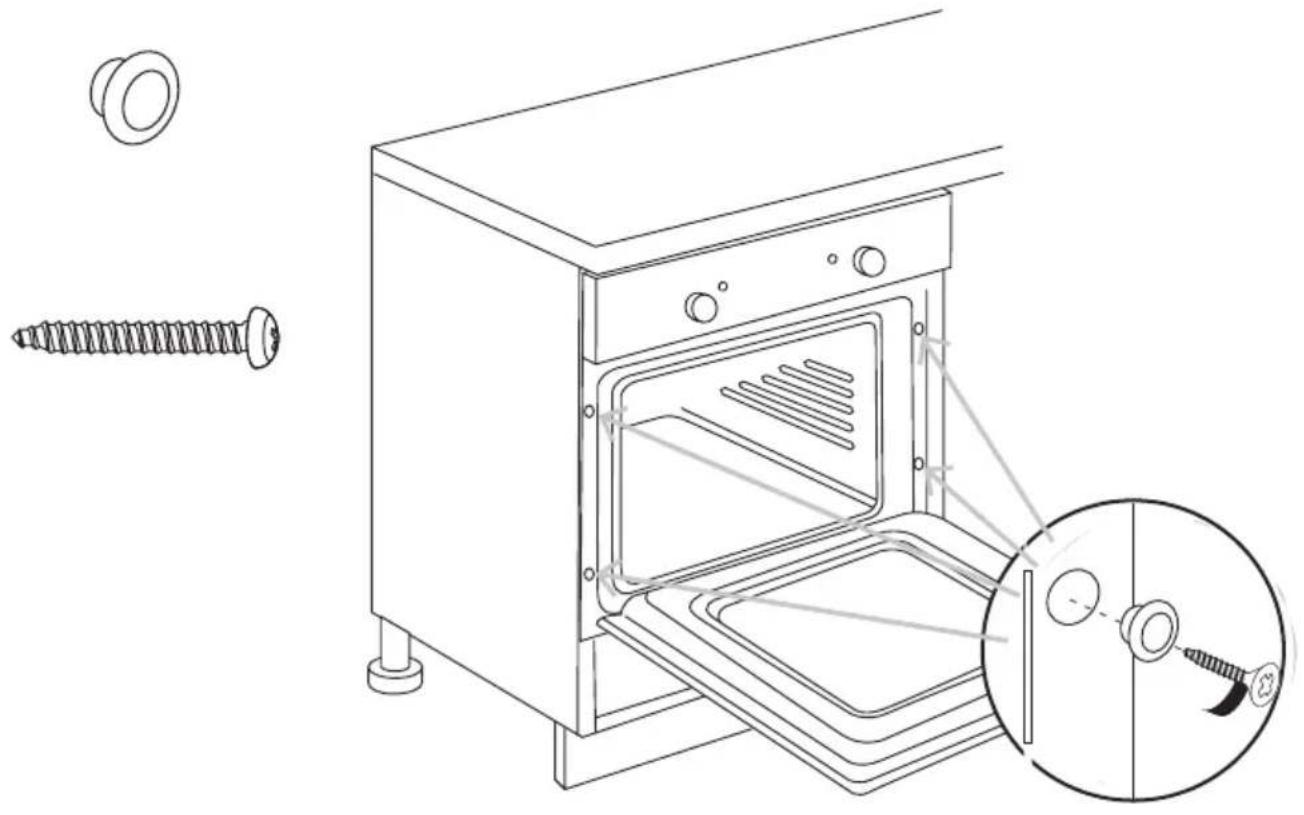
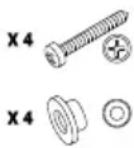
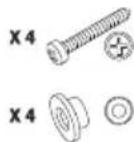
- Fixing openings (4x).
- Oven lamp.
- Shelf level markings.
-
Door.
-
Door handle.
- Power cable.
- Side rails.
- Side handles for carrying the oven.
Switching on / off

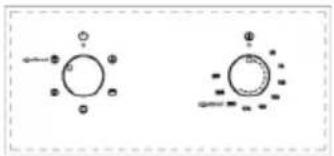
Control panel with 2 knobs
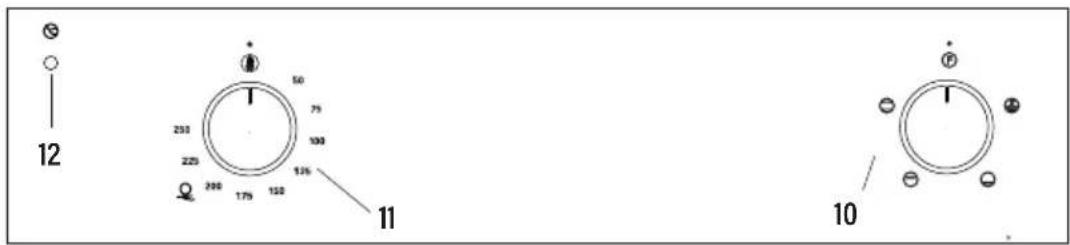
- Cooking mode knob.
- Temperature knob.
-
Temperature indicator.
-
Rotate the cooking mode knob (10) to a desired cooking mode.
- Rotate the temperature knob (11) to a desired cooking temperature.
- The oven now switches on and starts operation. The power indicator (13) and temperature indicator (12) light up.
- After cooking:
- Set the temperature knob (11) to

position.
- Set the cooking mode knob (10) to

position.

Control panel with 3 knobs
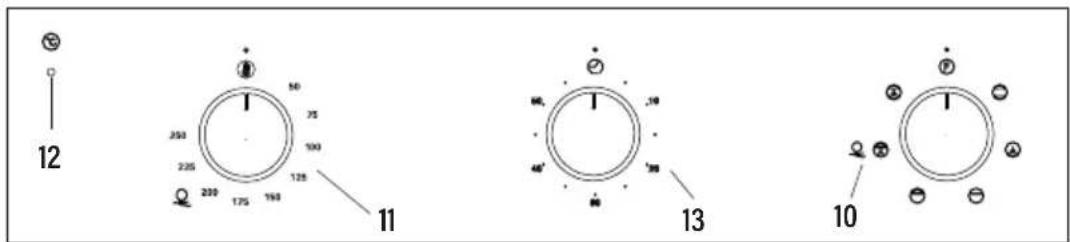
- Cooking mode knob.
- Temperature knob.
- Temperature indicator.
-
Timer
-
Rotate the cooking mode knob (10) to a desired cooking mode.
- Rotate the temperature knob (11) to a desired cooking temperature.
- The oven now switches on and starts operation. The power indicator (13) and temperature indicator (12) light up.
- Once the thermostat controls are in the desired position, turn the knob clockwise to the maximum position and then turn it anti-clockwise to the desired time; at the end of this set time the buzzer will sound. The timer only indicates the end of the set time, but it does not stop the function being used.
- After cooking:
- Set the temperature knob (11) to

position.
- Set the cooking mode knob (10) to

position.

Control panel with display
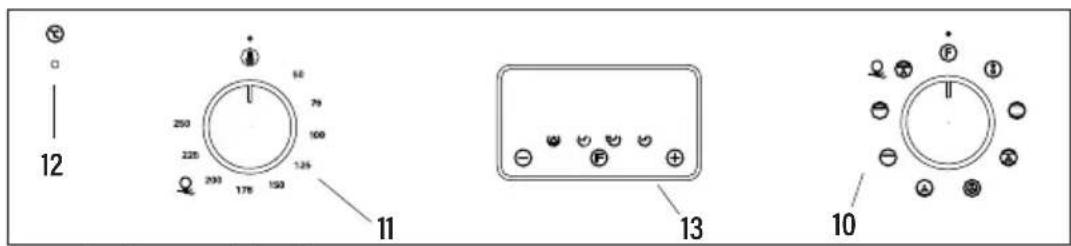
- Cooking mode knob.
- Temperature knob.
- Temperature indicator.
-
Display
-
Rotate the cooking mode knob (10) to a desired cooking mode.
- Rotate the temperature knob (11) to a desired cooking temperature.
- The oven now switches on and starts operation. The power indicator (13) and temperature indicator (12) light up.
- Use of the electronic timer
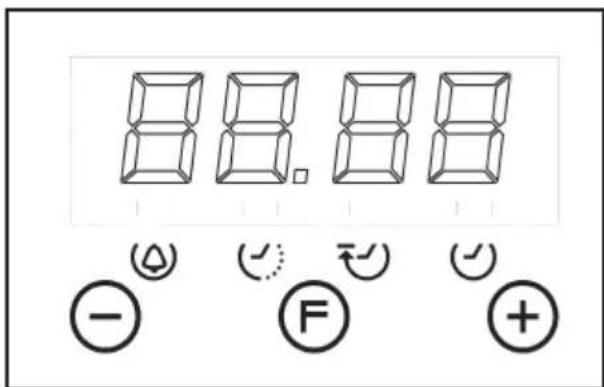
Description of the timer functions:
Warning alarm
Cooking in automatic mode (duration)
End of cooking time (time at end)
Setting the clock. Clock with 24-hour display.
Description of the buttons:
- Reduce Minutes
(F) Timer function selector - Increase Minutes
Warning alarm
An independent audible signal that can be set to a maximum time of 23 hours and 59 minutes. To set the time, press Ⓕ once. The alarm indicator will flash for 5 seconds, during which time we can select the required time by pressing ⭕ and ⊙. The countdown will start immediately. At the end of the time, the indicator will flash and an intermittent sound signal will be triggered, which can be interrupted by pressing the button. If it is not stopped, it will do so automatically after 2 minutes. The warning alarm does not control any of the oven functions.
Semi-automatic cooking
A. Cooking time setting
By pressing Ⓓ twice, set the cooking time using ⏻ and ⏱. The cooking will start immediately and appear on the ⏱ indicator. At the end of the set time, the cooking will be interrupted and the intermittent sound signal will be heard. Cancel it as indicated above.
Note that the oven will continue to work after the end of the cooking process and when the alarm has been stopped. It must be turned off manually.
B. Setting the cooking end time 🤔
By pressing Ⓧ three times, set the chosen cooking end time using ⊕ and ⊖. The cooking will start immediately and appear on the ⭕ indicator. When the cooking time ends, the cooking will stop and the intermittent sound signal will be heard. Cancel it as indicated above.
The programming status can be seen at any time by pressing Ⓕ. The programming can also be cancelled at any time by pressing and resetting the display. Pressing after this will prepare the oven for manual operation.
Note that the oven will continue to work after the end of the cooking process and when the alarm has been stopped. It must be turned off manually.
Automatic cooking. (+)
(Start and end of cooking)
1) Programme the cooking time by pressing Ⓕ twice and selecting the required time with⊕ and⊖.
2) Set the end of the cooking time by pressing Ⓕ 3 times and selecting the required time with ⊕ and ⊖.
3) Select the required temperature and function using the thermostat controls and selector.
After these operations, the Ⓗ and ⚫ indicators will continue to be shown on the display, showing that the oven has been programmed.
Practical example:
We want to cook for 45 minutes and for the cooking to end at 2 p.m.
- We press Ⓕ twice and select 0.45 by using ⊕ and ⊖.
- We press Ⓕ three times and select 14.00 with ⊕ and ⊖.
- After these operations, the current time will reappear on the display and the Ⓗ and Ⓥ indicators will show that our programming has been understood and memorised.
- At 1.15 p.m. (2 p.m. less 45 minutes), the oven will start automatically.
- At 2 p.m. the cooking will stop automatically and the intermittent sound signal will be heard.
- We can switch it off by pressing any button.
Note that the oven will continue to work after the end of the cooking process and when the alarm has been stopped. It must be turned off manually.
Setting the clock
When turning on the oven (and also after any possible power cut) the numbers 12.00 will appear in the panel and the ⏻ indicator will flash until we enter the right time.
To set the right time, press or Ⓧ to ⏱ adjust. There is a 5-second lapse for acceptance during which no button must be touched. The rate of change will increase considerably a few seconds after the buttons have been depressed.
To change the clock time, we can press Ⓕ 4 times until the ⏻ indicator flashes and set the correct time with Ⓕ and ⊖.
WARNING! any power cut cancels the programmed functions, including the clock. When the power supply returns, the ⏻ indicator will flash and can be reprogrammed
5. After cooking:
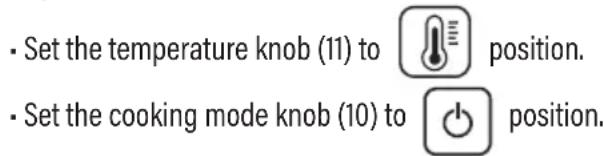
Note: The temperature indicator lights up from time to time during use. This indicates the oven is maintaining the set temperature.
CAUTION! The appliance will not switch off automatically after use. Never leave the appliance unattended during use.
Oven accessories
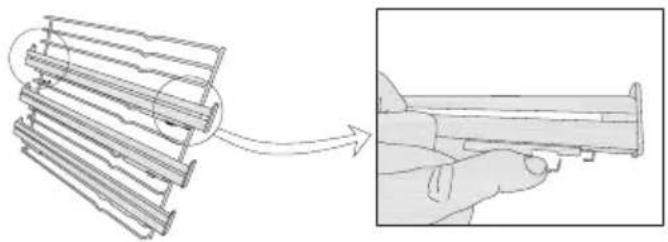
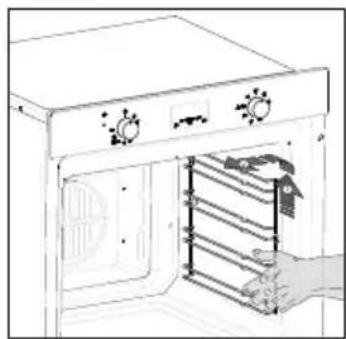
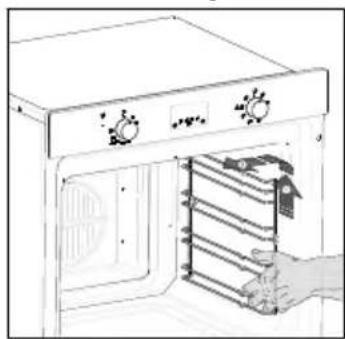
The oven can be provided with lateral guides fitted to the oven wall. Insert the grid and oven sheet provided on the lateral guides. To remove the guides proceed as follows for the two types:
To remove the lateral telescopic guides:
natural_image
Diagram showing a mechanical assembly with a magnified view of a hand holding a cylindrical component (no text or symbols present)To remove the lateral guides:
natural_image
Line drawing of an oven with a hand inserting a rack into the door (no text or symbols)Cleaning
Before cleaning or performing maintenance, disconnect the oven from the power supply. To extend the life of your oven, it must be cleaned frequently, keeping in mind that:
- Do not use abrasive powders or corrosive substances which could ruin the surfaces.
- The inside of the oven should preferably be cleaned immediately after use, when it is still warm, with hot water and soap. The soap should be rinsed away and the interior dried thoroughly. Avoid using abrasive detergents (for example cleaning powders, etc.) and abrasive sponges for dishes
or acids (such as lime scale remover, etc.) as these could damage the enamel. If the grease spots and dirt are particularly tough to remove, use a special product for oven cleaning, following the instructions provided with the product. - If the oven is in use for an extended period of time, condensation may form. Once the oven has cooled, remove the condensation using a dry cloth.
- There is a rubber seal surrounding the oven opening which creates a heat seal. Check the condition of this seal on a regular basis. If necessary, clean it and avoid using abrasive products or objects to do so. Should it become damaged, please contact the customer services helpline. We recommend you avoid using the oven until it has been repaired.
- Never put aluminium foil at the bottom of the oven, as the build up of heat could compromise cooking and even damage the enamel.
-
Clean the glass door (5) using non-abrasive products or sponges and dry it with a soft cloth.
-
Open the door (5).
- Clean all oven accessories with warm water or washing up liquid and polish dry with a soft clean cloth.
- Clean the oven interior with a soft clean cloth.
- Wipe the front of the appliance with a damp cloth.
- Let the oven and all accessories dry well.
WARNING: Always switch off the electricity supply before carrying out maintenance work on the hood. In the event of a fault, contact customer services.
Oven cleaning system equipped with the AQUASMART SYSTEM
1 Take out the internal components: tray, screen, side screens.
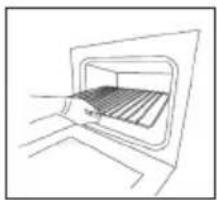
natural_image
Line drawing of a door with a gridded interior and a handle, no text or symbols present
natural_image
Line drawing of a hand opening a tray with a rectangular frame (no text or symbols)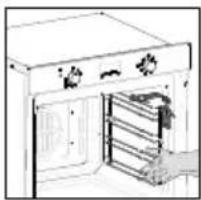
natural_image
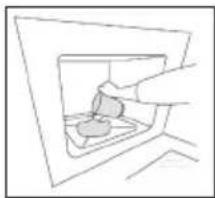
Line drawing of a cabinet with shelves and doors, no text or symbols present2 Pour 200 ml of soapy water on the bottom of the oven.
natural_image
Simple line drawing of a hand inserting a small object into a container (no text or symbols)3 Turn on and set the oven at 200^ for 15 minutes
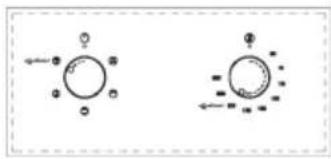
chemical
Two molecular orbital diagrams showing electron density distributions around a central atom4 Move the temperature control from 200^ C to 0^ C. Let the oven cool down for 20 minutes.
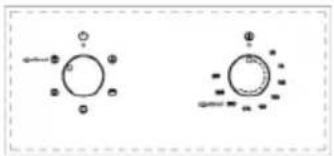
chemical
Two molecular orbital diagrams showing electron density distributions around a central atom5 Move the AquaSmart function to 0. Wipe clean with a rag or soft cloth.
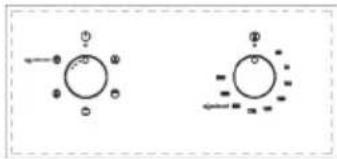
chemical
Two molecular orbital diagrams showing electron density distributions with labeled orbitals and dashed lines indicating orbital pathsReplacing the oven light bulb
- Remove all pans and grills from inside the oven to easily access the lamp cover (3).
- Unscrew the glass cover and remove the old lamp. Dispose of it safely and ecologically.
- Insert a new G9 halogen lamp into the lamp holder. Note: Please do not handle the lamp with bare skin to avoid reducing its life. Use a cloth or tissue.
- Replace the lamp cover.
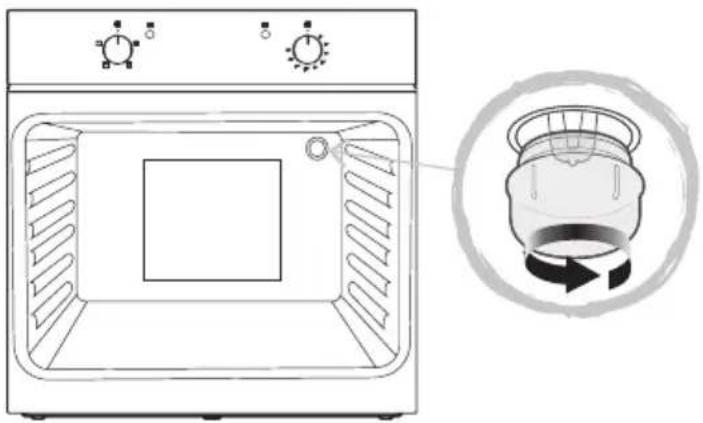
natural_image
Line drawing of a microwave oven with a circular inset showing the interior pan (no text or symbols)25 W, 300 °C, Tipo G9
WARNING! Ensure that the appliance is switched off and completely cool before replacing the lamp to avoid the possibility of electric shock or burns.
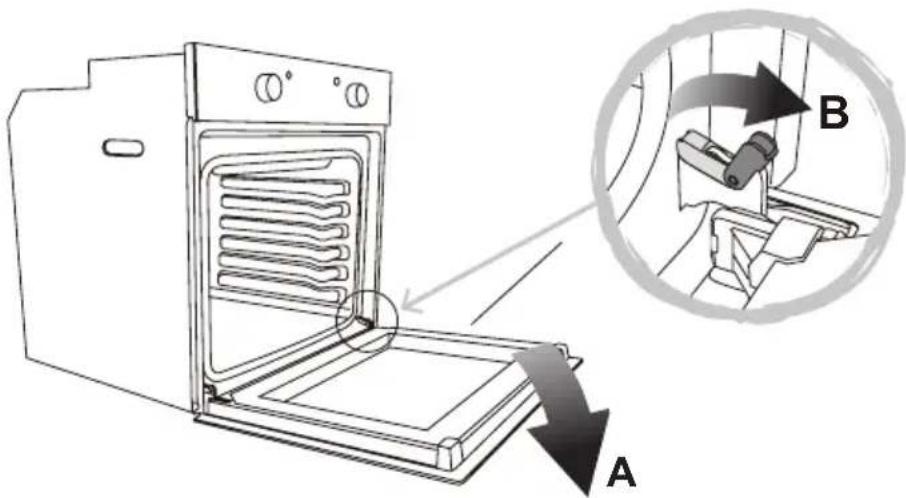
Removing the Door From the Oven
To simplify cleaning interior of the oven, the door (5) can be removed. Follow below steps to do so:
- Open the door (5) fully to position "A".
- Lift the two mobile links of the hinges to position "B".
- Close the door (5) to the half-way position.
- Lift the door (5) upwards and remove it by sliding the hinges outwards. Hold the door (5) by the sides close to the hinges when doing this.
- After cleaning, replace the door (5) in the reverse order.
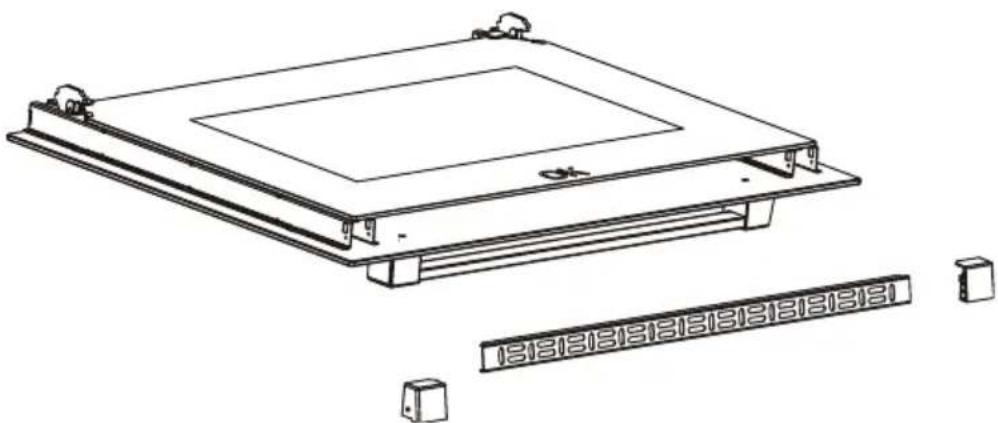
Removing the Rear Glass for Cleaning
- To simplify cleaning, the rear glass panel can be removed.
- After loosening 2 screws fixing the side supports of the glass, remove the supports and then the glass panel. Handle with care!
- After cleaning, replace the glass panel in the reverse order.
- Inner glass must be placed so that the "ok" is visible.
natural_image
Technical line drawing of a rectangular electronic device with mounting brackets and a separate panel labeled '1318181818181818181818181818181818181818181818181818181818181818181818181818181818181818181818181818181TROUBLE SHOOTING
| FAQS olution | S |
| What should I do if the oven does not heat up? | Check to see if one of the following actions resolves the issue: The oven may not be switched on. Switch on the oven.(→ Switching On/Off).Check to see if the required settings have been applied.A household fuse may have blown or a circuit breaker may have tripped.Replace the fuses or reset the circuit. If this happens repeatedly, call the Service Centre. |
| What should I do if, even though the oven function and temperature have been set, the oven does not heat up? | There may be problems with the internal electrical components.Call the Service Centre. |
| What should I do if I cannot change the set temperature? | Make sure to have used the temperature knob(→ Control elements). |
| What should I do if the oven light does not illuminate? | The oven light is faulty. Replace the oven light bulb(→ Replacing the oven light bulb). |
| The grill does not heat up properly? | The grill power is set too low. Turn the temperature control to a higher temperature. |
natural_image
Simple icon of a bottle with an 'X' mark and a cross symbol, no text or labels present.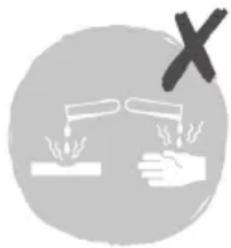
natural_image
Illustration of a test tube being heated by a hand using a microscope, with a 'X' symbol above (no text or labels)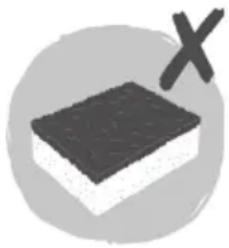
natural_image
Simple 3D illustration of a layered cake with a 'X' mark, no text or symbols presentINSTALAÇÃO
natural_image
Technical line drawing of a kitchen oven with screw and washer components, showing internal structure and mounting detail (no text or symbols)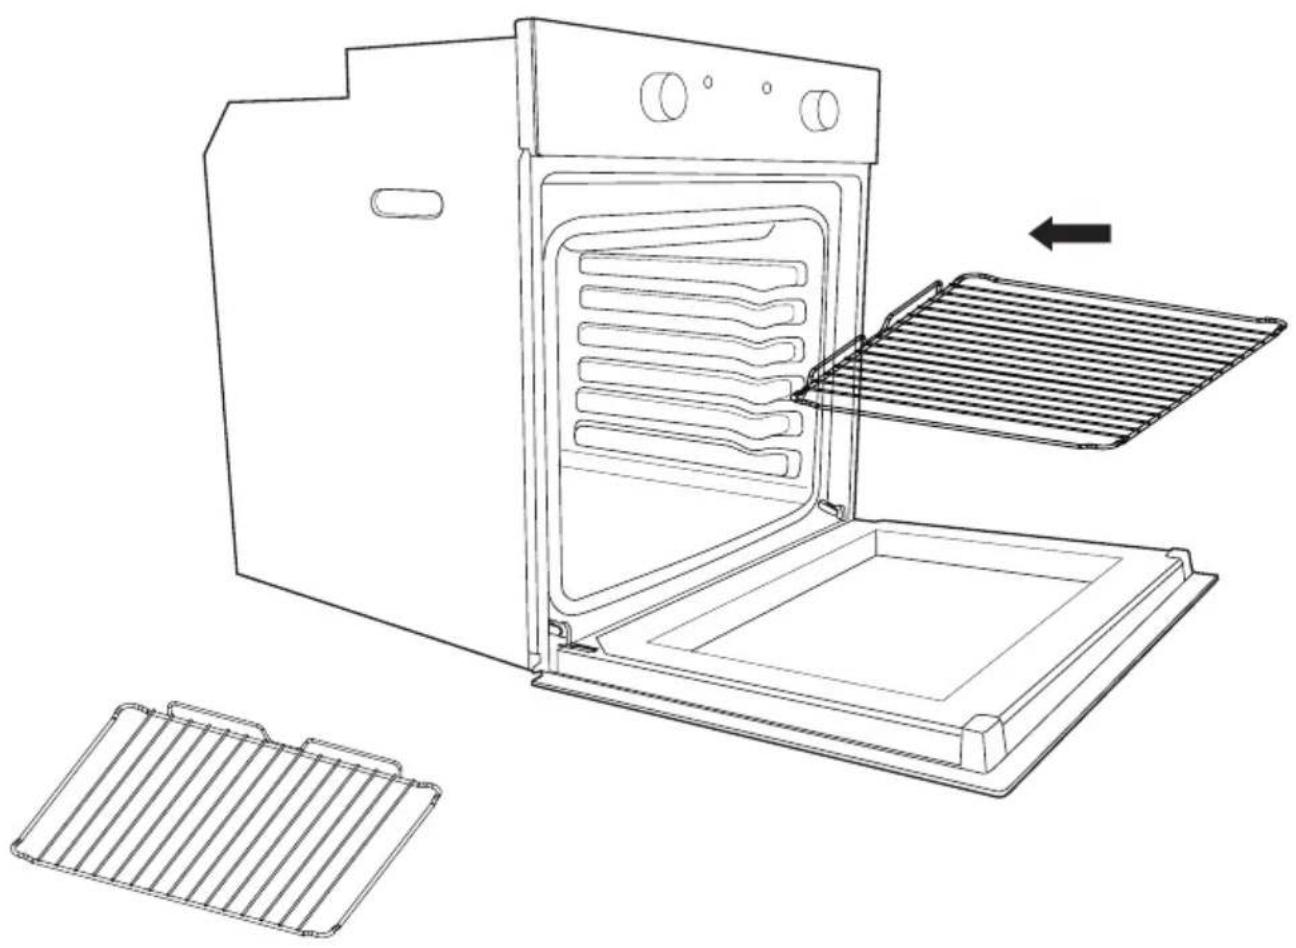
natural_image
Line drawing of an oven with a rack and ventilation grates, showing internal structure and cooling mechanism (no text or symbols)ANTES DE COMENÇAR
natural_image
Diagram showing a mechanical assembly with a magnified view of a hand holding a cylindrical component (no text or symbols present)Como desmontar as guias laterais:
natural_image
Line drawing of an oven with a hand inserting a rack into the door (no text or symbols)Limpieza
natural_image
Line drawing of a door opening with a slotted interior (no text or symbols)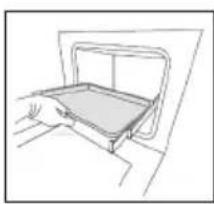
natural_image
Line drawing of a hand opening a tray with a lid (no text or symbols)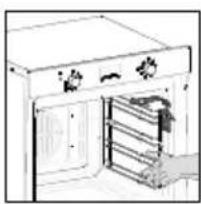
natural_image
Line drawing of a kitchen appliance with a door, cabinet, and ladder (no text or symbols)natural_image
Simple line drawing of a hand inserting a small object into a container (no text or symbols)chemical
Two molecular orbital diagrams showing electron density distributions around a central atom4 Mover o regulador de temperatura entre 200 °C e 0 °C. Deixar arrefecer o forno durante 20 minutos.
chemical
Two molecular orbital diagrams showing electron density distributions around a central atomchemical
Two molecular orbital diagrams showing electron density distributions with labeled orbitals and bonding patternsnatural_image
Line drawing of a microwave oven with control knobs and a circular diagram showing the interiormost chamber (no text or symbols)25 W, 300 °C, Tipo G9
RETIRAR O VIDRO TRASEIRO PARA LIMPAR
natural_image
Simple icon of a bottle with an 'X' mark and a cross symbol, no text or labels present.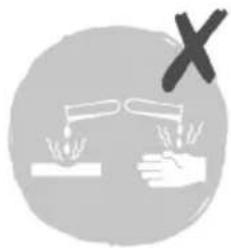
natural_image
Symbolic illustration of a test tube being heated by two hands, with a 'X' mark above (no text or labels)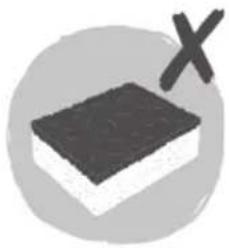
natural_image
Simple 3D illustration of a rectangular block with a cross mark, no text or symbols presentУстановка
natural_image
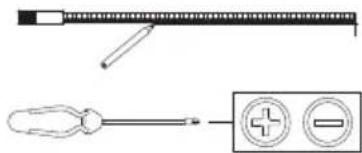
Pure technical line drawing of a tool and component without any text, numbers, or symbols
natural_image
Technical line drawing of a kitchen oven with screw and washer components, showing internal structure and mounting detail (no text or symbols)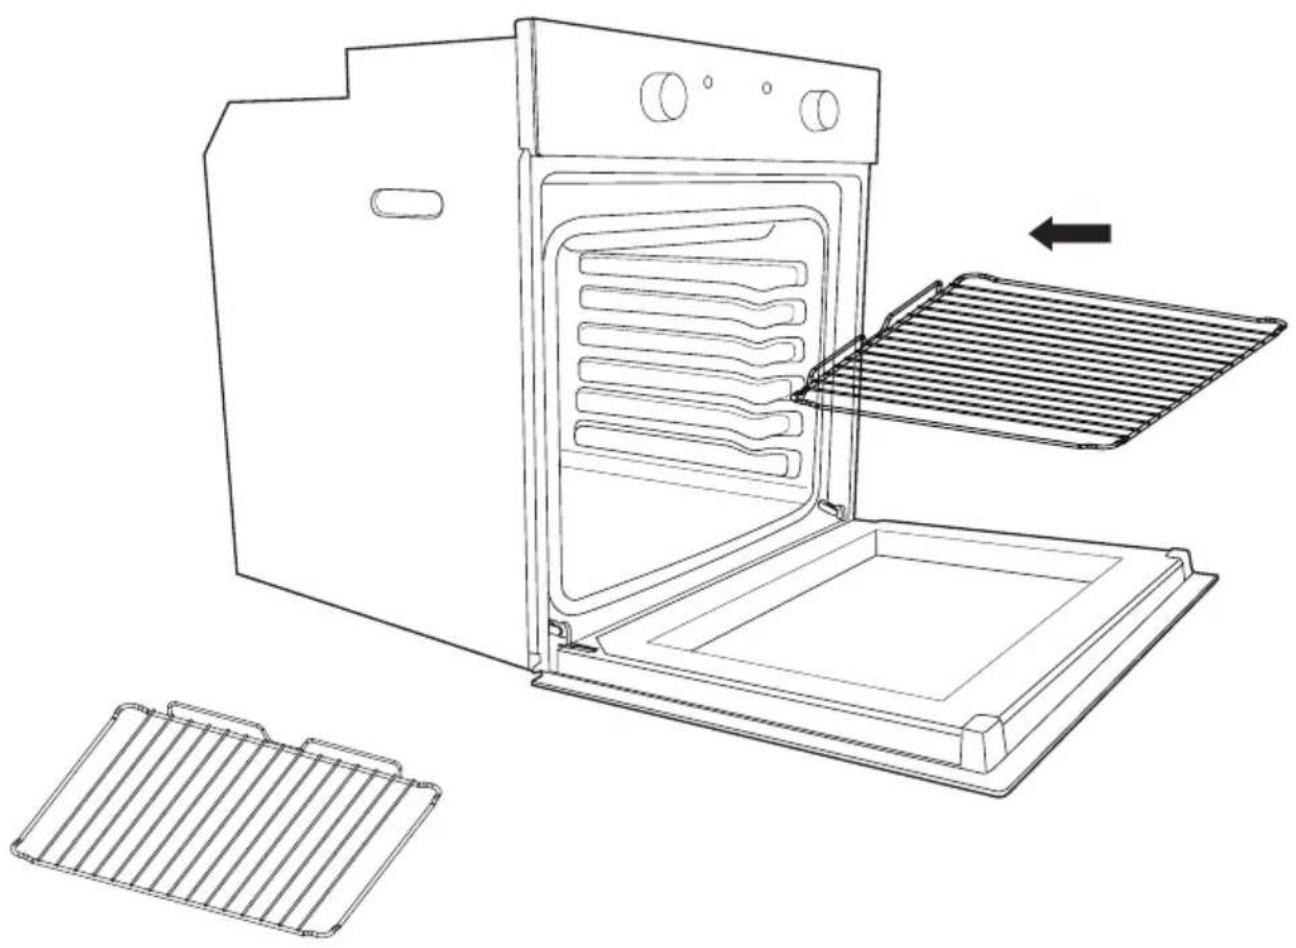
natural_image
Line drawing of an oven with a rack and ventilation grates, showing internal structure and cooling mechanism (no text or symbols)natural_image
Diagram showing a mechanical assembly being processed into a handheld device (no text or symbols present)natural_image
Diagram of an oven with air conditioner unit and hand inserting a rack (no text or symbols)Очистка
natural_image
Simple line drawing of a hand inserting a plug into a socket (no text or symbols)chemical
Two molecular orbital diagrams showing electron density distributions around a central atomchemical
Two molecular orbital diagrams showing electron density distributions around a central atomchemical
Two molecular orbital diagrams showing electron density distributions with labeled orbitals and bondingnatural_image
Line drawing of a microwave oven with a circular inset showing the interiormost pan (no text or symbols)25 W, 300 °C, Tipo G9
natural_image
Technical line drawing of a rectangular electronic device with mounting feet and a horizontal panel, no text or symbols present.
- INSTALACIÓN
- ANTES DE EMPEZAR
- Limpieza
- INSTALLATION
- VOR DEM START
- AVANT DE COMMENCER
- Nettoyage
- SAFETY
- Direct Connection
- Warning: This is a Class i appliance and MuST be earthed.
- BEFORE YOU START
- Switching on / off
- Control panel with 2 knobs
- Control panel with 3 knobs
- Control panel with display
- Description of the timer functions:
- Description of the buttons:
- Warning alarm
- Semi-automatic cooking
- Cooking time setting
- Setting the cooking end time 🤔
- Automatic cooking. (+)
- Practical example:
- Setting the clock
- After cooking:
- Oven accessories
- Cleaning
- Oven cleaning system equipped with the AQUASMART SYSTEM
- Replacing the oven light bulb
- Removing the Door From the Oven
- Removing the Rear Glass for Cleaning
- INSTALAÇÃO
- ANTES DE COMENÇAR
- RETIRAR O VIDRO TRASEIRO PARA LIMPAR
- Установка
- Очистка
Brand : CATA
Model : SE 6204 X
Category : Oven