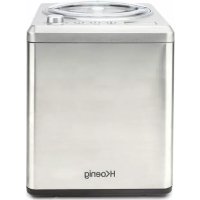
HF340 - Ice machine H.KOENIG - Free user manual and instructions
Find the device manual for free HF340 H.KOENIG in PDF.


Pick your language and provide your email: we'll send you a specifically translated version.
| Product type | Ice cream machine with built-in compressor |
| Brand | H.Koenig |
| Model | HF340 |
| Power supply | 220-240 V ~ 50/60 Hz |
| Power | 150 W (estimated) |
| Refrigerant | R600a (isobutane) – flammable |
| Removable bowl capacity | Approximately 1.5 L (fill to 60% max) |
| Dimensions (L x D x H) | Approximately 25 x 30 x 35 cm |
| Weight | Approximately 8 kg |
| Operating modes | Ice cream, cooling only, mixing only |
| Default operating time | Ice cream: 60 min, cooling: 30 min, mixing: 10 min (adjustable from 5 to 60 min) |
| Keep cold function | Automatic for 2 hours after cycle ends |
| Motor protection | Automatic stop in case of blockage by temperature detection |
| Materials | Removable bowl in food-grade plastic, stainless steel blade, plastic and metal body |
| Maintenance | Unplug before cleaning; hand wash removable parts with a damp cloth; do not immerse the body |
| Safety | Lid lock, automatic stop, overheating protection, use by children aged 8 and above under supervision |
| Included accessories | Fixed bowl, removable bowl, mixing blade, transparent lid, fill lid, measuring spoon, recipe booklet |
| Repairability | Spare parts available from the manufacturer; repair by a qualified professional |
Frequently Asked Questions - HF340 H.KOENIG
Can I use the machine without pre-freezing the bowl?
Yes, the HF340 is equipped with a built-in compressor that cools the ingredients directly. It is not necessary to pre-freeze the bowl.
How much ingredients can I put in the bowl?
To avoid overflow, do not exceed 60% of the removable bowl capacity, as the ice increases in volume while setting.
How to clean my ice cream machine?
Always unplug the appliance before cleaning. Wash the removable bowl, blade, and lids with a damp cloth and mild soap. Never immerse the body of the appliance in water.
What to do if the blade jams during production?
The motor is protected by an automatic stop in case of blockage. Turn off the appliance, remove the blade, and check that the ice is not too hard. Reduce the production time if needed.
Can I open the lid during operation?
Yes, you can use the fill lid to add ingredients (chips, fruits) without interrupting the cycle.
How long does it take to make ice cream?
The ice cream mode lasts 60 minutes by default, but you can adjust the time from 5 to 60 minutes according to the desired consistency.
My ice cream is not firm enough after the cycle, what to do?
You can extend the operating time by using the cooling only mode or freeze the obtained ice cream in a conventional freezer for 30 minutes to 1 hour.
The machine does not start, what to check?
Make sure the plug is properly connected and the voltage matches the one indicated on the appliance. Also check that the lid is correctly locked.
Can I use hot ingredients?
No, the initial temperature of the ingredients should be around 25°C. Do not put hot ingredients, this could damage the compressor.
Where to find the official recipes?
The provided manual contains several basic recipes (vanilla, chocolate, strawberry, lemon sorbet, frozen yogurt) and variations. You can also download them from the website notice-facile.com.
User questions about HF340 H.KOENIG
0 question about this device. Answer the ones you know or ask your own.
Ask a new question about this device
No questions yet. Be the first to ask one.
Download the instructions for your Ice machine in PDF format for free! Find your manual HF340 - H.KOENIG and take your electronic device back in hand. On this page are published all the documents necessary for the use of your device. HF340 by H.KOENIG.
USER MANUAL HF340 H.KOENIG
H
Instruction Manual
Manuel d'instructions
Bedienungsanleitung
Gebruiksaanwijzing
Manual de instrucciones
Manuale d'uso

natural_image
Exterior view of a modern stainless steel Koenig water tower (no signage or text visible on the device body)
Ice cream maker
Turbine à glace
Eismaschine
Ijsmachine
Heladera
Gelatiera

ENGLISH
INSTRUCTION MANUAL
Read this booklet thoroughly before using and save it for future reference
IMPORTANT NOTICES
When using an electrical appliance, basic safety precautions should always be followed to reduce the risk of fire, electric shock, and/or injury, including the following:
1. Read all instructions before using.
2. Ensure the voltage is compliant with the voltage range stated on the rating label, and ensure the earthing of the socket is in good condition.
3. If the supply cord is damaged, it must be replaced by the manufacturer or its service agent or a similarly qualified person in order to avoid a hazard.
4. Do not upend this product or incline it over a 45^ C angle.
5. To protect against risk of electric shock, do not pour water on cord, plug and ventilation, immerse the appliance in water or any other liquid.
6. Unplug the appliance after using or before cleaning.
7. Keep the appliance 8cm from other objects to ensure the good heat releasing.
8. Do not use the accessories which are not recommended by Manufacturer.
9. Do not use the appliance close by flames, hot plates or stoves.
10. Do not switch on the power button frequently (ensure 5min. interval at least) to avoid the damage of compressor.
11. Metal sheet or other electric objects are not allowed to be inserted into the appliance to avoid fire and short circuit.
12. When take out the ice cream, do not knock the barrel or edge of barrel to protect the barrel from damage.
13. Do not switch on the power before install well the barrel or blender blade.
14. The initial temperature of the ingredients is 25 ± 5^ . Do not put the ingredients into freezer for pre-freeze, as it will easily make the blender blade blocked before the ice cream is in good condition.
15. Do not remove the blender blade when the appliance is on working.
16. Do not use outdoors.
17. Never clean with scouring powders or hard implements.
18. Please keep the instruction manual.
19. This appliance can be used by children aged from 8 years and above and persons with reduced physical, sensory or mental capabilities or lack of experience and knowledge if they have been given supervision or instruction concerning use of the appliance in a safe way and understand the hazards involved. Children shall not play with the appliance. Cleaning and user maintenance shall not be made by children without supervision.
20. Children should be supervised to ensure that they do not play with the appliance.
21. The device must not be used if it has been dropped, it obvious signs of damage are visible or if it has leaks.
22. The plug must be removed before cleaning, maintaining or filling the appliance
23. This appliance may be used by children of at least 8 years of age, as long as they are supervised and have been given instructions about using the appliance safely and are fully aware of the dangers involved.
24. Cleaning and maintenance should not be carried out by children unless they are at least 8 years of age and are supervised by an adult.
25. Keep the appliance and its power cord out of reach of children under 8 years of age.
26. When using electrical equipment, safety precautions must always be taken to prevent the risk of fire, electric shock and/or injury in the event of misuse.
27. Make sure that the voltage rating on the typeplate corresponds to your main voltage of your installation. If this is not the case, contact the dealer and do not connect the unit
28. Never leave the unit unattended while in operation.
29. Please keep this document at hand and give it to the future owner in case of transfer of your device
30. The device must not be used if it has been dropped, it obvious signs of damage are visible or if it has leaks.
31. Do not use outside.
32. This appliance is intended to be used in household and similar applications such as
-staff kitchen areas in shops, offices and other working environments;
-farm houses and by clients in hotels, motels and other residential type environments;
-bed and breakfast type environments;
-catering and similar non-retail applications
Warning: Do not store explosive substances such as aerosol cans with a flammable propellant in this appliance.
Warning: Keep ventilation openings, in the appliance enclosure or in the built-in structure, clear of obstruction
Warning: Do not use mechanical devices or other means to accelerate the defrosting process, other than those recommended by the manufacturer
Warning: Do not damage the refrigerant circuit
Warning: Do not use electrical appliances inside the food storage compartments of the appliance, unless
they are of the type recommended by the manufacturer
Warning: When disposing of the appliance, do so only at an authorized waste disposal centre. Do not expose to flame.
The refrigerant isobutene (R600a) is contained within the refrigerant circuit of the appliance, a natural gas with a high level of environmental compatibility, which is nevertheless flammable. During transportation and installation of the appliance, ensure that none of the components of the refrigerant circuit becomes damaged.
The refrigerant (R600a) is flammable.

Caution: risk of fire
If the refrigerant circuit should be damaged:
- Avoid opening flames and sources of ignition.
● Thoroughly ventilate the room in which the appliance is situated.
SPECIFICATIONS:
PARTS & FEATURES:
1) Structure

2) Function buttons

[POWER]: After power up, the machine enters standby mode. Then press the [POWER] button to enter the setting mode, and LCD will display “60: 00” and light up the background light. If no other operation, the light will go off 15 seconds later; then press the [POWER] button again; the machine can go back to standby mode.
[MENU]: By pressing this button, there are 3 working modes for option, including: [ICE CREAM] [COOLING ONLY] and [MIXING ONLY]; the icon “■” of the selected mode will flash. Holding this button for 3 seconds during mode operation, the machine will go back the menu selection.
Time setting knob: Turn the knob to set working time, the default working time to [ICE CREAM] [COOLING ONLY] and [MIXING ONLY] is 60min, 30min, 10min, respectively. Rotating the knob to “-” can decrease the working time, the minimum setting time is 5min. Contrarily, rotating to “+” can increase time, the maximum setting time is 60min.
[START/PAUSE]: After setting the menu and time, press this button to start the working mode. During operation, by pressing this button, the mixing will pause and the time countdown will pause also. At pause mode, press this button again, the machine will continue the previous unfinished operation. Once the ice cream maker enters pause mode and no other operation, the compressor will stop working 3min later and the machine will go back to standby state 10min later.
MAKING ICE CREAM
Cleanness: Before use, thoroughly wash all parts that will come into contact with the ice cream (including the fixed bowl, removable bowl, mixing blade, transparent lid, refill lid, measuring cup and spoon).
Warning: Please be sure the power cord is unplugged.
Important: Always place the Ice Cream Maker upright on a flat surface in order that the build-in COMPRESSOR can provide best performance.
Step 1. Prepare recipe ingredients:
Prepare recipe ingredients from your own recipe or from the recipe booklet here. Note: You do not need to freeze the bowl for hours in a freezer in advance, as this machine has a BUILT-IN COMPRESSOR that freezes the recipe ingredients in operation thus ensure the output of ice cream.
Step 2. Pour the well prepared recipe ingredients into the removable bowl (See below picture).
Step 3. Put the removable bowl into the machine and slightly turn around the bowl to make it fitted well with the fixed bowl (See below picture).
Step 4. Place the mixing blade into the removable bowl and keep the mixing blade bottom hole fitted well with the motor axis. Then put the transparent lid onto the machine and lock it anticlockwise (See below picture).
Step 5. Plug in power, and press the [POWER] button to make the machine electrified.
Step 6. Press the [MENU] button to choose the working mode.
Step 7. Turn the knob to set the working time.
Step 8. Press the [START/PAUSE] button to start working.
Step 9. You can add the favorite ingredients by opening the refill cover (See below picture).

natural_image
Line drawing of a kitchen appliance with a bucket and lid, showing a downward arrow indicating rotation (no text or symbols)
Lock

natural_image
Line drawing of a microwave oven with lid and ventilation slots (no text or symbols)
Open the refilling lid, and add the ingredients

natural_image
Line drawing of a microwave oven with lid and ventilation slots (no text or symbols)
Step 10. After the operation is over, turn off the machine first, and then pull the removable bowl out.

OPERATION:
Keep cool function
To avoid melting when the ice cream is not placed well in time, the following design is supported: After the ice cream is finished and without any other operation, the machine will start up the keep cool function automatically, which can keep cool for 2 hours. Two hours later, machine will enter standby state.
Motor self-protection function
When the ice cream becomes harder, the mixing motor might be blocked. Then the motor protection device makes the mixing motor stop working by detecting its temperature to ensure the life of the motor.
Controlling the Volume of the Ingredients
To avoid overflow and waste, please make sure that the ingredients do not exceed 60% of capacity of the removable bowl (Ice cream expands when being formed)
The Differences Among These Three Working Mode
1. Ice cream mode: the default working time is 60 minutes. The detailed operation is instructed as above.
2. Cooling only mode, the default working time is 30 minutes. The operation is similar with that of ice cream mode, but there isn't mixing function.
3. Mixing only mode, the default working time is 10 minutes. The operation is similar with that of ice cream mode, but there isn't freezing function.
Storage of ice cream
Remove finished ice cream into another container using a plastic scoop or a wooden spoon, do not use a metal scoop avoiding scratch on the inside removable bowl.
MAINTENANCE:
Caution: The plug must be removed before cleaning to avoid electric shock.
1. Take out the mixing blade, wipe it with a dampened cloth
2. Take out the removable bowl, clean it with a dampened soft cloth
3. Wipe the transparent lid and refill lid with a dampened cloth
4. Remove the dirty on the body or other places with a dampened cloth, and do not pour water on cord, plug and ventilation, immerse the appliance in water or any other liquid
5. Allow drying thoroughly with a dry cloth, then return the component to the home position.
ICE CREAM RECIPE MANUAL
VANILLA ICE CREAM
Makes eight 1/2-cup servings.
1 cup whole milk
1/2 cup granulated sugar
3/2 cups heavy cream, well chilled
1 - 2 teaspoons pure vanilla extract, to taste
In a medium bowl, use a hand mixer or a whisk to combine the milk and granulated sugar until the sugar is dissolved, about 1 – 2 minutes on low speed. Stir in the heavy cream and vanilla to taste. Turn machine on, pour mixture into freezer bowl through ingredient spout and let mix until thickened, about 30 – 40 minutes.
Nutritional analysis per serving:
Calories 239 (68% from fat) . carbo. 17g . pro 2g . fat 18g . chol. 69mg .
VARIATIONS:
Mint Chip: Omit the vanilla and replace with 1 to 1-1/2 teaspoons pure peppermint extract (to taste). Chop your favorite 4-ounce bittersweet or semi-sweet chocolate bar into tiny uneven pieces. Add the chopped chocolate during the last 5 minutes of mixing.
Butter Pecan: Melt 1 stick unsalted butter in a 10-inch skillet. Add 1 cup roughly chopped pecans and 1 teaspoon kosher salt. Cook over medi-um-low heat, stirring frequently until the pecans are lightly browned. Remove from the heat, strain (the butter will have a pecan flavor and may be reserved for another use). Allow the pecans to cool completely. Add the toasted buttered pecans during the last 5 minutes of mixing.
Cookies & Cream: Add 3/4 cup coarsely chopped cookies or your favorite candy (chocolate chip, Oreos Mint Oreos., etc.) during the last 5 minutes of mixing.
BASIC CHOCOLATE ICE CREAM
Makes eight 1/2-cup servings.
1 cup whole milk
1/2 cup granulated sugar
240g or 8 ounces bittersweet or semi-sweet chocolate (your favorite),
broken into 1/2-inch pieces
1 cup heavy cream, well chilled
1 teaspoon pure vanilla extract
Heat the whole milk until it is just bubbling around the edges (this may be done on the stovetop or in a microwave). In a blender or food processor fitted with the metal blade, pulse to process the sugar with the chocolate until the chocolate is very finely chopped. Add the hot milk, process until well blended and smooth. Transfer to a medium bowl and let the chocolate mixture cool completely. Stir in the heavy cream and vanilla to taste.
Turn the machine on, pour mixture into freezer bowl through
ingredient spout and let mix until thickened, about 30 - 40 minutes.
Nutritional analysis per serving:
Calories 370 (60% from fat). carbo. 34g. pro 3g. fat 25g. chol. 65mg.
VARIATIONS:
Chocolate Almond: Add 1/2 teaspoon pure almond extract along with the vanilla. Add 1/2 - 3/4 cup chopped toasted almonds or chopped chocolate-coated almonds during the last 5 – 10 minutes of freezing.
Chocolate Cookie: Add 1/2 - 1 cup chopped cookies during the last 5 minutes of freezing.
Chocolate Fudge Brownie: Add 1/2 - 1 cup chopped day old brownies during the last 5 minutes of freezing.
Chocolate Marshmallow Swirl: When removing the ice cream to a container for freezing, layer it with dollops of your favorite chocolate sauce and scoops of marshmallow crème (fluff).
FRESH STRAWBERRY ICE CREAM
Makes eight 1/2-cup servings.
250g or 1 pint fresh ripe strawberries, stemmed and sliced
3/2 tablespoons freshly squeezed lemon juice
1/2 cup sugar, divided
1 cup whole milk
1 cups heavy cream
1 teaspoon pure vanilla extract
In a small bowl, combine the strawberries with the lemon juice and 1/2 cup of the sugar; stir gently and allow to the strawberries to macerate in the juices for 2 hours.
In a medium bowl, use a hand mixer or a whisk to combine the milk, and granulated sugar until the sugar is dissolved, about 1 – 2 minutes on low speed. Stir in the heavy cream plus any accumulated juices from the strawberries and vanilla. Turn the machine on, pour mixture into freezer bowl through ingredient spout and let mix until thickened, about 30 – 40 minutes. Add the sliced strawberries during the last 5 minutes of freezing.
Note: this ice cream will have a “natural” appearance of very pale pink; if a deeper pink is desired, sparingly add drops of red food coloring until desired color is achieved.
Nutritional analysis per serving:
Calories 222 (67% from fat) . carbo. 17g . pro 3g . fat 15g . chol.57mg .
FRESH LEMON SORBET
Makes eight 1/2-cup servings.
3/2 cups sugar
3/2 cups water
1 cup freshly squeezed lemon juice
1 tablespoon finely chopped lemon zest \*
Combine the sugar and water in a medium saucepan and bring to a boil over medium-high heat.
Reduce heat to low and simmer without stirring until the sugar dissolves, about 3 – 5 minutes. Cool completely. This is called a simple syrup, and may be made ahead in larger quantities to have on hand for making fresh lemon sorbet. Keep refrigerated until ready to use.
When cool, add the lemon juice and zest; stir to combine. Turn the machine on, pour the lemon mixture into freezer bowl through ingredient spout and mix until thickened, about 30 – 40 minutes.
When zesting a lemon or lime use a vegetable peeler to remove the colored part of the citrus rind.
Nutritional analysis per serving:
Calories 204 (0% from fat) . carbo. 52g . pro .19g . fat 0g . chol. 0mg .
VARIATION:
Fresh Pink Grapefruit Sorbet: Substitute 1-1/2 cups freshly squeezed pink grapefruit juice for the lemon juice, and 1 tablespoon finely chopped grapefruit zest for the lemon zest. Add 1/4 cup orgeat syrup to the mixture (Orgeat Syrup is used for cocktails such as a Mai Tai or Scorpion and can be found with the drink mixers in most grocery stores).
CHOCOLATE FROZEN YOGURT
Makes eight 1/2-cup servings.
1 cup whole milk
180g or 6 ounces bittersweet or semisweet chocolate, chopped
2 cups low-fat vanilla yogurt
1/4 cup sugar
Combine the milk and chocolate in a blender or food processor fitted with the metal blade and process until well blended and smooth, 20 – 30 seconds. Add the yogurt and sugar; process until smooth, about 15 seconds. Turn the machine ON, pour mixture into freezer bowl through ingredient spout and let mix until thickened, about 30 – 40 minutes.
Nutritional analysis per serving:
Calories 222 (31% from fat) . carbo. 36g . pro 3g . fat 8g . chol. 4mg
ENVIRONMENT
CAUTION:

Do not dispose of this product as it has with other household products. There is a separation of this waste product into communities, you will need to inform your local authorities about the places where you can return this product. In fact, electrical and electronic products contain
hazardous substances that have harmful effects on the environment or human health and should be recycled. The symbol here indicates that electrical and electronic equipment should be chosen carefully, a wheeled waste container is marked with a cross.
FRANÇAIS
MANUEL D'UTILISATION
Lire attentivement ce manuel avant utilisation et le conserver en lieu sûr.
AVIS IMPORTANT
Lorsque vous utilisez un appareil électrique et afin d'éviter tout risque d'incendie, de choc électrique et/ou de blessure, veillez à toujours respecter les consignes de sécurité élémentaires, notamment les suivantes :
1. Lisez toutes les instructions avant d'utiliser l'appareil.
2. Assurez-vous que la tension est conforme à la plage de tension indiquée sur la plaque signalétique et que la mise à la terre de la prise est en bon état.
3. Si le cordon d'alimentation est endommagé, il doit être remplacé par le fabricant, ou son réparateur, ou une personne de même qualification afin d'éviter tout accident.
4. Ce produit ne doit ni être renversé, ni être incliné selon un angle supérieur à 45°.
5. Pour éviter tout risque d'électrocution, ne renversez pas d'eau sur le cordon, la fiche ou la bouche de ventilation ; n'immergez pas l'appareil dans l'eau ou tout autre liquide.
6. Débranchez l'appareil après toute utilisation ou avant de le nettoyer.
7. Gardez l'appareil à une distance de 10 cm des autres objets afin de permettre à la chaleur de s'évacuer.
8. N'utilisez pas d'accessoires non recommandés par le fabricant.
9. N'utilisez pas l'appareil à proximité de flammes, de plaques de cuisson ou d'un four.
10. N'actionnez pas l'interrupteur de marche à intervalles rapprochés (prévoir un intervalle d'au moins 5 minutes) pour éviter d'endommager le compresseur.
11. Afin d'éviter tout risque d'incendie et de court-circuit,
aucune pièce métallique ou autre objet électrique ne peut être introduit dans l'appareil.
12. Lorsque vous sortez la glace, ne cognez pas la cuve ou le bord de la cuve pour ne pas l'endommager.
13. N'allumez pas l'appareil avant de bien installer la cuve ou la lame du mélangeur.
14. La température initiale des ingrédients est de 25 ±5°C. Ne mettez pas les ingrédients dans le congélateur pour la précongélation, car la lame du mélangeur sera facilement bloquée avant que la crème glacée ne soit prête.
15. Ne retirez pas la lame du mélangeur lorsque l'appareil est en marche.
16. Ne pas utiliser l'appareil à l'extérieur.
17. N'utilisez jamais de poudres à récurer ou d'ustensiles durs pour le nettoyage.
18. Veuillez conserver ce manuel d'utilisation.
19. Cet appareil peut être utilisé par des enfants à partir de 8 ans et par des personnes ayant des capacités physiques, sensorielles ou mentales réduites ou un manque d'expérience et de connaissances, seulement si elles ont reçu des instructions concernant l'utilisation de l'appareil en toute sécurité et en comprennent les dangers potentiels. Les enfants ne doivent pas jouer avec l'appareil. Le nettoyage et l'entretien de l'appareil ne doivent pas être effectués par des enfants sans surveillance.
20. Les enfants doivent être surveillés pour s'assurer qu'ils ne jouent pas avec l'appareil.
21. L'appareil ne doit pas être utilisé s'il a chuté ou tombé, s'il y a des signes visibles de dommages ou en cas de fuite
22. La fiche doit être débranchée avant le nettoyage, l'entretien ou le remplissage de l'appareil.
23. Cet appareil peut être utilisé par des enfants âgés d'au moins 8 ans, à condition qu'ils bénéficient d'une
surveillance ou qu'ils aient reçu des instructions quant à l'utilisation de l'appareil en toute sécurité et qu'ils comprennent bien les dangers encourus.
24. Le nettoyage et l'entretien par l'utilisateur ne doivent pas être effectués par des enfants, à moins qu'ils ne soient âgés de plus de 8ans et qu'ils soient sous la surveillance d'un adulte.
25. Conserver l'appareil et son câble hors de portée des enfants âgés de moins 8ans.
26. Lors de l'utilisation d'appareils électriques, des précautions de sécurité doivent toujours être prises pour prévenir tout risque d'incendie, de choc électrique et/ou de blessure en cas de mauvaise utilisation.
27. Vérifier que le voltage indiqué sur la plaque signalétique de l'appareil correspond bien à celui de votre installation électrique. Si ce n'est pas le cas, adressez-vous au revendeur et ne branchez pas l'appareil.
28. Ne jamais laisser l'appareil sans surveillance lorsqu'il est en fonctionnement.
29. Veuillez conserver ce document à disposition et le remettre au futur propriétaire en cas de cession de votre appareil.
30. Veuillez conserver ce document à disposition et le remettre au futur propriétaire en cas de cession de votre appareil
31. Ne pas utiliser à l'extérieur
32. Cet appareil est conçu pour un usage domestique et dans des endroits comme :
\- des coins-cuisines réservés au personnel de magasins, bureaux et autres lieux de travail ;
\- des exploitations agricoles, ainsi que par la clientèle d'hôtels, de motels et autres environnements de type résidentiel ;
\- des hébergements de type chambre d'hôte ;
– par des traiteurs et emplois similaires.
Avertissement : ne stockez pas de substances explosives telles que des aérosols contenant un gaz propulseur inflammable dans l'appareil.
Avertissement : maintenir les ouvertures d'aération du boîtier de l'appareil ou de la structure encastrée, dégagées.
Avertissement : n'utilisez pas de dispositifs mécaniques ou d'autres moyens pour accélérer le processus de dégivrage, autres que ceux recommandés par le fabricant.
Avertissement : veillez à ne pas endommager le circuit réfrigérant.
Avertissement : n'utilisez pas d'appareil électrique à l'intérieur du compartiment de stockage des aliments de l'appareil, sauf s'il est recommandé par le fabricant.
Avertissement : portez au rebut l'appareil uniquement dans un centre de traitement des déchets agréé. Tenez-le à l'écart des flammes.
L'isobutène réfrigérant (R600a) est contenu dans le circuit frigorifique de l'appareil ; c'est un gaz naturel très respectueux de l'environnement mais néanmoins inflammable. Lors du transport et de l'installation de l'appareil, assurez-vous qu'aucun des composants du circuit de réfrigération ne soit endommagé.
Le réfrigérant (R600a) est inflammable.

Attention : risque d'incendie.
Si le circuit de réfrigération est endommagé :
- Evitez les flammes nues et les sources d'inflammation
- Aérez la pièce dans laquelle se trouve l'appareil
SPÉCIFICATIONS :
PIÈCES ET CARACTÉRISTIQUES :
1) Structure

2) Fonction des boutons

[POWER] : après la mise sous tension, la machine passe en mode veille. Appuyez alors sur le bouton [POWER] pour définir les réglages ; l'écran affichera 60 : 00 " et allumera la lumière d'arrière-fond. Si aucune autre opération n'est engagée, la lumière s'éteindra 15 secondes plus tard; appuyez alors sur le bouton [POWER] de nouveau : la machine peut revenir en mode veille.
[MENU] : en appuyant sur ce bouton, vous avez le choix entre 3 modes de fonctionnement : [SORBET], [REFROIDISSEMENT UNIQUEMENT] et [MÉLANGE UNIQUEMENT]; l'icône "■" du mode
sélectionné clignotera. En maintenant ce bouton enfoncé pendant 3 secondes pendant le fonctionnement du mode, la machine recule dans la sélection du menu.
Bouton de réglage de l'heure : tourner le bouton pour régler le temps de travail ; celui par défaut pour [SORBET], [REFROIDISSEMENT UNIQUEMENT] et [MÉLANGE SEULEMENT] est respectivement de 60 min, 30 min et 10 min. Tourner le bouton sur «-» peut diminuer le temps de travail, sachant que le temps de réglage minimum est de 5 minutes. Au contraire, la rotation sur «+» peut augmenter le temps, sachant que le temps de réglage maximum est de 60 minutes.
[START/PAUSE] : après avoir défini le menu et l'heure, appuyez sur ce bouton pour faire fonctionner l'appareil. Pendant le fonctionnement, en appuyant sur ce bouton, l'opération s'interrompt et le compte à rebours se met également en pause. En mode pause, appuyez à nouveau sur le bouton, la machine reprend l'opération précédente non terminée. Une fois que la sorbetière est en mode pause et qu'aucune autre opération n'est en cours, le compresseur cesse de fonctionner 3 minutes plus tard et la machine revient à l'état de veille 10 minutes plus tard.
FAIRE DE LA GLACE
Propreté : avant utilisation, bien laver toutes les pièces qui entreront en contact avec la glace (y compris la cuve fixe, la cuve amovible, la lame du mélangeur, le couvercle transparent, le couvercle de remplissage, la tasse à mesurer et la cuillère).
Attention : assurez-vous que le cordon d'alimentation soit débranché.
Important : placez toujours la machine à glace à la verticale sur une surface plane afin que le COMPRESSEUR puisse offrir les meilleures performances.
Étape 1 : préparer les ingrédients de la recette
Préparez ici les ingrédients de votre recette ou du livret de recettes. Remarque : vous n'avez pas besoin de congeler la cuve pendant des heures dans un congélateur, car cette machine dispose d'un COMPRESSEUR INTÉGRÉ qui gèle les ingrédients de la recette lors du fonctionnement, garantissant ainsi la production de la crème glacée.
Étape 2 : Versez les ingrédients de la recette bien préparés dans le bol amovible (voir la photo ci-dessous)
Étape 3 : placez la cuve amovible dans la machine et tournez-la légèrement pour bien l'ajuster à la cuve fixe (voir la photo ci-dessous).
Étape 4 : placez la lame du mélangeur dans la cuve amovible et maintenez le trou de la lame du mélangeur bien fixé à l'axe du moteur. Placez ensuite le couvercle transparent sur la machine et verrouillez-le dans le sens inverse des aiguilles d'une montre (voir l'image ci-dessous).
Étape 5 : branchez l'appareil et appuyez sur le bouton [POWER] pour l'allumer.
Étape 6 : appuyez sur le bouton [MENU] pour choisir le mode de travail.
Étape 7 : tournez le bouton pour régler le temps de travail.
Étape 8: appuyez sur le bouton [START/PAUSE] pour commencer la production de glace.
Étape 9 : vous pouvez ajouter vos ingrédients préférés en retirant le couvercle de remplissage (voir l'image ci-dessous).

natural_image
Simple line drawing of a kitchen appliance with a bucket and handle, no text or symbols present

Retirer le couvercle de remplissage et ajouter les ingrédients

natural_image
Line drawing of a microwave oven with lid and ventilation slots (no text or symbols)
Étape 10 : une fois l'opération terminée, éteignez d'abord l'appareil, puis retirez la cuve amovible.

FONCTIONNEMENT :
Fonction « keep cool »
Pour éviter que la glace ne fonde, la procédure suivante a été prévue : quand la glace est terminée et qu'aucune autre opération n'est envisagée, la machine démarre automatiquement la fonction « keep cool » pendant 2 heures. Ensuite, la machine passe en mode veille.
Fonction de protection du moteur
Lorsque la glace devient plus dure, le moteur du mélangeur peut être bloqué. Alors, un coupe-circuit du moteur est actionné selon la température de celui-ci pour assurer la durée de vie du moteur.
Contrôle du volume des ingrédients
Pour éviter tout débordement et gaspillage, veuillez-vous assurer que les ingrédients ne dépassent pas 60% de la capacité de la cuve amovible (la glace se dilate lors de sa formation).
Différences entre ces trois modes de fonctionnement
1. Mode crème glacée : le temps de travail par défaut est de 60 minutes. L'opération détaillée est indiquée comme ci-dessus.
2. Mode refroidissement uniquement : le temps de travail par défaut est de 30 minutes. L'opération est similaire à celle du mode crème glacée, mais il n'y a pas de fonction de mélange.
3. Mode de mélange uniquement : le temps de travail par défaut est de 10 minutes. L'opération est similaire à celle du mode crème glacée, mais il n'y a pas de fonction de congélation.
Stockage de la glace
Mettez la crème glacée produite dans un autre récipient en utilisant une cuillère en plastique ou en bois ; n'utilisez pas de pelle en métal pour éviter de rayer l'intérieur de la cuve amovible.
ENTRETIEN :
Attention : la fiche doit être retirée avant le nettoyage de l'appareil pour éviter les chocs électriques.
1. Retirez la lame du mélangeur, essuyez-la avec un chiffon humide
2. Retirez la cuve amovible, nettoyez-la avec un chiffon doux humidifié
3. Essuyez le couvercle transparent et le couvercle de remplissage avec un chiffon humide
4. Enlevez la saleté sur le boitier ou tout autre endroit avec un chiffon humide et ne versez pas d'eau sur le cordon, la fiche et la bouche de ventilation ; ne plongez pas l'appareil dans de l'eau ou tout autre liquide
5. Séchez complètement avec un chiffon sec, puis remettez les accessoires en place
MANUEL DE RECETTES DE CRÈME GLACÉE
GLACE À LA VANILLE
Pour huit portions d'une 1/2 tasse.
1 tasse de lait entier
1/2 tasse de sucre cristallisé
1,5 tasse de crème fraîche, bien froide
1 - 2 cuillères à café d'extrait de vanille pure
Dans un bol moyen, utiliser un batteur à main ou un fouet pour mélanger le lait et le sucre cristallisé jusqu'à ce qu'il soit dissous, environ 1 à 2 minutes à basse vitesse. Ajouter la crème fraîche et la vanille selon votre goût. Mettre la machine en marche, verser le mélange dans la cuve du congélateur et laisser le tout se mélanger jusqu'à épaississement, environ 30 à 40 minutes.
Analyse nutritionnelle par portion :
239 calories (68% de matières grasses), sucres : 17 g, protéines : 2 g, graisses : 18 g, chol. 69 mg.
VARIANTES :
Pépites de chocolat à la menthe : remplacer la vanille par 1 à 1,5 cuillère à café d'extrait de menthe poivrée pure (selon votre goût). Découper 55 g de chocolat amère ou sucré en petits morceaux. Ajouter les morceaux de chocolat pendant les 5 dernières minutes du mélange.
Beurre de noix de pécan : faire fondre une motte de beurre non salé dans une poêle. Ajouter 120 g (½ tasse) de noix découpées grossièrement et ½ cuillère à café de sel. Faire cuire à feu moyen-doux, en remuant fréquemment jusqu'à ce que les noix soient légèrement dorées. Retirer du feu, passer au tamis (le beurre aura une saveur de noix de pécan et pourra être réservé à une utilisation ultérieure). Laisser refroidir les noix complètement. Ajouter les
noix de pécan grillées et beurrées au cours des 5 dernières minutes du mélange.
Cookies et crème : ajouter 3/4 tasse de cookies hachés grossièrement ou votre biscuit préféré (pépites de chocolat, menthe Oreos., etc.) au cours des 5 dernières minutes du mélange.
GLACE AU CHOCOLAT
Pour huit portions d'une 1/2 tasse.
1 tasse de lait entier
1/2 litre de lait,
240 g de chocolat amère ou sucré (selon votre goût),
découpé en petits morceaux
1 tasse de crème fraîche, bien froide
1 cuillère à café d'extrait de vanille pure
Chauffer le lait entier jusqu'à ce qu'il ne frémisse que sur les bords (ceci peut être fait sur la cuisinière ou au micro-onde). Dans un mixeur ou un robot de cuisine muni d'un mélangeur, mélanger le sucre avec le chocolat jusqu'à ce que celui-ci soit très finement haché. Ajouter le lait chaud, mélanger jusqu'à obtenir une consistance homogène et lisse. Transférer dans un bol moyen et laisser le mélange refroidir complètement. Ajouter la crème fraîche et la vanille, selon votre goût.
Allumer la machine, verser le mélange dans la cuve du congélateur par le bec verseur et laisser se mélanger jusqu'à épaississement, environ 30 à 40 minutes.
Analyse nutritionnelle par portion :
370 calories (60% de matières grasses), sucres : 34 g, protéines : 3 g, graisses : 25 g, chol. 65 mg.
VARIANTES :
Amande au chocolat : ajouter 1/2 cuillère à café d'extrait d'amande pure avec la vanille. Ajouter 1/2 à 3/4 tasse d'amandes grillées hachées ou d'amandes enrobées de chocolat haché au cours des 5 à 10 dernières minutes de congélation.
Cookies au chocolat : ajouter 1/2 à 1 tasse de cookies hachés au cours des 5 dernières minutes de congélation.
Chocolate Fudge Brownie : ajouter 1/2 à 1 tasse de brownies hachés de la veille au cours des 5 dernières minutes de congélation.
Chocolate Marshmallow Swirl : lorsque vous mettez la glace dans un récipient pour la congeler, étalez-la avec des morceaux de votre sauce au chocolat préférée et des cuillères de crème à la guimauve.
GLACE À LA FRAISE FRAÎCHE
Pour huit portions d'une 1/2 tasse.
250 g de fraises mûres, fraîches et coupées
2 cuillères à soupe de jus de citron fraîchement pressé
1/2 tasse de sucre
1 tasse de lait entier
1 tasse de crème épaisse
1 cuillère à café d'extrait de vanille pure
Dans un petit bol, mélanger les fraises avec le jus de citron et 1/2 de tasse de sucre et remuer délicatement, puis laisser les fraises mariner dans le jus pendant 2 heures.
Dans un bol moyen, utiliser un batteur à main ou un fouet pour mélanger le lait et le sucre cristallisé jusqu'à ce qu'il soit dissous, environ 1 à 2 minutes à basse vitesse. Ajouter la crème fraîche plus le jus des fraises accumulé et la vanille. Mettre la machine en marche, verser le mélange dans la cuve
du congélateur et laisser se mélanger jusqu'à épaississement, environ 30 à 40 minutes. Ajouter les morceaux de fraise au cours des 5 dernières minutes de congélation.
Remarque : cette glace aura un aspect «naturel» rose très pâle; si vous désirez une couleur plus intense, ajouter avec modération des gouttes de colorant alimentaire rouge.
Analyse nutritionnelle par portion :
222 calories (67% de matières grasses), sucres : 17 g, protéines : 3 g, graisses : 15 g, chol. 57 mg.
GLACE AU CITRON FRAIS
Pour huit portions d'une 1/2 tasse.
1,5 tasse de sucre
1,5 tasse d'eau
1 tasse de jus de citron, fraîchement pressé
1 cuillère à soupe de zestes de citron hachés finement \*
Mélanger le sucre et l'eau dans une casserole moyenne, puis porter à ébullition à feu moyen-vif. Passer à feu à doux, puis laisser mijoter sans remuer jusqu'à ce que le sucre soit dissous, environ 3 à 5 minutes. Laisser refroidir complètement. Ceci s'appelle un sirop simple et pourra être préparé à l'avance en plus grandes quantités afin d'en avoir sous la main au moment de la confection du sorbet au citron frais. Garder au réfrigérateur jusqu'au moment de servir.
Une fois refroidi, ajouter le jus de citron, l'eau et les zestes; incorporer puis mélanger. Mettre la machine en marche, verser le mélange de citron dans la cuve du congélateur et mélanger jusqu'à épaississement, environ 30 à 40 minutes.
Lorsque vous prélevez des zestes d'un citron ou d'un citron vert, utilisez un éplucheur à légumes pour enlever la partie colorée de la peau d'agrumes.
Analyse nutritionnelle par portion :
204 calories (0% de matières grasses), sucres : 52 g, protéines : 19 g, graisses : 0 g, chol. 0 mg
VARIANTES :
Sorbet au pamplemousse rose frais : utiliser 1/2 tasse de jus de pamplemousse rose fraîchement pressé et 1 cuillère à soupe de zestes de pamplemousse finement hachés. Ajouter 30 g de sirop d'orgeat au mélange (le sirop d'orgeat est utilisé pour les cocktails comme le Mai Tai ou le Scorpion et est vendu avec les jus mixtes dans la plupart des épiceries).
YAOURT GLACÉ AU CHOCOLAT
Pour huit portions d'une 1/2 tasse.
1 tasse de lait entier
180 g de chocolat doux ou amère, haché
2 tasses de yaourt à la vanille, écrémé
1/4 de litre de lait,
Mélanger le lait et le chocolat dans un mixeur ou un robot de cuisine jusqu'à obtenir une consistance lisse et homogène, 20 à 30 secondes. Ajouter le yaourt et le sucre; mélanger jusqu'à une consistance lisse, environ 15 secondes. Mettre la machine en marche, verser le mélange dans la cuve du congélateur et laissez se mélanger jusqu'à épaississement, environ 30 à 40 minutes.
Analyse nutritionnelle par portion :
222 calories (31% de matières grasses), sucres : 36 g, protéines : 3 g, graisses : 8 g, chol. 4 mg
ENVIRONNEMENT
ATTENTION :

Vous ne devez pas vous débarrasser de cet appareil avec vos déchets ménagers. Un système de collecte sélective pour ce type de produit est mis en place par les communes, vous devez vous renseigner auprès de votre mairie afin d'en connaître les emplacements.
En effet, les produits électriques et électroniques peuvent contenir des substances dangereuses qui ont des effets néfastes sur l'environnement ou la santé humaine et doivent être recyclés. Le symbole ci-contre indique que les équipements électriques et électroniques font l'objet d'une collecte sélective, il représente une poubelle sur roues barrée d'une croix.
Adeva SAS / H.Koenig Europe - 8 rue Marc Seguin, 77290 Mitry-Mory, France www.hkoenig.com - https://sav.hkoenig.com - Tél: +33 1 64 67 00 05
DEUTSCH
BEDIENUNGSANLEITUNG
Lesen Sie dieses Heft sorgfältig vor dem Gebrauch und bewahren Sie dieses als künftige Referenz auf
WICHTIGE HINWEISE
Während der Nutzung des elektrischen Gerätes müssen grundliegende Sicherheitsvorkehrungen immer befolgt werden, um das Risiko eines Brandes, Stromschlages, und/oder Verletzungen zu vermeiden, einschließlich die folgenden:
1. Lesen Sie vor dem Gebrauch alle Anweisungen.
2. Stellen Sie sicher, dass die Spannung mit dem auf dem Typenschild angegebenen Spannungsbereich übereinstimmt, und vergewissern Sie sich, dass die Erdung der Steckdose in einem guten Zustand ist.
3. Wenn das Stromkabel beschädigt ist, muss es von dem Hersteller, seinem Dienstleister oder einer ähnlich qialifizierten Person ersetzt werden, um Gefahren zu vermeiden.
4. Stellen Sie das Produkt nicht hochkant oder kippen Sie dieses nicht über einen 45°C Winkel.
5. Um sich vor einem Stromschlag zu schützen, gießen Sie kein Wasser auf das Kabel, den Stecker oder die Lüftung, tauchen Sie das Gerät nicht in Wasser oder andere Flüssigkeiten.
6. Ziehen Sie nach der Nutzung oder vor der Reinigung den Stecker.
7. Halten Sie das Gerät 8cm von anderen Gegenständen entfernt, um eine ausreichende Hitzeresistenz zu ermöglichen.
8. Benutzen Sie kein Zubehör, das nicht von dem Hersteller empfohlen worden ist.
9. Benutzen Sie das Gerät nicht in der Nähe von Flammen,
Heizplatten oder Öfen.
10. Schalten Sie die Power-Taste nicht zu häufig um (lassen Sie mindestens einen 5 Minuten Abstand), um eine Beschädigung vom Kompressor zu vermeiden.
11. Blech oder andere elektrische Gegenstände dürfen in das Gerät nicht eingesetzt werden, um ein Brand oder einen Kurzschluss zu vermeiden.
12. Wenn Sie das Eis entnehmen, versuchen Sie, das Fass oder den Fassrand nicht zu stoßen, um dieses vor Beschädigungen zu schützen.
13. Schalten Sie den Strom nicht an, bevor Sie das Fass oder den Mischer-Flügel installiert haben.
14. Die ursprüngliche Temperatur von Zutaten beträgt 25±5°C. Frieren Sie die Zutaten davor nicht ein, da es den Mischer-Flügel beeinträchtigen kann, bevor das Eis den richtigen Zustand erreicht hat.
15. Entfernen Sie den Mischer-Flügel nicht, wenn das Gerät im Betrieb ist.
16. Benutzen Sie das Gerät nicht draußen.
17. Reinigen Sie es niemals mit Scheuerpulver oder harten Utensilien.
18. Bewahren Sie die Bedienungsanleitung auf.
19. Das Gerät kann durch Kinder ab 8 Jahren und älter und Personen mit eingeschränkten physischen, sensorischen oder geistigen Fähigkeiten oder mangels Erfahrung und Wissen benutzt werden, wenn sie beaufsichtigt werden oder erhielten Anweisungen, wie das Gerät auf sichere Weise zu benutzen ist und kennen die damit verbundenen Gefahren. Kinder dürfen mit dem Gerät nicht spielen. Die Renigung und Wartung dürfen nicht von unbeaufsichtigen Kindern durchgeführt werden.
20. Kinder müssen beaufsichtigt werden, um sicher zu stellen, dass sie mit dem Gerät nicht spielen.
21. Das Gerät darf nicht benutzt werden, wenn es fallen gelassen wurde, wenn auffällige Zeichen von Beschädigungen sichtbar sind oder wenn es undicht ist
22. Der Stecker muss vor der Reinigung, Wartung oder dem Auffüllen des Gerätes entfernt werden.
23. Dieses Gerät darf von Kindern ab 8 Jahren benutzt werden, sofern diese beaufsichtigt werden oder eine Einweisung in den sicheren Gebrauch des Geräts erhalten haben und die damit verbundenen Gefahren verstehen.
24. Kinder dürfen das Gerät nur reinigen oder pflegen, wenn sie mindestens 8 Jahre alt sind und von einem Erwachsenen beaufsichtigt werden.
25. Bewahren Sie das Gerät und das zugehörige Netzkabel außerhalb der Reichweite von Kindern unter 8 Jahren auf.
26. Bei der Verwendung elektrischer Geräte sind stets Sicherheitsvorkehrungen zu treffen, um bei unsachgemäßer Verwendung die Gefahr von Bränden, elektrischen Schlägen und/oder Verletzungen zu vermeiden.
27. Achten Sie darauf, dass die auf dem Typenschild angegebene Nennspannung mit Ihrer Netzspannung übereinstimmt Ihrer Installation. Wenn dies nicht der Fall ist, wenden Sie sich an den Händler und schließen Sie das Gerät nicht an.
28. Lassen Sie das Gerät während des Betriebs niemals unbeaufsichtigt.
29. Bitte halten Sie dieses Dokument bereit und geben Sie es im Falle einer Übertragung Ihres Gerätes an den zukünftigen Besitzer weiter.
30. Das Gerät darf nicht benutzt werden, wenn es fallen gelassen wurde, wenn auffällige Zeichen von Beschädigungen sichtbar sind oder wenn es undicht ist.
31. Nicht im Freien verwenden.
32. Das Gerät ist dafür geeignet, im Haushalt oder ähnlichen Einrichtungen benutzt zu werden, wie zum Beispiel:
- Küchenbereiche für Mitarbeiter in Geschäften, Büros und anderen Arbeitsumgebungen;
- von den Gästen in Hotels, Motels und anderen Wohnumgebungen;
- Bed and Breakfast- Einrichtungen
- beim Catering und anderen Non-Retail Anwendungsbereichen.
Warnung:
Lagern Sie keine explosiven Stoffe wie z.B. Spraydosen mit entflammbaren Treibmittel in diesem Gerät.
Warnung:
Halten Sie die Lüftungsöffnungen in dem Gerätsgehäuse oder in dem integrierten Bauwerk frei von Hindernissen.
Warnung:
Benutzen Sie keine mechanischen Vorrichtungen oder andere Mittel, um den Auftauvorgang zu beschleunigen, außer diesen, die von dem Hersteller empfohlen wurden.
Warnung:
Beschädigen Sie nicht den Kältemittelkreislauf.
Warnung:
Benutzen Sie keine elektrischen Geräte in den Lagerfächer für Lebensmittel in dem Gerät, es sei denn diese sind von dem Hersteller empfohlen worden.
Warnung: Entsorgen Sie das Gerät ausschließlich in
autorisierten Abfallwirtschaftszentren. Setzen Sie es keinen Flammen aus.
Der Kältemittelkreislauf des Gerätes beinhaltet das Kältemittel-Isobuten (R600a), natürliches Gas mit einer hohen Umweltverträglichkeit, das jedoch entzündbar ist. Während des Transports und der Montage des Gerätes, stellen Sie sicher, dass keine Teile des Kältemittelkreislaufs beschädigt werden. Das Kältemittel (R600a) ist entflammbar.

Vorsicht: Risiko eines Brandes
Wenn der Kältemittelkreislauf beschädigt wird:
- Vermeiden Sie offene Flammen und Zündquellen.
- Lüften Sie sorgfältig den Raum, in dem sich das Gerät befindet.
SPEZIFIKATIONEN:
TEILE & EIGENSCHAFTEN
1) Struktur

2) Funktionstasten

[POWER]: Nach dem Einschalten betritt die Maschine den Standby-Modus. Drücken Sie dann auf die [POWER] Taste, um den Einstellungs-Modus zu betreten; der LCD-Bildschirm wird "60: 00" anzeigen und das Hintergrundlicht wird angehen. Wenn das Gerät nicht bedient wird, geht das Licht in 15 Sekunden aus; drücken Sie dann auf die [POWER] Taste erneut; die Maschine kann wieder in den Standby-Modus gehen.
[MENU] Indem Sie auf diese Taste drücken, können Sie zwischen 3 Arbeitsmodi auswählen, einschließlich: [EIS] [NUR KÜHLEN] [NUR MISCHEN]; Das Symbol “■” der gewählten Weise wird angehen. Wenn Sie diese Taste 3 Sekunden während des Modus-Betriebs gedrückt halten, geht die Maschine wieder zu der Menü-Auswahl.
Der Zeit-Einstellregler: Drehen Sie den Regler, um die Arbeitszeit einzustellen, die voreingestellte Arbeitszeit für [EIS] [NUR KÜHLEN] und [NUR MISCHEN] beträgt entsprechend 60 Minuten, 30 Minuten und 10 Minuten. Indem Sie den Regler zu “-“ drehen, verkürzen Sie die Arbeitszeit, Die minimal eingestellte Zeit ist 5 Minuten. Im Gegensatz dazu, verlängert das Drehen nach “+” die Zeit, die maximale Zeit beträgt 60 Minuten.
[START/PAUSE]: Nachdem Sie das Menü und die Zeit eingestellt haben, drücken Sie auf diese Taste, um den Arbeitsmodus auszuwählen. Während des Betriebs, wird das Mischen und der Countdown anhalten, wenn Sie auf diese Taste drücken. Bei dem Pause-Modus, drücken Sie auf diese Taste erneut, die Maschine wird die unbeendete Operation fortsetzen. Sobald die Eismaschine den Pausen-Modus betritt und es keine andere Operation gibt, wird der Kompressor nach 3 Minuten den Betrieb einstellen und die Maschine nach 10 Minuten in Standby gehen.
EIS MACHEN
Sauberkeit: Vor dem Gebrauch, reinigen Sie sorgfältig alle Teile, die in Kontakt mit dem Eis kommen werden (einschließlich die befestigte Schüssel, die abnehmbare Schüssel, den Mischer-Flügel, den transparenten Deckel, den Nachfüll-Deckel, den Messbecher und den Löffel).
Warnung: Stellen Sie bitte sicher, dass das Stromkabel nicht angeschlossen ist.
Wichtig: Platzieren Sie die Eismaschine immer aufrecht auf einer flachen Ebene, damit der eingebaute KOMPRESSOR beste Leistungen liefern kann.
Schritt 1: Bereiten Sie die Rezeptzutaten vor:
Bereiten Sie die Rezeptzutaten aus Ihrem eigenen Rezept oder aus dem Rezeptheft hier vor. Hinweis: Sie brauchen die Schüssel nicht in einem Gefrierfach stundenlang im Voraus einzufrieren, da diese Maschine über einen EINGEBAUTEN KOMPRESSOR verfügt, der die Rezeptzutaten während des Betriebs einfriert und dadurch die Ausgabe von Eis ermöglicht.
Schritt 2. Gießen Sie die gut vorbereiteten Rezeptzutaten zusammen in die abnehmbare Schüssel,(siehe das Bild unten).
Schritt 3. Platzieren Sie die abnehmbare Schüssel in der Maschine und drehen Sie diese leicht, um sie richtig an die befestigte Schüssel anzupassen (Siehe das Bild unten).
Schritt 4. Platzieren Sie den Mischer-Flügel in der abnehmbaren Schüssel und befestigen Sie richtig das Bodenloch des Mischer-Flügels an der Motorachse. Dann platzieren Sie den transparenten Deckel auf die Maschine und verriegeln Sie diesen linksläufig (Siehe das Bild unten).
Schritt 5. Schalten Sie den Strom an und drücken Sie auf die [POWER] Taste, um die Maschine mit Strom zu versorgen.
Schritt 6. Drücken Sie auf die [MENU] Taste, um den Arbeitsmodus zu wählen.
Schritt 7. Drehen Sie den Regler, um die Arbeitszeit einzustellen.
Schritt 8. Drücken Sie auf die [START/PAUSE] Taste, um den Betrieb zu starten.
Schritt 9. Sie können Ihre Lieblingszutaten hinzufügen, indem Sie den Nachfüll-Deckel öffnen.

natural_image
Line drawing of a kitchen appliance with a bucket and lid, showing a downward arrow indicating rotation (no text or symbols)


Schritt 10. Nachdem der Vorgang abgeschlossen ist, schalten Sie die Maschine zuerst aus, danach ziehen Sie die abnehmare Schüssel heraus.

BEDIENUNG:
Kühlhalte-Funktion
Um das Schmelzen des Eises, wenn es nicht rechtzeitig serviert wird, zu vermeiden, unterstützt das Gerät die folgende Funktion: Nachdem das Eis fertig ist und der Vorbereitungsvorgang beendet wird, schaltet die Maschine die Kühlhalte-Funktion automatisch an, die das Eis für 2 Stunden kühlen kann, Nach 2 Stunden geht das Gerät in den Standby-Modus.
Motor-Selbstschutzfunktion
Wenn das Eis härter wird, kann der Mischer-Motor blockiert werden. Die Motor-Schutzfunktion hält den Mischer-Motor an, indem diese die Temperatur erkennt, um dem Motor ein langes Leben zu ermöglichen.
Kontrolle des Zutatenumfangs
Um das Überlaufen und Verschwenden zu vermeiden, stellen Sie bitte sicher, dass die Zutaten 60% der Kapazität von der abnehmbaren Schüssel nicht überschreiten (das Eis dehnt sich aus, wenn es geformt wird).
Die Unterschiede zwischen den drei Arbeitsmodi
1. Eis-Modus: Die voreingestellte Arbeitszeit beträgt 60 Minuten. Detallierte Bedienungsanweisungen sind oben beschrieben.
2. Nur Kühlen-Modus: Die voreingestellte Arbeitszeit beträgt 30 Minuten. Die Bedienung ist ähnlich wie bei dem Eis-Modus, jedoch ohne die Mischfunktion.
3. Nur Mischen-Modus: Die voreingestellte Arbeitszeit beträgt 10 Minuten. Die Bedienung ist ähnlich wie bei dem Eis-Modus, jedoch ohne die Einfrier-Funktion.
Lagerung des Eises
Verlegen Sie das fertige Eis in einen anderen Behälter mithilfe einer Plastikschaufel oder eines Holzlöffels, benutzen Sie keine Metallschaufel, um Kratzer auf der Innenfläche der abnehmbaren Schüssel zu vermeiden.
WARTUNG:
Achtung: Der Stecker muss vor der Reinigung gezogen werden, um einen Stromschlag zu vermeiden.
(1) Entnehmen Sie den Mischer-Flügel und wischen Sie diesen mit einem befeuchteten Tuch ab.
(2) Entnehmen Sie die abnehmbare Schüssel und reinigen Sie diese mit einem feuchten, weichen Tuch.
(3) Wischen Sie den transparenten Deckel und den Nachfüll-Deckel mit einem feuchten Tuch ab.
(4) Entfernen Sie Verschmutzungen auf dem Gehäuse und anderen Stellen des Gerätes mit einem feuchten Tuch, gießen Sie kein Wasser auf das Kabel, den Stecker oder die Lüftung, tauchen Sie das Gerät nicht in Wasser oder andere Flüssigkeiten.
(5) Trocknen Sie das Gerät gründlich mit einem trockenen Tuch, dann montieren Sie die Teile auf ihre Ausgangspasitionen zurück.
EIS-REZEPTHEFT
VANILLEEIS
Beinhaltet acht 12 -Becher Portionen.
1 Tasse Vollmilch
12 Tasse Kristallzucker
3/2 Tassen Schlagsahne, gut gekühlt
1-2 Teelöffel reiner Vanilleextrakt, nach Geschmack
In einer mittelgroßen Schüssel, benutzen Sie einen Handmixer oder einen Schneebesen, um die Milch und den Kristallzucker zu vermischen, bis der Zucker sich aufgelöst hat, ungefähr 1-2 Minuten bei einer niedrigen Geschwindigkeit. Verrühren Sie die Schlagsahne und Vanille nach Geschmack.
Schalten Sie die Maschine an, gießen Sie die Mischung in die Gefrier-Schüssel durch den Zutaten-Ausguss und lassen Sie das Gerät mischen, bis die Mischung sich verdickt hat, ungefähr 30-40 Minuten.
Ernährungsanalyse pro Portion:
Kalorien 239 (68% von Fett). Karbo. 17g. pro 2g. Fett 18g. Cholesterin 69mg.
OPTIONEN:
Mint Chip: Lassen Sie die Vanille weg und ersetzen Sie diese mit 1 bis 1-1/2 Teelöffel mit reinem Pffeferminzextrakt (nach Geschmack). Hacken Sie Ihre Lieblings- 4-Unzen bittersüße oder halbsüße Schokoladentafel in kleine, ungleiche Stücke. Fügen Sie die gehackte Schokolade während der letzten 5 Minuten des Vorbereitungsvorgangs hinzu.
Butter-Pekannuss: Schmelzen Sie 1 Stück ungesalzene Butter in einer 10-Zoll Pfanne. Fügen Sie 1 Tasse grob gehackte Pekannüsse und 1 Teelöffel Koscher-Salz hinzu. Kochen Sie es bei mittlerer bis niedriger Hitze, mit häufigen Umrühren, bis die Pekannüsse leicht braun werden. Nehmen Sie diese von der Hitze und seihen Sie diese ab (die Butter wird einen Pekannus-Geschmack haben und kann für ein anderes Mal aufbewahrt werden). Lassen Sie die Pekannüsse komplett abkühlen. Fügen Sie die angebratenen, gebutterten Pekannüsse während der letzten 5 Minuten des Vorbereitungsvorgangs hinzu.
Cookies & Crème: Fügen Sie eine 34 Tasse grob gehackte Cookies oder Ihre Lieblings-Süßigkeit (Schokochips, Oreos, Minze-Oreos, usw.) während der letzten 5 Minuten des Vorbereitungsvorgangs hinzu.
EINFACHES SCHOKOEIS
Beinhaltet acht 12 -Becher Portionen.
1 Tasse Vollmilch
12 Tasse Kristallzucker
240g oder 8 Unzen bittersüße oder halbsüße Schokolade (Ihre Lieblingssorte) gebrochen in 12 -Zoll Stücke
1 Tasse Schlagsahne, gut gekühlt
1 Teelöffel reiner Vanilleextrakt
Kochen Sie die Vollmilch auf, bis diese anfängt, am Rand zu blubbern (Sie können es auf einer Herdplatte oder in einer Mikrowelle machen). In einem Mixer oder einer Küchenmaschine mit Metallklingen, verarbeiten Sie den Zucker mit der Schokolade, bis die Schokolade sehr fein gehackt ist. Fügen Sie die heiße Milch hinzu und verarbeiten Sie diese, bis die Substanz richtig vermischt und gleichmäßig ist. Verlegen Sie diese in eine mittlere Schüssel und lassen Sie die Schoko-Mischung komplett abkühlen. Rühren Sie die Schlagsahne und Vanille nach Geschmack ein.
Schalten Sie die Maschine an, gießen Sie die Mischung in die Gefrier-Schüssel durch den Zutaten-Ausguss und lassen Sie die Mischung dort, bis diese sich verdickt hat, ungefähr 30-40 Minuten.
Ernährungsanalyse pro Portion:
Kalorien 370 (60% von Fett). Karbo. 34g. pro 3g. Fett 25g. Cholesterin 65mg.
OPTIONEN:
Schoko-Mandel: Fügen Sie 12 Teelöffel reiner Mandelextrakt zusammen mit Vanille hinzu. Fügen Sie 12 bis 34 Tasse gehackte und geröstete Mandeln oder gehackte, schokoladen-überzogene Mandeln während der letzten 5-10 Minuten vorm Einfrieren hinzu.
Schoko-Cookie: Fügen Sie 12 -1 Tasse gehackte Cookies während der letzten 5 Minuten vorm Einfrieren hinzu.
Schokoladenfondant- Brownie: Fügen Sie ½- 1 Tasse gehackte, ein-Tag-alte Brownies während der letzten 5 Minuten vorm Einfrieren hinzu.
Schokoladen-Marshmallow Strudel: Wenn Sie das Eis in einen Behälter zum Einfrieren verlegen, schichten Sie es mit mehreren Klackse von Ihrer Lieblings- Schokosoße und Kugeln von der Marshmallow-Crème (Fluff).
FRISCHES ERDBEEREIS
Beinhaltet acht 12 -Becher Portionen.
250g oder 1 Pint frische, reife Erdbeeren, gereinigt und geschnitten
3/5 Teelöffel frisch ausgepresster Zitronensaft
12 Tassen Zucker, aufgeteilt
1 Tasse Vollmilch
1 Tasse Schlagsahne
1 Teelöffel reiner Vanilleextrakt
In einer kleinen Schüssel, vermengen Sie die Erdbeeren mit Zitronensaft und 12 Tassen Zucker; rühren Sie vorsichtig um und lassen Sie die Erdbeeren in dem Saft für 2 Stunden einweichen.
In einer mittleren Schüssel, benutzen Sie einen Stabmixer oder einen Schneebesen, um die Milch mit dem Kristallzucker zu vermischen, bis sich der Zucker auflöst, ungefähr 1-2 Minuten bei niedriger Geschwindigkeit. Rühren Sie die Schlagsahne mit dem angesammelten Saft von Erdbeeren und Vanille ein. Schalten Sie die Maschine an, gießen Sie die Mischung in die Gefrier-Schüssel durch den Zutaten-Ausguss und lassen Sie die Maschine mischen, bis die Mischung sich verdickt hat, ungefähr 30-40 Minuten. Fügen Sie die geschnittenen Erdbeeren während der letzten 5 Minuten vorm Einfrieren hinzu.
Hinweis: Dieses Eis wird über eine “natürliche”, hellrosane Farbe verfügen; Wenn eine kräftigere Pinkfarbe gewünscht ist, fügen Sie sparsam ein paar Tropfen von roter Lebensmittelfarbe hinzu, bis die gewünschte Farbe erreicht ist.
Ernährungsanalyse pro Portion:
Kalorien 222 (67% von Fett). Karbo. 17g. pro 3g. Fett 15g. Cholesterin 57mg.
FRISCHES ZITRONENSORBET
Beinhaltet acht 12 -Becher Portionen.
3/2 Tassen Zucker
3/2 Tassen Wasser
1 Tasse frisch gepresster Zitronensaft
1 Esslöffel fein gehackte Zitronenschale\*
Vermischen Sie den Zucker und Wasser in einem mittelgroßen Topf und kochen Sie die Mischung bei mittlerer Hitze auf. Verringern Sie die Hitze und köcheln Sie den Inhalt, ohne diesen umzurühren, bis der Zucker sich auflöst, für ungefähr 3-5 Minuten. Kühlen Sie die Mischung vollständig ab. Dies wird ein einfacher Syrup genannt und kann vorrätig in größeren Mengen vorbereitet werden, um ein frisches Zitronensorbet zu machen. Lagern Sie ihn gekühlt, bis er gebrauchsfertig wird.
Wenn kühl, fügen Sie den Zitronensaft und die Schale hinzu und verrühren Sie beides; Schalten Sie die Maschine an, gießen Sie die Zitronenmischung in die Gefrier-Schüssel durch den Zutaten-Ausguss und lassen Sie die Maschine mischen, bis der Inhalt sich verdickt hat, ungefähr 30-40 Minuten.
Wenn Sie eine Zitrone oder Limette schälen, benutzen Sie einen Gemüseschäler, um die verfärbten Teile vom Zitrusgewächs zu entfernen.
Ernährungsanalyse pro Portion:
Kalorien 204 (0% von Fett) . Karbo. 52g . pro 19g . Fett 0g . Cholesterin 0mg .
OPTIONEN:
Frisches Pink-Grapefruit Sorbet: Ersetzen Sie Zitronensaft durch 12 Tasse frisch gepressten Pink-Grapefruitsaft, und die Zitronenschale durch 1 Esslöffel fein gehackte Grapefruit-Schale. Fügen Sie 14 Tasse Mandelmilch-Syrup zu der Mischung hinzu. (Mandelmilch-Syrup wird für Cocktails wie z. B. Mai Tai oder Scorpion benutzt und kann unter Getränkemischungen in meisten Lebensmittelgeschäften gekauft werden).
SCHOKO- FROZEN YOGURT
Beinhaltet acht 12 -Becher Portionen.
1 Tasse Vollmilch
180g oder 6 Unzen bittersüße oder halbsüße Schokolade, gehackt
2 Tassen fettarmer Vanillejoghurt
14 Tasse Zucker
Vermischen Sie die Milch und Schokolade in einem Mixer oder einer Küchenmaschine mit Metallklingen und verarbeiten Sie diese, bis die Mischung richtig vermischt und gleichmäßig ist, ca 20 bis 30 Sekunden. Fügen Sie den Joghurt und den Zucker hinzu, und verarbeiten Sie diese, bis die Mischung gleichmäßig ist, für ca. 15 Sekunden. Schalten Sie die Maschine an, gießen Sie die Mischung in die Gefrier-Schüssel durch den Zutaten-Ausguss und lassen Sie die Mischung dort, bis diese sich verdickt hat, ungefähr 30-40 Minuten.
Ernährungsanalyse pro Portion:
Kalorien 222 (31% von Fett) . Karbo. 36g . pro 3g . Fett 8g . Cholesterin 4mg .
UMWELT
ACHTUNG:

Werfen Sie nicht dieses Produkt, wie es mit anderen Haushaltsprodukten hat. Es gibt eine Mülltrennungs von diesem Produkt in Gemeinden, Sie müssen Ihre lokalen Behörden über die Orte, wo man dieses Produkt zurückgeben können zu informieren. In der Tat enthalten elektrische und elektronische Produkte gefährliche Stoffe, die schädliche Auswirkungen auf die Umwelt oder die menschliche Gesundheit haben und sollte recycelt werden. Das Symbol hier darauf hinweisen, dass elektrische oder elektronische Geräte sollten sorgfältig ausgewählt werden, ist ein fahrbarer Abfallbehälter mit einem Kreuz markiert.
Adeva SAS / H.Koenig Europe - 8 rue Marc Seguin, 77290 Mitry-Mory, France www.hkoenig.com - https://kundenservice.hkoenig.com - Tél: +33 1 64 67 00 05
NEDERLANDS
GEBRUIKERSHANDLEIDING
Lees dit goed door voor gebruik en bewaar het voor toekomstige naslag.
BELANGRIJKE OPMERKINGEN
Bij het gebruik van elektrische apparaten moeten de standaard veiligheidsinstructies worden opgevolgd om de kans op vuur, elektrische schokken en/of verwondingen te verkleinen, inclusief het volgende:
1. Lees alle instructies voor gebruik.
2. Controleer dat het voltage overeenkomt met het voltage op het typeplaatje, en controleer dat de aarde van het stopcontact goed functioneert.
3. Als de stroomkabel beschadigd is, moet het worden vervangen door de fabrikant, een servicemonteur of een gelijkwaardig gekwalificeerd persoon om gevaren te vermijden.
4. Dit apparaat niet omdraaien of verder dan 45°C.
5. Ter voorkoming van een elektrische schok, geen water over de kabel, stekker of ventilatie sprenkelen, niet het apparaat in water onder dompelen of een andere vloeistof.
6. Haal de stekker uit het stopcontact na gebruik of voor de schoonmaak.
7. Houd het apparaat 8cm verwijderd van andere objecten om te verzekeren dat de hitte goed kwijt kan.
8. Gebruik geen accessoires die niet zijn aanbevolen door de fabrikant.
9. Gebruik het apparaat niet in de buurt van vlammen, fornuizen of kachels.
10. Druk niet regelmatig op de power knop (minimaal 5 min tussenpozen) om schade aan de compressor te vermijden.
11. Metalen of andere geleidende objecten mogen niet in het
apparaat om vuur en kortsluiting te voorkomen.
12. Bij het eruit halen van het ijs, niet tegen de kom of de rand van de kom tikken om beschadiging te voorkomen.
13. Niet het apparaat inschakelen voordat de kom of mixermes is geplaatst.
14. De initiële temperatuur van de ingrediënten is 25±5°C. Plaats de ingrediënten van te voren niet in de diepvries, dit kan het mixermes blokkeren voordat het ijs in goede staat is.
15. Niet het mixermes verwijderen als het apparaat in werking is.
16. Niet buiten gebruiken.
17. Nooit schoonmaken met bijtende middelen of harde spullen.
18. Bewaar de gebruikershandleiding.
19. Dit apparaat kan gebruikt worden door kinderen van 8 jaar en ouder en door personen met beperkte geestelijke of lichamelijke capaciteiten, of met een gebrek aan ervaring en kennis, zolang ze toezicht krijgen of instructies voor het veilig gebruik van dit apparaat hebben gehad en de bijbehorende gevaren begrijpen. Kinderen mogen niet met dit apparaat spelen.
Schoonmaken en gebruikersonderhoud mag niet worden uitgevoerd door kinderen zonder toezicht.
20. Kinderen moeten onder toezicht worden gehouden, om te verzekeren dat ze niet met het apparaat spelen.
21. Het apparaat mag niet worden gebruikt als het is gevallen, er zijn duidelijke tekenen van schade zichtbaar of er zijn lekken.
22. De stekker moet uit het stopcontact worden gehaald voor het schoonmaken, onderhouden of vullen van het apparaat.
23. Dit apparaat mag worden gebruikt door kinderen vanaf 8 jaar en ouder indien dit gebeurt onder toezicht, als zij van
tevoren instructies hebben ontvangen betreffende het veilige gebruik van het apparaat en als zij de mogelijke gevaren kennen.
24. Reiniging en onderhoud mogen niet worden uitgevoerd door kinderen tenzij ze 8 jaar of ouder zijn en onder toezicht van een volwassene staan.
25. Houd het apparaat en het snoer buiten bereik van kinderen onder de 8 jaar.
26. Bij het gebruik van elektrische apparatuur moeten altijd veiligheidsmaatregelen worden genomen om het risico van brand, elektrische schokken en/of letsel in geval van verkeerd gebruik te voorkomen.
27. Controleer of de spanning op het typeplaatje overeenkomt met de spanning die op het typeplaatje staat van uw installatie. Als dit niet het geval is, neem dan contact op met de dealer en sluit het apparaat niet aan.
28. Laat het apparaat nooit onbeheerd achter terwijl het in bedrijf is.
29. Bewaar dit document bij de hand en geef het aan de toekomstige eigenaar in geval van overdracht van uw apparaat.
30. Het apparaat mag niet worden gebruikt als het is gevallen, er zijn duidelijke tekenen van schade zichtbaar of er zijn lekken.
31. Niet buiten gebruiken.
32. Dit apparaat is bedoeld voor huishoudelijk gebruik en voor dergelijke situaties zoals:
- personeelsruimte in winkels, kantoor en andere werkomgevingen;
- herbergen en bij cliënten in hotels, motels en andere woontype omgevingen;
– bed & breakfast omgevingen;
- catering en gelijkwaardige niet retail-toepassingen.
Waarschuwing: Geen explosieve substantie zoals aerosol bussen met een brandbaar drijfgas in dit apparaat opslaan.
Waarschuwing: Houd de ventilatieopeningen van het apparaat, of het binnenwerk, vrij van obstructies
Waarschuwing: Gebruik geen mechanische apparaten of andere middelen om het vries proces te versnellen, tenzij ze worden aanbevolen door de fabrikant
Waarschuwing: Niet het koelcircuit beschadigen.
Waarschuwing: Gebruik geen elektrische apparaten in de voedselruimtes van het apparaat, tenzij dit type wordt aanbevolen door de fabrikant.
Waarschuwing: Bij het afvoeren van het apparaat, doe dat bij een bevoegde milieustraat. Niet blootstellen aan vuur.
Het koelmiddel isobutaan (R600a) is verwerkt in het koelingscircuit van het apparaat, een natuurlijk gas wat milieuvriendelijk is, maar desalniettemin brandbaar. Verzeker tijdens het transport en de installatie van het apparaat dat geen van de onderdelen van het koelingscircuit beschadigd raken.
Het koelingsmiddel (R600a) is brandbaar.

Waarschuwing: risico op vuur.
Als het koelingscircuit beschadigd raakt:
- Vermijd vlammen en ontstekingsbronnen.
- Ventileer de kamer grondig waar het apparaat staat.
SPECIFICATIES: ONDERDELEN EN OPTIES:

2) Functie knoppen

[POWER]: Na het inschakelen, gaat de machine in de stand-by-modus. Druk dan op de [POWER]-knop om in het menu te komen, het display zal "60: 00" tonen en de achtergrondverlichting gaat aan. Als er niets meer gebeurt, zal de verlichting na 15 seconden uitgaan, druk dan nogmaals op de [POWER]-knop; het apparaat gaat dan terug naar de stand-by-modus.
[MENU]: Door te drukken op deze knop zijn er 3 modi om uit te kiezen, dat zijn: [ICE CREAM] [COOLING ONLY] en [MIXING ONLY]; het teken “■” van de gekozen modus zal knipperen. Het vasthouden van deze knop voor 3 seconden tijdens deze modi, zal het apparaat terug naar het menu laten gaan.
Tijdinstellingsknop: Draai de knop naar de gewenste werktijd, de standaard voor [ICE CREAM] [COOLING ONLY] en [MIXING ONLY] is respectievelijk 60min, 30min, 10min. Het draaien van de knop naar "-" verminderd de werktijd, de minimale tijd is 5 minuten. Daarentegen zorgt het draaien naar de "+" voor een verhoging van de tijd, de maximale tijd is 60 minuten.
[START/PAUSE]: Na het instellen van het menu en tijd, druk op deze knop om te beginnen. Als tijdens gebruik op deze knop wordt gedrukt, zal het mixen worden gepauzeerd net als de timer. Als in de
pauzemodus nogmaals op deze knop wordt gedrukt, zal het apparaat verder gaan met het voorgaande onafgeronde taak. Als de ijsmachine in de pauzemodus staat en er gebeurt verder niets, zal de compressor na 3 minuten stoppen met werken en zal het apparaat 10 minuten later in de stand-by-modus gaan.
IJS MAKEN
Properheid: Voor gebruik grondig alle delen afwassen die in contact komen met het ijs (waaronder de vaste kom, de verwijderbare kom, mixermes, doorzichtige deksel, bijvuldeksel, maatbeker en lepel).
Waarschuwing: Verzeker dat de stekker uit het stopcontact is.
Belangrijk: Altijd de ijsmachine rechtop op een vlak ondergrond zetten om te zorgen dat de ingebouwde COMPRESSOR het beste functioneert.
Stap 1. Bereid ingrediënten voor:
Bereid de ingrediënten voor volgens uw eigen recept of een recept uit dit boekje. Opmerking: U hoeft niet de kom van te voren uren in de vriezer te leggen, aangezien dit apparaat een INGEBOUWDE COMPRESSOR heeft dat de ingrediënten bevriest wat de uitvoer van ijs verzekert.
Stap 2. Voer de voorbereide ingrediënten in de verwijderbare kom (Zie plaatje hieronder)
Stap 3. Plaats de verwijderbare kom op het apparaat en draai deze een stukje zodat deze goed op de vaste kom zit (Zie plaatje hieronder).
Stap 4. Plaats het mixermes in de verwijderbare kom en houdt het gat van het mixermes goed geplaatst op de motoras. Plaats dan de transparante klep op het apparaat en zet deze tegen de klok in vast (Zie plaatje hieronder).

Stap 5. Doe de stekker in het stopcontact, druk dan op [POWER] om het apparaat in te schakelen.
Stap 6. Druk op de [MENU]-knop om de gewenste modus te kiezen.
Stap 7. Draai aan de knop om de gewenste tijd in te stellen.
Stap 8. Druk op de [START/PAUSE]-knop om te beginnen.
Stap 9. U kunt uw favoriete ingrediënten toevoegen door de bijvulklep te openen.
Open de bijvulklep en
voeg de ingrediënten

natural_image
Line drawing of a small appliance with a lid and ventilation slots, no text or symbols present
Stap 10. Als de de taak is volbracht, schakel dan eerst het apparaat uit, haal dan pas de verwijderbare kom eraf.

GEBRUIK:
Koudhoudfunctie
Om smelten te vermijden als het ijs er niet uitgehaald wordt, is de volgende functie ingebouwd: Als het ijs klaar is en er niets meer gebeurt, start het apparaat automatisch met de koudhoudfunctie, wat 2 uur kan duren. Na 2 uur zal het apparaat in stand-by-modus gaan.
Zelfbeschermingsfunctie van de motor
Als het ijs harder wordt, kan de motor van de mixer vastlopen. De zelfbeschermingsfunctie van de motor zal de motor laten stoppen als de temperatuur oploopt ten gunste van de levensduur van de motor.
Beheers het volume van de ingrediënten
Om overloop en verspilling tegen te gaan, zorg dat de ingrediënten niet hoger komen dan 50% van de capaciteit van de verwijderbare kom is (Het ijs zet uit als dit gemaakt wordt)
De verschillen tussen de drie modi
1. IJsmodus: de standaard tijd is 60 minuten. De gedetailleerde uitleg is hetzelfde als hierboven.
2. Alleen koelen-modus: de standaard tijd is 30 minuten. Deze modus is vergelijkbaar met de ijsmodus, maar er wordt niet gemixt.
3. Alleen mixen-modus: de standaard tijd is 10 minuten. Deze modus is vergelijkbaar met de ijsmodus, maar er wordt niet gekoeld.
Opslag van ijs
Doe het gemaakte ijs in een andere kom door gebruik te maken van een plastic of houten lepel, gebruik geen metalen lepel om krassen te vermijden in de verwijderbare kom.
ONDERHOUD:
Waarschuwing: De stekker moet uit het stopcontact worden gehaald voor het schoonmaken om elektrische schokken te vermijden.
(1) Haal het mixermes eruit, veeg deze schoon met een vochtige doek
(2) Haal de verwijderbare kom eruit, maak deze schoon met een vochtige, zachte doek
(3) Veeg de transparante klep en bijvulklep met een vochtige doek
(4) Verwijder de viezigheid op de basis of op andere plekken met een vochtige doek, giet geen water op de kabel, stekker of ventilatie, dompel het apparaat niet onder in water of in een andere vloeistof
(5) Veeg het goed droog met een droge doek, plaats de componenten dan weer terug.
IJSRECEPT
VANILLE IJS
Maakt acht 1/2-kopjes ijs.
1 kop volle melk
1/2 kop kristalsuiker
3/2 kopjes slagroom, goed gekoeld
1 - 2 theelepels pure vanille-extract, naar smaak
In een gemiddelde kom, gebruik een handmixer of garde om de melk en kristalsuiker te mengen tot de suiker opgelost is, ongeveer 1 - 2 minuten op langzame snelheid. Meng de slagroom en vanille erbij naar smaak. Schakel het apparaat in, vul het mengsel in de vriezerkom door de ingrediëntenopening en laat dit mixen tot het dik wordt, ongeveer 30 - 40 minuten.
Voedingswaarde-analyse per portie:
Calorieën 239 (68% van vet) . koolhydraten. 17g . per 2g . vet 18g . chol. 69mg .
VARIATIES:
Munt: Vervang de vanille met 1 tot 1-1/2 theelepels pure pepermuntextract (naar smaak). Hak uw favoriete 110-grams bitterzoete of lichtzoete chocoladereep in kleine ongelijke stukken. Voeg de gehakte chocolade toe tijdens de laatste 5 minuten mixen.
Boter Pecannoten: Smelt 1 klont ongezouten boter in een pan van 25 cm. Voeg 1 kop grof gehakte pecannoten toe en 1 eetlepel koosjer zout. Bak dit op een middellage temperatuur, roer regelmatig tot de pecannoten lichtgebruind zijn. Haal ze van het vuur, giet ze af (de boter zal de pecannoten smaak hebben en kan voor iets anders worden gebruikt). Laat de noten afkoelen. Voeg de gebakken, geboterde pecannoten toe tijdens de laatste 5 minuten mixen.
Koekje & room: Voeg 3/4 kop grof gehakte koekjes toe van uw favoriete smaak (chocoladekoekjes, Oreos Mint, Oreos, etc.) tijdens de laatste 5 minuten van het mixen.
STANDAARD CHOCOLADE IJS
Maakt acht 1/2-kopjes ijs.
1 kop volle melk
1/2 kop kristalsuiker
240g bitterzoete of lichtzoete chocolade (uw favoriete),
gebroken in stukken van ongeveer een centimeter
1 kop slagroom, goed gekoeld
1 theelepel pure vanille-extract
Verwarm de volle melk tot het gaat borrelen bij de rand (dit kan op een fornuis of in de magnetron). In een blender of een keukenmachine uitgerust met een metalen mes, pulseer het mixen van de suiker met de chocolade tot de chocolade in kleine stukjes is gehakt. Voeg de hete melk toe, blijf mixen tot het een gladde substantie is. Giet het in een gemiddelde kom en laat het mengsel helemaal afkoelen.
Meng de slagroom en vanille erbij naar smaak.
Schakel het apparaat in, voeg het mengsel in de koelkom door
de ingrediëntenopening en mix tot het dik wordt, ongeveer 30 - 40 minuten.
Voedingswaarde-analyse per portie:
Calorieën 370 (60% van vet) . koolhydraten. 34g . per 3g . vet 25g . chol. 65mg .
VARIATIES:
Chocolade amandel: Voeg 1/2 theelepel pure amandelextract toe samen met de vanille. Voeg 1/2 - 3/4 kop gehakte, geroosterde amandelen of gehakte chocoladeamandelen tijdens de laatste 5 -10 minuten van het koelen.
Chocoladekoekjes: Voeg 1/2 - 1 kop gehakte koekjes toe tijdens de laatste 5 minuten koelen.
Chocolade karamel brownie: Voeg 1/2 - 1 kop gehakte, een dag oude brownies toe tijdens de laatste 5 minuten koelen.
Chocolade Marshmallow : Bij het overscheppen van het ijs in een bakje voor het vriezen, voeg klontjes van uw favoriete chocoladesaus en schepjes marshmallowcrème toe.
VERSE AARBEIENIJS
Maakt acht 1/2-kopjes ijs.
250g verse rijpe aardbeien, ontsteeld en gesneden
3/2 eetlepel versgeperste citroensap
1/2 kop suiker, verdeeld
1 kop volle melk
1 kop slagroom
1 theelepel pure vanille-extract
In een kleine kom de aardbeien mengen met het citroensap en 1/2 kop suiker, voorzichtig mengen en dan de aardbeien 2 uur laten weken in het sap.
In een gemiddelde kom, gebruik een handmixer of garde om de melk en kristalsuiker te mengen tot de suiker opgelost is, ongeveer 1 - 2 minuten op langzame snelheid. Meng de slagroom plus de sappen van de aardbeien en vanille. Schakel het apparaat in, vul het mengsel in de vriezerkom door de ingrediëntenopening en laat dit mixen tot het dik wordt, ongeveer 30 - 40 minuten. Voeg de gesneden aardbeien toe tijdens de laatste 5 minuten koelen.
Opmerking: dit ijs zal er zeer ‘natuurlijk’ uitzien, erg lichtroze; voor een betere kleur kunt u rood voedselkleurstof gebruiken tot de gewenst kleur is bereikt.
Voedingswaarde-analyse per portie:
Calorieën 222 (67% van vet) . koolhydraten. 17g . per 3g . vet 15g . Chol. 57mb ..
VERSE CITROENSORBET
Maakt acht 1/2-kopjes ijs. / 3/2 kopjes suiker / 3/2 kopjes water
1 eetlepel versgeperst citroensap
1 eetlepel fijngeraspte citroenschil \*
Voeg het suiker en water in een gemiddelde sauspan en breng het aan de kook op een gemiddeld-hoog vuur. Verlaag het vuur tot laag en laat het zonder te roeren sudderen tot de suiker oplost, ongeveer 3-5 minuten. Helemaal laten afkoelen. Dit noemt men een simpele siroop, en kan van te voren in grotere hoeveelheden gemaakt worden zodat u altijd een verse citroensorbet kunt maken.
Houd dit gekoeld tot het gebruiksklaar is.
Als het gekoeld is, voeg het citroensap en -schil toe; roeren om het te mengen. Schakel het apparaat in, vul het mengsel in de vriezerkom door de ingrediëntenopening en mix dit tot het dik wordt, ongeveer 30 - 40 minuten.
Bij het raspen van een citroen of limoen een groenteschiller gebruiken om het gekleurde deel van de citrusvrucht te verwijderen.
Voedingswaarde-analyse per portie:
Calorieën 204 (0% van vet) . koolhydraten. 52g . per 19g . vet 0g . chol. 0mg .
VARIATIE:
Sorbet van verse roze pompelmoes: Vervang 1-1/2 kopje versgeperste roze pompelmoes voor het citroensap, en 1 eetlepel fijngehakte pompelmoesschil voor de citroenschil. Voeg 1/4 kop orgeade siroop toe aan het mengsel (Orgeade siroop wordt gebruikt in cocktails zoals Mai Tai of Schorpioen en kan gevonden worden in de meeste supermarkten).
CHOCOLADE BEVROREN YOGHURT
Maakt acht 1/2-kopjes ijs.
1 kop volle melk
180g bitterzoete of lichtzoete chocolade, gehakt
2 kopjes vanilleyoghurt met weinig vet
1/4 kop suiker
Voeg de melk en chocolade toe in een blender of keukenmachine met een metalen mes en mix het tot het een gladde structuur heeft, 20 -30 seconden. Voeg de yoghurt en suiker toe; mixen tot het een glad mengsel is, ongeveer 15 seconden. Schakel het apparaat in, vul het mengsel in de vriezerkom door de ingrediëntenopening en laat dit mixen tot het dik wordt, ongeveer 30 - 40 minuten.
Voedingswaarde-analyse per portie:
Calorieën 222 (31% van vet) . koolhydraten. 36g . per 3g . vet 8g . chol. 4mg
MILIEU
ATTENTIE:

Dit apparaat mag niet met uw ander huishoudelijke toestellen worden verwijdert. Dit product moet op een geselecteerde stortplaats verwijdert worden. U kunt bij de gemeente een indiceerde plaats aanvragen. Elektrisch en elektronische producten kunnen gevaarlijke stoffen inhouden die schadelijk zijn voor mensen en het milieu en moet recycled worden. Het symbool aan de kant geeft aan dat het een elektrisch en elektronisch toestel is en zijn dus artikelen van een selectieve collectie. Het beeld geeft een afvalbak met een X teken aan.
ESPANOL
MANUAL DE INSTRUCCIONES
Lea este folleto detenidamente antes de utilizar la máquina y guárelo para consultas futuras.
Instrucciones importantes
Para utilizar un electrodoméstico, siempre se deben tomar las precauciones básicas de seguridad para reducir los riesgos de incendio, descargas eléctricas y/o lesiones, incluyendo las siguientes:
1. Lea todas las instrucciones antes usar la máquina.
2. Compruebe que la tensión de su red eléctrica sea compatible con la indicada en la placa de características de la máquina y verifique que la conexión a tierra del tomacorriente esté en buen estado.
3. Si el cable de alimentación está dañado, este deberá ser reemplazado por el fabricante, su agente de servicios técnicos o un especialista similar para evitar riesgos potenciales.
4. Nunca vuelque esta máquina ni la incline a más de 45 grados de la superficie.
5. Para prevenir descargas eléctricas, no vierta agua sobre el cable de alimentación, el enchufe o las ranuras de ventilación y nunca sumerja la máquina en agua o en cualquier otro líquido.
6. Desenchufe la máquina del tomacorriente después del uso o antes de limpiarla.
7. Mantenga la máquina a 8 cm de cualquier otro objeto para permitir la circulación de aire y una buena disipación de calor.
8. Utilice únicamente los accesorios recomendados por el fabricante.
9. No utilice la máquina cerca de llamas, fogones, hornillas o estufas.
10. Para evitar que se dañe el compresor, no encienda la máquina (botón POWER) demasiadas veces en cortos períodos de tiempo (espere al menos 5 minutos).
11. Para evitar incendios y cortocircuitos, nunca introduzca láminas de metal u otros objetos conductores en la máquina de helado.
12. Cuando saque el helado, no golpee el recipiente para no dañarlo.
13. Nunca enchufe la máquina al tomacorriente antes de instalar bien el recipiente y la cuchilla mezcladora.
14. La temperatura inicial de los ingredientes es de 25±5°C. No coloque los ingredientes en el congelador para precongelarlos, ya que hará que la cuchilla quede bloqueada fácilmente antes de que el helado esté en buenas condiciones.
15. No retire la cuchilla de la máquina cuando la misma esté funcionando.
16. No use la máquina a la intemperie.
17. Nunca limpie la máquina con productos abrasivos o implementos duros.
18. Debe conservar este manual de instrucciones.
19. Esta máquina puede ser utilizada por niños mayores de 8 años y personas con discapacidad física, sensorial o motora, o con falta de experiencia y conocimiento, siempre que sean supervisados o hayan sido instruidos en el uso de la máquina de forma segura y entienden los peligros involucrados. No permita que los niños jueguen con la máquina de hielo. Los niños no deben limpiar la máquina ni darle mantenimiento, a menos que sean supervisados.
20. Los niños deben ser supervisados para asegurarse de que no jueguen con el aparato.
21. El dispositivo no debe utilizarse si se ha caído, si hay signos evidentes de daño o si hay fugas.
22. Antes de realizar cualquier tarea de limpieza o mantenimiento, remueva el enchufe del tomacorriente.
23. Este aparato puede ser utilizado por niños de al menos 8 años de edad, siempre que cuenten con supervisión y hayan recibido instrucciones sobre el uso seguro del electrodoméstico y sean plenamente conscientes de los peligros que implica.
24. La limpieza y mantenimiento de la máquina no debe ser efectuada por niños a menos que tengan como mínimo 8 años de edad y cuenten con la supervisión de un adulto.
25. Mantenga el aparato y su cable eléctrico fuera del alcance de niños de menos de 8 años.
26. Al utilizar equipos eléctricos, siempre se deben tomar precauciones de seguridad para evitar el riesgo de incendio, descarga eléctrica y/o lesiones en caso de uso indebido.
27. Asegúrese de que la tensión nominal de la placa de características corresponde a la tensión de red de su instalación. Si no es así, póngase en contacto con el distribuidor y no conecte la unidad.
28. Al utilizar equipos eléctricos, siempre se deben tomar precauciones de seguridad para evitar el riesgo de incendio, descarga eléctrica y/o lesiones en caso de uso indebido.
29. Por favor, tenga este documento a mano y entréguelo al futuro propietario en caso de transferencia de su dispositivo.
30. El dispositivo no debe utilizarse si se ha caído, si hay
signos evidentes de daño o si hay fugas.
31. No utilizar en el exterior.
32. Esta máquina fue diseñada para el uso en el hogar y en aplicaciones domésticas similares, tales como:
√ Áreas del personal de cocina en tiendas, oficinas y otros entornos de trabajo.
√ En casas de campo y a disposición de huéspedes en hoteles, moteles y otros ambientes de tipo residencial.
√ Instalaciones como posadas o pensiones.
√ Abastecimientos y locales similares con fines no comerciales.
Advertencia – No use la máquina para almacenar sustancias explosivas, tales como latas de aerosol con propelentes inflamables.
Advertencia – Nunca obstruya las ranuras de ventilación en la cubierta de la máquina o en la estructura incorporada.
Advertencia – No use dispositivos mecánicos u otros medios para acelerar el proceso de descongelación, que no sean aquellos recomendados por el fabricante.
Advertencia – Cuidado para no dañar los conductos del refrigerante.
Advertencia – No utilice aparatos eléctricos en el compartimiento de almacenamiento de helado de esta máquina, a menos que sean del tipo recomendado por el fabricante.
Advertencia – Para desechar la máquina, hágalo solamente en un centro de recolección de residuos autorizado. No exponer al fuego.
El circuito de refrigeración de la máquina contiene gas refrigerante Isobutano (R600a), un gas natural con un alto nivel de compatibilidad medioambiental, que sin embargo es
inflamable. Durante el transporte y la instalación del aparato, asegúrese de que ninguno de los componentes del circuito de refrigeración se dañe.
El gas refrigerante (R600a) es inflamable.

Precaución, riesgo de incendio.
Si el circuito de refrigeración se daña:
- Evite abrir llamas y fuentes de ignición.
- Ventile completamente la habitación en la que se encuentra el aparato.
DESCRIPCIÓN DE LA MÁQUINA:
2) Estructura

2) Operación de los botones de control

[POWER]: Cuando conecte el enchufe al tomacorriente, la máquina entra al modo de espera. Presione el botón [POWER] para entrar al modo de ajuste y la pantalla LCD mostrará "60:00" y encenderá la luz de fondo. Si no se realiza otra operación, la luz de fondo se apagará 15 segundos después. Presione el botón [POWER] nuevamente para volver al modo de espera.
[MENU]: Al presionar el botón [MENU], encontrará 3 modos de funcionamiento, que incluyen: [HELADO] [SOLO REFRIGERACIÓN] y [SOLO MEZCLAR]; el ícono "■" del modo seleccionado parpadeará. Durante el funcionamiento del modo seleccionado si mantiene presionado el botón [MENU] durante 3 segundos, la máquina volverá al menú.
Perilla de ajuste de tiempo: Gire la perilla para establecer el tiempo de funcionamiento, para [HELADO] es de 60 minutos, para [SOLO REFRIGERACIÓN] es de 30 minutos y para [SÓLO MEZCLAR] es de 10 minutos. Girar la perilla a "-" disminuye el tiempo de funcionamiento, el tiempo mínimo de funcionamiento es de 5 minutos. Por el contrario, al girar a "+" aumenta el tiempo, el tiempo máximo de funcionamiento es de 60 minutos.
[START/PAUSE]: Después de configurar el menú y el tiempo de funcionamiento, presione el botón [START/PAUSE] para iniciar el trabajo. Durante la operación, al presionar el botón [START/PAUSE], la máquina se pausará y la cuenta regresiva también se detendrá. Presione el botón [START/PAUSE] nuevamente y la máquina continuará la operación anterior sin terminar. Una vez que la máquina entra en modo de pausa y no hay otra operación, el compresor dejará de funcionar 3 minutos más tarde y la máquina volverá al estado de espera 10 minutos después.
PREPARANDO HELADO
Limpieza: Antes de usar su máquina, lave bien todas las piezas que entren en contacto con el helado (incluyendo el recipiente fijo, el recipiente extraíble, la cuchilla mezcladora, la tapa transparente, la tapa de rellenado, el recipiente para medir y la cuchara).
Advertencia: Asegúrese de que el cable de alimentación esté desconectado del tomacorriente.
Importante: Coloque la máquina de helado en posición vertical sobre una superficie plana para que el COMPRESSOR incorporado tenga un mejor rendimiento.
Paso 1. Prepare los ingredientes de su propia receta o de las recetas dadas al final del manual.
Nota: No necesita congelar el recipiente de antemano, porque esta máquina cuenta con un COMPRESOR INCORPORADO que congela los ingredientes de la receta y garantiza la producción de helado.
Paso 2. Vierta los ingredientes de la receta en el recipiente extraíble (vea la imagen).
Paso 3. Coloque el recipiente extraíble en la máquina y gírelo ligeramente para que encaje bien con el recipiente fijo (vea la imagen).
Paso 4. Coloque la cuchilla mezcladora en el recipiente extraíble y ajuste bien el orificio inferior de la cuchilla mezcladora con el eje del motor. Luego coloque la tapa transparente en la máquina y gírela en el sentido contrario a las agujas del reloj (vea la imagen).
Paso 5. Conecte el enchufe al tomacorriente y presione el botón [POWER].
Paso 6. Presione el botón [MENU] para elegir el modo de funcionamiento.
Paso 7. Gire la perilla para establecer el tiempo de funcionamiento.
Paso 8. Presione el botón [START/PAUSE] para iniciar el trabajo.
Paso 9. Puede adicionar otros ingredientes durante el funcionamiento abriendo la tapa de rellenado (vea la imagen).
Abra la tapa de rellenado y agregue los ingredientes.

natural_image
Line drawing of a microwave oven with lid and vent, showing airflow direction (no text or symbols)

Paso 10. Una vez finalizada la operación, primero apague la máquina y luego retire el recipiente extraíble.

INSTRUCCIONES DE OPERACION:
Función de mantener frio:
Para evitar que el helado se derrita, la máquina está diseñada para mantener el frio: una vez que el helado está terminado y sin ninguna otra operación, la máquina iniciará automáticamente la función de mantener frío durante 2 horas. Luego de 2 horas, la máquina entrará en estado de espera.
Función de autoprotección del motor:
Cuando el helado se vuelve muy duro, el motor de mezcla podría bloquearse. Por esta razón, el dispositivo de protección del motor hace que el mismo deje de funcionar al detectar una temperatura alta para garantizar su vida útil.
Controle el volumen de los ingredientes:
Para evitar el desbordamiento y el desperdicio, asegúrese de que los ingredientes no excedan el 60% de la capacidad del recipiente extraíble (el helado se expande al formarse)
Diferencias entre los tres modos de funcionamiento
1. Modo helado: el tiempo de funcionamiento predeterminado es de 60 minutos. La operación detallada de este modo se indicó anteriormente.
2. Modo solo refrigeración, el tiempo de funcionamiento predeterminado es de 30 minutos. La operación es similar a la del modo helado, pero no hay función de mezcla.
3. Modo solo mezclar, el tiempo de funcionamiento predeterminado es de 10 minutos. La operación es similar a la del modo helado, pero no hay función de refrigeración.
Almacenamiento del helado
Retire el helado del recipiente extraíble con una cuchara de plástico o una cuchara de madera, no use una cuchara de metal para evitar rayar el recipiente extraíble.
MAINTENIMIENTO:
Precaución: el enchufe debe quitarse del tomacorriente antes de limpiar la máquina para evitar descargas eléctricas.
1. Extraiga la cuchilla mezcladora y límpiela con un paño húmedo.
2. Saque el recipiente extraíble, límpielo con un paño suave y húmedo.
3. Limpie la tapa transparente y la tapa de rellenado con un paño húmedo
4. Retire la suciedad de la carcasa y de otros lugares con un paño húmedo. Nunca vierta agua sobre el cable, el enchufe o las ranuras de ventilación, ni sumerja la máquina en agua o en cualquier otro líquido.
5. Seque completamente la máquina y sus componentes con un paño seco, luego regrese cada componente a su posición inicial.
RECETAS DE HELADOS
HELADO DE VAINILLA
Rinde 8 porciones de 1/2 taza.
1 taza de leche entera
1/2 taza de azúcar granulado
3/2 taza de crema espesa bien fría
1 - 2 cucharaditas de extracto puro de vainilla, al gusto.
En un tazón mediano, use un mezclador manual o una batidora para unir la leche y el azúcar granulado hasta que se disuelva, aproximadamente 1 - 2 minutos a baja velocidad. Agregue la crema espesa y la vainilla al gusto. Encienda la máquina, vierta la mezcla en el recipiente extraíble y deje que la mezcla se espese, aproximadamente 30 - 40 minutos.
Análisis nutricional por porción: Calorías 239 (68% de grasa); carbohidratos 17g; proteínas 2g; grasas 18g; colesterol 69 mg.
VARIACIONES:
Chocolate con menta: Reemplace la vainilla con 1 ^1/2 cucharaditas de extracto puro de menta (al gusto). Pica tu barra favorita de chocolate amargo o semi-amargo de 4 onzas en pedazos pequeños e irregulares. Agregue el chocolate picado durante los últimos 5 minutos de mezclado.
Mantequilla de nuez: Derrita 1 barra de mantequilla sin sal en una sartén de 10 pulgadas. Agregue 1 taza de nueces picadas y 1 cucharadita de sal gruesa. Cocine a fuego medio, revolviendo con frecuencia hasta que las nueces estén ligeramente doradas. Retire del fuego, cuele (la mantequilla tendrá un sabor a nuez y se puede reservar para otro uso). Deje que las nueces se enfríen por completo. Agregue las nueces tostadas durante los últimos 5 minutos de mezcla.
Galletas y cremas: Agregue 3/4 taza de galletas picada o su dulce favorito (chispas de chocolate, Oreos Mint, etc.) durante los últimos 5 minutos de mezclado.
HELADO DE CHOCOLATE
Rinde 8 porciones de 1/2 taza.
1 taza de leche entera
1/2 taza de azúcar granulado
240g u 8 onzas de chocolate amargo o semi-amargo (tu favorito), cortado en pedazos de 1/2 pulgada.
1 taza de crema espesa bien fría
1 cucharadita de extracto puro de vainilla.
Caliente la leche hasta que burbujee por los bordes (esto puede hacerse en el fogón o en un microondas). En una licuadora o procesador de alimentos equipado con una cuchilla de metal, mezcle el azúcar con el chocolate hasta que el chocolate esté picado finamente. Agregue la leche caliente y bata hasta que esté bien mezclado y sin grumos. Transfiera a un tazón mediano y deje que la mezcla de chocolate se enfríe por completo. Agregue la crema y la vainilla. Encienda la máquina, vierta la mezcla en el recipiente extraíble y deje que la mezcla se espese, aproximadamente 30 - 40 minutos.
Análisis nutricional por porción: Calorías 370 (60% de grasa); carbohidratos 34g; proteínas 3g; grasas 25g; colesterol 65 mg.
VARIACIONES:
Chocolate con almendras: Agregue 1/2 cucharadita de extracto de almendra puro junto con la vainilla. Agregue de 1/2 a 3/4 taza de almendras tostadas o almendras recubiertas de chocolate picadas durante los últimos 5-10 minutos de congelación.
Chocolate con galletas: Agregue de 1/2 a 1 taza de galletas picadas durante los últimos 5 minutos de congelación.
Chocolate con Brownie: Agregue de 1/2 a 1 taza de brownies cortados durante los últimos 5 minutos de congelación.
Chocolate con malvaviscos: Cuando retire el helado de la máquina póngalo en capas con cucharadas de su salsa favorita de chocolate y crema de malvavisco.
HELADO DE FRESA
Rinde 8 porciones de 1/2 taza.
250 g o 1 pinta de fresas frescas, maduras, sin tallo y cortadas en rodajas
3/2 cucharada de jugo de limón recién exprimido
1/2 taza de azúcar
1 taza de leche entera
1 taza de crema espesa
1 cucharadita de extracto puro de vainilla.
En un tazón pequeño, unir las fresas con el jugo de limón y el azúcar; revolver suavemente y dejar que las fresas se maceren en el jugo durante 2 horas.
En un tazón mediano, use un mezclador manual o una batidora para unir la leche y el azúcar hasta que se disuelva, aproximadamente 1 - 2 minutos a baja velocidad. Agregue la crema espesa, el jugo acumulado de las fresas y la vainilla. Encienda la máquina, vierta la mezcla en el recipiente extraíble y deje que la mezcla se espese, aproximadamente 30 - 40 minutos. Agregue las fresas en rodajas durante los últimos 5 minutos de congelación.
Nota: este helado tendrá una apariencia "natural" de color rosa muy pálido; si desea un color rosado más intenso, agregue con moderación gotas de colorante rojo hasta lograr el color deseado.
Análisis nutricional por porción: Calorías 222 (67% de grasa); carbohidratos 17g; proteínas 3g; grasas 15g; colesterol 57mg.
HELADO DE LIMÓN FRESCO
Rinde 8 porciones de 1/2 taza.
3/2 taza de azúcar
3/2 taza de agua
1 taza de jugo de limón recién exprimido
1 cucharada de ralladura de limón finamente picada \*.
Coloque el azúcar y el agua en una cacerola mediana y hágala hervir a fuego medio-alto. Reduzca el fuego y cocine sin revolver hasta que el azúcar se disuelva, aproximadamente de 3 a 5 minutos. Enfriar por completo (esto se llama jarabe simple y se puede preparar en grandes cantidades para tener a mano). Mantenga el jarabe refrigerado hasta que se enfríe.
Cuando el jarabe esté frío, agréguele el jugo de limón y la ralladura; revuélvalo bien. Encienda la máquina, vierta la mezcla de limón en el recipiente extraíble y deje que la mezcla se espese, aproximadamente 30 - 40 minutos.
Cuando ralle un limón o lima use un pelador de vegetales para quitar la parte coloreada de la cáscara del cítrico.
Análisis nutricional por porción: Calorías 204 (0% de grasa); carbohidratos 52g; proteínas 19g; grasas 0g; colesterol 0mg.
VARIACIONES:
Helado de toronja rosada fresca: Sustituya el jugo de limón por 1^1/2 tazas de jugo de toronja rosada recién exprimida y la ralladura de limón por 1 cucharada de ralladura de toronja finamente picada. Agregue 1/4 taza de jarabe de orgeat a la mezcla (el jarabe de Orgeat se usa para cócteles como Mai Tai o Scorpion y se puede encontrar en la mayoría de las tiendas de comestibles).
HELADO DE YOGURT Y CHOCOLATE
Rinde 8 porciones de 1/2 taza.
1 taza de leche entera
180g o 6 onzas de chocolate amargo o semi-amargo picado
2 tazas de yogurt de vainilla bajo en grasas
1/4 taza de azúcar
Batir la leche con el chocolate en una licuadora o procesador de alimentos equipado con cuchilla de metal, hasta que esté bien mezclado y sin grumos, de 20 a 30 segundos. Agregue el yogurt y el azúcar; batir hasta que quede suave, aproximadamente 15 segundos. Encienda la máquina, vierta la mezcla en el recipiente extraíble y deje que la mezcla se espese, aproximadamente 30 - 40 minutos.
Análisis nutricional por porción: Calorías 222 (31% de grasa); carbohidratos 36g; proteínas 3g; grasas 8g; colesterol 4mg.
MEDIO AMBIENTE
ATENCIÓN:

No se deshaga de este producto como lo hace con otros productos del hogar. Existe un sistema selectivo de colecta de este producto puesto en marcha por las comunidades, debe de informarse en su ayuntamiento acerca de los lugares en los que puede depositar este producto. De hecho, los productos eléctricos y electrónicos pueden contener substancias peligrosas que tienen efectos nefastos para el medio ambiente o para la salud humana y deben ser reciclados. El símbolo aquí presente indica que los equipos eléctricos o electrónicos deben de ser cuidadosamente seleccionados, representa un recipiente de basura con ruedas marcado con una X.
ITALIANO
MANUALE DI ISTRUZIONI
Leggere questo libretto di istruzioni prima dell'utilizzo dell'apparecchio e conservarlo per riferimenti futuri
COMUNICAZIONI IMPORTANTI
Quando si utilizza un apparecchio elettrico, alcune precauzioni di sicurezza devono sempre essere seguite per ridurre il rischio di incendi, scosse elettriche e/o lesioni, eccone alcune:
1. Leggere tutte le istruzioni prima dell'uso.
2. Verificare che la tensione disponibile sia compatibile con la tensione indicata sulla targhetta, e garantirsi che la messa a terra della presa sia in buone condizioni.
3. Se il cavo di alimentazione è danneggiato, deve essere sostituito dal costruttore, da un suo agente di servizio o da una persona qualificata, al fine di evitare rischi.
4. Non capovolgere questo prodotto o inclinarlo a più di 45°.
5. Per evitare il rischio di scosse elettriche, non versare acqua sul cavo, sulla spina e sulla ventola e non immergere l'apparecchio in acqua o altri liquidi.
6. Staccare l'apparecchio dalla corrente dopo l'utilizzo o prima della pulizia.
7. Mantenere 8cm di distanza tra l'apparecchio ed altri oggetti per assicurare il corretto dissipamento del calore.
8. Non utilizzare accessori che non siano raccomandati dai Produttore.
9. Non usare l'apparecchio vicino a fiamme, fornelli o stufe.
10. Non pigiare il pulsante di accensione troppo di frequente (garantire 5min. di Intervallo tra una volta e l'altra) per evitare il danneggiamento del compressore.
11. Oggetti metallici o oggetti elettrici non possono essere inseriti all'interno dell'apparecchio onde evitare incendi e corto circuiti.
12. Quando si raccoglie il gelato, non battere il contenitore o il bordo del contenitore per proteggerlo da eventuali danni.
13. Non accendere l'alimentazione prima di aver correttamente installato la pala.
14. La temperatura iniziale degli ingredienti deve variare intorno ai 25°. Non mettere gli ingredienti nel congelatore per il pre-congelamento, questo potrebbe bloccare la pala miscelatrice.
15. Non rimuovere la pala miscelarice quando l'apparecchio è in funzione.
16. Non utilizzare all'aperto.
17. Non pulire mai con detersivi corrosivi o utensili duri.
18. Si prega di conservare il manuale di istruzioni.
19. Questo apparecchio può essere utilizzato da bambini di età superiore agli 8 anni e da persone con capacità fisiche, sensoriali o mentali ridotte o senza esperienza e conoscenza purché siano controllati o istruiti all'uso dell'apparecchio in modo sicuro e ne comprendano i rischi derivanti. I bambini non devono giocare con l'apparecchio. La pulizia e la manutenzione da parte dell'utente non devono essere eseguite da bambini senza sorveglianza.
20. I bambini devono essere sorvegliati per assicurarsi che non giochino con l'apparecchio.
21. I dispositivo non deve essere utilizzato se è stato lasciato cadere, sono visibili evidenti segni di danneggiamento o se presenta perdite.
22. La spina deve essere scollegata prima della pulizia, della manutenzione o del riempimento dell'apparecchio.
23. Questo apparecchio può essere utilizzato da bambini a partire da 8 anni, purché sorvegliati e istruiti all'uso sicuro dell'apparecchio e pienamente a conoscenza dei pericoli che comporta.
24. La pulizia e la manutenzione non devono essere eseguite da bambini a meno che abbiano più di 8 anni e siano
sorvegliati da un adulto.
25. Conservare l'apparecchio e il cavo di alimentazione fuori dalla portata di bambini di età inferiore a 8 anni.
26. Quando si utilizzano apparecchiature elettriche, è necessario adottare sempre misure di sicurezza per prevenire il rischio di incendi, scosse elettriche e/o lesioni in caso di uso improprio.
27. Accertarsi che la tensione nominale sulla targhetta corrisponda alla tensione principale della vostra installazione. In caso contrario, contattare il rivenditore e non collegare l'unità.
28. Non lasciare mai l'unità incustodita durante il funzionamento.
29. Si prega di tenere questo documento a portata di mano e di consegnarlo al futuro proprietario in caso di trasferimento del dispositivo.
30. Il dispositivo non deve essere utilizzato se è stato lasciato cadere, sono visibili evidenti segni di danneggiamento o se presenta perdite.
31. Non utilizzare all'esterno.
32. Questo apparecchio è destinato ad essere utilizzato in applicazioni domestiche e similari come
-aree cucina per il personale di negozi, uffici e altri ambienti di lavoro;
-case coloniche e da parte dei clienti di alberghi, motel e altri ambienti di tipo residenziale;
-bed and breakfast;
-ristorazione e applicazioni non al dettaglio
Attenzione: Non conservare sostanze esplosive, come bombolette spray con un propellente infiammabile in questo apparecchio.
Avvertimento: Le aperture di ventilazione, nel dispositivo di chiusura o nella struttura incorporata, devono essere libere da ostruzioni.
Avvertimento: Non utilizzare dispositivi meccanici o altri mezzi per accelerare il processo di sbrinamento, diversi da quelli consigliati dal produttore.
Avvertimento: Non danneggiare il circuito refrigerante.
Avvertimento: Non utilizzare apparecchi elettrici all'interno degli scomparti per la conservazione degli alimenti, a meno che non siano del tipo consigliato dal produttore.
Attenzione: Eseguire lo smaltimento dell'apparecchio, solo presso un centro di smaltimento autorizzato. Non esporre alle fiamme.
L'isobutene refrigerante (R600a) è contenuto all'interno del circuito frigorifero dell'apparecchio, si tratta di un gas naturale con un elevato livello di compatibilità ambientale, ma che tuttavia è infiammabile. Durante il trasporto e l'installazione dell'apparecchio, assicurarsi che nessuno dei componenti del circuito refrigerante sia danneggiato.
Il refrigerante (R600a) è infiammabile.

Attenzione: rischio di incendio
Se il circuito refrigerante dovesse danneggiarsi : Evitare di accendere fiamme e fonti di accensione. Arieggiare il locale in cui si trova l'apparecchio.
CARATTERISTICHE TECNICHE:
PARTI & CARATTERISTICHE:
1) Struttura

2) Pulsanti Funzioni

[POWER]: Dopo l'accensione, la macchina entra in modalità di attesa. Quindi premere il tasto [POWER] per entrare nella modalità di impostazione, e il display LCD visualizzerà "60:00" e si accenderà lo sfondo. Se non si effettua nessun altra operazione, la luce si spegnerà dopo 15 secondi; quindi premere nuovamente il tasto [POWER]; la macchina torna alla modalità standby.
[MENU]: Premendo questo pulsante, ci sono 3 modalità di funzionamento, tra cui: [GELATO] [SOLO RAFFREDDAMENTO] e [SOLO MIXING]; l'icona “■”Della modalità selezionata lampeggia. Tenendo premuto per 3 secondi durante il funzionamento in modalità operazione, l'apparecchio torna al menu di selezione.
Manopola di regolazione timer: Ruotare la manopola per impostare il tempo, l'impostazione predefinita per [GELATO] [SOLO RAFFREDDAMENTO] e [SOLO MIXING] è rispettivamente di 60min, 30min, 10min. Ruotando la manopola verso “-” si può ridurre il tempo di funzionamento, il tempo minimo impostabile è 5 min. Al contrario, ruotando a “+” si può aumentare il tempo, il tempo massimo impostabile è 60 min.
[START / PAUSE]:Dopo aver impostato il menu e il tempo, premere questo pulsante per avviare la modalità di funzionamento. Durante il funzionamento, premendo questo pulsante, la miscelazione viene interrotta e il conteggio del tempo va in pausa. In modalità di pausa, premendo nuovamente il pulsante, la macchina continua la precedente operazione non ancora terminata. Una volta che la gelatiera entra in modalità pausa e non si effettua nessun altra operazione, il compressore si ferma dopo 3 min e la macchina torna in standby dopo 10 min.
FARE IL GELATO
Pulizia: Prima dell'uso, lavare accuratamente tutte le parti che entrano in contatto con il gelato (compresa la vasca fissa, il cestello estraibile, la pala miscelatrice, il coperchio trasparente, coperchio per il refill, misurino e cucchiaio).
Avvertimento: Si prega di assicurarsi che il cavo di alimentazione sia scollegato.
Importante: Posizionare sempre la gelatiera in posizione verticale su una superficie piana in modo che il compressore sia in grado di fornire le migliori prestazioni.
Fase 1. Preparare gli ingredienti della ricetta:
Preparare gli ingredienti della propria ricetta do dal ricettario allegato alla gelatiera. Nota: non è necessario congelare la ciotola per ore in congelatore in anticipo, in quanto questa macchina ha un COMPRESSORE INCORPORATO che congela gli ingredienti della ricetta durante il funzionamento per produrre gelato.
Fase 2. Versare gli ingredienti della ricetta ben preparati nel cestello estraibile (vedi immagine qui sotto).
Fase 3. Mettere il cestello estraibile nella macchina e posizionarlo bene rispetto alla vasca fissa (vedi immagine qui sotto).
Fase 4. Posizionare la pala di miscelazione nella ciotola estraibile e posizionare il foro inferiore della pala di miscelazione sull'asse motore. Quindi inserire il coperchio trasparente sulla macchina e bloccarlo in senso antiorario (vedi immagine).
Fase 5. Collegare la corrente, e premere il tasto [POWER] per accendere l'apparecch.o
Fase 6. Premere il tasto [MENU] per scegliere la modalità di funzionamento.
Fase 7. Ruotare la manopola per impostare il tempo.
Fase 8. Premere il tasto [START / PAUSE] per iniziare a lavorare.
Passo 9. È possibile aggiungere gli ingredienti preferiti aprendo il coperchio di refill (vedi immagine qui sotto).
Aprire il coperchio di riempimento e aggiungere gli ingredienti

natural_image
Line drawing of a microwave oven with lid and cooling unit (no text or symbols)

Passo 10. Quando l'operazione è terminata, spegnere la macchina prima, ed estrarre il cestello estraibile.

FUNZIONAMENTO:
Funzione mantenimento temperatura:
Per evitare che il gelato si sciolga se lasciato nell'apparecchio, vi è la seguente funzione: al termine della procedura di produzione del gelato, se non viene effettuata nessun'altra operazione, l'apparecchio avvierà la funzione freddo automatico, che può mantenere freddo il gelato per 2 ore. Trascorse le due ore, la macchina entrerà in standby.
Funzione di auto-protezione del motore
Quando il gelato diventa duro, il motore di miscelazione potrebbe bloccarsi. In questo caso il dispositivo di protezione del motore blocca la miscelazione rilevandone la temperatura per garantire la durata del motore stesso.
Controllo del volume degli ingredienti
Per evitare la fuoriuscita degli ingredienti, si prega di accertarsi che questi ultimi non superino il 60% della capacità della vasca estraibile (il gelato si espande quando si forma).
Le differenze tra le tre diverse modalità di funzionamento
1. Modalità Gelato: il tempo di funzionamento di default è di 60 minuti. Il funzionamento dettagliato avviene come descritto sopra.
2. Modalità Raffreddamento, il tempo di funzionamento di default è di 30 minuti. Il funzionamento è simile a quello della modalità gelato, ma non v'è la funzione di miscelazione.
3. Modalità Mixing, il tempo di funzionamento di default è di 10 minuti. Il funzionamento è simile a quello della modalità gelato, ma non v'è la funzione di congelamento.
Conservazione del gelato
Raccogliere il gelato finito in un altro contenitore con una paletta di plastica o un cucchiaio di legno, non utilizzare palette in metallo per evitare di danneggiare il cestello estraibile all'interno.
MANUTENZIONE:
Attenzione: La spina deve essere scollegata prima di effettuare la pulizia per evitare scariche elettriche.
(1) Estrarre la pala di miscelazione, pulirla con un panno umido.
(2) Estrarre la vaschetta estraibile, pulirla con un panno morbido inumidito.
(3) Pulire il coperchio trasparente e il coperchio per refill con un panno umido.
(4) Rimuovere lo sporco sul corpo o altri luoghi con un panno umido, non versare acqua sul cavo, sulla spina e sulla ventilazione, non immergere l'apparecchio in acqua o altri liquidi.
(5) Asciugare accuratamente con un panno asciutto e rimontare i componenti nella posizione iniziale.
RICETTARIO GELATI
GELATO ALLA VANIGLIA
Rende otto porzioni da 12 tazza.
1 tazza di latte intero
12 tazza di zucchero semolato
3/2 tazze di panna, ben fredda
1 - 2 cucchiaini di estratto di vaniglia puro, a piacere
In una ciotola media, usare un miscelatore a mano o una frusta per unire il latte e lo zucchero granulato finché lo zucchero è totalmente disciolto, circa 1-2 minuti a bassa velocità. Incorporare la panna e la vaniglia a piacere. Accendere la macchina, versare il composto in nella ciotola refrigerante attraverso beccuccio per gli ingredienti e lasciarli mescolare fino a quando si saranno addensati, a circa 30 - 40 minuti.
Analisi nutrizionale per porzione:
Calorie 239 (68% di grassi). carboidrati. 17g. proteine 2g. 18g di grassi. colesterolo. 69mg.
Variazioni:
Menta Chip: Omettere la vaniglia e sostituirla con estratto di menta piperita da 1 a 1 cucchiaino e ½ puro (qb). Tritare 4 once di cioccolato amaro o semi dolce in piccoli pezzi irregolari. Aggiungere il cioccolato tritato durante gli ultimi 5 minuti di miscelazione.
Burro e Noci Pecan: Sciogliere 1 tavoletta di burro non salato in una padella da 10 pollici. Aggiungere 1 tazza di noci tritate grossolanamente e 1 cucchiaino di sale kosher. Cuocere a fuoco lento, mescolando spesso fino a che le noci sono leggermente dorate. Toglierle dal fuoco, scolare (il burro avrà un sapore di noci pecan e può essere conservato per un altro uso). Far raffreddare completamente le noci. Aggiungere le noci pecan tostate durante gli ultimi 5 minuti di miscelazione.
Biscotti e crema: Aggiungere i 3/4 di tazza di biscotti tritati grossolanamente o le vostre caramelle preferite (con gocce di cioccolato, Oreo, Oreo alla menta Ecc.) durante gli ultimi 5 minuti di miscelazione.
GELATO AL CIOCCOLATO
Rende otto porzioni da 12 tazza.
1 tazza di latte intero
12 tazza di zucchero semolato
240g o 8 once di cioccolato fondente o semi-dolce (il vostro preferito), rotto in pezzi da un cm.
1 tazza di panna, ben fredda
1 cucchiaino di estratto di vaniglia puro
Scaldare il latte intero fino a quando bolle intorno ai bordi (questo può essere fatto sul piano cottura o in un forno a microonde). In un frullatore dotato di pala metallica, miscelare lo zucchero con il cioccolato fino a quando il cioccolato non viene sminuzzato molto finemente. Aggiungere il latte caldo, mescolare fino ad ottenere un composto ben amalgamato e liscio. Versare in una ciotola di medie dimensioni e lasciare che la miscela di cioccolato si raffreddi completamente. Incorporare la panna e la vaniglia a piacere.
Accendere la macchina, Versare il composto nella ciotola refrigerante attraverso il beccuccio per gli ingredienti e lasciare mescolare fino a quando non si è addensato, a circa 30 - 40 minuti.
Analisi nutrizionale per porzione:
Calorie 370 (il 60% di grassi). carboidrati 34g. proteine 3g. 25g di grassi. colesterolo 65mg.
Variazioni:
Mandorle e cioccolato: Aggiungere 1/2 cucchiaino di estratto puro di mandorle con la vaniglia. Aggiungere mezza tazza di mandorle tostate tritate o mandorle ricoperte di cioccolato tritato nel ultimi 5 - 10 minuti di miscelazione.
Cioccolato e Cookie: Aggiungere da 12 ad 1 tazza di biscotti tritati durante gli ultimi 5 minuti di miscelazione.
Cioccolato e Brownie: Aggiungere da 12 a 1 tazza di brownies secchi tritati durante gli ultimi 5 minuti di miscelazione.
Cioccolato e Marshmallow: Quando si rimuove il gelato dalla vaschetta refrigerante, guarnire con il vostro topping al cioccolato preferito e ricoprire di crema marshmallow (fluff).
GELATO ALLE FRAGOLE FRESCHE
Rende otto porzioni da 12 tazza.
250g o 1 pinta fragole fresche mature, pulite ed affettate
2/3 cucchiai di succo di limone appena spremuto
1/2 tazza di zucchero, diviso
1 tazza di latte intero
1 tazza di panna
1 cucchiaino di estratto di vaniglia puro
In una piccola ciotola, unire le fragole con il succo di limone e 1/2 tazza di zucchero; mescolare delicatamente e lasciar le fragole a macerare nel succo per 2 ore.
In una ciotola media, usare un miscelatore a mano o una frusta per unire il latte e lo zucchero granulato finché lo zucchero non si è disciolto, circa 1 - 2 minuti a bassa velocità. Incorporate la panna più eventuali succhi accumulati dalle fragole e vaniglia. Accendere la macchina, Versare il composto nella ciotola refrigerante attraverso beccuccio per gli ingredienti e lasciare mescolare fino a quando non si è addensato, circa 30 - 40 minuti. Aggiungere le fragole affettate durante gli ultimi 5 minuti di miscelazione.
Nota: questo gelato avrà un aspetto “naturale” di un rosa molto pallido; se si desidera un colore rosa più intenso, aggiungere qualche goccia di colorante alimentare rosso fino ad ottenere il colore desiderato.
Analisi nutrizionale per porzione:
Calorie 222 (67% di grassi). carboidrati 17g. proteine 3g. 15g di grassi. Colesterolo 57mg.
SORBETTO AL LIMONE
Rende otto porzioni da 12 tazza.
2/3 tazze di zucchero
2/3 tazze di acqua
1 tazza di succo di limone appena spremuto
1 cucchiaio di scorza di limone tritata finemente \*
Unire lo zucchero e l'acqua in una casseruola media e portare ad ebollizione a fuoco medio-alto.
Ridurre il fuoco al minimo e lasciare cuocere senza mescolare fino a quando lo zucchero si scioglie, circa 3-5 minuti. Raffreddare completamente. Questo sarà un semplice sciroppo, e può essere fatto in anticipo in grandi quantità per averlo a portata di mano per fare il sorbetto al limone. Conservare in frigo fino al momento dell'uso.
Lasciar raffreddare, aggiungere il succo di limone e la scorza; mescolare per miscelarli. Accendere la macchina, versare il composto di limone nella vaschetta refrigerante attraverso il beccuccio per ingredienti e mescolare fino a quando si è addensato, circa 30 - 40 minuti.
Quando si sbucciano un limone o lime usate un pelapatate per rimuovere la parte colorata della buccia degli agrumi.
Analisi nutrizionale per porzione:
Calorie 204 (0% di grassi). carboidrati 52g proteine 19g. 0 g di grassi. colesterolo 0 mg.
VARIAZIONE:
Sorbetto al pompelmo rosa: Sostituite le tazze di succo di limone con succo di pompelmo rosa e 1 cucchiaio tritato scorza di pompelmo alla buccia di limone. Aggiungere 1/4 di tazza di sciroppo di orzata alla miscela (l'orzata è usato per i cocktail, come un Mai Tai o Scorpion e può essere trovata nella maggior parte dei negozi di generi alimentari).
FROZEN YOGURT AL CIOCCOLATO
Rende otto porzioni da 12 tazza.
1 tazza di latte intero
180g o 6 once di cioccolato fondente o semi dolce, tritato
2 tazze di yogurt alla vaniglia a basso contenuto di grassi
1/4 di tazza di zucchero
Unire il latte e cioccolato in un frullatore dotato di pala metallica e miscelare fino ad ottenere un composto ben amalgamato e liscio, 20 - 30 secondi. Aggiungere lo yogurt e lo zucchero; miscelare fino a che diventa liscio, circa 15 secondi. Accendere l'apparecchio, Versare il composto nella vaschetta refrigerante attraverso il beccuccio ingredienti e lasciare mescolare fino a quando non si è addensato, circa 30 - 40 minuti.
Analisi nutrizionale per porzione:
Calorie 222 (31% di grassi. carboidrati 36g. proteine 3g. 8g grassi. colesterolo 4mg
AMBIENTE
ATTENZIONE:

Non gettare quest' apparecchio tra i rifiuti domestici. Per questo tipo di prodotti è fornito dai comuni un sistema di raccolta e ritiro in zona ed è quindi un dovere informarsi per conoscere il giusto smistamento del rifiuto. Infatti, i prodotti elettrici ed elettronici possono contenere sostanze pericolose che hanno effetti dannosi sull'ambiente o sulla nostra salute e quindi devono essere riciclati. Il simbolo al lato indica che le apparecchiature elettriche ed elettroniche fanno parte di una raccolta selettiva e differenziata (rappresentata da un bidone su due ruote sbarrato da una croce.
Adeva SAS / H.Koenig Europe - 8 rue Marc Seguin, 77290 Mitry-Mory, France www.hkoenig.com - https://assistenza.hkoenig.com - Tél: +33 1 64 67 00 05
LIVRE DE RECETTES
Sorbets & Glaces

natural_image
A waffle cone with ice cream and caramel topping, garnished with red jam, presented on a pink background (no text or symbols visible).

Vivement l'été
Instruction Manual
Manuel d'instructions Bedienungsanleitung Gebruiksaanwijzing Manual de instrucciones Manuale d'uso natural_image
Exterior view of a modern stainless steel Koenig water tower (no signage or text visible on the device body)ENGLISH
INSTRUCTION MANUAL
Read this booklet thoroughly before using and save it for future referenceIMPORTANT NOTICES
When using an electrical appliance, basic safety precautions should always be followed to reduce the risk of fire, electric shock, and/or injury, including the following: 1. Read all instructions before using. 2. Ensure the voltage is compliant with the voltage range stated on the rating label, and ensure the earthing of the socket is in good condition. 3. If the supply cord is damaged, it must be replaced by the manufacturer or its service agent or a similarly qualified person in order to avoid a hazard. 4. Do not upend this product or incline it over a 45^ C angle. 5. To protect against risk of electric shock, do not pour water on cord, plug and ventilation, immerse the appliance in water or any other liquid. 6. Unplug the appliance after using or before cleaning. 7. Keep the appliance 8cm from other objects to ensure the good heat releasing. 8. Do not use the accessories which are not recommended by Manufacturer. 9. Do not use the appliance close by flames, hot plates or stoves. 10. Do not switch on the power button frequently (ensure 5min. interval at least) to avoid the damage of compressor. 11. Metal sheet or other electric objects are not allowed to be inserted into the appliance to avoid fire and short circuit. 12. When take out the ice cream, do not knock the barrel or edge of barrel to protect the barrel from damage. 13. Do not switch on the power before install well the barrel or blender blade. 14. The initial temperature of the ingredients is 25 ± 5^ . Do not put the ingredients into freezer for pre-freeze, as it will easily make the blender blade blocked before the ice cream is in good condition. 15. Do not remove the blender blade when the appliance is on working. 16. Do not use outdoors. 17. Never clean with scouring powders or hard implements. 18. Please keep the instruction manual. 19. This appliance can be used by children aged from 8 years and above and persons with reduced physical, sensory or mental capabilities or lack of experience and knowledge if they have been given supervision or instruction concerning use of the appliance in a safe way and understand the hazards involved. Children shall not play with the appliance. Cleaning and user maintenance shall not be made by children without supervision. 20. Children should be supervised to ensure that they do not play with the appliance. 21. The device must not be used if it has been dropped, it obvious signs of damage are visible or if it has leaks. 22. The plug must be removed before cleaning, maintaining or filling the appliance 23. This appliance may be used by children of at least 8 years of age, as long as they are supervised and have been given instructions about using the appliance safely and are fully aware of the dangers involved. 24. Cleaning and maintenance should not be carried out by children unless they are at least 8 years of age and are supervised by an adult. 25. Keep the appliance and its power cord out of reach of children under 8 years of age. 26. When using electrical equipment, safety precautions must always be taken to prevent the risk of fire, electric shock and/or injury in the event of misuse. 27. Make sure that the voltage rating on the typeplate corresponds to your main voltage of your installation. If this is not the case, contact the dealer and do not connect the unit 28. Never leave the unit unattended while in operation. 29. Please keep this document at hand and give it to the future owner in case of transfer of your device 30. The device must not be used if it has been dropped, it obvious signs of damage are visible or if it has leaks. 31. Do not use outside. 32. This appliance is intended to be used in household and similar applications such as -staff kitchen areas in shops, offices and other working environments; -farm houses and by clients in hotels, motels and other residential type environments; -bed and breakfast type environments; -catering and similar non-retail applications Warning: Do not store explosive substances such as aerosol cans with a flammable propellant in this appliance. Warning: Keep ventilation openings, in the appliance enclosure or in the built-in structure, clear of obstruction Warning: Do not use mechanical devices or other means to accelerate the defrosting process, other than those recommended by the manufacturer Warning: Do not damage the refrigerant circuit Warning: Do not use electrical appliances inside the food storage compartments of the appliance, unless they are of the type recommended by the manufacturer Warning: When disposing of the appliance, do so only at an authorized waste disposal centre. Do not expose to flame. The refrigerant isobutene (R600a) is contained within the refrigerant circuit of the appliance, a natural gas with a high level of environmental compatibility, which is nevertheless flammable. During transportation and installation of the appliance, ensure that none of the components of the refrigerant circuit becomes damaged. The refrigerant (R600a) is flammable. Caution: risk of fire
If the refrigerant circuit should be damaged: - Avoid opening flames and sources of ignition. ● Thoroughly ventilate the room in which the appliance is situated.SPECIFICATIONS:
PARTS & FEATURES:
1) Structure  2) Function buttons  [POWER]: After power up, the machine enters standby mode. Then press the [POWER] button to enter the setting mode, and LCD will display “60: 00” and light up the background light. If no other operation, the light will go off 15 seconds later; then press the [POWER] button again; the machine can go back to standby mode. [MENU]: By pressing this button, there are 3 working modes for option, including: [ICE CREAM] [COOLING ONLY] and [MIXING ONLY]; the icon “■” of the selected mode will flash. Holding this button for 3 seconds during mode operation, the machine will go back the menu selection. Time setting knob: Turn the knob to set working time, the default working time to [ICE CREAM] [COOLING ONLY] and [MIXING ONLY] is 60min, 30min, 10min, respectively. Rotating the knob to “-” can decrease the working time, the minimum setting time is 5min. Contrarily, rotating to “+” can increase time, the maximum setting time is 60min. [START/PAUSE]: After setting the menu and time, press this button to start the working mode. During operation, by pressing this button, the mixing will pause and the time countdown will pause also. At pause mode, press this button again, the machine will continue the previous unfinished operation. Once the ice cream maker enters pause mode and no other operation, the compressor will stop working 3min later and the machine will go back to standby state 10min later.MAKING ICE CREAM
Cleanness: Before use, thoroughly wash all parts that will come into contact with the ice cream (including the fixed bowl, removable bowl, mixing blade, transparent lid, refill lid, measuring cup and spoon). Warning: Please be sure the power cord is unplugged. Important: Always place the Ice Cream Maker upright on a flat surface in order that the build-in COMPRESSOR can provide best performance.Step 1. Prepare recipe ingredients:
Prepare recipe ingredients from your own recipe or from the recipe booklet here. Note: You do not need to freeze the bowl for hours in a freezer in advance, as this machine has a BUILT-IN COMPRESSOR that freezes the recipe ingredients in operation thus ensure the output of ice cream. Step 2. Pour the well prepared recipe ingredients into the removable bowl (See below picture). Step 3. Put the removable bowl into the machine and slightly turn around the bowl to make it fitted well with the fixed bowl (See below picture). Step 4. Place the mixing blade into the removable bowl and keep the mixing blade bottom hole fitted well with the motor axis. Then put the transparent lid onto the machine and lock it anticlockwise (See below picture). Step 5. Plug in power, and press the [POWER] button to make the machine electrified. Step 6. Press the [MENU] button to choose the working mode. Step 7. Turn the knob to set the working time. Step 8. Press the [START/PAUSE] button to start working. Step 9. You can add the favorite ingredients by opening the refill cover (See below picture). natural_image
Line drawing of a kitchen appliance with a bucket and lid, showing a downward arrow indicating rotation (no text or symbols)natural_image
Line drawing of a microwave oven with lid and ventilation slots (no text or symbols)natural_image
Line drawing of a microwave oven with lid and ventilation slots (no text or symbols)OPERATION:
Keep cool function
To avoid melting when the ice cream is not placed well in time, the following design is supported: After the ice cream is finished and without any other operation, the machine will start up the keep cool function automatically, which can keep cool for 2 hours. Two hours later, machine will enter standby state.Motor self-protection function
When the ice cream becomes harder, the mixing motor might be blocked. Then the motor protection device makes the mixing motor stop working by detecting its temperature to ensure the life of the motor.Controlling the Volume of the Ingredients
To avoid overflow and waste, please make sure that the ingredients do not exceed 60% of capacity of the removable bowl (Ice cream expands when being formed)The Differences Among These Three Working Mode
1. Ice cream mode: the default working time is 60 minutes. The detailed operation is instructed as above. 2. Cooling only mode, the default working time is 30 minutes. The operation is similar with that of ice cream mode, but there isn't mixing function. 3. Mixing only mode, the default working time is 10 minutes. The operation is similar with that of ice cream mode, but there isn't freezing function.Storage of ice cream
Remove finished ice cream into another container using a plastic scoop or a wooden spoon, do not use a metal scoop avoiding scratch on the inside removable bowl.MAINTENANCE:
Caution: The plug must be removed before cleaning to avoid electric shock. 1. Take out the mixing blade, wipe it with a dampened cloth 2. Take out the removable bowl, clean it with a dampened soft cloth 3. Wipe the transparent lid and refill lid with a dampened cloth 4. Remove the dirty on the body or other places with a dampened cloth, and do not pour water on cord, plug and ventilation, immerse the appliance in water or any other liquid 5. Allow drying thoroughly with a dry cloth, then return the component to the home position.ICE CREAM RECIPE MANUAL
VANILLA ICE CREAM
Makes eight 1/2-cup servings. 1 cup whole milk 1/2 cup granulated sugar 3/2 cups heavy cream, well chilled 1 - 2 teaspoons pure vanilla extract, to taste In a medium bowl, use a hand mixer or a whisk to combine the milk and granulated sugar until the sugar is dissolved, about 1 – 2 minutes on low speed. Stir in the heavy cream and vanilla to taste. Turn machine on, pour mixture into freezer bowl through ingredient spout and let mix until thickened, about 30 – 40 minutes. Nutritional analysis per serving: Calories 239 (68% from fat) . carbo. 17g . pro 2g . fat 18g . chol. 69mg .VARIATIONS:
Mint Chip: Omit the vanilla and replace with 1 to 1-1/2 teaspoons pure peppermint extract (to taste). Chop your favorite 4-ounce bittersweet or semi-sweet chocolate bar into tiny uneven pieces. Add the chopped chocolate during the last 5 minutes of mixing. Butter Pecan: Melt 1 stick unsalted butter in a 10-inch skillet. Add 1 cup roughly chopped pecans and 1 teaspoon kosher salt. Cook over medi-um-low heat, stirring frequently until the pecans are lightly browned. Remove from the heat, strain (the butter will have a pecan flavor and may be reserved for another use). Allow the pecans to cool completely. Add the toasted buttered pecans during the last 5 minutes of mixing. Cookies & Cream: Add 3/4 cup coarsely chopped cookies or your favorite candy (chocolate chip, Oreos Mint Oreos., etc.) during the last 5 minutes of mixing.BASIC CHOCOLATE ICE CREAM
Makes eight 1/2-cup servings. 1 cup whole milk 1/2 cup granulated sugar 240g or 8 ounces bittersweet or semi-sweet chocolate (your favorite), broken into 1/2-inch pieces 1 cup heavy cream, well chilled 1 teaspoon pure vanilla extract Heat the whole milk until it is just bubbling around the edges (this may be done on the stovetop or in a microwave). In a blender or food processor fitted with the metal blade, pulse to process the sugar with the chocolate until the chocolate is very finely chopped. Add the hot milk, process until well blended and smooth. Transfer to a medium bowl and let the chocolate mixture cool completely. Stir in the heavy cream and vanilla to taste. Turn the machine on, pour mixture into freezer bowl through ingredient spout and let mix until thickened, about 30 - 40 minutes. Nutritional analysis per serving: Calories 370 (60% from fat). carbo. 34g. pro 3g. fat 25g. chol. 65mg.VARIATIONS:
Chocolate Almond: Add 1/2 teaspoon pure almond extract along with the vanilla. Add 1/2 - 3/4 cup chopped toasted almonds or chopped chocolate-coated almonds during the last 5 – 10 minutes of freezing. Chocolate Cookie: Add 1/2 - 1 cup chopped cookies during the last 5 minutes of freezing. Chocolate Fudge Brownie: Add 1/2 - 1 cup chopped day old brownies during the last 5 minutes of freezing. Chocolate Marshmallow Swirl: When removing the ice cream to a container for freezing, layer it with dollops of your favorite chocolate sauce and scoops of marshmallow crème (fluff).FRESH STRAWBERRY ICE CREAM
Makes eight 1/2-cup servings. 250g or 1 pint fresh ripe strawberries, stemmed and sliced 3/2 tablespoons freshly squeezed lemon juice 1/2 cup sugar, divided 1 cup whole milk 1 cups heavy cream 1 teaspoon pure vanilla extract In a small bowl, combine the strawberries with the lemon juice and 1/2 cup of the sugar; stir gently and allow to the strawberries to macerate in the juices for 2 hours. In a medium bowl, use a hand mixer or a whisk to combine the milk, and granulated sugar until the sugar is dissolved, about 1 – 2 minutes on low speed. Stir in the heavy cream plus any accumulated juices from the strawberries and vanilla. Turn the machine on, pour mixture into freezer bowl through ingredient spout and let mix until thickened, about 30 – 40 minutes. Add the sliced strawberries during the last 5 minutes of freezing. Note: this ice cream will have a “natural” appearance of very pale pink; if a deeper pink is desired, sparingly add drops of red food coloring until desired color is achieved. Nutritional analysis per serving: Calories 222 (67% from fat) . carbo. 17g . pro 3g . fat 15g . chol.57mg .FRESH LEMON SORBET
Makes eight 1/2-cup servings. 3/2 cups sugar 3/2 cups water 1 cup freshly squeezed lemon juice 1 tablespoon finely chopped lemon zest \* Combine the sugar and water in a medium saucepan and bring to a boil over medium-high heat. Reduce heat to low and simmer without stirring until the sugar dissolves, about 3 – 5 minutes. Cool completely. This is called a simple syrup, and may be made ahead in larger quantities to have on hand for making fresh lemon sorbet. Keep refrigerated until ready to use. When cool, add the lemon juice and zest; stir to combine. Turn the machine on, pour the lemon mixture into freezer bowl through ingredient spout and mix until thickened, about 30 – 40 minutes. When zesting a lemon or lime use a vegetable peeler to remove the colored part of the citrus rind. Nutritional analysis per serving: Calories 204 (0% from fat) . carbo. 52g . pro .19g . fat 0g . chol. 0mg .VARIATION:
Fresh Pink Grapefruit Sorbet: Substitute 1-1/2 cups freshly squeezed pink grapefruit juice for the lemon juice, and 1 tablespoon finely chopped grapefruit zest for the lemon zest. Add 1/4 cup orgeat syrup to the mixture (Orgeat Syrup is used for cocktails such as a Mai Tai or Scorpion and can be found with the drink mixers in most grocery stores).CHOCOLATE FROZEN YOGURT
Makes eight 1/2-cup servings. 1 cup whole milk 180g or 6 ounces bittersweet or semisweet chocolate, chopped 2 cups low-fat vanilla yogurt 1/4 cup sugar Combine the milk and chocolate in a blender or food processor fitted with the metal blade and process until well blended and smooth, 20 – 30 seconds. Add the yogurt and sugar; process until smooth, about 15 seconds. Turn the machine ON, pour mixture into freezer bowl through ingredient spout and let mix until thickened, about 30 – 40 minutes. Nutritional analysis per serving: Calories 222 (31% from fat) . carbo. 36g . pro 3g . fat 8g . chol. 4mgENVIRONMENT
CAUTION:
 Do not dispose of this product as it has with other household products. There is a separation of this waste product into communities, you will need to inform your local authorities about the places where you can return this product. In fact, electrical and electronic products contain hazardous substances that have harmful effects on the environment or human health and should be recycled. The symbol here indicates that electrical and electronic equipment should be chosen carefully, a wheeled waste container is marked with a cross.FRANÇAIS
MANUEL D'UTILISATION
Lire attentivement ce manuel avant utilisation et le conserver en lieu sûr.AVIS IMPORTANT
Lorsque vous utilisez un appareil électrique et afin d'éviter tout risque d'incendie, de choc électrique et/ou de blessure, veillez à toujours respecter les consignes de sécurité élémentaires, notamment les suivantes : 1. Lisez toutes les instructions avant d'utiliser l'appareil. 2. Assurez-vous que la tension est conforme à la plage de tension indiquée sur la plaque signalétique et que la mise à la terre de la prise est en bon état. 3. Si le cordon d'alimentation est endommagé, il doit être remplacé par le fabricant, ou son réparateur, ou une personne de même qualification afin d'éviter tout accident. 4. Ce produit ne doit ni être renversé, ni être incliné selon un angle supérieur à 45°. 5. Pour éviter tout risque d'électrocution, ne renversez pas d'eau sur le cordon, la fiche ou la bouche de ventilation ; n'immergez pas l'appareil dans l'eau ou tout autre liquide. 6. Débranchez l'appareil après toute utilisation ou avant de le nettoyer. 7. Gardez l'appareil à une distance de 10 cm des autres objets afin de permettre à la chaleur de s'évacuer. 8. N'utilisez pas d'accessoires non recommandés par le fabricant. 9. N'utilisez pas l'appareil à proximité de flammes, de plaques de cuisson ou d'un four. 10. N'actionnez pas l'interrupteur de marche à intervalles rapprochés (prévoir un intervalle d'au moins 5 minutes) pour éviter d'endommager le compresseur. 11. Afin d'éviter tout risque d'incendie et de court-circuit, aucune pièce métallique ou autre objet électrique ne peut être introduit dans l'appareil. 12. Lorsque vous sortez la glace, ne cognez pas la cuve ou le bord de la cuve pour ne pas l'endommager. 13. N'allumez pas l'appareil avant de bien installer la cuve ou la lame du mélangeur. 14. La température initiale des ingrédients est de 25 ±5°C. Ne mettez pas les ingrédients dans le congélateur pour la précongélation, car la lame du mélangeur sera facilement bloquée avant que la crème glacée ne soit prête. 15. Ne retirez pas la lame du mélangeur lorsque l'appareil est en marche. 16. Ne pas utiliser l'appareil à l'extérieur. 17. N'utilisez jamais de poudres à récurer ou d'ustensiles durs pour le nettoyage. 18. Veuillez conserver ce manuel d'utilisation. 19. Cet appareil peut être utilisé par des enfants à partir de 8 ans et par des personnes ayant des capacités physiques, sensorielles ou mentales réduites ou un manque d'expérience et de connaissances, seulement si elles ont reçu des instructions concernant l'utilisation de l'appareil en toute sécurité et en comprennent les dangers potentiels. Les enfants ne doivent pas jouer avec l'appareil. Le nettoyage et l'entretien de l'appareil ne doivent pas être effectués par des enfants sans surveillance. 20. Les enfants doivent être surveillés pour s'assurer qu'ils ne jouent pas avec l'appareil. 21. L'appareil ne doit pas être utilisé s'il a chuté ou tombé, s'il y a des signes visibles de dommages ou en cas de fuite 22. La fiche doit être débranchée avant le nettoyage, l'entretien ou le remplissage de l'appareil. 23. Cet appareil peut être utilisé par des enfants âgés d'au moins 8 ans, à condition qu'ils bénéficient d'une surveillance ou qu'ils aient reçu des instructions quant à l'utilisation de l'appareil en toute sécurité et qu'ils comprennent bien les dangers encourus. 24. Le nettoyage et l'entretien par l'utilisateur ne doivent pas être effectués par des enfants, à moins qu'ils ne soient âgés de plus de 8ans et qu'ils soient sous la surveillance d'un adulte. 25. Conserver l'appareil et son câble hors de portée des enfants âgés de moins 8ans. 26. Lors de l'utilisation d'appareils électriques, des précautions de sécurité doivent toujours être prises pour prévenir tout risque d'incendie, de choc électrique et/ou de blessure en cas de mauvaise utilisation. 27. Vérifier que le voltage indiqué sur la plaque signalétique de l'appareil correspond bien à celui de votre installation électrique. Si ce n'est pas le cas, adressez-vous au revendeur et ne branchez pas l'appareil. 28. Ne jamais laisser l'appareil sans surveillance lorsqu'il est en fonctionnement. 29. Veuillez conserver ce document à disposition et le remettre au futur propriétaire en cas de cession de votre appareil. 30. Veuillez conserver ce document à disposition et le remettre au futur propriétaire en cas de cession de votre appareil 31. Ne pas utiliser à l'extérieur 32. Cet appareil est conçu pour un usage domestique et dans des endroits comme : \- des coins-cuisines réservés au personnel de magasins, bureaux et autres lieux de travail ; \- des exploitations agricoles, ainsi que par la clientèle d'hôtels, de motels et autres environnements de type résidentiel ; \- des hébergements de type chambre d'hôte ; – par des traiteurs et emplois similaires. Avertissement : ne stockez pas de substances explosives telles que des aérosols contenant un gaz propulseur inflammable dans l'appareil. Avertissement : maintenir les ouvertures d'aération du boîtier de l'appareil ou de la structure encastrée, dégagées. Avertissement : n'utilisez pas de dispositifs mécaniques ou d'autres moyens pour accélérer le processus de dégivrage, autres que ceux recommandés par le fabricant. Avertissement : veillez à ne pas endommager le circuit réfrigérant. Avertissement : n'utilisez pas d'appareil électrique à l'intérieur du compartiment de stockage des aliments de l'appareil, sauf s'il est recommandé par le fabricant. Avertissement : portez au rebut l'appareil uniquement dans un centre de traitement des déchets agréé. Tenez-le à l'écart des flammes. L'isobutène réfrigérant (R600a) est contenu dans le circuit frigorifique de l'appareil ; c'est un gaz naturel très respectueux de l'environnement mais néanmoins inflammable. Lors du transport et de l'installation de l'appareil, assurez-vous qu'aucun des composants du circuit de réfrigération ne soit endommagé. Le réfrigérant (R600a) est inflammable.  Attention : risque d'incendie.Si le circuit de réfrigération est endommagé :
- Evitez les flammes nues et les sources d'inflammation - Aérez la pièce dans laquelle se trouve l'appareilSPÉCIFICATIONS :
PIÈCES ET CARACTÉRISTIQUES :
1) Structure  2) Fonction des boutons  [POWER] : après la mise sous tension, la machine passe en mode veille. Appuyez alors sur le bouton [POWER] pour définir les réglages ; l'écran affichera 60 : 00 " et allumera la lumière d'arrière-fond. Si aucune autre opération n'est engagée, la lumière s'éteindra 15 secondes plus tard; appuyez alors sur le bouton [POWER] de nouveau : la machine peut revenir en mode veille. [MENU] : en appuyant sur ce bouton, vous avez le choix entre 3 modes de fonctionnement : [SORBET], [REFROIDISSEMENT UNIQUEMENT] et [MÉLANGE UNIQUEMENT]; l'icône "■" du mode sélectionné clignotera. En maintenant ce bouton enfoncé pendant 3 secondes pendant le fonctionnement du mode, la machine recule dans la sélection du menu. Bouton de réglage de l'heure : tourner le bouton pour régler le temps de travail ; celui par défaut pour [SORBET], [REFROIDISSEMENT UNIQUEMENT] et [MÉLANGE SEULEMENT] est respectivement de 60 min, 30 min et 10 min. Tourner le bouton sur «-» peut diminuer le temps de travail, sachant que le temps de réglage minimum est de 5 minutes. Au contraire, la rotation sur «+» peut augmenter le temps, sachant que le temps de réglage maximum est de 60 minutes. [START/PAUSE] : après avoir défini le menu et l'heure, appuyez sur ce bouton pour faire fonctionner l'appareil. Pendant le fonctionnement, en appuyant sur ce bouton, l'opération s'interrompt et le compte à rebours se met également en pause. En mode pause, appuyez à nouveau sur le bouton, la machine reprend l'opération précédente non terminée. Une fois que la sorbetière est en mode pause et qu'aucune autre opération n'est en cours, le compresseur cesse de fonctionner 3 minutes plus tard et la machine revient à l'état de veille 10 minutes plus tard.FAIRE DE LA GLACE
Propreté : avant utilisation, bien laver toutes les pièces qui entreront en contact avec la glace (y compris la cuve fixe, la cuve amovible, la lame du mélangeur, le couvercle transparent, le couvercle de remplissage, la tasse à mesurer et la cuillère). Attention : assurez-vous que le cordon d'alimentation soit débranché. Important : placez toujours la machine à glace à la verticale sur une surface plane afin que le COMPRESSEUR puisse offrir les meilleures performances.Étape 1 : préparer les ingrédients de la recette
Préparez ici les ingrédients de votre recette ou du livret de recettes. Remarque : vous n'avez pas besoin de congeler la cuve pendant des heures dans un congélateur, car cette machine dispose d'un COMPRESSEUR INTÉGRÉ qui gèle les ingrédients de la recette lors du fonctionnement, garantissant ainsi la production de la crème glacée. Étape 2 : Versez les ingrédients de la recette bien préparés dans le bol amovible (voir la photo ci-dessous) Étape 3 : placez la cuve amovible dans la machine et tournez-la légèrement pour bien l'ajuster à la cuve fixe (voir la photo ci-dessous). Étape 4 : placez la lame du mélangeur dans la cuve amovible et maintenez le trou de la lame du mélangeur bien fixé à l'axe du moteur. Placez ensuite le couvercle transparent sur la machine et verrouillez-le dans le sens inverse des aiguilles d'une montre (voir l'image ci-dessous). Étape 5 : branchez l'appareil et appuyez sur le bouton [POWER] pour l'allumer. Étape 6 : appuyez sur le bouton [MENU] pour choisir le mode de travail. Étape 7 : tournez le bouton pour régler le temps de travail. Étape 8: appuyez sur le bouton [START/PAUSE] pour commencer la production de glace. Étape 9 : vous pouvez ajouter vos ingrédients préférés en retirant le couvercle de remplissage (voir l'image ci-dessous). natural_image
Simple line drawing of a kitchen appliance with a bucket and handle, no text or symbols presentnatural_image
Line drawing of a microwave oven with lid and ventilation slots (no text or symbols)FONCTIONNEMENT :
Fonction « keep cool »
Pour éviter que la glace ne fonde, la procédure suivante a été prévue : quand la glace est terminée et qu'aucune autre opération n'est envisagée, la machine démarre automatiquement la fonction « keep cool » pendant 2 heures. Ensuite, la machine passe en mode veille.Fonction de protection du moteur
Lorsque la glace devient plus dure, le moteur du mélangeur peut être bloqué. Alors, un coupe-circuit du moteur est actionné selon la température de celui-ci pour assurer la durée de vie du moteur.Contrôle du volume des ingrédients
Pour éviter tout débordement et gaspillage, veuillez-vous assurer que les ingrédients ne dépassent pas 60% de la capacité de la cuve amovible (la glace se dilate lors de sa formation).Différences entre ces trois modes de fonctionnement
1. Mode crème glacée : le temps de travail par défaut est de 60 minutes. L'opération détaillée est indiquée comme ci-dessus. 2. Mode refroidissement uniquement : le temps de travail par défaut est de 30 minutes. L'opération est similaire à celle du mode crème glacée, mais il n'y a pas de fonction de mélange. 3. Mode de mélange uniquement : le temps de travail par défaut est de 10 minutes. L'opération est similaire à celle du mode crème glacée, mais il n'y a pas de fonction de congélation.Stockage de la glace
Mettez la crème glacée produite dans un autre récipient en utilisant une cuillère en plastique ou en bois ; n'utilisez pas de pelle en métal pour éviter de rayer l'intérieur de la cuve amovible.ENTRETIEN :
Attention : la fiche doit être retirée avant le nettoyage de l'appareil pour éviter les chocs électriques. 1. Retirez la lame du mélangeur, essuyez-la avec un chiffon humide 2. Retirez la cuve amovible, nettoyez-la avec un chiffon doux humidifié 3. Essuyez le couvercle transparent et le couvercle de remplissage avec un chiffon humide 4. Enlevez la saleté sur le boitier ou tout autre endroit avec un chiffon humide et ne versez pas d'eau sur le cordon, la fiche et la bouche de ventilation ; ne plongez pas l'appareil dans de l'eau ou tout autre liquide 5. Séchez complètement avec un chiffon sec, puis remettez les accessoires en placeMANUEL DE RECETTES DE CRÈME GLACÉE
GLACE À LA VANILLE
Pour huit portions d'une 1/2 tasse. 1 tasse de lait entier 1/2 tasse de sucre cristallisé 1,5 tasse de crème fraîche, bien froide 1 - 2 cuillères à café d'extrait de vanille pure Dans un bol moyen, utiliser un batteur à main ou un fouet pour mélanger le lait et le sucre cristallisé jusqu'à ce qu'il soit dissous, environ 1 à 2 minutes à basse vitesse. Ajouter la crème fraîche et la vanille selon votre goût. Mettre la machine en marche, verser le mélange dans la cuve du congélateur et laisser le tout se mélanger jusqu'à épaississement, environ 30 à 40 minutes. Analyse nutritionnelle par portion : 239 calories (68% de matières grasses), sucres : 17 g, protéines : 2 g, graisses : 18 g, chol. 69 mg.VARIANTES :
Pépites de chocolat à la menthe : remplacer la vanille par 1 à 1,5 cuillère à café d'extrait de menthe poivrée pure (selon votre goût). Découper 55 g de chocolat amère ou sucré en petits morceaux. Ajouter les morceaux de chocolat pendant les 5 dernières minutes du mélange. Beurre de noix de pécan : faire fondre une motte de beurre non salé dans une poêle. Ajouter 120 g (½ tasse) de noix découpées grossièrement et ½ cuillère à café de sel. Faire cuire à feu moyen-doux, en remuant fréquemment jusqu'à ce que les noix soient légèrement dorées. Retirer du feu, passer au tamis (le beurre aura une saveur de noix de pécan et pourra être réservé à une utilisation ultérieure). Laisser refroidir les noix complètement. Ajouter les noix de pécan grillées et beurrées au cours des 5 dernières minutes du mélange. Cookies et crème : ajouter 3/4 tasse de cookies hachés grossièrement ou votre biscuit préféré (pépites de chocolat, menthe Oreos., etc.) au cours des 5 dernières minutes du mélange.GLACE AU CHOCOLAT
Pour huit portions d'une 1/2 tasse. 1 tasse de lait entier 1/2 litre de lait, 240 g de chocolat amère ou sucré (selon votre goût), découpé en petits morceaux 1 tasse de crème fraîche, bien froide 1 cuillère à café d'extrait de vanille pure Chauffer le lait entier jusqu'à ce qu'il ne frémisse que sur les bords (ceci peut être fait sur la cuisinière ou au micro-onde). Dans un mixeur ou un robot de cuisine muni d'un mélangeur, mélanger le sucre avec le chocolat jusqu'à ce que celui-ci soit très finement haché. Ajouter le lait chaud, mélanger jusqu'à obtenir une consistance homogène et lisse. Transférer dans un bol moyen et laisser le mélange refroidir complètement. Ajouter la crème fraîche et la vanille, selon votre goût. Allumer la machine, verser le mélange dans la cuve du congélateur par le bec verseur et laisser se mélanger jusqu'à épaississement, environ 30 à 40 minutes. Analyse nutritionnelle par portion : 370 calories (60% de matières grasses), sucres : 34 g, protéines : 3 g, graisses : 25 g, chol. 65 mg.VARIANTES :
Amande au chocolat : ajouter 1/2 cuillère à café d'extrait d'amande pure avec la vanille. Ajouter 1/2 à 3/4 tasse d'amandes grillées hachées ou d'amandes enrobées de chocolat haché au cours des 5 à 10 dernières minutes de congélation. Cookies au chocolat : ajouter 1/2 à 1 tasse de cookies hachés au cours des 5 dernières minutes de congélation. Chocolate Fudge Brownie : ajouter 1/2 à 1 tasse de brownies hachés de la veille au cours des 5 dernières minutes de congélation. Chocolate Marshmallow Swirl : lorsque vous mettez la glace dans un récipient pour la congeler, étalez-la avec des morceaux de votre sauce au chocolat préférée et des cuillères de crème à la guimauve.GLACE À LA FRAISE FRAÎCHE
Pour huit portions d'une 1/2 tasse. 250 g de fraises mûres, fraîches et coupées 2 cuillères à soupe de jus de citron fraîchement pressé 1/2 tasse de sucre 1 tasse de lait entier 1 tasse de crème épaisse 1 cuillère à café d'extrait de vanille pure Dans un petit bol, mélanger les fraises avec le jus de citron et 1/2 de tasse de sucre et remuer délicatement, puis laisser les fraises mariner dans le jus pendant 2 heures. Dans un bol moyen, utiliser un batteur à main ou un fouet pour mélanger le lait et le sucre cristallisé jusqu'à ce qu'il soit dissous, environ 1 à 2 minutes à basse vitesse. Ajouter la crème fraîche plus le jus des fraises accumulé et la vanille. Mettre la machine en marche, verser le mélange dans la cuve du congélateur et laisser se mélanger jusqu'à épaississement, environ 30 à 40 minutes. Ajouter les morceaux de fraise au cours des 5 dernières minutes de congélation. Remarque : cette glace aura un aspect «naturel» rose très pâle; si vous désirez une couleur plus intense, ajouter avec modération des gouttes de colorant alimentaire rouge. Analyse nutritionnelle par portion : 222 calories (67% de matières grasses), sucres : 17 g, protéines : 3 g, graisses : 15 g, chol. 57 mg.GLACE AU CITRON FRAIS
Pour huit portions d'une 1/2 tasse. 1,5 tasse de sucre 1,5 tasse d'eau 1 tasse de jus de citron, fraîchement pressé 1 cuillère à soupe de zestes de citron hachés finement \* Mélanger le sucre et l'eau dans une casserole moyenne, puis porter à ébullition à feu moyen-vif. Passer à feu à doux, puis laisser mijoter sans remuer jusqu'à ce que le sucre soit dissous, environ 3 à 5 minutes. Laisser refroidir complètement. Ceci s'appelle un sirop simple et pourra être préparé à l'avance en plus grandes quantités afin d'en avoir sous la main au moment de la confection du sorbet au citron frais. Garder au réfrigérateur jusqu'au moment de servir. Une fois refroidi, ajouter le jus de citron, l'eau et les zestes; incorporer puis mélanger. Mettre la machine en marche, verser le mélange de citron dans la cuve du congélateur et mélanger jusqu'à épaississement, environ 30 à 40 minutes. Lorsque vous prélevez des zestes d'un citron ou d'un citron vert, utilisez un éplucheur à légumes pour enlever la partie colorée de la peau d'agrumes. Analyse nutritionnelle par portion : 204 calories (0% de matières grasses), sucres : 52 g, protéines : 19 g, graisses : 0 g, chol. 0 mgVARIANTES :
Sorbet au pamplemousse rose frais : utiliser 1/2 tasse de jus de pamplemousse rose fraîchement pressé et 1 cuillère à soupe de zestes de pamplemousse finement hachés. Ajouter 30 g de sirop d'orgeat au mélange (le sirop d'orgeat est utilisé pour les cocktails comme le Mai Tai ou le Scorpion et est vendu avec les jus mixtes dans la plupart des épiceries).YAOURT GLACÉ AU CHOCOLAT
Pour huit portions d'une 1/2 tasse. 1 tasse de lait entier 180 g de chocolat doux ou amère, haché 2 tasses de yaourt à la vanille, écrémé 1/4 de litre de lait, Mélanger le lait et le chocolat dans un mixeur ou un robot de cuisine jusqu'à obtenir une consistance lisse et homogène, 20 à 30 secondes. Ajouter le yaourt et le sucre; mélanger jusqu'à une consistance lisse, environ 15 secondes. Mettre la machine en marche, verser le mélange dans la cuve du congélateur et laissez se mélanger jusqu'à épaississement, environ 30 à 40 minutes. Analyse nutritionnelle par portion : 222 calories (31% de matières grasses), sucres : 36 g, protéines : 3 g, graisses : 8 g, chol. 4 mgENVIRONNEMENT
ATTENTION :
 Vous ne devez pas vous débarrasser de cet appareil avec vos déchets ménagers. Un système de collecte sélective pour ce type de produit est mis en place par les communes, vous devez vous renseigner auprès de votre mairie afin d'en connaître les emplacements. En effet, les produits électriques et électroniques peuvent contenir des substances dangereuses qui ont des effets néfastes sur l'environnement ou la santé humaine et doivent être recyclés. Le symbole ci-contre indique que les équipements électriques et électroniques font l'objet d'une collecte sélective, il représente une poubelle sur roues barrée d'une croix. Adeva SAS / H.Koenig Europe - 8 rue Marc Seguin, 77290 Mitry-Mory, France www.hkoenig.com - https://sav.hkoenig.com - Tél: +33 1 64 67 00 05DEUTSCH
BEDIENUNGSANLEITUNG
Lesen Sie dieses Heft sorgfältig vor dem Gebrauch und bewahren Sie dieses als künftige Referenz aufWICHTIGE HINWEISE
Während der Nutzung des elektrischen Gerätes müssen grundliegende Sicherheitsvorkehrungen immer befolgt werden, um das Risiko eines Brandes, Stromschlages, und/oder Verletzungen zu vermeiden, einschließlich die folgenden: 1. Lesen Sie vor dem Gebrauch alle Anweisungen. 2. Stellen Sie sicher, dass die Spannung mit dem auf dem Typenschild angegebenen Spannungsbereich übereinstimmt, und vergewissern Sie sich, dass die Erdung der Steckdose in einem guten Zustand ist. 3. Wenn das Stromkabel beschädigt ist, muss es von dem Hersteller, seinem Dienstleister oder einer ähnlich qialifizierten Person ersetzt werden, um Gefahren zu vermeiden. 4. Stellen Sie das Produkt nicht hochkant oder kippen Sie dieses nicht über einen 45°C Winkel. 5. Um sich vor einem Stromschlag zu schützen, gießen Sie kein Wasser auf das Kabel, den Stecker oder die Lüftung, tauchen Sie das Gerät nicht in Wasser oder andere Flüssigkeiten. 6. Ziehen Sie nach der Nutzung oder vor der Reinigung den Stecker. 7. Halten Sie das Gerät 8cm von anderen Gegenständen entfernt, um eine ausreichende Hitzeresistenz zu ermöglichen. 8. Benutzen Sie kein Zubehör, das nicht von dem Hersteller empfohlen worden ist. 9. Benutzen Sie das Gerät nicht in der Nähe von Flammen, Heizplatten oder Öfen. 10. Schalten Sie die Power-Taste nicht zu häufig um (lassen Sie mindestens einen 5 Minuten Abstand), um eine Beschädigung vom Kompressor zu vermeiden. 11. Blech oder andere elektrische Gegenstände dürfen in das Gerät nicht eingesetzt werden, um ein Brand oder einen Kurzschluss zu vermeiden. 12. Wenn Sie das Eis entnehmen, versuchen Sie, das Fass oder den Fassrand nicht zu stoßen, um dieses vor Beschädigungen zu schützen. 13. Schalten Sie den Strom nicht an, bevor Sie das Fass oder den Mischer-Flügel installiert haben. 14. Die ursprüngliche Temperatur von Zutaten beträgt 25±5°C. Frieren Sie die Zutaten davor nicht ein, da es den Mischer-Flügel beeinträchtigen kann, bevor das Eis den richtigen Zustand erreicht hat. 15. Entfernen Sie den Mischer-Flügel nicht, wenn das Gerät im Betrieb ist. 16. Benutzen Sie das Gerät nicht draußen. 17. Reinigen Sie es niemals mit Scheuerpulver oder harten Utensilien. 18. Bewahren Sie die Bedienungsanleitung auf. 19. Das Gerät kann durch Kinder ab 8 Jahren und älter und Personen mit eingeschränkten physischen, sensorischen oder geistigen Fähigkeiten oder mangels Erfahrung und Wissen benutzt werden, wenn sie beaufsichtigt werden oder erhielten Anweisungen, wie das Gerät auf sichere Weise zu benutzen ist und kennen die damit verbundenen Gefahren. Kinder dürfen mit dem Gerät nicht spielen. Die Renigung und Wartung dürfen nicht von unbeaufsichtigen Kindern durchgeführt werden. 20. Kinder müssen beaufsichtigt werden, um sicher zu stellen, dass sie mit dem Gerät nicht spielen. 21. Das Gerät darf nicht benutzt werden, wenn es fallen gelassen wurde, wenn auffällige Zeichen von Beschädigungen sichtbar sind oder wenn es undicht ist 22. Der Stecker muss vor der Reinigung, Wartung oder dem Auffüllen des Gerätes entfernt werden. 23. Dieses Gerät darf von Kindern ab 8 Jahren benutzt werden, sofern diese beaufsichtigt werden oder eine Einweisung in den sicheren Gebrauch des Geräts erhalten haben und die damit verbundenen Gefahren verstehen. 24. Kinder dürfen das Gerät nur reinigen oder pflegen, wenn sie mindestens 8 Jahre alt sind und von einem Erwachsenen beaufsichtigt werden. 25. Bewahren Sie das Gerät und das zugehörige Netzkabel außerhalb der Reichweite von Kindern unter 8 Jahren auf. 26. Bei der Verwendung elektrischer Geräte sind stets Sicherheitsvorkehrungen zu treffen, um bei unsachgemäßer Verwendung die Gefahr von Bränden, elektrischen Schlägen und/oder Verletzungen zu vermeiden. 27. Achten Sie darauf, dass die auf dem Typenschild angegebene Nennspannung mit Ihrer Netzspannung übereinstimmt Ihrer Installation. Wenn dies nicht der Fall ist, wenden Sie sich an den Händler und schließen Sie das Gerät nicht an. 28. Lassen Sie das Gerät während des Betriebs niemals unbeaufsichtigt. 29. Bitte halten Sie dieses Dokument bereit und geben Sie es im Falle einer Übertragung Ihres Gerätes an den zukünftigen Besitzer weiter. 30. Das Gerät darf nicht benutzt werden, wenn es fallen gelassen wurde, wenn auffällige Zeichen von Beschädigungen sichtbar sind oder wenn es undicht ist. 31. Nicht im Freien verwenden. 32. Das Gerät ist dafür geeignet, im Haushalt oder ähnlichen Einrichtungen benutzt zu werden, wie zum Beispiel: - Küchenbereiche für Mitarbeiter in Geschäften, Büros und anderen Arbeitsumgebungen; - von den Gästen in Hotels, Motels und anderen Wohnumgebungen; - Bed and Breakfast- Einrichtungen - beim Catering und anderen Non-Retail Anwendungsbereichen.Warnung:
Lagern Sie keine explosiven Stoffe wie z.B. Spraydosen mit entflammbaren Treibmittel in diesem Gerät.Warnung:
Halten Sie die Lüftungsöffnungen in dem Gerätsgehäuse oder in dem integrierten Bauwerk frei von Hindernissen.Warnung:
Benutzen Sie keine mechanischen Vorrichtungen oder andere Mittel, um den Auftauvorgang zu beschleunigen, außer diesen, die von dem Hersteller empfohlen wurden.Warnung:
Beschädigen Sie nicht den Kältemittelkreislauf.Warnung:
Benutzen Sie keine elektrischen Geräte in den Lagerfächer für Lebensmittel in dem Gerät, es sei denn diese sind von dem Hersteller empfohlen worden. Warnung: Entsorgen Sie das Gerät ausschließlich in autorisierten Abfallwirtschaftszentren. Setzen Sie es keinen Flammen aus. Der Kältemittelkreislauf des Gerätes beinhaltet das Kältemittel-Isobuten (R600a), natürliches Gas mit einer hohen Umweltverträglichkeit, das jedoch entzündbar ist. Während des Transports und der Montage des Gerätes, stellen Sie sicher, dass keine Teile des Kältemittelkreislaufs beschädigt werden. Das Kältemittel (R600a) ist entflammbar. Vorsicht: Risiko eines Brandes
Wenn der Kältemittelkreislauf beschädigt wird: - Vermeiden Sie offene Flammen und Zündquellen. - Lüften Sie sorgfältig den Raum, in dem sich das Gerät befindet.SPEZIFIKATIONEN:
TEILE & EIGENSCHAFTEN
1) Struktur  2) Funktionstasten  [POWER]: Nach dem Einschalten betritt die Maschine den Standby-Modus. Drücken Sie dann auf die [POWER] Taste, um den Einstellungs-Modus zu betreten; der LCD-Bildschirm wird "60: 00" anzeigen und das Hintergrundlicht wird angehen. Wenn das Gerät nicht bedient wird, geht das Licht in 15 Sekunden aus; drücken Sie dann auf die [POWER] Taste erneut; die Maschine kann wieder in den Standby-Modus gehen. [MENU] Indem Sie auf diese Taste drücken, können Sie zwischen 3 Arbeitsmodi auswählen, einschließlich: [EIS] [NUR KÜHLEN] [NUR MISCHEN]; Das Symbol “■” der gewählten Weise wird angehen. Wenn Sie diese Taste 3 Sekunden während des Modus-Betriebs gedrückt halten, geht die Maschine wieder zu der Menü-Auswahl. Der Zeit-Einstellregler: Drehen Sie den Regler, um die Arbeitszeit einzustellen, die voreingestellte Arbeitszeit für [EIS] [NUR KÜHLEN] und [NUR MISCHEN] beträgt entsprechend 60 Minuten, 30 Minuten und 10 Minuten. Indem Sie den Regler zu “-“ drehen, verkürzen Sie die Arbeitszeit, Die minimal eingestellte Zeit ist 5 Minuten. Im Gegensatz dazu, verlängert das Drehen nach “+” die Zeit, die maximale Zeit beträgt 60 Minuten. [START/PAUSE]: Nachdem Sie das Menü und die Zeit eingestellt haben, drücken Sie auf diese Taste, um den Arbeitsmodus auszuwählen. Während des Betriebs, wird das Mischen und der Countdown anhalten, wenn Sie auf diese Taste drücken. Bei dem Pause-Modus, drücken Sie auf diese Taste erneut, die Maschine wird die unbeendete Operation fortsetzen. Sobald die Eismaschine den Pausen-Modus betritt und es keine andere Operation gibt, wird der Kompressor nach 3 Minuten den Betrieb einstellen und die Maschine nach 10 Minuten in Standby gehen.EIS MACHEN
Sauberkeit: Vor dem Gebrauch, reinigen Sie sorgfältig alle Teile, die in Kontakt mit dem Eis kommen werden (einschließlich die befestigte Schüssel, die abnehmbare Schüssel, den Mischer-Flügel, den transparenten Deckel, den Nachfüll-Deckel, den Messbecher und den Löffel). Warnung: Stellen Sie bitte sicher, dass das Stromkabel nicht angeschlossen ist. Wichtig: Platzieren Sie die Eismaschine immer aufrecht auf einer flachen Ebene, damit der eingebaute KOMPRESSOR beste Leistungen liefern kann.Schritt 1: Bereiten Sie die Rezeptzutaten vor:
Bereiten Sie die Rezeptzutaten aus Ihrem eigenen Rezept oder aus dem Rezeptheft hier vor. Hinweis: Sie brauchen die Schüssel nicht in einem Gefrierfach stundenlang im Voraus einzufrieren, da diese Maschine über einen EINGEBAUTEN KOMPRESSOR verfügt, der die Rezeptzutaten während des Betriebs einfriert und dadurch die Ausgabe von Eis ermöglicht. Schritt 2. Gießen Sie die gut vorbereiteten Rezeptzutaten zusammen in die abnehmbare Schüssel,(siehe das Bild unten). Schritt 3. Platzieren Sie die abnehmbare Schüssel in der Maschine und drehen Sie diese leicht, um sie richtig an die befestigte Schüssel anzupassen (Siehe das Bild unten). Schritt 4. Platzieren Sie den Mischer-Flügel in der abnehmbaren Schüssel und befestigen Sie richtig das Bodenloch des Mischer-Flügels an der Motorachse. Dann platzieren Sie den transparenten Deckel auf die Maschine und verriegeln Sie diesen linksläufig (Siehe das Bild unten). Schritt 5. Schalten Sie den Strom an und drücken Sie auf die [POWER] Taste, um die Maschine mit Strom zu versorgen. Schritt 6. Drücken Sie auf die [MENU] Taste, um den Arbeitsmodus zu wählen. Schritt 7. Drehen Sie den Regler, um die Arbeitszeit einzustellen. Schritt 8. Drücken Sie auf die [START/PAUSE] Taste, um den Betrieb zu starten. Schritt 9. Sie können Ihre Lieblingszutaten hinzufügen, indem Sie den Nachfüll-Deckel öffnen. natural_image
Line drawing of a kitchen appliance with a bucket and lid, showing a downward arrow indicating rotation (no text or symbols)BEDIENUNG:
Kühlhalte-Funktion
Um das Schmelzen des Eises, wenn es nicht rechtzeitig serviert wird, zu vermeiden, unterstützt das Gerät die folgende Funktion: Nachdem das Eis fertig ist und der Vorbereitungsvorgang beendet wird, schaltet die Maschine die Kühlhalte-Funktion automatisch an, die das Eis für 2 Stunden kühlen kann, Nach 2 Stunden geht das Gerät in den Standby-Modus.Motor-Selbstschutzfunktion
Wenn das Eis härter wird, kann der Mischer-Motor blockiert werden. Die Motor-Schutzfunktion hält den Mischer-Motor an, indem diese die Temperatur erkennt, um dem Motor ein langes Leben zu ermöglichen.Kontrolle des Zutatenumfangs
Um das Überlaufen und Verschwenden zu vermeiden, stellen Sie bitte sicher, dass die Zutaten 60% der Kapazität von der abnehmbaren Schüssel nicht überschreiten (das Eis dehnt sich aus, wenn es geformt wird).Die Unterschiede zwischen den drei Arbeitsmodi
1. Eis-Modus: Die voreingestellte Arbeitszeit beträgt 60 Minuten. Detallierte Bedienungsanweisungen sind oben beschrieben. 2. Nur Kühlen-Modus: Die voreingestellte Arbeitszeit beträgt 30 Minuten. Die Bedienung ist ähnlich wie bei dem Eis-Modus, jedoch ohne die Mischfunktion. 3. Nur Mischen-Modus: Die voreingestellte Arbeitszeit beträgt 10 Minuten. Die Bedienung ist ähnlich wie bei dem Eis-Modus, jedoch ohne die Einfrier-Funktion.Lagerung des Eises
Verlegen Sie das fertige Eis in einen anderen Behälter mithilfe einer Plastikschaufel oder eines Holzlöffels, benutzen Sie keine Metallschaufel, um Kratzer auf der Innenfläche der abnehmbaren Schüssel zu vermeiden.WARTUNG:
Achtung: Der Stecker muss vor der Reinigung gezogen werden, um einen Stromschlag zu vermeiden. (1) Entnehmen Sie den Mischer-Flügel und wischen Sie diesen mit einem befeuchteten Tuch ab. (2) Entnehmen Sie die abnehmbare Schüssel und reinigen Sie diese mit einem feuchten, weichen Tuch. (3) Wischen Sie den transparenten Deckel und den Nachfüll-Deckel mit einem feuchten Tuch ab. (4) Entfernen Sie Verschmutzungen auf dem Gehäuse und anderen Stellen des Gerätes mit einem feuchten Tuch, gießen Sie kein Wasser auf das Kabel, den Stecker oder die Lüftung, tauchen Sie das Gerät nicht in Wasser oder andere Flüssigkeiten. (5) Trocknen Sie das Gerät gründlich mit einem trockenen Tuch, dann montieren Sie die Teile auf ihre Ausgangspasitionen zurück.EIS-REZEPTHEFT
VANILLEEIS
Beinhaltet acht 12 -Becher Portionen. 1 Tasse Vollmilch 12 Tasse Kristallzucker 3/2 Tassen Schlagsahne, gut gekühlt 1-2 Teelöffel reiner Vanilleextrakt, nach Geschmack In einer mittelgroßen Schüssel, benutzen Sie einen Handmixer oder einen Schneebesen, um die Milch und den Kristallzucker zu vermischen, bis der Zucker sich aufgelöst hat, ungefähr 1-2 Minuten bei einer niedrigen Geschwindigkeit. Verrühren Sie die Schlagsahne und Vanille nach Geschmack. Schalten Sie die Maschine an, gießen Sie die Mischung in die Gefrier-Schüssel durch den Zutaten-Ausguss und lassen Sie das Gerät mischen, bis die Mischung sich verdickt hat, ungefähr 30-40 Minuten. Ernährungsanalyse pro Portion: Kalorien 239 (68% von Fett). Karbo. 17g. pro 2g. Fett 18g. Cholesterin 69mg.OPTIONEN:
Mint Chip: Lassen Sie die Vanille weg und ersetzen Sie diese mit 1 bis 1-1/2 Teelöffel mit reinem Pffeferminzextrakt (nach Geschmack). Hacken Sie Ihre Lieblings- 4-Unzen bittersüße oder halbsüße Schokoladentafel in kleine, ungleiche Stücke. Fügen Sie die gehackte Schokolade während der letzten 5 Minuten des Vorbereitungsvorgangs hinzu. Butter-Pekannuss: Schmelzen Sie 1 Stück ungesalzene Butter in einer 10-Zoll Pfanne. Fügen Sie 1 Tasse grob gehackte Pekannüsse und 1 Teelöffel Koscher-Salz hinzu. Kochen Sie es bei mittlerer bis niedriger Hitze, mit häufigen Umrühren, bis die Pekannüsse leicht braun werden. Nehmen Sie diese von der Hitze und seihen Sie diese ab (die Butter wird einen Pekannus-Geschmack haben und kann für ein anderes Mal aufbewahrt werden). Lassen Sie die Pekannüsse komplett abkühlen. Fügen Sie die angebratenen, gebutterten Pekannüsse während der letzten 5 Minuten des Vorbereitungsvorgangs hinzu. Cookies & Crème: Fügen Sie eine 34 Tasse grob gehackte Cookies oder Ihre Lieblings-Süßigkeit (Schokochips, Oreos, Minze-Oreos, usw.) während der letzten 5 Minuten des Vorbereitungsvorgangs hinzu.EINFACHES SCHOKOEIS
Beinhaltet acht 12 -Becher Portionen. 1 Tasse Vollmilch 12 Tasse Kristallzucker 240g oder 8 Unzen bittersüße oder halbsüße Schokolade (Ihre Lieblingssorte) gebrochen in 12 -Zoll Stücke 1 Tasse Schlagsahne, gut gekühlt 1 Teelöffel reiner Vanilleextrakt Kochen Sie die Vollmilch auf, bis diese anfängt, am Rand zu blubbern (Sie können es auf einer Herdplatte oder in einer Mikrowelle machen). In einem Mixer oder einer Küchenmaschine mit Metallklingen, verarbeiten Sie den Zucker mit der Schokolade, bis die Schokolade sehr fein gehackt ist. Fügen Sie die heiße Milch hinzu und verarbeiten Sie diese, bis die Substanz richtig vermischt und gleichmäßig ist. Verlegen Sie diese in eine mittlere Schüssel und lassen Sie die Schoko-Mischung komplett abkühlen. Rühren Sie die Schlagsahne und Vanille nach Geschmack ein. Schalten Sie die Maschine an, gießen Sie die Mischung in die Gefrier-Schüssel durch den Zutaten-Ausguss und lassen Sie die Mischung dort, bis diese sich verdickt hat, ungefähr 30-40 Minuten. Ernährungsanalyse pro Portion: Kalorien 370 (60% von Fett). Karbo. 34g. pro 3g. Fett 25g. Cholesterin 65mg.OPTIONEN:
Schoko-Mandel: Fügen Sie 12 Teelöffel reiner Mandelextrakt zusammen mit Vanille hinzu. Fügen Sie 12 bis 34 Tasse gehackte und geröstete Mandeln oder gehackte, schokoladen-überzogene Mandeln während der letzten 5-10 Minuten vorm Einfrieren hinzu. Schoko-Cookie: Fügen Sie 12 -1 Tasse gehackte Cookies während der letzten 5 Minuten vorm Einfrieren hinzu. Schokoladenfondant- Brownie: Fügen Sie ½- 1 Tasse gehackte, ein-Tag-alte Brownies während der letzten 5 Minuten vorm Einfrieren hinzu. Schokoladen-Marshmallow Strudel: Wenn Sie das Eis in einen Behälter zum Einfrieren verlegen, schichten Sie es mit mehreren Klackse von Ihrer Lieblings- Schokosoße und Kugeln von der Marshmallow-Crème (Fluff).FRISCHES ERDBEEREIS
Beinhaltet acht 12 -Becher Portionen. 250g oder 1 Pint frische, reife Erdbeeren, gereinigt und geschnitten 3/5 Teelöffel frisch ausgepresster Zitronensaft 12 Tassen Zucker, aufgeteilt 1 Tasse Vollmilch 1 Tasse Schlagsahne 1 Teelöffel reiner Vanilleextrakt In einer kleinen Schüssel, vermengen Sie die Erdbeeren mit Zitronensaft und 12 Tassen Zucker; rühren Sie vorsichtig um und lassen Sie die Erdbeeren in dem Saft für 2 Stunden einweichen. In einer mittleren Schüssel, benutzen Sie einen Stabmixer oder einen Schneebesen, um die Milch mit dem Kristallzucker zu vermischen, bis sich der Zucker auflöst, ungefähr 1-2 Minuten bei niedriger Geschwindigkeit. Rühren Sie die Schlagsahne mit dem angesammelten Saft von Erdbeeren und Vanille ein. Schalten Sie die Maschine an, gießen Sie die Mischung in die Gefrier-Schüssel durch den Zutaten-Ausguss und lassen Sie die Maschine mischen, bis die Mischung sich verdickt hat, ungefähr 30-40 Minuten. Fügen Sie die geschnittenen Erdbeeren während der letzten 5 Minuten vorm Einfrieren hinzu. Hinweis: Dieses Eis wird über eine “natürliche”, hellrosane Farbe verfügen; Wenn eine kräftigere Pinkfarbe gewünscht ist, fügen Sie sparsam ein paar Tropfen von roter Lebensmittelfarbe hinzu, bis die gewünschte Farbe erreicht ist. Ernährungsanalyse pro Portion: Kalorien 222 (67% von Fett). Karbo. 17g. pro 3g. Fett 15g. Cholesterin 57mg.FRISCHES ZITRONENSORBET
Beinhaltet acht 12 -Becher Portionen. 3/2 Tassen Zucker 3/2 Tassen Wasser 1 Tasse frisch gepresster Zitronensaft 1 Esslöffel fein gehackte Zitronenschale\* Vermischen Sie den Zucker und Wasser in einem mittelgroßen Topf und kochen Sie die Mischung bei mittlerer Hitze auf. Verringern Sie die Hitze und köcheln Sie den Inhalt, ohne diesen umzurühren, bis der Zucker sich auflöst, für ungefähr 3-5 Minuten. Kühlen Sie die Mischung vollständig ab. Dies wird ein einfacher Syrup genannt und kann vorrätig in größeren Mengen vorbereitet werden, um ein frisches Zitronensorbet zu machen. Lagern Sie ihn gekühlt, bis er gebrauchsfertig wird. Wenn kühl, fügen Sie den Zitronensaft und die Schale hinzu und verrühren Sie beides; Schalten Sie die Maschine an, gießen Sie die Zitronenmischung in die Gefrier-Schüssel durch den Zutaten-Ausguss und lassen Sie die Maschine mischen, bis der Inhalt sich verdickt hat, ungefähr 30-40 Minuten. Wenn Sie eine Zitrone oder Limette schälen, benutzen Sie einen Gemüseschäler, um die verfärbten Teile vom Zitrusgewächs zu entfernen. Ernährungsanalyse pro Portion: Kalorien 204 (0% von Fett) . Karbo. 52g . pro 19g . Fett 0g . Cholesterin 0mg .OPTIONEN:
Frisches Pink-Grapefruit Sorbet: Ersetzen Sie Zitronensaft durch 12 Tasse frisch gepressten Pink-Grapefruitsaft, und die Zitronenschale durch 1 Esslöffel fein gehackte Grapefruit-Schale. Fügen Sie 14 Tasse Mandelmilch-Syrup zu der Mischung hinzu. (Mandelmilch-Syrup wird für Cocktails wie z. B. Mai Tai oder Scorpion benutzt und kann unter Getränkemischungen in meisten Lebensmittelgeschäften gekauft werden).SCHOKO- FROZEN YOGURT
Beinhaltet acht 12 -Becher Portionen. 1 Tasse Vollmilch 180g oder 6 Unzen bittersüße oder halbsüße Schokolade, gehackt 2 Tassen fettarmer Vanillejoghurt 14 Tasse Zucker Vermischen Sie die Milch und Schokolade in einem Mixer oder einer Küchenmaschine mit Metallklingen und verarbeiten Sie diese, bis die Mischung richtig vermischt und gleichmäßig ist, ca 20 bis 30 Sekunden. Fügen Sie den Joghurt und den Zucker hinzu, und verarbeiten Sie diese, bis die Mischung gleichmäßig ist, für ca. 15 Sekunden. Schalten Sie die Maschine an, gießen Sie die Mischung in die Gefrier-Schüssel durch den Zutaten-Ausguss und lassen Sie die Mischung dort, bis diese sich verdickt hat, ungefähr 30-40 Minuten. Ernährungsanalyse pro Portion: Kalorien 222 (31% von Fett) . Karbo. 36g . pro 3g . Fett 8g . Cholesterin 4mg .UMWELT
ACHTUNG:  Werfen Sie nicht dieses Produkt, wie es mit anderen Haushaltsprodukten hat. Es gibt eine Mülltrennungs von diesem Produkt in Gemeinden, Sie müssen Ihre lokalen Behörden über die Orte, wo man dieses Produkt zurückgeben können zu informieren. In der Tat enthalten elektrische und elektronische Produkte gefährliche Stoffe, die schädliche Auswirkungen auf die Umwelt oder die menschliche Gesundheit haben und sollte recycelt werden. Das Symbol hier darauf hinweisen, dass elektrische oder elektronische Geräte sollten sorgfältig ausgewählt werden, ist ein fahrbarer Abfallbehälter mit einem Kreuz markiert. Adeva SAS / H.Koenig Europe - 8 rue Marc Seguin, 77290 Mitry-Mory, France www.hkoenig.com - https://kundenservice.hkoenig.com - Tél: +33 1 64 67 00 05NEDERLANDS
GEBRUIKERSHANDLEIDING
Lees dit goed door voor gebruik en bewaar het voor toekomstige naslag.BELANGRIJKE OPMERKINGEN
Bij het gebruik van elektrische apparaten moeten de standaard veiligheidsinstructies worden opgevolgd om de kans op vuur, elektrische schokken en/of verwondingen te verkleinen, inclusief het volgende: 1. Lees alle instructies voor gebruik. 2. Controleer dat het voltage overeenkomt met het voltage op het typeplaatje, en controleer dat de aarde van het stopcontact goed functioneert. 3. Als de stroomkabel beschadigd is, moet het worden vervangen door de fabrikant, een servicemonteur of een gelijkwaardig gekwalificeerd persoon om gevaren te vermijden. 4. Dit apparaat niet omdraaien of verder dan 45°C. 5. Ter voorkoming van een elektrische schok, geen water over de kabel, stekker of ventilatie sprenkelen, niet het apparaat in water onder dompelen of een andere vloeistof. 6. Haal de stekker uit het stopcontact na gebruik of voor de schoonmaak. 7. Houd het apparaat 8cm verwijderd van andere objecten om te verzekeren dat de hitte goed kwijt kan. 8. Gebruik geen accessoires die niet zijn aanbevolen door de fabrikant. 9. Gebruik het apparaat niet in de buurt van vlammen, fornuizen of kachels. 10. Druk niet regelmatig op de power knop (minimaal 5 min tussenpozen) om schade aan de compressor te vermijden. 11. Metalen of andere geleidende objecten mogen niet in het apparaat om vuur en kortsluiting te voorkomen. 12. Bij het eruit halen van het ijs, niet tegen de kom of de rand van de kom tikken om beschadiging te voorkomen. 13. Niet het apparaat inschakelen voordat de kom of mixermes is geplaatst. 14. De initiële temperatuur van de ingrediënten is 25±5°C. Plaats de ingrediënten van te voren niet in de diepvries, dit kan het mixermes blokkeren voordat het ijs in goede staat is. 15. Niet het mixermes verwijderen als het apparaat in werking is. 16. Niet buiten gebruiken. 17. Nooit schoonmaken met bijtende middelen of harde spullen. 18. Bewaar de gebruikershandleiding. 19. Dit apparaat kan gebruikt worden door kinderen van 8 jaar en ouder en door personen met beperkte geestelijke of lichamelijke capaciteiten, of met een gebrek aan ervaring en kennis, zolang ze toezicht krijgen of instructies voor het veilig gebruik van dit apparaat hebben gehad en de bijbehorende gevaren begrijpen. Kinderen mogen niet met dit apparaat spelen. Schoonmaken en gebruikersonderhoud mag niet worden uitgevoerd door kinderen zonder toezicht. 20. Kinderen moeten onder toezicht worden gehouden, om te verzekeren dat ze niet met het apparaat spelen. 21. Het apparaat mag niet worden gebruikt als het is gevallen, er zijn duidelijke tekenen van schade zichtbaar of er zijn lekken. 22. De stekker moet uit het stopcontact worden gehaald voor het schoonmaken, onderhouden of vullen van het apparaat. 23. Dit apparaat mag worden gebruikt door kinderen vanaf 8 jaar en ouder indien dit gebeurt onder toezicht, als zij van tevoren instructies hebben ontvangen betreffende het veilige gebruik van het apparaat en als zij de mogelijke gevaren kennen. 24. Reiniging en onderhoud mogen niet worden uitgevoerd door kinderen tenzij ze 8 jaar of ouder zijn en onder toezicht van een volwassene staan. 25. Houd het apparaat en het snoer buiten bereik van kinderen onder de 8 jaar. 26. Bij het gebruik van elektrische apparatuur moeten altijd veiligheidsmaatregelen worden genomen om het risico van brand, elektrische schokken en/of letsel in geval van verkeerd gebruik te voorkomen. 27. Controleer of de spanning op het typeplaatje overeenkomt met de spanning die op het typeplaatje staat van uw installatie. Als dit niet het geval is, neem dan contact op met de dealer en sluit het apparaat niet aan. 28. Laat het apparaat nooit onbeheerd achter terwijl het in bedrijf is. 29. Bewaar dit document bij de hand en geef het aan de toekomstige eigenaar in geval van overdracht van uw apparaat. 30. Het apparaat mag niet worden gebruikt als het is gevallen, er zijn duidelijke tekenen van schade zichtbaar of er zijn lekken. 31. Niet buiten gebruiken. 32. Dit apparaat is bedoeld voor huishoudelijk gebruik en voor dergelijke situaties zoals: - personeelsruimte in winkels, kantoor en andere werkomgevingen; - herbergen en bij cliënten in hotels, motels en andere woontype omgevingen; – bed & breakfast omgevingen; - catering en gelijkwaardige niet retail-toepassingen. Waarschuwing: Geen explosieve substantie zoals aerosol bussen met een brandbaar drijfgas in dit apparaat opslaan. Waarschuwing: Houd de ventilatieopeningen van het apparaat, of het binnenwerk, vrij van obstructies Waarschuwing: Gebruik geen mechanische apparaten of andere middelen om het vries proces te versnellen, tenzij ze worden aanbevolen door de fabrikant Waarschuwing: Niet het koelcircuit beschadigen. Waarschuwing: Gebruik geen elektrische apparaten in de voedselruimtes van het apparaat, tenzij dit type wordt aanbevolen door de fabrikant. Waarschuwing: Bij het afvoeren van het apparaat, doe dat bij een bevoegde milieustraat. Niet blootstellen aan vuur. Het koelmiddel isobutaan (R600a) is verwerkt in het koelingscircuit van het apparaat, een natuurlijk gas wat milieuvriendelijk is, maar desalniettemin brandbaar. Verzeker tijdens het transport en de installatie van het apparaat dat geen van de onderdelen van het koelingscircuit beschadigd raken. Het koelingsmiddel (R600a) is brandbaar.  Waarschuwing: risico op vuur. Als het koelingscircuit beschadigd raakt: - Vermijd vlammen en ontstekingsbronnen. - Ventileer de kamer grondig waar het apparaat staat.SPECIFICATIES: ONDERDELEN EN OPTIES:
 2) Functie knoppen  [POWER]: Na het inschakelen, gaat de machine in de stand-by-modus. Druk dan op de [POWER]-knop om in het menu te komen, het display zal "60: 00" tonen en de achtergrondverlichting gaat aan. Als er niets meer gebeurt, zal de verlichting na 15 seconden uitgaan, druk dan nogmaals op de [POWER]-knop; het apparaat gaat dan terug naar de stand-by-modus. [MENU]: Door te drukken op deze knop zijn er 3 modi om uit te kiezen, dat zijn: [ICE CREAM] [COOLING ONLY] en [MIXING ONLY]; het teken “■” van de gekozen modus zal knipperen. Het vasthouden van deze knop voor 3 seconden tijdens deze modi, zal het apparaat terug naar het menu laten gaan. Tijdinstellingsknop: Draai de knop naar de gewenste werktijd, de standaard voor [ICE CREAM] [COOLING ONLY] en [MIXING ONLY] is respectievelijk 60min, 30min, 10min. Het draaien van de knop naar "-" verminderd de werktijd, de minimale tijd is 5 minuten. Daarentegen zorgt het draaien naar de "+" voor een verhoging van de tijd, de maximale tijd is 60 minuten. [START/PAUSE]: Na het instellen van het menu en tijd, druk op deze knop om te beginnen. Als tijdens gebruik op deze knop wordt gedrukt, zal het mixen worden gepauzeerd net als de timer. Als in de pauzemodus nogmaals op deze knop wordt gedrukt, zal het apparaat verder gaan met het voorgaande onafgeronde taak. Als de ijsmachine in de pauzemodus staat en er gebeurt verder niets, zal de compressor na 3 minuten stoppen met werken en zal het apparaat 10 minuten later in de stand-by-modus gaan.IJS MAKEN
Properheid: Voor gebruik grondig alle delen afwassen die in contact komen met het ijs (waaronder de vaste kom, de verwijderbare kom, mixermes, doorzichtige deksel, bijvuldeksel, maatbeker en lepel). Waarschuwing: Verzeker dat de stekker uit het stopcontact is. Belangrijk: Altijd de ijsmachine rechtop op een vlak ondergrond zetten om te zorgen dat de ingebouwde COMPRESSOR het beste functioneert.Stap 1. Bereid ingrediënten voor:
Bereid de ingrediënten voor volgens uw eigen recept of een recept uit dit boekje. Opmerking: U hoeft niet de kom van te voren uren in de vriezer te leggen, aangezien dit apparaat een INGEBOUWDE COMPRESSOR heeft dat de ingrediënten bevriest wat de uitvoer van ijs verzekert. Stap 2. Voer de voorbereide ingrediënten in de verwijderbare kom (Zie plaatje hieronder) Stap 3. Plaats de verwijderbare kom op het apparaat en draai deze een stukje zodat deze goed op de vaste kom zit (Zie plaatje hieronder). Stap 4. Plaats het mixermes in de verwijderbare kom en houdt het gat van het mixermes goed geplaatst op de motoras. Plaats dan de transparante klep op het apparaat en zet deze tegen de klok in vast (Zie plaatje hieronder).  Stap 5. Doe de stekker in het stopcontact, druk dan op [POWER] om het apparaat in te schakelen. Stap 6. Druk op de [MENU]-knop om de gewenste modus te kiezen. Stap 7. Draai aan de knop om de gewenste tijd in te stellen. Stap 8. Druk op de [START/PAUSE]-knop om te beginnen. Stap 9. U kunt uw favoriete ingrediënten toevoegen door de bijvulklep te openen. Open de bijvulklep en voeg de ingrediënten natural_image
Line drawing of a small appliance with a lid and ventilation slots, no text or symbols presentGEBRUIK:
Koudhoudfunctie
Om smelten te vermijden als het ijs er niet uitgehaald wordt, is de volgende functie ingebouwd: Als het ijs klaar is en er niets meer gebeurt, start het apparaat automatisch met de koudhoudfunctie, wat 2 uur kan duren. Na 2 uur zal het apparaat in stand-by-modus gaan.Zelfbeschermingsfunctie van de motor
Als het ijs harder wordt, kan de motor van de mixer vastlopen. De zelfbeschermingsfunctie van de motor zal de motor laten stoppen als de temperatuur oploopt ten gunste van de levensduur van de motor.Beheers het volume van de ingrediënten
Om overloop en verspilling tegen te gaan, zorg dat de ingrediënten niet hoger komen dan 50% van de capaciteit van de verwijderbare kom is (Het ijs zet uit als dit gemaakt wordt)De verschillen tussen de drie modi
1. IJsmodus: de standaard tijd is 60 minuten. De gedetailleerde uitleg is hetzelfde als hierboven. 2. Alleen koelen-modus: de standaard tijd is 30 minuten. Deze modus is vergelijkbaar met de ijsmodus, maar er wordt niet gemixt. 3. Alleen mixen-modus: de standaard tijd is 10 minuten. Deze modus is vergelijkbaar met de ijsmodus, maar er wordt niet gekoeld.Opslag van ijs
Doe het gemaakte ijs in een andere kom door gebruik te maken van een plastic of houten lepel, gebruik geen metalen lepel om krassen te vermijden in de verwijderbare kom.ONDERHOUD:
Waarschuwing: De stekker moet uit het stopcontact worden gehaald voor het schoonmaken om elektrische schokken te vermijden. (1) Haal het mixermes eruit, veeg deze schoon met een vochtige doek (2) Haal de verwijderbare kom eruit, maak deze schoon met een vochtige, zachte doek (3) Veeg de transparante klep en bijvulklep met een vochtige doek (4) Verwijder de viezigheid op de basis of op andere plekken met een vochtige doek, giet geen water op de kabel, stekker of ventilatie, dompel het apparaat niet onder in water of in een andere vloeistof (5) Veeg het goed droog met een droge doek, plaats de componenten dan weer terug.IJSRECEPT
VANILLE IJS
Maakt acht 1/2-kopjes ijs. 1 kop volle melk 1/2 kop kristalsuiker 3/2 kopjes slagroom, goed gekoeld 1 - 2 theelepels pure vanille-extract, naar smaak In een gemiddelde kom, gebruik een handmixer of garde om de melk en kristalsuiker te mengen tot de suiker opgelost is, ongeveer 1 - 2 minuten op langzame snelheid. Meng de slagroom en vanille erbij naar smaak. Schakel het apparaat in, vul het mengsel in de vriezerkom door de ingrediëntenopening en laat dit mixen tot het dik wordt, ongeveer 30 - 40 minuten. Voedingswaarde-analyse per portie: Calorieën 239 (68% van vet) . koolhydraten. 17g . per 2g . vet 18g . chol. 69mg .VARIATIES:
Munt: Vervang de vanille met 1 tot 1-1/2 theelepels pure pepermuntextract (naar smaak). Hak uw favoriete 110-grams bitterzoete of lichtzoete chocoladereep in kleine ongelijke stukken. Voeg de gehakte chocolade toe tijdens de laatste 5 minuten mixen. Boter Pecannoten: Smelt 1 klont ongezouten boter in een pan van 25 cm. Voeg 1 kop grof gehakte pecannoten toe en 1 eetlepel koosjer zout. Bak dit op een middellage temperatuur, roer regelmatig tot de pecannoten lichtgebruind zijn. Haal ze van het vuur, giet ze af (de boter zal de pecannoten smaak hebben en kan voor iets anders worden gebruikt). Laat de noten afkoelen. Voeg de gebakken, geboterde pecannoten toe tijdens de laatste 5 minuten mixen. Koekje & room: Voeg 3/4 kop grof gehakte koekjes toe van uw favoriete smaak (chocoladekoekjes, Oreos Mint, Oreos, etc.) tijdens de laatste 5 minuten van het mixen.STANDAARD CHOCOLADE IJS
Maakt acht 1/2-kopjes ijs. 1 kop volle melk 1/2 kop kristalsuiker 240g bitterzoete of lichtzoete chocolade (uw favoriete), gebroken in stukken van ongeveer een centimeter 1 kop slagroom, goed gekoeld 1 theelepel pure vanille-extract Verwarm de volle melk tot het gaat borrelen bij de rand (dit kan op een fornuis of in de magnetron). In een blender of een keukenmachine uitgerust met een metalen mes, pulseer het mixen van de suiker met de chocolade tot de chocolade in kleine stukjes is gehakt. Voeg de hete melk toe, blijf mixen tot het een gladde substantie is. Giet het in een gemiddelde kom en laat het mengsel helemaal afkoelen. Meng de slagroom en vanille erbij naar smaak. Schakel het apparaat in, voeg het mengsel in de koelkom door de ingrediëntenopening en mix tot het dik wordt, ongeveer 30 - 40 minuten. Voedingswaarde-analyse per portie: Calorieën 370 (60% van vet) . koolhydraten. 34g . per 3g . vet 25g . chol. 65mg .VARIATIES:
Chocolade amandel: Voeg 1/2 theelepel pure amandelextract toe samen met de vanille. Voeg 1/2 - 3/4 kop gehakte, geroosterde amandelen of gehakte chocoladeamandelen tijdens de laatste 5 -10 minuten van het koelen. Chocoladekoekjes: Voeg 1/2 - 1 kop gehakte koekjes toe tijdens de laatste 5 minuten koelen. Chocolade karamel brownie: Voeg 1/2 - 1 kop gehakte, een dag oude brownies toe tijdens de laatste 5 minuten koelen. Chocolade Marshmallow : Bij het overscheppen van het ijs in een bakje voor het vriezen, voeg klontjes van uw favoriete chocoladesaus en schepjes marshmallowcrème toe.VERSE AARBEIENIJS
Maakt acht 1/2-kopjes ijs. 250g verse rijpe aardbeien, ontsteeld en gesneden 3/2 eetlepel versgeperste citroensap 1/2 kop suiker, verdeeld 1 kop volle melk 1 kop slagroom 1 theelepel pure vanille-extract In een kleine kom de aardbeien mengen met het citroensap en 1/2 kop suiker, voorzichtig mengen en dan de aardbeien 2 uur laten weken in het sap. In een gemiddelde kom, gebruik een handmixer of garde om de melk en kristalsuiker te mengen tot de suiker opgelost is, ongeveer 1 - 2 minuten op langzame snelheid. Meng de slagroom plus de sappen van de aardbeien en vanille. Schakel het apparaat in, vul het mengsel in de vriezerkom door de ingrediëntenopening en laat dit mixen tot het dik wordt, ongeveer 30 - 40 minuten. Voeg de gesneden aardbeien toe tijdens de laatste 5 minuten koelen. Opmerking: dit ijs zal er zeer ‘natuurlijk’ uitzien, erg lichtroze; voor een betere kleur kunt u rood voedselkleurstof gebruiken tot de gewenst kleur is bereikt. Voedingswaarde-analyse per portie: Calorieën 222 (67% van vet) . koolhydraten. 17g . per 3g . vet 15g . Chol. 57mb ..VERSE CITROENSORBET
Maakt acht 1/2-kopjes ijs. / 3/2 kopjes suiker / 3/2 kopjes water 1 eetlepel versgeperst citroensap 1 eetlepel fijngeraspte citroenschil \* Voeg het suiker en water in een gemiddelde sauspan en breng het aan de kook op een gemiddeld-hoog vuur. Verlaag het vuur tot laag en laat het zonder te roeren sudderen tot de suiker oplost, ongeveer 3-5 minuten. Helemaal laten afkoelen. Dit noemt men een simpele siroop, en kan van te voren in grotere hoeveelheden gemaakt worden zodat u altijd een verse citroensorbet kunt maken. Houd dit gekoeld tot het gebruiksklaar is. Als het gekoeld is, voeg het citroensap en -schil toe; roeren om het te mengen. Schakel het apparaat in, vul het mengsel in de vriezerkom door de ingrediëntenopening en mix dit tot het dik wordt, ongeveer 30 - 40 minuten. Bij het raspen van een citroen of limoen een groenteschiller gebruiken om het gekleurde deel van de citrusvrucht te verwijderen. Voedingswaarde-analyse per portie: Calorieën 204 (0% van vet) . koolhydraten. 52g . per 19g . vet 0g . chol. 0mg .VARIATIE:
Sorbet van verse roze pompelmoes: Vervang 1-1/2 kopje versgeperste roze pompelmoes voor het citroensap, en 1 eetlepel fijngehakte pompelmoesschil voor de citroenschil. Voeg 1/4 kop orgeade siroop toe aan het mengsel (Orgeade siroop wordt gebruikt in cocktails zoals Mai Tai of Schorpioen en kan gevonden worden in de meeste supermarkten).CHOCOLADE BEVROREN YOGHURT
Maakt acht 1/2-kopjes ijs. 1 kop volle melk 180g bitterzoete of lichtzoete chocolade, gehakt 2 kopjes vanilleyoghurt met weinig vet 1/4 kop suiker Voeg de melk en chocolade toe in een blender of keukenmachine met een metalen mes en mix het tot het een gladde structuur heeft, 20 -30 seconden. Voeg de yoghurt en suiker toe; mixen tot het een glad mengsel is, ongeveer 15 seconden. Schakel het apparaat in, vul het mengsel in de vriezerkom door de ingrediëntenopening en laat dit mixen tot het dik wordt, ongeveer 30 - 40 minuten. Voedingswaarde-analyse per portie: Calorieën 222 (31% van vet) . koolhydraten. 36g . per 3g . vet 8g . chol. 4mgMILIEU
ATTENTIE:  Dit apparaat mag niet met uw ander huishoudelijke toestellen worden verwijdert. Dit product moet op een geselecteerde stortplaats verwijdert worden. U kunt bij de gemeente een indiceerde plaats aanvragen. Elektrisch en elektronische producten kunnen gevaarlijke stoffen inhouden die schadelijk zijn voor mensen en het milieu en moet recycled worden. Het symbool aan de kant geeft aan dat het een elektrisch en elektronisch toestel is en zijn dus artikelen van een selectieve collectie. Het beeld geeft een afvalbak met een X teken aan.ESPANOL
MANUAL DE INSTRUCCIONES
Lea este folleto detenidamente antes de utilizar la máquina y guárelo para consultas futuras.Instrucciones importantes
Para utilizar un electrodoméstico, siempre se deben tomar las precauciones básicas de seguridad para reducir los riesgos de incendio, descargas eléctricas y/o lesiones, incluyendo las siguientes: 1. Lea todas las instrucciones antes usar la máquina. 2. Compruebe que la tensión de su red eléctrica sea compatible con la indicada en la placa de características de la máquina y verifique que la conexión a tierra del tomacorriente esté en buen estado. 3. Si el cable de alimentación está dañado, este deberá ser reemplazado por el fabricante, su agente de servicios técnicos o un especialista similar para evitar riesgos potenciales. 4. Nunca vuelque esta máquina ni la incline a más de 45 grados de la superficie. 5. Para prevenir descargas eléctricas, no vierta agua sobre el cable de alimentación, el enchufe o las ranuras de ventilación y nunca sumerja la máquina en agua o en cualquier otro líquido. 6. Desenchufe la máquina del tomacorriente después del uso o antes de limpiarla. 7. Mantenga la máquina a 8 cm de cualquier otro objeto para permitir la circulación de aire y una buena disipación de calor. 8. Utilice únicamente los accesorios recomendados por el fabricante. 9. No utilice la máquina cerca de llamas, fogones, hornillas o estufas. 10. Para evitar que se dañe el compresor, no encienda la máquina (botón POWER) demasiadas veces en cortos períodos de tiempo (espere al menos 5 minutos). 11. Para evitar incendios y cortocircuitos, nunca introduzca láminas de metal u otros objetos conductores en la máquina de helado. 12. Cuando saque el helado, no golpee el recipiente para no dañarlo. 13. Nunca enchufe la máquina al tomacorriente antes de instalar bien el recipiente y la cuchilla mezcladora. 14. La temperatura inicial de los ingredientes es de 25±5°C. No coloque los ingredientes en el congelador para precongelarlos, ya que hará que la cuchilla quede bloqueada fácilmente antes de que el helado esté en buenas condiciones. 15. No retire la cuchilla de la máquina cuando la misma esté funcionando. 16. No use la máquina a la intemperie. 17. Nunca limpie la máquina con productos abrasivos o implementos duros. 18. Debe conservar este manual de instrucciones. 19. Esta máquina puede ser utilizada por niños mayores de 8 años y personas con discapacidad física, sensorial o motora, o con falta de experiencia y conocimiento, siempre que sean supervisados o hayan sido instruidos en el uso de la máquina de forma segura y entienden los peligros involucrados. No permita que los niños jueguen con la máquina de hielo. Los niños no deben limpiar la máquina ni darle mantenimiento, a menos que sean supervisados. 20. Los niños deben ser supervisados para asegurarse de que no jueguen con el aparato. 21. El dispositivo no debe utilizarse si se ha caído, si hay signos evidentes de daño o si hay fugas. 22. Antes de realizar cualquier tarea de limpieza o mantenimiento, remueva el enchufe del tomacorriente. 23. Este aparato puede ser utilizado por niños de al menos 8 años de edad, siempre que cuenten con supervisión y hayan recibido instrucciones sobre el uso seguro del electrodoméstico y sean plenamente conscientes de los peligros que implica. 24. La limpieza y mantenimiento de la máquina no debe ser efectuada por niños a menos que tengan como mínimo 8 años de edad y cuenten con la supervisión de un adulto. 25. Mantenga el aparato y su cable eléctrico fuera del alcance de niños de menos de 8 años. 26. Al utilizar equipos eléctricos, siempre se deben tomar precauciones de seguridad para evitar el riesgo de incendio, descarga eléctrica y/o lesiones en caso de uso indebido. 27. Asegúrese de que la tensión nominal de la placa de características corresponde a la tensión de red de su instalación. Si no es así, póngase en contacto con el distribuidor y no conecte la unidad. 28. Al utilizar equipos eléctricos, siempre se deben tomar precauciones de seguridad para evitar el riesgo de incendio, descarga eléctrica y/o lesiones en caso de uso indebido. 29. Por favor, tenga este documento a mano y entréguelo al futuro propietario en caso de transferencia de su dispositivo. 30. El dispositivo no debe utilizarse si se ha caído, si hay signos evidentes de daño o si hay fugas. 31. No utilizar en el exterior. 32. Esta máquina fue diseñada para el uso en el hogar y en aplicaciones domésticas similares, tales como: √ Áreas del personal de cocina en tiendas, oficinas y otros entornos de trabajo. √ En casas de campo y a disposición de huéspedes en hoteles, moteles y otros ambientes de tipo residencial. √ Instalaciones como posadas o pensiones. √ Abastecimientos y locales similares con fines no comerciales. Advertencia – No use la máquina para almacenar sustancias explosivas, tales como latas de aerosol con propelentes inflamables. Advertencia – Nunca obstruya las ranuras de ventilación en la cubierta de la máquina o en la estructura incorporada. Advertencia – No use dispositivos mecánicos u otros medios para acelerar el proceso de descongelación, que no sean aquellos recomendados por el fabricante. Advertencia – Cuidado para no dañar los conductos del refrigerante. Advertencia – No utilice aparatos eléctricos en el compartimiento de almacenamiento de helado de esta máquina, a menos que sean del tipo recomendado por el fabricante. Advertencia – Para desechar la máquina, hágalo solamente en un centro de recolección de residuos autorizado. No exponer al fuego. El circuito de refrigeración de la máquina contiene gas refrigerante Isobutano (R600a), un gas natural con un alto nivel de compatibilidad medioambiental, que sin embargo es inflamable. Durante el transporte y la instalación del aparato, asegúrese de que ninguno de los componentes del circuito de refrigeración se dañe. El gas refrigerante (R600a) es inflamable. Precaución, riesgo de incendio.
Si el circuito de refrigeración se daña:
- Evite abrir llamas y fuentes de ignición. - Ventile completamente la habitación en la que se encuentra el aparato.DESCRIPCIÓN DE LA MÁQUINA:
2) Estructura  2) Operación de los botones de control  [POWER]: Cuando conecte el enchufe al tomacorriente, la máquina entra al modo de espera. Presione el botón [POWER] para entrar al modo de ajuste y la pantalla LCD mostrará "60:00" y encenderá la luz de fondo. Si no se realiza otra operación, la luz de fondo se apagará 15 segundos después. Presione el botón [POWER] nuevamente para volver al modo de espera. [MENU]: Al presionar el botón [MENU], encontrará 3 modos de funcionamiento, que incluyen: [HELADO] [SOLO REFRIGERACIÓN] y [SOLO MEZCLAR]; el ícono "■" del modo seleccionado parpadeará. Durante el funcionamiento del modo seleccionado si mantiene presionado el botón [MENU] durante 3 segundos, la máquina volverá al menú. Perilla de ajuste de tiempo: Gire la perilla para establecer el tiempo de funcionamiento, para [HELADO] es de 60 minutos, para [SOLO REFRIGERACIÓN] es de 30 minutos y para [SÓLO MEZCLAR] es de 10 minutos. Girar la perilla a "-" disminuye el tiempo de funcionamiento, el tiempo mínimo de funcionamiento es de 5 minutos. Por el contrario, al girar a "+" aumenta el tiempo, el tiempo máximo de funcionamiento es de 60 minutos. [START/PAUSE]: Después de configurar el menú y el tiempo de funcionamiento, presione el botón [START/PAUSE] para iniciar el trabajo. Durante la operación, al presionar el botón [START/PAUSE], la máquina se pausará y la cuenta regresiva también se detendrá. Presione el botón [START/PAUSE] nuevamente y la máquina continuará la operación anterior sin terminar. Una vez que la máquina entra en modo de pausa y no hay otra operación, el compresor dejará de funcionar 3 minutos más tarde y la máquina volverá al estado de espera 10 minutos después.PREPARANDO HELADO
Limpieza: Antes de usar su máquina, lave bien todas las piezas que entren en contacto con el helado (incluyendo el recipiente fijo, el recipiente extraíble, la cuchilla mezcladora, la tapa transparente, la tapa de rellenado, el recipiente para medir y la cuchara). Advertencia: Asegúrese de que el cable de alimentación esté desconectado del tomacorriente. Importante: Coloque la máquina de helado en posición vertical sobre una superficie plana para que el COMPRESSOR incorporado tenga un mejor rendimiento. Paso 1. Prepare los ingredientes de su propia receta o de las recetas dadas al final del manual. Nota: No necesita congelar el recipiente de antemano, porque esta máquina cuenta con un COMPRESOR INCORPORADO que congela los ingredientes de la receta y garantiza la producción de helado. Paso 2. Vierta los ingredientes de la receta en el recipiente extraíble (vea la imagen). Paso 3. Coloque el recipiente extraíble en la máquina y gírelo ligeramente para que encaje bien con el recipiente fijo (vea la imagen). Paso 4. Coloque la cuchilla mezcladora en el recipiente extraíble y ajuste bien el orificio inferior de la cuchilla mezcladora con el eje del motor. Luego coloque la tapa transparente en la máquina y gírela en el sentido contrario a las agujas del reloj (vea la imagen). Paso 5. Conecte el enchufe al tomacorriente y presione el botón [POWER]. Paso 6. Presione el botón [MENU] para elegir el modo de funcionamiento. Paso 7. Gire la perilla para establecer el tiempo de funcionamiento. Paso 8. Presione el botón [START/PAUSE] para iniciar el trabajo. Paso 9. Puede adicionar otros ingredientes durante el funcionamiento abriendo la tapa de rellenado (vea la imagen). Abra la tapa de rellenado y agregue los ingredientes. natural_image
Line drawing of a microwave oven with lid and vent, showing airflow direction (no text or symbols)INSTRUCCIONES DE OPERACION:
Función de mantener frio:
Para evitar que el helado se derrita, la máquina está diseñada para mantener el frio: una vez que el helado está terminado y sin ninguna otra operación, la máquina iniciará automáticamente la función de mantener frío durante 2 horas. Luego de 2 horas, la máquina entrará en estado de espera.Función de autoprotección del motor:
Cuando el helado se vuelve muy duro, el motor de mezcla podría bloquearse. Por esta razón, el dispositivo de protección del motor hace que el mismo deje de funcionar al detectar una temperatura alta para garantizar su vida útil.Controle el volumen de los ingredientes:
Para evitar el desbordamiento y el desperdicio, asegúrese de que los ingredientes no excedan el 60% de la capacidad del recipiente extraíble (el helado se expande al formarse)Diferencias entre los tres modos de funcionamiento
1. Modo helado: el tiempo de funcionamiento predeterminado es de 60 minutos. La operación detallada de este modo se indicó anteriormente. 2. Modo solo refrigeración, el tiempo de funcionamiento predeterminado es de 30 minutos. La operación es similar a la del modo helado, pero no hay función de mezcla. 3. Modo solo mezclar, el tiempo de funcionamiento predeterminado es de 10 minutos. La operación es similar a la del modo helado, pero no hay función de refrigeración.Almacenamiento del helado
Retire el helado del recipiente extraíble con una cuchara de plástico o una cuchara de madera, no use una cuchara de metal para evitar rayar el recipiente extraíble.MAINTENIMIENTO:
Precaución: el enchufe debe quitarse del tomacorriente antes de limpiar la máquina para evitar descargas eléctricas. 1. Extraiga la cuchilla mezcladora y límpiela con un paño húmedo. 2. Saque el recipiente extraíble, límpielo con un paño suave y húmedo. 3. Limpie la tapa transparente y la tapa de rellenado con un paño húmedo 4. Retire la suciedad de la carcasa y de otros lugares con un paño húmedo. Nunca vierta agua sobre el cable, el enchufe o las ranuras de ventilación, ni sumerja la máquina en agua o en cualquier otro líquido. 5. Seque completamente la máquina y sus componentes con un paño seco, luego regrese cada componente a su posición inicial.RECETAS DE HELADOS
HELADO DE VAINILLA
Rinde 8 porciones de 1/2 taza. 1 taza de leche entera 1/2 taza de azúcar granulado 3/2 taza de crema espesa bien fría 1 - 2 cucharaditas de extracto puro de vainilla, al gusto. En un tazón mediano, use un mezclador manual o una batidora para unir la leche y el azúcar granulado hasta que se disuelva, aproximadamente 1 - 2 minutos a baja velocidad. Agregue la crema espesa y la vainilla al gusto. Encienda la máquina, vierta la mezcla en el recipiente extraíble y deje que la mezcla se espese, aproximadamente 30 - 40 minutos. Análisis nutricional por porción: Calorías 239 (68% de grasa); carbohidratos 17g; proteínas 2g; grasas 18g; colesterol 69 mg.VARIACIONES:
Chocolate con menta: Reemplace la vainilla con 1 ^1/2 cucharaditas de extracto puro de menta (al gusto). Pica tu barra favorita de chocolate amargo o semi-amargo de 4 onzas en pedazos pequeños e irregulares. Agregue el chocolate picado durante los últimos 5 minutos de mezclado. Mantequilla de nuez: Derrita 1 barra de mantequilla sin sal en una sartén de 10 pulgadas. Agregue 1 taza de nueces picadas y 1 cucharadita de sal gruesa. Cocine a fuego medio, revolviendo con frecuencia hasta que las nueces estén ligeramente doradas. Retire del fuego, cuele (la mantequilla tendrá un sabor a nuez y se puede reservar para otro uso). Deje que las nueces se enfríen por completo. Agregue las nueces tostadas durante los últimos 5 minutos de mezcla. Galletas y cremas: Agregue 3/4 taza de galletas picada o su dulce favorito (chispas de chocolate, Oreos Mint, etc.) durante los últimos 5 minutos de mezclado.HELADO DE CHOCOLATE
Rinde 8 porciones de 1/2 taza. 1 taza de leche entera 1/2 taza de azúcar granulado 240g u 8 onzas de chocolate amargo o semi-amargo (tu favorito), cortado en pedazos de 1/2 pulgada. 1 taza de crema espesa bien fría 1 cucharadita de extracto puro de vainilla. Caliente la leche hasta que burbujee por los bordes (esto puede hacerse en el fogón o en un microondas). En una licuadora o procesador de alimentos equipado con una cuchilla de metal, mezcle el azúcar con el chocolate hasta que el chocolate esté picado finamente. Agregue la leche caliente y bata hasta que esté bien mezclado y sin grumos. Transfiera a un tazón mediano y deje que la mezcla de chocolate se enfríe por completo. Agregue la crema y la vainilla. Encienda la máquina, vierta la mezcla en el recipiente extraíble y deje que la mezcla se espese, aproximadamente 30 - 40 minutos. Análisis nutricional por porción: Calorías 370 (60% de grasa); carbohidratos 34g; proteínas 3g; grasas 25g; colesterol 65 mg.VARIACIONES:
Chocolate con almendras: Agregue 1/2 cucharadita de extracto de almendra puro junto con la vainilla. Agregue de 1/2 a 3/4 taza de almendras tostadas o almendras recubiertas de chocolate picadas durante los últimos 5-10 minutos de congelación. Chocolate con galletas: Agregue de 1/2 a 1 taza de galletas picadas durante los últimos 5 minutos de congelación. Chocolate con Brownie: Agregue de 1/2 a 1 taza de brownies cortados durante los últimos 5 minutos de congelación. Chocolate con malvaviscos: Cuando retire el helado de la máquina póngalo en capas con cucharadas de su salsa favorita de chocolate y crema de malvavisco.HELADO DE FRESA
Rinde 8 porciones de 1/2 taza. 250 g o 1 pinta de fresas frescas, maduras, sin tallo y cortadas en rodajas 3/2 cucharada de jugo de limón recién exprimido 1/2 taza de azúcar 1 taza de leche entera 1 taza de crema espesa 1 cucharadita de extracto puro de vainilla. En un tazón pequeño, unir las fresas con el jugo de limón y el azúcar; revolver suavemente y dejar que las fresas se maceren en el jugo durante 2 horas. En un tazón mediano, use un mezclador manual o una batidora para unir la leche y el azúcar hasta que se disuelva, aproximadamente 1 - 2 minutos a baja velocidad. Agregue la crema espesa, el jugo acumulado de las fresas y la vainilla. Encienda la máquina, vierta la mezcla en el recipiente extraíble y deje que la mezcla se espese, aproximadamente 30 - 40 minutos. Agregue las fresas en rodajas durante los últimos 5 minutos de congelación. Nota: este helado tendrá una apariencia "natural" de color rosa muy pálido; si desea un color rosado más intenso, agregue con moderación gotas de colorante rojo hasta lograr el color deseado. Análisis nutricional por porción: Calorías 222 (67% de grasa); carbohidratos 17g; proteínas 3g; grasas 15g; colesterol 57mg.HELADO DE LIMÓN FRESCO
Rinde 8 porciones de 1/2 taza. 3/2 taza de azúcar 3/2 taza de agua 1 taza de jugo de limón recién exprimido 1 cucharada de ralladura de limón finamente picada \*. Coloque el azúcar y el agua en una cacerola mediana y hágala hervir a fuego medio-alto. Reduzca el fuego y cocine sin revolver hasta que el azúcar se disuelva, aproximadamente de 3 a 5 minutos. Enfriar por completo (esto se llama jarabe simple y se puede preparar en grandes cantidades para tener a mano). Mantenga el jarabe refrigerado hasta que se enfríe. Cuando el jarabe esté frío, agréguele el jugo de limón y la ralladura; revuélvalo bien. Encienda la máquina, vierta la mezcla de limón en el recipiente extraíble y deje que la mezcla se espese, aproximadamente 30 - 40 minutos. Cuando ralle un limón o lima use un pelador de vegetales para quitar la parte coloreada de la cáscara del cítrico. Análisis nutricional por porción: Calorías 204 (0% de grasa); carbohidratos 52g; proteínas 19g; grasas 0g; colesterol 0mg.VARIACIONES:
Helado de toronja rosada fresca: Sustituya el jugo de limón por 1^1/2 tazas de jugo de toronja rosada recién exprimida y la ralladura de limón por 1 cucharada de ralladura de toronja finamente picada. Agregue 1/4 taza de jarabe de orgeat a la mezcla (el jarabe de Orgeat se usa para cócteles como Mai Tai o Scorpion y se puede encontrar en la mayoría de las tiendas de comestibles).HELADO DE YOGURT Y CHOCOLATE
Rinde 8 porciones de 1/2 taza. 1 taza de leche entera 180g o 6 onzas de chocolate amargo o semi-amargo picado 2 tazas de yogurt de vainilla bajo en grasas 1/4 taza de azúcar Batir la leche con el chocolate en una licuadora o procesador de alimentos equipado con cuchilla de metal, hasta que esté bien mezclado y sin grumos, de 20 a 30 segundos. Agregue el yogurt y el azúcar; batir hasta que quede suave, aproximadamente 15 segundos. Encienda la máquina, vierta la mezcla en el recipiente extraíble y deje que la mezcla se espese, aproximadamente 30 - 40 minutos. Análisis nutricional por porción: Calorías 222 (31% de grasa); carbohidratos 36g; proteínas 3g; grasas 8g; colesterol 4mg.MEDIO AMBIENTE
ATENCIÓN:  No se deshaga de este producto como lo hace con otros productos del hogar. Existe un sistema selectivo de colecta de este producto puesto en marcha por las comunidades, debe de informarse en su ayuntamiento acerca de los lugares en los que puede depositar este producto. De hecho, los productos eléctricos y electrónicos pueden contener substancias peligrosas que tienen efectos nefastos para el medio ambiente o para la salud humana y deben ser reciclados. El símbolo aquí presente indica que los equipos eléctricos o electrónicos deben de ser cuidadosamente seleccionados, representa un recipiente de basura con ruedas marcado con una X.ITALIANO
MANUALE DI ISTRUZIONI
Leggere questo libretto di istruzioni prima dell'utilizzo dell'apparecchio e conservarlo per riferimenti futuriCOMUNICAZIONI IMPORTANTI
Quando si utilizza un apparecchio elettrico, alcune precauzioni di sicurezza devono sempre essere seguite per ridurre il rischio di incendi, scosse elettriche e/o lesioni, eccone alcune: 1. Leggere tutte le istruzioni prima dell'uso. 2. Verificare che la tensione disponibile sia compatibile con la tensione indicata sulla targhetta, e garantirsi che la messa a terra della presa sia in buone condizioni. 3. Se il cavo di alimentazione è danneggiato, deve essere sostituito dal costruttore, da un suo agente di servizio o da una persona qualificata, al fine di evitare rischi. 4. Non capovolgere questo prodotto o inclinarlo a più di 45°. 5. Per evitare il rischio di scosse elettriche, non versare acqua sul cavo, sulla spina e sulla ventola e non immergere l'apparecchio in acqua o altri liquidi. 6. Staccare l'apparecchio dalla corrente dopo l'utilizzo o prima della pulizia. 7. Mantenere 8cm di distanza tra l'apparecchio ed altri oggetti per assicurare il corretto dissipamento del calore. 8. Non utilizzare accessori che non siano raccomandati dai Produttore. 9. Non usare l'apparecchio vicino a fiamme, fornelli o stufe. 10. Non pigiare il pulsante di accensione troppo di frequente (garantire 5min. di Intervallo tra una volta e l'altra) per evitare il danneggiamento del compressore. 11. Oggetti metallici o oggetti elettrici non possono essere inseriti all'interno dell'apparecchio onde evitare incendi e corto circuiti. 12. Quando si raccoglie il gelato, non battere il contenitore o il bordo del contenitore per proteggerlo da eventuali danni. 13. Non accendere l'alimentazione prima di aver correttamente installato la pala. 14. La temperatura iniziale degli ingredienti deve variare intorno ai 25°. Non mettere gli ingredienti nel congelatore per il pre-congelamento, questo potrebbe bloccare la pala miscelatrice. 15. Non rimuovere la pala miscelarice quando l'apparecchio è in funzione. 16. Non utilizzare all'aperto. 17. Non pulire mai con detersivi corrosivi o utensili duri. 18. Si prega di conservare il manuale di istruzioni. 19. Questo apparecchio può essere utilizzato da bambini di età superiore agli 8 anni e da persone con capacità fisiche, sensoriali o mentali ridotte o senza esperienza e conoscenza purché siano controllati o istruiti all'uso dell'apparecchio in modo sicuro e ne comprendano i rischi derivanti. I bambini non devono giocare con l'apparecchio. La pulizia e la manutenzione da parte dell'utente non devono essere eseguite da bambini senza sorveglianza. 20. I bambini devono essere sorvegliati per assicurarsi che non giochino con l'apparecchio. 21. I dispositivo non deve essere utilizzato se è stato lasciato cadere, sono visibili evidenti segni di danneggiamento o se presenta perdite. 22. La spina deve essere scollegata prima della pulizia, della manutenzione o del riempimento dell'apparecchio. 23. Questo apparecchio può essere utilizzato da bambini a partire da 8 anni, purché sorvegliati e istruiti all'uso sicuro dell'apparecchio e pienamente a conoscenza dei pericoli che comporta. 24. La pulizia e la manutenzione non devono essere eseguite da bambini a meno che abbiano più di 8 anni e siano sorvegliati da un adulto. 25. Conservare l'apparecchio e il cavo di alimentazione fuori dalla portata di bambini di età inferiore a 8 anni. 26. Quando si utilizzano apparecchiature elettriche, è necessario adottare sempre misure di sicurezza per prevenire il rischio di incendi, scosse elettriche e/o lesioni in caso di uso improprio. 27. Accertarsi che la tensione nominale sulla targhetta corrisponda alla tensione principale della vostra installazione. In caso contrario, contattare il rivenditore e non collegare l'unità. 28. Non lasciare mai l'unità incustodita durante il funzionamento. 29. Si prega di tenere questo documento a portata di mano e di consegnarlo al futuro proprietario in caso di trasferimento del dispositivo. 30. Il dispositivo non deve essere utilizzato se è stato lasciato cadere, sono visibili evidenti segni di danneggiamento o se presenta perdite. 31. Non utilizzare all'esterno. 32. Questo apparecchio è destinato ad essere utilizzato in applicazioni domestiche e similari come -aree cucina per il personale di negozi, uffici e altri ambienti di lavoro; -case coloniche e da parte dei clienti di alberghi, motel e altri ambienti di tipo residenziale; -bed and breakfast; -ristorazione e applicazioni non al dettaglio Attenzione: Non conservare sostanze esplosive, come bombolette spray con un propellente infiammabile in questo apparecchio. Avvertimento: Le aperture di ventilazione, nel dispositivo di chiusura o nella struttura incorporata, devono essere libere da ostruzioni. Avvertimento: Non utilizzare dispositivi meccanici o altri mezzi per accelerare il processo di sbrinamento, diversi da quelli consigliati dal produttore. Avvertimento: Non danneggiare il circuito refrigerante. Avvertimento: Non utilizzare apparecchi elettrici all'interno degli scomparti per la conservazione degli alimenti, a meno che non siano del tipo consigliato dal produttore. Attenzione: Eseguire lo smaltimento dell'apparecchio, solo presso un centro di smaltimento autorizzato. Non esporre alle fiamme. L'isobutene refrigerante (R600a) è contenuto all'interno del circuito frigorifero dell'apparecchio, si tratta di un gas naturale con un elevato livello di compatibilità ambientale, ma che tuttavia è infiammabile. Durante il trasporto e l'installazione dell'apparecchio, assicurarsi che nessuno dei componenti del circuito refrigerante sia danneggiato. Il refrigerante (R600a) è infiammabile. Attenzione: rischio di incendio
Se il circuito refrigerante dovesse danneggiarsi : Evitare di accendere fiamme e fonti di accensione. Arieggiare il locale in cui si trova l'apparecchio. CARATTERISTICHE TECNICHE: PARTI & CARATTERISTICHE: 1) Struttura  2) Pulsanti Funzioni  [POWER]: Dopo l'accensione, la macchina entra in modalità di attesa. Quindi premere il tasto [POWER] per entrare nella modalità di impostazione, e il display LCD visualizzerà "60:00" e si accenderà lo sfondo. Se non si effettua nessun altra operazione, la luce si spegnerà dopo 15 secondi; quindi premere nuovamente il tasto [POWER]; la macchina torna alla modalità standby. [MENU]: Premendo questo pulsante, ci sono 3 modalità di funzionamento, tra cui: [GELATO] [SOLO RAFFREDDAMENTO] e [SOLO MIXING]; l'icona “■”Della modalità selezionata lampeggia. Tenendo premuto per 3 secondi durante il funzionamento in modalità operazione, l'apparecchio torna al menu di selezione. Manopola di regolazione timer: Ruotare la manopola per impostare il tempo, l'impostazione predefinita per [GELATO] [SOLO RAFFREDDAMENTO] e [SOLO MIXING] è rispettivamente di 60min, 30min, 10min. Ruotando la manopola verso “-” si può ridurre il tempo di funzionamento, il tempo minimo impostabile è 5 min. Al contrario, ruotando a “+” si può aumentare il tempo, il tempo massimo impostabile è 60 min. [START / PAUSE]:Dopo aver impostato il menu e il tempo, premere questo pulsante per avviare la modalità di funzionamento. Durante il funzionamento, premendo questo pulsante, la miscelazione viene interrotta e il conteggio del tempo va in pausa. In modalità di pausa, premendo nuovamente il pulsante, la macchina continua la precedente operazione non ancora terminata. Una volta che la gelatiera entra in modalità pausa e non si effettua nessun altra operazione, il compressore si ferma dopo 3 min e la macchina torna in standby dopo 10 min.FARE IL GELATO
Pulizia: Prima dell'uso, lavare accuratamente tutte le parti che entrano in contatto con il gelato (compresa la vasca fissa, il cestello estraibile, la pala miscelatrice, il coperchio trasparente, coperchio per il refill, misurino e cucchiaio). Avvertimento: Si prega di assicurarsi che il cavo di alimentazione sia scollegato. Importante: Posizionare sempre la gelatiera in posizione verticale su una superficie piana in modo che il compressore sia in grado di fornire le migliori prestazioni.Fase 1. Preparare gli ingredienti della ricetta:
Preparare gli ingredienti della propria ricetta do dal ricettario allegato alla gelatiera. Nota: non è necessario congelare la ciotola per ore in congelatore in anticipo, in quanto questa macchina ha un COMPRESSORE INCORPORATO che congela gli ingredienti della ricetta durante il funzionamento per produrre gelato. Fase 2. Versare gli ingredienti della ricetta ben preparati nel cestello estraibile (vedi immagine qui sotto). Fase 3. Mettere il cestello estraibile nella macchina e posizionarlo bene rispetto alla vasca fissa (vedi immagine qui sotto). Fase 4. Posizionare la pala di miscelazione nella ciotola estraibile e posizionare il foro inferiore della pala di miscelazione sull'asse motore. Quindi inserire il coperchio trasparente sulla macchina e bloccarlo in senso antiorario (vedi immagine). Fase 5. Collegare la corrente, e premere il tasto [POWER] per accendere l'apparecch.o Fase 6. Premere il tasto [MENU] per scegliere la modalità di funzionamento. Fase 7. Ruotare la manopola per impostare il tempo. Fase 8. Premere il tasto [START / PAUSE] per iniziare a lavorare. Passo 9. È possibile aggiungere gli ingredienti preferiti aprendo il coperchio di refill (vedi immagine qui sotto). Aprire il coperchio di riempimento e aggiungere gli ingredienti natural_image
Line drawing of a microwave oven with lid and cooling unit (no text or symbols)FUNZIONAMENTO:
Funzione mantenimento temperatura:
Per evitare che il gelato si sciolga se lasciato nell'apparecchio, vi è la seguente funzione: al termine della procedura di produzione del gelato, se non viene effettuata nessun'altra operazione, l'apparecchio avvierà la funzione freddo automatico, che può mantenere freddo il gelato per 2 ore. Trascorse le due ore, la macchina entrerà in standby.Funzione di auto-protezione del motore
Quando il gelato diventa duro, il motore di miscelazione potrebbe bloccarsi. In questo caso il dispositivo di protezione del motore blocca la miscelazione rilevandone la temperatura per garantire la durata del motore stesso.Controllo del volume degli ingredienti
Per evitare la fuoriuscita degli ingredienti, si prega di accertarsi che questi ultimi non superino il 60% della capacità della vasca estraibile (il gelato si espande quando si forma).Le differenze tra le tre diverse modalità di funzionamento
1. Modalità Gelato: il tempo di funzionamento di default è di 60 minuti. Il funzionamento dettagliato avviene come descritto sopra. 2. Modalità Raffreddamento, il tempo di funzionamento di default è di 30 minuti. Il funzionamento è simile a quello della modalità gelato, ma non v'è la funzione di miscelazione. 3. Modalità Mixing, il tempo di funzionamento di default è di 10 minuti. Il funzionamento è simile a quello della modalità gelato, ma non v'è la funzione di congelamento.Conservazione del gelato
Raccogliere il gelato finito in un altro contenitore con una paletta di plastica o un cucchiaio di legno, non utilizzare palette in metallo per evitare di danneggiare il cestello estraibile all'interno.MANUTENZIONE:
Attenzione: La spina deve essere scollegata prima di effettuare la pulizia per evitare scariche elettriche. (1) Estrarre la pala di miscelazione, pulirla con un panno umido. (2) Estrarre la vaschetta estraibile, pulirla con un panno morbido inumidito. (3) Pulire il coperchio trasparente e il coperchio per refill con un panno umido. (4) Rimuovere lo sporco sul corpo o altri luoghi con un panno umido, non versare acqua sul cavo, sulla spina e sulla ventilazione, non immergere l'apparecchio in acqua o altri liquidi. (5) Asciugare accuratamente con un panno asciutto e rimontare i componenti nella posizione iniziale.RICETTARIO GELATI
GELATO ALLA VANIGLIA
Rende otto porzioni da 12 tazza. 1 tazza di latte intero 12 tazza di zucchero semolato 3/2 tazze di panna, ben fredda 1 - 2 cucchiaini di estratto di vaniglia puro, a piacere In una ciotola media, usare un miscelatore a mano o una frusta per unire il latte e lo zucchero granulato finché lo zucchero è totalmente disciolto, circa 1-2 minuti a bassa velocità. Incorporare la panna e la vaniglia a piacere. Accendere la macchina, versare il composto in nella ciotola refrigerante attraverso beccuccio per gli ingredienti e lasciarli mescolare fino a quando si saranno addensati, a circa 30 - 40 minuti. Analisi nutrizionale per porzione: Calorie 239 (68% di grassi). carboidrati. 17g. proteine 2g. 18g di grassi. colesterolo. 69mg.Variazioni:
Menta Chip: Omettere la vaniglia e sostituirla con estratto di menta piperita da 1 a 1 cucchiaino e ½ puro (qb). Tritare 4 once di cioccolato amaro o semi dolce in piccoli pezzi irregolari. Aggiungere il cioccolato tritato durante gli ultimi 5 minuti di miscelazione. Burro e Noci Pecan: Sciogliere 1 tavoletta di burro non salato in una padella da 10 pollici. Aggiungere 1 tazza di noci tritate grossolanamente e 1 cucchiaino di sale kosher. Cuocere a fuoco lento, mescolando spesso fino a che le noci sono leggermente dorate. Toglierle dal fuoco, scolare (il burro avrà un sapore di noci pecan e può essere conservato per un altro uso). Far raffreddare completamente le noci. Aggiungere le noci pecan tostate durante gli ultimi 5 minuti di miscelazione. Biscotti e crema: Aggiungere i 3/4 di tazza di biscotti tritati grossolanamente o le vostre caramelle preferite (con gocce di cioccolato, Oreo, Oreo alla menta Ecc.) durante gli ultimi 5 minuti di miscelazione.GELATO AL CIOCCOLATO
Rende otto porzioni da 12 tazza. 1 tazza di latte intero 12 tazza di zucchero semolato 240g o 8 once di cioccolato fondente o semi-dolce (il vostro preferito), rotto in pezzi da un cm. 1 tazza di panna, ben fredda 1 cucchiaino di estratto di vaniglia puro Scaldare il latte intero fino a quando bolle intorno ai bordi (questo può essere fatto sul piano cottura o in un forno a microonde). In un frullatore dotato di pala metallica, miscelare lo zucchero con il cioccolato fino a quando il cioccolato non viene sminuzzato molto finemente. Aggiungere il latte caldo, mescolare fino ad ottenere un composto ben amalgamato e liscio. Versare in una ciotola di medie dimensioni e lasciare che la miscela di cioccolato si raffreddi completamente. Incorporare la panna e la vaniglia a piacere. Accendere la macchina, Versare il composto nella ciotola refrigerante attraverso il beccuccio per gli ingredienti e lasciare mescolare fino a quando non si è addensato, a circa 30 - 40 minuti. Analisi nutrizionale per porzione: Calorie 370 (il 60% di grassi). carboidrati 34g. proteine 3g. 25g di grassi. colesterolo 65mg.Variazioni:
Mandorle e cioccolato: Aggiungere 1/2 cucchiaino di estratto puro di mandorle con la vaniglia. Aggiungere mezza tazza di mandorle tostate tritate o mandorle ricoperte di cioccolato tritato nel ultimi 5 - 10 minuti di miscelazione. Cioccolato e Cookie: Aggiungere da 12 ad 1 tazza di biscotti tritati durante gli ultimi 5 minuti di miscelazione. Cioccolato e Brownie: Aggiungere da 12 a 1 tazza di brownies secchi tritati durante gli ultimi 5 minuti di miscelazione. Cioccolato e Marshmallow: Quando si rimuove il gelato dalla vaschetta refrigerante, guarnire con il vostro topping al cioccolato preferito e ricoprire di crema marshmallow (fluff).GELATO ALLE FRAGOLE FRESCHE
Rende otto porzioni da 12 tazza. 250g o 1 pinta fragole fresche mature, pulite ed affettate 2/3 cucchiai di succo di limone appena spremuto 1/2 tazza di zucchero, diviso 1 tazza di latte intero 1 tazza di panna 1 cucchiaino di estratto di vaniglia puro In una piccola ciotola, unire le fragole con il succo di limone e 1/2 tazza di zucchero; mescolare delicatamente e lasciar le fragole a macerare nel succo per 2 ore. In una ciotola media, usare un miscelatore a mano o una frusta per unire il latte e lo zucchero granulato finché lo zucchero non si è disciolto, circa 1 - 2 minuti a bassa velocità. Incorporate la panna più eventuali succhi accumulati dalle fragole e vaniglia. Accendere la macchina, Versare il composto nella ciotola refrigerante attraverso beccuccio per gli ingredienti e lasciare mescolare fino a quando non si è addensato, circa 30 - 40 minuti. Aggiungere le fragole affettate durante gli ultimi 5 minuti di miscelazione. Nota: questo gelato avrà un aspetto “naturale” di un rosa molto pallido; se si desidera un colore rosa più intenso, aggiungere qualche goccia di colorante alimentare rosso fino ad ottenere il colore desiderato. Analisi nutrizionale per porzione: Calorie 222 (67% di grassi). carboidrati 17g. proteine 3g. 15g di grassi. Colesterolo 57mg.SORBETTO AL LIMONE
Rende otto porzioni da 12 tazza. 2/3 tazze di zucchero 2/3 tazze di acqua 1 tazza di succo di limone appena spremuto 1 cucchiaio di scorza di limone tritata finemente \* Unire lo zucchero e l'acqua in una casseruola media e portare ad ebollizione a fuoco medio-alto. Ridurre il fuoco al minimo e lasciare cuocere senza mescolare fino a quando lo zucchero si scioglie, circa 3-5 minuti. Raffreddare completamente. Questo sarà un semplice sciroppo, e può essere fatto in anticipo in grandi quantità per averlo a portata di mano per fare il sorbetto al limone. Conservare in frigo fino al momento dell'uso. Lasciar raffreddare, aggiungere il succo di limone e la scorza; mescolare per miscelarli. Accendere la macchina, versare il composto di limone nella vaschetta refrigerante attraverso il beccuccio per ingredienti e mescolare fino a quando si è addensato, circa 30 - 40 minuti. Quando si sbucciano un limone o lime usate un pelapatate per rimuovere la parte colorata della buccia degli agrumi. Analisi nutrizionale per porzione: Calorie 204 (0% di grassi). carboidrati 52g proteine 19g. 0 g di grassi. colesterolo 0 mg.VARIAZIONE:
Sorbetto al pompelmo rosa: Sostituite le tazze di succo di limone con succo di pompelmo rosa e 1 cucchiaio tritato scorza di pompelmo alla buccia di limone. Aggiungere 1/4 di tazza di sciroppo di orzata alla miscela (l'orzata è usato per i cocktail, come un Mai Tai o Scorpion e può essere trovata nella maggior parte dei negozi di generi alimentari).FROZEN YOGURT AL CIOCCOLATO
Rende otto porzioni da 12 tazza. 1 tazza di latte intero 180g o 6 once di cioccolato fondente o semi dolce, tritato 2 tazze di yogurt alla vaniglia a basso contenuto di grassi 1/4 di tazza di zucchero Unire il latte e cioccolato in un frullatore dotato di pala metallica e miscelare fino ad ottenere un composto ben amalgamato e liscio, 20 - 30 secondi. Aggiungere lo yogurt e lo zucchero; miscelare fino a che diventa liscio, circa 15 secondi. Accendere l'apparecchio, Versare il composto nella vaschetta refrigerante attraverso il beccuccio ingredienti e lasciare mescolare fino a quando non si è addensato, circa 30 - 40 minuti. Analisi nutrizionale per porzione: Calorie 222 (31% di grassi. carboidrati 36g. proteine 3g. 8g grassi. colesterolo 4mgAMBIENTE
ATTENZIONE:
 Non gettare quest' apparecchio tra i rifiuti domestici. Per questo tipo di prodotti è fornito dai comuni un sistema di raccolta e ritiro in zona ed è quindi un dovere informarsi per conoscere il giusto smistamento del rifiuto. Infatti, i prodotti elettrici ed elettronici possono contenere sostanze pericolose che hanno effetti dannosi sull'ambiente o sulla nostra salute e quindi devono essere riciclati. Il simbolo al lato indica che le apparecchiature elettriche ed elettroniche fanno parte di una raccolta selettiva e differenziata (rappresentata da un bidone su due ruote sbarrato da una croce. Adeva SAS / H.Koenig Europe - 8 rue Marc Seguin, 77290 Mitry-Mory, France www.hkoenig.com - https://assistenza.hkoenig.com - Tél: +33 1 64 67 00 05 LIVRE DE RECETTESSorbets & Glaces
natural_image
A waffle cone with ice cream and caramel topping, garnished with red jam, presented on a pink background (no text or symbols visible).
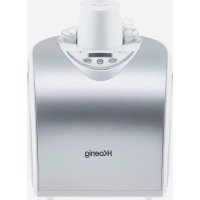
Table of contents
Click a title to access it
- H Instruction Manual
- ENGLISH
- INSTRUCTION MANUAL
- IMPORTANT NOTICES
- Caution: risk of fire
- SPECIFICATIONS:
- PARTS & FEATURES:
- MAKING ICE CREAM
- Step 1. Prepare recipe ingredients:
- OPERATION:
- Keep cool function
- Motor self-protection function
- Controlling the Volume of the Ingredients
- The Differences Among These Three Working Mode
- Storage of ice cream
- MAINTENANCE:
- ICE CREAM RECIPE MANUAL
- VANILLA ICE CREAM
- VARIATIONS:
- BASIC CHOCOLATE ICE CREAM
- FRESH STRAWBERRY ICE CREAM
- FRESH LEMON SORBET
- VARIATION:
- CHOCOLATE FROZEN YOGURT
- ENVIRONMENT
- CAUTION:
- FRANÇAIS
- MANUEL D'UTILISATION
- AVIS IMPORTANT
- Si le circuit de réfrigération est endommagé :
- SPÉCIFICATIONS :
- PIÈCES ET CARACTÉRISTIQUES :
- FAIRE DE LA GLACE
- Étape 1 : préparer les ingrédients de la recette
- FONCTIONNEMENT :
- Fonction « keep cool »
- Fonction de protection du moteur
- Contrôle du volume des ingrédients
- Différences entre ces trois modes de fonctionnement
- Stockage de la glace
- ENTRETIEN :
- MANUEL DE RECETTES DE CRÈME GLACÉE
- GLACE À LA VANILLE
- VARIANTES :
- GLACE AU CHOCOLAT
- GLACE À LA FRAISE FRAÎCHE
- GLACE AU CITRON FRAIS
- YAOURT GLACÉ AU CHOCOLAT
- ENVIRONNEMENT
- ATTENTION :
- DEUTSCH
- BEDIENUNGSANLEITUNG
- WICHTIGE HINWEISE
- Warnung:
- Vorsicht: Risiko eines Brandes
- SPEZIFIKATIONEN:
- TEILE & EIGENSCHAFTEN
- EIS MACHEN
- Schritt 1: Bereiten Sie die Rezeptzutaten vor:
- BEDIENUNG:
- Kühlhalte-Funktion
- Motor-Selbstschutzfunktion
- Kontrolle des Zutatenumfangs
- Die Unterschiede zwischen den drei Arbeitsmodi
- Lagerung des Eises
- WARTUNG:
- EIS-REZEPTHEFT
- VANILLEEIS
- OPTIONEN:
- EINFACHES SCHOKOEIS
- FRISCHES ERDBEEREIS
- FRISCHES ZITRONENSORBET
- SCHOKO- FROZEN YOGURT
- UMWELT
- NEDERLANDS
- GEBRUIKERSHANDLEIDING
- BELANGRIJKE OPMERKINGEN
- SPECIFICATIES: ONDERDELEN EN OPTIES:
- IJS MAKEN
- Stap 1. Bereid ingrediënten voor:
- GEBRUIK:
- Koudhoudfunctie
- Zelfbeschermingsfunctie van de motor
- Beheers het volume van de ingrediënten
- De verschillen tussen de drie modi
- Opslag van ijs
- ONDERHOUD:
- IJSRECEPT
- VANILLE IJS
- VARIATIES:
- STANDAARD CHOCOLADE IJS
- VERSE AARBEIENIJS
- VERSE CITROENSORBET
- VARIATIE:
- CHOCOLADE BEVROREN YOGHURT
- MILIEU
- ESPANOL
- MANUAL DE INSTRUCCIONES
- Instrucciones importantes
- Precaución, riesgo de incendio.
- Si el circuito de refrigeración se daña:
- DESCRIPCIÓN DE LA MÁQUINA:
- PREPARANDO HELADO
- INSTRUCCIONES DE OPERACION:
- Función de mantener frio:
- Función de autoprotección del motor:
- Controle el volumen de los ingredientes:
- Diferencias entre los tres modos de funcionamiento
- Almacenamiento del helado
- MAINTENIMIENTO:
- RECETAS DE HELADOS
- HELADO DE VAINILLA
- VARIACIONES:
- HELADO DE CHOCOLATE
- HELADO DE FRESA
- HELADO DE LIMÓN FRESCO
- HELADO DE YOGURT Y CHOCOLATE
- MEDIO AMBIENTE
- ITALIANO
- MANUALE DI ISTRUZIONI
- COMUNICAZIONI IMPORTANTI
- Attenzione: rischio di incendio
- FARE IL GELATO
- Fase 1. Preparare gli ingredienti della ricetta:
- FUNZIONAMENTO:
- Funzione mantenimento temperatura:
- Funzione di auto-protezione del motore
- Controllo del volume degli ingredienti
- Le differenze tra le tre diverse modalità di funzionamento
- Conservazione del gelato
- MANUTENZIONE:
- RICETTARIO GELATI
- GELATO ALLA VANIGLIA
- Variazioni:
- GELATO AL CIOCCOLATO
- GELATO ALLE FRAGOLE FRESCHE
- SORBETTO AL LIMONE
- VARIAZIONE:
- FROZEN YOGURT AL CIOCCOLATO
- AMBIENTE
- ATTENZIONE:
- Sorbets & Glaces
Manual assistant
Powered by Anthropic
Waiting for your message
Product information
Brand : H.KOENIG
Model : HF340
Category : Ice machine