
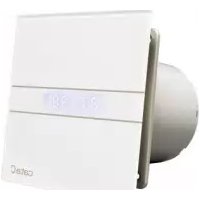
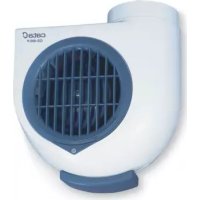
PROFESSIONAL 750750L - Range hood CATA - Free user manual and instructions
Find the device manual for free PROFESSIONAL 750750L CATA in PDF.
| Product type | Range hood |
| Brand | CATA |
| Model | PROFESSIONAL 750750L |
| Power supply | 230 V / 50 Hz |
| Electrical class | Class I (earthing mandatory) |
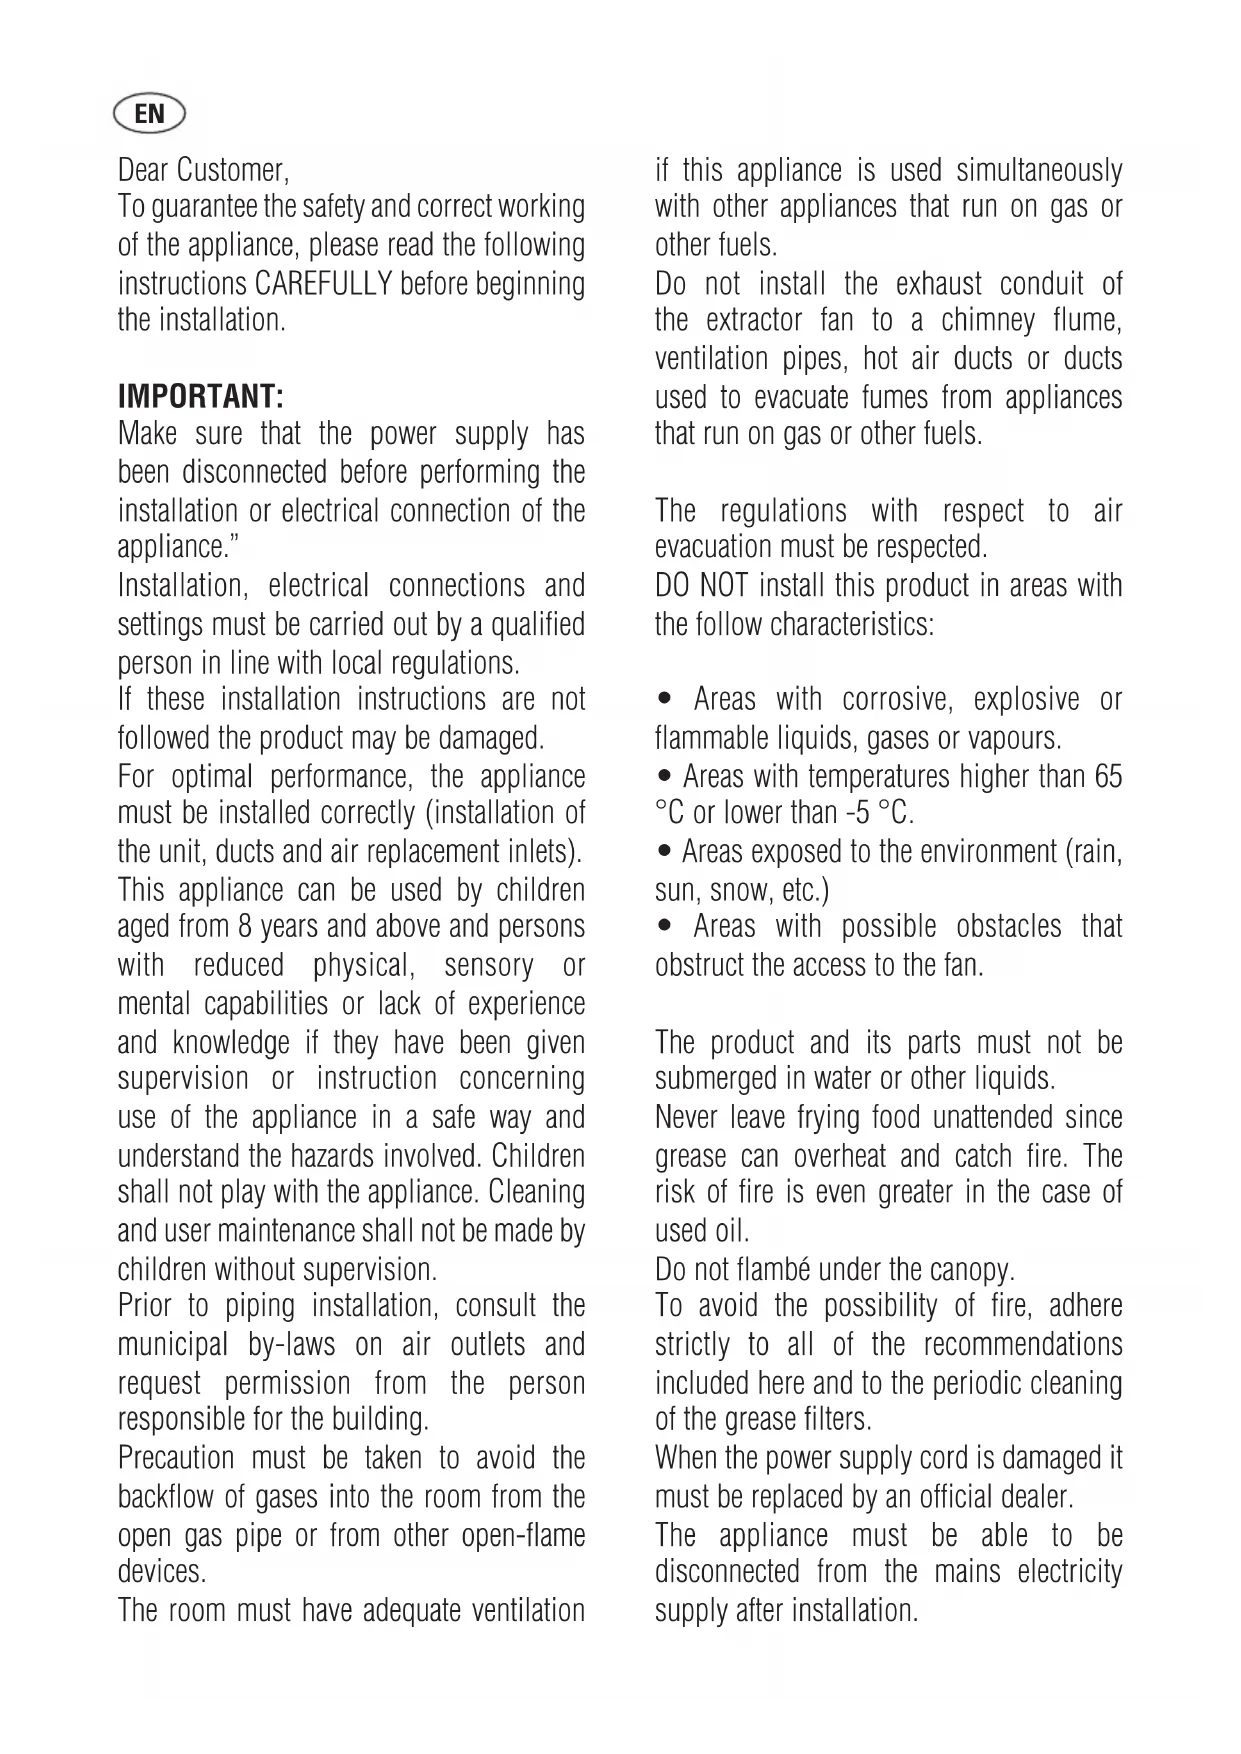
| Mounting type | Wall-mounted |
| Minimum distance from cooking surface | 65 cm |
| Lighting | Tungsten filament lamp (intermittent use) |
| Filter type | Metal grease filter (dishwasher-safe) |
| Housing material | Plastic |
| Recommended cable cross-section | 1 mm² to 1.5 mm² |
| Operating temperature | -5°C to 65°C |
| Use | Indoor use only |
| Filter cleaning | Every 2 to 3 weeks |
| Approximate weight | 5 kg |
Frequently Asked Questions - PROFESSIONAL 750750L CATA
User questions about PROFESSIONAL 750750L CATA
0 question about this device. Answer the ones you know or ask your own.
Ask a new question about this device
Download the instructions for your Range hood in PDF format for free! Find your manual PROFESSIONAL 750750L - CATA and take your electronic device back in hand. On this page are published all the documents necessary for the use of your device. PROFESSIONAL 750750L by CATA.
USER MANUAL PROFESSIONAL 750750L CATA
Extractors for kitchen hoods
Instruetiones de uso e instalacion Instruetions d'installation et d'emploi Instrucoes de uso e instalacao Operating and installation instructions
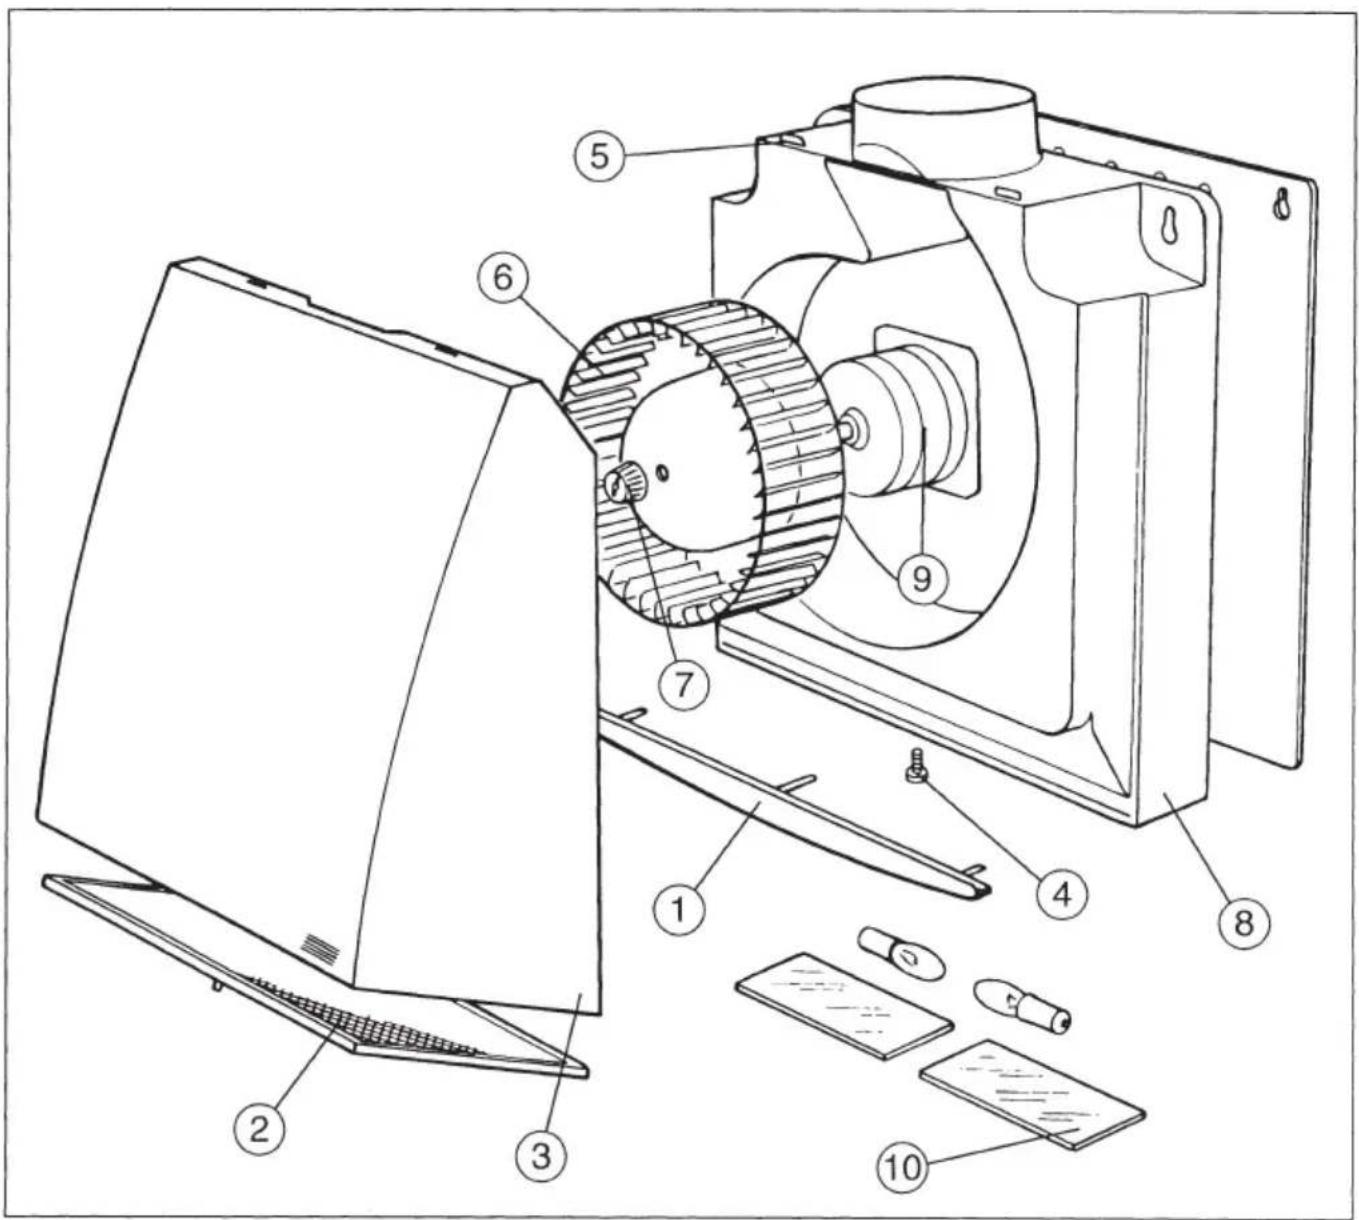

Fig.1
Estimado CLIENTE,
To guarantee the safety and correct working of the appliance, please read the following instructions CAREFULLY before beginning the installation.
IMPORTANT:
Make sure that the power supply has been disconnected before performing the installation or electrical connection of the appliance."
Installation, electrical connections and settings must be carried out by a qualified person in line with local regulations.
If these installation instructions are not followed the product may be damaged.
For optimal performance, the appliance must be installed correctly (installation of the unit, ducts and air replacement inlets).
This appliance can be used by children aged from 8 years and above and persons with reduced physical, sensory or mental capabilities or lack of experience and knowledge if they have been given supervision or instruction concerning use of the appliance in a safe way and understand the hazards involved. Children shall not play with the appliance. Cleaning and user maintenance shall not be made by children without supervision.
Prior to piping installation, consult the municipal by-laws on air outlets and request permission from the person responsible for the building.
Precaution must be taken to avoid the backflow of gases into the room from the open gas pipe or from other open-flame devices.
The room must have adequate ventilation
if this appliance is used simultaneously with other appliances that run on gas or other fuels.
Do not install the exhaust conduit of the extractor fan to a chimney flume, ventilation pipes, hot air ducts or ducts used to evacuate fumes from appliances that run on gas or other fuels.
The regulations with respect to air evacuation must be respected.
DO NOT install this product in areas with the follow characteristics:
- Areas with corrosive, explosive or flammable liquids, gases or vapours.
- Areas with temperatures higher than 65 ^ C or lower than -5^ C .
- Areas exposed to the environment (rain, sun, snow, etc.)
- Areas with possible obstacles that obstruct the access to the fan.
The product and its parts must not be submerged in water or other liquids.
Never leave frying food unattended since grease can overheat and catch fire. The risk of fire is even greater in the case of used oil.
Do not flambre under the canopy.
To avoid the possibility of fire, adhere strictly to all of the recommendations included here and to the periodic cleaning of the grease filters.
When the power supply cord is damaged it must be replaced by an official dealer.
The appliance must be able to be disconnected from the mains electricity supply after installation.
It can be disconnected by making the plug accessible or by incorporating a switch in the fixed wiring that meets electrical installation standards."
The manufacturer declares that this product meets all the essential requirements for low voltage electrical material set out in European directive 2006/95/EEC of 12 December 2006 and for electromagnetic compatibility as required by European directive 2004/108/EEC of 15 December 2004.
The manufacturer declines all responsibility for personal injury or damage to animals or objects caused by inappropriate use of the appliance according to the warnings for installation, use and maintenance described in this instruction manual.
After finishing the installation these instructions should be given to the owner/ user of the appliance.
INSTALLATION:
Before starting the installation, check that the propeller is not deformed or damaged, that it can turn freely, and that no foreign body is lodged inside the outer casing. The appliance shall be installed according to the attached graphic documentation.
Such appliances must be set inside the kitchen chimney, at a minimum distance of 50mm to the side panels, as shown in fig. 1.
For its installation, make two holes of 6mm diameter, being 300mm distant.
Next, insert the plastic plug and screws hooks supplied with the appliance and hand it from its rear side.
Following, mark in the wall the exact point where the plastic plug should be placed to fix the extractor (hole situated at the lower part of the cover).
Make sure that there is no obstacle blocking the flow of air.
The appliance must be placed in such a way, that the supply plug is accessible.
The appliance must be installed at a minimum distance of 65cm from the stovetop.
If the installation instructions for the cooker indicate a greater distance, this should be observed.
ELECTRICAL CONNECTION:
Make sure that the voltage (V) and frequency (Hz) of the power supply correspond to the values indicated on the nameplate.
The appliance must be permanently connected to fixed installation.
(Cable rigid or stiff-tipped 3 wires, with a minimum cross-section of 1mm2 and maximum of 1.5mm2 ).
APPLIANCE CLASS I: It must be connected to an efficient ground connection.
If the appliance is connected with a plug, this must be accessible.
In the event that this appliance is not used, it is recommended that you disconnect it from the mains electricity supply.
To finish the installation, verify that all the connections have been done correctly and make sure that the cables are placed correctly.
Make sure that the blades turn freely.
On appliance equipped with tungsten lamps, the lights should only be used during operation of the motor.
They should not be left on permanently and used as a light source.
CLEANING AND MAINTENANCE:
- Before cleaning make sure that the appliance is not connected to the electric network and prevent it from being reconnected by accident.
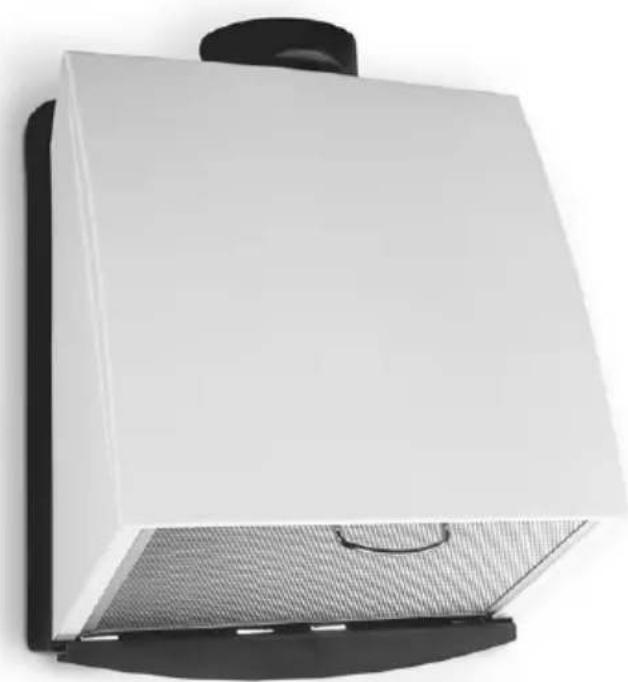
Firstly, take off the oil tray (1) and remove the filter (2) by pulling out and downwards the handel in the front side, to release it from its fixation to the extractor cover (3).
Then, untight the screw (4) till loosing the piece (3). Pulling up and towards, the piece will go out of the fixation device (5), acceding to the air ducting.
Following, loosen the nut counter clockwise to take off the turbine (6). Turbine can be cleaned in the washing machine.
The plastic cover must be cleaned with detergents trying not to wet the motor.
For the assembly of this appliance, make the same process but on the other way round, by FITTING THE MARK OF THE TURBINE () with the flat surface of the axle.
Keep the cleansing instructions on the packing for the maintenance.
SAFETY NORM: There is a risk of fire if the extractor is not kept clean.
To clean the appliance use a cloth dampened with denatured ethyl alcohol.
The cleansing frequency varies depending on the intensity of use, nevertheless, it is recommended to clean it every 2 or 3 weeks.
To clean the light screen (10) or to replace lamps, take off the screen by smoothly pulling towards.
-
The motor, propeller and all components should be inspected periodically to ensure that they are not dirty and have not suffered any damage. The frequency of inspections depends on the appliance's operating conditions.
-
Remove the dirt on the propeller and the inner parts of the casing to avoid imbalances during operation, a decrease in aerodynamic performance and motor damage.
-
Changing the light:
Before changing the light make sure that the hood is not connected.
Remove the grease filter and replace the light with a light bulb no more powerful than that specified in the Technical Characteristics. Place the filter in position.
- Cleaning the grease filter.
Depending on use, and at least once a month the grease filters should be disassembled and cleaned in a dishwasher or with hot soapy water.
If washed in a dishwasher, the filters should be placed in an upright position to prevent food remains from falling on them. After rinsing and drying, replace the filters by following the steps for disassembly in reverse order.
- The appliance does not require additional maintenance.
Always demand original spare parts for repairs.
If you need any technical help or would like more information about our products, please do not hesitate to contact our official distributor.
THE MANUFACTURER reserves the right to make any technological improvement or modification without prior notification.
cata C

CATA ELECTRODOMÉSTICOS, S.L.
c/ Ter, 2 - 08570 TORELLO (Barcelona) SPAIN
Tel. +34 938 594 100 - Fax +34 938 594 101
www.cnagroup.es - e-mail: cna@cnagroup.es

Brand : CATA
Model : PROFESSIONAL 750750L
Category : Range hood