SV3060 - Croque monsieur clip Concept - Free user manual and instructions
Find the device manual for free SV3060 Concept in PDF.
| Brand | Concept |
| Model | SV3060 |
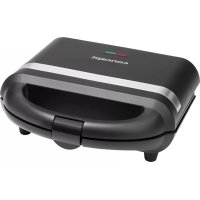
| Product type | Sandwich press (croque-monsieur, waffle and grill maker) |
| Electrical supply | 220-240 V ~ 50/60 Hz |
| Power | 700 W |
| Functions | Grill croque-monsieur, prepare waffles and grills |
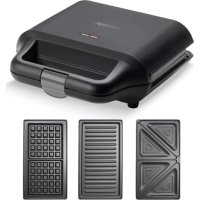
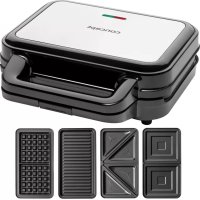
| Removable plates | Yes, with button release system |
| Coating | Non-stick |
| Indicators | Power indicator and ready-to-cook indicator |
| Safety | Closing clip, stop after use (unplug) |
| Cleaning | Plates hand washable, wipe with a damp cloth |
| Included accessories | 3 sets of plates: sandwich, waffle, grill |
| Use | Household use only |
| Cooking temperature | Automatic adjustment (built-in thermostat) |
| Cooking time | Approximately 4 minutes for a croque-monsieur |
| Preheating | Necessary before first use |
Frequently Asked Questions - SV3060 Concept
User questions about SV3060 Concept
0 question about this device. Answer the ones you know or ask your own.
Ask a new question about this device
Download the instructions for your Croque monsieur clip in PDF format for free! Find your manual SV3060 - Concept and take your electronic device back in hand. On this page are published all the documents necessary for the use of your device. SV3060 by Concept.
USER MANUAL SV3060 Concept
text_image
concept SV3060CZ SK PL HU LV EN DE FR IT ES RO


PODĚKOVÁNÍ
natural_image
Two black wafers with grid patterns, one placed on top and the other on the side (no text or symbols visible)
natural_image
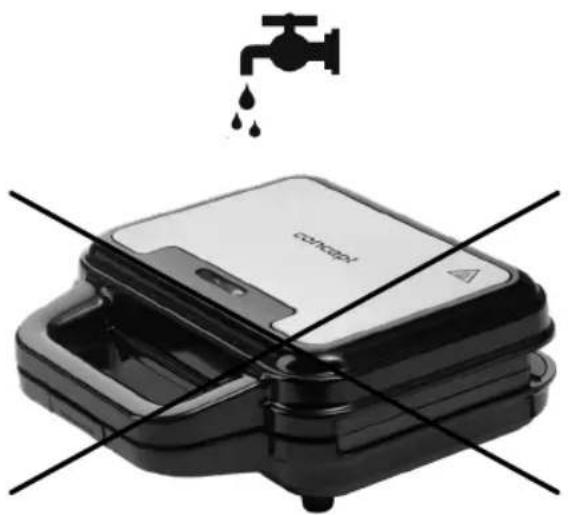
Two black rectangular heat exchanger grilles with horizontal slats, no text or symbols visibleNIKDY NEPONOŘUJTE SPOTŘEBIČ DO VODY ANI DO ŽÁDNÉ JINÉ KAPALINY!
natural_image
Black and white photo of a microwave oven with water drop symbol above (no text or labels)NÁVOD K OBSLUZE
text_image
4 5 COTCAPYbezpečnostní uzávěr
Montáž desek
natural_image
Two black wafers with grid patterns, one placed on top and the other on the side (no text or symbols visible)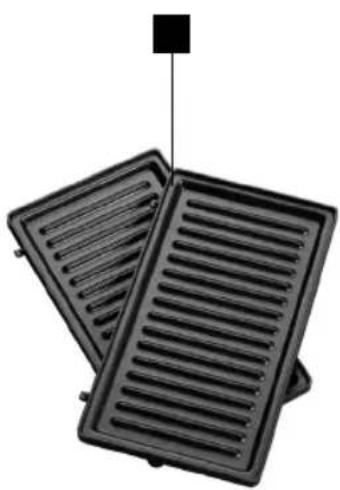
natural_image
Two black rectangular heat exchanger grilles with horizontal slats, one upright and one tilted (no text or symbols visible)NIKDY NEPONÁRAJTE SPOTREBIČ DO VODY ANI DO ŽIADNEJ INEJ KVAPALINY!

natural_image
Black and white photo of a microwave oven with water drop symbol above (no text or labels)NÁVOD NA OBSLUHU
natural_image
Two black wafers with grid patterns, one placed on top and the other on the side (no text or symbols visible)
natural_image
Two black rectangular heat exchanger grilles with horizontal slats, one upright and one tilted (no text or symbols visible)NIGDY NIA ZANURZAĆ URZĄDZENIA W WODZIE LUB INNYM PŁYNIE!

natural_image
Black and white photo of a microwave oven with water drop symbol above (no text or labels)INSTRUKCJA OBSŁUGI
text_image
4 5 concepttext_image
1 4 5 concept 3 6 2
text_image
7 8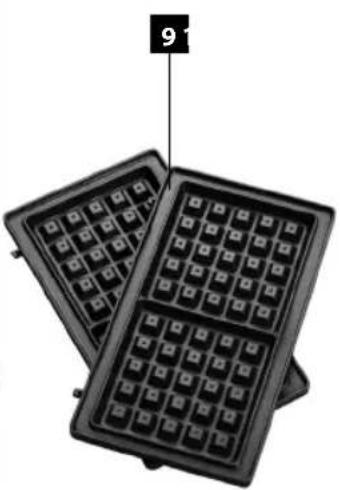
natural_image
Two black wafers with grid patterns, one placed on top and the other on the side (no text or symbols visible)
natural_image
Two black rectangular heat exchanger grilles with horizontal slats, one upright and one tilted (no text or symbols visible)A KÉSZÜLÉKET SOHA NE TEGYE VÍZBE VAGY MÁS FOLYADÉKBA!

natural_image
Black and white photo of a microwave oven with water drop symbol above (no text or labels)HASZNÁLATI ÚTMUTATÓ
natural_image
Two black wafers with grid patterns, one placed on top and the other on the side (no text or symbols visible)
natural_image
Two black rectangular heat exchanger grilles with horizontal slats, one upright and one tilted (no text or symbols visible)NEIEGREMDĘJIET IERİCI ÜDENİ VAI CITÄ ŠKIDRUMÄ!

natural_image
Black and white photo of a microwave oven with water drop symbol above (no text or labels)EKSPLUATĀCIJAS NORĀDĪJUMI
Thank you for purchasing a Concept product. We hope you will be satisfied with our product throughout its service life. Please study the entire Operating Manual carefully before you start using the product. Keep the manual in a safe place for future reference. Make sure other people using the product are familiar with these instructions.
| Technical parameters | |
| Voltage 220–240 V ~ 50/60 Hz | |
| Power input 700 W | |

Caution!
Hot surface
IMPORTANT SAFETY NOTICE
- Use the unit only as described in this operating manual.
- Remove all the covering and marketing materials from the unit before the first use.
- Make sure the mains voltage corresponds to the values stated on the product's rating plate.
- The unit reaches high temperatures during operation and remains hot for some time after being turned off. Do not touch the hot surfaces. Use the handles and buttons. There is a risk of being burned.
- The unit may not be cleaned, stored, or covered until it has cooled down completely.
- Do not put the unit on its side during operation.
- Close supervision is necessary when the unit is on or plugged into the socket.
- Never carry the unit during operation or while hot. Do not carry the unit by the power cord.
- Never pull the cord to disconnect the plug from the socket; hold the plug instead.
- The appliance is not intended for and should not be accessible to children or people with reduced capabilities.
- Persons with limited movement capacity, reduced sensory perception, insufficient mental capacity or those who are unaware of the proper handling should use the product only under the supervision of a responsible, aware person.
- Pay the utmost attention when using the unit close to children.
-
Do not use the appliance as a toy.
-
Turn the unit off, disconnect the power cord from the wall outlet, and allow the unit to cool before cleaning.
- Do not let the power cord hang loosely over the edge of a table. Make sure the power cord does not touch hot surfaces.
- The unit may only be installed on a stable surface resistant to high temperature, away from other heat sources, such as heating bodies, ovens, etc. Do not expose the unit to direct sunlight or moisture.
- Do not use the unit in an environment with explosive gases or flammable substances (solvents, varnishes, adhesives, etc.).
- Caution – Bread may ignite! When using the unit, keep a sufficient space around and above the unit to ensure sufficient air circulation. Do not let the unit come into contact with curtains, wall linings, textile, paper, or other combustible materials while in operation. In addition, it is not recommended to install the unit near or under the above materials. Do not put any of these materials on top of the unit.
- Do not use the unit without the removable crumb tray. The tray shall be cleaned regularly. Do not allow crumbs to accumulate on the tray. They could touch the heating body and ignite.
- Do not insert any metal objects into the unit.
- Do not insert excessively big pieces of food into the unit.
- The unit is not designed for outdoor use.
- The appliance is intended for domestic use only, not for commercial use.
- When unplugging the unit from the wall outlet, make sure the unit has been turned off (bread lowering lever in the upper position), then disconnect the plug from the wall outlet.
- Never operate the appliance with wet hands.
- Do not immerse the power cord, plug, or appliance in water or any other liquid.
- Use manufacturer-recommended accessories only.
- Do not try to repair the appliance; instead, refer to an authorised service centre.
concept
EN
- This appliance may be used by children 8 years of age and older and by persons with physical or mental impairments or by inexperienced persons if they are properly supervised or have been informed about how to use of the product in a safe manner and understand the potential dangers. Children must not play with the appliance. This appliance may be cleaned by children 8 years of age and older if they are properly supervised. Keep this appliance and the power cord out of reach of children younger than 8 years of age.
Failure to follow the manufacturer's instructions may lead to refusal of warranty repair.
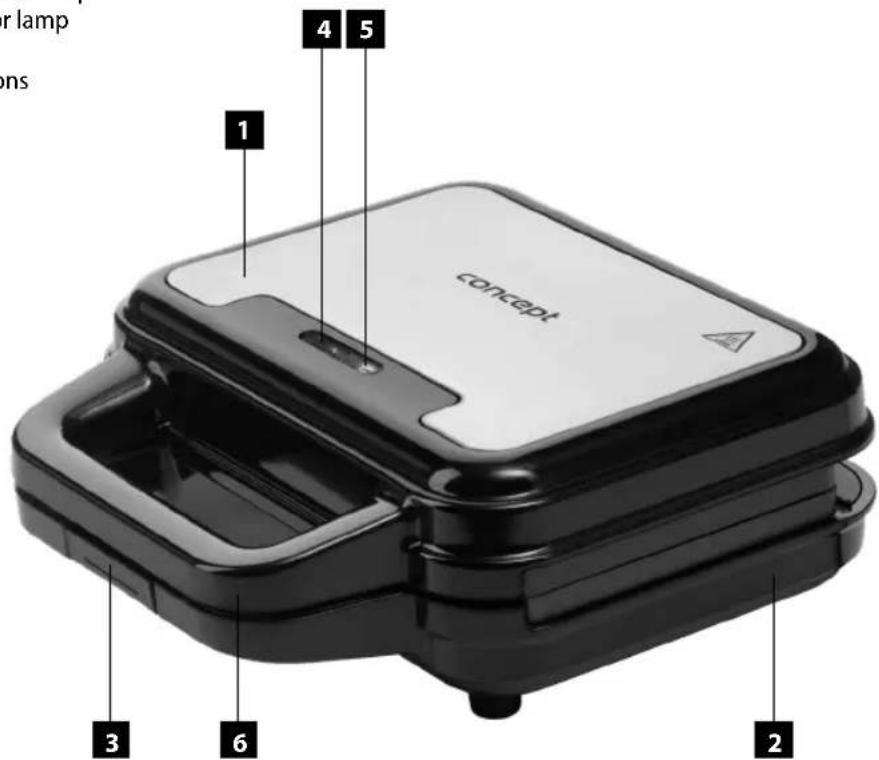
PRODUCT DESCRIPTION
- Hinged top cover
- Bottom cover
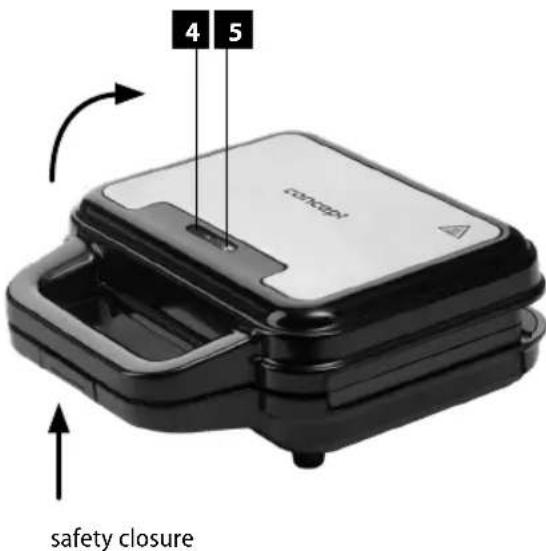
- Safety closure
- "Power On" indicator lamp
- "Heat On" indicator lamp
- Grip handle
- Plate release buttons
- Sandwich plate
- Waffle plate
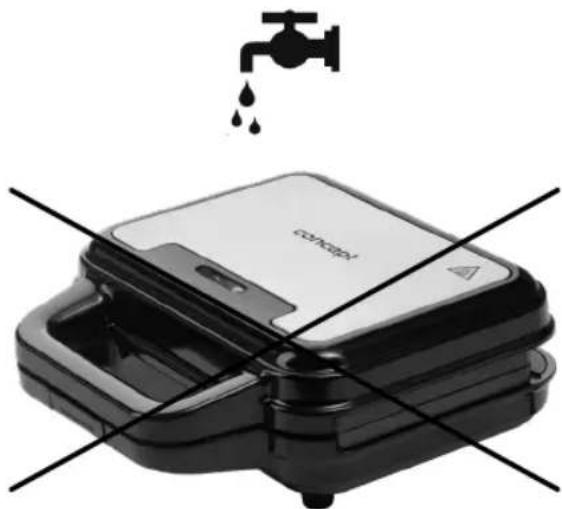
- Grill plate
text_image
or lamp ons 1 4 5 concept 3 6 2
text_image
7 8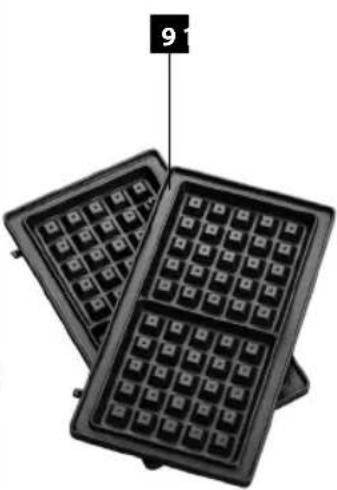
natural_image
Two black wafers with grid patterns, one placed on top and the other on the side (no text or symbols visible)
natural_image
Two black rectangular heat exchanger grilles with horizontal slats, no text or symbols visibleNEVER IMMERSE THE APPLIANCE INTO WATER OR OTHER LIQUID!

natural_image
Black and white photo of a microwave oven with water drop symbol above (no text or labels)OPERATING INSTRUCTIONS
Before using the appliance for the first time, wash the toasting surfaces using a wet cloth; in spite of that, we recommend that the first two pairs of sandwiches should not be eaten.
Food preparation procedure
- Plug the appliance into a socket. Make sure that the mains voltage conforms to the voltage of the appliance. Both the "Power On" indicator lamp and "Heat On" indicator lamp will be on.
- Close the top cover of the sandwich maker (during its warming-up, you can prepare your food).
- When the green "Heat On" indicator lamp goes off, the sandwich maker is ready.
- Open the top cover of the sandwich maker and put sandwiches on the lower part of the sandwich maker.
- Your food will be ready to be served in approximately 4 minutes or longer as per your taste.
NOTE
- Do not close the sandwich maker by force. A cloud of steam may rise from in between the toasting surfaces during the toasting process.
-
During the toasting process, the sandwich maker must be closed using the safety closure. Keep in mind that the "Heat On" indicator lamp will go on and off as the thermostat keeps the sandwich maker at proper temperature.
-
Open the sandwich maker and remove the sandwiches using a plastic or wooden spatula. Never use a metal knife as it might damage the non-adhesive coating.
- Close the top cover in order keep the surfaces hot for further toasting.
- During the toasting process, you can prepare your food.
• After finishing the toasting, unplug the appliance.
text_image
4 5 safety closureMounting the plates
- Make sure the product is unplugged.
- Select the plate you want to use.
- Position the sandwich maker so that the controls are facing you. Open the sandwich maker by lifting the handle.
- Insert the plate into the holes in the covers and push gently. It will snap into place. Repeat the procedure with the second plate.
Removing the plates
- Make sure the product is unplugged and completely cool.
- Press the plate release button (7).
-
Plates can be washed by hand.
-
Pressing the button causes the plate to pop up slightly from the base. Lift the plate and slide it out of the tabs. Repeat the procedure with the second plate.
CLEANING AND MAINTENANCE
- Before cleaning, unplug the appliance and let it cool down.
- Wipe the inner parts and edges of grating using a paper towel or soft cloth. Wipe the sandwich maker surface only using a slightly wet cloth and prevent water, grease or oil from entering the cooling openings.
- Do not clean the inner and outer parts using a rough sponge or pot scourer, as this might damage the parts.
SERVICE
Any extensive maintenance or repair requiring access to the internal parts of the product shall be performed by an authorized service center.
ENVIRONMENTAL PROTECTION
- Packaging materials and obsolete appliances should be recycled.
- The transport box may be disposed of as sorted waste.
- Polyethylene bags shall be handed over for recycling.
Appliance recycling at the end of its service life:
A symbol on the product or its packaging indicates that this product should not go into household waste. It must be taken to the collection point of an electric and electronic equipment recycling facility. By making sure this product is disposed of properly, you will help prevent the negative effects on the environment and human health that would otherwise result from inappropriate disposal of this product. You can learn more about recycling this product from your local authorities, a household waste disposal service or in the shop where you bought this product.

This product meets all the basic EU regulation requirements that relate to it.
Changes to the text, design and technical specifications may occur without prior notice and we reserve the right to make these changes.
DANKSAGUNG
natural_image
Two black wafers with grid patterns, one placed on top and the other on the side (no text or symbols visible)
natural_image
Two black rectangular heat exchanger grilles with horizontal slats, no text or symbols visibleTAUCHEN SIE DAS GERÄT NIEMALS INS WASSER ODER ANDERE FLÜSSIGKEITEN!

natural_image
Black and white photo of a microwave oven with water drop symbol above (no text or labels)BEDIENUNGSANLEITUNG
text_image
4 5 concept
Attention!
Surfaces chaudes
PRÉCAUTIONS PARTICULIERES DE SÉCURITÉ
natural_image
Two black waffle-shaped grates with grid patterns, one labeled with number 9 (no text or symbols on the grates themselves)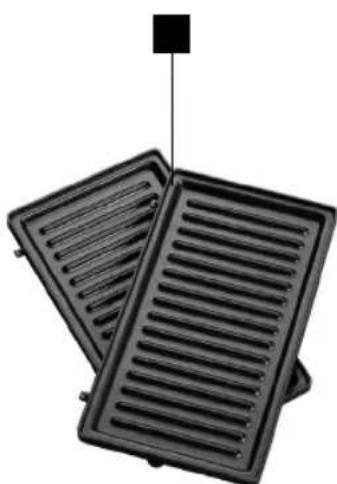
natural_image
Two black plastic heat exchanger grilles with horizontal slats, no text or symbols visibleNE JAMAIS IMMERGER L'APPAREIL A L'EAU OU TOUT AUTRE LIQUIDE!

natural_image
Black and white photo of a microwave oven with water drop symbol above (no text or labels)MODE D'EMPLOI
natural_image
Two black wafers with grid patterns, one placed on top and the other on the side (no text or symbols visible)
natural_image
Two black rectangular heat exchanger grilles with horizontal slats, one upright and one tilted (no text or symbols visible)NON IMMERGERE MAI L'APPARECCHIO NELL'ACQUA NE' IN ALTRI LIQUIDI!

natural_image
Black and white photo of a microwave oven with water drop symbol above (no text or labels)MANUALE D'USO
natural_image
Two black wafers with grid patterns, one placed on top and the other on the side (no text or symbols visible)
natural_image
Two black rectangular heat exchanger grilles with horizontal slats, one upright and one tilted (no text or symbols visible)iNO SUMERJA NUNCA EL ELECTRODOMÉSTICO EN AGUA NI EN OTRO LÍQUIDO!

natural_image
Black and white photo of a microwave oven with water drop symbol above (no text or labels)INSTRUCCIONES DE USO
natural_image
Two black wafers with grid patterns, one placed on top and the other on the side (no text or symbols visible)
natural_image
Two black rectangular heat exchanger grilles with horizontal slats, no text or symbols visibleA NU SE CUFUNDA NICIODATĂ APARATUL ÎN APĂ ȘI NICI ÎN ALT LICHID!