CID364DTB4 - Cooker Fisher & Paykel - Free user manual and instructions
Find the device manual for free CID364DTB4 Fisher & Paykel in PDF.


User questions about CID364DTB4 Fisher & Paykel
0 question about this device. Answer the ones you know or ask your own.
Ask a new question about this device
Download the instructions for your Cooker in PDF format for free! Find your manual CID364DTB4 - Fisher & Paykel and take your electronic device back in hand. On this page are published all the documents necessary for the use of your device. CID364DTB4 by Fisher & Paykel.
USER MANUAL CID364DTB4 Fisher & Paykel
DOWNDRAFT INDUCTION COOKTOP
MINIMAL
CID364DTB4
USERGUIDE
USCA
Safety and warnings 4
First use 9
Safety features 11
Cookware 12
Using your induction zones 14
SmartZones 16
PowerBoost 18
GentleHeat 19
Auto RapidHeat 20
Using the timer 22
Cooking guide 24
Using the extractor 26
Care and cleaning 28
Maintenance alerts 30
Troubleshooting 32
Service and warranty 35
IMPORTANT INSTRUCTIONS
WARNING!
Hot Surface Hazard
Failure to follow this advice may result in serious injury.
- DO NOT TOUCH SURFACE UNITS OR AREAS NEAR UNITS - Surface units may be hot even though they are dark in color.
- During and after use, do not touch, or let clothing or other flammable materials contact surface units or areas near units until they have had sufficient time to cool.
- During and after use, accessible parts of this appliance will become hot enough to cause burns.
- Never leave metal objects (such as kitchen utensils) or empty pans on the cooktop as they can become hot very quickly.
- Magnetisable metal objects worn on the body may become hot in the vicinity of the cooktop. Gold or silver jewellery will not be affected.
- To reduce the risk of burns, ignition of flammable materials, and spillage due to unintentional contact with the utensil, the handle of a utensil should be positioned so that it is turned inward, and does not extend over adjacent surface units.

WARNING!
Fire Hazard
Failure to follow this advice may result in serious injury.

- Unattended cooking on a hob with fat or oil can be dangerous and may result in fire.
- NEVER try to extinguish a fire with water, but switch off the appliance and cover flame, eg with a lid or fire blanket, or use dry chemical or foam-type extinguisher.
- Do not store items on cooking surfaces.
WARNING!
Electrical Shock Hazard
Failure to follow this advice may result in electrical shock or death.
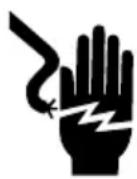
- Switch the power to the cooktop off at the wall before cleaning or maintenance.
- Do not cook on a broken or cracked cooktop. If the glass should break or crack, switch the appliance off immediately at the mains power supply (wall switch) and contact a qualified technician.
WARNING!

Health Hazard
Failure to follow this advice may result in death.
- This appliance complies with electromagnetic safety standards. However, persons with cardiac pacemakers or other electrical implants (such as insulin pumps) must consult with their doctor or implant manufacturer before using this appliance to make sure that their implants will not be affected by the electromagnetic field.
READ AND SAVE THESE INSTRUCTIONS
To reduce the risk of fire, injury to persons or damage when using the appliance, follow the important safety instructions listed below. Read all the guidance before using the appliance. Ensure your appliance is properly installed and grounded by a qualified technician.
WARNING - TO REDUCE THE RISK OF FIRE, ELECTRIC SHOCK, OR INJURY TO PERSONS, OBSERVE THE FOLLOWING:
a) Use this unit only in the manner intended by the manufacturer. If you have questions, contact the manufacturer.
b) Before servicing or cleaning unit, switch power off at service panel and lock the service disconnecting means to prevent power from being switched on accidentally. When the service disconnecting means cannot be locked, securely fasten a prominent warning device, such as a tag, to the service panel.
WARNING - TO REDUCE THE RISK OF INJURY TO PERSONS IN THE EVENT OF A RANGE TOP GREASE FIRE, OBSERVE THE FOLLOWING*:
SMOTHER FLAMES with a close-fitting lid, cookie sheet, or metal tray, then turn off the
- burner. BE CAREFUL TO PREVENT BURNS. If the flames do not go out immediately, EVACUATE AND CALL THE FIRE DEPARTMENT.
- NEVER PICK UP A FLAMING PAN - You may be burned.
DO NOT USE WATER, including wet dishcloths or towels - a violent steam explosion will result.
- Use an extinguisher ONLY if:
- You know you have a Class ABC extinguisher, and you already know how to operate it.
- The fire is small and contained in the area where it started.
The fire department is being called. - You can fight the fire with your back to an exit.
General Use
- CAUTION For General Ventilating Use Only. Do Not Use To Exhaust Hazardous Or
Explosive Materials And Vapors.
- There shall be adequate ventilation of the room when the range hood is used at the same time as appliances burning gas or other fuels (not applicable to appliances that only discharge the air back into the room).
-
WARNING - TO REDUCE THE RISK OF A RANGE TOP GREASE FIRE:
-
Never leave surface units unattended at high settings. Boilovers cause smoking and greasy spillovers that may ignite. Heat oils slowly on low or medium settings.
- Always turn hood ON when cooking at high heat or when flambeing food (i.e. Crepes Suzette, Cherries Jubilee, Peppercorn Beef Flambe').
- Clean ventilating fans frequently. Grease should not be allowed to accumulate on fan or filter.
-
Use proper pan size. Always use cookware appropriate for the size of the surface element.
-
Never use your appliance as a work or storage surface.
- Wear proper apparel — Loose-fitting or hanging garments should never be worn while using the appliance.
- Do not leave any magnetic item, e.g. cutlery, roast dish, etc. on your cooktop, including the cooking zones and user interface.
- Do not place or leave any magnetisable objects (eg credit cards, memory cards) or electronic devices (eg computers, MP3 players) near the appliance, as they may be affected by its electromagnetic field.
- We recommend using plastic or wooden kitchen utensils for cooking with your induction cooktop.
- Storage in or on appliance — Flammable materials should not be stored in an oven or near surface units.
- Do not place or leave aluminum foil on the cooktop.
- Never use your appliance for warming or heating the room.
- Do not use water on grease fires - Smother fire or flame or use dry chemical or foam-type extinguisher.
- Use only dry potholders — Moist or damp potholders on hot surfaces may result in burns from steam. Do not let potholder touch hot heating elements. Do not use a towel or other bulky cloth.
- Use proper pan size — Always place pans in the centre of the cooking zone. Select utensils having flat bottoms large enough to cover the surface unit heating element. The use of undersized utensils will expose a portion of the heating element to direct contact and may result in ignition of clothing. Proper relationship of utensil to burner will also improve efficiency.
- After use, always turn off the cooking zones and the cooktop as described in this guide (ie by using the touch controls). Do not rely on the pan detection feature to turn off the cooking zones when you remove the pans.
- Do not use a steam cleaner to clean your cooktop.
- Do not place or drop heavy objects on your cooktop.
- Do not stand on your cooktop.
- Do not use pans with jagged edges or drag pans across the ceramic glass surface as this can scratch the glass.
- Do not use scourers or any other harsh/abrasive cleaning agents to clean your cooktop, as these can scratch the ceramic glass.
- Do not operate your cooktop by means of an external timer or separate remote-control system.
-
Do not cook on broken cooktop - If cooktop should break, cleaning solutions and spillovers may penetrate the broken cooktop and create a risk of electric shock. Contact a qualified technician immediately.
-
Glazed Cooking Utensils - Only certain types of glass, glass/ceramic, ceramic, earthenware, or other glazed utensils are suitable for range-top service without breaking due to the sudden change in temperature.
Child Safety
- Do not allow children to play with the appliance or sit, stand, or climb on it.
- Do not store items of interest to children in cabinets above the appliance. Children climbing on the cooktop could be seriously injured.
- Do not leave children alone or unattended in the area where the appliance is in use. Children of less than 8 years old must be kept away from the appliance unless continuously supervised. This appliance can be used by children aged from 8 years and above, and persons with reduced physical, sensory or mental capabilities or lack of experience and knowledge, if they have been given supervision or instruction concerning the use of the appliance in a safe way and they understand the hazards involved. Cleaning and user maintenance shall not be done by children without supervision.
- This appliance is not intended for use by persons (including children) with reduced physical. Sensory or mental capabilities, or lack of experience and knowledge, unless they have been given supervision or instruction concerning use of the appliance by a person responsible for their safety;
Children should be supervised to ensure they do not play with the appliance
Cleaning
- Clean cooktop with caution — If a wet sponge or cloth is used to wipe spills on a hot cooking area, be careful to avoid steam burn. Some cleaners can produce noxious fumes if applied to a hot surface.
- There is a fire risk if cleaning is not carried out in accordance with the instructions.
Servicing
- Do not repair or replace any part of the appliance unless specifically recommended in the user guide. All other servicing should be undertaken by a Fisher & Paykel trained and supported service technician or qualified person.
- If the power supply cable is damaged, it must only be replaced by a qualified technician.
- If the appliance is malfunctioning, then contact your Authorized Service Center or Customer Care to arrange for service. Do not use your appliance until it has been repaired by a Fisher & Paykel authorized technician.
- CAUTION: The cooking process has to be supervised. A short term cooking process has to be supervised continuously.
Standard Requirements
-
This induction cooktop generates and uses ISM frequency energy that heats cookware by using an electromagnetic field. It has been tested and complies with Part 18 of the FCC Rules for ISM equipment. This induction cooktop meets the FCC requirements to minimize interference with other devices in residential installation. Induction cooktops may cause interference with television or radio reception. If interference occurs, the user should try to correct the interference by:
-
Relocating the receiving antenna of the radio or television
- Increasing the distance between the cooktop and the receiver
- Connecting the receiver into an outlet different than the receiver.
Cooktop overview
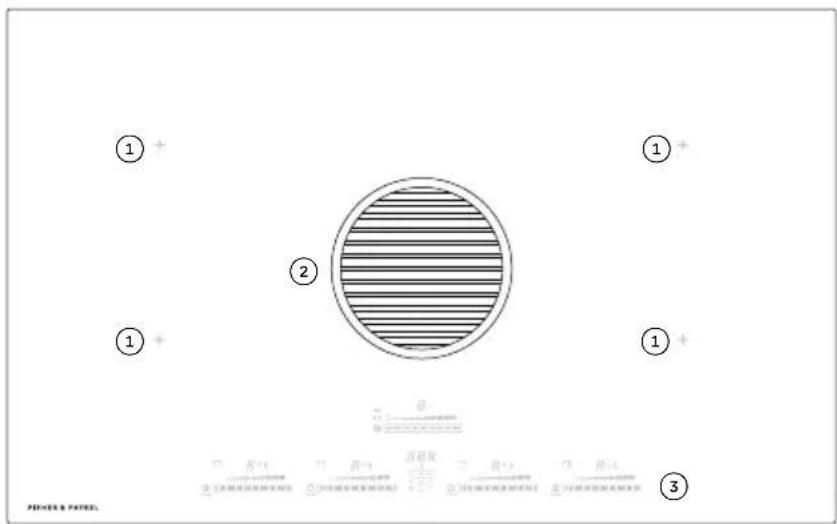
COOKTOP FEATURES
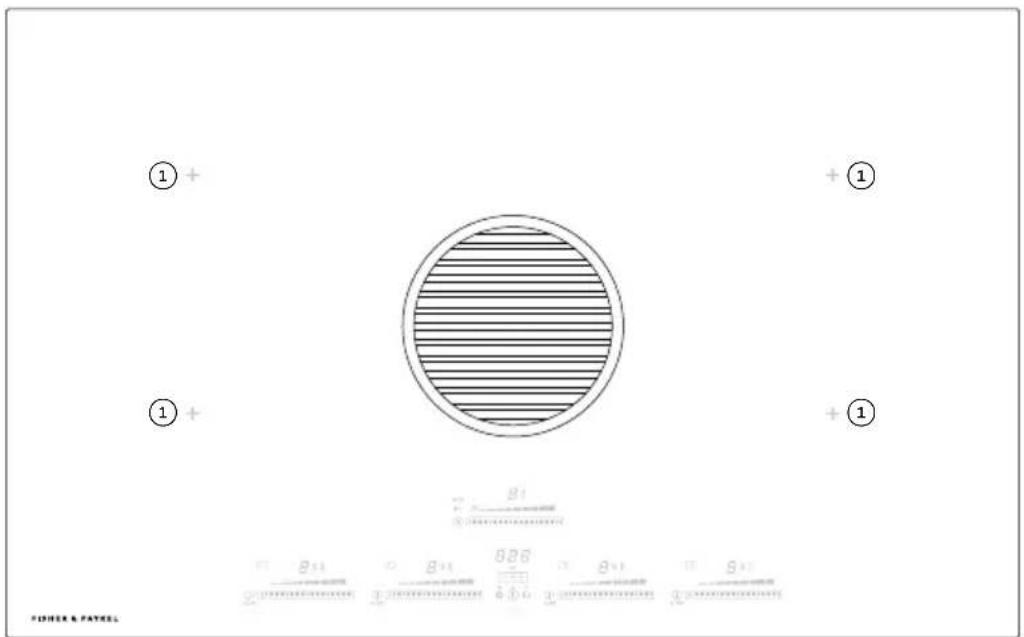
① Induction zones
② Extractor
③ Control panel
Control panel overview
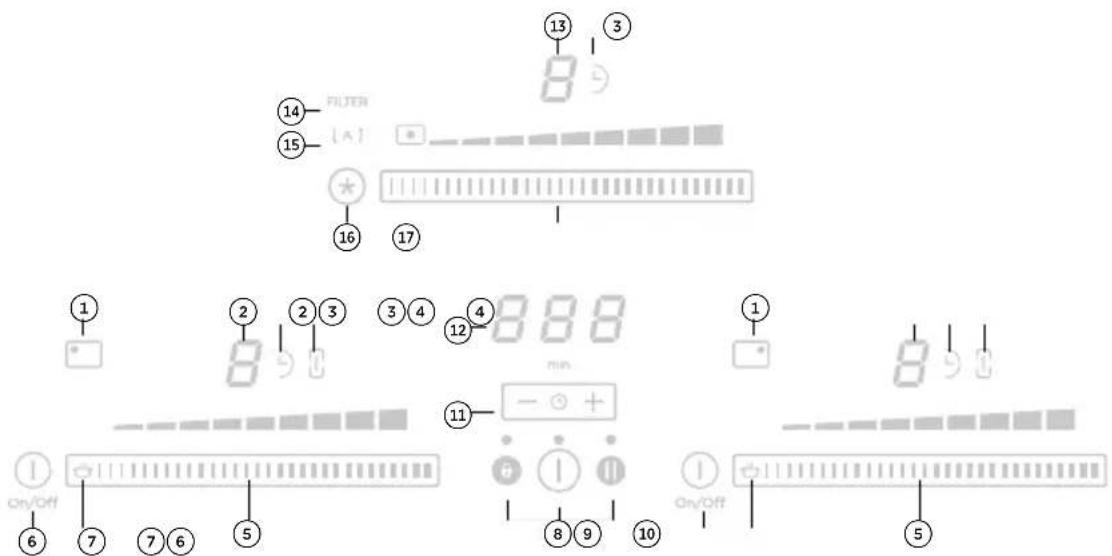
CONTROL PANEL FEATURES
① Cooking zone indicator
② Cooking zone display
③ Zone timer indicator
④ Bridged zone indicator
⑤ Zone heat selector
Cooking zone On/Off
Gentle heat selector
Product On/Off
Keylock
10 Pause
⑪ Timer control
12 Main display
⑬ Extraction display
⑭ Filter indicator
15 Auto-extraction indicator
Auto-function selector and filter saturation reset
⑦ Extraction speed selector
Display overview
Touch display
Your cooktop is operated using an intuitive touch display. Use the control panel to navigate cooking settings.
Using the touch controls
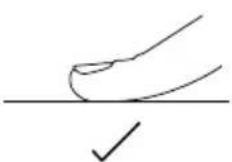
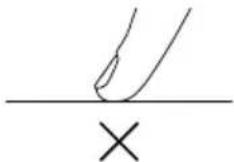
Use the ball of your finger, not its tip. The controls respond to touch, so pressure is not needed.
| ZONE DISPLAY DESCRIPTION | |
| 8 | Cooking zone off (not activated) |
| 0 | Cooking zone on (activated but not operating) |
| 1 | 9 Power levels |
| P | PowerBoost function |
| H | Hot Surface indicator |
| u | Pan detection indicator |
| u | Gentle heat indicator |
| L | Childlock indicator |
| II | Pause function |
| A | Auto RapidHeat function |
The cooktop controls can be locked for cleaning and to prevent unintended use. When the cooktop is locked the controls and cooktop display will remain unresponsive.
Keylock

ACTIVATING KEYLOCK
Ensure all cooking zones have been turned to OFF. Touch and hold the keylock control . The indicator above the keylock control will illuminate indicating that the controls are locked.

DISABLING KEYLOCK
To unlock the cooktop, touch and hold the keylock control. The indicator light above the control will dim. Your cooktop is now unlocked.
Childlock

ACTIVATING CHILDLOCK
Ensure cooktop is OFF and all cookware is removed. Touch and hold and will illuminate in the display indicating that the controls are locked.
DISABLING CHILDLOCK
To unlock the cooktop, touch and hold and The indicator will dim. Your cooktop is now unlocked.
Cookware size
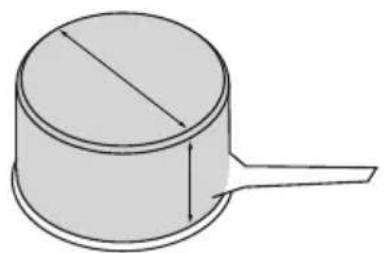
For optimal performance, ensure the size of the cookware is suitable for the zone in use.
Cooking zone Min. pan size* Power** Powerboost

Smartzone
unbridged 4 5/16" (110mm) 2100 W 3000 W
bridged 9 1/16" (230mm) 3000 W n/a
- Recommended
**Total max power 7400 W
Induction cookware
The quality of your cookware can affect cooking performance. Only use induction-compatible cookware that has been specifically designed for induction cooking. Look for the induction symbol on the packaging or the bottom of the pan.
Suitable cookware material:
- stainless steel - with a magnetic base or core
- aluminium and copper - with a magnetic base or core
cast iron - steel
- enamelled steel.
Unsuitable cookware material:
- aluminium or copper - without a magnetic base
glass - wood
porcelain - ceramic or earthenware.
To check if cookware material is suitable for induction use, carry out a magnet test:
Move a magnet across the base of the pan. If the magnet is attracted, the pan is induction suitable. Ensure attraction is consistent across the base of the pan. If there are gaps, such as an indented manufacturer's logo, then the performance will be impaired.
If you do not have a magnet, fill the pan with some water and refer to section 'Using your induction zones'. If does not flash and the water is heating, pan is suitable.
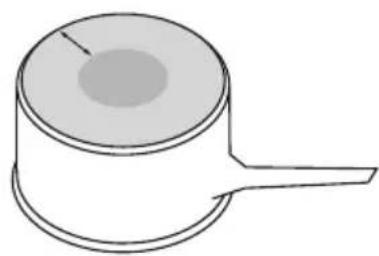
Quickest heating Performance
High content of ferromagnetic material. Heating area is consistent across the base and up the sides of pan.
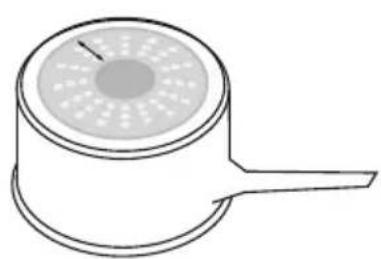
Average heating Performance
Reduced area of ferromagnetic material. Reduced zone of heating, results in poor performance and slower heating.
Slow heating Performance
Very limited area of ferromagnetic material. Results in very slow heating performance.
Note: This type of pot is good for very delicate tasks such as melting chocolate, as heating is very slow.
Ensure the base of your cookware is smooth, sits flat against the glass, and is similar in size as the cooking zone. A small pot on a large cooking zone may not be detected. Always centre your pan on the cooking zone and lift pans off the cooktop - do not slide, or they may scratch the glass.
To begin cooking
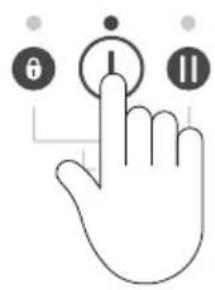
1
Press the ON/OFF control. The indicator light above the control will glow.

(2)

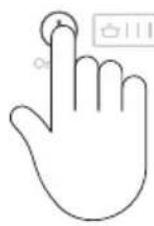
Press ① to turn the individual cooking zone on.
3
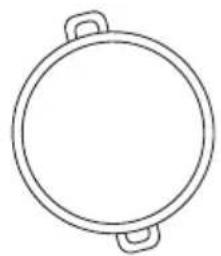
Place a suitable pan on the desired cooking zone. Ensure the bottom of the pan and the surface of the cooking zone are clean and dry.
Always place small pans in the centre of the cooking zone.
(4)
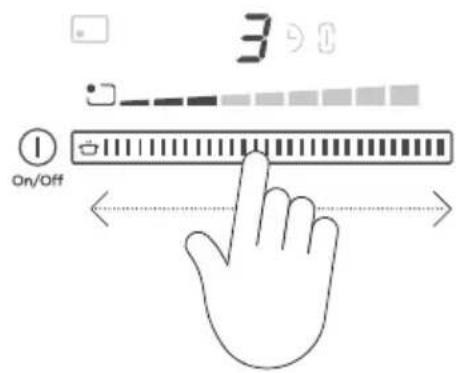
Select a heat setting by touching or sliding the setting selector with your finger.
- If you don't select a heat setting within 10 seconds, the cooktop will automatically turn off.
- You can modify the heat setting at any time during cooking.
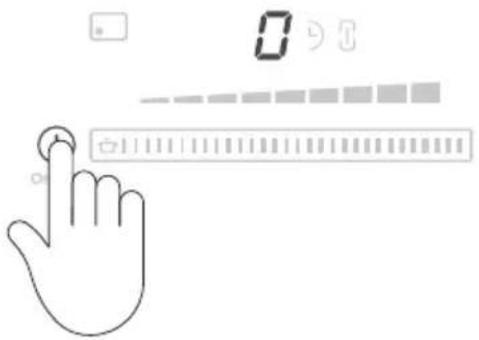
Turn the cooking zone off:
Press ① to turn the individual cooking zone off.
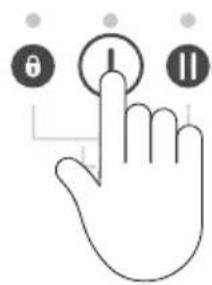
Turn the product off:
touch the ON/OFF control.
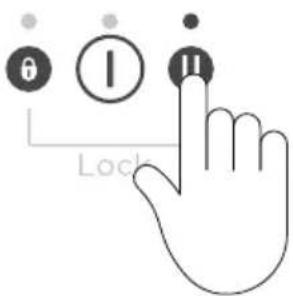
Pause cooking:
touch to pause all cooking functions, will show in the main display. To unpause, press again followed by the desired setting selector.
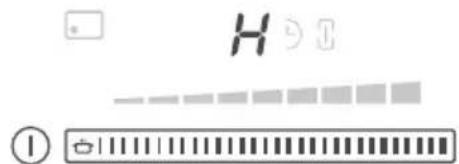
If H flashes in the display:
H will flash in the cooking zone display of any zone that is too hot to touch. It will remain illuminated until it has cooled to a safe temperature.

On/Off
If flashes alternately with the heat setting:
the pan may not be located on the correct cooking zone, it may not be centred correctly or it may not suitable for induction cooking.
No heating will take place until a suitable pan is detected. The cooktop will turn off after 10 minutes if no suitable pan is used.
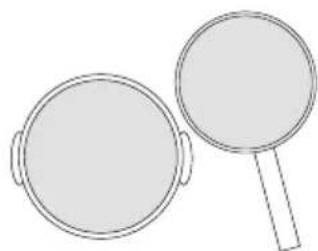
The SmartZones can accommodate several small pots. These small pots will be detected as one large pot.
The entire SmartZone is activated when a pot is detected. This means that other magnetic items (such as cutlery) sitting in the cooking zone will heat up. Do not leave cutlery or other magnetic items on your cooktop.
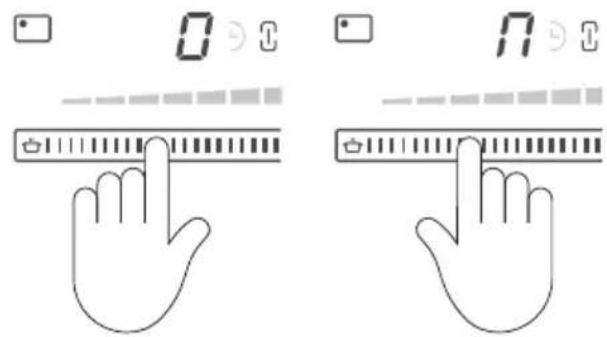
Bridging Zones
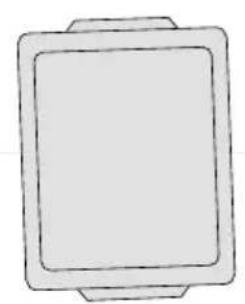
The bridging zone function allows you to use two SmartZones together.
- You can only bridge a cooking zone with the one directly behind it.
- There may be a cooler area in the centre of the combined cooking zones. You may need to move food around the pan to ensure even cooking.
- When using bridging zones, it is not possible to use the PowerBoost function.
①
Place the pan over the two zones you wish to use, ensuring both zones are covered.
②
Touch anywhere on the setting selectors of both cooking zones at the same time.
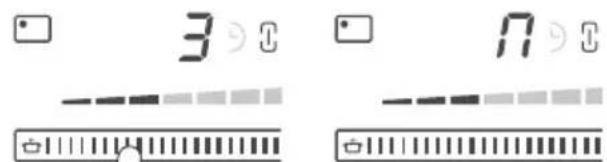
will illuminate in both zones to indicate the bridge-status. will show in the display of the rear cooking zone to indicate it is now controlled by the front control.
3
Use the front setting selector to set the heat setting for the combined zone.
The heat setting will be displayed in both bridged zones. The setting indicator will glow on both zones.
If no pan is detected on one cooking zone:
The left hand display will still show the selected temperature and the right hand display will still show
If after 10 minutes no pan is detected:
- The bridging function will switch off.
- The cooking zone without a detectable pan will turn off.
- The remaining cooking zone will continue cooking at the selected heat setting.
To cancel bridging
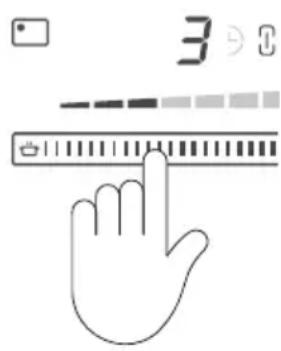
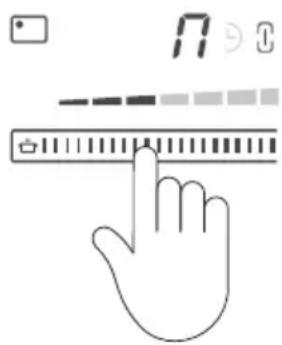
Touch the setting selectors of both bridged cooking zones at the same time. The bridging indicator lights will dim.
Sliding the scale down to will not turn off bridging.
Using the timer in bridged mode:
You may only set one timer for the bridged cooking zone. See 'Using the timer'. The timer indicator will show in both displays.
Cancelling bridging will also cancel the timer for those cooking zones.
Using PowerBoost
This feature enables you to sear meat or bring liquid to boil very quickly. When a cooking zone is set to PowerBoost, it uses more than 100% of the power of that particular cooking zone, resulting in a boost of intense heat. PowerBoost heats food and liquids very quickly. Do not leave the cooktop unattended when using this feature.
Setting PowerBoost
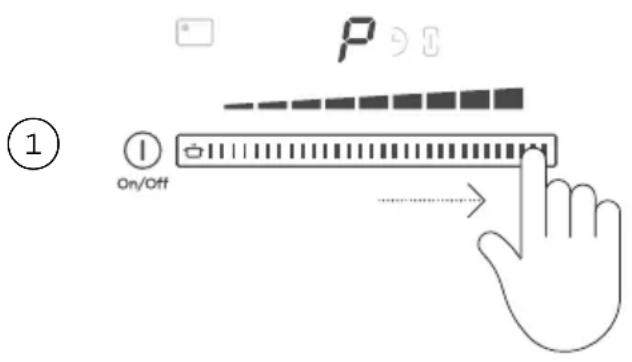
Slide the setting selector to set the cooking zone to the highest heat level. Hold until P displayed.
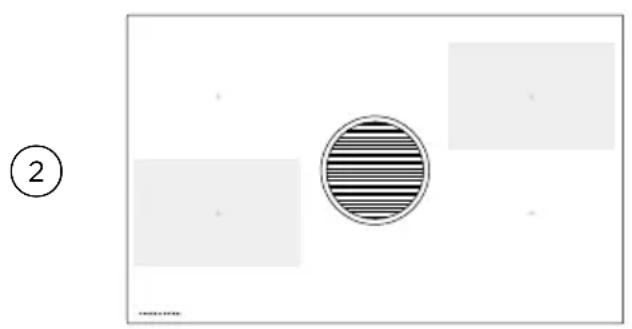
You can set two cooking zones for PowerBoost, as long as one is not behind the other.
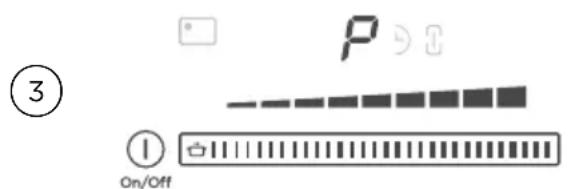
Once PowerBoost is set, the cooking zone will heat more than 100% for 10 minutes. P will flash for a few seconds before the cooking zone automatically reduces the heat to setting 日
- If one cooking zone is set to PowerBoost and a second cooking zone in front or behind the first cooking zone is accidentally set to PowerBoost, P will flash on the first cooking zone to alert that the configuration is not possible and power is automatically decreased.
- When a cooking zone is set for PowerBoost, the other cooking zone in front of or behind may automatically reduce its power level.
- PowerBoost is not available if cooking zones are bridged.
To cancel PowerBoost
Slide the setting selector to a new heat setting or to to turn off the zone.
Using GentleHeat
There are two GentleHeat settings.
- The Low setting is ideal for the most delicate cooking tasks (such as melting chocolate), as the cooking zone will provide a very low continuous gentle heat.
- The Medium setting is ideal for keeping cooked food warm and the gentle warming of delicate foods.
Setting up a cooking zone for GentleHeat
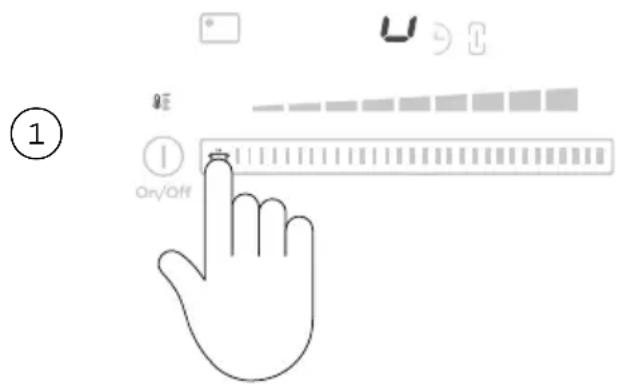
For Low setting
Touch and hold the GentleHeat control on the setting selector.
The Low setting indicator above will glow and will show in the display.
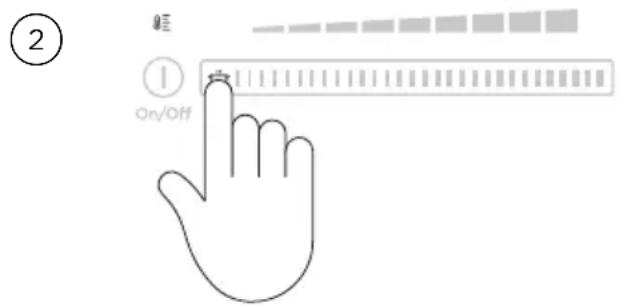
For Medium setting
With Low GentleHeat active, touch the GentleHeat control again to select the Medium setting.
- The Medium setting indicator above will glow and the Low setting indicator goes out.
- Touching the GentleHeat control a third time will switch off the cooking zone.
To exit the GentleHeat setting
Touch or slide the setting selector to a new setting or to turn the cooking zone off.
AUTO RAPIDHEAT
Using Auto RapidHeat
This feature enables the cooking zones to:
heat up food or liquid quickly at the highest setting, and
- reduce the temperature automatically to a pre-selected heat setting.
The amount of time the cooking zone will rapidly heat depends on the selected heat setting.
| HEAT SETTING | APPROXIMATE TIME AT RAPID HEAT |
| 140 seconds | |
| 21 minute | |
| 3 2 minutes | |
| 4 3 minutes | |
| 5 4 minutes | |
| 6 7 minutes | |
| 7 2 minutes | |
| 8 3 minutes |
Setting a cooking zone for Auto RapidHeat
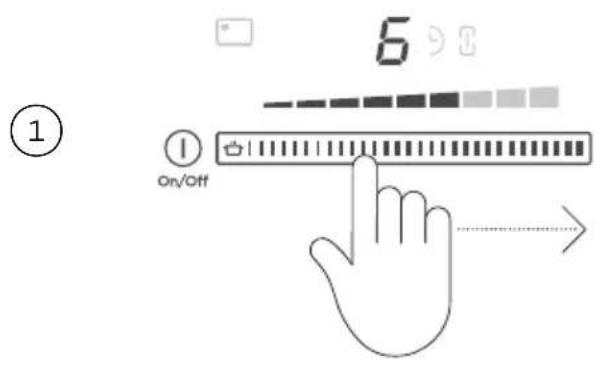
With cooking zone turned on, touch and slide the setting selector to the desired level of reduced heat for the cooking zone.
Keep your finger on the selector.
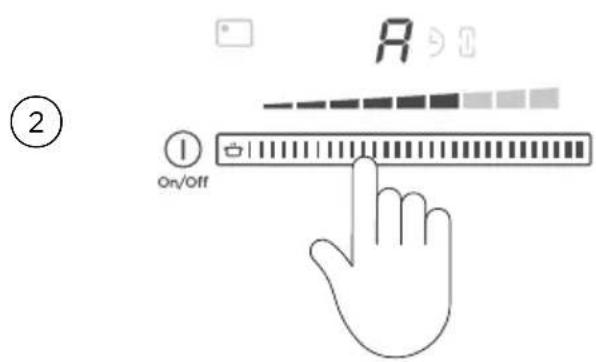
Hold your finger on the selector for 3 seconds until the letter starts to flash alternately with the selected temperature.
- Lift up your finger once setting is complete.
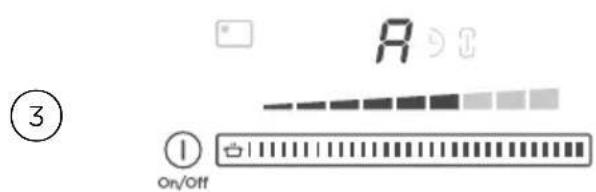
Initially, while the cooking zone is at the highest setting, will flash alternately with your selected lower setting. The length of time at the highest setting depends on the selected lower heat setting.

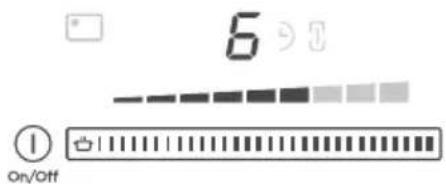
Then, when the period of highest setting is over, will stop flashing and the cooking zone will automatically reduce the heat to your pre-selected lower setting.
If you would like a lower or higher heat setting than you originally selected, simply slide to the new setting and hold until the starts flashing. Alternatively, wait until A stops flashing and then modify the heat setting.
To quit Auto RapidHeat setting while is flashing
Either touch or slide the setting selector to a new setting or to to turn the cooking zone off.
The Auto RapidHeat and PowerBoost features cannot be used together. If you turn PowerBoost on when Auto RapidHeat is already set, the Auto RapidHeat will cancel and PowerBoost will remain.
You can set the timer for up to 1 hour and 59 minutes. The time will be displayed in hours and minutes when the timer is set for longer than 10 minutes.
Using timer as minute minder
The minute minder can be set when not using any cooking or extraction zones. The cooktop will turn off after 10 seconds once the time has been set, but the timer will continue to count down.
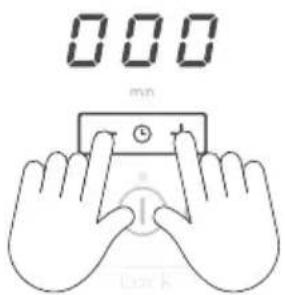
①
Ensure the cooktop is turned ON.
Touch the - and + controls together until 0.00 shows in the timer display and ⑤ is illuminated.
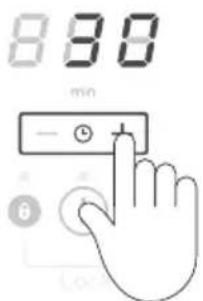
②
Set the time using the - and + controls.
To scroll through the minutes faster, press and hold - or +. The time can be adjusted at any time during use.
When the set time is up
0.00 will flash and the timer will beep. Touch the - or + controls to stop the beeping.
Setting the timer for individual cooking zones.
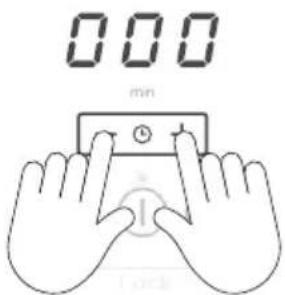
①
Ensure the cooktop is turned ON.
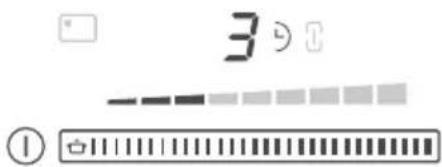
Touch the - and + controls together to activate keylock.
②
Touch the - and + controls repeatedly until ⑨ illuminates for the desired cooking zone.
To cancel a timer setting
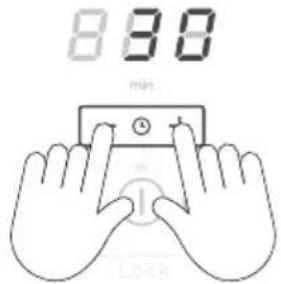
1
With the cooktop turned on, tap the - and + controls together until the indicator light in the desired cooking zone illuminates.
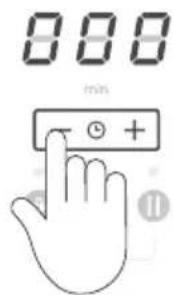
②
Press and hold the - control until the minute display shows. Scroll down the time to will not turn off the cooking zone.
When you have finished cooking, either touch or slide the setting selector to a new setting or to to turn the cooking zone off.
Setting different times for each of the cooking zones
Setting the minute minder when other timers are set
Tap the - and + controls of the timer together as you cycle through the individual timers for the cooking zones until ⑨ illuminates. ⑩ will show in the timer display.
② Touch the - and + controls to set the timer.
When the timer is set
If more than one timer is set, the cooking zone or minute minder indicator with the shortest remaining time setting will glow brightly. Other timer indicators will be dimly lit.
To check the remaining time for another cooking zone
Press the - and + controls together until the indicator in the desired cooking zone window glows brightly.
Take care when frying: oil and fat heat up very quickly, particularly if you're using PowerBoost. At extremely high temperatures oil and fat will ignite spontaneously and this presents a serious fire risk.
Cooking tips
- When food comes to the boil, reduce the temperature setting.
- Using a lid will reduce cooking times and save energy by retaining the heat.
- Minimize the amount of liquid or fat to reduce cooking times.
- Start cooking on a high setting and reduce the setting when the food has heated through.
Simmering, cooking rice
- Simmering occurs below boiling point, at around 85^ , when bubbles are just rising occasionally to the surface of the cooking liquid. This is the key to delicious soups and tender stews because the flavours develop without overcooking the food. You should also cook egg-based and flour-thickened sauces below boiling point.
- Some tasks, including cooking rice by the absorption method, may require a setting higher than the lowest setting to ensure the food is cooked properly in the time recommended.
Searing steak
To cook juicy flavoursome steaks:
① Stand the meat at room temperature for about 20 minutes before cooking.
Heat up a heavy-based frying pan.
③ Brush both sides of the steak with oil. Drizzle a small amount of oil into the hot pan and then lower the meat onto the hot pan.
④ Turn the steak only once during cooking. The exact cooking time will depend on the thickness of the steak and how cooked you want it. Times may vary from about 2-8 minutes per side. Press the steak to gauge how cooked it is - the firmer it feels the more 'well done' it will be.
⑤ Leave the steak to rest on a warm plate for a few minutes to allow it to relax and become tender before serving.
Stir-frying
When stir-frying be careful to lift the pan clear of the surface if tossing the ingredients. Sliding the pan across the cooktop surface may scratch it.
① Choose an induction compatible flat-based wok or a large frying pan.
2 Have all the ingredients and equipment ready. Stir-frying should be quick. If cooking large quantities, cook the food in several smaller batches.
Preheat the pan briefly and add two tablespoons of oil.
Cook any meat first, put it aside and keep warm.
⑤ Stir-fry the vegetables. When they are hot but still crisp, turn the cooking zone to a lower setting, return the meat to the pan and add your sauce.
⑥ Stir the ingredients gently to make sure they are heated through.
⑦ Serve immediately.
Induction heat settings
| HEAT SETTING SUITABILITY | |
| U | ● melting chocolate, butter, and foods that burn quickly |
| ● delicate warming for small amounts of food | |
| 1 - 2 | ● gentle simmering ● slow warming |
| 3 - 4 | ● reheating ● rapid simmering ● cooking rice |
| 5 - 6 | ● pancakes |
| 7 - 8 | ● sautéing ● cooking pasta |
| 9 | ● stir-frying ● searing ● bringing soup to the boil |
| P | ● boiling water |
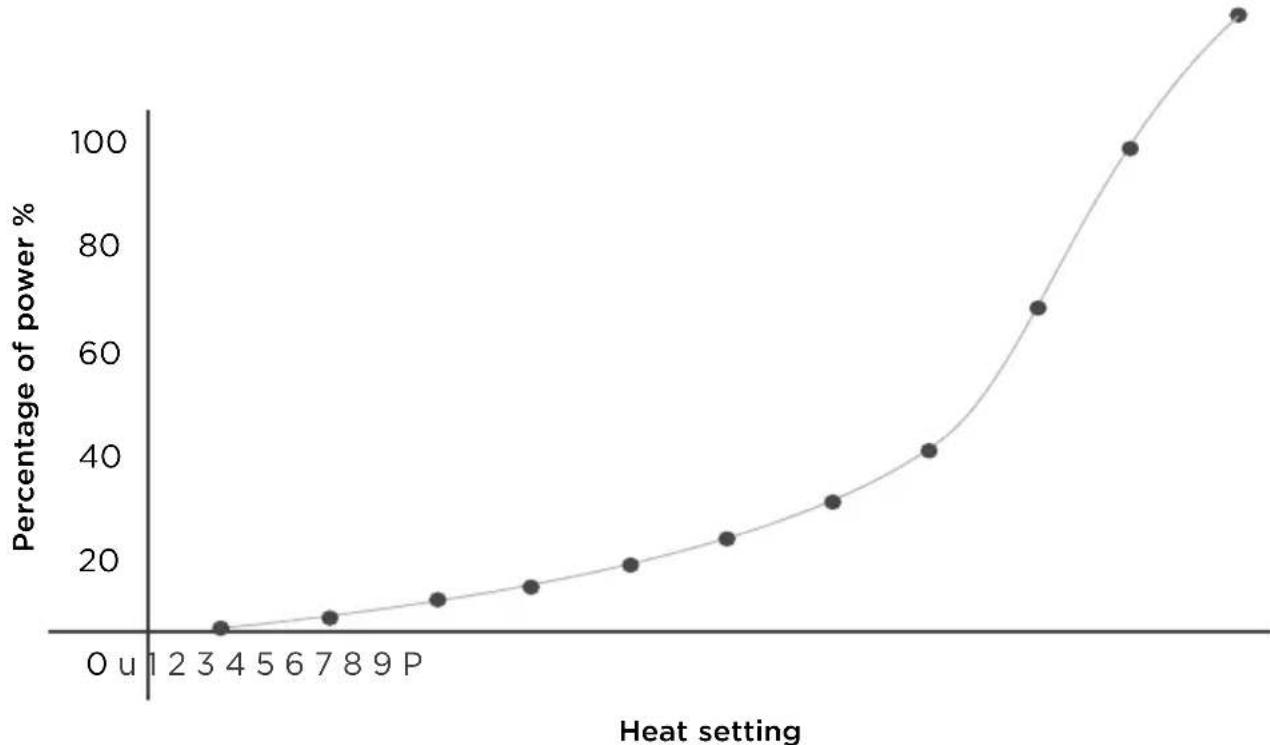
The settings below are guidelines only. The exact setting will depend on several factors, including your cookware and the amount you are cooking. Experiment with the cooktop to find the settings that best suit you.
To start the extractor

①
Ensure the cooktop is turned ON.
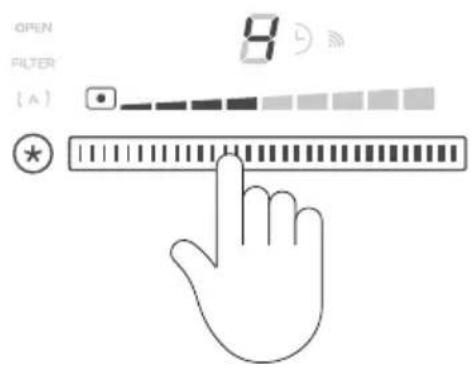
②
Select an extraction setting by touching or sliding the extraction speed selector with your finger.
- If you don't select an extraction setting within 10 seconds, the extractor will automatically turn off.
- You can modify the extraction setting at any time.
Using Extraction PowerBoost
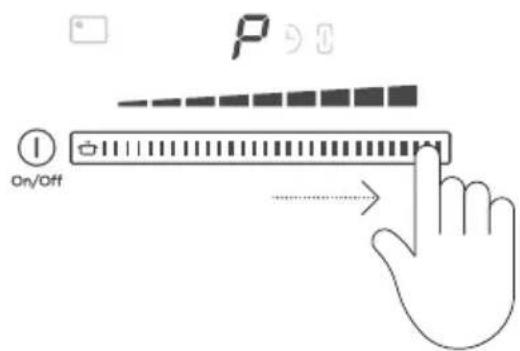
①
Slide the extraction setting selector to the highest level. Hold until is displayed.
- Once PowerBoost is set, the fan will extract at full speed for 15 minutes.
P will flash for a few seconds before reducing back to level 9.
To cancel Extraction PowerBoost
Slide the setting selector to a new setting or to to turn off the fan.
Using Auto-extraction
This feature enables your cooktop to automatically adjust its extraction speed based on the amount of steam generated during cooking.
Setting Auto-extraction
1
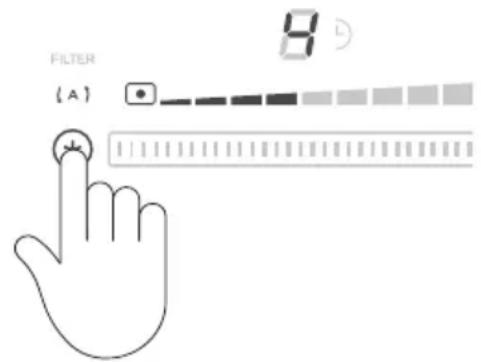
Press 念 will illuminate to indicate Auto-extraction is active.
To cancel Auto-extraction
You can exit Auto-extraction at any time by pressing again or by manually adjusting the fan speed.
| WHAT? HOW? IMPORTANT! | ||
| Everyday soiling on glass (fingerprints, marks, stains left by food or non-sugary spillovers on the glass) | ①Switch the power to the cooktop off at the wall. ②Apply cooktop cleaner while the glass is still warm (but not hot) ③Rinse and wipe dry with a clean cloth or paper towel. ④Switch the power to the cooktop back on at the wall. | ·When the power to the cooktop is switched off, there will be no ‘hot surface’ indication but the cooking zone may still be hot! Take extreme care. ·Heavy-duty scourers, some nylon scourers and harsh/abrasive cleaning agents may scratch the glass. Always read the label to check if your cleaner or scourer is suitable. ·Never leave cleaning residue on the cooktop: the glass may become stained. |
| Boilovers, melts, and hot sugary spills on the glass | ①Remove these immediately with a knife or scraper suitable for ceramic glass cooktops, but beware of hot cooking zone surfaces. ②Switch the power to the cooktop off at the wall. ③Hold the blade or utensil at a 30° angle and scrape the soiling or spill to a cool area of the cooktop. ④Clean the soiling or spill up with a dish cloth or paper towel. ⑤Follow steps 2 to 4 for ‘Everyday soiling on glass’ above. | ·Remove stains left by melts and sugary food or spillovers as soon as possible. If left to cool on the glass, they may be difficult to remove or even permanently damage the glass surface. ·Cut hazard: when the safety cover is retracted, the blade in a scraper is razor-sharp. Use with extreme care and always store safely and out of reach of children. |
| Spillover on the touch controls and stainless steel strip | ①Switch the power to the cooktop off at the wall. ②Soak up the spill. ③Wipe the touch control area with a clean damp sponge or cloth. ④Wipe the area completely dry with a paper towel. ⑤Switch the power to the cooktop back on at the wall. | ·The cooktop may beep and turn itself off, and the touch controls may not function while there is liquid on them. Make sure you wipe the touch control area dry before turning the cooktop back on. |
Cleaning the filter cover and grease filter
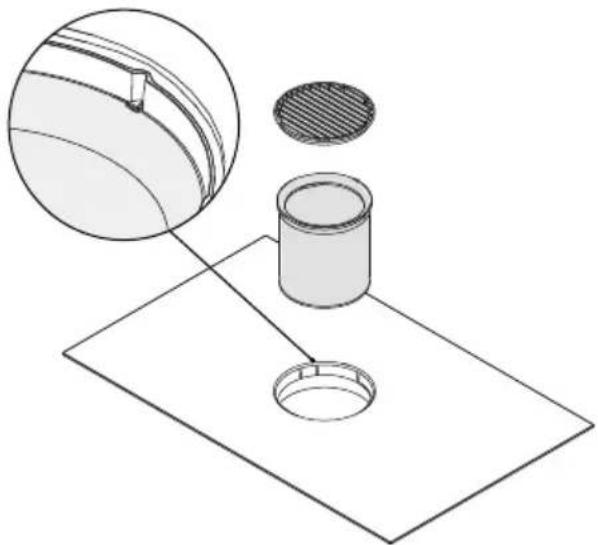
① Lift the filter cover out.
② Rotate the grease filter clockwise to unlock, then lift out.
③ Wash with hot soapy water or in the dishwasher.
For optimum performance clean the filter and cover once a week.
Cleaning the overflow trap
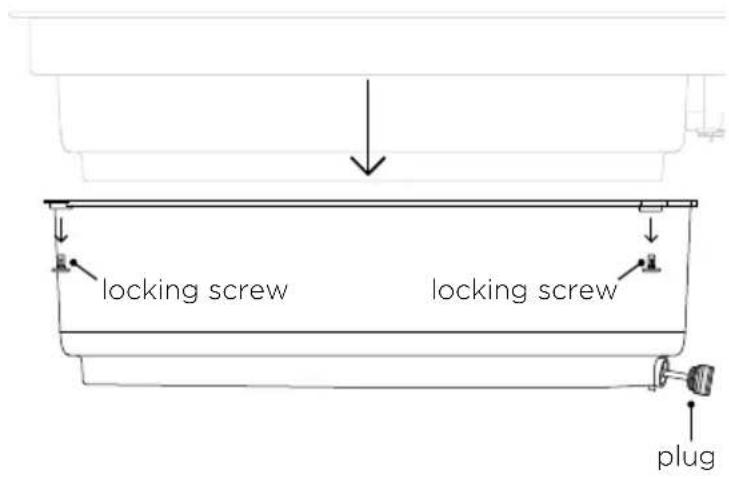
To remove the overflow trap
The overflow trap is located under the cooktop unit.
② Remove the plug in the base of the trap to drain any excess grease and liquids into a bucket or container.
③ Locate the locking Screws securing the trap and rotate by 90^ to unlock.
Gently remove the trap and clean in hot soapy water.
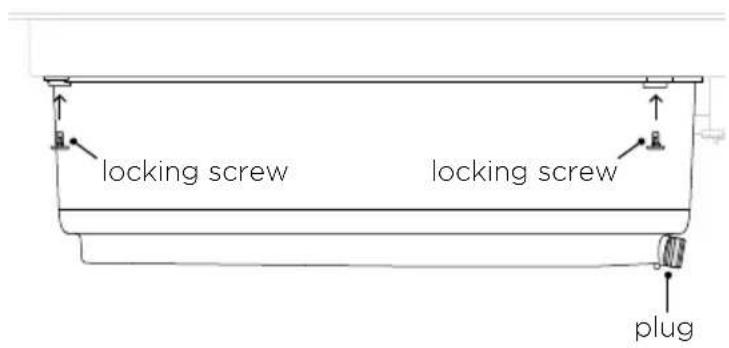
To refit the overflow trap
① Position the rear of the trap first then push up firmly.
Push both locking screws upwards and rotate by 90^ to engage the lock.
③ Ensure the plug in the base of the trap has been refitted.
Enable grease filter maintenance alert
By default, the grease filter maintenance alerts will be deactivated.
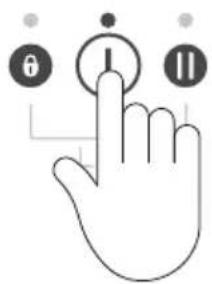
①
Ensure the cooktop is turned ON and all extraction and cooking zones are turned OFF.
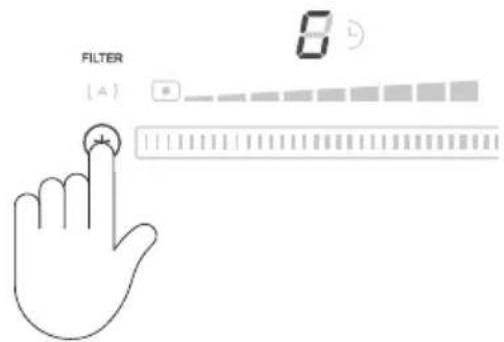
②
Press and hold until it minimates dimly and 9 shows in the display.
To confirm, press the extraction speed area.
Grease filter maintenance alert
If the grease filter requires cleaning, FILTER will illuminate and 9 will show in the display for the first 10 seconds after turning the cooktop on.
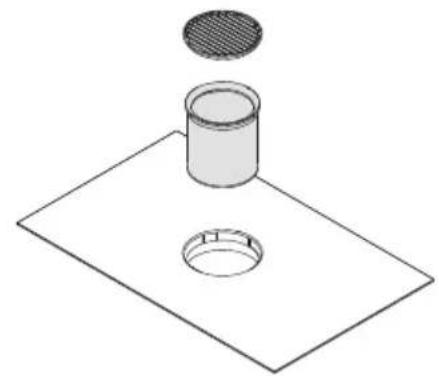
①
Refer to "Cleaning the filter cover and grease filter" for guidance.
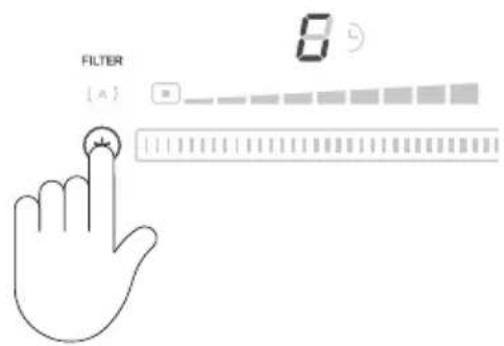
②
Press and hold to clear the alert. If FILTER is still illuminated, ensure the grease filter has been cleaned and refitted correctly
| PROBLEM POSSIBLE CAUSES WHAT TO DO | ||
| The cooktop cannot be turned on. | No power. Make sure the cooktop is connected to the power supply and that it is switched on at the wall. Check whether there is a power outage in your home or area. If you've checked everything and the problem persists, call your Authorized Service Centre or Customer Care. | |
| The touch controls are unresponsive. | The controls are locked. Unlock the controls. See section 'Safety features' for instructions. | |
| The touch controls are difficult to operate. | There may be a slight film of water over the controls or you may be using the tip of your finger when touching the controls. | Make sure the touch control area is dry and use the ball of your finger when touching the controls. |
| The glass is being scratched. | Rough-edged cookware. Use cookware with flat and smooth bases. See 'Cookware'. | |
| Unsuitable, abrasive scouser or cleaning products being used. | See 'Care and cleaning'. | |
| Some or all displays flash and there is a continuous beep. | Liquid has spilled onto the touch control area. | Switch the power to the cooktop off at the wall and see 'Care and cleaning' for instructions. |
| There are objects (eg utensils) on the touch control area. | Remove the objects from the touch control area. | |
| Several touch controls are registering continuous contact (eg due to someone resting their hand or arm on the touch control area). | Remove the cause of continuous contact. | |
| Pans do not become hot. The heat setting display comes on, but the does not flash when I remove a pan. -shows in the timer display when I turn on the cooktop. | The cooktop is in 'Display mode'. | Contact Customer Care or your Authorized Service Centre. |
| Some pans make crackling or clicking noises. | This may be caused by the construction of your cookware (layers of different metals vibrating differently). | This is normal for induction cookware and does not indicate a fault. |
| The cooktop makes a low humming noise when used on a high heat setting (especially PowerBoost). | This is caused by the technology of induction cooking. | This is normal, but the noise should quieten down or disappear completely when you decrease the heat setting. |
| Fan noise coming from the cooktop. | A cooling fan built into your cooktop has come on to prevent the electronics from overheating. It may continue to run even after you've turned the cooktop off. | This is normal and needs no action. Do not switch the power to the cooktop off at the wall while the fan is running. |
| Pans do not become hot and appears in the display. | The cooktop cannot detect the pan because it is not suitable for induction cooking. | Use cookware suitable for induction cooking. See section 'Cookware'. |
| The cooktop cannot detect the pan because it is too small for the cooking zone or not properly centred on it. | Centre the pan and make sure that its base matches the size of the cooking zone. | |
| I have locked the control panel while two cooking zones are bridged and the cooktop has not turned off. | This is normal. The cooking zones will remain inactive, but the indicator lights will remain on. | Unlock the controls, deactivate the bridging zones (by touching the two setting selectors simultaneously) and then lock the cooktop again. |
| Extraction performance has decreased. | The grease filter needs cleaned. | Clean the grease filter. Refer to 'Maintenance alerts' for details. |
| Cookware is blocking extraction. | Tilt cookware lids to allow steam to vent towards the centre of the cooktop. | |
| P flashes in the display when you are trying to set PowerBoost. | PowerBoost is temporarily unavailable because the cooktop needs to protect itself from overheating. | Allow the cooktop to cool down. |
| PROBLEM POSSIBLE CAUSES WHAT TO DO | |
| The cooktop or a cooking zone has turned itself off unexpectedly, a tone sounds and an error code is displayed (typically E or Er- alternating with one or two digits in the cooking zone displays). | Technical fault. Please note down the error letters and numbers, switch the power to the cooktop off at the wall, and contact your Authorized Service Centre or Customer Care with the error code information. |
Before you call for service or assistance:
Check the things you can do yourself. Refer to the installation instructions and your user guide and check that:
① Your product is correctly installed.
You are familiar with its normal operation.
If after checking these points you still need assistance or parts, please refer to the Service & Warranty book for warranty details and your nearest Authorized Service Centre, Customer Care, or contact us through our website www.fisherpaykel.com.
Contact details
For replacement parts or if further help is needed concerning this appliance call: Toll Free 1888 9 FNP USA (1 888 936 7872)
Or write to:
Fisher & Paykel Appliances Inc.
695 Town Center Drive,
Suite 180 Costa Mesa.
CA 92626-1902
USA
Complete and keep for safe reference:
Model
Serial No.
Purchase Date
Purchaser
Dealer
Suburb
Town
Country
FISHERPAYKEL.COM
Fisher & Paykel Appliances 2021. All rights reserved.
The models shown in this guide may not be available in all markets and are subject to change at any time.
The product specifications in this guide apply to the specific products and models described at the date of issue. Under our policy of continuous product improvement, these specifications may change at any time.
For current details about model and specification availability in your country, please go to our website or contact your local Fisher & Paykel dealer.
FISHER & PAYKEL
SURFACE DE CUISSON À INDUCTION AVEC ASPIRATION DESCENDANTE
MINIMALISTE
CID364DTB4
GUIDE D'UTILISATION
USCA
Fisher & Paykel Appliances Inc.
695 Town Center Drive,
Suite 180 Costa Mesa.
CA 92626-1902
États-Unis