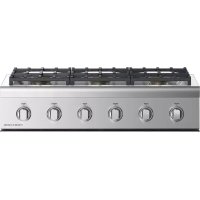
CPV2366L - Cooker Fisher & Paykel - Free user manual and instructions
Find the device manual for free CPV2366L Fisher & Paykel in PDF.


User questions about CPV2366L Fisher & Paykel
0 question about this device. Answer the ones you know or ask your own.
Ask a new question about this device
Download the instructions for your Cooker in PDF format for free! Find your manual CPV2366L - Fisher & Paykel and take your electronic device back in hand. On this page are published all the documents necessary for the use of your device. CPV2366L by Fisher & Paykel.
USER MANUAL CPV2366L Fisher & Paykel
If the information in this manual is not followed exactly, a fire or explosion may result causing property damage, personal injury or death.
Do not store or use gasoline or other flammable vapors and liquids in the vicinity of this or any other appliance.
NEVER use this appliance as a space heater to heat or warm the room. Doing so may result in carbon monoxide poisoning and overheating of the appliance.
WHAT TO DO IF YOU SMELL GAS
- Do not try to light any appliance.
- Do not touch any electrical switch.
- Do not use any phone in your building.
- Immediately call your gas supplier from a neighbor's phone. Follow the gas supplier's instructions.
If you cannot reach your gas supplier, call the fire department.
Installation and service must be performed by a qualified installer, service agency or the gas supplier.
Safety and warnings 2
Introduction 7
First use - seasoning the griddle 9
Using the cooktop burners 10
Guidelines for using the cooktop burners 11
Using the grill 12
Using the griddle 14
Care and cleaning 15
Troubleshooting 20
Warranty and service 23
IMPORTANT!
SAVE THESE INSTRUCTIONS
The models shown in this user guide may not be available in all markets and are subject to change at any time. For current details about model and specification availability in your country, visit our website fisherpaykel.com or contact your Fisher & Paykel dealer.
To reduce the risk of fire, electrical shock, injury to persons, or damage when using the appliance, follow the important safety instructions listed below:

WARNING!
Electrical Shock Hazard
This appliance is equipped with a three-prong grounding plug for your protection against shock hazard and should be plugged directly into a properly grounded power outlet. Do not under any circumstances cut or remove the grounding prong from this plug. Failure to follow this advice may result in electrical shock.

WARNING!
Fire Hazard
Never use your appliance for warming or heating the room.
Persons could be injured or a fire could start.
Keep the area around the appliance free from combustible materials (eg wall coverings, curtains, drapes), gasoline and other flammable vapors and liquids.
Do not let cooking grease or other flammable materials accumulate on or near the appliance.
Never leave the cooktop burners unattended when in use -
Boilover causes smoking and greasy spillovers that may ignite.
Be sure all the controls are turned off and the appliance is cool before using any type of aerosol cleaner on or around the appliance.
Chemicals in such cleaners could, in the presence of heat, ignite or cause metal parts to corrode.
Failure to follow this advice may result in death or serious injury.

WARNING!
Explosion Hazard
If you smell gas, do not use the appliance. Open a window or door to let the gas escape, then follow the instructions on the inside front cover of this manual.
Do not use water on grease fires. A violent steam explosion may result. Turn all burners off, then smother fire or flame or use dry chemical or foam-type extinguisher.
Do not heat unopened food containers such as cans - Build-up of pressure may cause container to burst and result in injury. Failure to follow this advice may result in injury or death.

WARNING!
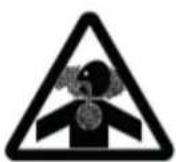
Poisoning Hazard
Clean the appliance with caution. If a wet sponge or cloth is used to wipe spills on a hot cooking area, be careful to avoid steam burn.
Some cleaners can produce noxious fumes if applied to a hot surface. Follow the directions of the cleaner manufacturer.
Never use this appliance as a space heater to heat or warm the room.
Doing so may result in carbon monoxide poisoning and overheating of the appliance.
Failure to follow this advice may result in poisoning or death.

WARNING!

Hot Surface Hazard
Accessible parts may become hot during use.
Do not touch burners, areas near burners, the grill, griddle or grease drip-pans - These may be hot enough to cause burns even though they are dark in color. During and after use, do not touch, or let clothing or other flammable materials contact these parts and surfaces until they have had sufficient time to cool. Other parts and surfaces of the appliance may become hot enough to cause burns - among these areas are the grates, back trim at the back of the cooktop, front edge, surfaces adjacent to the cooktop.
Use only dry potholders - Moist or damp potholders on hot surfaces may result in burns from steam. Do not let potholder touch hot heating elements. Do not use a towel or other bulky cloth.
Let hot grease cool before attempting to handle it.
Failure to follow this advice may result in serious injury.
IMPORTANT SAFETY INSTRUCTIONS!
- Read all the instructions before using the appliance. Use the appliance only for its intended purpose as described in these instructions.
- Proper installation - Be sure your appliance is properly installed and grounded by a qualified technician.
- Do not operate the appliance if it is damaged or not working properly. If you received a damaged product, contact your dealer or installer immediately.
- Be sure to have the installer show you where and how to turn off the power supply to the cooktop (ie location of the main fuse or circuit breaker panel) and where and how to turn off the gas supply to the cooktop in an emergency.
- Do not leave children alone - Children should not be left alone or unattended in the area where the appliance is in use. They should never be allowed to play with the appliance or to sit or stand on any part of the appliance.
- Caution - for safety reasons, do not store items of interest to children in cabinets above a cooktop or at the back of the cooktop - children climbing on the cooktop to reach items could be seriously injured.
- Wear proper apparel - Loose-fitting or hanging garments should never be worn while using the appliance.
- User servicing - Do not repair or replace any part of the appliance unless specifically recommended in the manual. All other servicing should be referred to a qualified technician. Technicians must disconnect the appliance from the power supply before any servicing.
- Storage in or on appliance - Flammable materials should not be stored in an oven or near the cooktop.
- Be careful when reaching for items stored in cabinets above the appliance.
IMPORTANT SAFETY INSTRUCTIONS!
- Clean only the parts listed in this manual.
- Do not use a steam cleaner to clean any part of the appliance.
- Do not obstruct the flow of combustion and ventilation air to the appliance.
- Do not use any cookware on the grill or griddle.
- Top cover (lid) must be removed when the grill or griddle is in operation.
- When using the grill or griddle, make sure the grease drip-pan is in place - absence of this during use may subject wiring or components underneath to damage.
- The grill and griddle cannot be used in the event of a power failure. Do not attempt to operate these during power failure.
- Do not use aluminum foil to line any part of the cooktop. This will cause heat to be trapped underneath it. This trapped heat can upset the cooking performance and damage the finish of the cooktop parts.
- For safety reasons, the cooktop burner flame size should be adjusted so it does not extend beyond the edge of the cookware.
- Use cookware of the appropriate size and construction for the type of cooking. This appliance is equipped with burners of different sizes. Cookware must be matched to the size of the burner. Select utensils with flat bottoms large enough to cover the burner flames. The use of undersize utensils will expose a portion of the burner flames to direct contact and may result in ignition of clothing. Proper relationships of utensil to burner will also improve efficiency.
- Protective liners - Do not use aluminum foil to line grease drip-pans.
- Glazed cooking utensils - only certain types of glass, glass/ceramic, ceramic, earthenware, or other glazed utensils are suitable for cooktop service without breaking due to the sudden change in temperature.
- Utensil handles should be turned inward and not extend over adjacent cooktop burners - To reduce the risk of burns, ignition of flammable materials, and spillage due to unintentional contact with the utensil, the handle of a utensil should be positioned so that it is turned inward, and does not extend over adjacent cooktop burners.
- The Governor of California is required to publish a list of substances known to the State of California to cause cancer or reproductive harm and requires businesses to warn customers of potential exposures to such substances.
- WARNING!: This product emits exhaust that contains chemicals known to the State of California to cause cancer, birth defects, and other reproductive harm. To reduce the risk from such chemicals, make sure this appliance is installed, operated, and maintained according to the manufacturer's instructions.
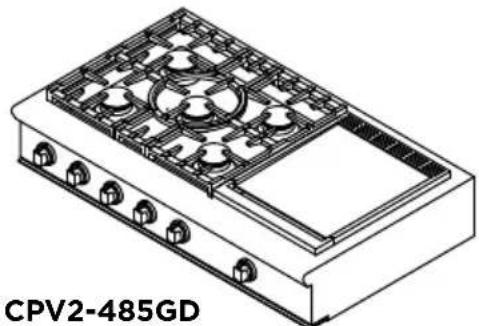
48" models
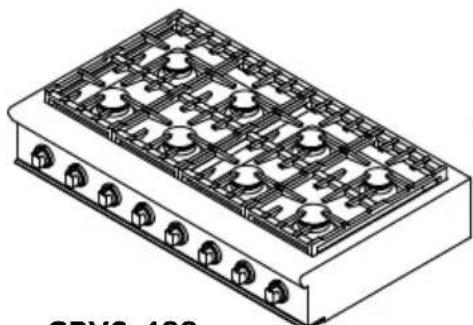
CPV2-488
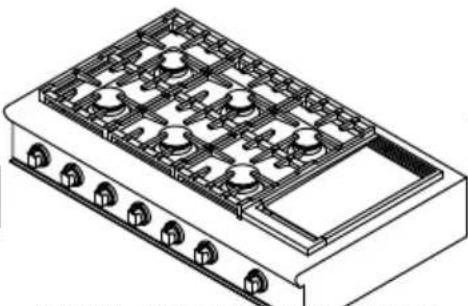
CPV2-486GD CPV2-486GL
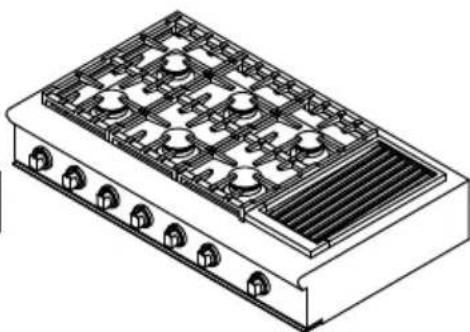
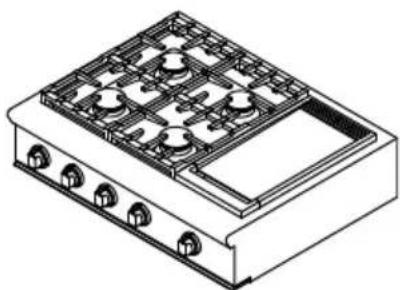
36" models
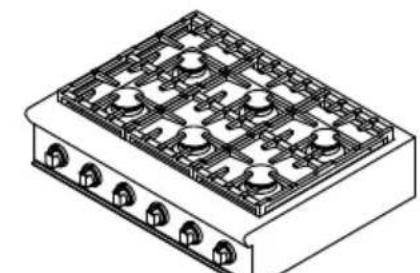
CPV2-366 CPV2-364GD
30" models
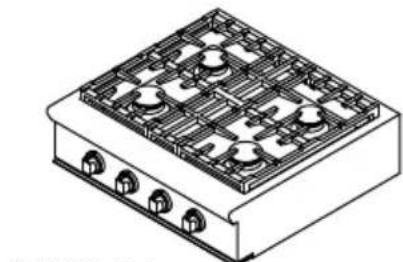
CPV2-304
Before you start
① Find the model and serial numbers on the label on the underside of the front trim, on the right (see the drawing below). Note these numbers down for future reference in the space provided in section `Warranty and service'.
② Read this guide, taking special note of the 'Safety and warnings' section.
③ Remove all the packaging from the cooktop. Recycle items that you can. If any adhesive residue is left on surfaces, remove this using dishwashing liquid on a soft cloth. Do not use any harsh or abrasive cleaners.
④ If your cooktop has a griddle, make sure you season it before using it for cooking. See section 'First use - seasoning the griddle' for instructions.
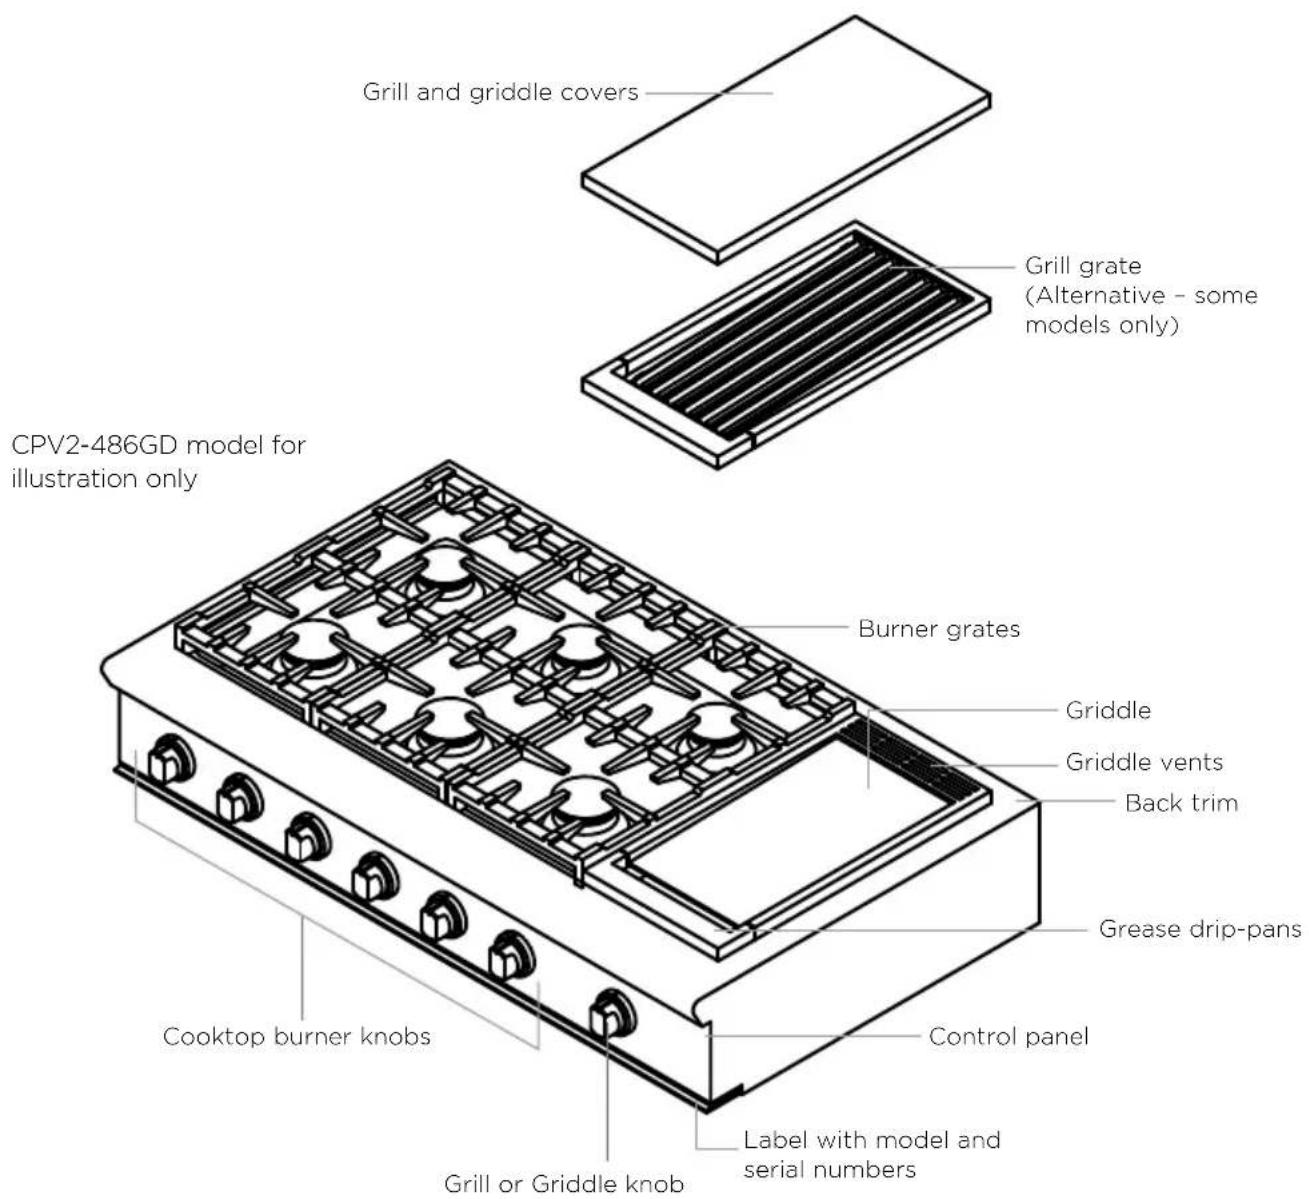
IMPORTANT!
Do not block the vents of the griddle with cookware, utensils or towels. During cleaning, take care not to let any liquids run down these vents.
① Clean the griddle thoroughly with hot, soapy water to remove any protective coating.
② rinse with a mixture of 1 cup water and 1 / 4 cup white vinegar, then dry thoroughly.
Pour 1 tsp vegetable (but not corn) oil into the center of the griddle, then rub it over its entire surface, using a soft, heavy cloth.
④ Turn the griddle knob counterclockwise to 350^ .
⑤ When the oil begins to smoke, turn the knob clockwise back to OFF and allow the griddle to cool.
Repeat steps 3 to 5.
⑦ Wipe the entire surface of the griddle using a soft, heavy cloth.
Apply a very thin layer of vegetable (but not corn) oil.
⑨ Check the grease drip-pan and clean if necessary. Discard any liquid or soiling that may have collected in the grease drip-pan during the conditioning.
The griddle is now ready to use.
- For best results, re-season the griddle after long periods of non-use.
Note: the griddle will darken with use. This is normal.
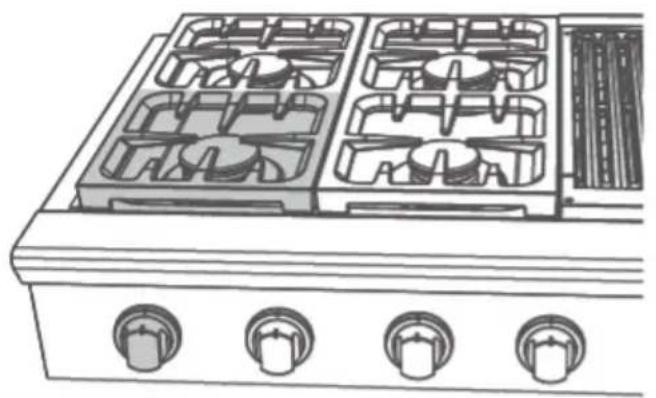
① Identify the knob of the burner you want to use.
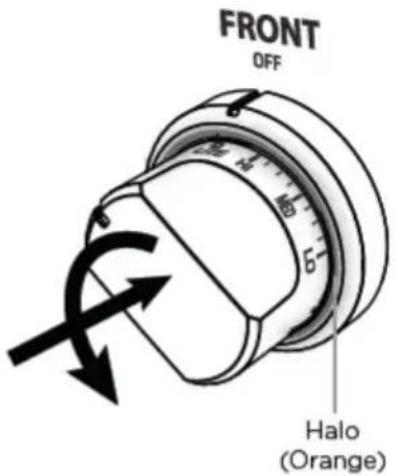
② Push the knob in and turn it counterclockwise to LITE.
Make sure you stop at LITE before turning the knob to any flame setting.
The halo will glow orange.
- You will start hearing a clicking sound. If there is no clicking, turn the knob clockwise back to OFF and see 'Troubleshooting' for advice.
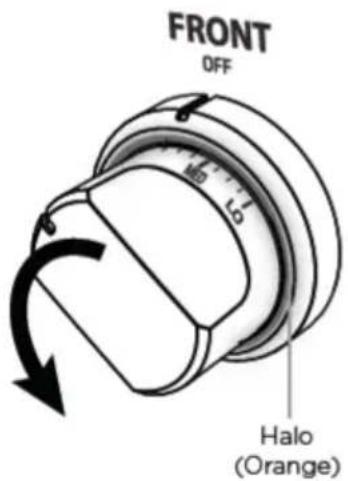
③ When the burner has lit, turn the knob to any setting between HI (high) and SIM (simmer).
The clicking should stop as soon as the burner has lit.
If the burner doesn't light, and/or the clicking doesn't stop, or the flames are not blue and well-defined, turn the knob clockwise back to OFF and see 'Troubleshooting' for advice.
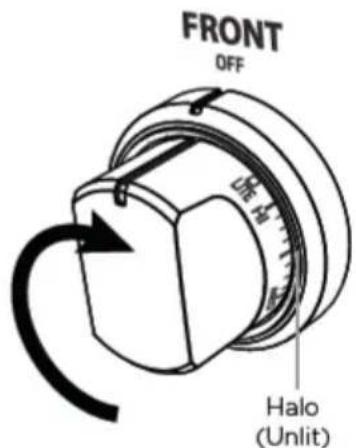
When you have finished cooking, turn the knob clockwise back to OFF.
The knob will release and the burner and halo will go out.
If you are using LP gas, there may be a slight 'extinction pop' or flash at the flame spreader a few seconds after the burner has been turned off. This is normal for LP gas.
Guidelines for using the cooktop burners
- All burners have the same low turn-down setting (SIM) for gentle simmering (1,300 BTU/hr). Use the SIM setting for melting chocolate and butter, cooking rice and delicate sauces, simmering soups and stews, and keeping cooked food hot.
-
For cooking that requires especially intense heat (eg searing meat, wok-cooking, stir-frying), use the burners listed below, as these have a higher maximum output (23,500 BTU/hr for Natural gas) than the other burners (18,500 BTU/hr for Natural gas).
-
CPV2-485GD models: Center burner
-
CPV2-488/CPV2-366: Front left burner or front right burner
All other models: Front left burner -
Never leave the cooktop unattended when in use. Boilover causes smoking and greasy spills that may ignite.
- Never allow flames to extend beyond cookware or curl up its sides. This could discolor and damage the utensil and you may get burned touching a hot handle.
- Keep handles out of the way. Turn handles so that they don't extend over the edge of the cooktop or another burner that is on.
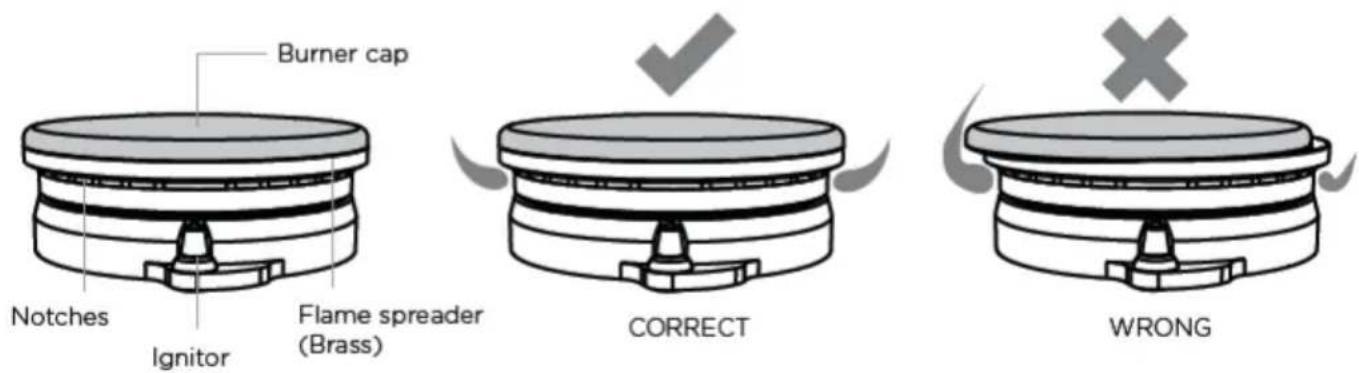
Take care when deep-frying. Oil or fat can overheat very quickly, particularly on a high setting. - Make sure that all burner parts are properly in place. Incorrectly or incompletely assembled burners may produce dangerous flames. See 'Replacing the burner parts' in 'Care and cleaning'.
- Keep the burners clean. Especially after a spill or boilover, make sure you clean the affected burners before using them again. Food residue may clog the ignitor and the notches of the flame spreader, stopping the burner from functioning correctly. See 'Care and cleaning' for instructions.
- Check that the burner flames are regular. They should be blue with no yellow tipping, and burn without fluttering all around the burner cap. If not, see 'Troubleshooting' for advice.
- Use woks only with a wok ring. Wok rings can be purchased separately through your Fisher & Paykel dealer or Customer Care. To use, place the wok ring over the grates, making sure the small protrusions on its bottom straddle the grate fingers. The wok ring should be stable and unable to rotate.
The grill has a reversible grate. It will change color with use as oils cook onto the surface. This is normal and doesn't affect grilling performance.
For foods where you want the fat to run down, such as:
- Hamburgers patties
- Steak
- Sausages
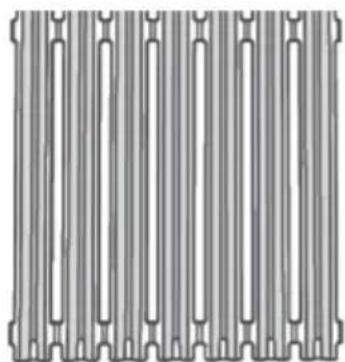
Ridged side
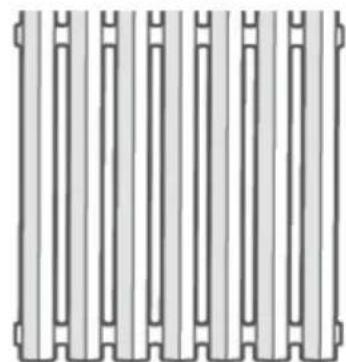
Flat side
For foods that need more support and don't contain a lot of fat, such as:
Fish
Vegetables
- Lean chicken pieces
To use the grill
① Remove the cover and check that the grease drip-pan and the grill grate are properly in place and you have the best side for your food. The grate should always be sloping towards the grease drip-pan, with its support bar firmly resting in the groove of the rear ledge, as shown.
IMPORTANT!
Never turn on or use the grill with the grill cover in place.
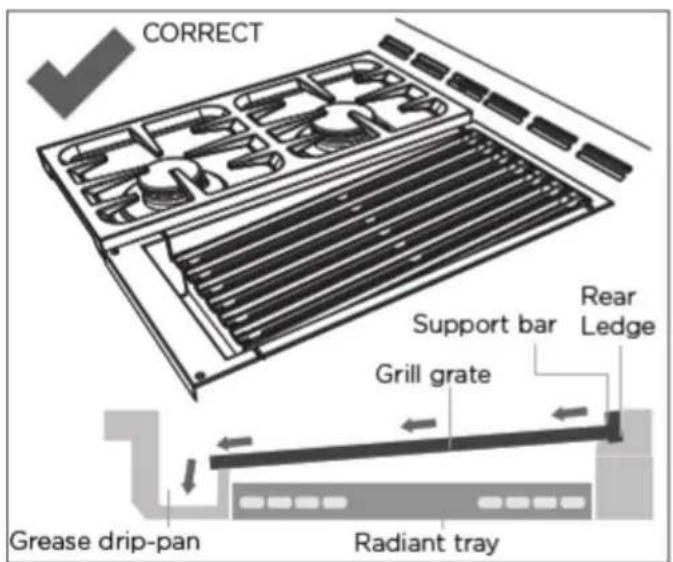
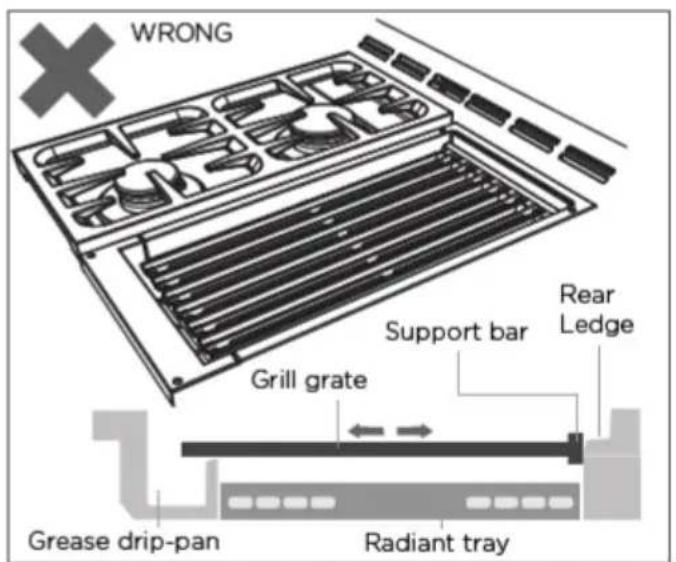
② Turn the grill knob counterclockwise to the LITE/HI setting.
The halo around the knob will glow orange.
There may be a delay of a minute or so before the grill burner lights. This is normal.
③ Allow the empty grill to preheat for about 15 minutes.
④ Adjust the heat anywhere between HI (high) and LO (low) during grilling.
⑤ When you have finished using the grill, turn the grill knob clockwise back to OFF.
⑥ Clean the grill grate immediately after use. See 'Care and cleaning' for instructions.
When the grill has cooled down, clean the grease drip-pan. See 'Care and cleaning' for instructions.
Grill cooking guidelines
IMPORTANT!
- Never leave the grill unattended during use. Grease drippings may cause short flare-ups or even sustained flaming. If left unattended, these may cause fire.
- Make sure you have your ventilation hood set on maximum during grilling.
- Clean the grease drip-pan after every use. Accumulated grease can be a fire hazard.
The longer you preheat the grill, the darker the grill marks will appear on food. - Trim excess fat off meat to minimize flare-ups.
- Generally, start out on a high setting to sear or brown meat, then lower the setting to make sure that meat or poultry is cooked through.
- When turning meat over, use tongs or a spatula as these will not puncture the meat and allow the juices to run out.
The griddle will darken and 'season' with use, developing a natural non-stick coating. When it is properly seasoned it can be used without any additional oil.
① Remove the cover and check that the grease drip-pan is properly in place.
IMPORTANT!
- Never turn on or use the griddle with the cover in place.
-
Always keep the vents at the rear of the griddle frame clear of any object: airflow to the vents must not be blocked.
② If you haven't used the griddle for a long time, re-season it. See section 'First use - seasoning the griddle' for instructions.
③ Turn the griddle knob counterclockwise to the desired temperature. -
There may be a delay of a minute or so before the griddle comes on. This is normal.
While the griddle is heating up, the halo around the knob will glow white.
See the 'Griddle cooking chart' below for suggestions.
④ When the halo turns orange (after about 15 minutes), the griddle is ready to use.
- Note: the halo may alternate between white and orange during use as the griddle maintains the set temperature.
⑤ When you have finished using the griddle, turn its knob clockwise back to OFF.
⑥ Clean the griddle and grease drip-pan after every use. The griddle should be cleaned very carefully while it is still hot. See 'Care and cleaning' for instructions.
IMPORTANT!
Clean the grease drip-pan after every use. Accumulated grease can be a fire hazard.
Griddle cooking chart
| FOOD TEMPERATURE SETTING | |
| Eggs 225-250 | °F |
| Bacon, ham, pork chops 300-325 | °F |
| Sausage, grilled cheese sandwiches 325-350 | °F |
| Pancakes, French toast 350-375 | °F |
| Hash brown potatoes 400-425 | °F |
DOS DON'TS
- Read these cleaning instructions and the 'Safety and warnings' section before you start cleaning your cooktop.
- Before cleaning or removing any part, make sure that everything on the cooktop has been turned off.
Unless suggested otherwise in the chart following, allow any part to cool to a safe temperature before cleaning. If you do need to handle a warm or hot part (eg grill or griddle), take extreme care. Wear long protective mitts to avoid burns from steam or hot surfaces. -
Try using any cleaner on a small area first, to ensure it doesn't stain.
See the page following this chart for instructions on replacing the burner parts.
To help you identify any parts, see illustrations in section 'Introduction' and after this cleaning chart. -
Do not use aerosol cleaners until the cooktop has completely cooled. The propellant substance in these cleaners could catch fire in the presence of heat.
- Do not let soiling or grease accumulate anywhere on the cooktop. This will make future cleaning more difficult and may present a fire hazard.
- Do not use any abrasive or harsh cleaners, cloths, scouring pads or steel wool. These will scratch your cooktop and damage its appearance.
- Do not use a steam cleaner to clean any part of the cooktop.
- Do not perform any cleaning or maintenance on parts not specifically named in the chart below. If in doubt, contact Customer Care.
- Do not lift the black grill and griddle frames off the cooktop.
Manual cleaning chart
| WHAT? HOW OFTEN? | HOW? IMPORTANT! | |
| Control panel | ① Soften any stubborn stains under a hot soapy cloth. | • Always read the label to make sure your stainless steel cleaner does not contain chlorine compounds as these are corrosive and may damage the appearance of your cooktop. |
| Sump area around cooktop burners | ② Clean with a solution of mild detergent and hot water, then wipe dry with a microfiber cloth. | |
| Grill and griddle covers | ③ For extra shine, use a suitable stainless steel cleaner and polish, following manufacturer's instructions. | • Do not use and take care not to spill any stainless steel cleaner on the knobs. |
| Back trim | Always rub the stainless steel in the direction of the polish lines. | These are not stainless steel parts and their surface may be damaged by stainless steel cleaner. |
| Front trim | ||
| After every use | ||
| Control knobs | ① Wipe with a damp cloth using a solution of mild detergent and hot water. ② Dry thoroughly with microfiber cloth. If wished, the knobs can be removed for cleaning. Before removing a knob, make sure that it is set to OFF, then pull it straight towards you. Remove only one knob at a time, and make sure that you refit it on its shaft completely and correctly after cleaning. | ·Do not use stainless steel cleaner on these parts, as doing so may damage their coating. ·The knobs are not interchangeable: if you remove them for cleaning, do so one at a time. This is to ensure that you replace each knob exactly where you removed it from. |
| Burner caps and brass flame spreaders | ① Check that the burner is turned OFF and allow it to cool. ② Lift off the burner cap and brass flame spreader. ③ Wash them in hot soapy water, rinse, and dry. ·Use a stiff nylon brush or straight-ended paper clip to clear the notches of a flame spreader. ④ Replace the flame spreader and burner cap correctly. See ‘Replacing the burner parts’. | ·Keep the notches of the flame spreaders clear. Soiling may clog these and cause ignition problems. ·Before replacing the burner parts, check that they are dry. Wet burner parts may result in an irregular flame. ·Before lighting a burner you have reassembled, check that all of its parts are positioned correctly. Incorrect assembly can cause dangerous irregular flames and ignition problems. |
| Ignitors | ① Check that the burner is turned OFF. ② Clean the ignitor with a small brush (eg old toothbrush) or cotton swab that has been dipped into rubbing alcohol. | The ignitors must be kept clean and dry to work correctly. Dirty or wet ignitors could cause constant clicking and sparking, even if a flame is present. |
| Burner grates | ① Wait until the grates have cooled completely. ② Carefully lift the grates off the cooktop and place them on a protected surface. ③ To remove stubborn stains, soak the grates in a mixture of clothes washing detergent and water. ④ Wash in a mixture of hot water and dishwashing liquid, then rinse and allow to dry. ·The grates are also dishwasher safe. | ·Take care, the grates are heavy. ·Make sure you place a dish towel or other soft cover on the surface before putting a grate on it. |
| Grill grate | ① Check that the grill has been turned off. ② Put on barbecue mitts for protection against steam and heat. ③ Scrub the grill with a brass bristle barbecue brush dipped frequently into a bowl of warm water. The softened food particles will drop onto the radiant tray below the grate. ④ Once the grate has cooled completely, remove it and wash in the sink with hot soapy water. ⑤ Dry with a soft cloth, then replace. | ·The grill grate should be cleaned immediately after use (while it is still hot), so that food particles do not become ‘baked-on’ and hard to remove. ·The grill grate will change color with use. This is normal. ·To ensure that you replace the grill grate correctly, see illustrations in section ‘Using the grill’. |
| Radiant tray (under grill grate) | ① Wait until the grill has completely cooled. ② Lift off the grill grate, lift out the grease drip-pan, then carefully lift out the radiant tray. ③ Shake it gently over a sheet of newspaper or waste bin to empty it of ash and food particles. ④ Replace the tray, making sure that the tab with the hole is at the front of the cooktop. ⑤ Replace the grease drip-pan and the grate. | ·The radiant tray doesn’t need regular cleaning. Clean only if there’s evidence of large food particles. ·The radiant tray doesn’t need cleaning with water, as smaller soiling will be burned off during use. ·Make sure you replace the radiant tray correctly: the tab with the hole must be at the front. FRONT Tab with hole |
| Griddle | To remove light soiling after each use: ① While the griddle is still hot, use a square-edged spatula or brass brush to clean the griddle of grease and food particles. ② Once the griddle has cooled to lukewarm, rub the surface lightly with vegetable oil, then wipe thoroughly with a heavy, coarse cloth. To remove stubborn, ‘baked-on’ soiling: ① Use a griddle stone following manufacturer's instructions, taking care to avoid the griddle's black frame. ② Wash with hot soapy water, rinse and dry. ③ Re-season the griddle following instructions in section ‘First use – seasoning the griddle’. | Take extreme care while cleaning a hot griddle: wear barbecue mitts and be careful of steam and hot surfaces. Never flood the hot griddle with cold water: this could cause it to crack or warp. Do not lift the black griddle frame off the cooktop. The griddle assembly must not be removed. The griddle will develop a non-stick coating and will darken or discolor in patches with use: this is normal. |
| Grease drip- pan | ① Wait until the grease drip-pan has cooled to a safe temperature to touch, then slide it slightly towards you and lift out. ② Discard grease, then clean the drip-pan with hot water and dishwashing liquid. The grease drip-pan is also dishwasher-safe. ③ Rinse with clean water and allow to dry. ④ Replace the clean grease drip-pan. | Do not use abrasive cleaners or scouring pads as they may damage the coating. |
| Black frame of grill and griddle | ① Soften any stubborn stains under a hot soapy cloth. ② Clean with a solution of mild detergent and hot water, then wipe dry with a microfiber cloth. | Do not lift the frame off the cooktop. Do not use abrasive cleaners or scouring pads as they may damage the coating. |
| Wok ring (not supplied, purchased separately) | ① To remove stubborn stains, soak the wok ring in a mixture of clothes washing detergent and water. ② Wash in a mixture of hot water and dishwashing liquid, then rinse and allow to dry. The wok ring is also dishwasher-safe. |
Replacing the burner parts
IMPORTANT!
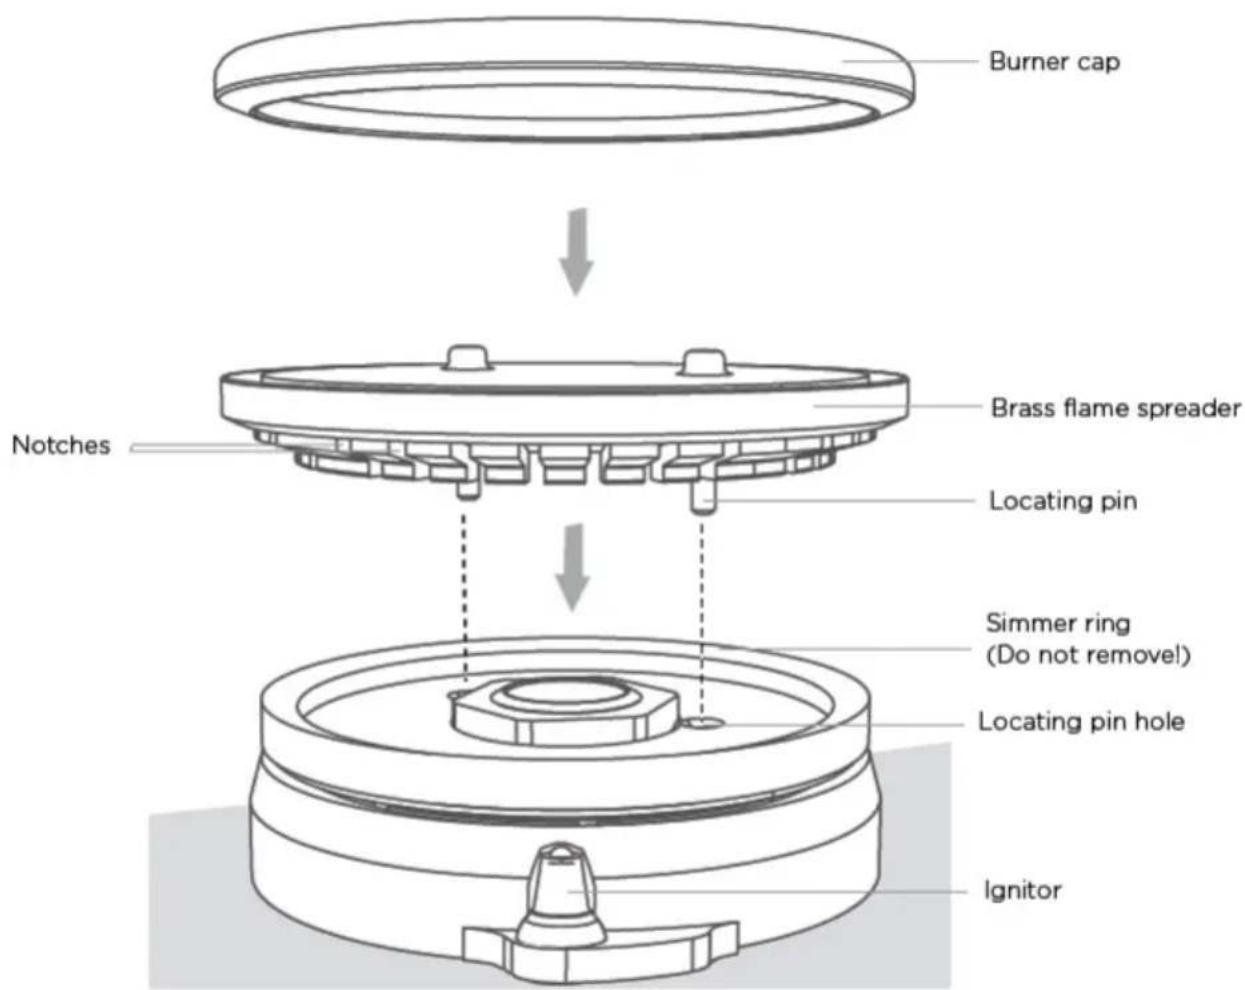
When replacing the burners, make sure that the two locating pins on the bottom of the brass flame spreader are properly aligned with the locating pin holes on the top of the simmer ring. Incorrect alignment will produce a potentially dangerous flame and poor burner performance.
If you can't find an answer to your problem in the chart below, or if the problem cannot be fixed, you will need technical help. Contact your Authorized Service Center or Customer Care.
| PROBLEM POSSIBLE CAUSES WHAT TO DO | ||
| COOKTOP BURNERS | ||
| None of the burners, grill, or griddle will light. | No power supply. | Check that there is no power outage in your area and that the power supply to the cooktop is switched on at the circuit breaker panel. |
| No gas. | Check that the gas supply to the house is working. You should hear the gas when you turn a burner on. If you are using bottled gas, check that it is not empty. | |
| Some burners will not light. | Burner parts or ignitors may be wet, dirty, or misaligned. | Check that the burner parts are clean, dry, and correctly assembled. Check that the ignitors are clean and dry. See ‘Care and cleaning’ for instructions. |
| Flames do not burn all around the burner cap. | ||
| There is no clicking when I try to light a burner. | The ignitor is dirty or there is a power outage. | Clean the ignitor(s). See ‘Care and cleaning’ for instructions. |
| PROBLEM POSSIBLE CAUSES WHAT TO DO | ||
| COOKTOP BURNERS | ||
| There is a power failure - can I still use the cooktop burners? | Power outage in your area. The | cooktop burners can still be used. To light them: ① Holding a lighted match to the flame spreader, push in on the control knob and turn counterclockwise to LITE. ② When the flame is burning all the way around the burner, you may adjust the heat. IMPORTANT! If the flame is blown out during a power failure, turn the knob immediately to OFF, as the burner will not automatically relight and gas may escape. |
| The flames have suddenly gone out. | A draft or a spill has extinguished the flame. | No action required. The burner will detect this and automatically relight. However, if there has been a large spill, we recommend turning the burners off and cleaning the burners and sump area. See ‘Care and cleaning’ for instruetions. |
| There is a slight ‘extinction pop’ or flash after I’ve turned a cooktop burner off. | This is normal for LP gas and requires no action. | |
| PROBLEM POSSIBLE CAUSES WHAT TO DO | ||
| COOKTOP BURNERS | ||
| The burner flames are uneven, very large, yellow or yellow-tipped or sooty. | Technical fault: the gas is the wrong type or hasn't been adjusted properly. | Do not use your cooktop burners. Contact your Authorized Service Center or Customer Care. |
| The ignitor keeps clicking (continuous spark) even when a burner has lit. | Dirty or wet ignitor(s). Clean the ignitor(s).See ‘Care and cleaning’ for instructions. | |
| GRIDLE | ||
| The surface is discolored in patches. | Oils cook onto the surface with repeated use. | This is normal and doesn't affect cooking performance. |
| There is a power failure - can I still use the griddle? | Power outage in your home or neighborhood. | The griddle cannot be used until power is restored. |
| GRILL | ||
| Flare-ups during grilling. Fatty cuts of meat. | Minor flare-ups are normal. To minimize them, trim excess fat off meat before grilling. | |
| Turn the grill off, wait for it to cool, then position it correctly. See ‘Using the grill’ for instructions and illustrations. | ||
| There is a power failure - can I still use the grill? | Power outage in your home or neighborhood. | The grill cannot be used until power is restored. |
Before you call for service or assistance ...
Check the things you can do yourself. Refer to the installation instructions and your user guide and check that:
① Your product is correctly installed.
You are familiar with its normal operation.
If after checking these points you still need assistance or parts, please refer to the Service & Warranty book for warranty details and your nearest Authorized Service Center, Customer Care, or contact us through our website www.fisherpaykel.com.
Contact details
For replacement parts or if further help is needed concerning this appliance call:
Toll Free 1888 9 FNP USA (1888 936 7872)
or write to:
Fisher & Paykel Appliances Inc.
695 Town Center Drive
Suite 180 Costa Mesa
CA 92626-1902
USA
or contact us through our web site www.fisherpaykel.com
Complete and keep for safe reference:
Model
Serial No.
Purchase Date
Purchaser
Dealer
Suburb
Town
Country
FISHER & PAYKEL
LA TABLE DE CUISSON PROFESSIONNELLE
Modèles CPV2
GUIDE D'UTILISATION
CA
MISE EN GARDE!
Fisher & Paykel Appliances Inc.
695 Town Center Drive
Suite 180 Costa Mesa
CA 92626-1902
USA
Fisher & Paykel Appliances 2018. All rights reserved.
The product specifications in this booklet apply to the specific products and models described at the date of issue. Under our policy of continuous product improvement, these specifications may change at any time. You should therefore check with your Dealer to ensure this booklet correctly describes the product currently available.