T50 - Speaker POLK - Free user manual and instructions
Find the device manual for free T50 POLK in PDF.
User questions about T50 POLK
0 question about this device. Answer the ones you know or ask your own.
Ask a new question about this device
Download the instructions for your Speaker in PDF format for free! Find your manual T50 - POLK and take your electronic device back in hand. On this page are published all the documents necessary for the use of your device. T50 by POLK.
USER MANUAL T50 POLK
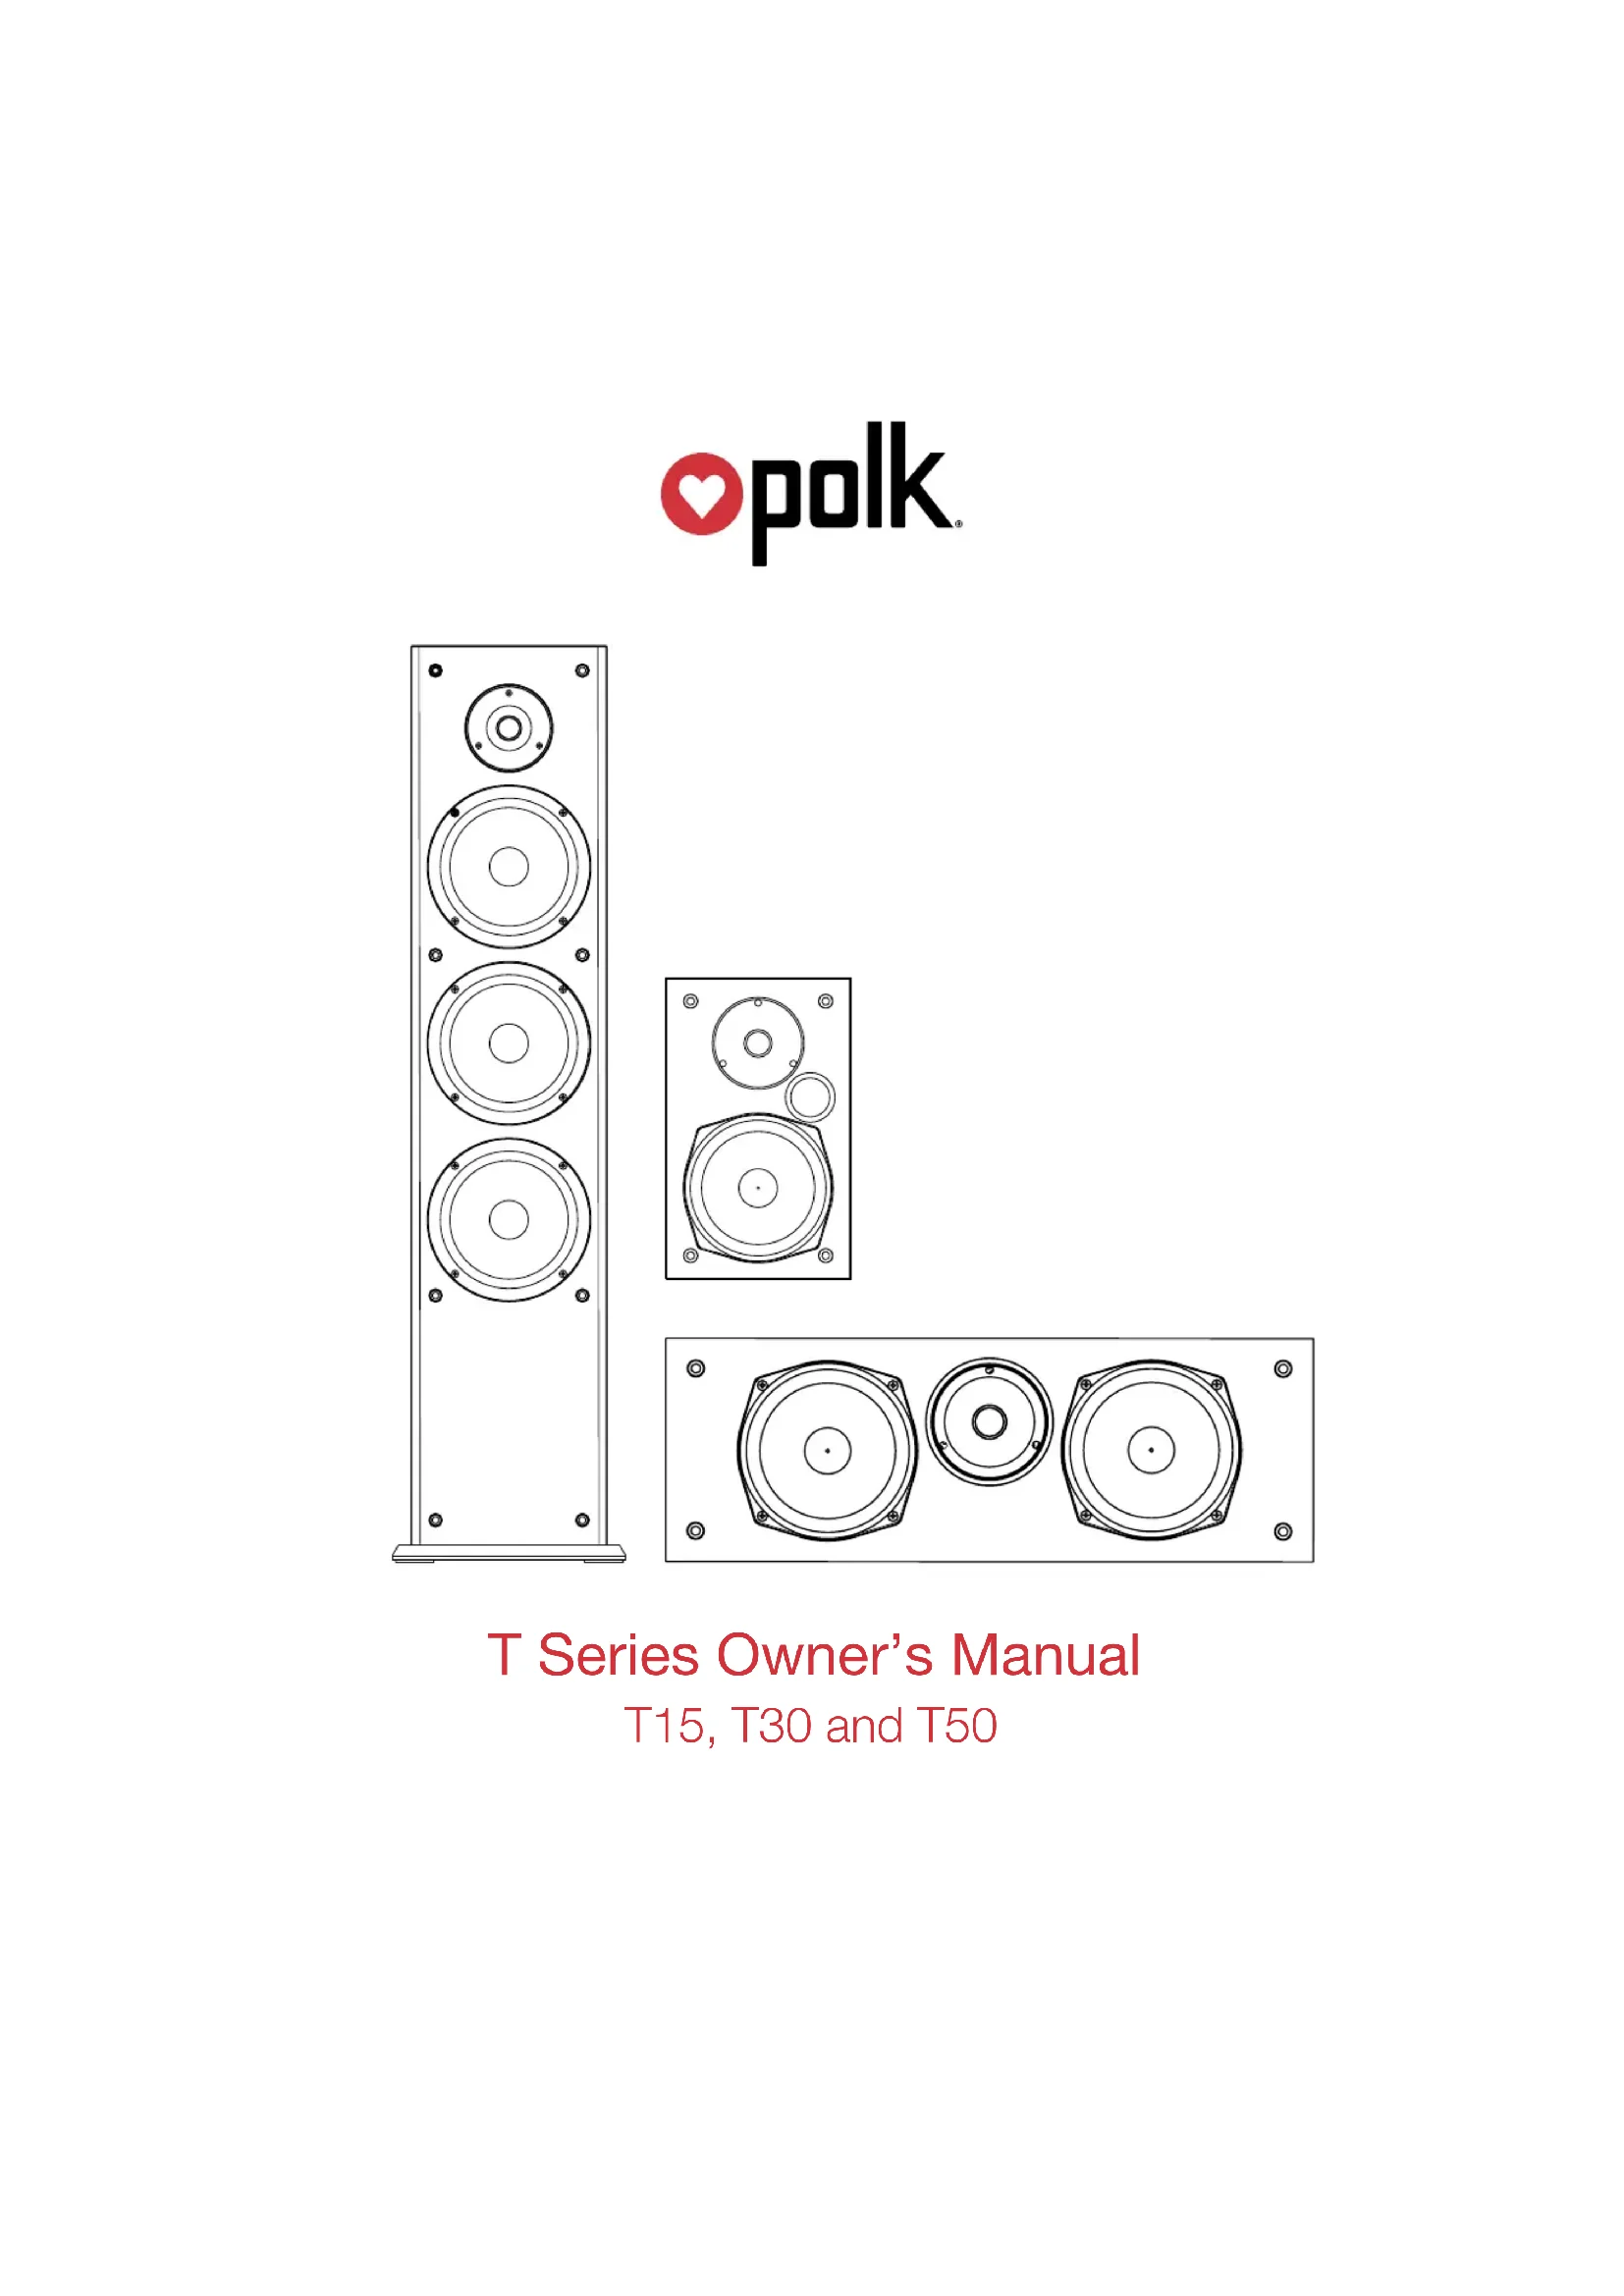
T Series Owner's Manual
T15, T30 and T50
Contents
How to Connect Your System 3
T Series Speaker Positioning 3
Adding Adhesive-Backed Rubber
Feet to the T-Series. 4
Cleaning Your Polk Speakers. 4
Specifications 5
T15 Keyhole Template 23
Technical Assistance & Contact 24
Polk Audio History—A Passion for Sound
Polk Audio was founded in Baltimore in 1972 by Johns Hopkins University graduates, Matthew Polk and George Klopfer. Today, Polk Audio is a leading manufacturer of high-quality home, car and multimedia and the largest audio brand of Sound United. Polk products emphasize superior sound and build quality, and feature many patented and award-winning innovations. Having built their reputation as "The Speaker Specialists" for more than 40 years, Polk products are sold throughout the USA, Canada and in more than 50 countries around the world. Polk Audio's mission is simple: Build high-quality, great-sounding speakers at affordable prices. For the people of Polk Audio, building speakers is not just a job—it's a passion.
Important Notice
Please find the serial number located on the back of the product. It's a good idea to write this number on the warranty sheet and put it in a safe place should you need to reference it later.
Prior to Using Equipment
Polk Audio thanks you for your purchase. Make sure to read this user guide in full before using your speaker system. It will ensure that you get the most from the product and understand all safety requirements. Once you're done reading the user guide, put it in a safe place for later reference.
To avoid damaging your speaker from input overload, please note the following:
- Don't supply power to the speaker system that exceeds its maximum input
- Always make sure the amplifier is turned off when your connecting or disconnecting cables
- If you're using a graphic equalizer to highlight those high and low frequencies, avoid excessive amplifier volume
- Never leave your speaker playing unattended
How to Connect Your System
To get the best sound quality, it's important to wire your speakers correctly.
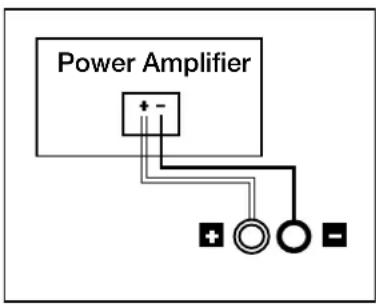
How to Use Binding Post Connectors
Loosen hex nut and insert bare speaker wire through hole. Tighten hex nut down to make connection.
Note: Do not insert insulated section of wire into hole (you will not get a connection).

Basic Speaker Hookup
Make sure that the red (+) and black (-) connectors on your amplifier or receiver connect to the red (+) and black (-) connectors on your speakers. If your speakers sound "thin," with little bass and little or no center image, odds are that one of the speaker wires is connected backwards. Double check all connections.
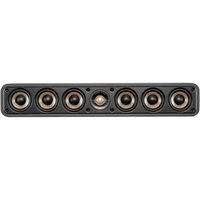
Placement Recommendations for the T30 Center Channel Speaker
The most popular placement for your T30 center channel speaker is on a shelf below your flat screen TV (if you have an older box TV, a popular option is to place your center channel speaker on top of it, anchoring the dialogue and effects to the screen).
Processor Mode for the T30 Center Channel Speaker
Note: Set Center Channel Speaker to "small" in your receiver's Bass Management Settings.
The "bass management" or "speaker configuration" menus of most surround receivers offer the choice of "normal" or "wide" modes for center channel operation. In discrete channel digital processors, these modes are referred to as "small" and "large." Normal (small) mode filters bass frequencies from the center channel speaker and sends them instead to the front left and right main speakers or to the subwoofer output (LFE) jack. Wide (large) mode sends an unfiltered, full-range signal to the center channel speaker. Use the Small (normal) mode for optimum center (and surround) channel performance and reliability.
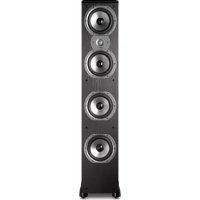
T Series Speaker Positioning
To maximize the sound quality of your Speaker system—whether you've purchased T15 Bookshelf Speakers, a T30 center channel speaker, or T50 tower speakers—correct placement is everything. Take a look at the following examples and give them a try based on the T Series speakers you've purchased.
Note: Your T Series speakers are compatible with 2.0, 2.1, 3.1, 5.1, 7.1 and 9.1 setups (optional subwoofer shown in graphics).
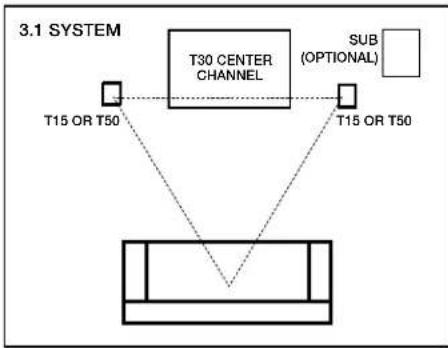
Listening in 3.1 System (T15, T30, T50)
Get the most realistic stereo image by placing speakers as far apart as the listeners are sitting from them. If room conditions require that you place the speakers farther apart, you may choose to angle the speakers toward the middle to support a more solid center image.
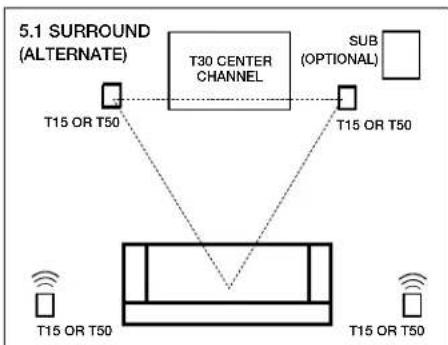
Listening in 5.1 Surround (T15, T30, T50)
You can use the T Series speakers as rear surround speakers in a Polk Audio home theater system. Ideal rear channel surround speaker placement is on a side wall, slightly behind and above the listening position.
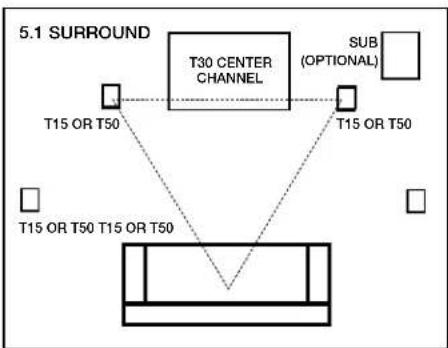
Listening in 5.1 Surround-alternate option (T15, T30, T50)
Alternate rear channel surround speaker placement for T Series speakers. If you cannot place rear surrounds on the side walls, position them on the rear wall above the listening position.
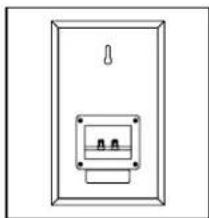
Wall Mounting the T15 Bookshelf Speaker
The T15 features a built-in keyhole slot for easy wall mounting. Follow the steps below to safely wall mount these speakers.
Use template to mark mounting location
Uso #10 panhead scrow for well stud.
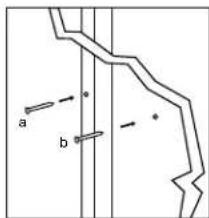
a) Use #10 wall anchors with appropriate weight rating and screws for no wall stud
b) leave screws 1/4'' - 1/8'' (4mm) exposed
Slide the speaker down on the screw head to catch the keyhole slots
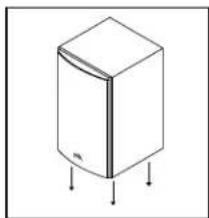
Adding Adhesive-Backed Rubber Feet to the T Series
To keep your Polk speakers firmly in place and prevent damage to floors or furniture, it's a smart idea to attach the included adhesive-backed rubber feet to the bottom of your speaker.

Peel and stick in corners of speaker enclosure
Cleaning Your Polk Speakers
You bought Polk quality for a reason. Keep your speakers looking good for years to come with these simple tips.


Clean cabinet with a damp cloth. Do not use furniture polish on veneer.
T Series Specifications
| T15 T30 T50 | |||
| Speaker Use Bookshelf Center Floor standing | |||
| Driver Complement | |||
| Mid/Woofer 5.25" 5.25" 6.5" Diameter | 6.5" Bass Radiator (X2) | ||
| Tweeter 0.75" 1" Wave Guide Tweeter 1" Wave Guide Tweeter | |||
| Electrical | |||
| Overall Frequency | 60Hz - 24kHz | 38Hz - 24kHz | 38Hz - 24kHz |
| Crossover | 2-way 2-way | 2-way | |
| Response | |||
| Lower | -3db Limit 65Hz | -3db Limit 40Hz | -3db Limit 40Hz |
| Upper | -3db Limit 20kHz | -3db Limit 20kHz | -3db Limit 20kHz |
| Nominal Impedance | 8 ohms | 6 ohms | 6 ohms |
| Recommended | 20 - 100 | 20 - 100 | 20 - 100 |
| Watts / Channel | Watts / Channel | Watts / Channel | Watts / Channel |
| Amplifier Power | |||
| Efficiency | 89 dB 90 dB | 90 dB | |
| Inputs | 5-way binding posts | 5-way binding posts | 5-way binding posts |
| Maximum Power Handling | 150W 100W | 150W | |
| Dimensions | |||
| Cabinet Size | 10.625" H x 6.5" W x 7.25" D | 6.5" H x 19" W x 8.5" D | 36.25" H x 9.25" W x 10.25" D |
| Mounting Options | Wall mount with integrated key-hole slot | N/A | N/A |
| Enclosure Type | Vented | Vented | Bass Rolflex |
| Shipping Unit | Pair | Each | Each |
| Speaker Warranty | 5 years parts and labor (original purchaser) | 5 years parts and labor (original purchaser) | 5 years parts and labor (original purchaser) |
| Recommended Optional Accessories | 30 - 36" speaker stands | N/A | N/A |
Contenu
T Series - fiche technique
T15 T30 T50
Entres Bomes 5-facons Bomes 5-facons Bomes 5-facons
Polk Audio thanks you for your purchase. Make sure to read this user guide in full before using your speaker system. It will ensure that you get the most from the product and understand all safety requirements. Once you're done reading the user guide, put it in a safe place for later reference.
por canal Vatos/Canal Vatos/Canal Vatos/Canal