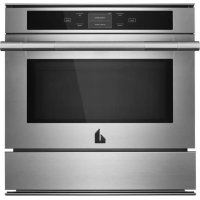
KOWT107EBS - Oven KITCHENAID - Free user manual and instructions
Find the device manual for free KOWT107EBS KITCHENAID in PDF.
Download the instructions for your Oven in PDF format for free! Find your manual KOWT107EBS - KITCHENAID and take your electronic device back in hand. On this page are published all the documents necessary for the use of your device. KOWT107EBS by KITCHENAID.
USER MANUAL KOWT107EBS KITCHENAID
Use & Care Guide For questions about features, operation/performance, parts, accessories or service, call: 1-800-422-1230 In Canada, for assistance, installation and service, call: 1-800-807-6777 or visit our website at... www.kitchenaid.com or www.kitchenaid.ca
WARMING DRAWER SAFETY
You can be killed or seriously injured if you don't immediately You can be killed or seriously injured if you don'tfollow All safety messages will tell you what the potential hazard is, tell you how to reduce the chance of injury, and tell you what can happen if the instructions are not followed. Your safety and the safety of others are very important. We have provided many important safety messages in this manual and on your appliance. Always read and obey all safety messages.This is the safety alert symbol.This symbol alerts you to potential hazards that can kill or hurt you and others.All safety messages will follow the safety alert symbol and either the word “DANGER” or “WARNING.”These words mean:follow instructions.instructions. DANGER WARNING
SAVE THESE INSTRUCTIONS
IMPORTANT SAFETY INSTRUCTIONS
WARNING: To reduce the risk of fire, electrical shock,
injury to persons, or damage when using the warming drawer, follow basic precautions, including the following:■ Read all instructions.■ Proper Installation – Be sure the warming drawer is properly installed and grounded by a qualified technician.■ Never Use the Warming Drawer for Warming or Heating the Room.■ Do Not Leave Children Alone – Children should not be left alone or unattended in area where warming drawer is in use. They should never be allowed to sit or stand on any part of the warming drawer.■ Wear Proper Apparel – Loose-fitting or hanging garments should never be worn while using the warming drawer.■ User Servicing – Do not repair or replace any part of the warming drawer unless specifically recommended in the manual. All other servicing should be referred to a qualified technician.■ Storage in Warming Drawer – Flammable materials should not be stored in a warming drawer.■ Do Not Use Water on Grease Fires – Smother fire or flame or use dry chemical or foam-type extinguisher.■ Use Only Dry Potholders – Moist or damp potholders on hot surfaces may result in burns from steam. Do not let potholder touch hot heating elements. Do not use a towel or other bulky cloth.■ Use Care When Opening Drawer – Let hot air or steam escape before removing or replacing food.■ Do Not Heat Unopened Food Containers – Build-up of pressure may cause container to burst and result in injury.■ Placement of Warming Drawer Racks – Always place warming drawer racks in desired location while warming drawer is cool. If rack must be moved while warming drawer is hot, do not let potholder contact hot heating element in warming drawer.■ DO NOT TOUCH HEATING ELEMENTS OR INTERIOR SURFACES OF WARMING DRAWER – Heating elements may be hot even though they are dark in color. Interior surfaces of a warming drawer become hot enough to cause burns. During and after use, do not touch, or let clothing or other flammable materials contact heating elements or interior surfaces of warming drawer until they have had sufficient time to cool. Other surfaces of the warming drawer may become hot enough to cause burns – among these surfaces are warming drawer vent openings and surfaces near these openings and warming drawer doors.■ Do not touch hot surfaces. Use handles or knobs.■ Do not operate any appliance with a damaged cord or plug or after the appliance malfunctions or has been damaged in any manner. Return appliance to the nearest authorized service facility for examination, repair or adjustment.■ The use of accessory attachments not recommended by the warming drawer manufacturer may cause injuries.■ Do not use warming drawer for other than intended use.■ To reduce risk of electric shock, do not mount over a sink.■ This product is designed for household use only.4 Electrical Requirements It is important to make sure you have the proper electrical connection:A 115 Volt, 60 Hz., AC only 15- or 20-amp electrical supply, properly grounded in accordance with the National Electrical Code and local codes and ordinances, is required.It is recommended that a separate circuit, serving only your warming drawer, be provided. Recommended Grounding Method The warming drawer must be grounded. This warming drawer is equipped with a power supply cord having a 3 prong grounding plug. To minimize possible shock hazard, the cord must be plugged into a mating, 3 prong, grounding-type wall receptacle, grounded in accordance with the National Electrical Code and local codes and ordinances. If mating wall receptacle is not available, it is the personal responsibility of the customer to have a properly grounded, 3 prong wall receptacle installed by a qualified electrician.
Control Panel Control Knob Push in and turn the control knob to turn on the warming drawer. The power indicator light will turn on and remain on while the warming drawer is in operation.When finished, turn the control knob to OFF to turn off the warming drawer. When the warming drawer is turned off, the power indicator light will go out and the drawer will begin to cool.The temperature is controlled by rotating the control knob to the desired setting. The temperature setting ranges from Lo to Hi on the warming drawer control to keep heated foods warm at the selected temperatures. State of California Proposition 65 Warnings:WARNING: This product contains one or more chemicals known to the State of California to cause cancer.WARNING: This product contains one or more chemicals known to the State of California to cause birth defects or other reproductive harm. Electrical Shock HazardPlug into a grounded 3 prong outlet.Do not remove ground prong.Do not use an adapter.Do not use an extension cord.Failure to follow these instructions can result in death, fire, or electrical shock. WARNING A. Warming drawer temperature control zoneB. Slow cooker temperature control zoneC. Proofing bread control positionD. Power indicator light
WARNING Food Poisoning HazardDo not let food sit for more than one hour before or after cooking.Doing so can result in food poisoning or sickness.5 Moist-Dry Slide Control The Moist-Dry slide control allows you to open or close the vent slots in the door. The MOIST setting holds moisture in, while the DRY setting allows steam and moisture to escape from the drawer. NOTE: Condensation may form on inner surfaces. This is normal. To keep foods moist, slide control to MOIST, closing the vents. Closing the vents will seal the drawer and keep hot foods soft and moist. To keep foods crisp, slide control to DRY, opening the vents. Opening the vents releases moisture from the drawer and keeps hot foods crisp and dry. See the Warming Drawer Temperature Chart in the “Setting the Controls” section. Setting the Controls The Indoor/Outdoor Warming Drawer is ideal for keeping hot cooked foods at serving temperature. It is designed to operate properly either indoors or outdoors at temperatures down to 32°F (0°C). If the drawer is operated at temperatures colder than 32°F (0°C), performance may be affected. Different types of food may be placed in the warming drawer at the same time. When keeping several types of food hot, use the setting for the highest temperature food in the warming drawer. Place foods requiring the highest temperature on the bottom of the drawer and those foods requiring the lowest temperature on the elevated rack. For best results, do not hold foods in the warming drawer longer than 1 hour. For smaller quantities or heat-sensitive foods, such as eggs, do not hold longer than 30 minutes. Food must be cooked and at serving temperature before being placed in the warming drawer. Cover foods with a lid. Breads, pastries, and fruit pies may be heated from room temperature on the HI setting. Remove food from plastic bags and place in oven-safe container. Oven-safe serving dishes and dinner plates can be heated while the warming drawer is preheating. NOTE: To conserve heat, place cookware and positioning rack in the warming drawer before preheating. To Use:
1. Push in and turn the control knob to the desired food
warming setting: Lo (low), between Lo and Med (medium low), Med (medium), between Med and Hi (medium high), or Hi (high). NOTE: For best results, meats, seafood, poultry and any foods containing meat, seafood or poultry should be set to medium or higher.
2. Select MOIST or DRY setting.
3. Allow warming drawer to preheat. Recommended minimum
preheating times are 5 minutes for Lo, 10 minutes for Med, and 20 minutes for Hi.
4. Push in and turn the control knob to OFF when finished.
WARMING DRAWER TEMPERATURE CHART
Different foods require different settings in order to maintain the ideal serving temperature. Use the following chart as a guide. You can set the drawer temperature anywhere between Lo and Hi. For best results, meats, seafood and poultry should be set to medium or higher. Cover food, if desired, to maintain heat and moisture. When keeping several different types of food hot, set the drawer to the food requiring the highest temperature setting. Place item(s) requiring the highest temperature on the bottom of the drawer and those items requiring the lowest temperature on the rack. WARNING Food Poisoning Hazard Do not let food sit for more than one hour before or after cooking. Doing so can result in food poisoning or sickness. FOOD SETTING Bacon Med to Hi - DRY Beef, medium and well-done Med to Hi - MOIST Bread, hard rolls Med - DRY Bread, soft rolls Med - MOIST Casseroles - with a crisp top Casseroles Med - DRY Med - MOIST Coffee cake Med - MOIST Cooked cereal Med to Hi - MOIST Eggs Hi - MOIST Fish, Seafood (no breading) Hi - MOIST Fish, Seafood (breaded) Hi - DRY Fried foods Hi - DRY Gravy, Cream Sauces Hi - MOIST Ham Med Hi - MOIST Hors d’oeuvres (crisp) Hi - DRY Lamb Med to Hi - MOIST Pancakes, waffles Hi - DRY Pies, single crust Med - DRY Pies, double crust Med to Lo - DRY Pizza Hi - DRY Pork Med to Hi - MOIST Potatoes, baked Med - DRY Potatoes, mashed Med to Hi - MOIST Poultry Hi - DRY Vegetables Med to Hi - MOIST6 Warming Cookware Use only cookware approved for oven use. Follow the cookware manufacturer’s instructions. Positioning Racks and Pans Positioning Rack The 2 racks accompanying your warming drawer will fit from front to back or side to side. NOTE: The warming drawer must be fully opened when placing or removing racks. Each rack raises an oven-safe container 1¹⁄₈" (2.86 cm) from the bottom of the drawer.Keep the number of times the drawer is opened to a minimum in order to maintain set temperature in the warming drawer. Optional Pans (accessory) The warming drawer includes 2 pan support rails designed to hold a variety of serving pan sizes. Pan sizes that can be used are 1/6, 1/9, 1/3, 1/2, and 2/3. A full size serving pan can be placed across the width of the 27" (68.6 cm) and 30" (76.2 cm) warming drawer. 1/2 and 1/3 size pans may be purchased from the KitchenAid
Customer eXperience Center. See the “Assistance or Service” section to order.Other size serving pans can be purchased at various retailers and restaurant supply stores.Please refer to the following chart to determine the correct positioning of the pan support rails for each of the pan sizes. *Full size pans cannot be used with the 24" (61 cm) warming drawer.When using serving pans, make sure the pan support rails are properly installed in the locator notch before inserting pans. Proofing Bread Proofing bread prepares dough for baking by activating the yeast. Check dough periodically for progress. To Proof: 1. Cover dough with lightly oiled waxed paper and place temperature safe bowl(s) on rack.2. Set control knob to PROOF setting.3. Place vent on MOIST setting.
4. Verify doneness by pressing 2 fingers ¹⁄₂" (1.3 cm) into dough.
If indentation remains, the dough is ready.For second proofing of dough, repeat steps 1-4. Slow Cook Function The SLOW COOK function in the warming drawer cooks food slowly at a low temperature over a long period of time, similar to a countertop slow cooker. When the warming drawer is installed outdoors, the SLOW COOK function should not be used when the temperature is below 32°F (0°C). There are 2 settings: Hi and Lo. Guidelines for cooking times are 4 to 5 hours for Hi and 8 to 10 hours for Lo. Smaller quantities of food may require less time, while larger quantities may require more time.When slow cooking, use serving pans (available for purchase) or oven-safe cookware. To order serving pans, see the “Assistance or Service” section.Before slow cooking, thaw frozen foods completely.IMPORTANT: Brown roasts thoroughly before starting to slow cook.Pan Size Pan Support RailsFull* Positions 1 and 3 2/3 Positions 1 and 31/2 Positions 1 and 31/3 Positions 1 and 3 or 1 and 21/6 Positions 1 and 21/9 Positions 1 and 2A. Position 1 pan support rail locator notchB. Position 2 pan support rail locator notchC. Position 3 pan support rail locator notch
WARNING Food Poisoning Hazard Do not let food sit for more than one hour before or after cooking. Doing so can result in food poisoning or sickness.7 To Use: 1. Push in and turn control knob to the SLOW COOK zone and set the desired temperature: Lo or Hi. Preheating is not necessary.2. Place food into warming drawer. Food should be placed directly on the bottom of the warming drawer. Do not use the rack.
3. Close the warming drawer. Be sure that the warming drawer
is completely closed during operation.4. Turn control knob to OFF when finished. Panel Kits (Accessory) Panel kits are available for customizing the front of the warming drawer to match other KitchenAid home appliances. See the “Assistance or Service” section to order.
Drawer Slides The drawer slides allow you to fully extend the drawer for easier cleaning. If necessary, the drawer can be removed.NOTE: Load capacity for the drawer is 100 lbs (45 kg). Warming Drawer Remove all items from inside the warming drawer, and allow the warming drawer to cool completely before attempting to remove the drawer. To Remove: 1. Open drawer to its fully open position.2. Locate the black tabs on both sides of the drawer.3. Press the tab down on the right side of the drawer and lift tab up on the left side of the drawer at the same time. Then pull drawer out another inch to disengage latch.4. Hold the drawer by the sides (not by the front). Pull it slowly all the way out. To Replace: 1. Align the drawer rails with the receiving slides.2. Push drawer in all the way.3. Gently open and close the drawer to ensure it is seated properly on the slices. General Cleaning IMPORTANT: Before cleaning, make sure all controls are off and the warming drawer and the drawer accessories are cool. Always follow label instructions on cleaning products. Soap, water and a soft cloth or sponge are suggested first unless otherwise noted.
STAINLESS STEEL SURFACES
To avoid damage to stainless steel surfaces, do not use soap-filled scouring pads, abrasive cleaners, Cooktop Polishing Creme, steel-wool pads, gritty washcloths or some paper towels. Rub in direction of grain to avoid damaging.Cleaning Method:■ affresh Stainless Steel Cleaner Part Number W10355016 (not included):See “Assistance or Service” section to order.■ Liquid detergent or all-purpose cleaner:Rinse with clean water and dry with soft, lint-free cloth.■ Vinegar for hard water spotsA. Tab
CONTROL KNOB Do not use steel wool, abrasive cleansers or oven cleaner. Do not soak knob. When replacing knob, make sure knob is in the Off position. Cleaning Method: ■ Soap and water: Pull knob straight away from control panel to remove. Wash, rinse and dry with a soft cloth. WARMING DRAWER Cleaning Method: Routine cleaning ■ Paper towel and spray glass cleaner: Make sure drawer is cool. Follow manufacturer’s instructions. ■ Warm, soapy water or all-purpose cleaner and a nonabrasive, plastic scrubbing pad: Wash, wipe with clean water and dry thoroughly. ■ affresh
Kitchen and Appliance Cleaner W10355010 (not included): See “Assistance or Service” section to order. Stubborn stains and baked-on residue Rub in direction of grain to avoid damaging. ■ Mildly abrasive cleanser or stainless-steel cleaners and a damp cloth or sponge. Wash, wipe with clean water and dry thoroughly. Repeat if necessary. RACKS Cleaning Method: ■ Steel-wool pad and warm, soapy water: Wash, rinse and dry thoroughly. TROUBLESHOOTING Try the solutions suggested here first in order to avoid the cost of an unnecessary service call. Warming drawer will not operate ■ Has a household fuse blown, or has a circuit breaker tripped? Replace the fuse or reset the circuit breaker. If the problem continues, call an electrician. ■ Is the power supply cord unplugged? Plug into a grounded 3 prong outlet. Warming drawer does not slide properly ■ Has the drawer been mounted properly on the slides? See “Warming Drawer Care” section. ■ Has the drawer been overloaded? The weight inside the drawer should not exceed 100 lbs (45 kg). ■ Is the drawer load uneven? Redistribute the food to evenly balance the weight. Excessive moisture on the warming drawer ■ Did you preheat the drawer? Preheat the drawer before each use. See “Warming Drawer Use” section. ■ Is the MOIST-DRY setting correct? Set the MOIST-DRY slide to DRY to vent the moisture. Cooking results not what expected ■ The exterior of beef and pork may become very dark, but not burnt. This is normal. The interior will remain tender and juicy. Poultry will also darken, especially in areas not covered by skin. Electrical Shock Hazard Plug into a grounded 3 prong outlet. Do not remove ground prong. Do not use an adapter. Do not use an extension cord. Failure to follow these instructions can result in death, fire, or electrical shock. WARNING9
ASSISTANCE OR SERVICE
If you need service Please refer to the warranty page in this manual. If you need replacement parts If you need to order replacement parts, we recommend that you use only factory specified parts. These factory specified parts will fit right and work right because they are made with the same precision used to build every new KITCHENAID
appliance. To locate factory specified parts in your area, call us or your nearest KitchenAid designated service center. In the U.S.A. Call the KitchenAid Customer eXperience Center toll free: 1-800-422-1230 or visit our website at www.kitchenaid.com. Our Consultants Provide Assistance With: ■ Scheduling of service. KitchenAid designated service technicians are trained to fulfill the product warranty and provide after-warranty service, anywhere in the United States. ■ Features and specifications on our full line of appliances.■ Referrals to local dealers.■ Installation information.■ Use and maintenance procedures.■ Accessory and repair parts sales. ■ Specialized customer assistance (Spanish speaking, hearing impaired, limited vision, etc.). For Further Assistance If you need further assistance, you can write to KitchenAid with any questions or concerns at: KitchenAid Brand Home Appliances Customer eXperience Center 553 Benson Road Benton Harbor, MI 49022-2692 Please include a daytime phone number in your correspondence. Accessories Accessories U.S.A. To order accessories, call the KitchenAid Customer eXperience Center toll free at 1-800-422-1230 and follow the menu prompts. Or visit our website at www.kitchenaid.com. Portable appliances, bakeware, cookware, gadgets and textiles are also available. 1/2 Size Serving Pan Order Part Number W10242695A 1/3 Size Serving Pan Order Part Number W10242694A affresh
Stainless Steel Cleaner Order Part Number W10355016 affresh
Kitchen and Appliance Cleaner Order Part Number W10355010 In Canada Call the Whirlpool Canada LP Customer eXperience Centre toll free: 1-800-807-6777 or visit our website at www.kitchenaid.ca. Our Consultants Provide Assistance With: ■ Scheduling of Service. KitchenAid appliances designated service technicians are trained to fulfill the product warranty and provide after-warranty service, anywhere in Canada. ■ Features and specifications on our full line of appliances.■ Referrals to local dealers.■ Use and maintenance procedures.■ Accessory and repair parts sales. For Further Assistance If you need further assistance, you can write to Whirlpool Canada LP with any questions or concerns at: Customer eXperience Centre Whirlpool Canada LP
200 - 6750 Century Ave.
Mississauga, Ontario L5N 0B7 Please include a daytime phone number in your correspondence.10 KITCHENAID
WARMING DRAWER WARRANTY
LIMITED WARRANTY For one year from the date of purchase, when this major appliance is operated and maintained according to instructions attached to or furnished with the product, KitchenAid brand of Whirlpool Corporation or Whirlpool Canada LP (hereafter “KitchenAid”) will pay for Factory Specified Parts and repair labor to correct defects in materials or workmanship. Service must be provided by a KitchenAid designated service company. This limited warranty is valid only in the United States or Canada and applies only when the major appliance is used in the country in which it was purchased. Outside the 50 United States and Canada, this limited warranty does not apply. Proof of original purchase date is required to obtain service under this limited warranty.
ITEMS EXCLUDED FROM WARRANTY
This limited warranty does not cover: 1. Service calls to correct the installation of your major appliance, to instruct you on how to use your major appliance, to replace or repair house fuses, or to correct house wiring or plumbing. 2. Service calls to repair or replace appliance light bulbs, air filters or water filters. Consumable parts are excluded from warranty coverage. 3. Repairs when your major appliance is used for other than normal, single-family household use or when it is used in a manner that is contrary to published user or operator instructions and/or installation instructions. 4. Damage resulting from accident, alteration, misuse, abuse, fire, flood, acts of God, improper installation, installation not in accordance with electrical or plumbing codes, or use of consumables or cleaning products not approved by KitchenAid. 5. Cosmetic damage, including scratches, dents, chips or other damage to the finish of your major appliance, unless such damage results from defects in materials or workmanship and is reported to KitchenAid within 30 days from the date of purchase. 6. Costs associated with the removal from your home of your major appliance for repairs. This major appliance is designed to be repaired in the home and only in-home service is covered by this warranty.
7. Repairs to parts or systems resulting from unauthorized modifications made to the appliance.
8. Expenses for travel and transportation for product service if your major appliance is located in a remote area where service by an authorized KitchenAid servicer is not available. 9. The removal and reinstallation of your major appliance if it is installed in an inaccessible location or is not installed in accordance with published installation instructions. 10. Major appliances with original model/serial numbers that have been removed, altered or cannot be easily determined. This warranty is void if the factory applied serial number has been altered or removed from your major appliance. The cost of repair or replacement under these excluded circumstances shall be borne by the customer. DISCLAIMER OF IMPLIED WARRANTIES; LIMITATION OF REMEDIES CUSTOMER'S SOLE AND EXCLUSIVE REMEDY UNDER THIS LIMITED WARRANTY SHALL BE PRODUCT REPAIR AS PROVIDED HEREIN. IMPLIED WARRANTIES, INCLUDING WARRANTIES OF MERCHANTABILITY OR FITNESS FOR A PARTICULAR PURPOSE, ARE LIMITED TO ONE YEAR OR THE SHORTEST PERIOD ALLOWED BY LAW. KITCHENAID SHALL NOT BE LIABLE FOR INCIDENTAL OR CONSEQUENTIAL DAMAGES. SOME STATES AND PROVINCES DO NOT ALLOW THE EXCLUSION OR LIMITATION OF INCIDENTAL OR CONSEQUENTIAL DAMAGES, OR LIMITATIONS ON THE DURATION OF IMPLIED WARRANTIES OF MERCHANTABILITY OR FITNESS, SO THESE EXCLUSIONS OR LIMITATIONS MAY NOT APPLY TO YOU. THIS WARRANTY GIVES YOU SPECIFIC LEGAL RIGHTS, AND YOU MAY ALSO HAVE OTHER RIGHTS WHICH VARY FROM STATE TO STATE OR PROVINCE TO PROVINCE. If outside the 50 United States and Canada, contact your authorized KitchenAid dealer to determine if another warranty applies. If you need service, first see the “Troubleshooting” section of the Use & Care Guide. After checking “Troubleshooting,” you may find additional help by checking the “Assistance or Service” section or by calling KitchenAid. In the U.S.A., call 1-800-422-1230. In Canada, call 1-800-807-6777. 9/0711