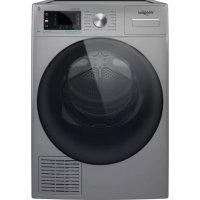
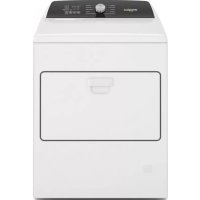
WCD3090JW - Dryer WHIRLPOOL - Free user manual and instructions
Find the device manual for free WCD3090JW WHIRLPOOL in PDF.
Download the instructions for your Dryer in PDF format for free! Find your manual WCD3090JW - WHIRLPOOL and take your electronic device back in hand. On this page are published all the documents necessary for the use of your device. WCD3090JW by WHIRLPOOL.
USER MANUAL WCD3090JW WHIRLPOOL
DÉPANNAGE ......................................................................... 61 ASSISTANCE OU SERVICE ...................... Couverture arrière34 Accessories INSTALLATION & MAINTENANCE ACCESSORIES FACTORY CERTIFIED PARTS – these three words represent quality parts and accessories designed specically for your appliance. Time tested engineering that meets our strict quality specications.
FACTORY CERTIFIED PARTS
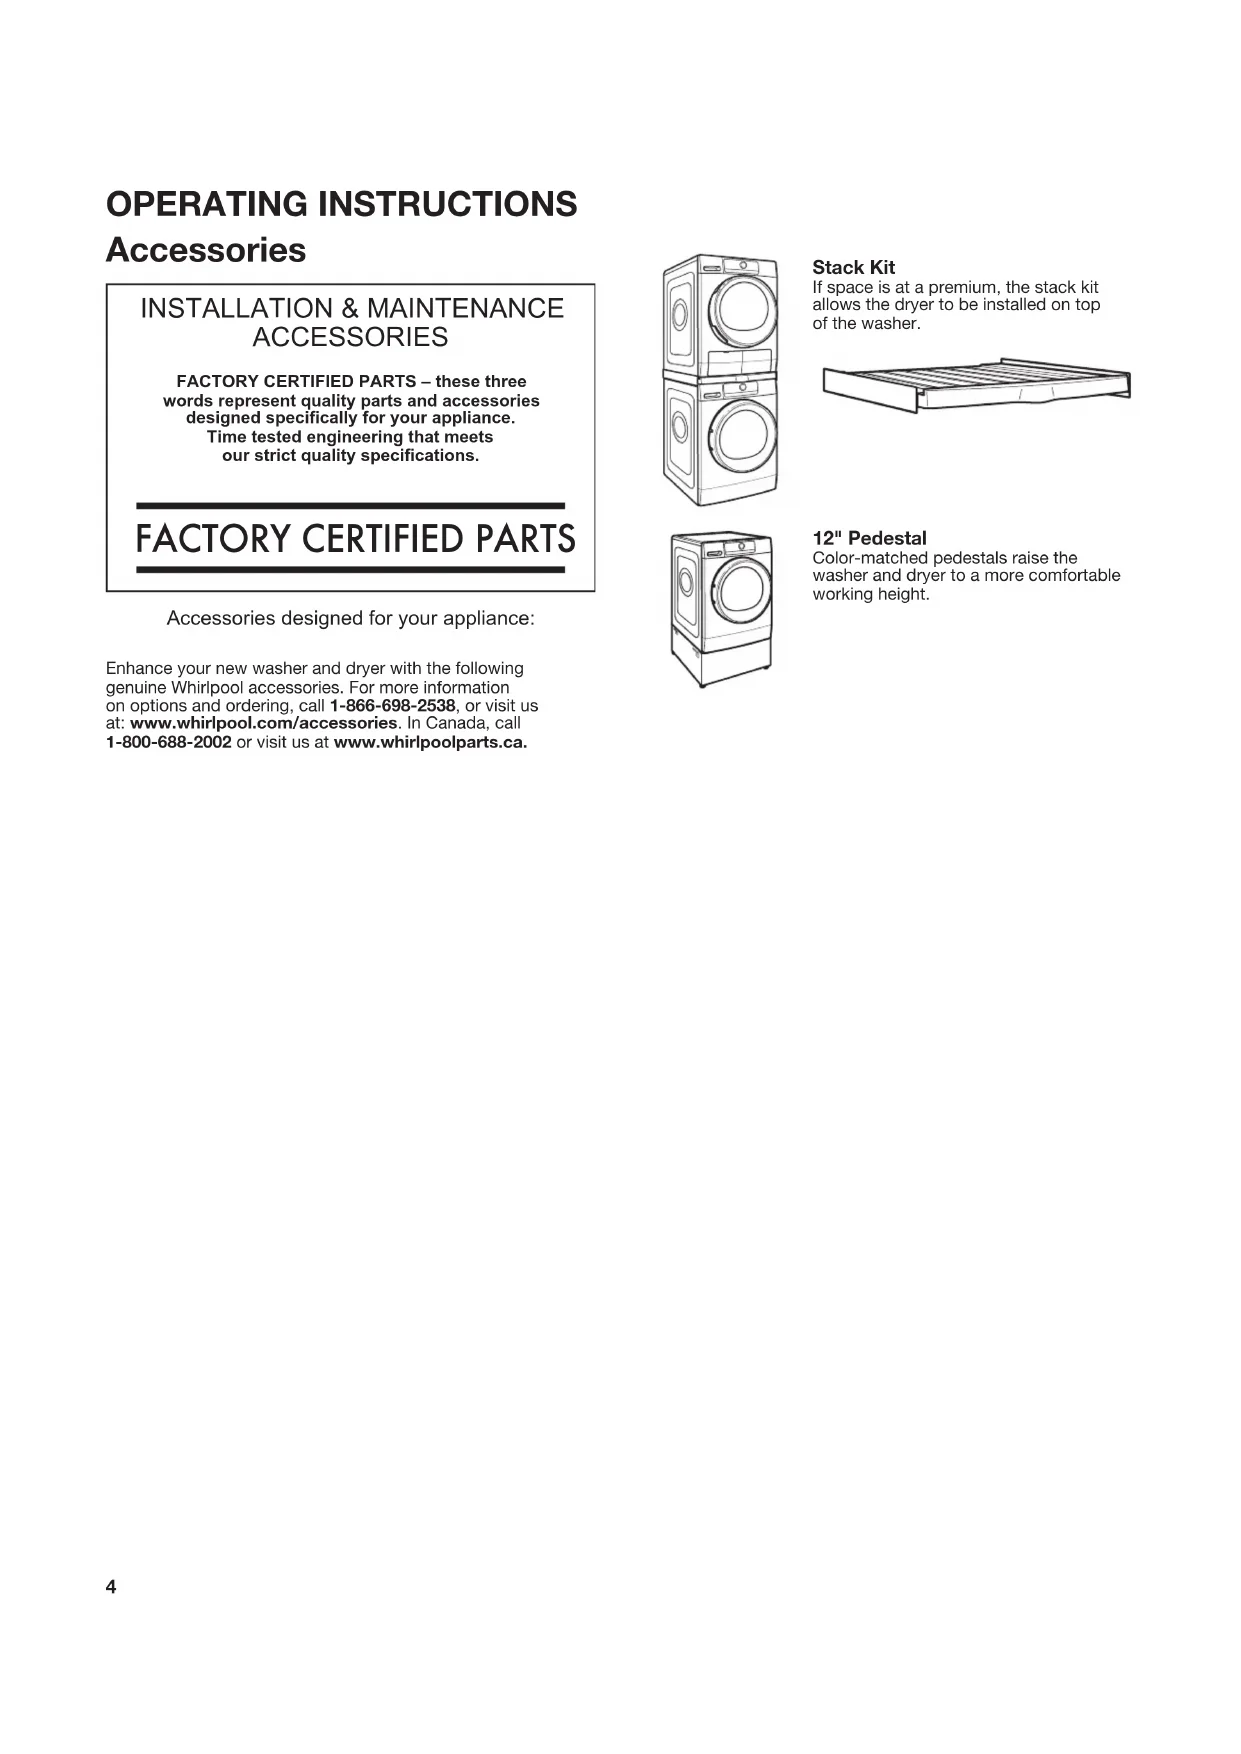
Accessories designed for your appliance: Enhance your new washer and dryer with the following genuine Whirlpool accessories. For more information on options and ordering, call 1-866-698-2538, or visit us at: www.whirlpool.com/accessories. In Canada, call 1-800-688-2002 or visit us at www.whirlpoolparts.ca. Stack Kit If space is at a premium, the stack kit allows the dryer to be installed on top of the washer. OPERATING INSTRUCTIONS 12" Pedestal Color-matched pedestals raise the washer and dryer to a more comfortable working height.5 Use Automatic Cycles for better fabric care and energy savings Use the Automatic Cycles to provide the most energy savings and enhanced fabric care from the dryer. During Automatic Cycles, condensing dryer unit temperature and moisture level are sensed in the load. This sensing occurs throughout the drying cycle and the dryer shuts off when the load reaches the selected dryness. Use the NORMAL dryness level to provide optimal energy savings. With Timed Dry, the dryer runs the amount of time set and can result in shrinkage, wrinkling, and static due to over- drying. Use Timed Dry for the occasional damp load that needs a little more drying time.
Condenser is drying air and discharging condensation water Drying Air blower Evaporator is drying air and discharging condensation water Heater
Condenser Dryer Technology A typical air vented dryer uses large amounts of energy; this dryer consumes a fraction of the energy by recycling and reclaiming heat. This dryer is a ventless condensing dryer that uses an air to air condenser to dry and recycle the same air. The laundry is dried with lower temperatures; therefore it may feel cooler than expected during and after the drying process. The condensing dryer’s heating phase is longer than in traditional air vented dryers. If possible, do not open the dryer door during the process as heat can escape from the drum and can make longer drying times. Benets of a Condensing Dryer
- ENERGY: Regenerates energy to reduce overall energy consumption.• PERFORMANCE: Allows flexibility to manage drying performance and energy savings.• FABRIC CARE: Capability to use less heat than vented dryer.• VENTLESS DESIGN: Allows installation in more locations throughout the home. New Sounds from a Condensing Dryer
- The water from wet clothes is pumped out to your drain or water tank. You may notice a gurgling sound occasionally. Condensing Dryer Unit
Control Panel and Features POWER BUTTON Touch until the indicator above the Program button lights up. Symbols appear on the control panel and sounds are played. PROGRAM (cycle) When you turn on the dryer, the light above this button will turn on. The program settings which you used last will appear on the control panel. This button also lets you set water conductivity (see “Adapting the dryer to water conductivity” for more information).
An indicator next to each program/cycle lights up as you use the knob to scroll through the list. Press the knob when the indicator next to the desired program/cycle lights up. CONTROL KNOB Turn the knob to select a program/cycle for your laundry load, change dryness level, set drying time or delay start time, or select Other Options. Press the knob to conrm your selection. OPTIONS Touch to activate additional dry options or additional features on the dryer before touching the Start/Pause button. Additional dry options or additional features selected after touching the Start/Pause button may not be activated. To return to factory default cycle settings, unplug the dryer for 30 seconds, then plug back in. NOTE: Not all options are available with all cycles. Settings Use to specify additional settings of the dryer: Set the Language for the display text, set the sound level for the buttons, set the sound level for the end of cycle alert, set the ability to recall the last used cycle, set the amount of time that the display will remain on after it is nished, and reset the factory settings.
Wrinkle Shield™ This option helps to avoid creasing if you cannot unload the laundry soon after the program/cycle ends. The dryer starts to tumble the laundry periodically a few minutes after the program/cycle ends. This tumbling will last up to approximately 12 hours. Tumbling can be stopped any time by touching the Power button to turn off the dryer. Cycle Signal Use to turn on or off the signal indicating the end of a drying cycle. NOTE: Touch and hold the Cycle Signal button for about one second to turn sounds on or off. Delay Start Touch to start your program/cycle at a later time. SETTINGS Timed Dry Sets the length of a Timed Dry cycle. Dryness Level When using some Automatic Cycles on the type of load you are drying. NOTE: Dryness Level is for use with Automatic Cycles only. OTHER OPTIONS Rapid This option provides quicker drying. Gentle This option dries laundry more gently by reducing the drying temperature.
Touch to start, or touch and hold to pause, a program/ cycle. LED DISPLAY When you select a program or cycle, using the knob, the name of the cycle will be displayed here, as well as the estimated time remaining. Factors such as load size, dryness level may affect the time that is displayed.
Items to Dry: Cycle: Dryness Level: Available Options: Cycle Details: Work clothes, casual wear, corduroys Normal Normal Wrinkle Shield™ Dryness Level Uses Low/Medium Heat to thoroughly dry large loads of mixed fabrics and items. Whites, Sturdy Items Whites More Normal Less Wrinkle Shield™ Dryness Level Rapid Gentle Cycle uses medium heat with no drum reversing to properly dry whites items. Undergarments, blouses, lingerie Delicates More Normal Less Wrinkle Shield™ Dryness Level Uses extra low heat to gently dry delicate items. Colored clothes Colors More Normal Less Wrinkle Shield™ Dryness Level Uses lower heat than the whites to gently dry colored clothes. Normally soiled laundry made of articial bers or cotton blends Synthetics More Normal Less Wrinkle Shield™ Dryness Level Uses low heat to gently dry delicate items. Drum reverses intermittently to redistribute load for thorough drying. Jeans, Overalls, Denim Jeans More Normal Less Wrinkle Shield™ Dryness Level Rapid Gentle Uses higher heat than normal cycle to dry denim items. Do not over ll the drum or longer dryer may be noticed. Cotton Towels, Heavyweight Items Towels More Normal Less Wrinkle Shield™ Dryness Level Uses Medium heat to dry large loads of cotton towels or heavyweight items. Tumbling reverses intermittently to redistribute the load for thorough drying. Jackets, Comforters, Duvets, Pillows Bulky More Normal Less Wrinkle Shield™ Dryness Level Rapid Gentle Use for drying large, bulky items; do not overll dryer drum. Performance / exercise wear Sports More Normal Less Wrinkle Shield™ Dryness Level Use for drying exercise wear; do not overll dryer drum. Cotton Garments Quick Dry Normal N/A Ideal for drying garments spun at high speed in the washing machine. Shirts, Blouses, Slacks Refresh Normal N/A Use to reduce odors and light wrinkles. Do not add dryer sheets. When loading laundry into the drum, add a wet wash cloth. Kids clothes, Women's Dresses, Pajamas, Cotton, Wool, Silk, Dress shirts More Cycles N/A N/A More cycles available. See section below. Program/Cycle Guide – Automatic Cycles Settings and options shown in bold are default settings for that cycle. If settings are changed, the new settings will be remembered. If there is a power failure, settings will return to the default. Not all settings and options are available on each cycle. Use Automatic Cycles for better fabric care and energy savings The dryer senses moisture in the load or air temperature and shuts off when the load reaches the selected dryness level. Use the NORMAL dryness level to provide optimal energy savings. Load Size Recommendations For best results, follow the wet load size recommendations noted for each cycle. Small load: Fill the dryer drum with 3–4 items, not more than 1/4 full. Medium load: Fill the dryer drum up to about 1/2 full. Large load: Fill the dryer drum up to about 3/4 full. Do not pack tightly. Items need to tumble freely. STATUS INDICATOR (next to LED Display) This indicator will light up to alert you when certain conditions occur. The condition will be displayed in the LED Display. Symbols Water tank full (see “Empty Water Tank” in “Using Your Dryer”) Clean bottom lter (see “Cleaning the Bottom Filter” in “Dryer Care”) Clean door lter (see “Cleaning the Lint Screen” in “Dryer Care”) Check bottom lter (see "Positioning the bottom lter" in "Dryer Care")8 Load Size Recommendations For best results, follow the wet load size recommendations noted for each cycle. Small load: Fill the dryer drum with 3–4 items, not more than 1/4 full. Medium load: Fill the dryer drum up to about 1/2 full. Large load: Fill the dryer drum up to about 3/4 full. Do not pack tightly. Items need to tumble freely. Adjust drying time on Timed Dry Cycles Instead of having the machine auto terminate the cycle, timed dry can be selected as an option on the 4 cycles below. Upon selecting the button Timed Dry, the dry time can be set 15 to 120 min (2 hours). Program/Cycle Guide – Adjustable Time Cycles Settings and options shown in bold are default settings for that cycle. If settings are changed, the new settings will be remembered. If there is a power failure, settings will return to the default. Not all settings and options are available on each cycle. Items to Dry Cycle Dryness Level Available Options Cycle Details Whites, Sturdy Items Whites More Normal Less Wrinkle Shield™ Dryness Level Rapid Gentle Cycle uses medium heat with no drum reversing to properly dry whites items. Undergarments, blouses, lingerie Delicates More Normal Less Wrinkle Shield™ Dryness Level Uses extra low heat to gently dry delicate items. Colored clothes Colors More Normal Less Wrinkle Shield™ Dryness Level Uses lower heat than the whites to gently dry colored clothes. Normally soiled laundry made of articial bers or cotton blends Synthetics More Normal Less Wrinkle Shield™ Dryness Level Uses low heat to gently dry delicate items. Drum reverses intermittently to redistribute load for thorough drying. More Cycles Details To set one of the following cycles, select “More Cycles” on the display, use the knob to select the desired cycle and press the knob to conrm the selection. Items to Dry: Cycle: Dryness Level: Available Options: Cycle Details: Mixed Cotton Items, sheets Cotton More Normal Less Wrinkle Shield™ Dryness Level Standard cotton cycle, suitable to dry normally wet cotton. Wool items labeled with the Woolmark logo and identied as machine washable Wool Normal N/A Programme for drying wool clothing. It is advisable to turn the garments inside out before drying. Leave to dry naturally the heaviest edges that are still damp. Silk Items (Shirts, blouses, scarfs, undergarments) Silk Normal N/A Uses lower heat than the delicates cycle to gently dry silk items. Shirts made from cotton or cotton blends/synthetics Dress Shirts More Normal Less Wrinkle Shield™ Dryness Level Gentle This is a cycle or Shirts made from cotton or cotton blend/ synthetics. NOTE: These clothes dryer's Government energy certifications were based on the Normal Cycle, Non adjustable Temperature Setting and Normal Dryness Level. The as-shipped default of Wrinkle Shield off was used.9 Using Your Dryer
WARNING: To reduce the risk of re, electric shock, or injury to
persons, read the IMPORTANT SAFETY INSTRUCTIONS before operating this appliance.
Hold the handle and carefully pull out the water tank. Holding the full water tank with both hands, empty out the water. Then push the container back into place. Make sure that it is properly inserted.
2. Clean door lint screen
Clean the lint screen before or after each load. Pull the lint screen straight up and out. Press tab down and open lint screen. Roll lint off the screen with your fingers. Push the lint screen firmly back into place. IMPORTANT: Clean lint screen before each dryer use as a screen blocked with lint will increase drying time.
3. Clean bottom lter
Clean the bottom filter after every 3 cycles. Open the filter door on the bottom of the dryer and grab the handle to pull out filter. A small amount of water may escape from the area. Placing a absorbent towel under the flap will capture the water. Clean the filter by hand or rinse with water – do not wash the filter foam in a washer. Wring out the filter foam – do not insert it in the bottom filter dripping wet. For additional cleaning information, see “Dryer Care.” Replace the bottom filter in the filter chamber. Fold the filter handle down and close the bottom door. NOTE: To turn off the “Clean bottom filter” status indicator, the filter must be removed and replaced with the Power button touched ON and no cycle running.
4. Rinse the Heat Exchanger
Approximately every 3 months the heat exchanger will need to be cleaned. Cool the machine down completely. A small amount of water may escape, therefore place an absorbent cloth under the maintenance flap. Remove the bottom filter, shown in step 3. Turn down both locking levers, and remove the heat exchanger. Rinse the heat exchanger thoroughly, removing all of the lint.10
6. Touch Power button to turn on dryer
Open the door by pulling on the handle. Place laundry in the dryer. Add a dryer sheet to wet load if desired. Close the door. IMPORTANT: Do not tightly pack the dryer. Items need to tumble freely. Tightly packing can lead to poor drying performance and may increase wrinkling and tangling.
7. Select program/cycle
Turn the knob to select a program/cycle for your laundry load. As you turn the knob, an indicator light will light up next to the program/cycle names to the left of the knob and the program/ cycle name will also appear in the LED display. Stop turning when the indicator next to the desired program/cycle lights up. Press the knob to conrm your selection. See “Program/Cycle Guide” for details on program/cycle features. Turning the knob to More Cycle, then depressing the 6th Sense button, will present additional cycles in the LED display than that is predominantly displayed.
8. Select options, if desired
9. Setting a delayed start, if desired
If you do not want to begin a cycle immediately, you may choose the Delay Start option. This will delay the start of the drying cycle by up to 24 hours. To set a Delayed Start:
1. Touch the Delay Start button to set the desired delay time.
2. Turn the knob to the number of hours you want to delay
the start of the drying cycle. The delay time will appear on the display. Press the knob to conrm your selection. After touching the Start/Pause button, the time will count down until the delay time has been reached. The dryer will start and the display will show the remaining time in the cycle.
10. If Air Dry or Timed Dry was selected,
set drying time When you select a timed cycle, the indicator light above “Timed Dry” lights up. Turn the knob to select the desired time, up to 120 minutes. Press the knob to conrm your selection.11
15. Remove garments promptly
after cycle is nished Promptly remove garments after cycle has completed to reduce wrinkling.
12. Select any additional options
After setting drying time or dryness level, the indicator light above “Options” lights up. Turn the knob to select the desired option(s). As you turn the knob, the option symbols above the Options button will light up one at a time as you turn the knob. Stop turning when the symbol of the desired option lights up. Press the knob to conrm your selection.
Not all options and settings are available with all program/ cycles. See “Program/Cycle Guide” for available options and settings. When the display indicates that the cycle has nished, touch the Power button to turn off the dryer. Open the door and take out your laundry. To save energy, the dryer turns off automatically about a quarter hour after the program/cycle ends. If not turned off right after the program/cycle ends, the dryer will tumble the laundry for about 10 minutes to prevent wrinkling. The display shows an animation. NOTE: If the Power button is touched and held, a countdown will be displayed. At the end of the countdown, any errors will be erased and the program/cycle will restart.
13. Touch Start/Pause button to begin
drying program/cycle Touch the Start/Pause button to start the drying program/ cycle. To pause a program/cycle in progress, touch the Start/ Pause button once, then touch again to continue the program/ cycle. To cancel a program/cycle, touch the Power button.
14. Touch Power button to turn off
dryer after program/cycle ends
11. If an automatic cycle was selected,
set dryness level When you select an automatic cycle, the indicator light above “Dryness Level” lights up. Turn the knob to select the desired level. As you turn the knob, an indicator light will light up next to the dryness levels to the right of the knob. Stop turning when the indicator next to the desired level lights up. Press the knob to conrm your selection.12 Dryer Care
CLEANING THE DRYER LOCATION
Keep dryer area clear and free from items that would block the airflow for proper dryer operation. This includes clearing piles of laundry in front of the dryer.
CLEANING THE DRYER INTERIOR
To clean dryer drum:
1. Use a mild hand dish detergent mixed at a low
concentration with very warm water, and rub with a soft cloth.
2. Rinse well with a wet sponge or towel.
3. Tumble a load of clean clothes or towels to dry drum
Use a microfiber cloth and hot water in a spray bottle to clean the drum and a second microfiber towel to dry.
REMOVING ACCUMULATED LINT
From Inside the Dryer Cabinet Lint should be removed every 2 years, or more often, depending on dryer usage. Cleaning should be done by a qualified appliance servicer.
CLEANING THE LINT SCREEN
Clean lint screen after every load. The lint screen is located in the door opening of the dryer. A screen blocked by lint can increase drying time. To clean:
1. Pull the lint screen straight up and out. Press tab down
and open lint screen. Roll lint off the screen with your fingers.
2. Push the lint screen firmly back into place.
IMPORTANT: Ƀ Do not run the dryer with the lint screen loose, damaged, blocked, or missing. Doing so can cause overheating and damage to both the dryer and fabrics. As-needed cleaning Laundry detergent and fabric softener residue can build up on the lint screen. This buildup can cause longer drying times for your clothes, or cause the dryer to stop before your load is completely dry. Clean the lint screen with a nylon brush every 6 months, or more frequently, if it becomes clogged due to a residue buildup. To wash lint screen:
1. Roll lint off the screen with
2. Wet both sides of lint screen
3. Wet a nylon brush with hot water
and liquid detergent. Scrub lint screen with the brush to remove residue buildup.
4. Rinse screen with hot water.
5. Thoroughly dry lint screen with
a clean towel. Reinstall screen in dryer.13
1. Approximately every 3 months, clean the condensing unit
situated behind the bottom filter.
2. Lower the levers situated on the sides of the condenser.
After having removed the condenser, clean it under running water.
3. Place the condenser back in place and lift the levers.
4. Close the rear side of the bottom filter and place it back
by checking it is perfectly integrated in place.
5. Lower the filter handle and close the bottom door.
6. Make sure the air intake is free.
Clean bottom filter after every 3 loads. The filter is located in bottom corner of dryer. To clean:
1. Pull the lint screen straight up and out. Press tab down
and open lint screen. Roll lint off the screen with your fingers.
2. Push the lint screen firmly back into place.
As-needed cleaning: Laundry detergent and fabric softener residue can build up on the lint screen. This buildup can cause longer drying times for your clothes, or cause the dryer to stop before your load is completely dry. Clean the lint screen with a nylon brush every 6 months, or more frequently, if it becomes clogged due to a residue buildup. To wash lint screen:
1. Roll lint off the screen with your fingers.
2. Wet both sides of lint screen with hot water.
3. Wet a nylon brush with hot water and liquid detergent.
Scrub lint screen with the brush to remove residue buildup.
4. Rinse screen with hot water.
5. Thoroughly dry lint screen with a clean towel. Reinstall
screen in dryer. IMPORTANT: Ƀ Do not run the dryer with the filter loose, damaged, blocked, or missing. Doing so can cause overheating and damage to both the dryer and fabrics.
NON-USE, STORAGE, AND MOVING CARE
Non-Use or Storage Care Operate your dryer only when you are at home. If you will be on vacation or not using your dryer for an extended period of time, you should:
1. Empty water tank.
2. Unplug dryer or disconnect power.
3. Clean lint screen. See “Cleaning the Lint Screen.”
Moving Care For power supply cord-connected dryers:
1. Empty water tank.
2. Unplug the power supply cord.
3. Make sure leveling legs are secure in dryer base.
4. Use tape to secure dryer door.
NON-USE, STORAGE, AND
MOVING CARE (cont.) For direct-wired dryers:
1. Empty water tank.
2. Disconnect power.
3. Disconnect wiring.
4. Make sure leveling legs are secure in dryer base.
5. Use tape to secure dryer door.
Reinstalling the Dryer Follow the “Installation Instructions” section to locate, level, and connect the dryer.14 INSTALLATION INSTRUCTIONS Installation Requirements
Gather the required tools and parts before starting installation. Tools needed: Flat-blade screwdriver #2 Phillips screwdriver Min. 8" long TORX
screwdriver Wire stripper (direct wire installations) Channel locks Adjustable wrench that opens to 1" (25 mm) or hex-head socket wrench 1/4" and 5/16" nut driver (recommended) Utility knife Tape measure Level Pliers If using a power supply cord: Use a UL-listed power supply cord kit marked for use with clothes dryers. The kit should contain: Ƀ A UL-listed 30 A power supply cord, rated 120 V/240 V minimum. The cord should be type SRD or SRDT and be at least 4 ft. (1.22 m) long. The wires that connect to the dryer must end in ring terminals or spade terminals with upturned ends. Additional Accessories: (Not supplied with dryer) Refer to “Operating Instructions” for information about accessories available for your dryer.
TORX and T20 are registered trademarks of Acument Intellectual Properties, LLC.15 Location Requirements Check code requirements. Some codes limit, or do not permit, installing dryer in garages, closets, mobile homes, or sleeping quarters. Contact your local building inspector. You will need: Ƀ A separate 30 A circuit. Ƀ If using power supply cord, a grounded electrical outlet located within 2 ft. (610 mm) of either side of dryer. See “Electrical Requirements.” Ƀ Floor must support dryer weight of 200 lbs. (90.7 kg). Also consider weight of companion appliance. Ƀ Level floor with maximum slope of 1" (25 mm) under entire dryer. If forward slope is greater than 1" (25 mm), water could run out from front of filter. If not level, clothes may not tumble properly and automatic sensor cycles may not operate correctly. Ƀ For garage installation, place dryer at least 18" (460 mm) above floor. If using a pedestal, you will need 18" (460 mm) to bottom of dryer. IMPORTANT: Do not operate, install, or store dryer where it will be exposed to water, weather, or at temperatures below 40°F (4°C). Lower temperatures may cause dryer not to shut off at end of automatic sensor cycles, resulting in longer drying times. DRYER DIMENSIONS (595 mm) 23 / "
19/32" Back view: (687 mm)(15 mm)(100 mm)19/32" 27" NOTES: Ƀ Allow clearance behind dryer for proper drain hose routing. Push dryer back as far as possible and make sure drain hose is not crushed or kinked. Ƀ Water can be drained into an alternate location. Remove the top end of the white hose from the water tank and install, for example, in a floor standpipe (see “Drain System”). Power cord/cable16 Installation spacing for recessed area or closet installation All dimensions show recommended and minimum spacing allowed. Ƀ Additional spacing should be considered for ease of installation and servicing. Ƀ Additional clearances might be required for wall, door, floor, moldings, and drain system. Ƀ Additional spacing should be considered on all sides of the dryer to reduce noise transfer. Ƀ For closet installation with a door, minimum ventilation openings in the top and bottom of the door are required. Louvered doors with equivalent ventilation openings are acceptable. Ƀ Companion appliance spacing should also be considered. Recommended installation clearances (dryer only): 0" (0 mm)0"(0 mm)0" - 5"* (0 mm - 127 mm) 24 in.
3"(76 mm)3"(76 mm)0" (0 mm) *NOTE: 0"–5" (0 mm–127 mm) spacing is allowed behind dryer, providing drain hose is not kinked or pinched. Mobile home – Additional installation requirements: This dryer is suitable for mobile home installations. The installation must conform to the Manufactured Home Construction and Safety Standard, Title 24 CFR,
Part 3280 (formerly the Federal Standard for Mobile home con-
struction and Safety, Title 24, HUD Part 280) or Standard CAN/CSA-Z240 MH. Minimum diameter for a standpipe drain: 2" (51 mm). Top of standpipe must be at least 30" (762 mm) high; install no higher than 36" (910 mm) from bottom of dryer. Floor standpipe drain system Drain system can be installed by routing the white hose to a oor drain, wall standpipe, oor standpipe, or laundry tub instead of to the water tank. Select the method you need. IMPORTANT: To avoid siphoning, only 4.5" (114 mm) of drain hose should be inside standpipe; do not force excess hose into standpipe. Always secure drain hose with a cable tie (not supplied). 4.5" (114 mm) 4.5" (114 mm) max. 36" (910 mm) min. 30" (762 mm) Custom under-counter installation: 0" Min. (0 mm) 0"Min. (0 mm) 0"Min. (0 mm) 34½ " Min. (876 mm) DRAIN SYSTEM17 Electrical Requirements – U.S.A. Only It is your responsibility: Ƀ To contact a qualified electrical installer. Ƀ To be sure that the electrical connection is adequate and in conformance with the National Electrical Code, ANSI/ NFPA 70 – latest edition and all local codes and ordinances. The National Electrical Code requires a 4-wire power supply connection for homes built after 1996, dryer circuits involved in remodeling after 1996, and all mobile home installations. A copy of the above code standards can be obtained from: National Fire Protection Association, One Batterymarch Park, Quincy, MA 02269. Ƀ To supply the required 3- or 4-wire, single-phase, 120/240 V, 60 Hz, AC-only electrical supply (or 3- or 4-wire, 120/208 V electrical supply, if specified on the serial/rating plate) on a separate 30 A circuit, fused on both sides of the line. Connect to an individual branch circuit. Do not have a fuse in the neutral or grounding circuit. Ƀ Do not use an extension cord. Ƀ If codes permit and a separate ground wire is used, it is recommended that a qualified electrician determine that the ground path is adequate. Electrical Connection To properly install your dryer, you must determine the type of electrical connection you will be using and follow the instructions provided for it here. Ƀ This dryer is manufactured ready to install with a 3-wire electrical supply connection. A neutral ground conductor (blue wire) is provided between the power supply neutral connection (center terminal) and the dryer external grounding point (green screw). If the dryer is installed with a 4-wire electrical supply connection, one end of the neutral ground conductor must be removed from the external ground connector (green screw), and secured under the neutral terminal (center screw) of the terminal block. When both ends of the neutral ground conductor are secured under the neutral terminal (center or white wire) of the terminal block, the dryer cabinet is isolated from the neutral conductor. The green ground wire of the 4-wire power cord must be secured to the dryer cabinet with the green ground screw. Ƀ If local codes do not permit the connection of a neutral ground wire to the neutral wire, see “Optional External Ground 3-wire connection”. Ƀ A 4-wire power supply connection must be used when the appliance is installed in a location where grounding through the neutral conductor is prohibited. Grounding through the neutral is prohibited for (1) new branch-circuit installations after 1996, (2) mobile homes, (3) recreational vehicles, and (4) areas where local codes prohibit grounding through the neutral conductors. If using a power supply cord: Use a UL-listed power supply cord kit marked for use with clothes dryers. The kit should contain: Ƀ A UL-listed 30 A power supply cord, rated 120/240 V minimum. The cord should be type SRD or SRDT and be at least 4 ft. (1.22 m) long. The wires that connect to the dryer must end in ring terminals or spade terminals with upturned ends. If connecting by direct wire: Power supply cable must match power supply (4-wire or 3-wire) and be: Ƀ Flexible armored cable or nonmetallic sheathed copper cable (with ground wire), covered with flexible metallic conduit. All current-carrying wires must be insulated. Ƀ 10-gauge solid copper wire (do not use aluminum) at least 5 ft. (1.52 m) long. Then choose a 4-wire power supply cord with ring or spade terminals and UL-listed strain relief. The 4-wire power supply cord, at least 4 ft. (1.22 m) long, must have four 10-gauge copper wires and match a 4-wire receptacle of NEMA-Type 14-30R. The ground wire (ground conductor) may be either green or bare. The neutral conductor must be identified by a white cover. Then choose a 3-wire power supply cord with ring or spade terminals and UL-listed strain relief. The 3-wire power supply cord, at least 4 ft. (1.22 m) long, must have three 10-gauge copper wires and match a 3-wire receptacle of NEMA-Type 10-30R. 4-wire receptacle (14-30R) 3-wire receptacle (10-30R) If your outlet looks like this:18 Electric Dryer Power Hookup – Canada Only Electrical Requirements It is your responsibility: Ƀ To contact a qualified electrical installer. Ƀ To be sure that the electrical connection is adequate and in conformance with the Canadian Electrical Code, C22.1 – latest edition and all local codes. A copy of the above codes standard may be obtained from: Canadian Standards Association, 178 Rexdale Blvd., Toronto, ON M9W 1R3 CANADA. Ƀ To supply the required 4-wire, single-phase, 120/240 V, 60 Hz., AC-only electrical supply on a separate 30 A circuit, fused on both sides of the line. A time-delay fuse or circuit breaker is recommended. Connect to an individual branch circuit. Ƀ This dryer is equipped with a CSA International Certified Power Cord intended to be plugged into a standard 14-30R wall receptacle. The cord is 5 ft. (1.52 m) in length. Be sure wall receptacle is within reach of dryer’s final location. Ƀ Do not use an extension cord.If using a replacement power supply cord, it is recommended that you use Power Supply Cord Replacement Part Number 8579325. For further information, please reference the “Assistance or Service” section. GROUNDING INSTRUCTIONS
SAVE THESE INSTRUCTIONS
For a grounded, cord-connected dryer: This dryer must be grounded. In the event of malfunction or breakdown, grounding will reduce the risk of electric shock by providing a path of least resistance for electric current. This dryer is equipped with a cord having an equipment- grounding conductor and a grounding plug. The plug must be plugged into an appropriate outlet that is properly installed and grounded in accordance with all local codes and ordinances.
WARNING: Improper connection of the equipment-
grounding conductor can result in a risk of electric shock. Check with a qualied electrician or service representative or personnel if you are in doubt as to whether the dryer is properly grounded. Do not modify the plug provided with the dryer: if it will not t the outlet, have a proper outlet installed by a qualied electrician. Electric Installation – U.S.A. Only Remove hold-down screws and terminal block cover.
1. Choose electrical connection type
Power supply cord 4-wire receptacle(NEMA-Type 14-30R):Go to “Power Supply Cord Connection.”3-wire direct connection:Go to “Direct Wire Connection.”4-wire direct connection:Go to “Direct Wire Connection.”Power supply cord 3-wire receptacle(NEMA Type 10-30R):Go to “Power Supply Cord Connection.”NOTE: If local codes do not permit connection of a cabinet-ground conductor to neutral wire, go to “Optional External Ground for 3-Wire Connection.” This connection can be used with either a power supply cord or a direct wire connection.
2. Remove terminal block cover
Before you start: disconnect power.4-wire receptacle (14-30R)19 WARNING Fire HazardUse a new UL listed 30 amp power supply cord. Use a UL listed strain relief. Disconnect power before making electrical connections.Connect neutral wire (white or center wire) to center terminal. Ground wire (green or bare wire) must be connected to green ground connector. Connect remaining 2 supply wires to remaining 2 terminals. Securely tighten all electrical connections. Failure to do so can result in death, fire, or electrical shock. 4-Wire Power Supply Cord Strain Relief: IMPORTANT: Use the strain relief supplied with the dryer. Power Supply Cord Connection 4-Wire Power Supply Cord Connection IMPORTANT: A 4-wire connection is required for mobile homes and where local codes do not permit the use of 3-wire connections.4-wire receptacle (NEMA-type 14-30R)4 prong plugSpade terminals with upturned endsRing terminals Attach power supply cord to strain relief Put power supply cord through the strain relief. Be sure that the wire insulation on the power supply cord is inside the strain relief. Do not further tighten strain relief screws at this point.Power supply cord 4-wire receptacle(NEMA-Type 14-30R):Go to “4-Wire Power Supply Cord Connection.”Power supply cord 3-wire receptacle(NEMA-Type 10-30R):Go to “3-Wire Power Supply Cord Connection.”If your outlet looks like this:Connect neutral wire (white or center) (C) of power supply cord under center terminal block screw (B). Tighten screw.
1. Connect neutral wire
Connect ground wire (F) (green or bare) of power supply cord under green external ground conductor screw (A). Tighten screw.
2. Connect ground wire
A20 3-wire receptacle (NEMA-type 10-30R) 3 prong plug Spade terminals with upturned ends Ring terminals
3. Connect remaining wires
Connect remaining wires under outer terminal block screws. Tighten screws, tighten strain relief screws. Finally, replace the terminal block cover and secure with the 4 hold-down screws. Now, go to “Level Dryer.” 3-Wire Power Supply Cord Connection Use where local codes permit connecting cabinet-ground conductor to neutral wire.
2. Connect remaining wires
Connect remaining wires under outer terminal block screws. Tighten screws, tighten strain relief screws. Finally, replace the terminal block cover and secure with the 4 hold-down screws. Now, go to “Level Dryer.” Connect neutral (center) wire (C) of power supply cord under center terminal block screw (B) . Tighten screw. 3-Wire Power Supply Cord Strain Relief: IMPORTANT: Use the strain relief supplied with the dryer. Attach power supply cord to strain relief Put power supply cord through the strain relief. Be sure that the wire insulation on the power supply cord is inside the strain relief. Do not further tighten strain relief screws at this point.
B21 Direct Wire Connection WARNING Fire HazardUse 10 gauge copper wire.Use a UL listed strain relief. Disconnect power before making electrical connections.Connect neutral wire (white or center wire) to center terminal. Ground wire (green or bare wire) must be connected to green ground connector. Connect remaining 2 supply wires to remaining 2 terminals. Securely tighten all electrical connections. Failure to do so can result in death, fire, or electrical shock. Direct Wire Strain Relief IMPORTANT: Use a conduit strain relief (not supplied).
3. Attach direct wire cable to strain relief
Put direct wire cable through the strain relief. The strain relief should have a tight fit with the dryer cabinet and be in a vertical position. Tighten strain relief screw against the direct wire cable.3-wire direct connection:Go to “3-Wire Direct Wire Connection.”4-wire direct connection:Go to “4-Wire Direct Wire Connection.” If your wiring looks like this:
2. Attach direct wire strain relief
Put the strain relief (B) through the hole below the terminal block opening (A). Press the strain relief from bottom to fit into the hole. Make sure that strain relief is fitted properly in the hole.
1. Remove existing strain relief
With a flat-blade screwdriver, flatten the three tabs on the band at the top of the strain relief. Pull out strain relief.22
1. Prepare your 3-wire cable
for direct connection 1"(25 mm) 3½"(89 mm)
4. Connect remaining wires
Direct wire cable must have 5 ft. (1.52 m) of extra length so dryer may be moved if needed. Strip 3
" (89 mm) of outer covering from end of cable. Strip insulation back 1" (25 mm). If using 3-wire cable with ground wire, cut bare wire even with outer covering. Shape wire ends into hooks. Place hooked ends of remaining direct wire cable wires under outer terminal block screws (hooks facing right). Squeeze hooked ends together, tighten screws. Finally, replace the terminal block cover and secure with the 4 hold-down screws. Now, go to “Level Dryer.” 3-Wire Direct Wire Connection Use where local codes permit connecting cabinet-ground conductor to neutral wire. 4-Wire Direct Wire Connection IMPORTANT: A 4-wire connection is required for mobile homes and where local codes do not permit 3-wire connections.
1. Prepare your 4-wire cable
for direct connection
(127 mm) Direct wire cable must have 5 ft. (1.52 m) of extra length so dryer may be moved if needed. Strip 5" (127 mm) of outer covering from end of cable, leaving bare ground wire at 5" (127 mm). Cut 1
" (38 mm) from remaining 3 wires. Strip insulation back 1" (25 mm). Shape ends of wires into hooks. Place hooked end (hook facing right) of neutral wire (white or center wire) (C) of direct wire cable under center screw of terminal block (B). Squeeze hooked ends together. Tighten screw.
Connect ground wire (green or bare) (F) of direct wire cable under green external ground conductor screw (A). Tighten screw.
3. Connect ground wire
A23 Place hooked end of neutral wire (white or center) (C) of direct wire cable under center screw of terminal block (B), hook facing right. Squeeze hooked end together. Tighten screw.
3. Connect remaining wires
Place hooked ends of remaining direct wire cable wires under outer terminal block screws (hooks facing right). Squeeze hooked ends together, tighten screws, tighten strain relief screws. Finally, replace the terminal block cover and secure with the 4 hold-down screws. Now, go to “Level Dryer.” Optional External Ground for 3-Wire Connection (Power Supply Cord Shown) IMPORTANT: You must verify with a qualied electrician that this grounding method is acceptable before connecting. Remove center terminal block screw (B) and green external ground conductor screw (A). Loop neutral bonding wire (blue) (D) to center terminal block location. Connect neutral wire (white or center) (C) of power supply cord or cable under center terminal block screw (B). Make sure the end of neutral bonding wire (white) (D) looped in Step 1 remains on the center terminal when the power supply cord neutral wire is attached. Tighten screw. Place ends of remaining wires under outer terminal block screws. Tighten screws and tighten strain relief.
3. Connect remaining wires
Connect a separate copper ground wire (G) under the green external ground conductor screw (A) to an adequate ground. Finally, replace the terminal block cover and secure with the 4 hold-down screws. Now, go to “Level Dryer.”
1. Prepare to connect neutral wire
4. Connect external ground wire
Place level here on either side Not Level LEVEL Not Level Check levelness of dryer from side to side. Repeat from front to back. NOTE: The dryer must be level for the moisture-sensing system to operate correctly. If forward slope of dryer is greater than 1" (25 mm), water could run out from front of filter.
2. Adjust leveling legs
If dryer is not level, prop up using a wood block, use wrench to adjust legs up or down, and check again for levelness. Once dryer is level, make sure all four legs are snug against the floor and dryer does not rock. Complete Installation Checklist Ƀ Check that all parts are now installed. If there is an extra part, go back through steps to see what was skipped. Ƀ Check that dryer is level. See “Level Dryer.” Ƀ Check that you have all of your tools. Ƀ Dispose of/recycle all packaging materials. Ƀ Check dryer’s final location. Ƀ Remove any tape remaining on dryer. Ƀ Wipe dryer drum interior thoroughly with a damp cloth to remove any dust. Ƀ Read “Using Your Dryer” in “Operating Instructions.” Ƀ For power supply cord installation, plug into a grounded outlet. For direct wire installation, turn on power. Ƀ Select a Timed Dry heated cycle and start dryer. If dryer will not start, check the following:
- Controls are set in a running or ON position.
- Start/Pause button has been pushed rmly and held for 3 seconds.
- Dryer is plugged into an outlet and/or electrical supply.
- Household fuse is intact and tight or circuit breaker has not tripped.
- Dryer door is closed. This dryer automatically runs an installation diagnostic routine at the start of its first cycle. NOTE: You may notice an odor when dryer is first heated. The odor will go away.25
1. Remove door lock screws
screwdriver Tools needed: Door Reversal (optional)
Press the small knob above the door lock with a small screwdriver. At the same time, push up on the door lock and pull it towards you.
Remove two screws on door hinge Remove the two trim screws located above and below the door lock, to the left of the door opening.
4. Remove door and gently lay
front-side-down on soft surface26
5. Unscrew bottom screw to release
7. While holding door, gently turn
chrome trim ring clockwise and remove27
9. Remove 2 side screws on each side
10. Remove 4 inner screws on each
11. Remove side parts on each side
12. Reverse side parts and insert them
Re-fasten 2 screws on each side of door
Re-fasten 4 inner screws on each side of door
faces up and re-fasten chrome trim ring screw
Fasten door to left side of door opening Press the door lock completely into the hole and move it slightly downwards until the small knob of the door lock latches. Fasten the two trim screws located above and below the door lock, to the right of the door opening. Fasten the two screws to the door hinge.30 TROUBLESHOOTING If you experience Possible Causes Solution Dryer Operation Dryer will not run Door not closed completely. Make sure the dryer door is closed completely. Start/Pause button not touched rmly. Touch the Start/Pause button rmly. Bottom lter not in place. Place lter back in dryer and make sure the handle is properly seated. The bottom lter indicator will light up if not properly seated. Household fuse is blown or circuit breaker has tripped. There may be 2 household fuses or circuit breakers for the dryer. Check that both fuses are intact and tight, or that both circuit breakers have not tripped. Replace the fuses or reset the circuit breaker. If the problem continues, call an electrician. Incorrect power supply. Electric dryers require 240 V power supply. Check with a qualied electrician. Wrong type of fuse. Use a time-delay fuse. Unusual Noise Thumping noise Dryer hasn’t been used in a while. This is due to temporary at spots on the drum rollers. The thumping sound will diminish after a few minutes. Rattling or vibrating noise A small object caught between the edges of dryer drum. Check the front and rear edges of the drum for small objects. Clean out pockets before laundering. Dryer isn’t properly leveled. The dryer may vibrate if not properly installed. See “Installation Instructions.” All four dryer feet should be in rm contact with the oor. Clothing is balled up in dryer. When balled up, the load will bounce, causing the dryer to vibrate. Separate the load items and restart the dryer. Loud humming or increased noise during cycle Load is packed tightly. Reduce load size to recommended load size in “Program/Cycle Guide.” Run the dryer for 5–10 minutes. Dryer Results Clothes are not drying satisfactorily or drying times are too long Lint screen is clogged with lint. Clean lint screen before each load. Bottom lter and screen is clogged with lint. Clean bottom lter after every 5th cycle. The dryer is not level. Clothes not contacting the moisture sensors during Automatic Cycles. See “Level Dryer” in “Installation Instructions.” The load is too large and heavy to dry quickly. Separate the load to tumble freely. Fabric softener sheets are blocking the grille. The air outlet grille is just inside the door. Check that it is not blocked by a fabric softener sheet. Use only one fabric softener sheet, and use it only once. The dryer is located in a room with temperature below 45ºF (7ºC). Proper operation of dryer cycles requires temperatures above 45ºF (7ºC). The dryer is located in a closet. Closet doors must have ventilation openings at the top and bottom of the door. First try the solutions suggested here or visit our website at www.whirlpool.com/product_help – In Canada www.whirlpool.ca for assistance and to possibly avoid a service call.31 TROUBLESHOOTING If you experience Possible Causes Solution Dryer Results (cont.) There may be some water in the bottom lter or on oor The dryer is not level. Floor needs to have a slope less than 1" (25 mm). See “Level Dryer” in “Installation Instructions.” Bottom lter is not properly seated. Make sure lter is placed in the housing cabinet correctly. See “Cleaning the Bottom Filter.” Drain hose is longer than what was provided. Verify water container and hose connections. Drain hose can be installed no higher than 36" (91 cm) from bottom of the dryer. See “Drain System” in “Installation Instructions.” Cycle time is too short The load may not be contacting the sensor strips on Automatic Cycles. Level the dryer. See “Installation Instructions.” All four dryer feet should be in rm contact with the oor. The Automatic Cycle is ending early. Change the dryness level setting on Automatic Cycles. Increasing or decreasing the dryness level will change the amount of drying time in a cycle. Lint on load Lint screen is clogged with lint. Clean lint screen before or after each load. Stains on load Improper use of fabric softener. Add dryer fabric softener sheets at the beginning of the cycle. Fabric softener sheets added to a partially dried load can stain your garments. Do not use fabric softener sheets with steam cycles. Stains on drum Loose dyes in clothes. Drum stains are caused by dyes in clothing (usually blue jeans). These will not transfer to other clothing. Loads are wrinkled The load was not removed from dryer at the end of the cycle. Refer to garment care label instructions. Dry-clean-only garments are not recommended. The dryer was tightly packed. Dry smaller loads that can tumble freely. Results may also vary depending on fabric type. Odors Recent painting, staining, or varnishing in the area where your dryer is located. Ventilate the area. When the odors or fumes are gone from the area, rewash and dry the clothing. Odors are left in garments after wearing. Rewash and dry the clothing. Load too hot Load removed before cool-down portion of cycle complete. Allow the dryer to complete the cool-down portion of the cycle before removing the load. Stains or lint buildup on wall behind dryer Dryer too close to wall. Move dryer away from wall and make sure you have proper ventilation. First try the solutions suggested here or visit our website at www.whirlpool.com/product_help – In Canada www.whirlpool.ca for assistance and to possibly avoid a service call.32 Risque possible de décès ou de blessure grave si vous ne suivez pas immédiatement les instructions. Risque possible de décès ou de blessure grave si vous ne suivez pas les instructions. Tous les messages de sécurité vous diront quel est le danger potentiel et vous disent comment réduire le risque de blessure et ce qui peut se produire en cas de non-respect des instructions. Votre sécurité et celle des autres est très importante. Nous donnons de nombreux messages de sécurité importants dans ce manuel et sur votre appareil ménager. Assurez-vous de toujours lire tous les messages de sécurité et de vous y conformer. AVERTISSEMENT DANGER Voici le symbole d’alerte de sécurité. Ce symbole d’alerte de sécurité vous signale les dangers potentiels de décès et de blessures graves à vous et à d’autres. Tous les messages de sécurité suivront le symbole d’alerte de sécurité et le mot “DANGER” ou “AVERTISSEMENT”. Ces mots signifient :
©2019 Whirlpool. All rights reserved. Used under license in Canada. Tous droits réservés. Emploi sous licence au Canada. Assistance or Service Before calling for assistance or service, please check “Troubleshooting” or visit www.whirlpool.com/owners. It may save you the cost of a service call. If you still need help, follow the instructions below. When calling, please know the purchase date and the complete model and serial number of your appliance. This information will help us to better respond to your request. Whirlpool Brand Appliances Customer eXperience Center 553 Benson Road Benton Harbor, MI 49022-2692 1-866-698-2538 Whirlpool Brand Appliances Customer eXperience Centre Unit 200-6750 Century Ave Mississauga, Ontario L5N 0B7 1-800-688-2002 You can write with any questions or concerns at: Our consultants provide assistance with Please include a daytime phone number in your correspondence. If you need replacement parts or to order accessories We recommend that you use only FSP
Factory Specied Parts. These parts will t right and work right because they are made with the same precision used to build every new WHIRLPOOL
appliance. To locate FSP