USER MANUAL Create 4 E4CM16ST ELECTROLUX
Create 4 Coffee Maker
User Manual

How to use
text_image
Illustration showing a hand using an electric plug to clean air from a microwave oven, with four sequential steps of cleaning and packaging.
flowchart
graph LR
    A["Box with lid"] --> B["Add steam to a cup"]
    B --> C["Add coffee maker into a kettle"]
    C --> D["Add coffee maker to a coffee maker with water drop"]
    D --> E["Add coffee maker to a coffee maker with water drop"]
Regular Function
text_image
ON
ABOMA
AROMA Function
text_image
To maximize the flavour extraction
and get a stronger coffee
natural_image
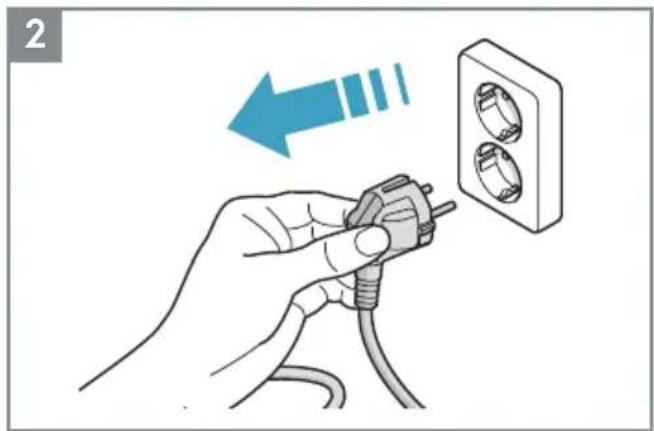
Illustration of a hand holding an electrical plug with a wall socket, showing a blue arrow indicating direction (no text or symbols present)
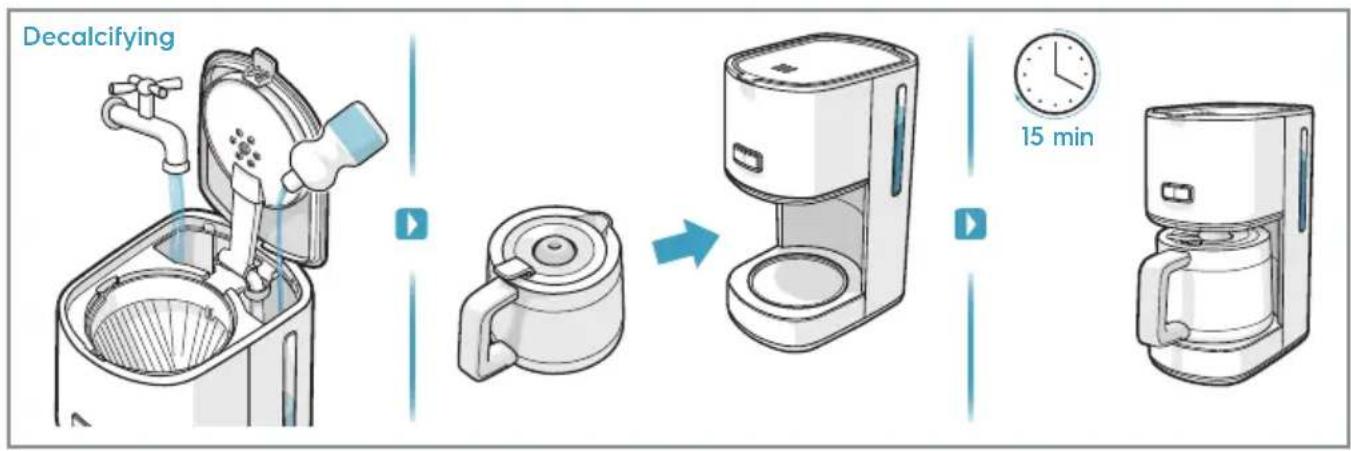
Decalcifying: Recommended 1x every 3 months With decalcifying agent
flowchart
graph LR
    A["Decalcifying"] --> B["Add water into washing machine"]
    B --> C["Add a coffee maker"]
    C --> D["Add coffee maker with 15 min time indicator"]
text_image
ON
A200mm
text_image
Illustration showing the step-by-step installation of a coffee maker with water filter, including washing machine, digital coffee maker, and hand press control.

natural_image
Diagram of a water dispenser with a drop symbol and droplet illustration (no text or labels)

Warning!
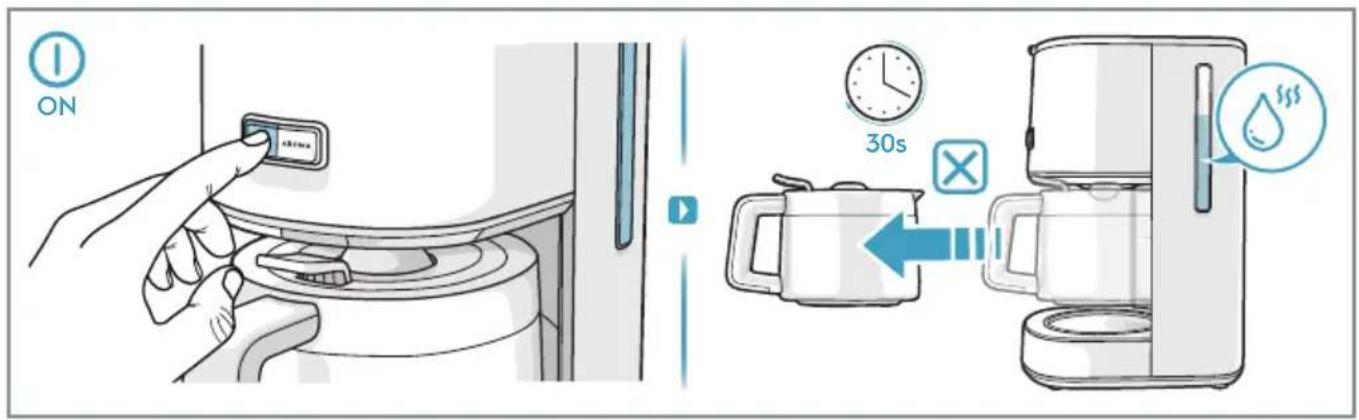
While boiling, the jug must not be removed for longer than 30 seconds or the filter will overflow.
text_image
ON
30s
text_image
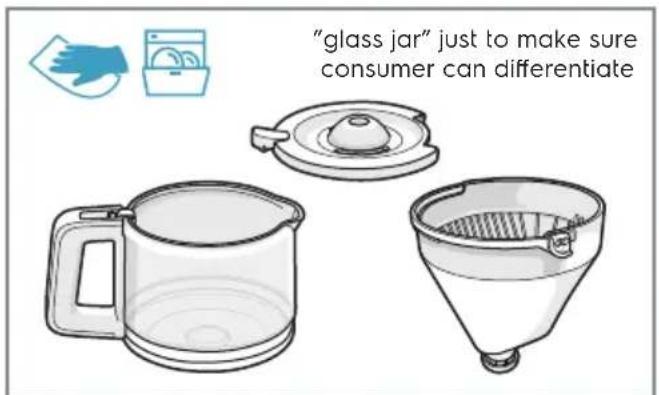
Thermal Jar Glass Jar
Max
×10
text_image
Max
x12
Cleaning
natural_image
Line drawing of a modern coffee maker with three directional icons (hand, cross, lock) above it, no text or symbols present.
text_image
"glass jar" just to make sure consumer can differentiate
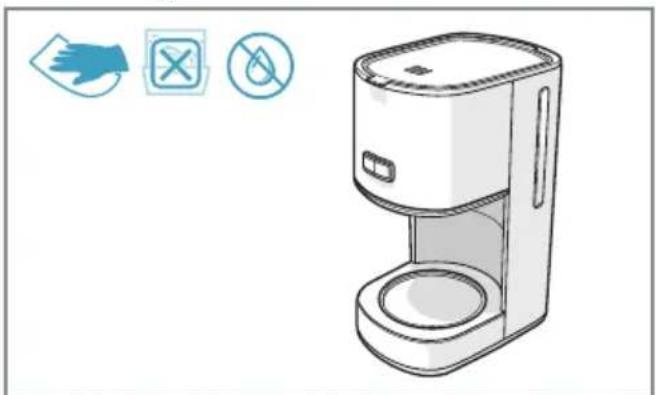
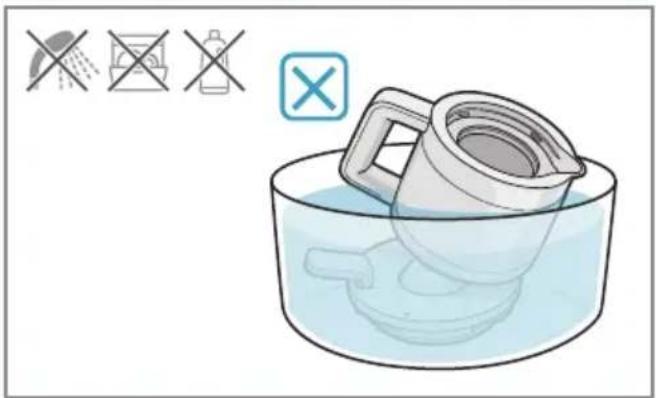
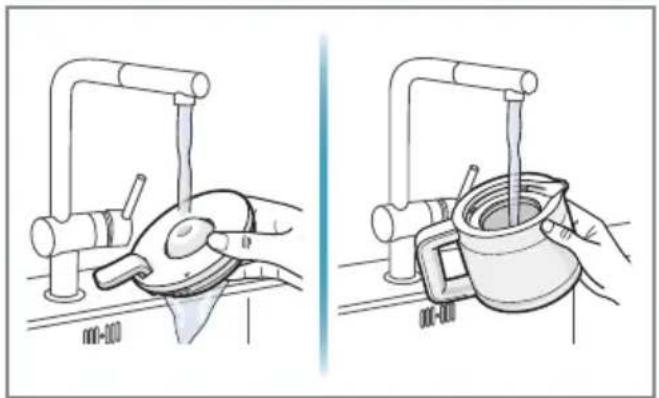
Never immerse the thermo jug in liquid or wash it in dishwasher.* It can only be washed under running water
natural_image
Illustration of a washing machine in a basin with no text or symbols
natural_image
Two-step illustration of a hand washing a cup into a sink, showing mechanical components and tubing (no text or symbols)
Thank you for choosing an Electrolux product. In order to ensure the best results, always use original Electrolux accessories and spare parts. They have been designed especially for your product. This product is designed with the environment in mind. All plastic parts are marked for recycling purposes.
Visit our website to:
Get usage advice, brochures, trouble shooter, service information:
www.electrolux.com
Register your product for better service:
www.electrolux.com/productregistration
Buy Accessories and Consumables for your appliance:
www.electrolux.com/shop
CUSTOMER CARE AND SERVICE
When contacting Service, ensure that you have the following data available. The information can be found on the rating plate.
Model, PNC, Serial Number.
Warning / Caution-Safety information
General information and tips
Environmental information

text_image
Electrolux
A
II
C
B
F
G
H
text_image
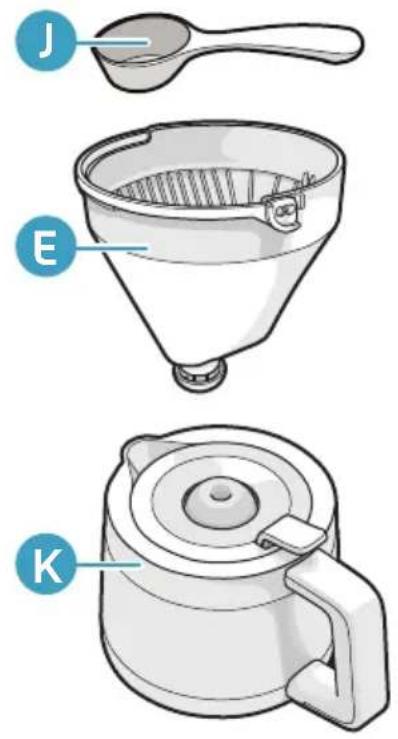
J
E
K
A ON/OFF switch with power indicator light
B Water tank
C Water level indicator
D Hinged lid
E Filter holder with anti-drip valve
F Glass coffee jug*
G Warming plate*
H Power cord & plug
I Aroma button
J Measuring spoon
K Stainless steel thermo jug*
*depending on model
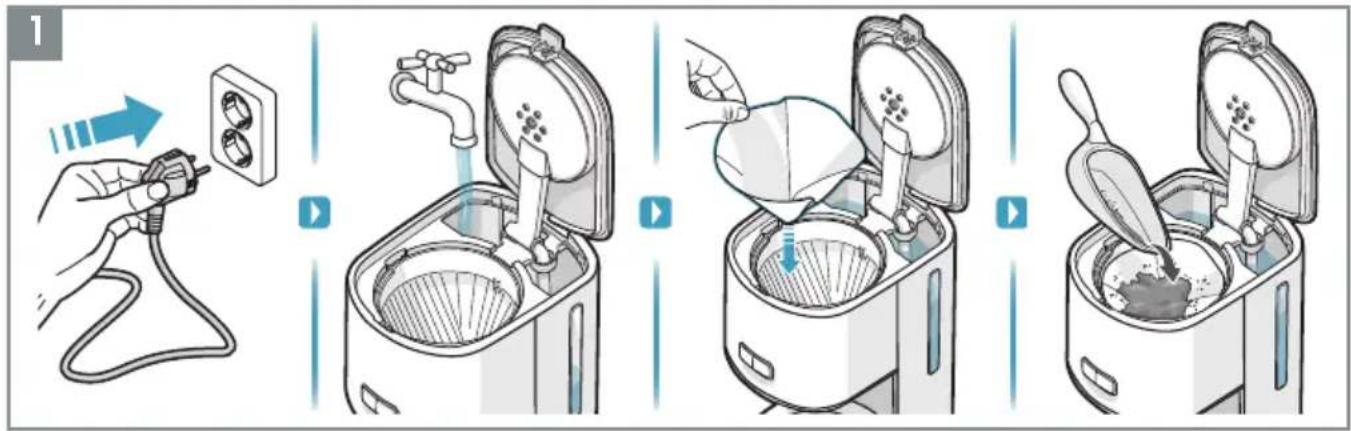
GETTING STARTED
1 Place the machine on a flat surface. When starting the machine for the first time, fill the tank with cold water. Start the machine with the ON/OFF switch. Let a full tank of water pass through the machine once or twice to clean it, without using paper filter or coffee.
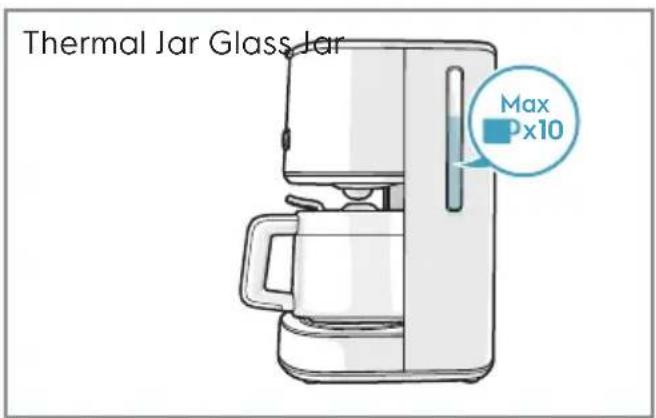
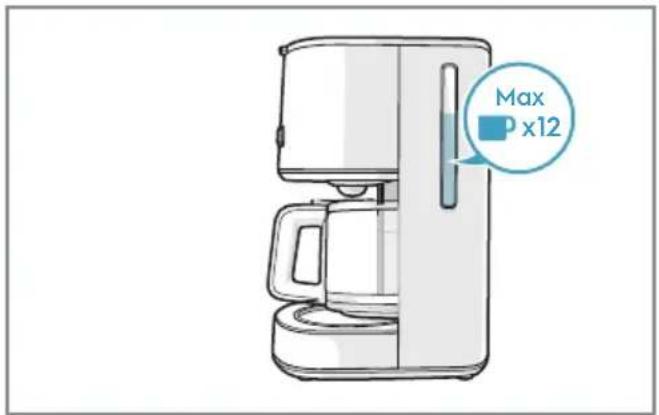
2 Making coffee: open the lid and fill the water tank with fresh cold water up to the desired level. There is a water-level indicator for 2-10 big cups / 3-15 small cups inside the water tank.
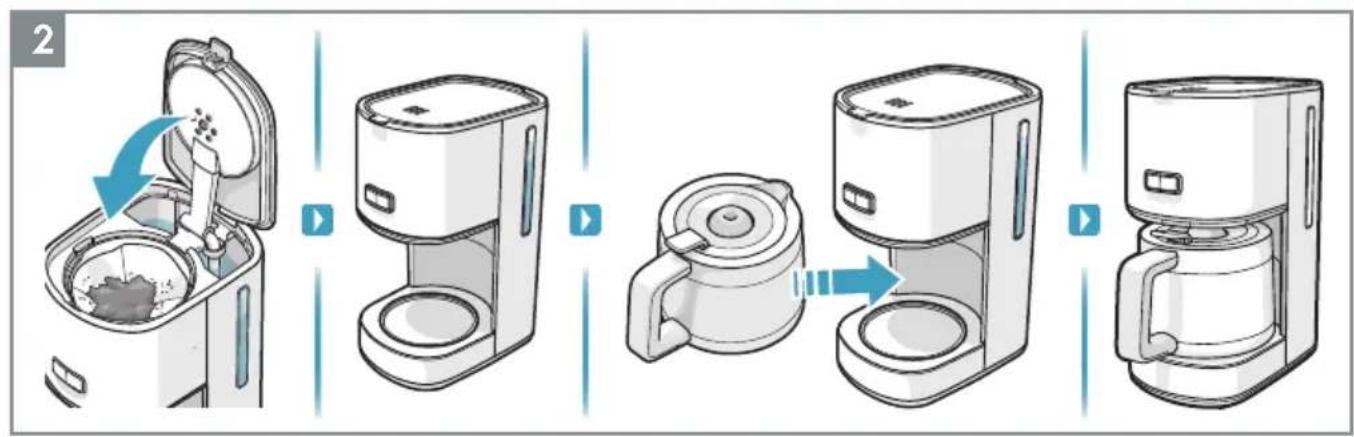
3 Insert paper filter into filter basket and fill it with ground coffee. There is a gauge for recommended number of spoons of coffee next to the water gauge. For medium-strength coffee, one measuring spoon (approx. 6-7 g) per cup is sufficient. Close the water tank lid and place the jug (complete with lid) onto the warming plate.
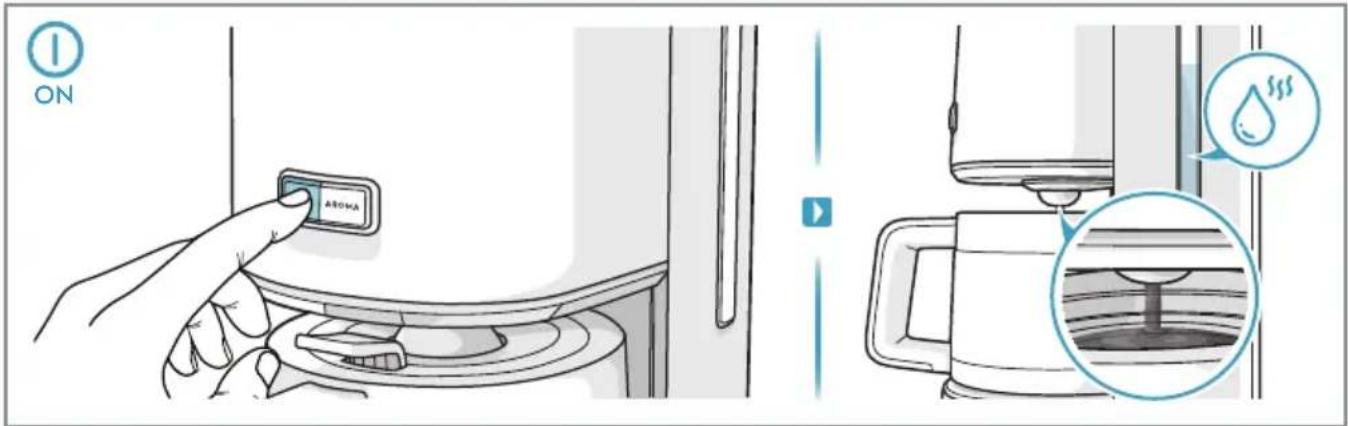
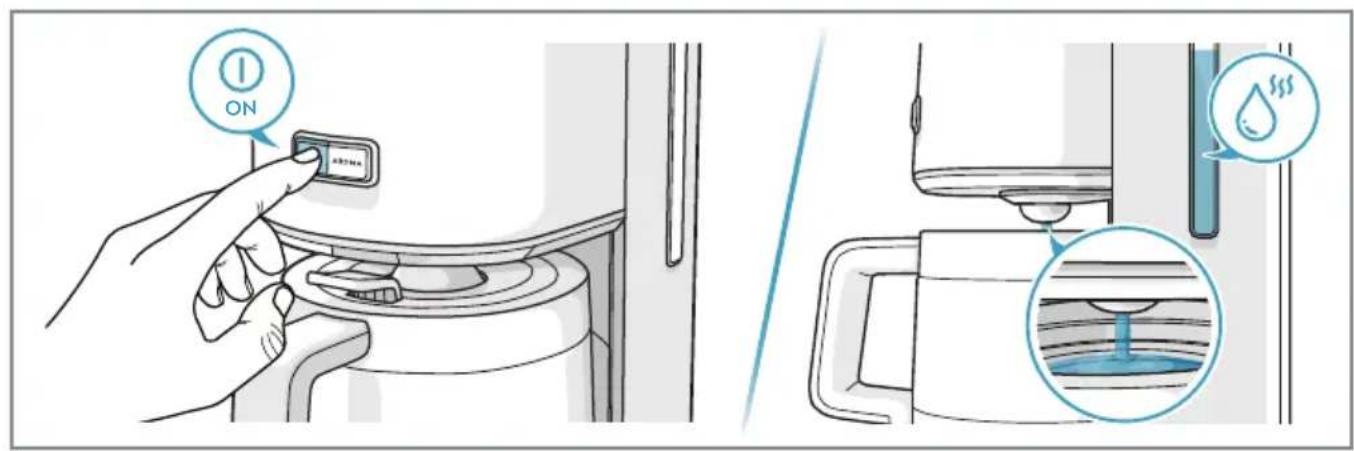
4 Start the machine with the ON/OFF switch. The power indicator light will come on and hot water will flow into the filter. When water has stopped flowing, the warming plate keeps the coffee hot until the machine is turned off with the ON/OFF switch. If the machine is not turned off manually, the Safety Auto-Off function turns it off after 40 minutes.
5 If the jug is removed, the filter valve prevents coffee from dripping onto the warming plate. While boiling, the jug must not be removed for longer than 30 seconds or the filter will overflow.
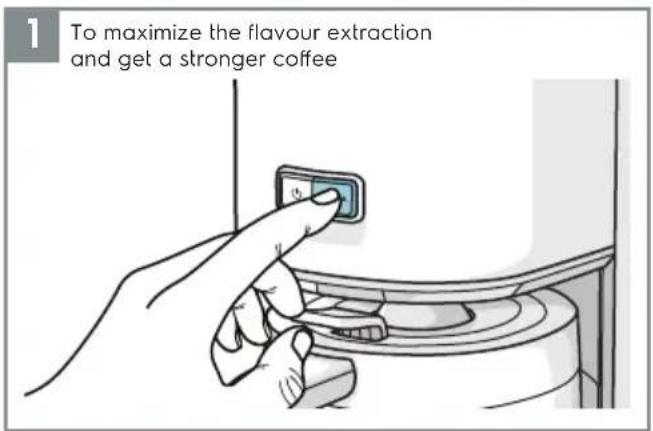
6 The Aroma Selector extends the brewing time to maximize the flavour extraction and get a stronger coffee for a small number of cups (normally less than 6). Press the Aroma button, and the aroma icon will turn on.
CLEANING AND CARE
1 Switch the machine off and unplug the power cord. Wipe all outer surfaces with a damp cloth.
Coffee jug (F) and jug lid are dishwasher proof. Never use caustic or abrasive cleaners, and never immerse the machine in liquid!
2 To clean the filter holder (E), lift up the handle and remove the filter holder. To clean the filter valve thoroughly, rotate it several times while it is being rinsed.
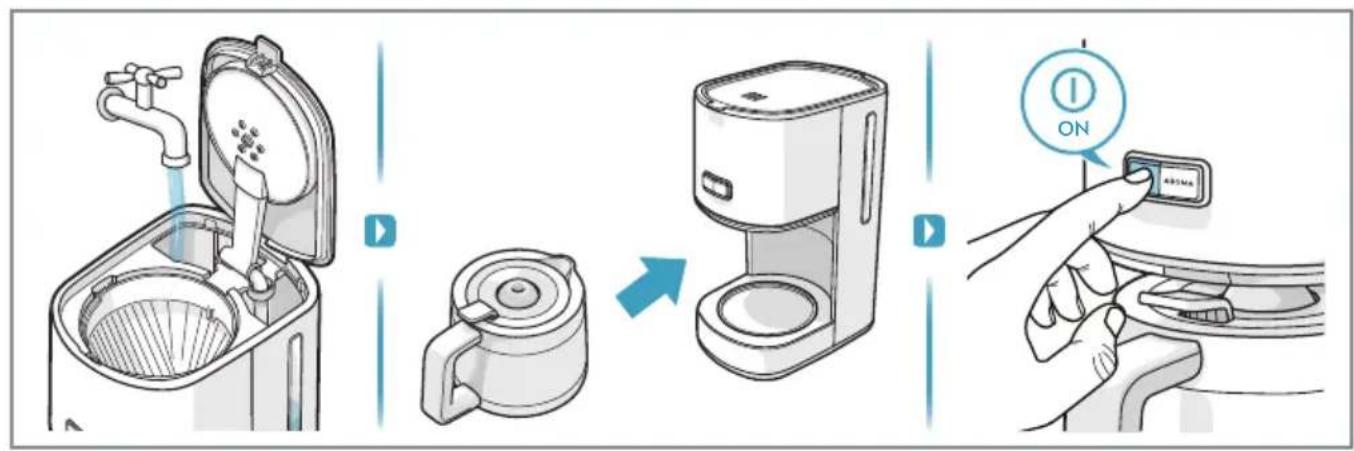
3 Decalcifying is recommended regularly, depending on water hardness. Fill the tank with water and decalcifier according to product instructions, then follow steps 9 and 10.
4 Place the coffee jug (F) with its lid onto the warming plate (G). Allow the decalcifier to take effect for about 15 minutes, then switch the machine on. Switch it off when the solution has finished flowing through. If necessary repeat the decalcifying process.
5 Allow the machine to run at least twice with plain water. Then thoroughly rinse the coffee jug (F), jug lid and filter holder (E) under running water, activate the filter valve repeatedly during the rinse process.
SAFETY ADVICE
This appliance is not intended for use by persons (including children) with reduced physical, sensory or mental capabilities, or lack of experience and knowledge, unless they have been given supervision or instruction concerning use of the appliance by a person responsible for their safety.
Children should be supervised to ensure that they do not play with the appliance.
This appliance can be used by children aged from 8 years and above and persons with reduced physical, sensory or mental capabilities or lack of experience and knowledge if they have been given supervision or instruction concerning use of the appliance in a safe way and understand the hazards involved. Children shall not play with the appliance.
Cleaning and user maintenance shall not be made by children without supervision.
The appliance may only be connected to a power supply whose voltage and frequency comply with the specifications on the rating plate! Never use or pick up the appliance if – the supply cord is damaged, – the housing is
damaged. The appliance must only be connected to an earthed socket.
If necessary an extension cable suitable for 10 A can be used. If the appliance or the supply cord is damaged, it must be replaced by the manufacturer, its service agent or similarly qualified person, in order to avoid hazard.
Always place the appliance on a flat, level surface.
Never leave the appliance unattended while connected to the supply mains.
The appliance must be switched off and the mains plug withdrawn each time after use, before cleaning and maintenance.
The appliance and accessories become hot during operation. Use only designated handles and knobs. Allow to cool down before or storage. The mains cable must not come into contact with any hot parts of the appliance.
Do not immerse the appliance in water or any other liquid. Do not exceed the maximum filling volume as indicated on the appliances. Do not use or place the appliance on a hot surface or near source of heat.
This appliance is intended to be used in household and similar applications such as:
- staff kitchen areas in shops, offices and other working environments;
- farm houses;
- by clients in hotels, motels and other residential type environments;
- bed and breakfast type environments.
The coffee maker shall not be placed in a cabinet when in use.
No action is needed to adapt the product to 50 or 60Hz.
The product will adjust itself.
DISPOSAL
Recycle the materials with the symbol. Put the packaging in applicable containers to recycle it. Help protect the environment and human health and to recycle waste of electrical and electronic appliances.
This symbol on the product indicates that this product contains a battery which shall not be disposed with normal household waste. This symbol on the product or on its packaging indicates that the product may not be treated as household waste. To recycle your product, please take it to an official collection point or to an Electrolux service center that can remove and recycle the battery and electric parts in a safe and professional way. Follow your country's rules for the separate collection of electrical products and rechargeable batteries.
Electrolux reserves the right to change products, information and specifications without notice.
TROUBLESHOOTING
| Symptoms Possible causes | Solution |
| Coffee is not brewing. | The power supply is not connected or the ON/OFF switch is not turned on. | Connect the power plug into an earthed wall socket and turn on the ON/OFF switch. |
| No water in the water tank. | Fill the water tank with cold water. |
| Too much lime scale is formed in the water tank. | Perform the decalcifying procedure. |
| Filter holder is leaking. | The anti-drip valve in filter holder is obstructed by residual coffee powder. | Remove the obstructing particles and clean the anti-drip valve. |
| Coffee powder found in the coffee jug. | No paper coffee filter in the filter holder. | Always use a new paper coffee filter in the filter holder when brewing coffee. |
www.electrolux.com/productregistration
www.electrolux.com/productregistration
www.electrolux.com/productregistration
www.electrolux.com/productregistration
www.electrolux.com/productregistration
www.electrolux.com/productregistration
PROBLÈME CAUSE POSSIBLE SOLUTION MISE AU REBUT
www.electrolux.com/productregistration
www.electrolux.com/productregistration
www.electrolux.com/productregistration
www.electrolux.com/productregistration
www.electrolux.com/productregistration
www.electrolux.com/productregistration
- bed and breakfast-miljøer.
www.electrolux.com/productregistration
www.electrolux.com/productregistration
www.electrolux.com/productregistration
Visit our website to:
www.electrolux.com/productregistration
Kupite pribor i potrošni materijal za svoj uređaj:
www.electrolux.com/shop
BRIGA O KORISNIKU I SERVISIRANJE
www.electrolux.com/productregistration
www.electrolux.com/productregistration
Kupite dodatke in potrošni material za svojo napravo:
www.electrolux.com/shop
POMOČ STRANKAM IN SERVIS
Ko stopite v stik s servisom, zagotovite, da imate na voljo naslednje podatke.
www.electrolux.com/productregistration
www.electrolux.com/productregistration
www.electrolux.com/productregistration


