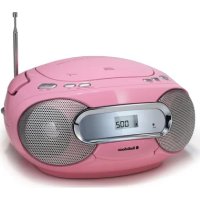
CD1582 - Cd player/recorder AudioSonic - Free user manual and instructions
Find the device manual for free CD1582 AudioSonic in PDF.



| Product Type | CD player/recorder with FM radio |
| Brand | AudioSonic |
| Model | CD1582 |
| Dimensions | 257 x 118 x 200 mm (L x W x H) |
| Weight | 1.48 kg |
| Power Supply | 230 V~50 Hz AC or 12 V DC (8 R14 batteries not included) |
| Power Consumption | Energy saving: turn off or unplug when not in use |
| Radio Frequency Range | FM 88 to 108 MHz |
| Output Power | 2 x 3 W (speakers) |
| Player Type | Audio CD player (Class 1 laser) |
| Supported Formats | Audio CD, CD-R, CD-RW (no CD-ROM, CDi, VCD, DVD) |
| Playback Functions | Play, pause, next/previous, search, repeat (1 track or entire disc) |
| Programming | Up to 20 tracks, random order |
| Headphone Jack | 3.5 mm stereo jack |
| Speakers | 2 speakers (8 ohms) |
| Antenna | Telescopic antenna for FM |
| Safety | Double insulation, no grounding required |
| Cleaning | Soft cloth slightly damp, no solvents |
| Batteries | Remove if not used for long; recycle |
| Disposal | Do not dispose with household waste; recycle |
Frequently Asked Questions - CD1582 AudioSonic
User questions about CD1582 AudioSonic
0 question about this device. Answer the ones you know or ask your own.
Ask a new question about this device
Download the instructions for your Cd player/recorder in PDF format for free! Find your manual CD1582 - AudioSonic and take your electronic device back in hand. On this page are published all the documents necessary for the use of your device. CD1582 by AudioSonic.
USER MANUAL CD1582 AudioSonic
natural_image
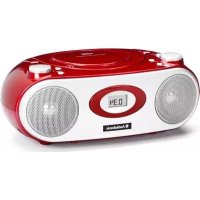
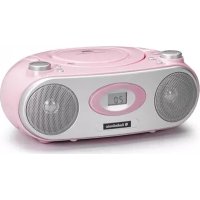
Pink audio recording device with silver mesh grille and digital display showing 02:00 (no visible text or symbols on device body)Radio
CD - Player
CD-1582

AudioSonic
SAFETY INFORMATION
Mains supply
This equipment is designed to operate from a 230 Volt, 50Hz AC mains supply. Other power sources may damage it. Check that the rating label of the equipment says 230V AC before you plug it in for the first time.
Mains plug
We have fitted this equipment with a standard mains plug.
- If the mains lead gets damaged it must be replaced by a qualified service agent with an approval lead the same type.
- If you cut off the mains plug, for example to fit a different type, please destroy the old plug as it would be dangerous if inserted into a live power outlet. Carefully follow the wiring instructions supplied with the new plug.
• If a fuse is fitted to the plug, remove the fuse before throwing the plug away.
• Carefully follow the wiring instructions supplied with a new mains plug.
• Inever use a fused mains plug without the fuse cover.
Symbols

This equipment is double insulated and an earth connection is not required.

Dangerous voltage constituting a risk of electric shock is present inside this equipment.

This mark is applied to show the equipment conforms to European safety and electromagnetic compatibility standards.

There are important operating and maintenance instructions in the literature accompanying this equipment.
Safe use and care of your audio equipment
We have designed and made this product to meet European safety standards, but as with any electrical equipment you must take care to get the longest working life from it and stay safe. Here are a few tips to help you do this.
Read these instructions carefully before you try to use the equipment.
- Protect the mains lead.
- You must ensure the mains lead cannot be walked on, crushed, chafed, cut, and so on.
- Avoid harsh conditions such as wet or damp places, high humidity, strong vibration, extremely high or low temperatures, strong sunlight and places that are very dusty.
• Never let anyone, push objects into holes and ventilation slots.
SAFETY INFORMATION
- To save power switch off mains power or pull out the mains power plug when you are not using the equipment, unless the function of the equipment requires a continuous power supply.
- Don't continue to use this equipment if you have spilt liquids in it, if it is damaged in any way or if it does not work normally. Immediately unplug the equipment and get expert advice.
• Pull the mains plug out of the wall socket during thunderstorms.
This product is designed for domestic use only. Any other use may invalidate the guarantee and might be dangerous.
Ventilation
Place the equipment on a hard flat surface away from direct sunlight and heat sources. If it is in a cabinet, allow at least a 10cm gap all around. Don't obstruct the ventilation slots, including those underneath, with soft furnishings. Overheating will shorten the life of the equipment and increase the risk of fire.
Cleaning
Disconnect the mains supply and use only a lightly dampened soft cloth. Do not use chemical solvents or strong detergents as these may damage the cosmetic finish.
Batteries
Remove batteries when the equipment is not to be used for a long time. Batteries left in equipment may cause damage through deterioration and corrosive leakage, invalidating the guarantee. To protect the environment please use local recycling facilities for battery disposal.
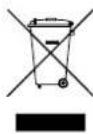
Disposal
Waste electric and electronic products must not be disposed of with household waste. Please refer to the retailer from whom you purchased this item for disposal instructions.
Batteries and packaging materials can be recycled using your local collection facilities.
IMPORTANT SAFETY WARNINGS
• To prevent electric shock, do not remove any cover.
- If anything goes wrong, don't try and fix it yourself, get a qualified service agent to look at it.
- Do not expose this equipment to dripping or splashing or place any objects filled with liquids, such as vases, on the equipment.
• Never put a naked flame source on or near the equipment.
• Small parts. Do not let young children play with the equipment.
• Never operate the equipment and try to view video while driving a vehicle.
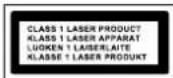
Class 1 laser product
This product contains a low power laser device. Invisible laser radiation when open and interlocks defeated. Avoid exposure to beam.

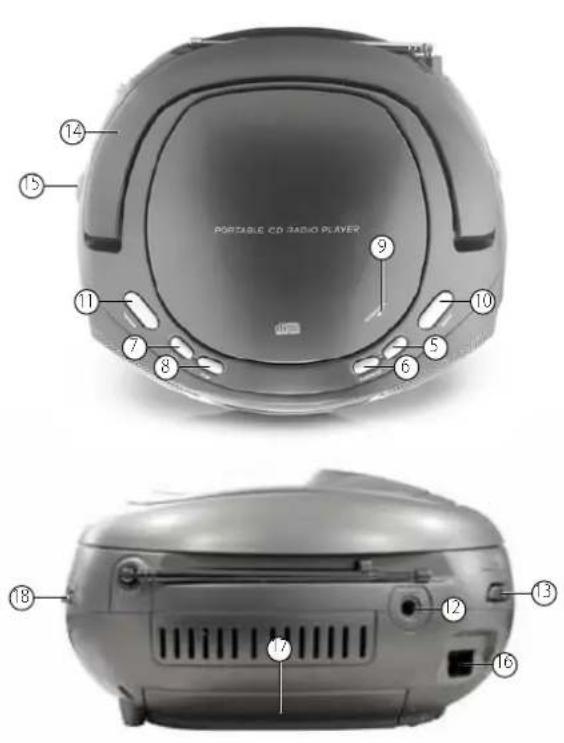
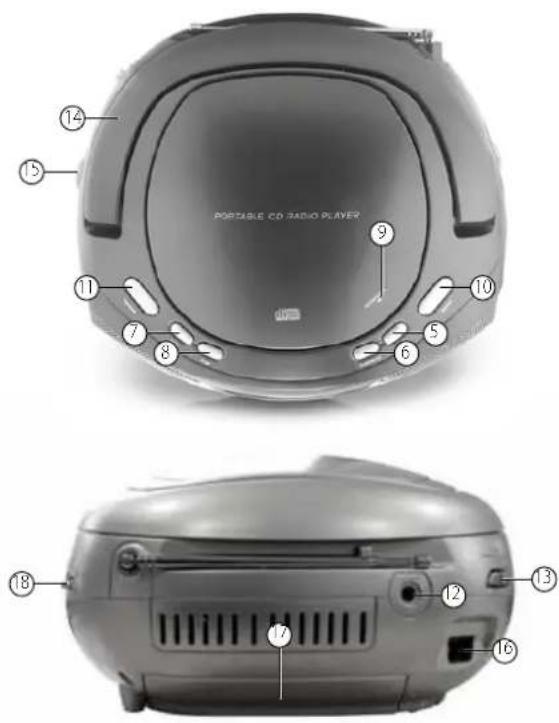
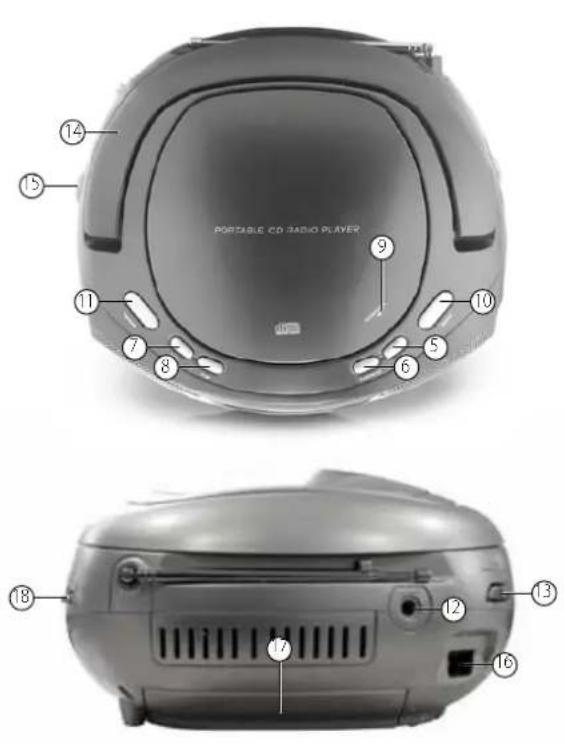
IDENTIFYING PARTS
- SPEAKER
- DISPLAY
- FM STEREO INDICATOR
- TELESCOPIC ANTENNA
- NEXT
- PLAY/PAUSE
- BACK
- STOP
- CD DOOR
- REPEAT
- PROGRAM/RESTART
- STEREO HEADPHONE JACK
- FUNCTION SELECTOR
- HANDLE
- VOLUME CONTROL
- AC POWER SUPPLY
- BATTERY COMPARTMENT COVER
- TUNING KNOB
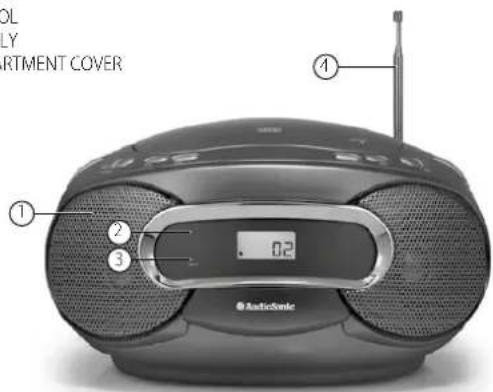
COMPACT DISC
COMPACT DISC
- Always use a compact discs bearing the mark as shown:
- Noted on handling discs
- Removing the disc from its storage case and loading it.
• Do not touch the reflective recorded surface.
• Do not stick paper or write anything on the surface. - Do not bend the disc.
- Storage
• Store the disc in its case. - Do not expose discs to direct sunlight or high temperatures, high humidity or dusty places.
- Cleaning a disc
• Should the disc become soiled, wipe off dust, dirt and fingerprints with a soft cloth.
• The disc should be cleaned from the centre to the edge. - Never use benzene, thinners, record cleaner fluid or anti static spray.
- Be sure to close the CD door so the lens is not contaminated by dust.
- Do not touch the lens.
POWER SUPPLY
Using the DC power supply
The mains power supply can be used to save the batteries. Make sure that the unit is NOT plugged into the wall outlet before inserting the batteries.
Batteries (not included)
Open the battery compartment and insert 8 R14 batteries carefully observing the "+" and "-" polarity marking inside the compartment.
Important:
When replacing the batteries, make sure you dispose of the old batteries in accordance with regulations in your area. They should be disposed of in a location specifically designated for that purpose so they can be recycled safely and without posing any risk for the environment. Do not burn batteries.
NOTE:
- Incorrect use of the batteries may result in electrolyte leakage having a corrosive effect in the compartment.
- Do not mix different types of batteries: do not use alkaline batteries with saline batteries, for example.
- Do not mix old batteries with new ones. Use batteries of the same type recommended by the manufacturer.
- If the unit is not to be used for an extended period of time, remove the batteries as damage may occur due to battery leakage.
Using the AC supply
- Make sure that the voltage indicated on the manufacturer's nameplate in the battery compartment corresponds to the voltage supply in your home. If this is not the case, DO NOT use this appliance. Seek qualified advice.
- Connect the electrical power cable to the unit, then plug it into the wall outlet. The wall outlet must be located near the product and be easily accessible.
• To turn power to the apparatus off, unplug the power supply cable from the wall outlet.
• To protect the unit during thunderstorms, unplug the power supply cable from the wall outlet.
GENERAL OPERATION
General operation
- Select the source by setting the FUNCTION SELECTOR to CD, OFF or FM ST.
• Set the desired volume level using the VOLUME KNOB.
• To turn off the unit, set the FUNCTION SELECTOR to OFF.
Radio
- To listen to the FM radio, extend the telescopic antenna and adjust it for optimum reception. Reduce the length of the antenna if the signal is too strong (if you are very near the transmitter, for example).
Radio reception
• Set the FUNCTION SELECTOR on FM ST.
• Turn the TUNING KNOB to search for the desired station.
NOTE:
- The FM stereo indicator comes on if the BAND SELECTOR is set on FM ST. and you have tuned the radio to an FM stereo station.
- When you have finished listening to the radio, position the FUNCTION SELECTOR to OFF.
Stereo headphones jack
- Connect headphones with the volume set low and increase it if required. Prolonged listening through some headphones at high volume settings can result in hearing damage.
- Reduce the VOLUME to a low level before putting on the headphones. You can then adjust the VOLUME progressively to a comfortable level.
CD
The CD player supports audio discs, CD-R, CD-RW. Do not attempt to read CD-ROM, CDi, VCD's, DVDs or DATA CDs.
Note:
Even if this portable radio-CD player is able to read CD-R and CD-RW discs, it is not possible to offer a 100% guarantee that all CD-R / RW discs can be read; playback depends on the quality and condition of the blank discs that you use, among other things. A playback failure does not necessarily indicate that the unit is malfunctioning.
• Position the FUNCTION SELECTOR on CD.
• To open the CD door, raise it by pressing the corner marked OPEN / CLOSE.
- Insert a CD, CD-R, CD-RW, printed surface facing upwards and gently close the CD player door.
• Start playback by pressing PLAY / PAUSE.
- Press PLAY / PAUSE to PAUSE and PLAY. To stop CD playback, press STOP.
NOTE:
CD playback stops automatically when the CD compartment is opened, the radio function is selected or the CD has finished.
Selecting a different track
• During playback, press NEXT or BACK on the unit to select a track.
- If you have selected a track number in Stop or Pause mode, press PLAY / PAUSE to resume playback.
- Briefly press NEXT to pass to the next track or press NEXT several times until the desired track number appears in the display.
- Briefly press BACK to return to the start of the current track.
• Press BACK several times to find a previous track.
Searching for a passage on a track
- Press and hold BACK or NEXT to read the track in fast forward mode with the volume muted.
- Release the BACK or NEXT button periodically until you have found the desired passage (normal playback resumes automatically).
- Repeat (CD only)
- Whilst in play mode, press the REP button once to playback the current track repeatedly.
- Whilst in play mode, press the REP button twice to playback the entire CD repeatedly.
Programming of track numbers
- Up to 20 tracks can be programmed in any order. If desired, a given track can be programmed more than once.
• In STOP mode, press BACK or NEXT to select a track. - When the desired track number appears, press the PROG button once to record the track (the unit displays "prog", briefly followed by the track number selected).
• Repeat steps 1 and 2 to select and program the desired tracks.
• To start playback of your programmed tracks, press PLAY / PAUSE. - The display will show "FUL" if you attempt to program more than 20 tracks.
Program check
In STOP mode, press the PROG button. (the unit displays the track numbers in the order they are programmed).
Deleting a program
Perform any of the following operations to delete the memory:
- Open the CD door;
• Select the RADIO source; - Press STOP twice.
SPECIFICATIONS
General
Power supply : AC 230V \~ 50Hz
: DC 12 8R 14 batteries (not included)
Dimensions of unit : 257(L) x 118(W) x 200(H) mm
Weight : 1.48 kg
Frequency range : FM 88 to 108MHz
Output power : 2x3W
Speaker : 8 Ohms
Headphone : 3.5mm Jack
(The technical characteristics are liable to change without notice)
TROUBLE SHOOTER
UNIT DEAD NO FUNCTIONS
| Check unit is plugged into mains outlet. | Plug appliance into mains supply. Check supply with another appliance. |
| Fuse blown. Replace plug fuse. | |
| Batteries exhausted. Replace batteries |
NO SOUND
| Wrong sound settings selected. | Check the band selector is on the correct setting. Is the CD dirty or are there fingerprints on it. |
| SOUND WOBBLING OR DISTORTED. INTERFERENCE ON RADIO | |
| Batteries interference. Replace batteries. | |
| Excessive vibration. | Place unit on a flat, stable surface.Check the aerial. |
POPPING OR CRACKLING NOISE OVER THE SOUND.
| External inference. Move receiver to a new location. |
| Weak signal. Try fine tuning the receiver. |
WEAK RECEPTION.
| Aerial adjustment required or weak signal area. | Adjust aerial or move receiver to a different location near a window if using an indoor aerial. |
VEILIGHEIDSVOORZORGEN
Netvoeding
COMPACT DISK
COMPACT DISK
Piles (non-incluses)
DYSK KOMPAKTOWY
DYSK KOMPAKTOWY
KOMPAKTNÍ DISK
KOMPAKTNÍ DISK
natural_image
Modern flat-screen TV with 'LED' logo on screen, next to a CD and remote control (no readable text or symbols)
natural_image
Black portable electronic device with a beach screen displaying turquoise sky and waves, no visible text or symbols.DV-1821
natural_image
Black electronic device with digital clock and smartphone displaying a grid of app icons (no readable text or symbols)CD-570LE-247802

www.tristar.eu
Tristar Europe B.V. | Jules Verneweg 87 | 5015 BH Tilburg | The Netherlands
- Radio
- AudioSonic
- SAFETY INFORMATION
- Mains supply
- Mains plug
- Symbols
- Safe use and care of your audio equipment
- Read these instructions carefully before you try to use the equipment.
- This product is designed for domestic use only. Any other use may invalidate the guarantee and might be dangerous.
- Ventilation
- Cleaning
- Batteries
- Disposal
- IMPORTANT SAFETY WARNINGS
- Class 1 laser product
- IDENTIFYING PARTS
- COMPACT DISC
- POWER SUPPLY
- Using the DC power supply
- Batteries (not included)
- Important:
- NOTE:
- Using the AC supply
- GENERAL OPERATION
- Radio reception
- Stereo headphones jack
- CD
- Selecting a different track
- Searching for a passage on a track
- Programming of track numbers
- Program check
- Deleting a program
- SPECIFICATIONS
- General
- TROUBLE SHOOTER
- VEILIGHEIDSVOORZORGEN
- Netvoeding
- COMPACT DISK
- Piles (non-incluses)
- DYSK KOMPAKTOWY
- KOMPAKTNÍ DISK
Brand : AudioSonic
Model : CD1582
Category : Cd player/recorder