
MF 5260 - Milk frother GRUNDIG - Free user manual and instructions
Find the device manual for free MF 5260 GRUNDIG in PDF.
| Product Type | Electric Milk Frother |
| Brand | Grundig |
| Model | MF 5260 |
| Power Supply | 220-240 V ~, 50/60 Hz |
| Power | 400 W |
| Maximum Capacity (Frothing) | 100 ml cold milk |
| Maximum Capacity (Heating) | 200 ml milk |
| Functions | Frothing only, frothing + heating, heating |
| Included Accessories | Whisk, stirring accessory |
| Jug Material | Stainless steel (estimated) |
| Lid | Transparent with pouring spout |
| Heating Temperature | ~65 ±5 °C |
| Preparation Time (Frothing) | Approximately 60 seconds |
| Preparation Time (Heating) | 110-130 seconds |
| Preparation Time (Frothing + Heating) | 65-80 seconds |
| Indicator Lights | Red for heating, blue for frothing |
| Automatic Shut-off | Yes, flashing for 30 seconds after cycle |
| Cleaning and Maintenance | Wash removable parts with hot water, do not immerse base |
| Safety | Do not use without milk, do not exceed max level, automatic shut-off, anti-burn protection |
| Repairability | Accessories available for at least 5 years, repair by authorized center |
| Usage | Private household only, not for professional use |
Frequently Asked Questions - MF 5260 GRUNDIG
User questions about MF 5260 GRUNDIG
0 question about this device. Answer the ones you know or ask your own.
Ask a new question about this device
Download the instructions for your Milk frother in PDF format for free! Find your manual MF 5260 - GRUNDIG and take your electronic device back in hand. On this page are published all the documents necessary for the use of your device. MF 5260 by GRUNDIG.
USER MANUAL MF 5260 GRUNDIG
natural_image
Simple line drawing of a coffee cup on a saucer (no text or symbols)MF 5260
natural_image
Simple black padlock icon with a labeled square (no text or symbols on the padlock itself)
natural_image
Black shoe inside a coiled spring-like frame, with a labeled 'H' at the bottom (no text or symbols on the shoe itself)DEUTSCH 05-17
ENGLISH 18-28
TÜRKÇE 29-43
ESPAÑOL 44-55
FRANÇAIS 56-68
HRVATSKI 69-79
POLSKI 80-91
natural_image
Stylized grayscale illustration of a tree with leaves and roots, enclosed in a circular frame (no text or symbols)Please read this instruction manual thoroughly before using this appliance! Follow all safety instructions in order to avoid damages due to improper use!
Keep the instruction manual for future reference. Should this appliance be given to a third party, then this instruction manual must also be handed over.
- This appliance is intended for private domestic use only and is not suitable for professional-catering purposes. It should not be used for commercial purposes.
- Do not use the appliance for anything other than its intended use. The milk frother is designed for frothing and heating milk. Do not use the milk frother to heat any other liquids and tinned, jarred or bottled food.
■ Never use the appliance in or near to combustible, inflammable places and materials.
■ Do not use the appliance outdoors or in the bathroom.
SAFETY AND SET-UP
- Check if the mains voltage on the rating label corresponds to your local mains supply. The only way to disconnect the appliance from the mains is to pull out the plug.
■ For additional protection, this appliance should be connected to a redisual current protection switch with no more than 30 mA. Please contact an electrician for advice.
■ Do not immerse the appliance, base, power cord or power plug in water or in other liquids and do not clean parts in the dishwasher.
■ Disconnect the power plug after using the appliance, before cleaning the appliance, before leaving the room or if a fault occurs.
■ Do not disconnect the plug by pulling on the cord. - Do not wrap the power cord around the appliance.
- Do not squeeze or bend the power cord and do not rub it on sharp edges in order to prevent any damage. Keep the power cord away from hot surfaces and open flames.
SAFETY AND SET-UP
- Do not use an extension cord with the appliance.
■ Never use the appliance if the power cord or the appliance is damaged. - Our GRUNDIG Household Appliances meet applicable safety standards; if the appliance or power cord is damaged, it must be repaired or replaced by a service centre to avoid any dangers. Faulty or unqualified repair work may cause danger and risks to the user.
- Do not dismantle the appliance under any circumstances. No warranty claims are accepted for damage caused by improper handling.
SAFETY AND SET-UP
■ This appliance can be used by children (aged from 8 years) and persons with reduced physical, sensory or mental capabilities or lack of experience and knowledge if they have been given supervision or instruction concerning utilisation of the delete appliance in a safe way and if they understand the hazards involved. Children shall not play with the appliance. Cleaning and user maintenance shall not be made by children without supervision.
- Do not leave the appliance unattended as long as it is in use. Extreme caution is advised when the appliance is being used near children and people with limited physical, sensory or mental capabilities.
■ Before using the appliance for the first time, clean all parts carefully which come into contact with milk. Please see full details in the "Cleaning and Care" section.
■ Dry the appliance and all accessories before connecting it to mains supply and before attaching any parts.
SAFETY AND SET-UP
■ Never operate or place any part of this appliance on or near hot surfaces such as a gas burner, electric burner or heated oven.
■ Operate the appliance with delivered parts only.
■ Operate the appliance with its original base. Do not use the base for any other purpose.
■ Do not use the appliance with damp or wet hands.
■ Do not touch rotating parts, there is a risk of injury.
■ Always use the appliance on a stable, flat, clean and dry surface.
■ Make sure that there is no danger that the power cord could be accidentally pulled out that someone could trip over it when the appliance is in use.
■ The appliance has to be positioned in such a way that the plug is always accessible.
SAFETY AND SET-UP
■ Make sure that when using the milk frother, the lid always remains closed properly.
■ Do not fill the milk frother below the minimum level indicator.
■ Never operate the appliance without any milk inside it.
■ Do not stick any foreign objects on the appliance.
■ By exceeding the filling capacity, the jug may overflow.
■ Do not insert any objects and/or fingers in the appliance apertures.
■ Scalding may occur if the lid is removed during the cooking.
Dear Customer,
Congratulations to the purchase of your new GRUNDIG Milk Frother MF 5260.
Read the following user notes carefully to ensure full enjoyment of your quality GRUNDIG product for many years to come.
A responsible approach!

natural_image
Stylized grayscale illustration of a tree with leaves and roots, enclosed in a circular frame (no text or symbols)GRUNDIG focuses on contractually agreed social working conditions with fair wages for both internal employees and suppliers. We also attach great importance to the efficient use of raw materials with continuous waste reduction of several tonnes of plastic every year. Furthermore, all our accessories are available for at least 5 years.
For a future worth living.
Grundig.
Controls and parts
See the figure on page 3.
A Transparent Lid
B Spout
c Jug
D Frothing & Heating
E Frothing
F Power Base
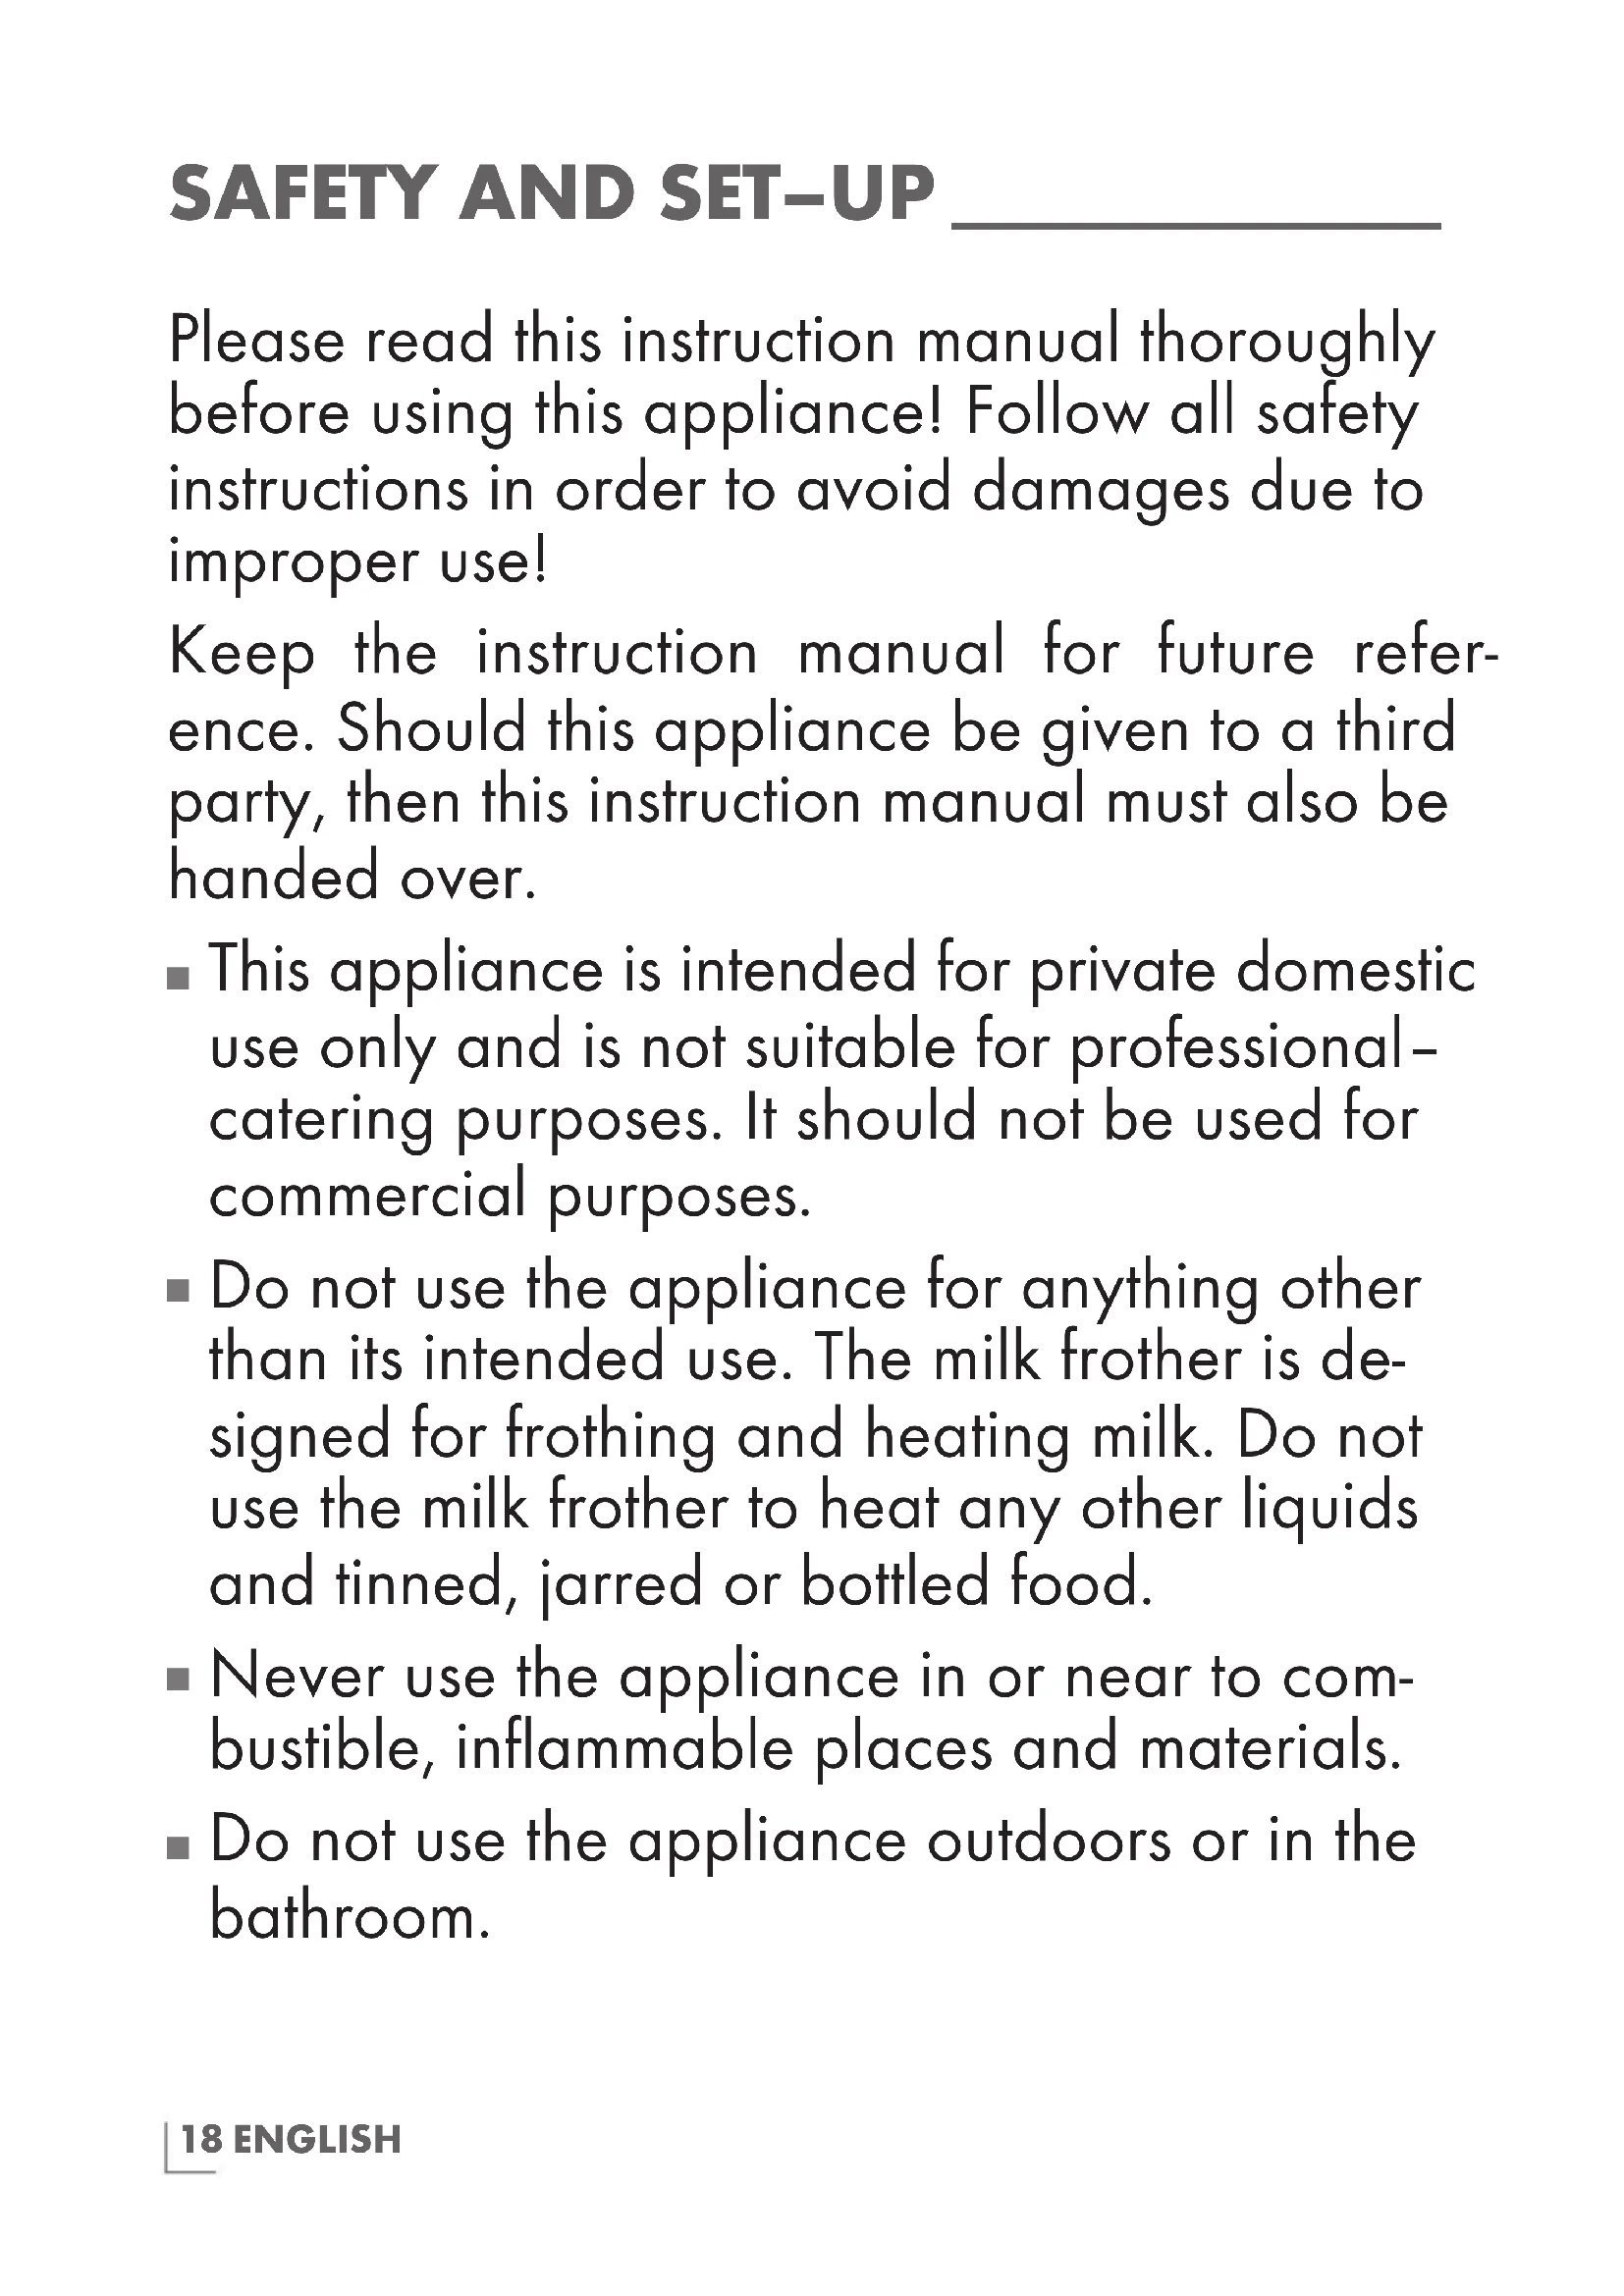
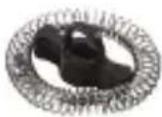
G Stir attachment
H Whisk attachment
| Whisk/Stir | Functions Max capacity | acities Completion time |
 | Frothing cold milk | 100ml 60 sec. |
| Frothing & Heating | 100ml 65–80 sec. | |
 | Heating (with a small amount of froth) | 200ml 110–130 sec. |
Preparation
1 Clean the milk frother well before first use. For details please read the "Cleaning and care" section.
Operation
1 Open the lid A.
2 Insert the attachment of your choice.
- Whisk attachment H for creamy milk foam.
- Stir attachment G for hot milk.
3 Fill the jug with milk (attend the max. /min. capacities above for reference).
Notes
- Do not place the jug ☐ on the base ☑ while filling it with milk.
■ Never fill the jug ⓒ above the maximum level indicator.
4 Close the lid A.
5 Place the jug C on the power base F. Make sure that it is sitting in an upright and stable position.
6 Insert the plug into the wall socket.
7 Push the button D for frothing and heating or button E for frothing.
- The indicator light of the pushed button lights up: red if you pushed D or blue if you pushed E.
8 After the frothing or heating process, the indicator light of button D or button E flashes for 30 seconds.
9 Disconnect the plug from the wall socket.
10 Take the jugC from the power baseF.
11 Open the transparent lid by A removing it. Pour the milk or foam from the jug C by using the spout B in the cup or glass you want to use.
Note
■ Let the milk frother cool down between each heating process.
■ Use whole milk (fat content 3.0%) for best results.
■ Milk heats to approximately 65+/-5°C. This is the ideal temperature to ensure the best flavor.
Cleaning and care
Caution
■ Never use petrol, solvents or abrasive cleaners or hard brushes to clean the appliance.
■ Never put the appliance, power base F or power cord in water or any other liquid.
1 Turn the appliance off and disconnect it from the wall socket.
2 Let the appliance cool down completely.
3 Remove the jug C from the power base F before cleaning, separate the lid A and the silicon ring from the jug C and wash with warm water.
4 Remove the whisks from the jug □ and wash with warm water.
5 Clean the inner walls with soapy water and a non-abrasive cloth. Then wipe them dry with a soft cloth.
Note
■ Before using the appliance after cleaning, dry all parts carefully using a soft towel.
Storage
If you do not plan to use the appliance for a long period of time, please store it carefully.
■ Store the whisk and stir attachment directly with the appliance. The second attachment can be stored in the bracket at the lid.
■ Make sure the appliance is unplugged and completely dry.
■ Store the appliance in a cool, dry place.
■ Make sure the appliance is kept out of the reach of children.
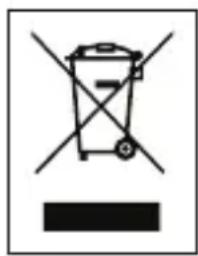
Compliance with the WEEE Directive and Disposing of the Waste Product:
This product complies with EU WEEE Directive (2012/19/EU). This product bears a classification symbol for waste electrical and electronic equipment (WEEE).
natural_image
Simple line drawing of a trash bin with crossed lines indicating no waste or discharge (no text or symbols)This symbol indicates that this product shall not be disposed with other household wastes at the end of its service life. Used device must be returned to official collection point for recycling of electrical and electronic devices. To find these collection systems please contact to your local authorities or retailer where the product was purchased. Each household performs important role in recovering and recycling of old appliance. Appropriate disposal of used appliance helps prevent potential negative consequences for the environment and human health.
Compliance with RoHS Directive
The product you have purchased complies with EU RoHS Directive (2011/65/EU). It does not contain harmful and prohibited materials specified in the Directive.
Package information

Packaging materials of the product are manufactured from recyclable materials in accordance with our National Environment Regulations. Do not dispose of the packaging materials together with the domestic or other wastes. Take them to the packaging material collection points designated by the local authorities.
Technical data

Power supply:
220-240 V \~,
50/60 Hz
Power: 400 W
Technical and design modifications reserved.
GÜVENLİK VE KURULUM
natural_image
Stylized grayscale illustration of a tree with leaves and roots, enclosed in a circular frame (no text or symbols)natural_image
Symbol of a trash bin with crossed lines indicating no waste, and a solid black rectangle below (no text or labels)natural_image
Stylized grayscale illustration of a tree with leaves and roots, enclosed in a circular frame (no text or symbols)natural_image
Symbol of a trash bin with crossed lines indicating no waste, and a solid black rectangle below (no text or labels)natural_image
Stylized grayscale illustration of a tree with leaves and roots, enclosed in a circular frame (no text or symbols)natural_image
Symbol of a trash bin with crossed lines indicating no waste, and a solid black rectangle below (no text or labels)natural_image
Stylized grayscale illustration of a tree with leaves growing from soil, enclosed in a circular frame (no text or symbols)natural_image
Symbol of a trash bin with crossed lines indicating no waste, and a solid black rectangle below (no text or labels)Ovaj simbol označava da se ovaj proizvod ne smije odlagati zajedno s ostalim kućanskim otpadom na kraju njegovog radnog vijeka. Rabljeni uređaj mora se vratiti na službeno sabirno mjesto za recikli- ranje električnih i elektroničkih ure- daja. Da biste pronašli te sustave za prikupljanje, obratite se lokal- nim vlastima ili prodavaču gdje je proizvod kupljen. Svako kućanstvo igra važnu ulogu u uporabi i recikli- ranju starih uređaja. Odgovarajuće odlaganje iskorištenog aparata po- maže u sprečavanju mogućih ne- gativnih posljedica za okoliš i ljud- sko zdravlje.
Usklađenost s Direktivom o zabrani uporabe određenih opasnih tvari u električnoj i elektroničkoj opremi (RoHS):
natural_image
Stylized circular icon depicting a tree with leaves and roots, no text or symbols present.natural_image
Symbol of a trash bin with crossed lines indicating no waste, and a solid black rectangle below (no text or labels)- SAFETY AND SET-UP
- A responsible approach!
- Controls and parts
- Preparation
- Operation
- Notes
- Note
- Cleaning and care
- Caution
- Storage
- Compliance with the WEEE Directive and Disposing of the Waste Product:
- Compliance with RoHS Directive
- Package information
- Technical data
- GÜVENLİK VE KURULUM
- Usklađenost s Direktivom o zabrani uporabe određenih opasnih tvari u električnoj i elektroničkoj opremi (RoHS):
Brand : GRUNDIG
Model : MF 5260
Category : Milk frother