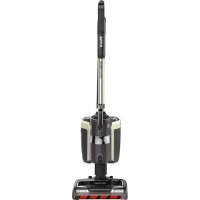
Rocket AH401 - Vacuum Cleaner SHARK - Free user manual and instructions
Find the device manual for free Rocket AH401 SHARK in PDF.
Download the instructions for your Vacuum Cleaner in PDF format for free! Find your manual Rocket AH401 - SHARK and take your electronic device back in hand. On this page are published all the documents necessary for the use of your device. Rocket AH401 by SHARK.
USER MANUAL Rocket AH401 SHARK
Contents Getting to Know Your Shark
SAVE THESE INSTRUCTIONS
When using an electrical appliance, basic safety precautions should always be observed, including the following: WARNING TO REDUCE THE RISK OF FIRE, ELECTRIC SHOCK OR INJURY: 1 DO NOT use outdoors or on wet surfaces 2 Unplug from electrical outlet when not in use and before servicing 3 Inspect power cord or plug for any damage before use DO NOT use vacuum cleaner with a damaged cord or plug 4 If vacuum cleaner is not working as it should, has been dropped, damaged, left outdoors, or dropped into water, return it to EURO-PRO Operating LLC for examination, repair, or adjustment 5 DO NOT pull or carry vacuum cleaner by the cord or use the cord as a handle 6 DO NOT unplug by pulling on cord; to unplug, grasp the plug, not the cord 7 DO NOT handle plug or vacuum cleaner with wet hands 8 DO NOT run the vacuum cleaner over the power cord, close a door on the cord or pull cord around sharp corners 9 The use of an extension cord is not recommended 10 DO NOT leave vacuum cleaner when plugged in 11 Keep cord away from heated surfaces 12 Turn off all controls before plugging or unplugging the vacuum cleaner 13 Store your vacuum cleaner with the power cord secured around the two cord holders as shown in the STORAGE section 14 DO NOT attempt to defeat the interlocks GENERAL USE 15 Use only as described in this manual 16 DO NOT put any objects into openings DO NOT use with any opening blocked; keep free of dust, lint, hair, and anything that may reduce airflow 17 Keep your work area well lit 18 Keep the vacuum cleaner moving over the carpet surface at all times to avoid damaging the carpet fibers 19 DO NOT place vacuum cleaner on unstable surfaces such as chairs or tables 20 DO NOT allow young children to operate the vacuum cleaner or use as a toy Close attention is necessary when used near children 21 DO NOT use without Dust Cup and/or filters in place 22 DO NOT use if airflow is restricted; if the air paths or the Motorized Floor Nozzle become blocked, turn the vacuum cleaner off Remove all obstructions before you turn on the unit again 23 Keep Motorized Floor Nozzle away from hair, face, fingers, uncovered feet, and loose clothing 24 Only use manufacturer’s recommended attachments
Before turning on the vacuum: 25 Make sure that all filters are thoroughly dry after routine cleaning 26 Make sure that Dust Cup and all filters are in place after routine maintenance Refer to MAINTENANCE section for filter cleaning instructions 27 Make sure Motorized Floor Nozzle is free of blockages 28 Only use filters and accessories provided by EURO-PRO Operating LLC [Failure to do so will void the warranty] GENERAL CLEANING 29 DO NOT pick up large-sized objects 30 DO NOT pick up hard or sharp objects such as glass, nails, screws, or coins that could damage the vacuum cleaner 31 DO NOT use to pick up drywall dust 32 DO NOT pick up smoking or burning objects such as hot coals, cigarette butts, fireplace ash, or matches 33 DO NOT pick up flammable or combustible materials such as lighter fluid, gasoline, or kerosene or use vacuum in areas where they may be present 34 DO NOT pick up toxic solutions such as chlorine bleach, ammonia, or drain cleaner 35 DO NOT use in an enclosed space where vapors are present from paint, paint thinner, moth-proofing substances, flammable dust, or other explosive or toxic materials 36 DO NOT vacuum up any liquids 37 DO NOT immerse vacuum cleaner in water or other liquids 38 DO NOT use outdoors or on wet surfaces; use only on dry surfaces 39 Use extra care when cleaning on stairs 40 Remove brushroll from unit before rinsing POLARIZED PLUG To reduce the risk of electric shock, this vacuum cleaner has a polarized plug (one blade is wider than the other) As a safety feature, this plug will fit into a polarized outlet only one way If the plug does not fit fully into the outlet, reverse the plug If it still does not fit, contact a qualified electrician DO NOT force into outlet or try to modify to fit English
READ ALL INSTRUCTIONS BEFORE USE
CAUTION: The Motorized Power Nozzle, Telescoping Wand and Handle contain electrical connections: - These are not serviceable parts. - Do not use to vacuum any liquids. - Do not immerse in water when cleaning. - If Handle/Wand is damaged, discontinue use. IMPORTANT SAFEGUARDS3 www.sharkrocketpowerhead.com
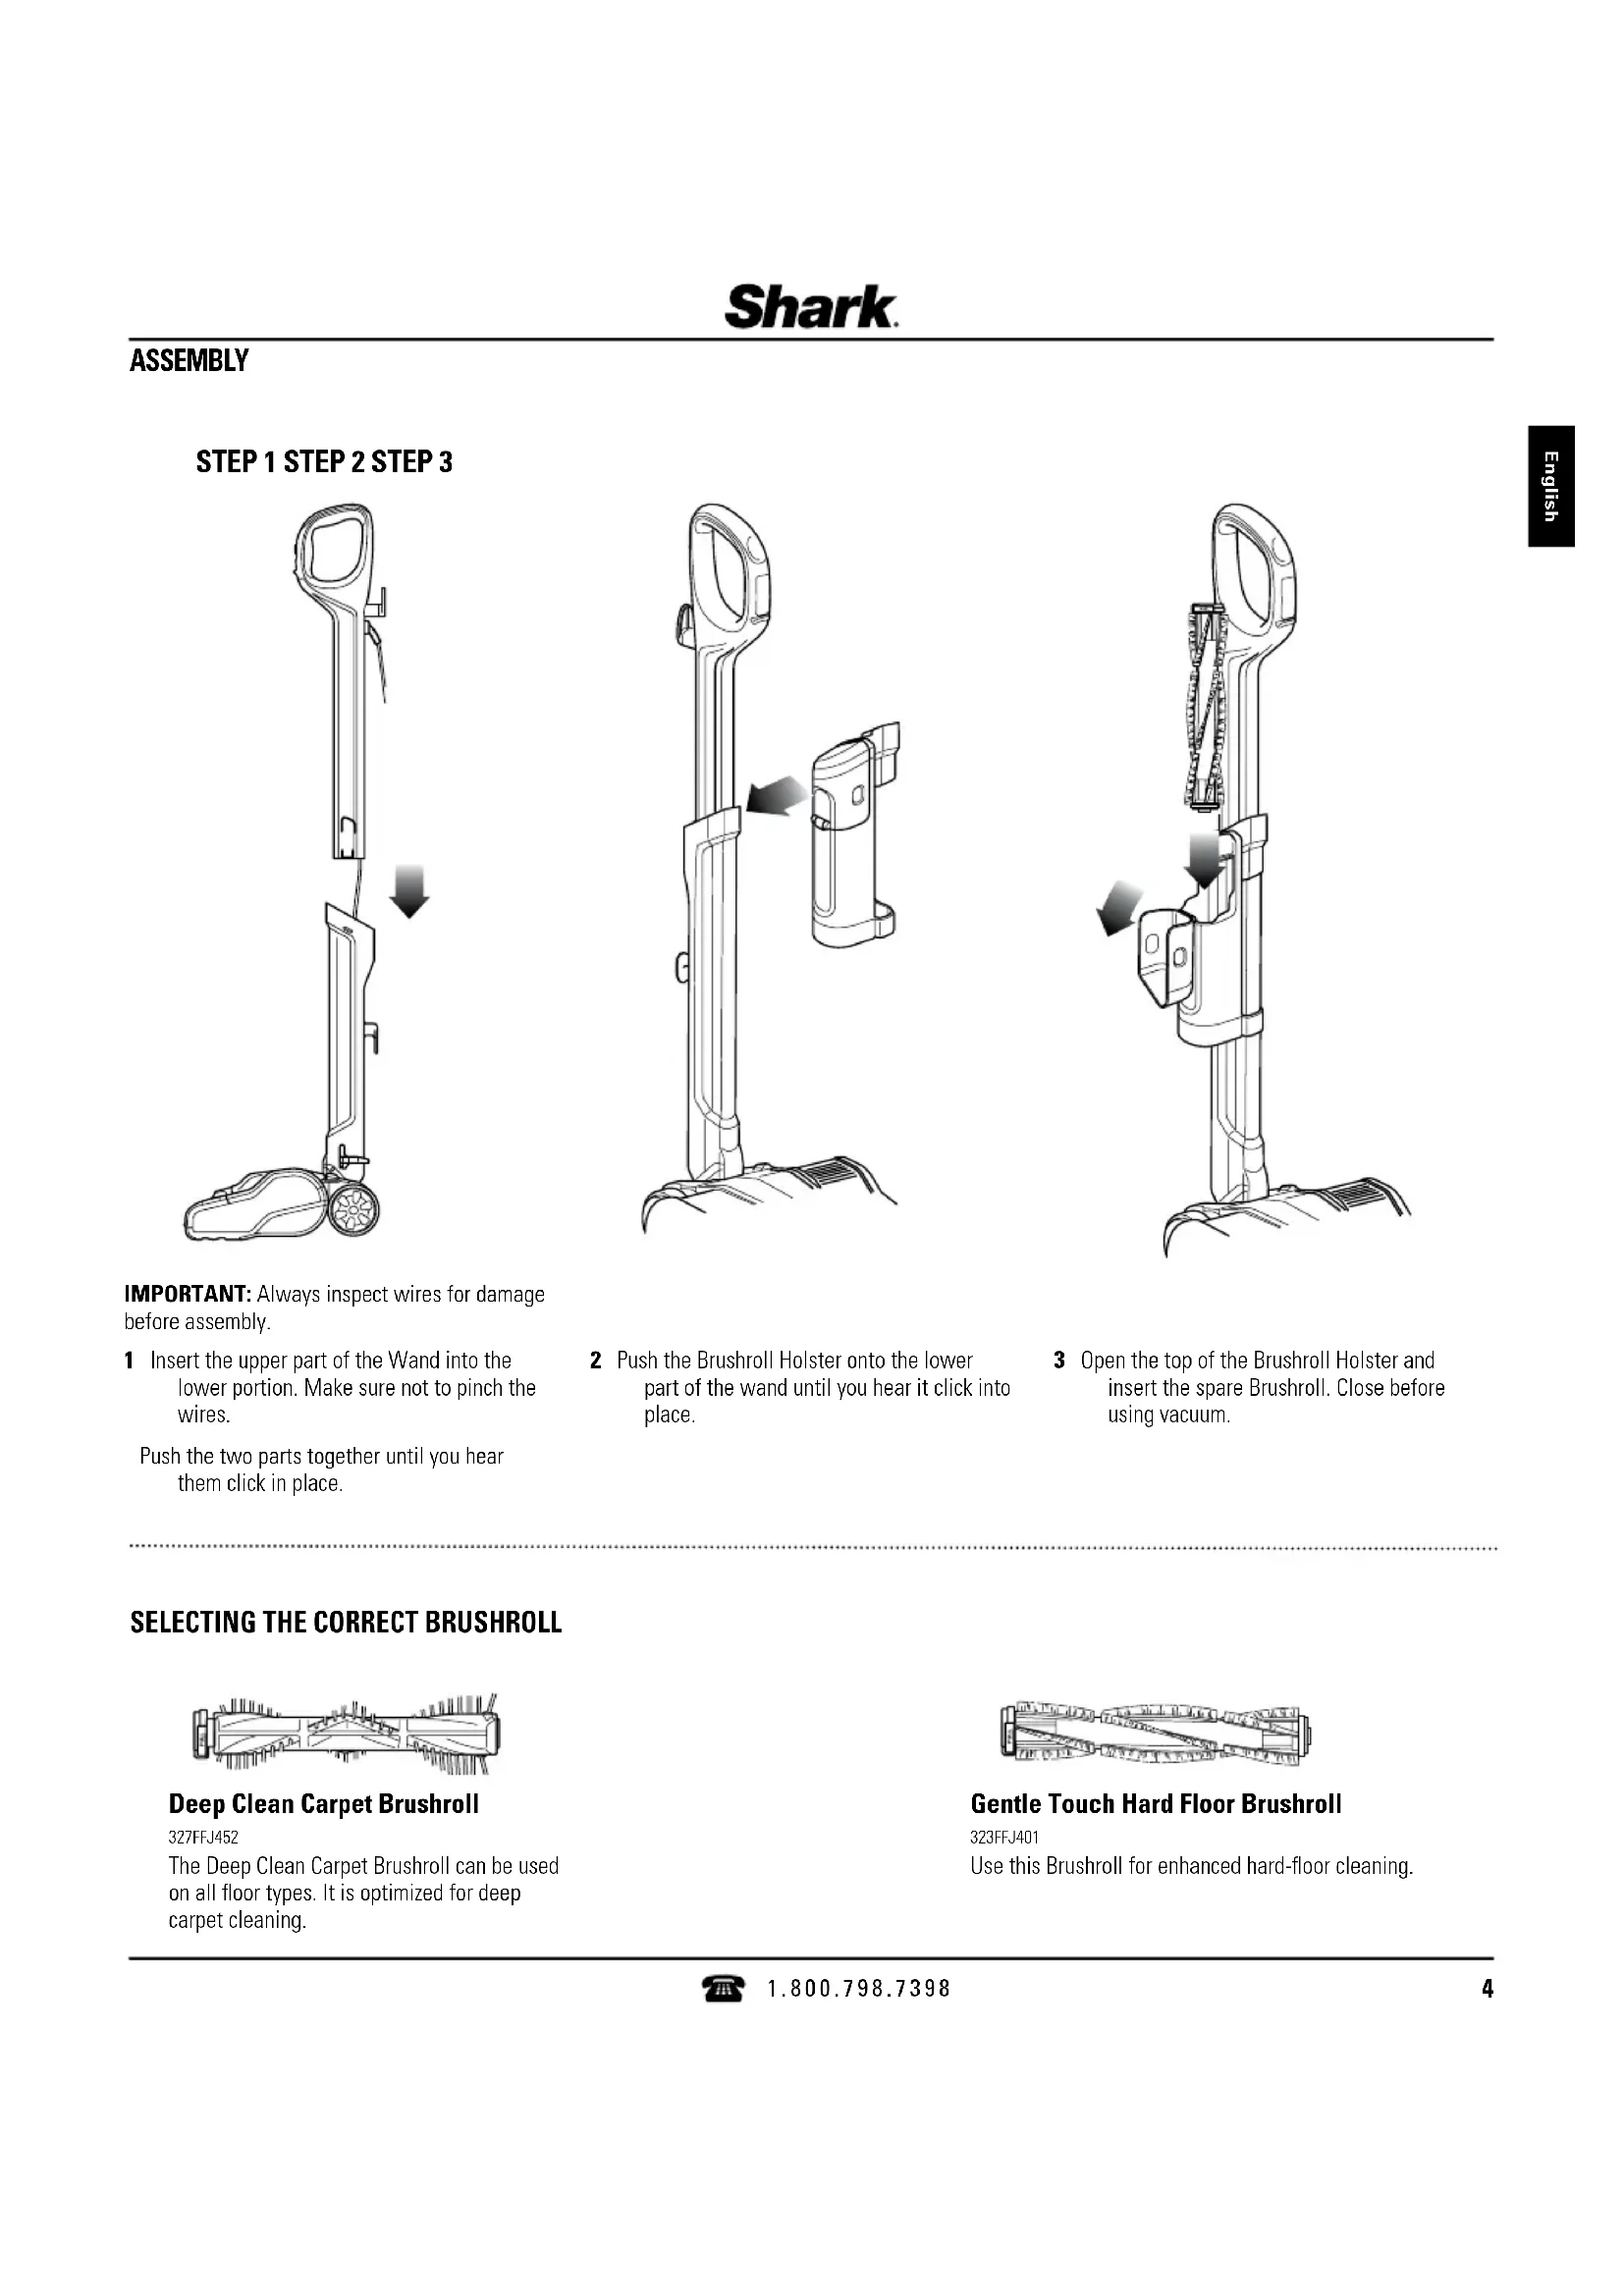
ASSEMBLY IMPORTANT: Always inspect wires for damage before assembly 1 Insert the upper part of the Wand into the lower portion Make sure not to pinch the wires Push the two parts together until you hear them click in place 2 Push the Brushroll Holster onto the lower part of the wand until you hear it click into place 3 Open the top of the Brushroll Holster and insert the spare Brushroll Close before using vacuum
English Deep Clean Carpet Brushroll 327FFJ452 The Deep Clean Carpet Brushroll can be used on all floor types It is optimized for deep carpet cleaning Gentle Touch Hard Floor Brushroll 323FFJ401 Use this Brushroll for enhanced hard-floor cleaningThe Shark
Powerhead has a 2-speed POWER slider switch on the handle. Less Suction open More Suction closed SUCTION RELEASE This unit has a Suction Control Button to help with push and pull on high-pile carpets and to release suction when vacuuming area rugs Open to minimize suction Be sure to close again for maximum suction LO HI Brushroll spins quickly www.sharkrocketpowerhead.com
- LO - For gentle on hard floors and area rugs
- HI - For deep-cleans carpets by removing embedded dirt NOTE: For deep cleaning per ASTM F 608 (embedded dirt in carpets) please use the carpet brushroll on HI setting with the SUCTION CONTROL closed 1 Plug the unit into an electrical outlet 2 Slide the POWER switch to the LO position to gently clean hard floors and area rugs The Brushroll will spin slowly 3 Slide the POWER switch to the HI position to deep-clean carpets by removing embedded dirt The Brushroll will spin quickly NOTE: Before vacuuming your delicate area rugs or carpets, refer to the manufacturer’s recommended cleaning instructions Deep Clean Carpet Brushroll
- LO - For large and heavy debris pickup
- HI - For loose and stuck-on dust and debris 1 Plug the unit into an electrical outlet 2 Slide the POWER switch to the LO position to clean large and heavy debris The Brushroll will spin slowly 3 Slide the POWER switch to the HI position to clean loose and stuck- on dust and debris The Brushroll will spin quickly NOTE: The brushroll will not spin unless the Telescoping Wand is reclined Gentle Touch Hard Floor Brushroll Brushroll spins slowly CHOOSING THE APPROPRIATE SETTING1 Stand the vacuum upright Step on the Motorized Floor Nozzle and pull the wand back to start vacuuming VACUUMING STORAGE 1 Wrap the power cord around the cord hooks WHAT DOES THE BRUSHROLL INDICATOR LIGHT MEAN?
- Solid Green: The brushroll is on and working as it should
- Solid Red: There is a jam in the brushroll area Turn your vacuum off and remove the blockage
- *Flashing Red: The motorized floor nozzle is overheating Turn your vacuum off and wait for it to cool down *See Troubleshooting section for further instructions
1 Detach the removable Dust Cup from the Motorized Floor Nozzle by pressing the Dust Cup Release Foot Pedal located on the left side near the Nozzle 2 Holding the Dust Cup by the handle, lift it up to remove it from the Motorized Floor Nozzle 3 Hold the Dust Cup over a garbage bag or can, then press the Empty button on the side of the Dust Cup The bottom lid will open, allowing the debris to fall out 4 Clean the dust screen inside the Dust Cup as required MAINTENANCE To keep your vacuum’s suction power optimal, follow these instructions. IMPORTANT: Allow ALL filters to dry completely before replacing in the vacuum. Make sure unit is off and cord is unplugged.
CLEANING THE FILTERS
Pre-Motor Filters Access the Pre-Motor Filters by pressing the FILTER ACCESS latch on the top of the Dust Cup Remove and rinse the foam and felt filters every month Let air-dry COMPLETELY before replacing in the vacuum Hand wash only Tap loose dirt off filters between washes as needed Insert the felt filter first, and then place the foam filter on top of it Post-Motor Filter Access the Post-Motor Filter on the top of the Motorized Floor Nozzle Remove and rinse once a year Let air-dry completely before replacing Hand wash only Post-Motor Filter Pre-Motor Filters Filter Access Latch Foam Felt
7CLEANING THE POWERHEAD
TO ACCESS THE BRUSHROLL
1 Slide the Brushroll Cover Release Buttons out 2 Pull up to open the hood of the Motorized Floor Nozzle 3 Lift the tab on the Brushroll up to remove it from the Motorized Floor Nozzle 4 Remove any string, carpet fibers, or hair that is wrapped around the Brushroll The groove on the Brushroll allows a pair of scissors to cut the debris without damaging the bristles 5 The Brushroll can be removed and rinsed under running water Let the Brushroll air-dry completely before replacing in the Motorized Floor Nozzle 6 To reassemble, hold the Brushroll by the tab and align the other end with the gear Then with the tab facing up, place the Brushroll in the Motorized Floor Nozzle 7 Close the Brushroll cover Listen for a click and make sure the release buttons are fully closed IMPORTANT: DO NOT place the Brushroll in the dishwasher to wash or the dryer to dry DO NOT submerge the Brushroll in water IMPORTANT: Using a wet Brushroll in the Motorized Floor Nozzle will void your warranty.
IMPORTANT: Remove Brushroll from unit before rinsing. IMPORTANT: Make sure Brushrolls are completely dry before replacing in the vacuum. Make sure unit is off and cord is unplugged.
Vacuum is not picking up dirt. No suction or light suction.
- Check filters to see if they need cleaning Follow instructions for rinsing and completely air-drying the filters before re-inserting into the vacuum
- Dust Cup may be full; empty Dust Cup
- Check Motorized Floor Nozzle for blockages; clear blockages if required
- Remove any string, carpet fibers, or hair that may be wrapped around the Brushroll Vacuum lifts area rugs.
- Suction is powerful Take care when vacuuming area rugs or rugs with delicately sewn edges
- Turn off the unit to disengage the Brushroll and restart with the POWER slider switch
- Open the Suction Control Button on the Motorized Floor Nozzle to decrease suction power What does the brushroll indicator light mean?
- Solid Green: The brushroll is on and working as it should
- Solid Red: There is a jam in the brushroll area Turn your vacuum off and remove the blockage
- Flashing Red: The motorized floor nozzle is overheating Turn your vacuum off and wait for it to cool down Brushroll does not spin.
- If Brushroll Indicator Light on the Motorized Floor Nozzle turns red, the Brushroll has stopped spinning Immediately turn off, unplug vacuum and remove blockage Replace the power plug into the electrical outlet and turn the vacuum on
- If Brushroll Indicator Light on the Motorized Floor Nozzle is green, the blockage has been successfully cleared If the light is still red, please contact customer service at 1-800-798-7398
- Check to make sure the Brushroll was replaced correctly if it had been removed
- Make sure that the 2-speed POWER slider switch on the handle is properly set to the desired floor setting
- Ensure hood of the Motorized Floor Nozzle is closed completely Brushroll access hood will not close.
- Make sure that the Brushroll was reinserted correctly with the pull tab facing up Dust Cup will not latch back onto Motorized Floor Nozzle.
- Make sure both the bottom door and filter access are fully closed Press firmly in the center of the Dust Cup on the Motorized Floor Nozzle until you hear a click Vacuum turns off on its own or the indicator light flashes red.
- This vacuum is equipped with a motor protective thermostat so the vacuum will shut off if it overheats Should this occur, perform the following steps to restart the motor thermostat: 1 Turn the unit off 2 Unplug the vacuum 3 Empty the Dust Cup and clean filters 4 Check for blockages in tube, accessories and inlet openings 5 Allow the unit to cool for a minimum of 45 minutes 6 Plug in the vacuum 7 Restart the unit by turning the POWER slider switch on