
the Boss BBL910XL - Blender BREVILLE - Free user manual and instructions
Find the device manual for free the Boss BBL910XL BREVILLE in PDF.
| Product Type | Blender |
| Brand | Breville |
| Model | the Boss BBL910XL |
| Power | 1500 W |
| Voltage | 120 V ~ 60 Hz |
| Container Capacity | 2 L (68 oz) |
| Container Material | BPA-free Eastman Tritan |
| Dimensions (H x W x D) | 460 mm x 189 mm x 240 mm |
| Net Weight | 6 kg |
| Number of Speeds | 12 (from STIR to MILL) |
| Preset Programs | 5: Crushed Ice, Smoothie, Green Smoothie, Frozen Dessert, Soup |
| Additional Functions | Pulse, Auto-Clean, Timer, Pause/Resume |
| Blade System | ProKinetix with 3 stainless steel blades |
| Control Type | Buttons and manual speed selector |
| Display | LCD screen with countdown and count-up timer |
| Motor Protection | Overload protection (self-resetting fuse) |
| Safety | Auto shut-off, lid lock, grounding system |
| Included Accessories | Scraper spatula, frozen dessert pusher, measuring cap |
| Maintenance | Container and lid dishwasher safe (lid on top rack) |
| Auto Clean | AUTO NET program with soapy water |
| Plug Type | Assisted Plug with pull ring, grounded (3-pin) |
Frequently Asked Questions - the Boss BBL910XL BREVILLE
User questions about the Boss BBL910XL BREVILLE
0 question about this device. Answer the ones you know or ask your own.
Ask a new question about this device
Download the instructions for your Blender in PDF format for free! Find your manual the Boss BBL910XL - BREVILLE and take your electronic device back in hand. On this page are published all the documents necessary for the use of your device. the Boss BBL910XL by BREVILLE.
USER MANUAL the Boss BBL910XL BREVILLE
Instruction Book - BBL910XL
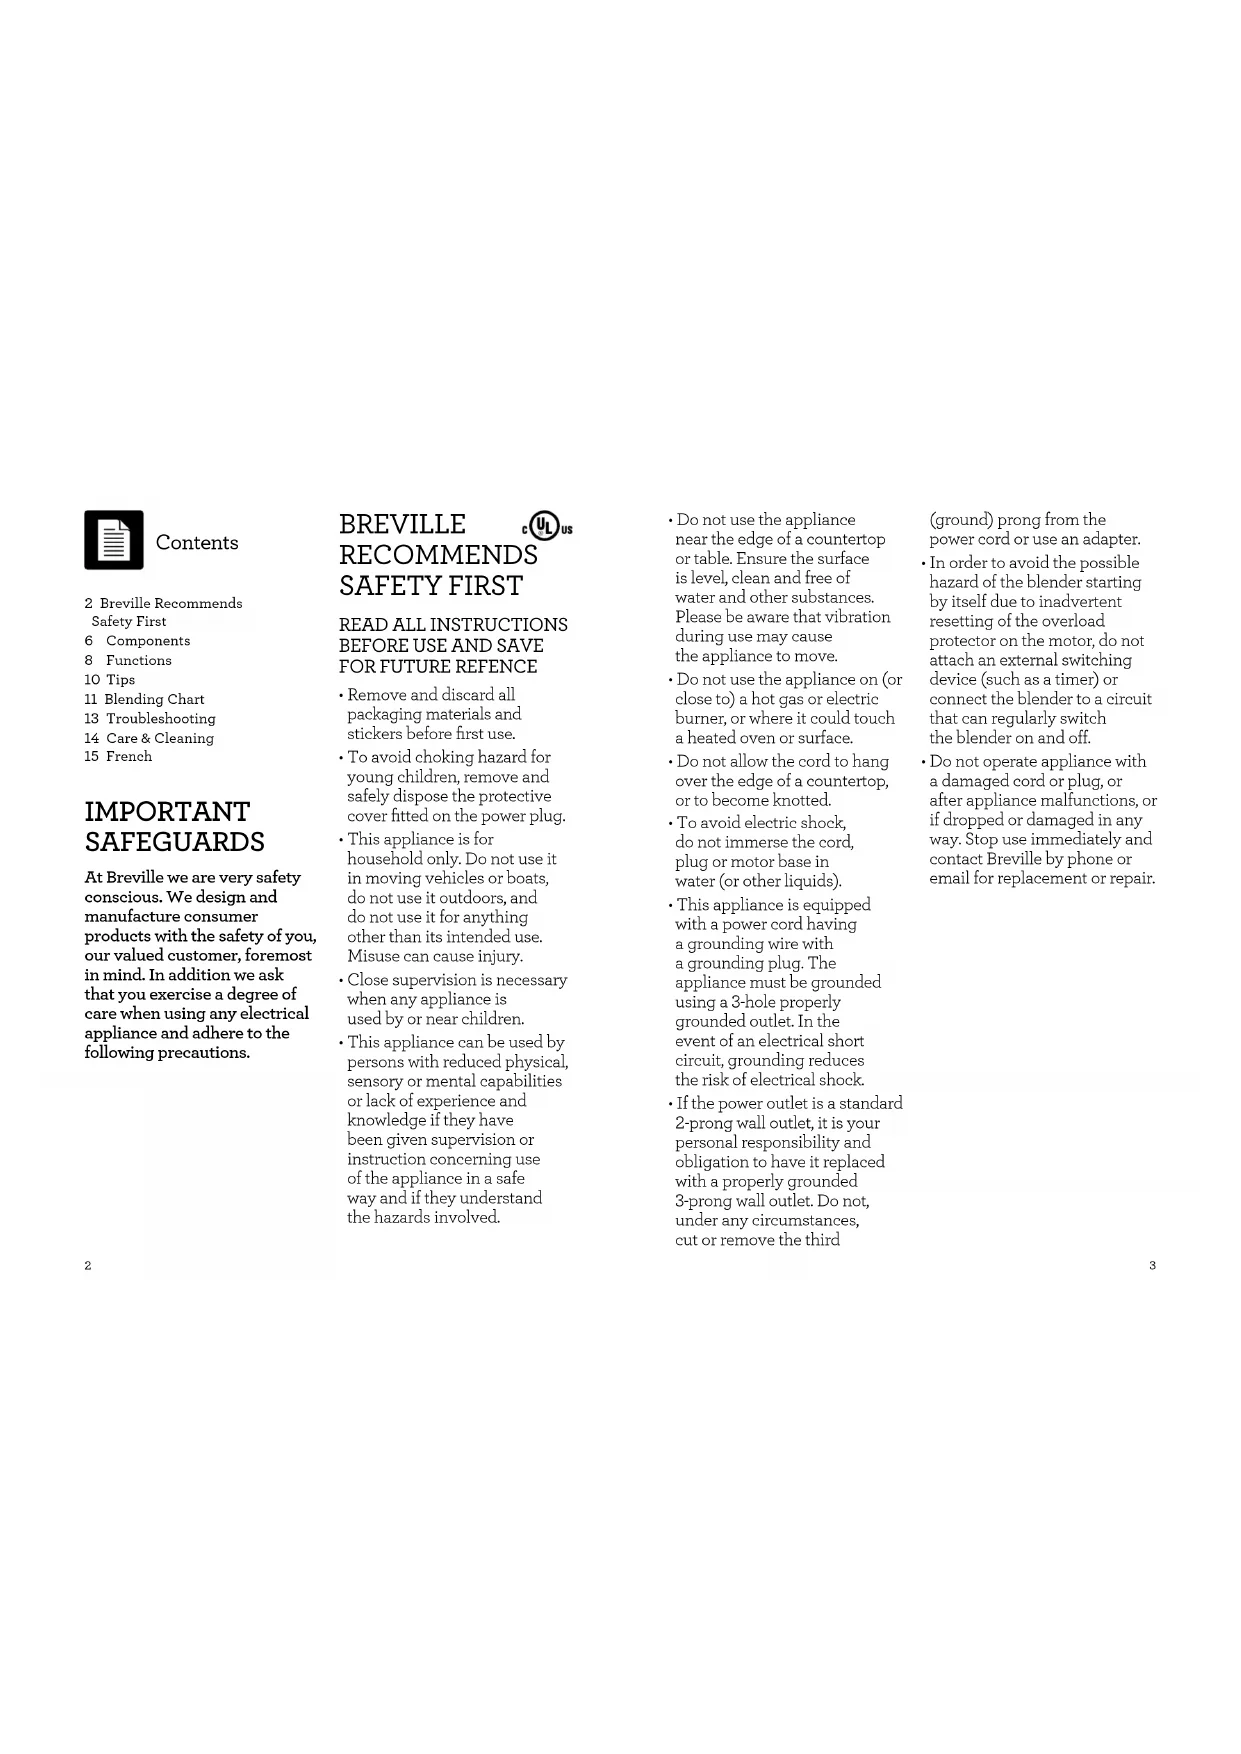
natural_image
Exterior view of a modern Breville blender with clear glass body and control buttons (no text or symbols on main body)Breville®

Contents
2 Breville Recommends Safety First
6 Components
8 Functions
10 Tips
11 Blending Chart
13 Troubleshooting
14 Care & Cleaning
15 French
IMPORTANT SAFEGUARDS
At Breville we are very safety conscious. We design and manufacture consumer products with the safety of you, our valued customer, foremost in mind. In addition we ask that you exercise a degree of care when using any electrical appliance and adhere to the following precautions.
BREVILLE c ^UL us RECOMMENDS SAFETY FIRST
READ ALL INSTRUCTIONS BEFORE USE AND SAVE FOR FUTURE REFENCE
- Remove and discard all packaging materials and stickers before first use.
• To avoid choking hazard for young children, remove and safely dispose the protective cover fitted on the power plug.
• This appliance is for household only. Do not use it in moving vehicles or boats, do not use it outdoors, and do not use it for anything other than its intended use. Misuse can cause injury. -
Close supervision is necessary when any appliance is used by or near children.
• This appliance can be used by persons with reduced physical, sensory or mental capabilities or lack of experience and knowledge if they have been given supervision or instruction concerning use of the appliance in a safe way and if they understand the hazards involved. -
Do not use the appliance near the edge of a countertop or table. Ensure the surface is level, clean and free of water and other substances. Please be aware that vibration during use may cause the appliance to move.
- Do not use the appliance on (or close to) a hot gas or electric burner, or where it could touch a heated oven or surface.
- Do not allow the cord to hang over the edge of a countertop, or to become knotted.
• To avoid electric shock, do not immerse the cord, plug or motor base in water (or other liquids). - This appliance is equipped with a power cord having a grounding wire with a grounding plug. The appliance must be grounded using a 3-hole properly grounded outlet. In the event of an electrical short circuit, grounding reduces the risk of electrical shock.
- If the power outlet is a standard 2-prong wall outlet, it is your personal responsibility and obligation to have it replaced with a properly grounded 3-prong wall outlet. Do not, under any circumstances, cut or remove the third
(ground) prong from the power cord or use an adapter.
- In order to avoid the possible hazard of the blender starting by itself due to inadvertent resetting of the overload protector on the motor, do not attach an external switching device (such as a timer) or connect the blender to a circuit that can regularly switch the blender on and off.
- Do not operate appliance with a damaged cord or plug, or after appliance malfunctions, or if dropped or damaged in any way. Stop use immediately and contact Breville by phone or email for replacement or repair.
- Wash the blender jug with warm soapy water before first use.
- Use only the blender jug and lid that is supplied with this blender. The use of attachments, including canning jars or accessories not manufactured or specified by Breville may cause the risk of fire, electrical shock, or injury.
• Always ensure the blender is assembled properly before using. Lid must be firmly secured to the jug before operation to ensure internal contents do not escape, spray or overflow. - If the motor is straining under a heavy load, do not operate continuously for more than 10 seconds. Allow the motor to rest for 1 minute between uses on heavy loads. Note that none of the recipes in these instructions are considered a heavy load.
- Do not leave the blender unattended when in use.
-
Flashing light indicates ready to operate. Avoid any contact with blades or moving parts.
-
Keep hands, fingers, hair and clothing away from the blender during use. Always turn blender off and unplug at the wall before reaching inside.
- Be careful when handling the blender jug as the blades are very sharp. Be careful when emptying the jug and during cleaning. Mishandling of the blades may cause injury.
- Do not remove the jug from the motor base while blender is in use.
• The blender is intended for food or drinks preparation. Do not use for anything other than food or drinks. Do not operate without any ingredients in the blender jug. - Never attempt to operate with damaged blades, or with utensils, or any foreign objects inside the blender jug.
• To reduce the risk of severe injury to persons or damage to the blender, keep hands and utensils out of the jug while blending. The spatula and food pusher provided can be used, provided the main lid is in place. -
Never blend boiling hot liquids. Allow temperature to drop before putting into the jug for blending.
-
Be careful if hot liquid is poured into the blender, as it can be ejected out of the jug due to sudden steaming.
- When blending hot liquids ensure inner measuring cap is in place. Cap will protect from splashing of hot liquids during blending and includes vents designed to relieve pressure and avoid steam build up.
- When blending hot liquids, do not exceed the hot liquids maximum of 40oz. (1.2L).
- Be careful removing the lid after blending hot liquids, as steam traps can form in the liquid and be ejected out of the jug.
- Do not put the blender jug in extremes of heat or cold, for example placing a cold jug into hot water, or vice versa.
• Before moving the blender, cleaning or putting it away for storage, always turn blender off and unplug at the wall.
BREVILLE ASSIST™ PLUG
Your Breville appliance comes with a unique Assist™ Plug, conveniently designed with a finger hole to ease removal from the power outlet.
SHORT CORD INSTRUCTIONS
Your Breville appliance is fitted with a short power supply cord to reduce personal injury or property damage resulting from pulling, tripping or becoming entangled with a longer cord. If an extension cord is used, (1) the marked electrical rating of the cord set or extension cord should be at least as great as the electrical rating of the appliance, (2) the cord should be arranged so that it will not drape over the countertop or table-top where it can be pulled on by children or tripped over unintentionally and (3) the extension cord must include a 3-prong grounding plug.
SAVE THESE INSTRUCTIONS
SPECIFICATIONS
| Power Consumption | 120V - 60Hz |
| Output 1500W | |
| Outside Dimensions | 460mm (H)190mm (W)240mm (D) |
| Net Weight Approx. 6kg | |
These specifications may change without notice.

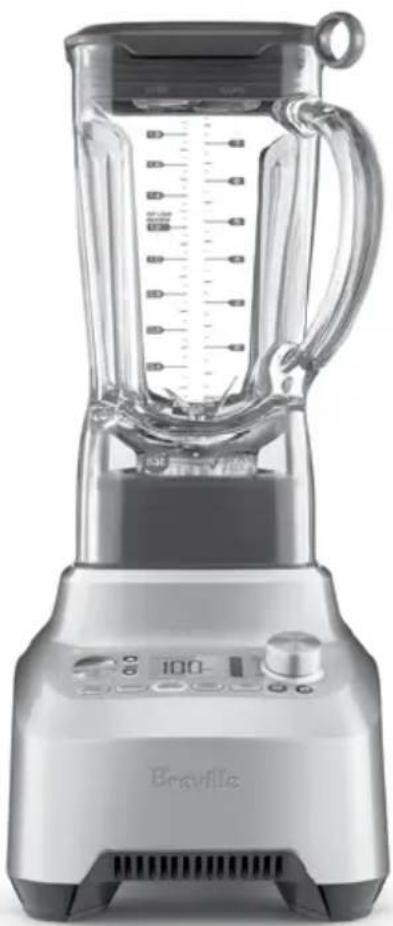
Components
A. Inner measuring cup Remove to add ingredients while blending.
B. High performance lid
Withstands high velocity tasks, and is designed to vent steam and prevent splatter.
C. 68oz. (2.0L) BPA-free Tritan ^™ jug Impact resistant, shatter proof and dishwasher safe.
D. ProKinetix ^® extra-wide, heavy duty blade and bowl system
Designed with 3 powerful stainless steel blades contoured to the base of the jug for maximum cutting power and processing results including liquid-free processing. The wide blades create the Kinetix ^® motion, and eliminate food traps.
E. Heavy duty metal coupling
For durable and long lasting performance under demanding conditions.
F. Heavy duty 1500W motor
High velocity power combined with high torque for outstanding results.
G. Overload protection
Resettable thermal fuse for motor protection.
H. Manual speed control
Wide speed range from super slow stir up to high speed milling for precise control.
I. LCD timer and display panel
Counts down for pre-programmed settings,
and counts up for speed dial settings.
J. Durable die-cast metal base
K. 5 preset programs
Optimize the blender's capabilities for crushing ice, smoothies, green smoothies, milling and soup.
ACCESSORIES
L. Scraper spatula Designed to push food down from the walls, or for easily removing ingredients after blending.
M. Frozen desert tamper Helps make frozen desserts by pushing thick foods directly into the blades.
EASTMAN TRITAN™ COPOLYESTER
This blender jug is made with Eastman Tritan™ Copolyester, which is a tough,
BPA - free polymer used to make housewares products that can stand up to extreme use and repeated dishwasher cleaning. Products made from Tritan™ are impact resistant and shatter resistant and stay clear and durable even after hundreds of cycles in the dishwasher.
BREVILLE ASSIST™ PLUG
Your Breville appliance comes with a unique Breville Assist™ Plug, conveniently designed with a finger hole to easy removal from the wall outlet.

Functions

GETTING STARTED
ON | OFF
The ON | OFF button powers the unit into READY mode.
READY mode
The blender will default to MANUAL.
MANUAL FEATURES
Speed control dial
There are 12 speed settings from STIR through to MILL.
STIR mixes more delicate foods with a slow stirring motion and light pausing to fold ingredients together.
MILL is the fastest setting, and is ideal for milling nuts, grains and seeds.
The blender is programmed to allow manual speeds to run for 6 minutes before automatically stopping.
PAUSE | PLAY▶II
Pauses and holds the speed and timer for up to 2 minutes. Press PAUSE | PLAY again to resume.
It is also activated if the jug is removed from base during use. Replace jug, and press PAUSE | PLAY again to resume.
Repeat function
If the START | CANCEL button is pressed when using the manual speed dial, or if the timer finishes, the current speed setting will be held for 2 minutes to allow a quick repeat of the cycle.
Pressing the START | CANCEL button will re-start this cycle.
If you want to clear the previous speed from the memory, press and hold the START | CANCEL button for 2 seconds.
Sleep
After 2 minutes of inactivity, LCD powers off, and the ON | OFF button flashes red. After 5 minutes of inactivity, the blender turns OFF completely. Press the ON | OFF button to reactivate.
Count-up timer
If the timer isn't set, the blender timer counts up in seconds as it blends. When using the timer this way, the blender will stop after 6 minutes, or you can cancel blending manually.
Count-down timer
The alternative to running the blender in count-up mode is to set the blending time before starting.
PRESET PROGRAMS
If the blender is running and you press a different preset button, it will switch to that program without stopping.
PULSE | ICE CRUSH
Optimized to crush ice, and has an intelligent sensor to stop the motor when ice is done. This cycle is also ideal for processing other foods that need sudden bursts of power.
SMOOTHIE
Optimized to combine and aerate frozen and liquid ingredients together. The SMOOTHIE function has a unique processing technique that blends the denser ingredients at lower speed, then increases in speed as ingredients thicken. This will happen several times while blending smoothies. The programming also circulates the ingredients for maximum aeration and a creamy texture.
GREEN SMOOTHIE
Optimized to break down whole hard ingredients like fruits, leafy greens and seeds, and allows them to blend together with other soft and liquid ingredients.
FROZEN DESSERT
Optimized to break down and combine frozen ingredients quickly. Use the frozen dessert wand for best results.
SOUP
This preset program runs for 6 minutes to blend and heat ingredients to make soups. The program has a slow start to combine ingredients before running at high speed, and ends with a couple of stirs to release any steam bubbles that may have formed in the soup.
Do not exceed 40oz. (1.2L) when blending hot liquids.

WARNING
Never blend boiling hot liquids. Allow temperature to drop before putting into the jug for blending.
AUTO CLEAN
Use to remove most of the ingredients off the blender walls and blades. Add 2 cups (around 500ml) warm soapy water, and press the AUTO CLEAN button. For harder to clean, sticky or thick ingredients, add 12 teaspoon of dish liquid detergent for extra cleaning power. For best results, run the auto clean cycle immediately after use.

WARNING
Lifting the jug during use damages the coupling. Do not lift jug until motor has stopped.

Tips
- If the volume (while blending) is below the maximum line, the inner measuring cap can be removed and oils/liquids can be added while blender is in use.
- Run the blender only for the appropriate amount of time required - do not over blend ingredients.
- Use the PULSE | ICE CRUSH button when food is too thick or coarse to circulate within the blender jug.
• The scraper spatula and frozen desert wand can be used during blending by removing the inner measuring cap. Always make sure the main lid stays firmly in place. - Do not exceed the maximum mark when adding foods and liquids into the blender.
- Ingredients may stick to the sides of the blender jug. To push food back onto the blades with the main lid on (inner cap removed), use the spatula provided to scrape down the sides of the jug, and continue blending.
- If any moisture or liquid appears on top of the motor base during blending, turn the blender off and unplug from the outlet. Remove the blender jug, and wipe motor base immediately with a dry cloth or paper towel.
• To stop blending at any time or during one of the programs, press the START | CANCEL button. -
A speed or function can be selected at any time, even while the blender is running. Press the new speed or program, and the blender will change operation immediately.
• The maximum amount of ice cubes that the blender can process is 250g (approx. 1 standard ice tray). -
Thicker mixtures pure more efficiently if the jug is 14 to 12 full.
- When the blender has been running for 2 minutes in manual mode, it will automatically turn off. This is a safety feature to protect the motor.
- Do not use metal utensils, as they may damage the blades or blender jug.
• To avoid damaging the coupling, do not lift jug until motor has stopped.

Blending Chart
FOOD PREPARATION
QUANTITY FUNCTIONS TIME
| Grains & seeds | Mill into flour. Use in bread, pizza doughs, cakes, muffins and flour batters. | 250-500g1 14 -2 14 cups | MILL speed 30-60 secs |
| Dried beans, grains & corn e.g. wheat, garbanzo beans, corn kernels | Mill into flour. Use for breads, cakes, muffins, pancakes. | 250-500g1 14 -2 14 cups | MILL speed 1 min 30 sec |
| Spices | To make ground spices. Use whole spices except for cinnamon quills that need to be broken half. Store in airtight containers. | 55-115g 12 -1 cup8-16 cinnamon sticks | MILL speed 1 min 30 sec |
| Raw nuts | To make nut meal. Use in cakes, cookies and muffins. | 150-300g1-2 cups | MILL speed 20-30 secs |
| Toasted nuts | To make nut butters and spreads. | 300-450g2-3 cups | MILL speed with scraper 1 minute |
| Granulated sugar | Mill to make pure icing sugar or powdered sugar. | 200g1 cup or 7oz | MILL speed 15 seconds |
| Raw vegetables | Peel and cut into 34 inch (2cm) cubes. Finey chopped. Use for stuffing, filling, bolognaise, stews and casseroles. | 225g8oz | CHOP speed 5-10 secs |
| Graham crackers /cookies | Break cookies in half. Blend to form crumbs. Use for cheesecake crusts. | 225g8oz | PULSE | ICE CRUSH 6-10 pulses |
DRY MILLING
Please note that milling hard ingredients like spices, nuts, sugar, coffee, grains, etc will cause scratching and clouding to the inside surfaces of the jug.
This is a cosmetic result from milling these kinds of ingredients, and does not affect the performance of the jug.
FOOD PREPARATION
QUANTITY FUNCTIONS TIME
| Bread crumbs | Remove crusts. Cut bread into 1 inch (2 14 cm) cubes. Use in crumb coatings, stuffings or in meatballs and meat patties. | 120g (up to 3 slices) | CHOP speed | 20 - 30 seconds |
| Mayonnaise | Mix the egg yolk, mustard and vinegar or lemon juice. Add oil slowly through the lid. Use for dressing. | Up to 4 egg yolks and 2 cups of oil. | MIX speed 1 min 30 sec | |
| Hard cheeses (like Parmesan and Pecorino) | Cut into 1 12 inch (3cm) cubes. Use in creamy sauces, pasta dishes. | 130g 4 12 ounces | CHOP speed | 15-20 seconds |
| Cream | Whip cream to firm peaks. Add sugar or vanilla before blending, if desired. | 300 - 600ml 1 14 - 2 12 cups | MILL speed 10 seconds | |
This blending chart should be used as a guide only.

Troubleshooting
| Motor doesn't start or blade doesn't rotate | Check the blender jug and lid are securely in place.Check the ON | OTT button and selected function button is illuminated.Check that the power plug is properly inserted into the power outlet. |
| Food is unevenly chopped | This can happen when too much food is being blended at one time. Try a smaller amount, and work in batches if necessary.The ingredients may be too large. Try cutting into smaller pieces. For best results, ingredients should be in pieces no larger than 4inch (2cm). |
| Food is chopped too fine or is watery | Try blending for shorter period of time. Use the PULSE | ICE CRUSH function for better control. |
| Food sticks to blade and jug | The mixture may be too thick. Try adding more liquid and/or using a slower speed for blending. |
| Blender overloaded | This blender has a motor protection feature to protect against over heating and/or over current use. When activated OVERLOAD PROTECTION will flash on the LCD and the blender will be inoperable.I' activated, turn the blender off by pressing the ON | OTT button on the control panel, and unplug the blender. Wait a few minutes then re plug and power ON the blender.I' OVERLOAD PROTECTION is still flashing, repeat and leave the blender for at least 20-30 minutes. Once OVERLOAD PROTECTION has disappeared from the screen the blender is ready to be used again.We recommend blending in smaller batches, or cutting ingredients into smaller pieces. |

Care & Cleaning
Cleaning the jug and lid
In order to keep your jug clean and avoid food drying on the blades, jug and lid, follow the below steps as soon as possible after use:
- Rinse most of the ingredients off the jug and lid.
- Add 2 cups (around 500ml) of warm water and press the AUTO CLEAN button. If thick or sticky ingredients require extra cleaning power add a few drops of dish liquid detergent.
- Rinse the jug and lid again and/or wash separately in warm soapy water with a soft cloth or bottle brush.
Sanitizing
The recommended sanitizing solution is 1.5 tsp (7.5ml) of household bleach in 2qt (8 cups / 2L) of clean, cool water, mixed according to the recommended instructions on the bleach container. To sanitize, follow the below steps:
- After performing the auto clean cycle as per the instructions above, add half (4 cups/1L) of the recommended sanitizing solution to the jug. Secure the lid and inner lid and press AUTO CLEAN to run a sanitizing clean cycle.
- Allow to stand for 1 minute, then empty solution.
- Soak lid, inner lid (also scraper spatula and frozen dessert wand if used) in the remaining second half of the sanitizing solution mixture for 2 minutes.
- Place the empty jug and lid back on blender base and run on manual speed MIX for 10-20secs to remove any excess moisture from the blade area.
- Wipe the exterior of the lid, jug and base with a soft cloth dampened with the sanitizing solution.
- Do not rinse after sanitizing. Allow to air dry before storage. Rinse with clean water prior to next use.
Motor base
To clean the motor base, wipe with a soft, damp cloth then dry thoroughly. Wipe any excess food particles from the power cord.
Cleaning agents
Do not use abrasive scouring pads or cleaners on either the motor base or the jug, as they may scratch the surface. Use only warm soapy water with a soft cloth.
Dishwasher
The blender jug and lid can be washed in the dishwasher on a standard wash cycle. Jug can be placed on the bottom shelf, however the lid and inner measuring cap should be washed on the top shelf only.
Stubborn food stains and odors
Strong smelling foods such as garlic, fish and some vegetables such as carrots may leave an odor or stain on the blender jug and lid. To remove, soak blender jug and lid for 5 minutes in warm soapy water. Then wash with a mild detergent and warm water, rinse well and dry thoroughly. Store jug with the lid off.
Storage
Store your blender upright with the blender jug assembled on the motor base, or beside it. Do not place anything on top. To allow air to circulate, keep the lid off.
Dry milling
Please note that milling hard ingredients like spices, nuts, sugar, coffee, grains, etc will cause scratching and clouding to the inside surfaces of the jug.
This is a cosmetic result from milling these kinds of ingredients, and does not affect the performance of the jug.
the Breville Boss ^24c
Manuel d'instructions - BBL910XL
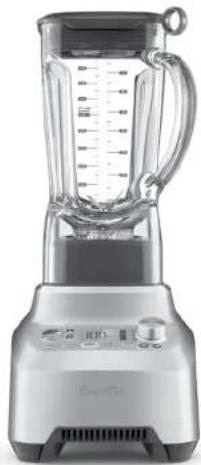
natural_image
Exterior view of a modern blender with clear glass body and control buttons (no text or symbols visible)Breville

Contents
A. Bouchon-mesure
Do not use abrasive scouring pads or cleaners on either the motor base or the jug, as they may scratch the surface. Use only warm soapy water with a soft cloth.
Lave-vaisselle
Breville Customer Service Centre
USA
Mail: Breville USA
19400 S. Western Ave
Torrance CA
90501-1119
Phone: 1-866-273-8455
1-866-BREVILLE
Email: askus@brevilleusa.com
Web: www.brevilleusa.com
Canada
Mail: Breville Canada
3595 boulevard Côte-Vertu,
Saint-Laurent, Québec
H4R1R2
Phone: 1-855-683-3535
Email: askus@breville.ca
Web: www.breville.ca
Breville®
Thought for food
Breville is a registered trademark of Breville Pty. Ltd. A.B.N. 98 000 092 928.
Copyright Breville Pty. Ltd. 2015.
Due to continued product improvement, the products illustrated/photographed
in this booklet may vary slightly from the actual product.

- Contents
- IMPORTANT SAFEGUARDS
- BREVILLE c UL us RECOMMENDS SAFETY FIRST
- READ ALL INSTRUCTIONS BEFORE USE AND SAVE FOR FUTURE REFENCE
- BREVILLE ASSIST™ PLUG
- SHORT CORD INSTRUCTIONS
- SAVE THESE INSTRUCTIONS
- Components
- ACCESSORIES
- EASTMAN TRITAN™ COPOLYESTER
- Functions
- GETTING STARTED
- ON | OFF
- READY mode
- MANUAL FEATURES
- Speed control dial
- PAUSE | PLAY▶II
- Repeat function
- Sleep
- Count-up timer
- Count-down timer
- PRESET PROGRAMS
- PULSE | ICE CRUSH
- SMOOTHIE
- GREEN SMOOTHIE
- FROZEN DESSERT
- SOUP
- WARNING
- AUTO CLEAN
- Tips
- Blending Chart
- DRY MILLING
- Care & Cleaning
- Cleaning the jug and lid
- Sanitizing
- Motor base
- Cleaning agents
- Dishwasher
- Stubborn food stains and odors
- Storage
- the Breville Boss 24c
- Lave-vaisselle
- Breville Customer Service Centre
Brand : BREVILLE
Model : the Boss BBL910XL
Category : Blender