
Xtreme SPK080 - Soundbar Peerless-AV - Free user manual and instructions
Find the device manual for free Xtreme SPK080 Peerless-AV in PDF.
| Product Type | Outdoor Soundbar |
| Brand | Peerless-AV |
| Model | Xtreme SPK080 |
| Dimensions (W x H x D) | 969 x 99 x 110 mm (38.13 x 3.91 x 4.32 in) |
| Weight | 4.4 kg (9.7 lb) |
| Total Power | 200 watts (Class D amplifier) |
| Drivers | 2 x 76 mm (3 in) aluminum woofers + 2 x 38 mm (1.5 in) titanium dome tweeters |
| Audio Inputs | 1 Toslink optical, 1 analog 3.5 mm, Bluetooth 4.0 |
| Protection Rating | IP65 (soundbar) |
| Frequency Response | 50 Hz - 20 kHz |
| Operating Temperature | -40°C to 49°C (-40°F to 120°F) |
| VESA Mounting Compatibility | 400 mm wide configuration |
| Power Type | Mains via included power cord |
| Remote Control | With AAA batteries (non-IP rated) |
| Warranty | 1 year parts and labor |
| Cleaning | Do not use chemicals; do not pressure wash the grille |
| Safety Instructions | Do not open the enclosure; use correct rated voltage; disconnect during thunderstorms |
Frequently Asked Questions - Xtreme SPK080 Peerless-AV
User questions about Xtreme SPK080 Peerless-AV
0 question about this device. Answer the ones you know or ask your own.
Ask a new question about this device
Download the instructions for your Soundbar in PDF format for free! Find your manual Xtreme SPK080 - Peerless-AV and take your electronic device back in hand. On this page are published all the documents necessary for the use of your device. Xtreme SPK080 by Peerless-AV.
USER MANUAL Xtreme SPK080 Peerless-AV
ENG - This product is designed to be installed on wood stud, solid concrete or cinder block walls. Before installing make sure the supporting surface will support the combined load of the equipment and hardware. Screws must be tightly secured. Do not overtighten screws or damage can occur and product may fail. Never exceed the Maximum Load Capacity. Always use an assistant or mechanical lifting equipment to safely lift and position equipment. Be careful not to pinch fingers when operating the mount. For support please call customer care at 1-800-865-2112.
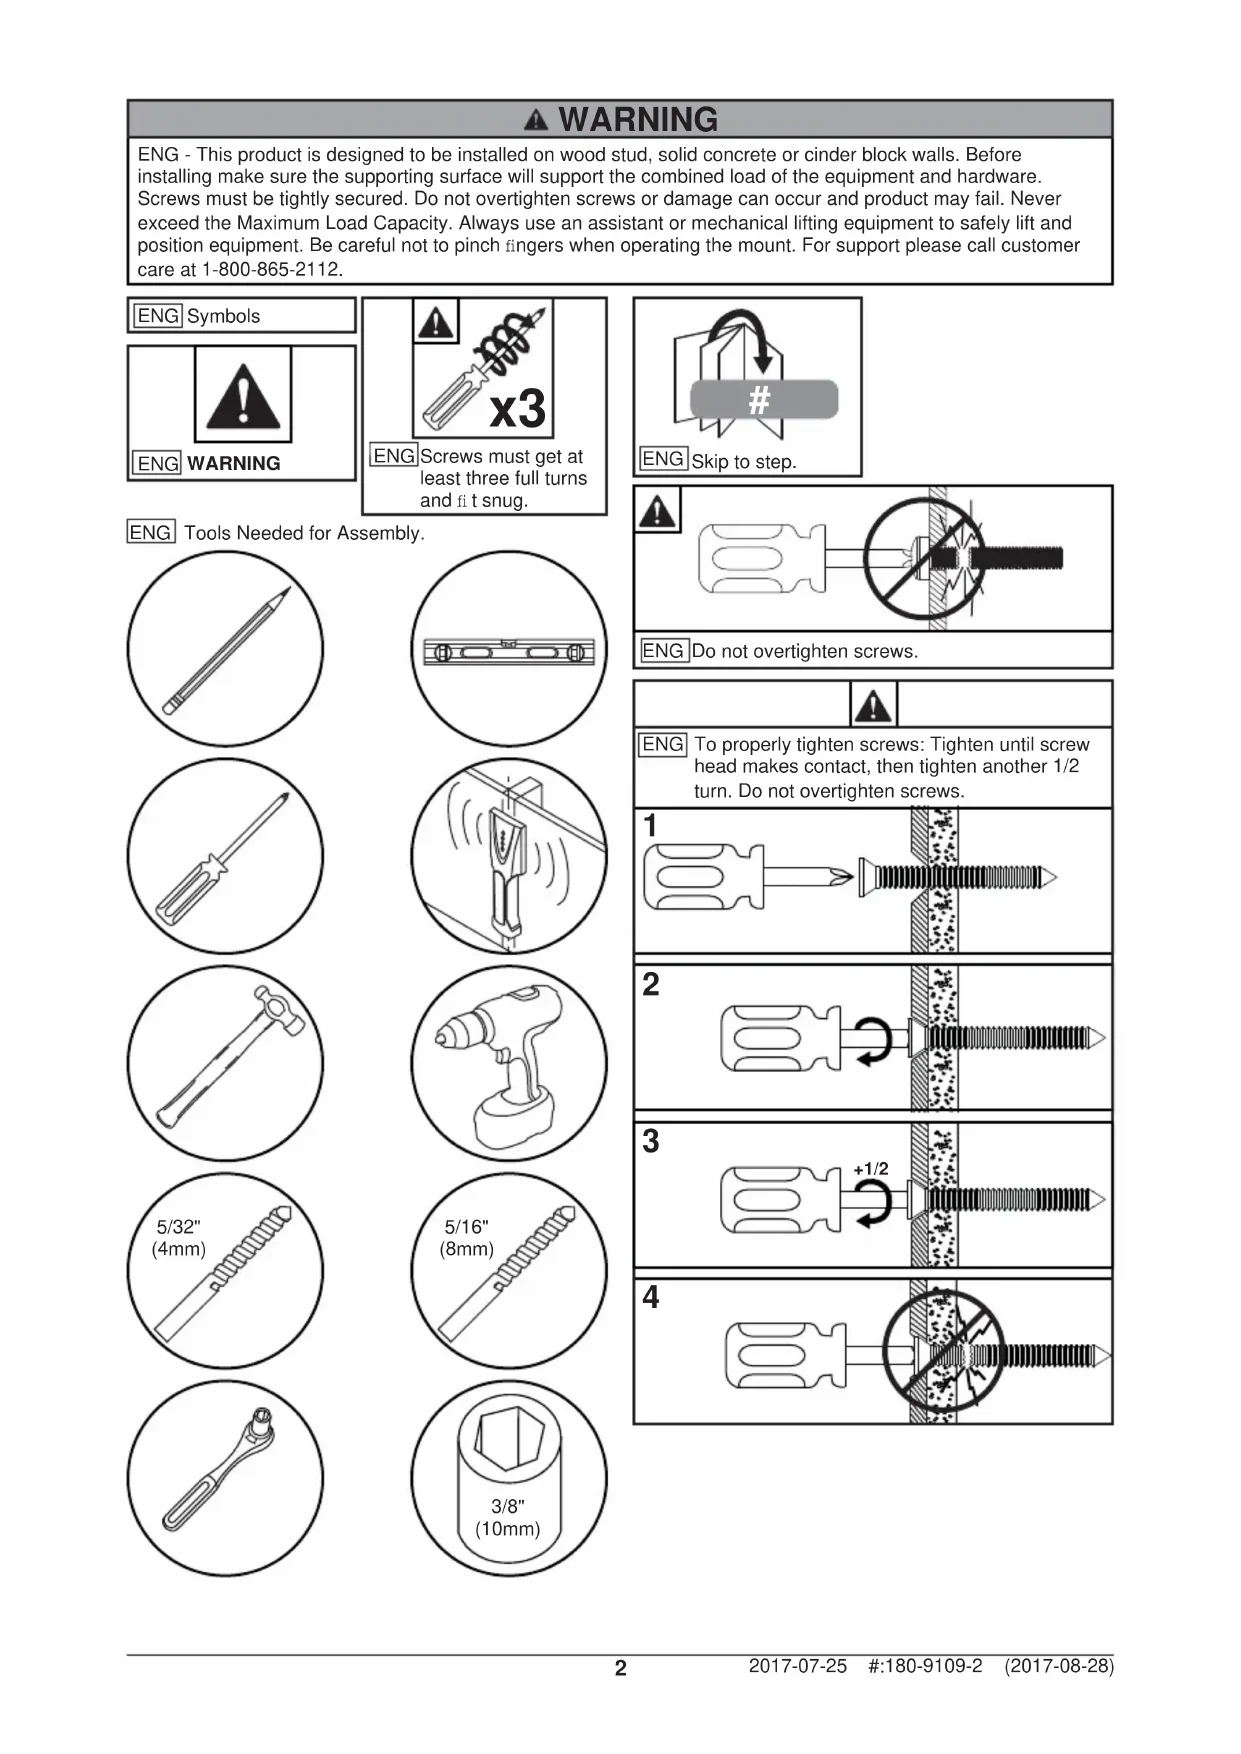
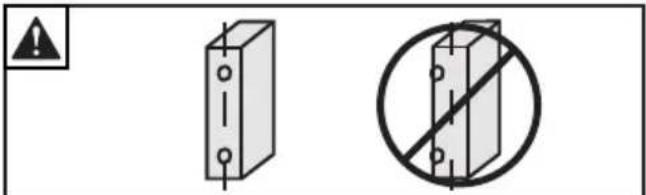
ENGSymbols
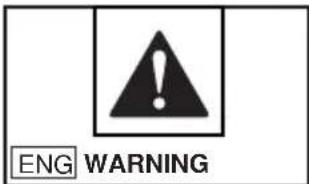
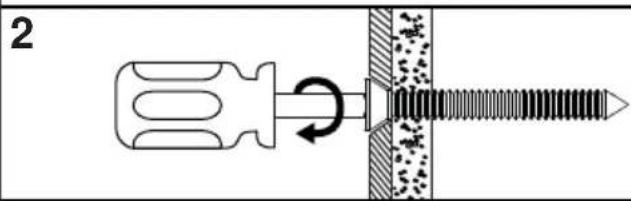
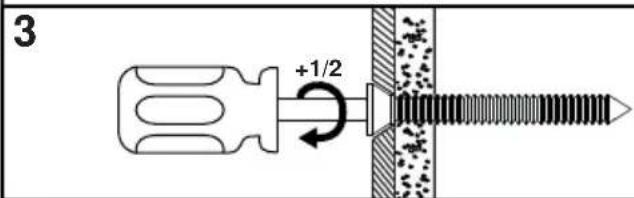
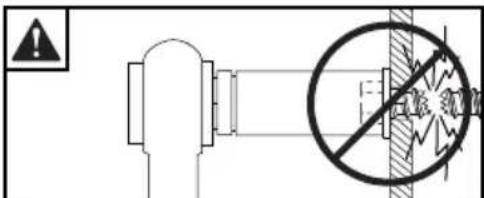
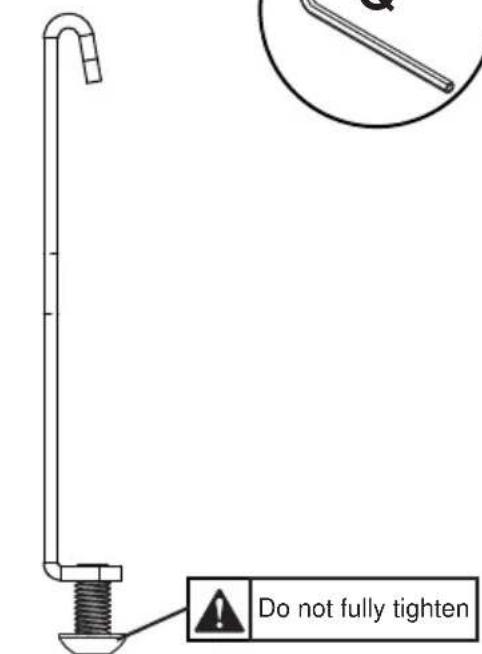
ENG Screws must get at least three full turns and fit snug.

ENG Skip to step.

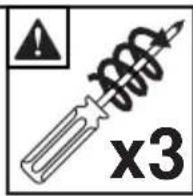
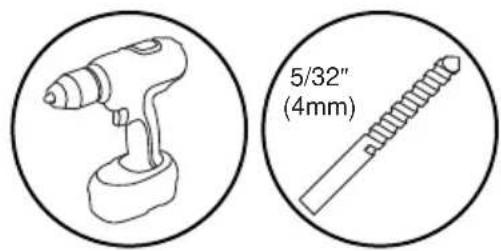
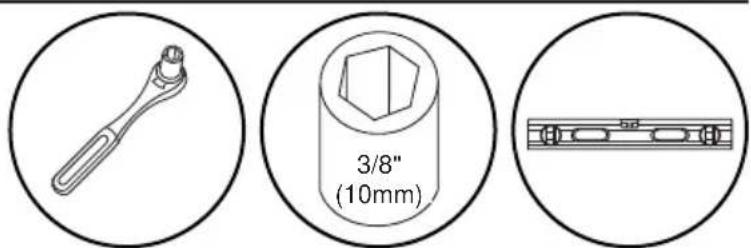
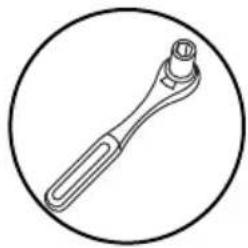
ENG Tools Needed for Assembly.

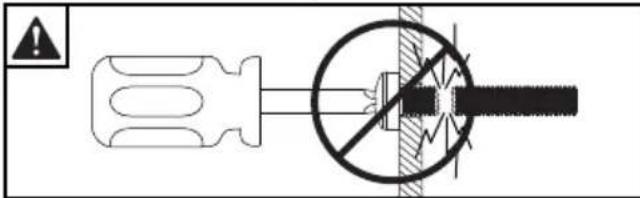
ENG Do not overtighten screws.

ENG To properly tighten screws: Tighten until screw head makes contact, then tighten another 1/2 turn. Do not overtighten screws.


GENERAL SAFETY PRECAUTIONS
WARNING
RISK OF ELECTRICAL SHOCK
To reduce the risk of electric shock, do not disassemble the unit under any circumstances. No user serviceable parts inside. All product services should be done by the Peerless-AV certified service personnel.
Read before operating equipment
Thank you for purchasing our product. Before using it, please read this user manual carefully and follow the instructions correctly for safe operation. Please keep this manual handy for future reference. Also, please be sure to always include this user manual in the packaging when transferring or transporting this product to a different location.
Batteries Installed Warning
CAUTION - Danger of explosion if batteries are incorrectly replaced. Replace only with the same or equivalent type. The batteries shall not be exposed to excessive heat such as sunshine, fire or the like.
NOTE - The soundbar remote control does not carry an IP rating. Do NOT allow the remote control to get wet. Do NOT leave the remote control outside when the soundbar is not in use.
CAUTION:
These servicing instructions are for use by qualified service personnel only. To reduce the risk of electric shock, do NOT perform any servicing other than that contained in the operating instructions unless you are qualified to do so.
- Read these instructions.
- Keep these instructions.
- Heed all warnings.
- Follow all instructions.
- Do NOT defeat the safety purpose of the polarized or grounding type plug. A polarized plug has two blades with one wider than the other. A grounding type plug has two blades and a third grounding prong. The wide blade or the third prong are provided for your safety. If the provided plug does not fit into your outlet, consult an electrician for replacement of the obsolete outlet.
- Protect the power cord from being walked on or pinched particularly at plugs, convenience receptacles, and the point where they exit from the apparatus.
- Refer all servicing to qualified service personnel. Servicing is required when the apparatus has been damaged in any way, such as power-supply cord or plug is damaged, does not operate normally, or has been dropped.
- Only use attachments/accessories specified by the manufacturer.
- In case of emergency such as fire or electric shock caused by the product, immediately contact 911 or proper emergency police/fe re service agencies in your country.
- Follow instructions for wall, shelf or ceiling mounting as recommended by the manufacturer.
- Use properly rated power voltage. Use of non-rated voltage may cause fire, electric shock and severe damages to the product.
- Do NOT open the cabinet under any circumstances. High voltage inside of this product may cause electric shock.
- Do NOT, under any circumstances, modify or disassemble this product as it may cause fire, electric shock, or severe damages to the product. Also any unauthorized modifications made to the product automatically void product warranty.
- Never touch antenna lines, wires, if applicable, power cables or power plugs in such circumstances as lightning and thunder as it may cause electric shock.
- Any severe physical impact on the product may cause certain components to fall out of place within and break, which may cause fire or electric shock. In such event, do not operate the product. Contact the manufacturer for support.
- Periodically clean dust off the power plug, to keep it clean and dry, ensuring proper and safe operation of the product.
-
Do NOT destroy, process, or place the product close to any heating device; do NOT bend or twist power cords, power plugs, cables, or wires with excessive force; do NOT place any heavy object on the product as all of the above may cause damages to the product and result in fire or electric shock.
-
Do NOT touch power plugs with wet hands.
- Always make sure to plug in the power plug firmly and completely. Incompletely placed power plugs may cause fire or electric shock due to built up heat emission.
- Do NOT use any non-rated power sockets or power strips with many other devices jointly plugged in. The wire of non-designated capacity may cause fire due to built up heat emission. Try to use a single, directly dedicated and rated GFI power socket for the product for safe operation.
- In case of product malfunction or unusual events such as electrical burning smell, smoke, or loss of content signals on soundbar due to internal overheating, immediately turn off and unplug the power and contact the manufacturer.
- Do NOT install the product at such unstable locations as moving objects, constantly vibrating props, or uneven surfaces. Improper installation may cause products to fall off. Follow mounting instructions properly for safe operation of the product.
- Do NOT install the product near any poisonous gas or chemically unstable atmosphere as it may cause fire.
- Do NOT install the product near any strong magnetic or electrical current field. It may cause fire, electric shock, or severe damages to the product. The product may be subject to any electromagnetic radiation, causing failure.
- Do NOT leave any fire source, such as candles, close to or on the product as it may be a cause for fire or damages to the product.
- Do NOT move or transport the product with any cables (power cables, content connectivity cables) plugged in to the source devices. Damages may occur to the cables, plugs, or jointing connectors of the cables due to forcible bending and stress, which may cause damages to the waterproof seal of the product, making it subject to fire, electric shock, or shorted circuit.
- When unplugging, always grab the plugs of power cords or cables. Improper pulling of the cords or cables may cause damages to the waterproof seal of the product, making it subject to fire, electric shock, or shorted circuit.
- Do NOT climb on the product.
- Do NOT use any other power cords or connection cables than what is provided with the product or from the manufacturer directly. Use of untested, unauthorized, or substituted power cords or connection cables may be a cause for malfunction, fire, electric shock, or severe damages to the product. Also such use of improper or undesignated power cords or connection cables will void product warranty.
- Always leave the power Off when plugging or unplugging the power cords or connection cables to avoid electric shock or damages to the product.
- Do NOT use any chemical such as paint thinner or benzene to clean the product's exterior. It may cause scratches on the surface, erasing proper indications, identification labels, or instructions on the exterior, which may be a cause for misuse and improper operation of the product.
- Never power wash or spray water at the front grill of the soundbar. While the speaker gaskets are IP65 rated and won't allow ingress of water to the electrical components, doing so may cause damage to the drivers and void the warranty.
FCC CAUTION
To assure continued compliance and possible undesirable interference, ferrite cores may be used when connecting this TV to video equipment; maintain at least 400mm (15.75 inches) spacing to other peripheral devices.
FCC STATEMENT
This equipment has been tested and found to comply with the limits for a Class B digital device, pursuant to Part 15 of the FCC Rule. These limits are designed to provide reasonable protection against harmful interference in a residential installation. This equipment generates, uses and can radiate radio frequency energy and, if not installed and used in accordance with these instructions, may cause harmful interference to radio communications; however, there is no guarantee that interference will not occur in a particular installation. If this equipment does cause harmful interference to radio or television reception, which can be determined by turning the equipment off and on, the user is encouraged to try to correct the interference by one or more of the following measures:
- Reorient or relocate the receiving antenna.
- Increase the separation between the equipment and receiver.
- Connect the equipment into an outlet on a circuit different from that to which the receiver is connected.
- Consult the dealer or an experienced radio/TV technician for help.
This device complies with Part 15 of the FCC Rules. Operation is subject to the following two conditions:
- This device may not cause harmful interference.
This device must accept any interference received, including interference that may cause undesired operation.
Relevant Information
Record your soundbar's model and serial number here for future reference. Keep this user manual in an accessible location in the event settings need to be changed or service is desired.
Note: Your soundbar's serial number can be found on the box and on the rear input panel.
Model Number
Serial Number
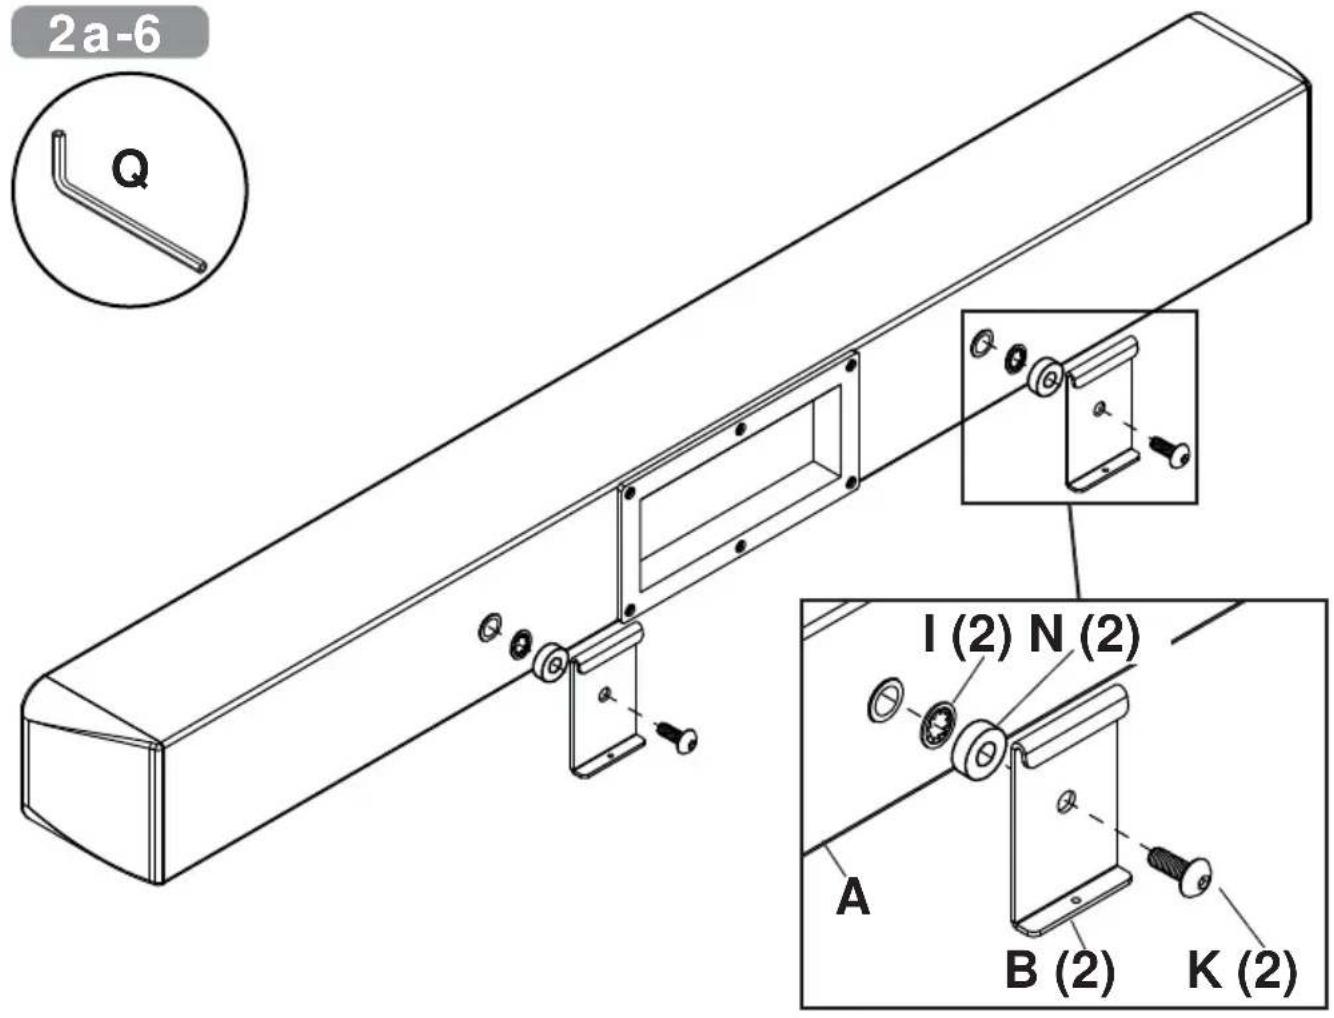
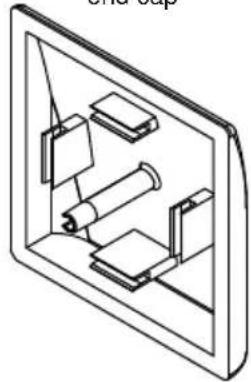
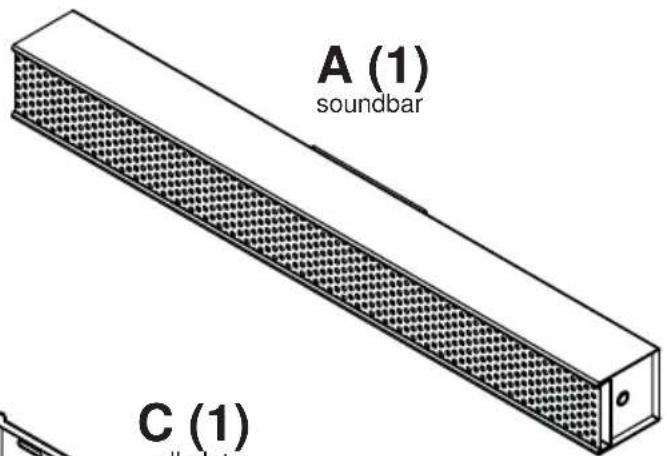
Part #Description Qty
Parts List
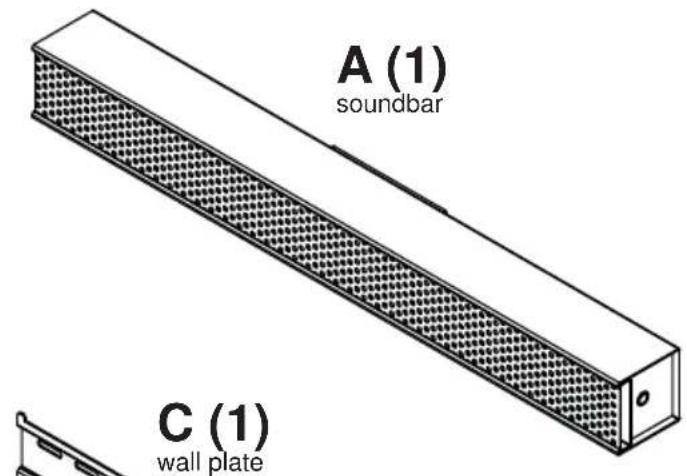
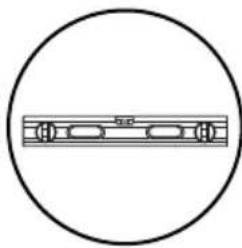
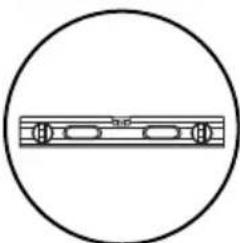
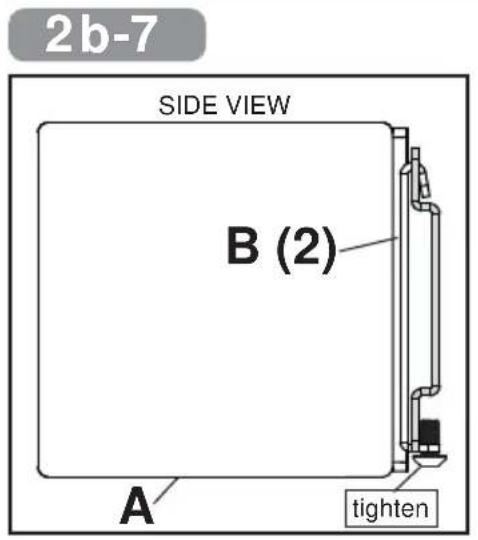
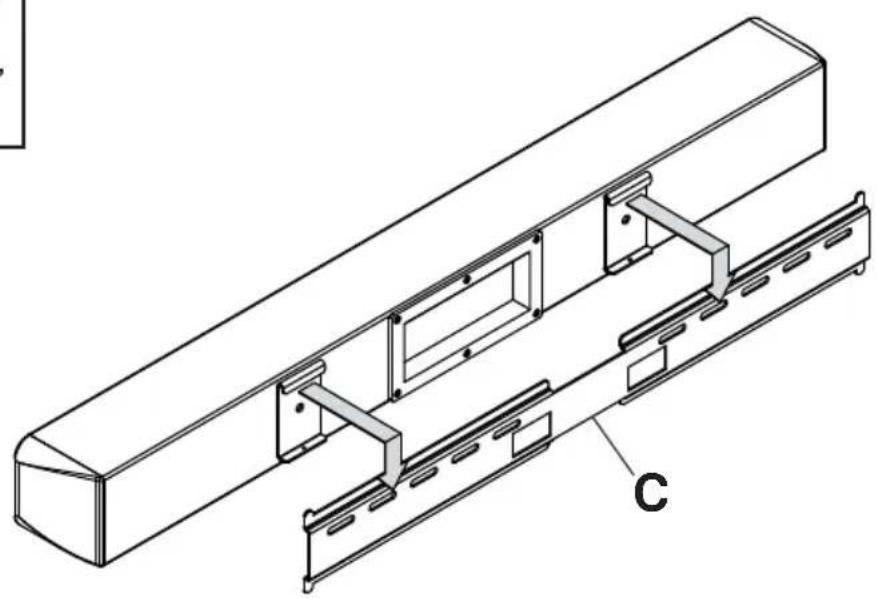
| A soundbar 1 soundbar | |
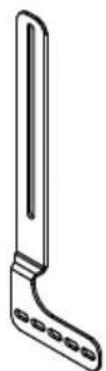
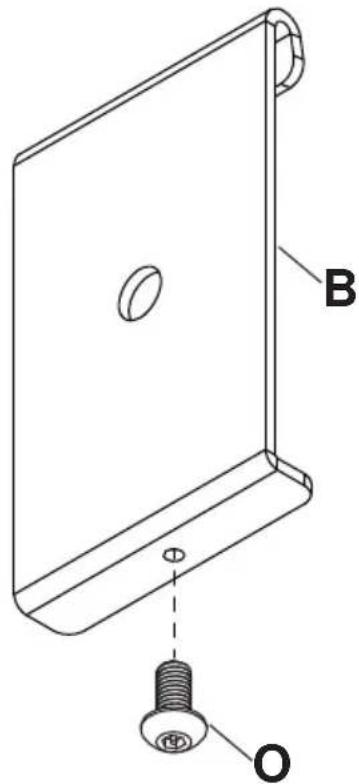
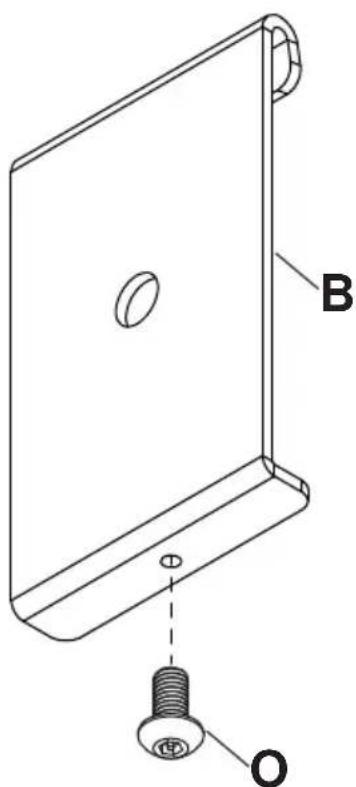
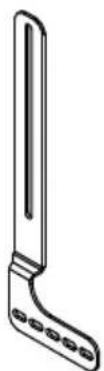
| B hook-on bracket 2 180-0265 | |
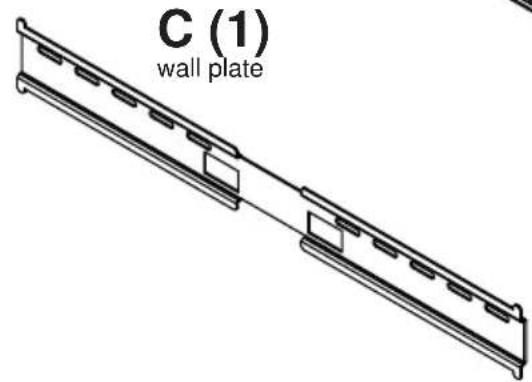
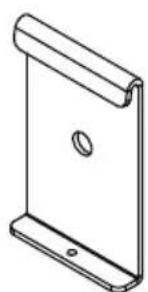
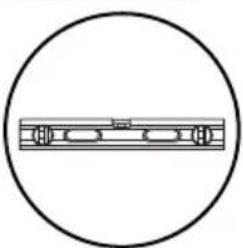
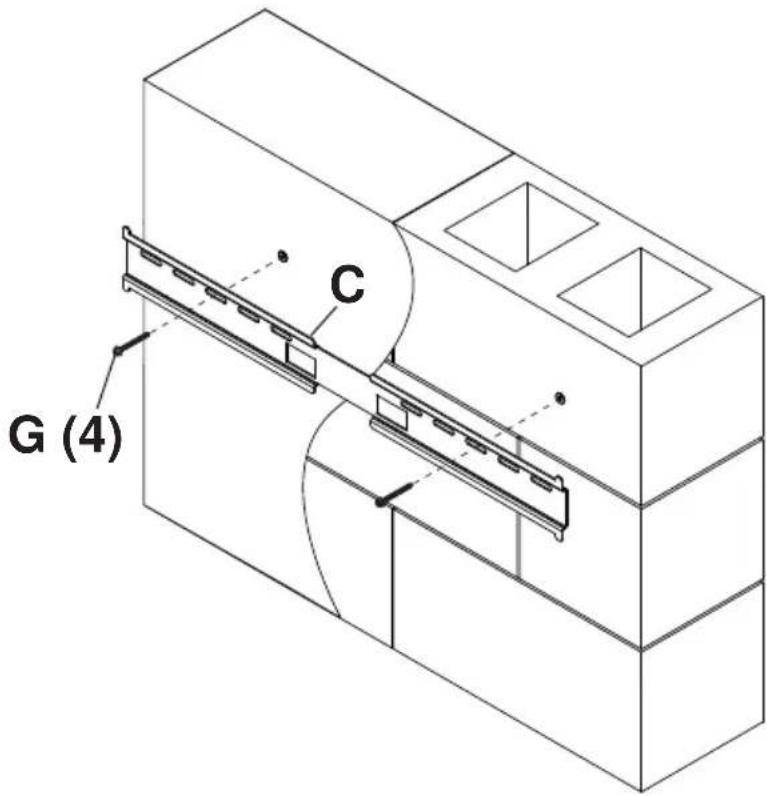
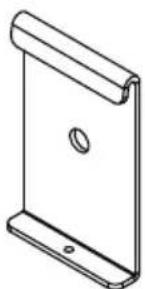
| C wall plate 1 180-0264 | |
| D left mount bracket 1 180-0268 | |
| E right mount bracket 1 180-0267 | |
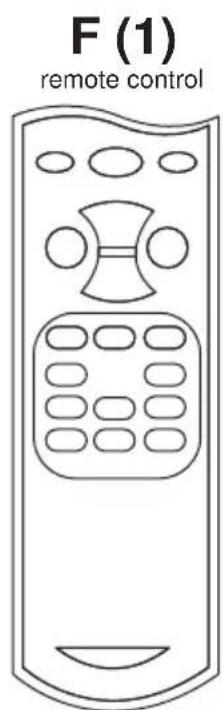
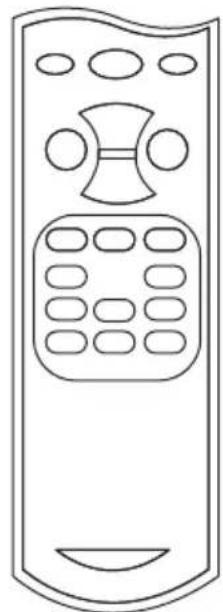
| F remote control 1 remote | |
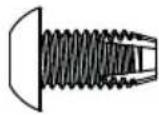
| G #14 x 2.5" wood screw 2 520-D1033 | |
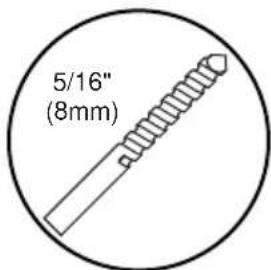
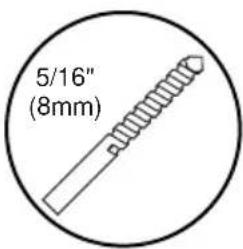
| H 8mm concrete anchor 2 590-0320 | |
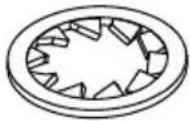
| I lock washer 2 540-3622 | |
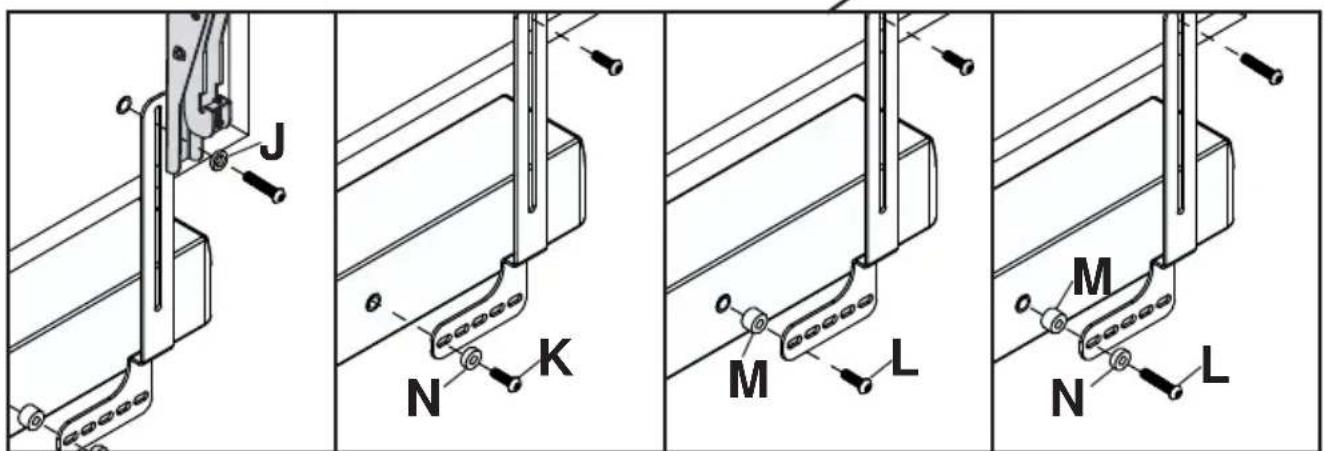
| J nylon washer 2 590-1231 | |
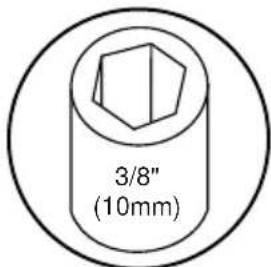
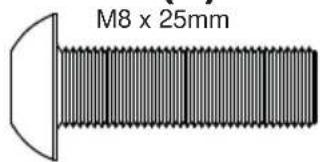
| K M8 X 25mm socket pin screw | 2 520-D1101 |
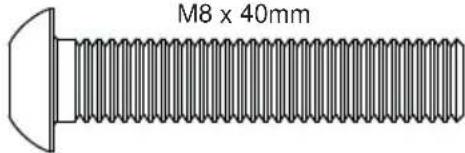
| L M8 x 40mm socket pin screw | 2 520-D1152 |
| M .5" spacer | 2 540-1059 |
| N .25" spacer | 2 540-1002 |
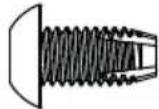
| O M5 x 10mm self-tapping | 2 520-D1164 |
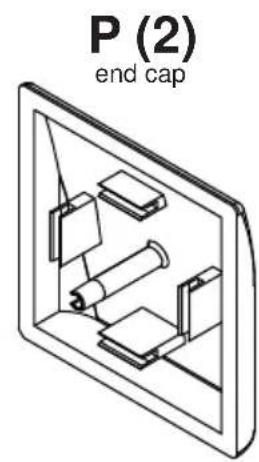
| P end cap | 2 590-0407 |
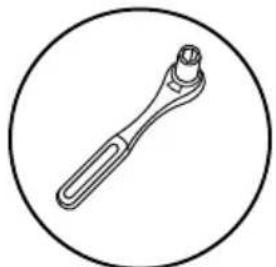
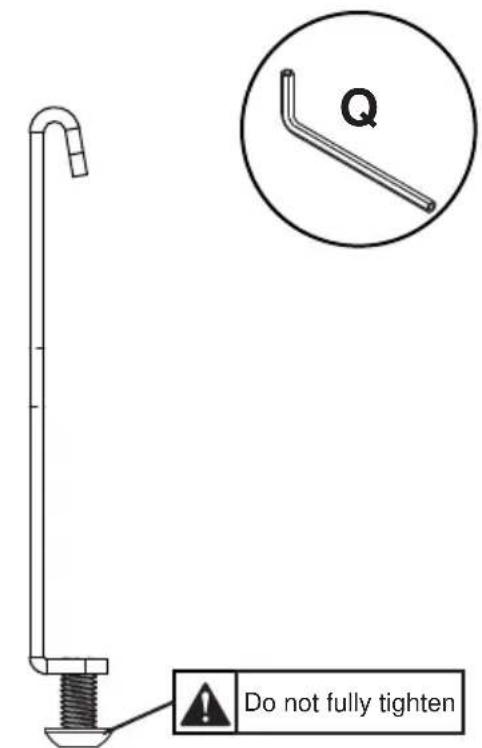
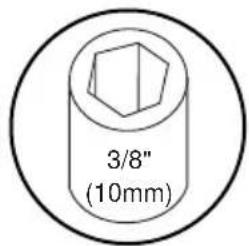
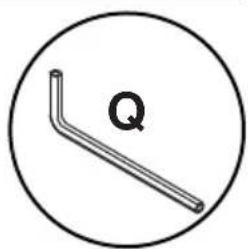
| Q 4mm security allen wrench | 1 520-1129 |
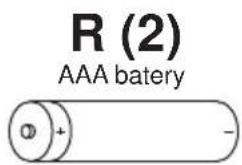
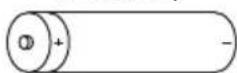
| R AAA battery | 2 410-0040 |
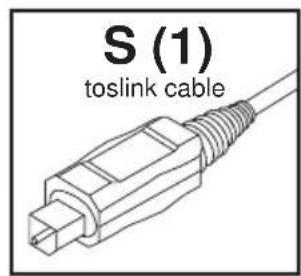
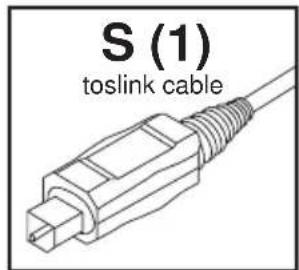
| S toslink cable | 1 410-0098 |
D (1) left mount bracket
E (1) right mount bracket
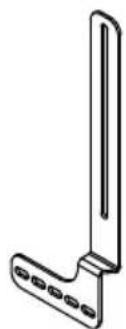
B (2) hook-on bracket
G (2)
14x2-1/2" wood screw

H (2)
8mm concrete anchor
I (2)
lock washer
J (2)
nylon washer

K (2)

M (2)
.5" spacer
O (2)
M5 x 10mm

Q (1)
4mm allen wrench
N (2)
.25" spacer

L (2)
M8×40mm

1

2
Wood stud wall.

Concrete/Cinder block.
WARNING
ENG - When installing Peerless wall mounts on a wood stud wall covered with gypsum board (drywall), verify that the wood studs are a minimum of 2'' × 4'' nominal size. Do not install over gypsum board thicker than 5/8'' .
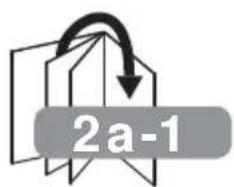
2a-1
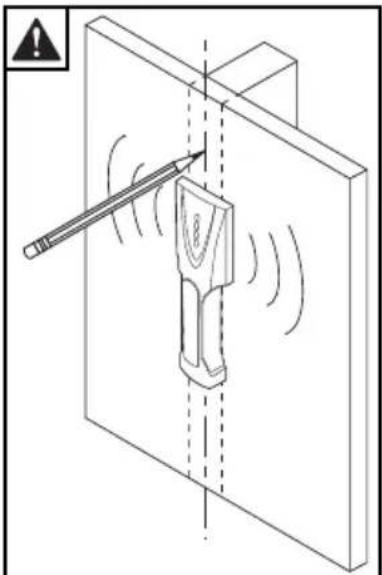
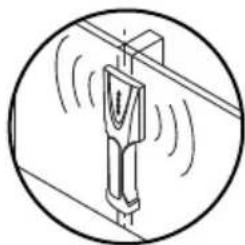
Use stud fi nder to locate and mark stud center lines.

2a-2

Level wallplate. Mark mounting holes on stud center lines.
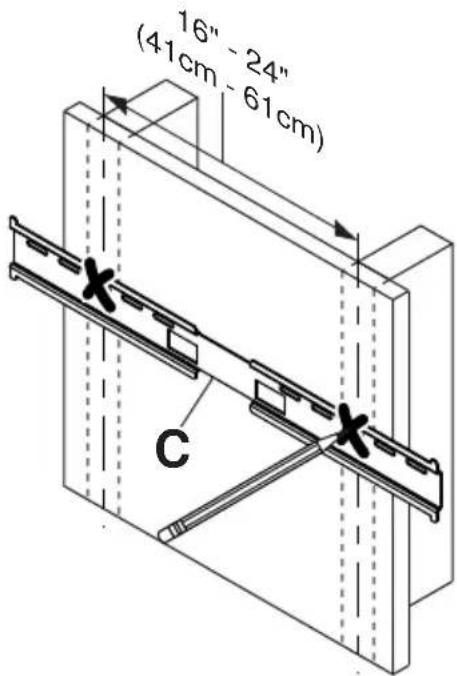
2a-3
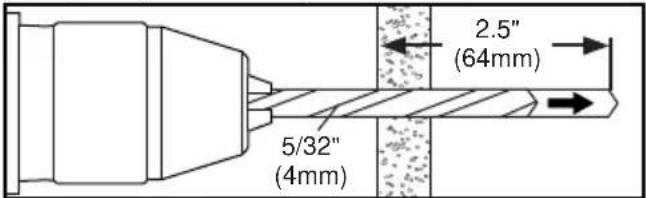
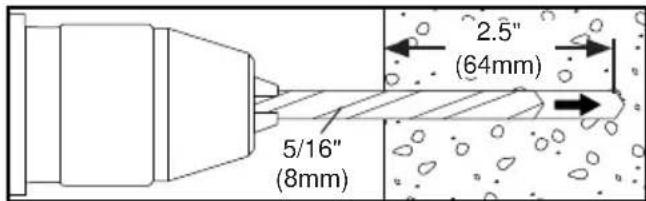
Drill mounting holes into supporting surface (2.5" (64mm) minimum depth required).
Mounting hole must center on stud.
2a-4
Level wallplate. Install using wood screws provided.
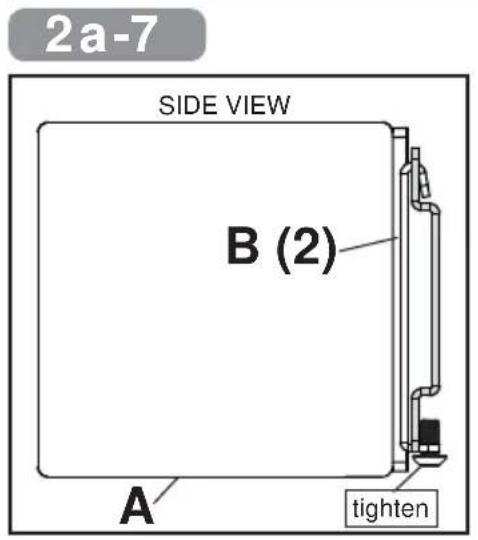
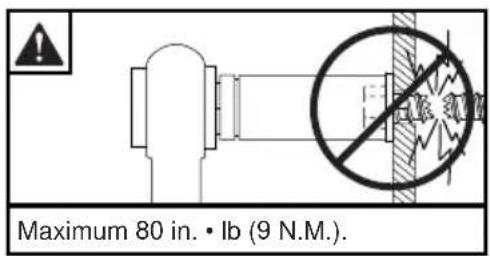
Maximum 80 in. · Ib (9 N.M.).
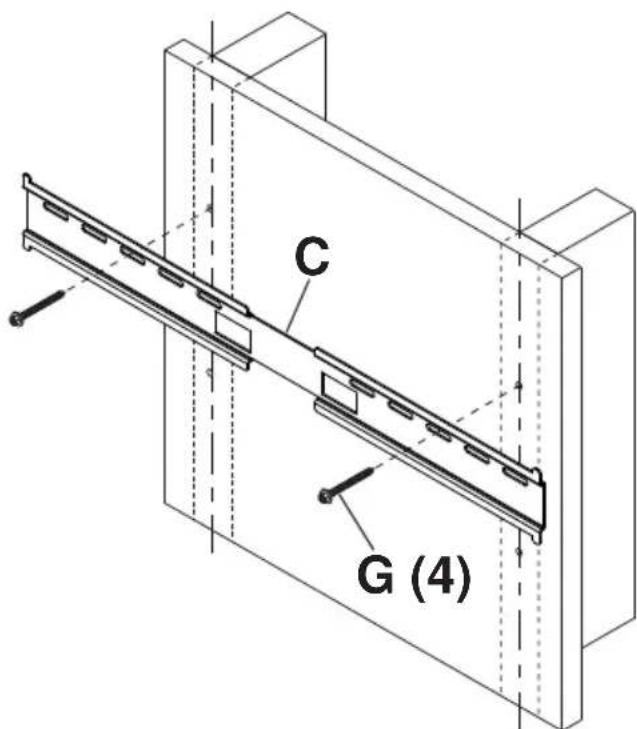
2a-5
x2


2b
WARNING
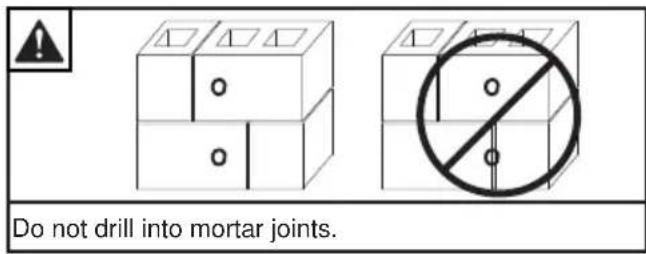
ENG - When installing Peerless wall mounts on a concrete wall, the wall must be at least 8" thick with a minimum compressive strength of 2000 psi. When installing Peerless wall mounts on a cinder block wall, the cinder blocks must meet ASTM C-90 specifications and have a minimum nominal width of 8". Do not drill into mortar joints! Be sure to mount in a solid part of the block, generally 1" (25 mm) minimum from the side of the block. It is suggested that a standard electric drill on slow setting is used to drill the hole instead of a hammer drill to avoid breaking out the back of the hole when entering a void or cavity. Never attach concrete expansion anchors to concrete or cinder block covered with plaster, drywall or other finishing material.
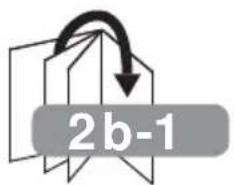
2b-1

Level wallplate. Mark mounting holes.
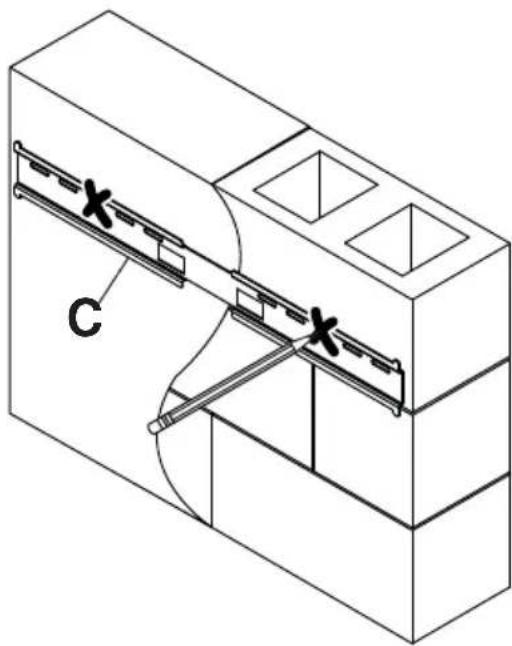
2b-2
Drill mounting holes into supporting surface (2.5" (64mm) minimum depth required).
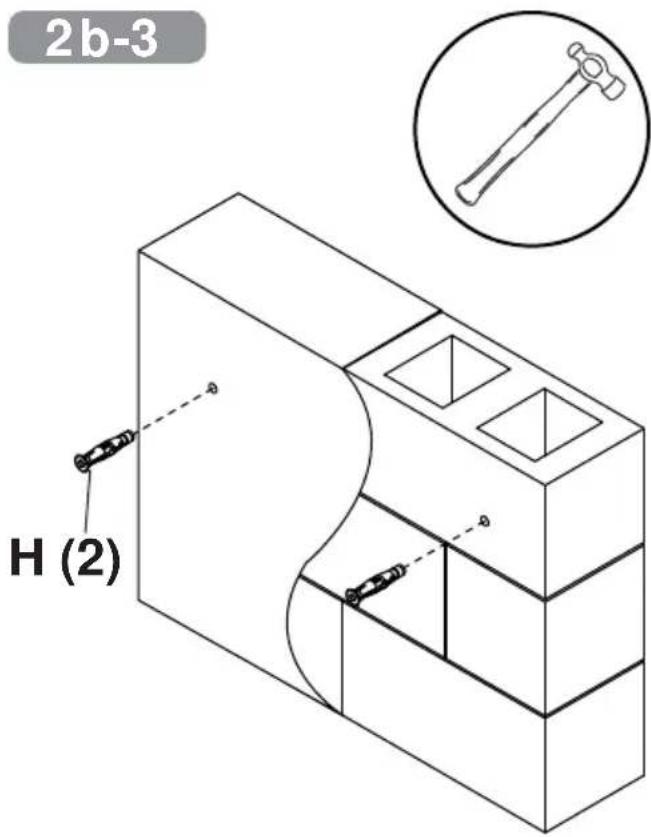
2b-3

2b-4
Level wallplate. Install using concrete anchors and wood screws provided.
2b-5
x2


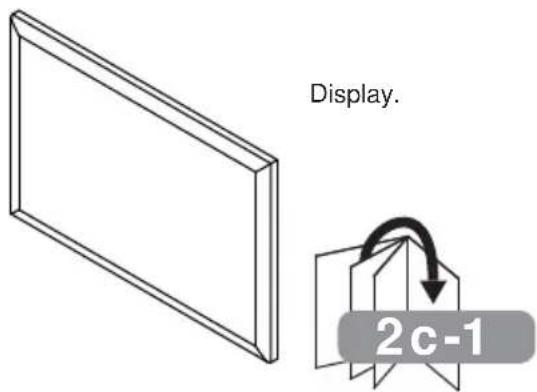
2c-1
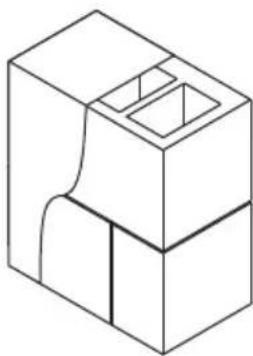
Position display screen-side down on a fl at, clean surface. Position soundbar grill-side down either above or below display. Determine which bracket configuration below fits your display
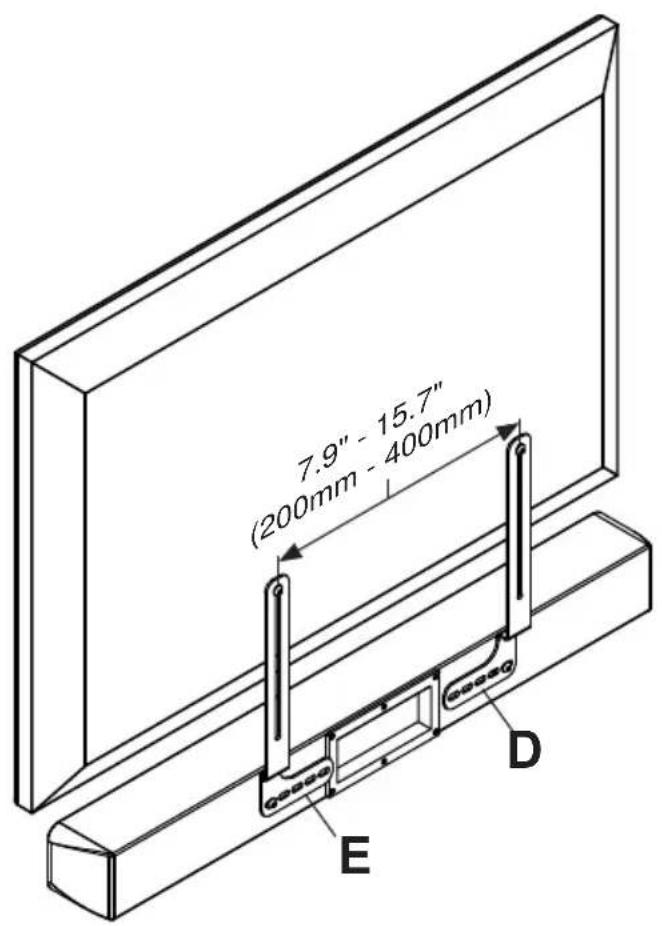
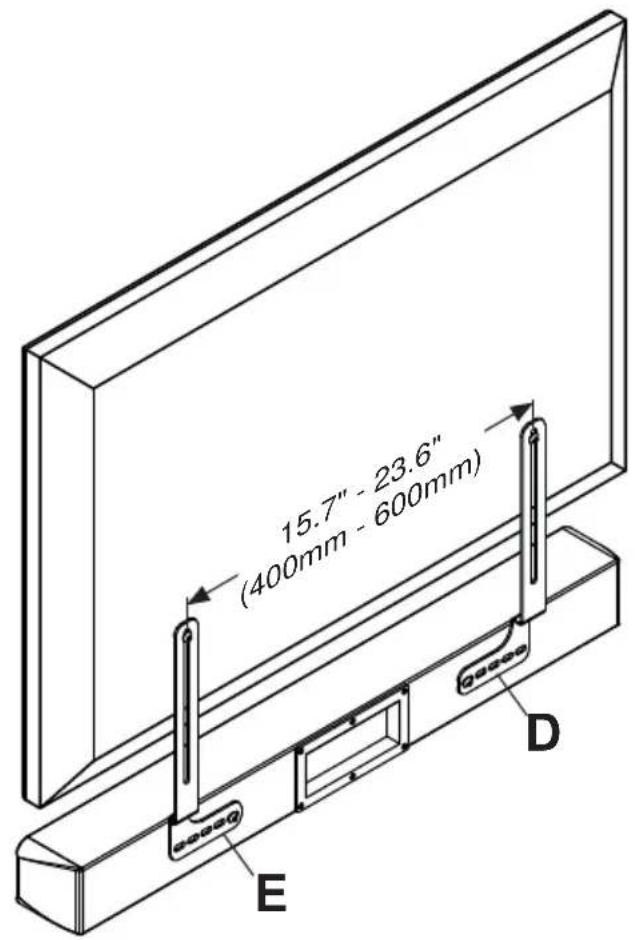
2c-2
Determine which hardware to use based on the depth needed.

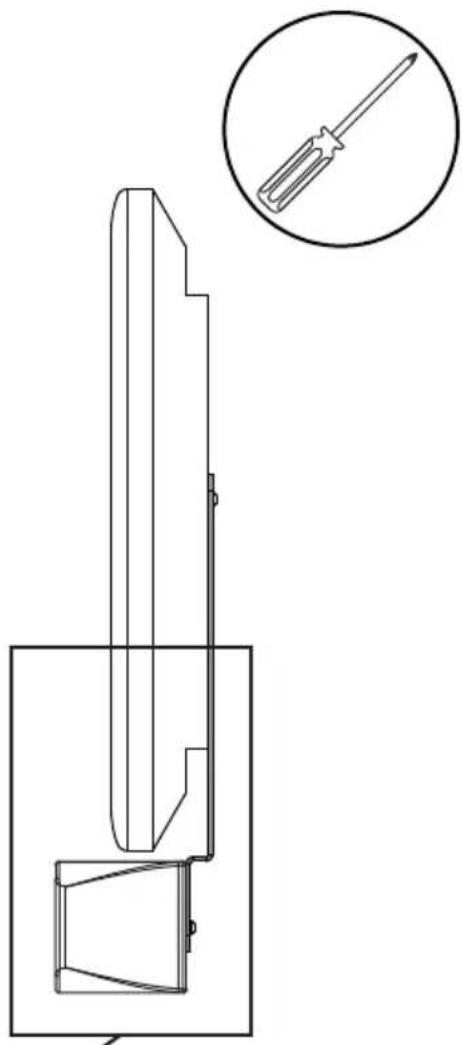
*Hardware included for installing soundbar only. To attach display, use hardware included with display mount.
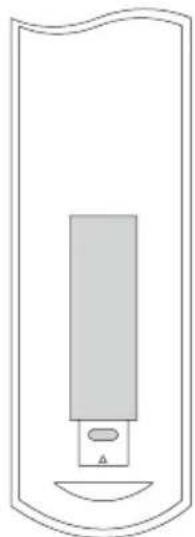
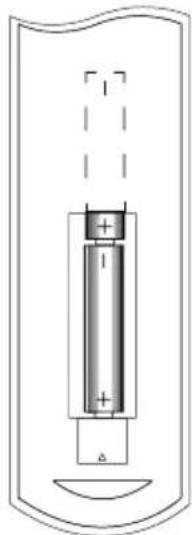
Battery Installation and Replacement
The remote control is powered by two 15V AAA batteries.
To install or replace batteries:
-
Install/Replace the batteries by removing the battery cover and sliding in two new "AAA" batteries. Important: Match the batteries to the (+) and (-) marks on the inside of the remote control.
-
Snap the battery cover back onto the remote control.
CAUTION
Incorrect usage of batteries can result in leaks or bursting. Peerless-AV recommends the following battery use:
- Do NOT mix battery brands.
- Do NOT combine new and old batteries. This can shorten the battery life or cause liquid leakage of the batteries.
- Remove dead batteries immediately to prevent battery acid from leaking into the battery compartment.
- Do NOT touch exposed battery acid as it may injure skin.
- Remove the batteries if you do not intend to use the remote control for a long period of time.
Cable Management and Soundbar Orientation
For Digital Connection:
- Connect the provided toslink cable to the optical digital audio out port on the TV. Make sure the cable is fully inserted.
- Plug the other end of the optical cable into the optical port on the soundbar. Make sure that there are no excessive bends or pinch points when connecting the optical cable.
- Plug the soundbar's power cable into the nearest outlet.
- Note: When optical digital audio port is not being used on the soundbar the port cover should remain closed
For Analog Connection:
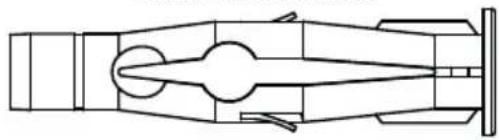
- Connect the soundbar's 3.5mm audio cable to the audio out port on the TV. Make sure the 3.5mm audio cable is fully inserted.
- Plug the soundbar's power cable into the nearest outlet.
- Note: If the audio output of the TV is RCA stereo, a female 3.5mm to male RCA stereo audio cable will be required.
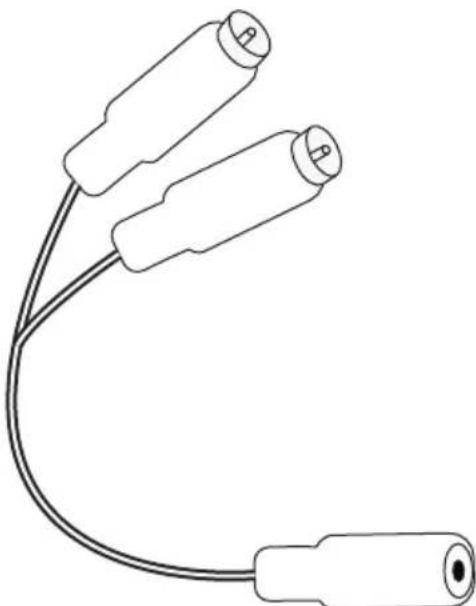
Female 3.5mm to male RCA stereo audio cable (sold separately)
Using The Remote Control
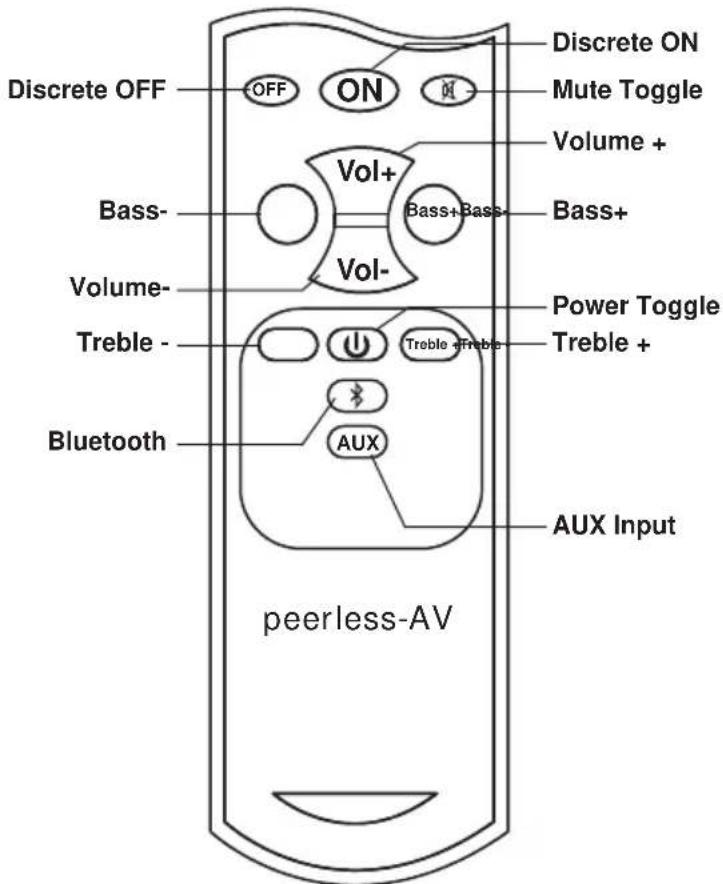
- Turn on the TV.
- Turn on the soundbar by aiming the included remote at the front of the soundbar and pressing the ON button. Your soundbar will begin to play the audio coming from your display. If you don't hear any audio coming from the soundbar aim the remote at the soundbar and press the AUX button. You should see a green light illuminated when the Aux input is selected. When AUX is selected on the soundbar it will support both the analog 3.5mm input and the optical digital audio input.
- To listen to a Bluetooth® enabled device, aim the included remote at the front of the soundbar and press the button with the Bluetooth icon on it.
- When the soundbar is switched to the Bluetooth input a blue light will appear on the soundbar. Make sure that Bluetooth function is enabled on the device that is being connected and that the device is within Bluetooth range (33'). Scan for devices on your Bluetooth enabled device and select "Peerless-AV" from the list of devices. Start playing content from your Bluetooth enabled device.
NOTE - The soundbar remote control does not carry an IP rating. Do NOT allow the remote control to get wet. Do NOT leave the remote control outside when the soundbar is not in use.
Remote control functions
Discrete Off - Powers the soundbar Off
Discrete On - Powers the soundbar On
Mute - Toggles the mute on and off
Bass - Decreases the bass level
Bass + - Increases the bass level
Volume + - Increases the output level
Volume - Decreases the output level
Treble - Decreases the treble level
Treble + - Increases the treble level
Power - Toggles power on and off
Bluetooth - switches to bluetooth input
AUX - switches to 3.5mm/optical input
TIPS
Troubleshooting
| Distorted Audio | Source level should not exceed 80%. ·Verify the the 3.5mm audio plug is fully inserted. |
| No Audio | ·Verify that the soundbar is plugged into an outlet that has power. Ensure that the audio signal cable is connected to the audio-out port on the TV. Make sure that the source volume is not muted and that the volume level is not at zero. Aim the remote at the soundbar and select the desired input of the source that is playing. |
| Problem Connecting a Bluetooth Enabled Device | ·Aim the remote at the front of the soundbar and hit the Bluetooth icon. ·Make sure Bluetooth is enabled on the device that is being connected and that you are within 33' of the soundbar. ·Complete a device scan on the device that is being connected and select "peerless-AV" from the list of devices. ·If "peerless-AV" is not present on the list, turn the Bluetooth on the device off. Turn the Bluetooth on the soundbar off by switching to the Aux input. Turn the Bluetooth on the soundbar back on by pressing the Bluetooth button on the soundbar remote. Turn the Bluetooth on your device back on and perform another scan. |
PRODUCT SPECIFICATIONS
Specifications subject to change without notice
| Sound Bar | |
| TV Size Range | 42" (107cm) and above |
| Built-in Class D Amplifier | Total System Power: 200 watts |
| SPL | 105db |
| Crossover | Digital Signal Processing (DSP) |
| Drivers | 2) 3" [76mm] Aluminum Drivers |
| Tweeters | 2) 1.5" [38mm] Titanium Domes |
| Audio Inputs | 1) Digital Optical Audio, (1) Analog 3.5mm connector, (1) Bluetooth 4.0 input |
| Environmental Protection Rating | IP65 |
| Frequency Response | 50Hz - 20kHz |
| Operating Temperature Range | -40° - 120°F (-40°C - 49°C) |
| Vesa Mounting Pattern | 400mm wide pattern |
| Product Dimensions | 38.13" x 3.91" x 4.32" (969 x 99 x 110mm) |
| Product Weight | 9.7lb (4.4kg) |
ONE YEAR PARTS & LABOR LIMITED WARRANTY
The Peerless-AV Xtreme Outdoor Soundbar is warranted to be free of defects in material and workmanship from the time of purchase by the original owner. If this product is found and proved to be defective under the terms and conditions of this warranty, Peerless-AV will repair or replace defective parts with new and/or reconditioned parts at no charge for the parts and labor to the original owner, subject to the terms and conditions of this Limited Warranty.
This Limited Warranty covers failures due to defects in material or workmanship that occur during normal residential or commercial use as follows:
- Parts – the warranty period for parts are: one (1) year from the date of original purchase. During the applicable Limited Warranty period for parts, defective parts will be replaced at no charge. Parts used for the replacement will be warranted for the remainder of the original warranty period for those parts.
- Labor - the warranty period for labor is: one (1) year from the date of original purchase. During the applicable Limited Warranty period for labor, Peerless-AV will provide the labor for warranty repair at no charge for a period of one (1) year from the date of original purchase.
- Original owner must provide verification of the date of purchase when requesting Limited Warranty Services. A copy of the original Dated Sales Receipt is required together with the product to obtain service under this Limited Warranty. Product Registration at the time of purchase is required.
- All repairs must be performed by a Peerless-AV Authorized Service Provider.
- Customer is responsible for returning (including any freight and shipping costs) defective unit to a Peerless-AV Authorized Service Provider. If the product is found to have no defects, the customer will be responsible for return shipping costs as well.
THIS LIMITED WARRANTY DOES NOT COVER:
Shipping damage.
- Damage caused during customer unpacking, and/or removal of packing materials.
- Damage due to improper, incorrect or insufficient AC voltage.
- Damage due to power surges or lightning strikes.
- Damage which results from fire, flood, lightning, tornado, hurricane, large hail, extremely gusty winds, sand storms, vandalism, terrorism or other acts of nature.
- Any unit which has been modified or damaged due to improper installation or failure to obey the operating instructions provided in the User Manual.
Any failure, loss, damage or personal injury due to accident, neglect, misuse, abuse, improper operation, improper maintenance, improper storage, alteration to the unit, or failure by the consumer to follow operating instructions provided in the User Manual.
- Any owner other than the original owner.
- Any unit purchased from an unauthorized seller.
- Indirect, consequential, or special damages, except as required by federal or state laws.
Any unit tampered with, modified, adjusted or repaired by any party other than the Peerless-AV Authorized Service Provider.
Any cosmetic damages to the surface or exterior that has been defaced or faded, or caused by normal wear and tear or exposure to chemicals, acid rain, large hail or adverse weather conditions.
- Because the soundbar cabinet and components are hand-assembled and altered, we do not cover minor cabinet blemishes or minor scratches to the exterior of the unit.
Any damage, scratches or blemishes to the soundbar and/or exterior cabinet due to end-user cleaning.
- If the original product serial number has been removed, defaced or tampered with in any way.
- Return shipping when no defect is found.
Peerless-AV and its representatives or agents shall in no event be liable for any general, indirect or consequential damages arising out of/or caused by the use of/or the inability to use this product.
This warranty is made in lieu of all other warranties, expressed or implied, and all other liabilities on the part of Peerless-AV. Any other warranties, including the warranties of merchantability and fitness for a particular purpose are hereby disclaimed by Peerless-AV and its representatives and/or agents.
The laws of some states do not allow exclusion of implied warranties; therefore, this warranty shall be deemed modified to be consistent with such laws. This Limited Warranty gives you specific legal rights. You may also have other rights that vary from state to state.
All warranty inspections and repairs must be performed by Peerless-AV or its authorized service representations.
Customer Care: 800.865.2112 or 630.375.5100
Guía del Nombre
F remote control 1 remote
G #14 x 2.5" wood screw 2 520-D1033
H 8mm concrete anchor 2 590-0320
lockwasher2540-3622
J nylon washer
K M8 X 25mm socket pin screw
LM8 x 40mm socket pin screw
M .5" spacer
N.25" spacer
M5 x 10mm self-tapping
P end cap
Q 4mm security allen wrench
R AAA battery
S toslink cable
Parts List
| 2 590-1231 |
| 2 520-D1101 |
| 2 520-D1152 |
| 2 540-1059 |
| 2 540-1002 |
| 2 520-D1164 |
| 2 590-0407 |
| 1 520-1129 |
| 2 410-0040 |
| 1 410-0098 |

P (2)
end cap

S (1)
toslink cable
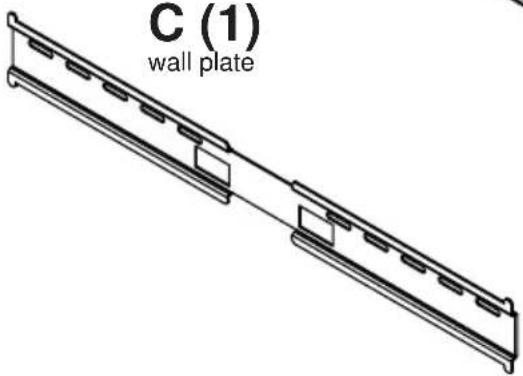
C (1)
wall plate
R (2)
AAA battery
F (1)
remote control
B (2)
hook-on bracket

D (1)
left mount bracket

E (1)
right mount bracket


G (2)
14x2-1/2" wood screw

H (2)
8mm concrete anchor

I (2)
lock washer
J (2)
nylon washer


K (2)
M (2)
.5" spacer
O (2)
M5 x 10mm

Q (1)
4mm allen wrench
N (2)
.25" spacer

L (2)
M8×40mm


1

2
Pared demadera
F remote control 1 remote
G #14 x 2.5" wood screw 2 520-D1033
H 8mm concrete anchor 2 590-0320
lockwasher2540-3622
J nylon washer
K M8 X 25mm socket pin screw
LM8 x 40mm socket pin screw
M .5" spacer
N.25" spacer
M5 x 10mm self-tapping
P end cap
Q 4mm security allen wrench
R AAA battery
S toslink cable
Parts List
| 2590-1231 |
| 2520-D1101 |
| 2520-D1152 |
| 2540-1059 |
| 2540-1002 |
| 2520-D1164 |
| 2590-0407 |
| 1520-1129 |
| 2410-0040 |
| 1410-0098 |

P (2)
end cap
S (1)
toslink cable

C (1)
wall plate

R (2)
AAA battery
F (1)
remote control
B (2)
hook-on bracket
D (1)
left mount bracket

E (1)
right mount bracket
G (2)
14x2-1/2" wood screw

H (2)
8mm concrete anchor
I (2)
lock washer
J (2)
nylon washer

K (2)

M (2)
.5" spacer
O (2)
M5 x 10mm
Q (1)
4mm allen wrench
N (2)
.25" spacer

L (2)
M8×40mm


1

2
Mur en bois

CARACTERISTIQUES DU PRODUIT
CETTE GARANTIE NE COUVRE PAS:
Unit 3 Watford Interchange.
Colonial Way, Watford, Herts
WD24 4WP, United Kingdom
Customer Care
44(0)1923200100
www. peerless-av.com
Peerless-AV de Mexico
- GENERAL SAFETY PRECAUTIONS
- WARNING
- RISK OF ELECTRICAL SHOCK
- Read before operating equipment
- Batteries Installed Warning
- CAUTION:
- FCC CAUTION
- FCC STATEMENT
- Relevant Information
- G (2)
- H (2)
- I (2)
- J (2)
- K (2)
- M (2)
- O (2)
- Q (1)
- N (2)
- L (2)
- 2a-3
- 2a-4
- 2b
- 2b-1
- 2b-4
- 2b-5
- x2
- 2c-1
- 2c-2
- Battery Installation and Replacement
- CAUTION
- Cable Management and Soundbar Orientation
- For Digital Connection:
- For Analog Connection:
- Using The Remote Control
- Remote control functions
- TIPS
- PRODUCT SPECIFICATIONS
- ONE YEAR PARTS & LABOR LIMITED WARRANTY
- THIS LIMITED WARRANTY DOES NOT COVER:
- Guía del Nombre
- CARACTERISTIQUES DU PRODUIT
- CETTE GARANTIE NE COUVRE PAS:
Brand : Peerless-AV
Model : Xtreme SPK080
Category : Soundbar