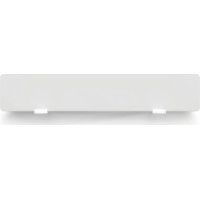
DryWave - Frying Pan Blumfeldt - Free user manual and instructions
Find the device manual for free DryWave Blumfeldt in PDF.


| Brand | Blumfeldt |
| Model | DryWave |
| Product type | Electric heater / Towel warmer |
| Article numbers | 10046529, 10046530, 10046531 |
| Power supply | 220-240 V ~ 50/60 Hz |
| Power | 50 W |
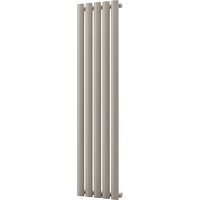
| Panel dimensions | 50 cm x 9.5 cm |
| Weight (estimated) | Approximately 2.5 kg |
| Installation | Wall mounting or free-standing (feet included) |
| Usage | Indoor, damp rooms (IP24 rating) |
| Main features | Electric heating, towel warmer, cascade connection (up to 3 units) |
| Control | Main on/off switch |
| Material | Aluminum (likely) |
| Safety | IP24 protection, hot surface (do not touch, do not cover), automatic shut-off not specified |
| Maintenance and cleaning | Unplug and clean with a soft, dry cloth |
| Included accessories | 2 feet, power cable (Euro plug to IEC C7), wall mounting kit (2 plugs, 2 screws), drilling template, manual |
| Spare parts and repairability | Contact an authorized service center. IEC C7 connection cable available for extension. |
| Recycling | Do not dispose with household waste. Take to a WEEE collection point. |
| Manufacturer | Chal-Tec GmbH, Wallstrasse 16, 10179 Berlin, Germany |
Frequently Asked Questions - DryWave Blumfeldt
User questions about DryWave Blumfeldt
0 question about this device. Answer the ones you know or ask your own.
Ask a new question about this device
Download the instructions for your Frying Pan in PDF format for free! Find your manual DryWave - Blumfeldt and take your electronic device back in hand. On this page are published all the documents necessary for the use of your device. DryWave by Blumfeldt.
USER MANUAL DryWave Blumfeldt
Berlin Brands Group UK Limited
PO Box 42
272 Kensington High Street
London, W8 6ND
Großbritannien
Dear Customer,
Congratulations on purchasing this equipment. Please read this manual carefully and take care of the following hints to avoid damages. Any failure caused by ignoring the items and cautions mentioned in the instruction manual are not covered by our warranty and any liability. Scan the QR code to get access to the latest user manual and other information about the product.

CONTENTS
Technical Specifications 11
Safety Instructions 12
Installation 14
Operating Instructions 15
Part Description 16
Disposal Considerations 17
Manufacturer & Importer (UK) 17
TECHNICAL SPECIFICATIONS
| Article number 10046 | 529, 10046530, 10046531 |
| Power supply 220-240 | V~ 50/60 Hz |
| Power 50 W | |
| Mounting wall -mounted | / free-standing |
| Dimensions | 50×9.5 cm |
SAFETY INSTRUCTIONS
READ INSTRUCTIONS CAREFULL: Read and follow all instructions. Place instructions in a safe place for future reference. Do not allow anyone who has not read these instructions to assemble, light, adjust or operate the heater.
- Extreme caution: This appliance is not intended for use by persons (including children) with reduced physical, sensory or mental capabilities, or lack of experience and knowledge, unless they have been given supervision or instruction concerning use of the appliance by a person responsible for their safety. Children should be supervised to ensure that they do not play with the appliance.
- This heater is hot when in use. To avoid burns, do not let bare skin touch hot surfaces. Keep combustible materials, such as furniture, pillows, bedding, papers, clothes, and curtains at least 3 feet (0.9m) from the front of the heater and keep them away from the sides and rear.
Always unplug heater when not in use. - Do not operate the heater with a damaged cord or plug or after the heater malfunctions, has been dropped or damaged in any manner. Return it to authorized service facility for examination, electrical or mechanical adjustment, or repair.
- Indoor use only.
- This heater (with IP24 protection) is suitable for use in wet or damp rooms such as bathrooms, washrooms, etc., and is intended for indoor use only! If you use the heater in bathroom or washroom (wet or damp room), please make sure the IPX0 plug cannot be used in Zone 0 (IPX7), Zone 1(IPX4) and Zone 2 (IPX4) according to HD 60364-7-701: 2007 unless the plug and the socket outlet are protected by an enclosure with at least IPX4 protection degree. Keep the heater at least 60 cm away from water points and make sure that it can never fall into water and that no water can enter the stove. Should this ever happen, take out the plug from the socket first! Do not use an internally wet stove again but offer it for repair. Never immerse the heater, cord or plug in water or other liquids and never touch the heater with wet hands.
- Do not run cord under material. Do not cover cord with throw rugs, runners, or similar coverings.
- To prevent a possible fire, do not block the space between the heater and the wall which is for air intake or exhaust in any manner.
- A heater has hot and arcing or sparking parts inside. Do not use it in the areas where gasoline, paint, or flammable liquids are used or stored.
- Use this heater only as described in this manual. Any other use not recommended by the manufacturer may cause fire, electric shock, or injury to persons.
- Avoid the use of an extension cord because the extension cord may overheat and cause a risk of fire. However, if you have to use an extension cord, the cord shall be rated not less than 200 watts (under 220-240V).
- To prevent overloading a circuit, do not plug the heater into a circuit that
already has other appliances working. Do not install the heater under the wall socket.
- It is normal for the plug to feel warm to the touch; however, a loose fit between the AC outlet (receptacle) and plug may cause overheating and distortion of the plug. Contact a qualified electrician to replace loose or worn outlet.
- The output of this heater may vary and its temperature may become intense enough to burn exposed skin. Use of this heater is not recommended for persons with reduced sensitivity to heat or an inability to react to avoid burns.
- In order to avoid overheating, do not cover the heater.
Explanation of symbols
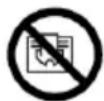
Do not cover.
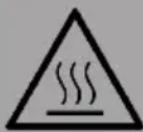
CAUTION
Risk of burns! Some parts of this product can become very hot and cause burns. Particular attention has to be given where children and vulnerable people are present.
INSTALLATION
Unpack your package and find the heater together with the feet and wall mounting accessories pack.
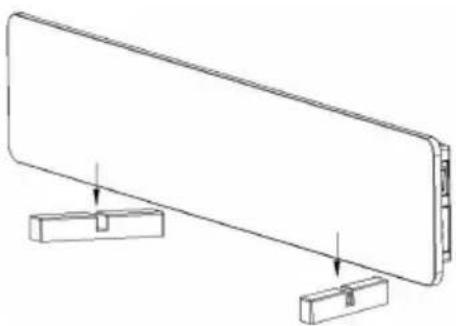
Free standing installation
- Take out the two feet from the package.
- Put the heater into the slot of the feet.
Wall mounting installation
- Mark the positions of the two holes to be drilled on the wall, and drill the holes with the drill bit (picture 1). Make sure the distance between each hole is same as the round holes on the brackets at back of the heater. The drilling template paper in the package can help you to fix the drill position easily, which is at the scale of 1:1.)

- Insert the plastic rails fitting into the holes (picture 2).
- Insert the metal screws into the plastic rails (picture 3).
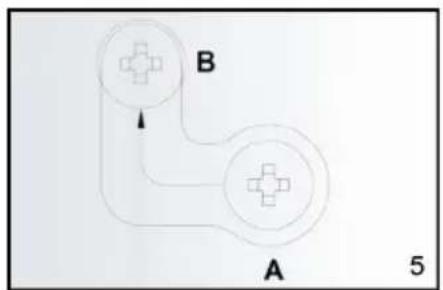
- Lift the heater and aim the two round holes on the brackets at back of the heater to the 2 screws on the wall(picture 4), and slide the screw from Position A to Position B by moving the heater slightly (picture 5).
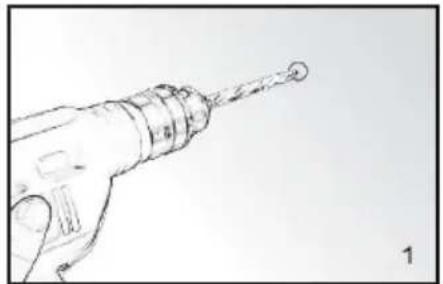
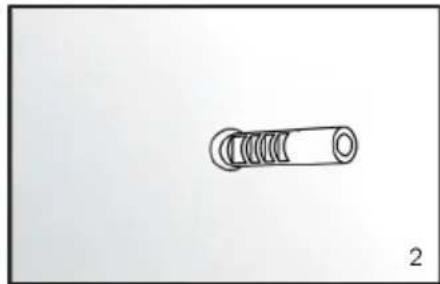
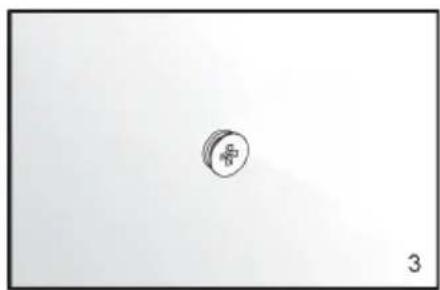
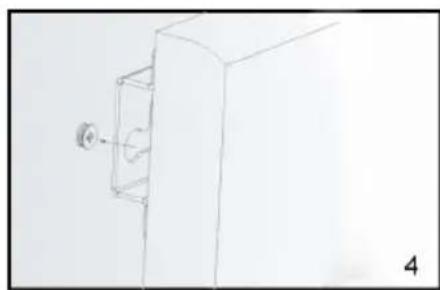
OPERATING INSTRUCTIONS
- Check the heater to be sure it is not damaged.
- Connect the power cable with Input hole on the heater, and insert the plug in the socket.
- Switch on main power switch to start the heater
- After use, switch off the main power switch. Finally remove the plug from the socket.
This wall dryer is able to connected with each other by an IEC C7 type connector cable (which can be found in the package if you buy the dual or triple packs). Please use 3pcs as maximum if you want to use such connection. By doing this, one heater need to be connected with the socket by using the main cord and connect with the power input, this main heater can supplier power at the power output connector with a C7 type cable connected with a second heater(for this second heater please connect the C7 cable with power input connector). The third heater can do same way with heater number 2.
PART DESCRIPTION
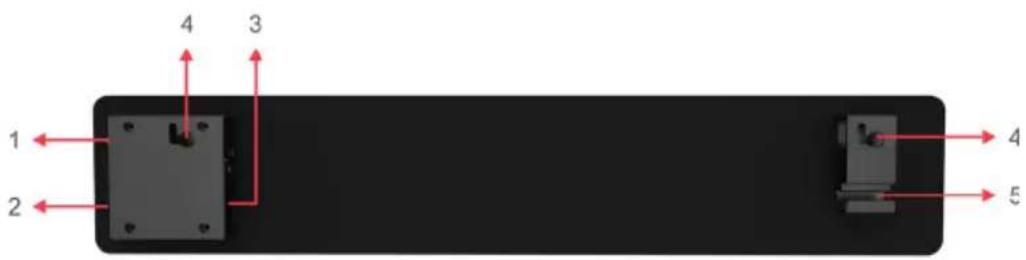
- Main power switch
- Power Input
- Power Output with cover
- Wall mounting holes
- Cord storage area
Packing List (for one set)
- Heater: 1 piece
- Power connection cable (Euro plug to IEC connector C7): 1 piece
Feet: 2 pieces - Instruction manual: 1 piece
- Drilling template: 1 piece
Accessories for wall mounting:
2xplastic rails
2 x metal screws
There will also be a connection cable (IEC connector C7) for connecting the two panels if you bought Dual or Triple packs.
DISPOSAL CONSIDERATIONS
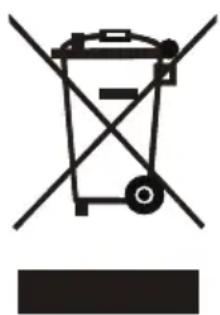
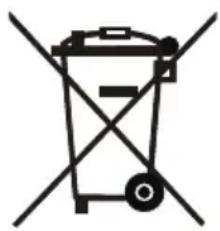
If there is a legal regulation for the disposal of electrical and electronic devices in your country, this symbol on the product or on the packaging indicates that this product must not be disposed of with household waste. Instead, it must be taken to a collection point for the recycling of electrical and electronic equipment. By disposing of it in accordance with the rules, you are protecting the environment and the health of your fellow human beings from negative consequences. For information about the recycling and disposal of this product, please contact your local authority or your household waste disposal service.
MANUFACTURER & IMPORTER (UK)
Manufacturer:
Chal-Tec GmbH, Wallstrasse 16, 10179 Berlin, Germany.
Importer for Great Britain:
Berlin Brands Group UK Limited
PO Box 42
272 Kensington High Street
London, W8 6ND
United Kingdom
Chere cliente, cher client,
Berlin Brands Group UK Limited
Boite postale 42
272 Kensington High Street
Londres, W8 6ND
Royaume-Uni
Gentile cliente,
Berlin Brands Group UK Limited
PO Box 42
272 Kensington High Street
Londra, W8 6ND
United Kingdom
Estimado cliente:
∴ m = 3/11 ;
Berlin Brands Group UK Limited
272 Kensington High Street
Londres, W8 6ND
Reino Unido



- DEAR CUSTOMER
- CONTENTS
- TECHNICAL SPECIFICATIONS
- SAFETY INSTRUCTIONS
- EXPLANATION OF SYMBOLS
- CAUTION
- INSTALLATION
- FREE STANDING INSTALLATION
- WALL MOUNTING INSTALLATION
- OPERATING INSTRUCTIONS
- PART DESCRIPTION
- PACKING LIST (FOR ONE SET)
- DISPOSAL CONSIDERATIONS
- MANUFACTURER & IMPORTER (UK)
- MANUFACTURER
- IMPORTER FOR GREAT BRITAIN
- CHERE CLIENTE, CHER CLIENT
- GENTILE CLIENTE
- ESTIMADO CLIENTE
Brand : Blumfeldt
Model : DryWave
Category : Frying Pan