Vortex 18 TS050W18U - Floor cleaner TORNADO - Free user manual and instructions
Find the device manual for free Vortex 18 TS050W18U TORNADO in PDF.
User questions about Vortex 18 TS050W18U TORNADO
0 question about this device. Answer the ones you know or ask your own.
Ask a new question about this device
Download the instructions for your Floor cleaner in PDF format for free! Find your manual Vortex 18 TS050W18U - TORNADO and take your electronic device back in hand. On this page are published all the documents necessary for the use of your device. Vortex 18 TS050W18U by TORNADO.
USER MANUAL Vortex 18 TS050W18U TORNADO
natural_image
Tornado Vortex 18 water heater with yellow body and black handle, no visible text or symbols on device bodyModel No. TS050-W18-U
CONTENTS INTRODUCTION
Getting Started
Introduction 2
Warranty 3
Grounding Instructions 4
Important Safety Instructions 5-6
Cleaning Agents 7
Technical Specifications 8
Brush Selection 9
Operating Instructions
Key Features 10
Assembly 11-13
Controls 14-16
Operation 17-18
Cleaning 19-21
Transport and Storage 22
Maintenance 23
Accessories 24
Fault Diagnosis 25
Your new Tornado unit is a high quality, precision-made product. All parts used in the manufacturing of this unit have passed rigid quality control standards prior to assembly. Please safeguard the original receipt/invoice given at the time of purchase. If you experience any problems with your unit during the warranty period, the original receipt/invoice will act as proof of purchase.
Upon receipt, inspect outer box for exterior damage. Unpack all internal parts, ensure no hidden damage is found.
Each unit is tested and thoroughly inspected prior to shipping. If damage is discovered, immediately notify the transportation company that delivered your machine and request an inspection. As a manufacturer, we are unable to act upon any claim for concealed damage and you must originate the claim. Be sure to keep the carton, packing inserts, and carrier's receipt until the inspector has verified your claim.
Protect the environment
Please dispose of packaging materials in an environmentally safe way according to local waste disposal regulations.

Always remember to recycle.
GROUNDING INSTRUCTIONS
Warranty
Within 30 days of purchase, to activate product warranty, go to: https://tornadovac.com/services/warranty-registration-form.aspx For warranty information go to www.tornadovac.com.
Warning Labels
Prior to operating the unit, read and understand completely this owner's manual paying special attention to warning labels. These labels indicate a potentially hazardous situation that could result in death or serious injury if not avoided. Use only as described in this manual.
Important
There are no owner serviceable parts inside this machine. Removal of screws and accessing internal components will void all warranty claims.
This appliance must be grounded. If it should electrically malfunction, grounding provides a path of least resistance for the current to reduce the risk of electric shock. This machine is equipped with a cord having an equipment grounding conductor and grounding plug. The plug must be inserted into an appropriate outlet that is properly installed and grounded in accordance with all local codes and ordinances.

Improper connection of the equipment grounding conductor can result in a risk of electric shock. Check with a qualified electrician or service person if you are in doubt as to whether the outlet is properly grounded. Do not modify the plug provided with the appliance. If the plug will not fit the outlet, have the proper outlet installed by a qualified electrician. DO NOT REMOVE THE GROUNDING PIN FOR ANY REASON.
This appliance is for use on a nominal 115-volt circuit and has a grounding plug that appears as shown below.

text_image
GROUNDING OUTLET GROUNDING PIN GROUNDED OUTLET BOXIMPORTANT SAFETY INSTRUCTIONS
Read and understand this owner's manual and all labels on the unit before operating. Safety is a combination of common sense, staying alert, and knowing how your unit works. To reduce the risk of personal injury or damage to your unit use only as indicated in this manual.

To reduce the risk of fire, electrical shock, or injury, the instructions below must be read and understood completely prior to machine operation
IMPORTANT:
IMPORTANT. The manufacturer cannot accept responsibility for damage caused when the appliance is not used according to the instructions, or for uses other than those for which it was intended.
WARNING:
- This machine must only be used for the manufacturer's approved application as described in this manual.
- The machine must be unpacked and assembled in accordance with these instructions before connecting to the electrical supply.
- Only genuine accessories and spare parts provided with the machine or those approved by the manufacturer should be used. The use of other accessories may impair the safety of the machine. All repairs must be performed by a qualified service agent.
- DO NOT modify the machine from its original design.
- Operators must be fully trained in the use of the machine in accordance with these instructions and be able to perform regular user maintenance as outlined in this manual.
- Operators should be physically capable to maneuver, transport and operate the machine.
- Operators should be able to recognize unusual operation of the machine and report any problems.
- This machine is not intended for use by persons (including children) with reduced physical, sensory or mental capabilities, or lack of experience and knowledge unless they have
been given instruction concerning use of the machine and are under supervision by a person responsible for their safety.
- Keep children and unauthorized persons away from the machine when in use.
DO NOT use the machine as a toy.
- DO NOT use with a damaged cord or plug. If it has been damaged, left outdoors or dropped in water, return it to a service center for inspection and/or repair.
- DO NOT use where hazardous dust is present.
• DO NOT use in an explosive environment.
- DO NOT pick up or use near flammable or combustible fluids, hazardous dusts or vapors.
CAUTION – If it is suspected that there is hazardous dust or flammable/corrosive material, stop cleaning the area immediately and consult your supervisor.
- DO NOT use to clean up any burning or lighted materials such as cigarettes, matches, ashes, or other combustible objects.
- Only use the machine on firm, level surfaces. DO NOT use the machine on gradient or slope of more than 2%.
SAVE THESE INSTRUCTIONS

TORNADO
IMPORTANT SAFETY INSTRUCTIONS
- CAUTION – This machine is for dry, indoor use only and should not be used or stored outdoors or in wet conditions.
Protect from rain.
• Take care when using this machine near the top of stairs to avoid loss of balance.
• DO NOT cover the machine when in use. - DO NOT run the machine dry as this could damage the floor surface and/or the machine itself.
- DO NOT leave the machine running unattended.
- Keep hair, loose clothing, hands, feet, and all other parts of the body away from openings and moving parts. Do not put hands under base as rotating parts can cause injury.
- DO NOT put any object into openings. DO NOT use with any opening blocked. Keep free of dust, debris and anything that may reduce airflow.
- DO NOT use volatile or combustible solvents (e.g., diesel, petrol, PA, trichloromethane) nor any corrosive, toxic, or highly irritant substance to wash floors, even if diluted. In the event of accidental contact with any such substances (e.g., due to spills) follow the decontamination procedures in force at the user site. If in any doubt about the condition of the machine, contact Tornado or the dealer/agent who supplied the machine.
-
DO NOT leave the machine unattended when plugged in. Unplug from outlet when not in use and before changing brushes or attempting any maintenance or adjustment.
-
DO NOT fill the machine with water hotter than 104°F (40°C).
- When used on escalators, ensure the machine is positioned at the bottom of the escalator with the escalator moving towards the operator.
- DO NOT pull or carry by cord, use cord as a handle, close a door on cord, or pull cord around sharp edges on corners.
- DO NOT run machine over cord. Keep cord away from heated surfaces.
- DO NOT unplug by pulling on cord. To unplug, grasp the plug, not the cord. Do not handle plug or machine with wet hands. Turn off all controls before unplugging.
- Connect only to a properly grounded outlet. See grounding instructions.
- Use care to keep electrical supply cable from contacting moving parts such as floor brushes.
- Make sure voltage and frequency at the wall receptacle correspond with that indicated on nameplate before plugging in machine.
- The machine must be kept clean and in good condition with regular inspections of the power cord and plug for signs of any damage. If any parts are damaged, they shall only be replaced by an approved part by the manufacturer, its service agent or a similar qualified person in order to avoid a hazard.
- Only replace the power cord with original OEM equipment.
SAVE THESE INSTRUCTIONS

TORNADO
CLEANING AGENTS
- When using cleaning and care agents, the manufacturer's danger warnings must be followed, and proper PPE must be worn per manufacturer's instruction.
- Only use low-foaming, non-combustible cleaning agents which DO NOT contain generally health-hazardous substances.
- Please ensure that after each use, any chemical residue is rinsed out with clean water.
The manufacturer cannot accept responsibility for damage caused when the appliance is not used in accordance with the instructions provided or for uses other than those for which it was intended.
OPERATOR GUIDELINES
Let the machine do the work. Grip the handle as lightly as possible.
- Wear suitable footwear to avoid slipping.
- Wear suitable clothing to keep dry.
- Do not smoke when using the machine.
- Do not use excessively foaming or highly corrosive cleaning solutions. If operating on a flooded floor, ensure that water depth does not exceed 6mm (1/4 inch).
This machine is heavy. Do not attempt to lift the machine without assistance. Incorrect lifting techniques may result in personal injury.
TORNADO
8
TECHNICAL SPECIFICATIONS
| Specification Value | |
| Voltage 115 | |
| Hertz 60 | |
| Cleaning Width 18 in / 440 mm | |
| Handle Height 44 in / 1110 mm | |
| Width 22 in / 550 mm | |
| Length 15 in / 390 mm | |
| Motor Power 1150 Watts | |
| Amperage 10 | |
| Brush Speed 670 RPM | |
| Solution Tank Capacity 1 Gallon / 4 Liters | |
| Cleaning Capacity | 4844 ft ^2 /hr. / 450 m ^2 /hr. |
| Noise Level | 71 db(A) |
Handle vibration does not exceed 2.5 m/s ^2 when operating on a smooth, hard surface.
- Noise levels measured at a distance of 3.28 feet (1 meter) from machine and 5.25 feet (1.6 meters) above floor when washing a hard floor.
- Above values are approximate. Since the company's policy is to continuously improve the product, there could be changes without prior notice.
- Cleaning Capacity above is theoretical as there are potentially many variances in machine operation.
TORNADO
9
BRUSH SELECTION
KEY FEATURES
| Floor Type First Time Cleaning Maintenance Cleaning | ||
| Grouted Tile, Ceramic, Mosaic, Wood, Sports Floors, Rubber, Vinyl Tile | Standard Soft | |
| Short Pile Carpet Carpet Carpet | ||
| Marble, Granite, Slate Soft Soft | ||
| Smooth Concrete Hard | Standard | |
| Others To suit individual floor conditions | ||
| Brush Type | Part Number |
| Standard | 93216 |
| Soft | 93212 |
| Hard | 93218 |
| Escalator | 35086 |
| Side | 93094 |
text_image
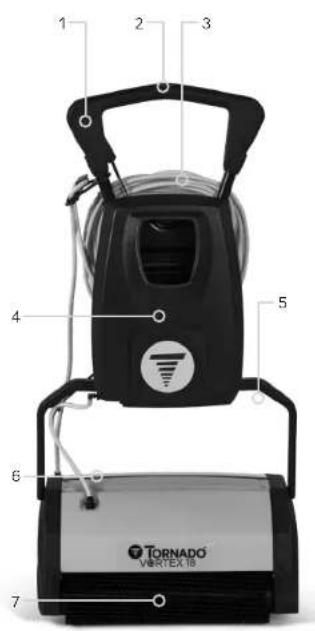
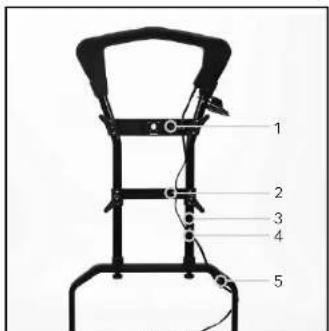
1 2 3 4 5 6 7 TORNADO VARGTEX 18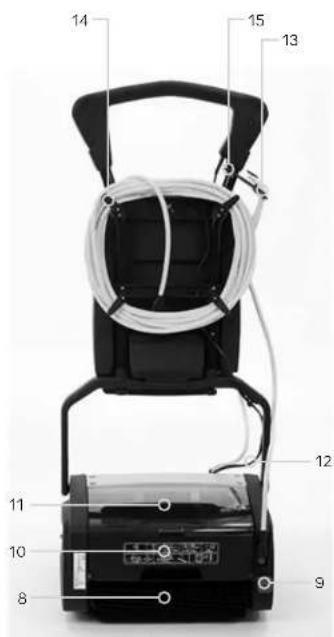
text_image
Labeled diagram of a portable electronic device with numbered components| Item Description | |
| 1 Handle | |
| 2 Solution Control Button | |
| 3 | Power Cord |
| 4 | Solution Tank |
| 5 | Handle Bracket |
| 6 | Solution Hose |
| 7 | Front Brush |
| 8 | Rear Brush |
| Item Description | |
| 9 | Handle Release Pedal |
| 10 | Dirty Water Tank |
| 11 | Dirty Water Tank Lid |
| 12 | Pump Control CableRouting Location |
| 13 | Power Cord Retainer |
| 14 | Power Cord Wrap Hooks |
| 15 Cable | |
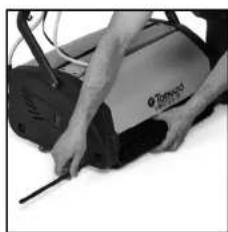
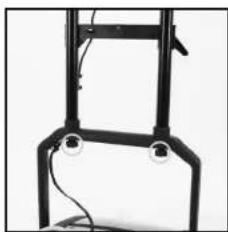
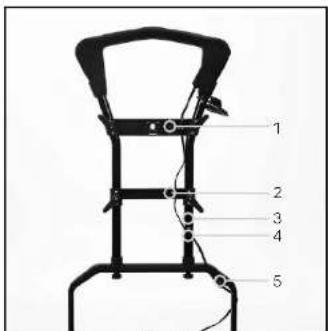
ASSEMBLY
ASSEMBLY
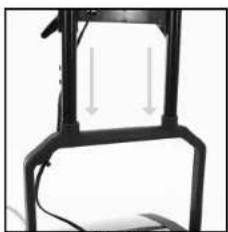
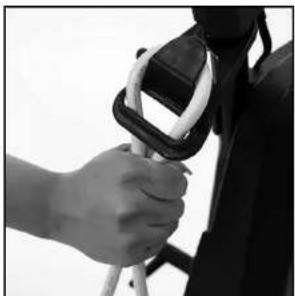
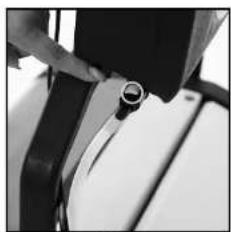
- Insert the handle assembly into the handle bracket. (Fig.1)
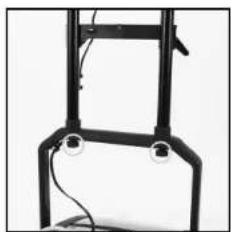
- Using the knob, star washer and flat washer, fasten the handle to the handle bracket. (Fig. 2)
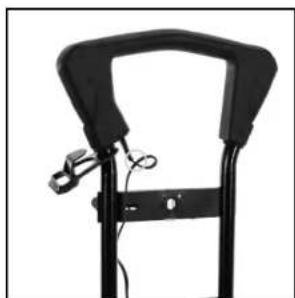
- Ensure the handle solution tank pin is toward the front of the unit and the cord wrap hooks are towards the rear. (Fig. 3)
- Feed the pump control cable through the (5) locations shown in the handle bracket and handle. (Fig. 4)
natural_image
Mechanical frame with two downward arrows indicating force or movement (no text or symbols)Fig. 1
natural_image
Mechanical frame with attached wires and a small circular component (no visible text or symbols)Fig. 2

natural_image
Black-and-white photo of a vertical chair with attached sensors and cables (no visible text or symbols)Fig. 3

text_image
1 2 3 4 5Fig. 4
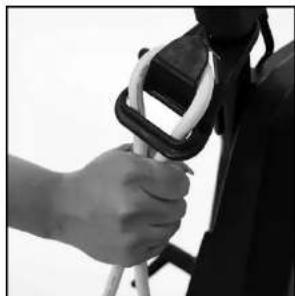
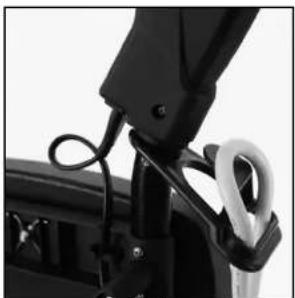
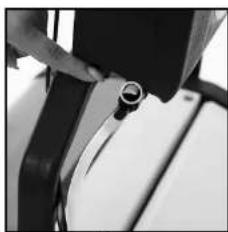
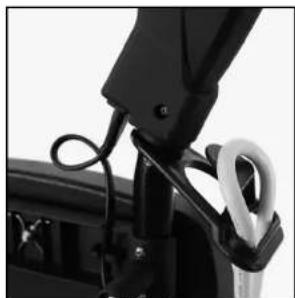
- Plug the end of the pump control cable into the socket in the handle assembly. This plug is not polarity sensitive and will fit into the handle either way. Ensure there is enough slack at the bottom of the cable so that the pump housing lid is not raised when the handle is moved to the working position. (Fig. 5)
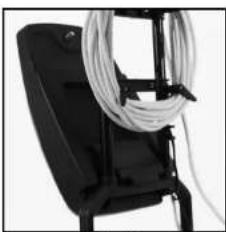
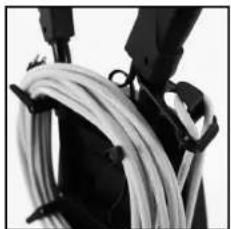
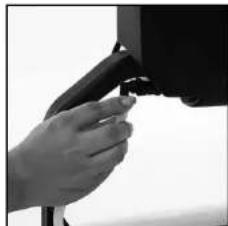
- Feed the loop of the power cord through the slot in the power cord retainer. (Fig. 6)
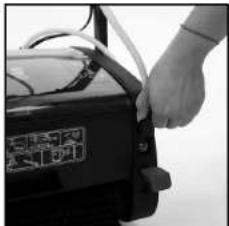
- Hook the loop over the lip of the retainer and pull any slack back through the slot. Wrap cord around 4 cord hooks on the back of the machine. (Fig. 7)
natural_image
Black mechanical device with handle and clasp (no visible text or symbols)Fig. 5

natural_image
Close-up of a black mechanical bracket with attached cable and hook (no visible text or symbols)Fig. 6
natural_image
Close-up of a hand using a crisbee to lift a person's shoulder (no text or symbols visible)Fig. 7
TORNADO
12 13
TORNADO
ASSEMBLY
CONTROLS
- Place the lip of the solution tank on the handle bracket and rotate it up so that the solution tank pin engages the solution tank pin retainer. (Fig. 8)
- Pressing the white lab on the connector will release the elbow connector from the tank. (Fig. 9)
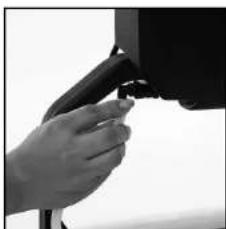
- Attach the hose barb end of the black elbow connector to the hose coming from the pump housing. Attach the other end of the elbow to the tank by pushing the elbow into the connection until it "clicks" and locks in. (Fig. 10)
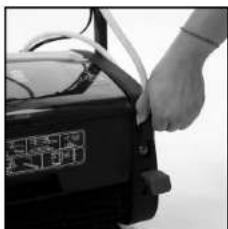
- Attach one end of the power cable to the unit and the other to a wall outlet. (Fig. 11 & 12)
natural_image
Black electronic device with coiled cable and stand (no visible text or symbols)Fig. 8

natural_image
Close-up of a hand adjusting a circular mechanical component (no visible text or symbols)Fig. 9
natural_image
Close-up of a hand holding a black electronic device with a small plug, no visible text or symbolsFig. 10
natural_image
Close-up of a hand holding a black car trunk with visible branding (no readable text or symbols)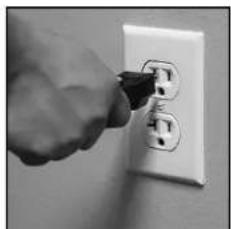
natural_image
Hand inserting a plug into an electrical outlet (no text or symbols visible)Fig. 12 Fig. 11
TORNADO
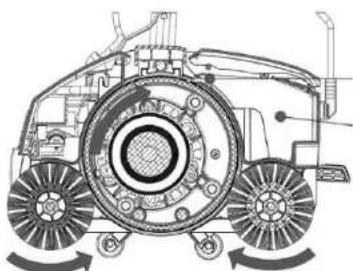
How it works:
Cleaning liquid in the solution tank is sprayed onto the floor.
The counter rotating brushes scrub the floor and throw the dirty water on the conveyor drum. The front brush does most of the scrubbing and drying. The rear brush completes the scrubbing and collects the remaining water from the floor.
The blade fitted to the recovery tank wipes the drum and collects the dirty water.
natural_image
Technical line drawing of a tractor's front wheel assembly (no text or symbols)BRUSH CONTROLS
The handle must be in the upright and locked position to change the transport / work lever.
To put machine in TRANSPORT MODE, move red lever to the DOWN position. In this mode, the transport wheels contact the floor when the handle is moved to the working position.
Note: The machine will NOT turn on when in this mode.
natural_image
Close-up of a black industrial device with ventilation grilles and a circular button, no visible text or symbolsTORNADO
CONTROLS
CONTROLS
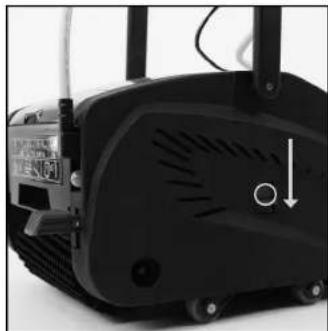
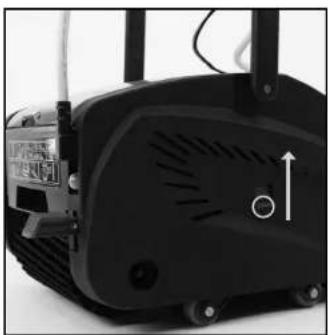
Brush Controls:
Move the slider all the way UP to put the machine in WORKING MODE. In this mode, the brushes contact the floor when the handle is moved to the working position.
natural_image
Close-up of a black industrial air conditioner unit with ventilation grilles and a circular indicator symbol (no readable text or labels)
Keeping slider in the UP, working position while transporting the machine WILL damage the brushes. Always transport in TRANSPORT MODE.
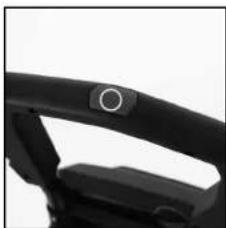
Solution Control:
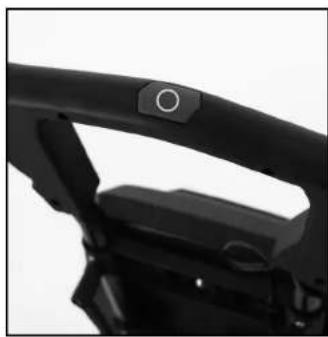
By pushing the red solution button, the cleaning solution is sprayed onto the floor from the front of the machine. The solution stops once the solution control button is released.
natural_image
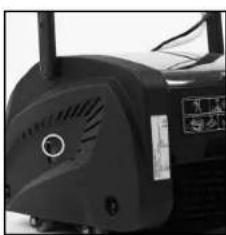
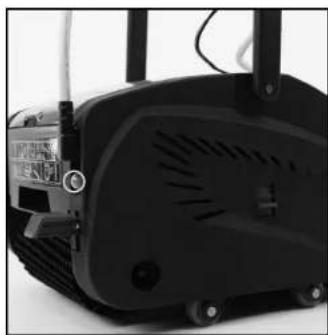
Close-up of a black mechanical component with a circular mark on the handle (no visible text or symbols)Brush Contact Control:
Brush contact control is adjustable in 4 steps in order to compensate for brush wear and control scrubbing effect. Contact is MINIMUM when the knob is fully down and MAXIMUM when fully raised. If the machine does not move when the handle is lowered, slide the brush contact control slider up one step.
natural_image
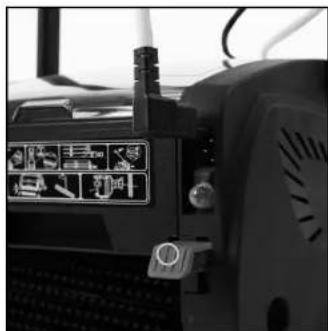
Close-up of a black industrial machine with ventilation slots and a label (no readable text or symbols)Circuit Breaker:
In the event of circuit overload due to improper power supply or unexpected obstruction to the brush/drum rotation, the circuit breaker trips and protects the motor from damage. If this happens, UNPLUG THE UNIT, identify the cause, correct it, and reset the breaker after a minimum of 1 minute from tripping by pressing the circuit breaker button manually and continue working as normal. If no obstruction can be found, consult a qualified electrician as the source circuit could be potentially problematic.
natural_image
Close-up of a black industrial air purifier device with ventilation slots and control knobs (no visible text or symbols)On / Off Control:
To start the motor, depress the red pedal with your foot and pull handle back. The brushes and the drum will begin to rotate. Release the red foot pedal in this position and pull handle towards you in order to engage rotating brushes onto the floor. To stop operation, return the handle to the upright and locked position.
natural_image
Close-up of a mechanical control panel with tool icons and control buttons (no readable text or symbols)TORNADO
TORNADO
OPERATION
OPERATION

Prior to machine operation, pre-sweep floor to remove debris before using the unit.
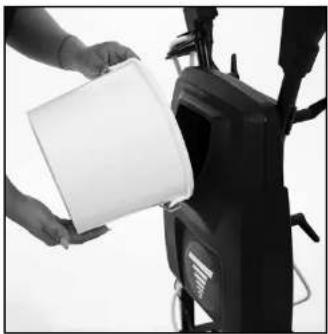
- Fill the freshwater tank with cleaning solution at a maximum temperature of 104^ F ( 40^ C). Add cleaning solution per manufacturer's recommendations.
- Press the red foot pedal lightly with your foot and pull handle back to start the motor. The brushes and the drum will begin to rotate. Pulling the handle towards you WITHOUT pressing the pedal lowers the machine and engages the rotating brushes with the floor. To stop working, return the handle to the upright and locked position.
natural_image
Person holding a white container next to a device (no visible text or symbols)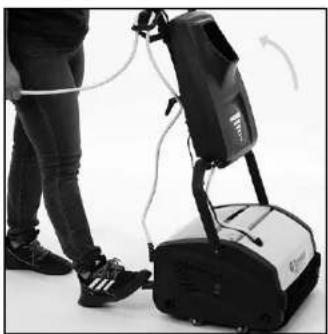
natural_image
Person standing next to a black robotic device with attached sensors and a white base (no visible text or symbols)- Move forward while sparingly pushing the solution control button. This button should only be pushed intermittently based on the floor type and amount of soil on the floor. For tiled or stone floors apply very little solution. Release the solution control button to stop the solution discharge approximately 12 inches before end of forward motion. Continue to move forward up to the wall without pressing button.
- Pull the machine backwards in the same track WITHOUT discharging any solution. When you reach the starting point, change the track and repeat the steps above. When you are changing the track, allow some overlap with the cleaned area to ensure complete coverage. In case of large halls, make a U-turn while moving forward. If quick drying is required, move on the same track without discharging solution.
natural_image
Close-up of a black mechanical component with a circular button and lever mechanism (no visible text or symbols)
Should the machine fail to operate, please refer to the troubleshooting section in the back of this instruction manual. If the problem/remedy is not listed, please contact the Tornado Technical Service Department
CLEANING
CLEANING

Prior to cleaning, ensure unit is OFF and disconnected from power supply.
- When floor cleaning operation is complete, return handle to upright and locked position and unplug the power cord. Wrap the power cord around the hooks on the handle.
- Move the transport lever to the DOWN position to remove brushes from floor.
- Lifl the recovery tank lid and remove recovery tank. Empty tank and rinse completely with clean water. Clean steel wiper blade prior to re-inserting recovery tank.
natural_image
Close-up of a person's shoulder holding a bundle of white cables (no text or symbols visible)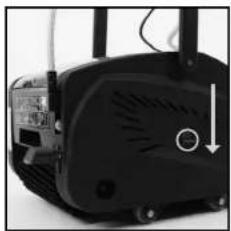
natural_image
Close-up of a black industrial device with ventilation slots and a circular arrow indicating a downward motion (no visible text or symbols)
natural_image
Close-up of a black industrial machine component with visible exhaust ducts and control panel (no readable text or symbols)
Avoid touching the sharp edges of the dirty water tank as injury to hands can occur.
- To prevent possible clogging of the solution lines, empty any unused solution from the tank, lines and filter and flush completely with clean water. Store dry.
- Release brushes by removing brush shafts held in by quick release retaining balls.
natural_image
Close-up of hands holding a black cylindrical object with a white spherical base (no visible text or symbols)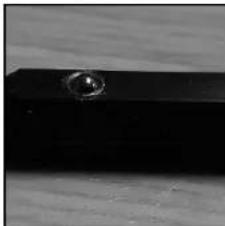
natural_image
Close-up of a dark rectangular object with a small circular hole on top (no visible text or symbols)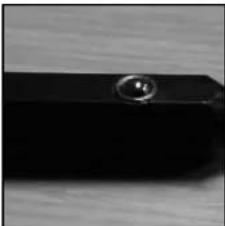
natural_image
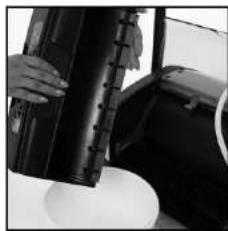
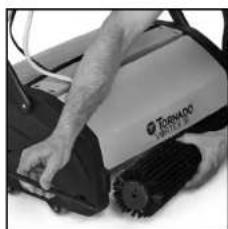
Close-up of a black rectangular object with a circular button on top, resting on a wooden surface (no text or symbols visible)- Remove brushes and wash them either by dipping in a bucket/sink or in running water.
natural_image
Person operating a large industrial machine with visible branding (no readable text or symbols)
Dispose of dirty water in accordance with all local, state, and federal hazardous material disposal regulations.
TORNADO
20 21
TORNADO
CLEANING
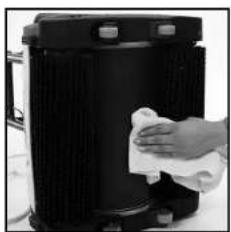
- Turn machine on its side and wipe clean the rubberized drum and machine body with clean, damp cloth.
- Re-install the brushes after washing. It is easier to push the brush shaft in from the right-hand side of the machine (side of electrical cable and foot pedal).
- The purpose of the small multi-colored plastic plugs is to provide a method of brush identification to be used in different areas. Additionally, this helps the operator easily identify the brushes in order to avoid cross contamination.
natural_image
Hand cleaning a black trash bin with a cloth (no text or symbols visible)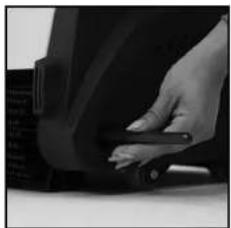
natural_image
Close-up of a hand adjusting a black seatbelt (no visible text or symbols)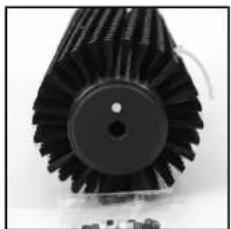
natural_image
Close-up of a black mechanical gear or turbine component with visible teeth and central hub (no text or symbols)TRANSPORT AND STORAGE
Transport:
Take extreme care when moving the machine up or down steps or stairs.
Incorrect lifting techniques may result in personal injury.
As stated earlier in this manual, this machine is heavy. Do not attempt to lift the machine without assistance.
Carefully wrap the power cord and store in a dry, indoor location.
DO NOT expose the machine to rain or moisture.
When transporting the machine, ensure that all components, tanks and removable parts are securely fastened and that the power cord and plug are not trailing.
DO NOT lift or transport the machine while it contains liquid as this will add considerable weight to the unit.
When transporting the machine, the handle should be locked in the upright position.
Storage:
Always store the machine with the handle in the vertical position which will turn the machine OFF.
Wrap the power cord around the power cord wrap hooks ensuring that the plug is not trailing on the floor.
Always unplug, empty, wipe down and dry the machine after use.
Both the solution and recovery lanks should be emplied and flushed out with clean water to ensure the seals and pumps are free from any cleaning detergents.
Store machine in a dry indoor area only.

Prior to performing any maintenance, ensure unit is OFF and disconnected from power supply.
Recommended operator checks prior to use:
- BODY OF MACHINE - Wipe down with a clean, damp cloth.
- POWER CORD – Regularly inspect sheath, plug, and cord anchorage for damage or loose connection. Only replace power cord with OEM specified replacement parl.
- BRUSHES – For maximum life, wash the brushes regularly. Ensure machine is in TRANSPORT MODE when not in use. Store additional brushes in a vertical position to avoid bending of bristles. Check for permanent bending of bristles in a particular direction. This may occur if the machine is not operated for several days without removing the brushes which is not recommended. If this occurs, reverse the brush so that the bent bristles can flex back to original position.
- WIPER BLADE – After an extended period of use, the wiper blade may wear. If this occurs, the water collection performance will decrease and should be replaced by an authorized service center.
- SOLUTION FEED FILTER – The filter prevents clogging of the pump and spray nozzle and should be periodically cleaned.
- NOZZLE MAINTENANCE - If the spray of the nozzle becomes blocked, slide the nozzle cover off and remove the nozzle. Wash the nozzle in clean water ensuring that the nozzle is clear prior to refitting.

Besides those outlined above, all additional servicing and repairs should only be performed by an Authorized Tornado Servicing Agent.

Do not use side brush in a room without mop boards. Walls will get dirty.
The side brush can be used to clean corners near the walls. UNPLUG MACHINE PRIOR TO SIDE BRUSH INSTALLATION.
Side Brush Installation:
- Remove the front brush and brush shaft.
- Fix the shield assembly on the side plate.
- Insert the side brush shaft through the shield and main brush.
Side Brush Use:
- Tilt the machine at an angle that will allow the rear brush to collect the dirty water.
- Use side brush only for washing edges and corners of floor.
natural_image
Close-up of hands using a tool to adjust or install a device on a dark surface (no visible text or symbols)
natural_image
Close-up of a black textured brush and a white industrial device labeled 'Tobacco' (no visible text or symbols on the brush itself)
natural_image
Exterior view of a Tornado Newton electric motor (no visible text or symbols on body)FAULT DIAGNOSIS

Do not use side brush in a room without mop boards. Walls will get dirty.
| TROUBLE REASON REMEDY | ||
| Machine fails to start | Transport Slider is in DOWN position. | Move Transport Slider to the working (UP) position. |
| Circuit breaker has tripped. | Remove any obstruction to the brush/drum. Wait 1 minute and reset the circuit breaker. | |
| Transport wheels not raising off of the ground when handle lowered. | Check for debris and clean machine. | |
| Lack of voltage / electrical supply. | Check power cord, plug, and socket outlet. | |
| Machine fails to pick up water from the floor. | Incorrectly fitted / damaged recovery tank. | Refit or replace recovery tank. |
| Worn brushes. | Check brush pressure. Replace brushes if needed. | |
| Drum not rotating. See below. | ||
| Drum not rotating. | Debris around drum or base of machine. | Clean drum and base of machine. |
| Drum is rotating, but brushes are not. | Debris around brushes. | Clean drum and base of the machine. |
| Machine fails to spray solution onto the floor. | Faulty pump. | If there is no noise present from the pump, check that the pump cable is fitted correctly. |
| Improper water hose connection. | Check the quick lock connector for proper fitting. | |
| Solution tank empty. Fill solution tank. | ||
| Clogged jet. Clean jet. | ||
| Blocked filter or faulty valve in solution tank. | Clean / replace filter or valve. | |
| Motor makes a humming noise but does not turn. | Debris around drum and base of machine. | Clean drum and base of machine. |

TORNADO

TORNADO®
Tornado Industries, LLC 3101 Wichita Court
Ft. Worth, TX 76140-1755
Phone: 800-VACUUMS
Fax: 1-817-551-0719
WWW.TORNADOVAC.COM
| Record of PurchaseSerial Number: ____Purchase Date: ____Dealer: ____Phone Number: ____ |
T-OM-VCR18 04/2022
TORNADO®
VORTEX 18 MULTIWASH
natural_image
Exterior view of a Tornado VENTEX 38 water heater with attached control panel (no visible text or symbols on device body)natural_image
Symbol of a trash bin with no text or numbers presentnatural_image
Simple recycling symbol icon with three chasing arrows forming a triangle (no text or labels)natural_image
Mechanical frame with two downward arrows indicating motion or force (no text or symbols)Fig. 1
natural_image
Mechanical frame with attached wires and a circular component (no visible text or symbols)Fig. 2

natural_image
Black-and-white photo of a horizontal bar with attached wires and sensors (no text or symbols visible)Fig. 3
text_image
1 2 3 4 5Fig. 4
TORNADO
38 39
TORNADO
MONTAJE
MONTAJE
natural_image
Black handheld device with adjustable handle and cable, no visible text or symbolsFig. 5
natural_image
Close-up of a black mechanical component with attached cable and spring (no visible text or symbols)Fig. 6
natural_image
Close-up of a hand holding a white cable outdoors, with a black object partially visible (no text or symbols)Fig. 7
natural_image
Black electronic device with coiled cable and connectors (no visible text or symbols)Fig. 8
natural_image
Close-up of a hand adjusting a circular component on a mechanical part (no visible text or symbols)Fig. 9
natural_image
Close-up of a hand holding a black electronic device with a small plug, no visible text or symbolsFig. 10
natural_image
Close-up of a hand holding a black electronic device with visible ports and cables (no readable text or symbols)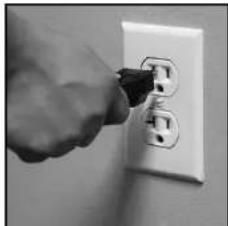
natural_image
Hand inserting a plug into an electrical outlet socket (no text or symbols visible)Fig. 12 Fig. 11
TORNADO
40 41
TORNADO
CONTROLES
CONTROLES
Cómo funciona:
natural_image
Technical line drawing of a mechanical assembly with gears and levers (no text or symbols)CONTROLES DE LOS CEPILLOS
natural_image
Close-up of a black industrial machine with ventilation grilles and a circular arrow indicating a component (no visible text or symbols)TORNADO
42 43
natural_image
Close-up of a black industrial machine with ventilation grilles and a circular indicator symbol (no readable text or labels)
natural_image
Close-up of a black mechanical component with a circular detail on the side (no visible text or symbols)natural_image
Close-up of a black industrial fan or pump device with visible blades and control knobs (no text or symbols)TORNADO
CONTROLES
OPERACIÓN
Disyuntor:
natural_image
Close-up of a black industrial lamp or electronic device with ventilation grilles and control knobs (no visible text or symbols)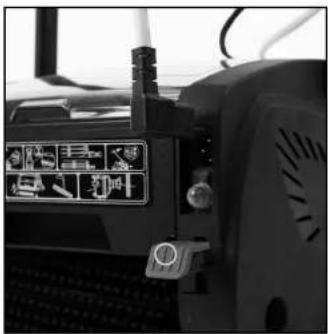
natural_image
Close-up of a tractor's front wheel and dashboard with control panel (no visible text or symbols)
natural_image
Person holding a white plastic container next to a black electronic device (no visible text or symbols)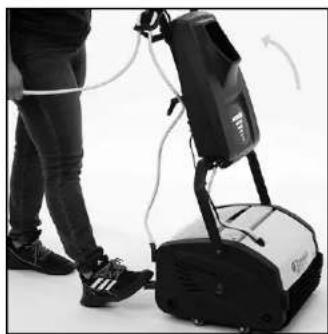
natural_image
Person standing next to a black outdoor cleaning machine with visible wiring and motion arrows (no text or symbols)OPERATION
LIMPIEZA
natural_image
Close-up of a black mechanical component with a circular button and lever mechanism (no visible text or symbols)natural_image
Close-up of a person's shoulder cable with attached straps (no visible text or symbols)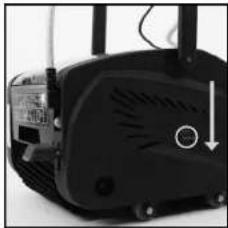
natural_image
Close-up of a black electronic device with ventilation slots and a circular arrow indicator (no visible text or symbols)
text_image
Close-up of a black industrial machine with visible Chinese text labels on its side panel.
natural_image
Close-up of hands holding a black cylindrical object with a white spherical base, next to a vehicle (no visible text or symbols)
natural_image
Close-up of a dark rectangular object with a small circular mark on top, resting on a wooden surface (no text or symbols visible)
natural_image
Close-up of a black rectangular object with a circular button on top, resting on a wooden surface (no text or symbols visible)natural_image
Person operating a Torinado industrial machine with visible gears and wiring (no text or symbols)
natural_image
Hand cleaning a black cylindrical object with a cloth (no visible text or symbols)
natural_image
Close-up of a hand adjusting a dark mechanical component (no visible text or symbols)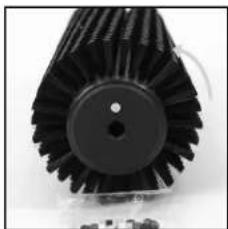
natural_image
Close-up of a mechanical gear component with visible teeth and central hub (no text or symbols)TORNADO
natural_image
Close-up of hands using a tool to adjust or install a dark object, no visible text or symbols
natural_image
Close-up of a Tornado printer and two black textured brushes (no visible text or symbols)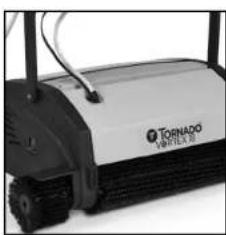
natural_image
Exterior view of a Tornado VENTEL 30 industrial machine (no visible text or symbols on body)
Tornado Industries, LLC
3101 Wichita Court
Ft. Worth, TX 76140-1755
natural_image
Exterior view of a Tornado VENTLEX 18 water heater with attached control panel (no visible text or symbols on body)natural_image
Symbol of a trash bin with no text or numbers present
natural_image
Simple recycling symbol with three chasing arrows forming a triangle (no text or labels)
natural_image
Mechanical frame with two downward arrows indicating motion or force (no text or symbols)Fig. 1

natural_image
Mechanical frame with attached wires and a small circular component (no visible text or symbols)Fig. 2

natural_image
Black-and-white photo of a vertical ladder with attached sensors and cables (no text or symbols visible)Fig. 3
text_image
1 2 3 4 5Fig. 4
natural_image
Black mechanical device with handle and clasp (no visible text or symbols)Fig. 5
natural_image
Close-up of a black mechanical bracket with attached cable and hook (no visible text or symbols)Fig. 6

natural_image
Close-up of a hand using a crisbee to lift a person's shoulder (no text or symbols visible)Fig. 7
TORNADO
66 67
TORNADO
ASSEMBLÉE
COMMANDES
natural_image
Black electronic device with coiled cable and cable spool (no visible text or symbols)Fig. 8
natural_image
Close-up of a hand adjusting a circular component on a mechanical part (no visible text or symbols)Fig. 9
natural_image
Close-up of a hand holding a black electronic device with a small plug, no visible text or symbolsFig. 10

natural_image
Close-up of a hand holding a small electronic device with a label (no readable text or symbols)
natural_image
Hand inserting a plug into an electrical outlet (no text or symbols visible)Fig. 12 Fig. 11
TORNADO
68 69
natural_image
Technical line drawing of a mechanical assembly with gears and blades (no text or symbols)CONTRÔLE DES BROSSES

natural_image
Close-up of a black industrial machine with ventilation grilles and a circular arrow indicating a component (no visible text or symbols)TORNADO
COMMANDES
COMMANDES
natural_image
Close-up of a black industrial air purifier device with ventilation slots and a circular arrow indicator (no text or symbols)
natural_image
Close-up of a black mechanical component with a circular button on the handle (no visible text or symbols)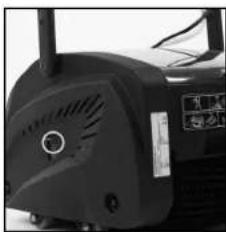
natural_image
Close-up of a black industrial machine with visible fan and control panel (no text or symbols)Disjoncteur:
natural_image
Close-up of a black industrial device with ventilation slots and control knobs (no visible text or symbols)natural_image
Close-up of a tractor's front wheel and dashboard with control panel (no visible text or symbols)TORNADO
70 71
TORNADO

natural_image
Person holding a white container next to a device (no visible text or symbols)
natural_image
Person standing next to a black robotic device with attached sensors and a white base (no visible text or symbols)natural_image
Close-up of a black mechanical component with a circular button and lever mechanism (no visible text or symbols)
natural_image
Close-up of a person's shoulder holding a bundle of white cables (no text or symbols visible)
natural_image
Close-up of a black industrial device with ventilation slots and a circular arrow indicating a downward motion (no text or symbols visible)
natural_image
Close-up of a black industrial machine component with visible exhaust ducts and control panel (no readable text or symbols)
Avoid touching the sharp edges of the dirty water tank as injury to hands can occur.
natural_image
Close-up of hands holding a black cylindrical object with a white spherical base (no visible text or symbols)
natural_image
Close-up of a dark rectangular object with a small circular hole on top (no visible text or symbols)
natural_image
Close-up of a black rectangular object with a circular button on top, resting on a wooden surface (no visible text or symbols)natural_image
Person operating a large industrial machine with visible branding (no readable text or symbols)
Dispose of dirty water in accordance with all local, state, and federal hazardous material disposal regulations.
NETTOYAGE
natural_image
Hand cleaning a black cylindrical device with a cloth (no visible text or symbols)
natural_image
Close-up of a hand adjusting a seatbelt (no visible text or symbols)
natural_image
Close-up of a black industrial turbine or impeller with visible teeth and central hub (no text or symbols)natural_image
Close-up of hands using a tool to adjust or install a device (no visible text or symbols)
natural_image
Close-up of a handheld electronic device with black connectors and a metallic sensor (no visible text or symbols)
natural_image
Exterior view of a Tornado Newton electric motor (no visible text or symbols on body)
Tornado Industries, LLC
3101 Wichita Court
Ft. Worth, TX 76140-1755
Téléphone: 800-VACUUMS
Télécopie: 1-817-551-0719
WWW.TORNADOVAC.COM
Tornado Industries, LLC
3101 Wichita Court
Ft. Worth, TX 76140-1755
Phone: 800-VACUUMS
Fax: 1-817-551-0719
WWW.TORNADOVAC.COM