
Versatility 84966RT - Slow cooker WestBend - Free user manual and instructions
Find the device manual for free Versatility 84966RT WestBend in PDF.
| Product type | Electric slow cooker with griddle function |
| Brand | WestBend |
| Model | Versatility 84966RT |
| Capacity | 6 liters (5.7 L) |
| Power supply | 120 V, 60 Hz |
| Power | Approximately 250 W (estimated) |
| Temperature settings | LO (low), HI (high), WM (keep warm), GRIDDLE (griddle) |
| Programmable timer | Yes, from 5 to 9 hours depending on setting |
| Material of the pot | Stone (ceramic) with non-stick coating |
| Material of the lid | Tempered glass |
| Heating base | With non-stick coating and electronic controls |
| Included accessories | Metal roasting rack, insulated carrying bag (depending on model) |
| Stovetop use | Yes, the pot (without base) can be used on gas or electric |
| Oven use | Yes, up to 177 °C (350 °F) without base |
| Cleaning the pot and lid | Dishwasher or hand wash |
| Cleaning the heating base | Wipe with a damp cloth |
| Safety | Automatic shut-off after cooking (switches to keep warm) |
| Warranty | 1 year parts and labor |
| Dimensions (approx.) | 35 x 35 x 25 cm (estimated) |
| Weight (approx.) | 3.5 kg (estimated) |
Frequently Asked Questions - Versatility 84966RT WestBend
User questions about Versatility 84966RT WestBend
0 question about this device. Answer the ones you know or ask your own.
Ask a new question about this device
Download the instructions for your Slow cooker in PDF format for free! Find your manual Versatility 84966RT - WestBend and take your electronic device back in hand. On this page are published all the documents necessary for the use of your device. Versatility 84966RT by WestBend.
USER MANUAL Versatility 84966RT WestBend
Register this and other Focus Products Group International products through our website: www.registerfocus.com.
Product registration is not required to activate warranty.
Important Safeguards. 2
Before Using for the First Time 3
Using Your 6 Qt. Versatility™ Cooker 3
Helpful Hints 6
Cleaning Your 6 Qt. Versatility™ Cooker 7
Recipes 8
Warranty. 12
SAVE THIS INSTRUCTION MANUAL FOR FUTURE REFERENCE
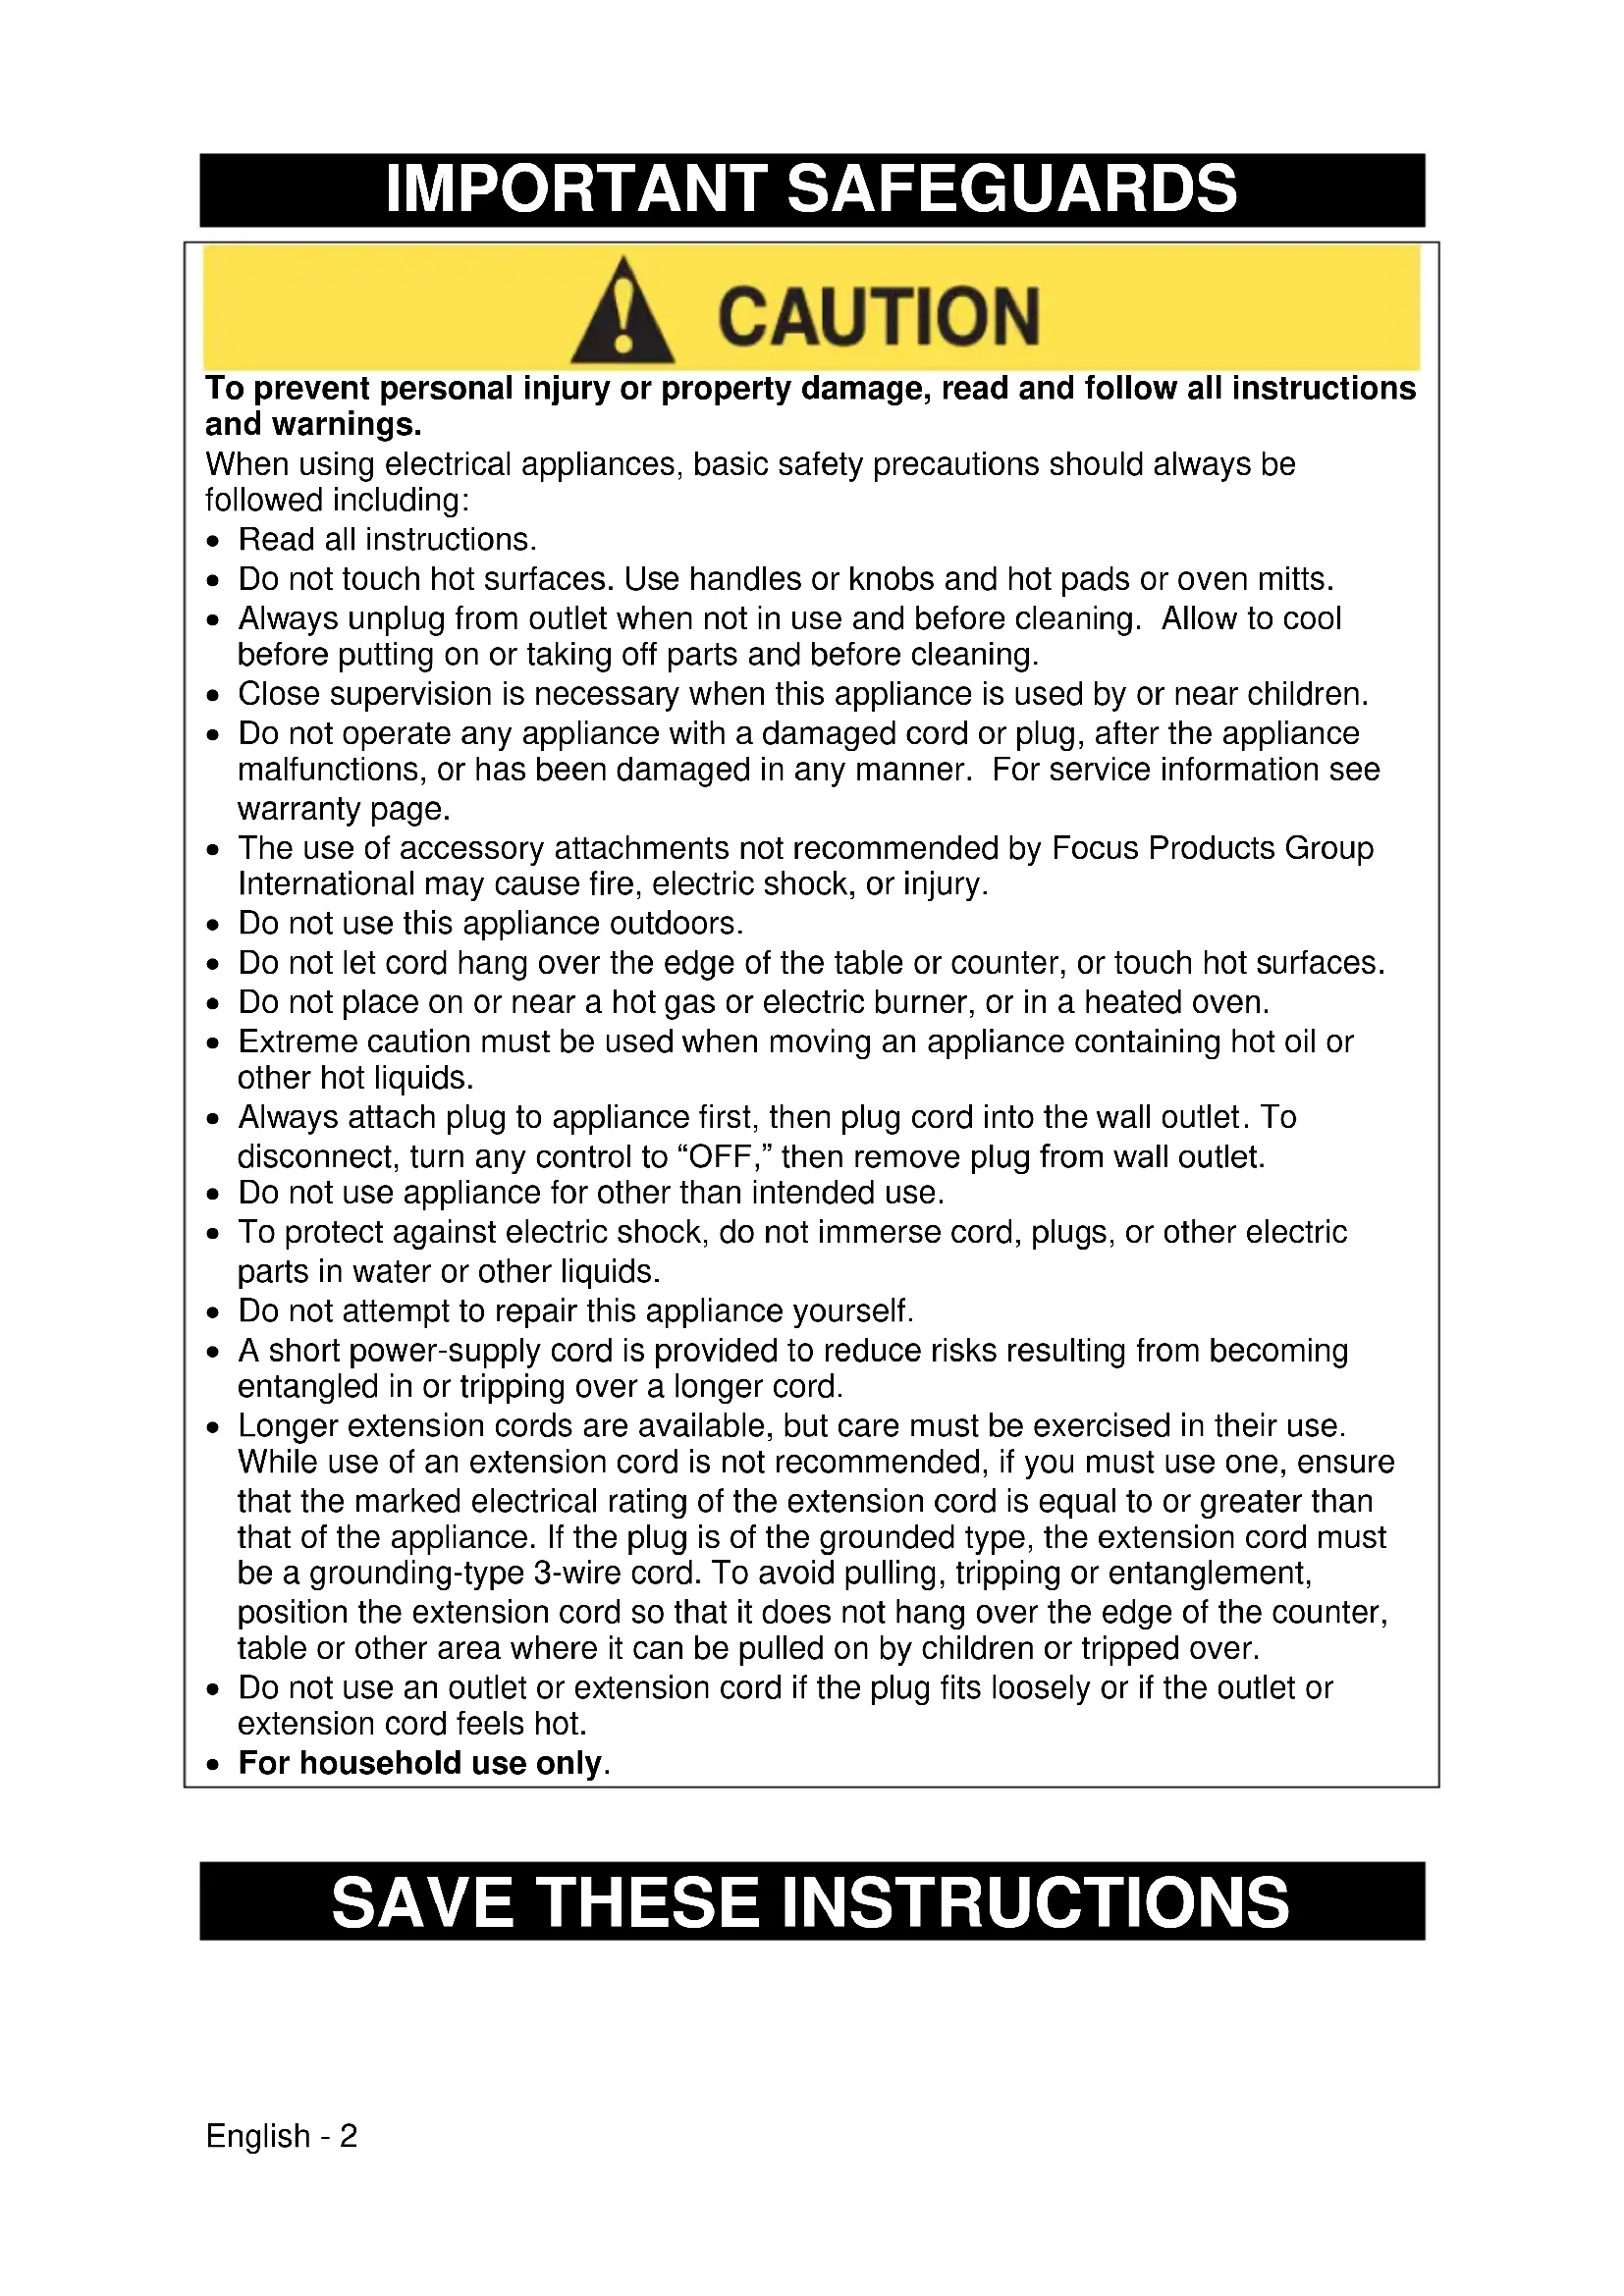
IMPORTANT SAFEGUARDS

CAUTION
To prevent personal injury or property damage, read and follow all instructions and warnings.
When using electrical appliances, basic safety precautions should always be followed including:
- Read all instructions.
- Do not touch hot surfaces. Use handles or knobs and hot pads or oven mitts.
- Always unplug from outlet when not in use and before cleaning. Allow to cool before putting on or taking off parts and before cleaning.
- Close supervision is necessary when this appliance is used by or near children.
- Do not operate any appliance with a damaged cord or plug, after the appliance malfunctions, or has been damaged in any manner. For service information see warranty page.
- The use of accessory attachments not recommended by Focus Products Group International may cause fire, electric shock, or injury.
- Do not use this appliance outdoors.
- Do not let cord hang over the edge of the table or counter, or touch hot surfaces.
- Do not place on or near a hot gas or electric burner, or in a heated oven.
- Extreme caution must be used when moving an appliance containing hot oil or other hot liquids.
- Always attach plug to appliance first, then plug cord into the wall outlet. To disconnect, turn any control to "OFF," then remove plug from wall outlet.
- Do not use appliance for other than intended use.
- To protect against electric shock, do not immerse cord, plugs, or other electric parts in water or other liquids.
- Do not attempt to repair this appliance yourself.
- A short power-supply cord is provided to reduce risks resulting from becoming entangled in or tripping over a longer cord.
- Longer extension cords are available, but care must be exercised in their use. While use of an extension cord is not recommended, if you must use one, ensure that the marked electrical rating of the extension cord is equal to or greater than that of the appliance. If the plug is of the grounded type, the extension cord must be a grounding-type 3-wire cord. To avoid pulling, tripping or entanglement, position the extension cord so that it does not hang over the edge of the counter, table or other area where it can be pulled on by children or tripped over.
- Do not use an outlet or extension cord if the plug fits loosely or if the outlet or extension cord feels hot.
- For household use only.
SAVE THESE INSTRUCTIONS
BEFORE USING FOR THE FIRST TIME
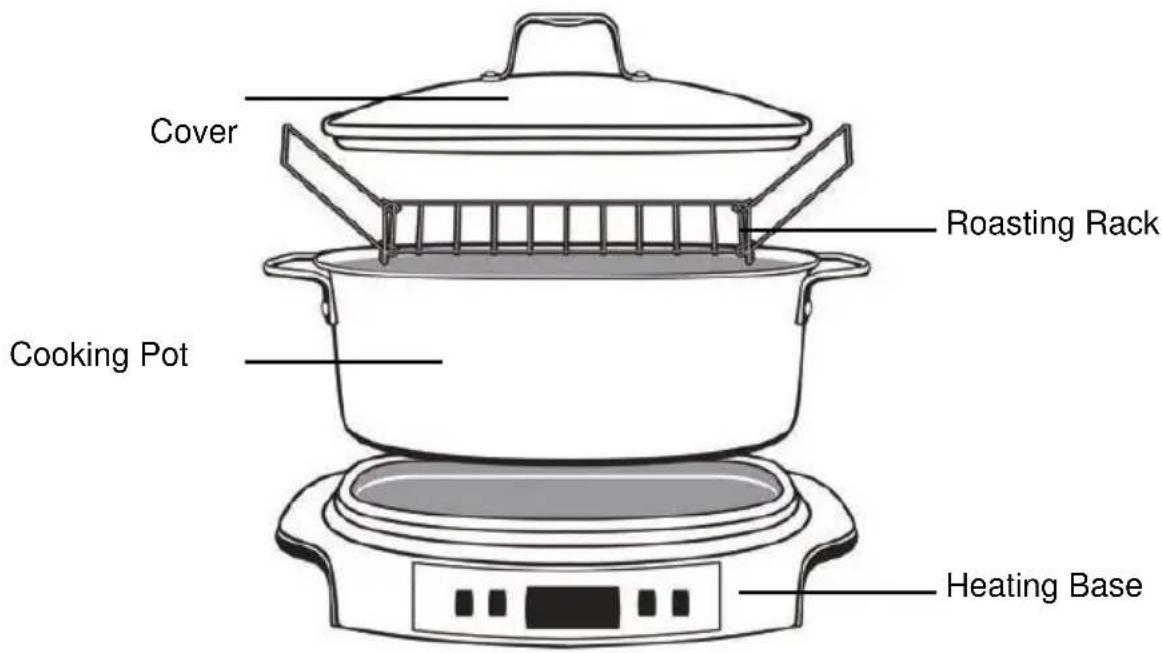
Please check all packaging material carefully before discarding. Accessory parts may be contained within the packaging material.
Before using, wash the cooking pot, cover, and roasting rack as directed in the "Cleaning your 6 Qt. Versatility™ Cooker" section of this manual. Wipe the non-stick finish of the slow cooker heating base with a damp cloth and dry.

USING YOUR 6 QT. VERSATILITY™ COOKER
To Use as a Slow Cooker:
- Place heating base on dry, level, heat-resistant surface away from any edge.
- Place foods into cooking pot, cover and place cooking pot onto heating base. If you wish to brown or precook any foods before slow cooking, place cooking pot directly on range top over medium heat. After foods are browned or cooked, transfer cooking pot to heating base. NOTE: Use only plastic, rubber, wooden, or non-metal cooking tools in the cooking pot. Use of metal cooking tools will scratch the non-stick surface.
- Attach cord to base, then plug cord into a 120 volt, AC electric outlet only. The heating base will beep when plugged in. Nothing will show on the display until the "POWER" button is pressed.
- Press the "POWER" button. "SEL" will be displayed and "LO" temperature setting is indicated with a flashing light. If you do not select a setting within 5 seconds, the slow cooker will default to "LO," 9 hours.
-
Press "TEMP" to select "HI," "LO," keep warm "WM" or "Griddle" setting. Note: Only "HI" or "LO" settings are available for programmed cooking times. Any time the "TEMP" button is pressed, the time will reset to the default for that setting; "LO," 9 hours and "HI," 5 hours.
-
Press "TIME" button to scroll up to desired cooking time. You cannot program the Versatility™ Slow Cooker to cook for longer than 12 hours. Note: The time can be cycled from 1-12 hours. The clock starts at the default time; press the "TIME" button past 12 hours to cycle to 1 hour.
- The timer, once set, will count down in minutes. If the "TIME" button is pressed at any point, the time will cycle up to the next whole hour, and then will increase in 1 hour increments.
- Press "COOK" to start the cooking cycle. If "COOK" hasn't been pressed within 5 seconds, the base will beep 5 times, indicating that it has begun the cooking cycle. When the cooking cycle is completed, the program will shift to the keep warm "WM" setting and timer will count up from zero showing the elapsed time on warm. Note: The keep warm "WM" setting will automatically shut off after 24 hours of heating.
- Press the "POWER" button to turn the appliance off. Pressing "POWER" at any point in any cooking cycle, or keep warm "WM," will turn the appliance off. All settings will then be reset back to default when power is turned back on. No previous settings are saved when the 6 Qt. Versatility™ Cooker is powered off.
- Slow cooker base offers heat settings of keep warm "WM," "LO," "HI," and "GRIDDLE." "WM" should only be used to keep cooked foods warm for serving, whereas "LO" and "HI" are to be used for actual cooking of foods. NOTE: DO NOT USE THE KEEP WARM "WM" SETTING FOR ACTUAL COOKING OF RAW FOODS AS THE SLOW COOKER WILL NOT GET HOT ENOUGH TO COOK FOODS. DO NOT USE THE GRIDDLE SETTING FOR SLOW COOKING AS OVERCOOKING WILL OCCUR.
- Select heat setting and cook food for recommended time as given in recipe or the temperature guide below. As a general guideline, most meat and vegetable combinations need 7 to 10 hours of cooking at "LO," or 4 to 6 hours of cooking at "HI." Meats will become most tender when cooked for the longer time at the lower heat setting. Avoid removing cover when slow cooking as cooking time will be increased due to loss of heat. Remove cover only when needed to stir occasionally or when adding ingredients.
To Use as a Griddle:
The heating base can be used as a light duty griddle.
- Press the "TEMP" button until "GRIDDLE" is selected. Press the "COOK" button to start the griddle, or wait 5 seconds, and the base will beep 5 times, indicating that the "GRIDDLE" setting has been selected and the griddle has started heating. For best results, preheat base for about 8 - 10 minutes, then cook foods to desired doneness. Please refer to the "Temperature Guide" below. The heating base will perform only as a light duty griddle. "GRIDDLE" setting should NEVER be used as a slow cooker setting.
- When food is done cooking, press "POWER" to turn the appliance off. Unplug the cord from the outlet, and allow to cool completely. Follow cleaning instructions in the "Cleaning Your 6 Qt. Versatility™ Cooker" section of this manual.
Note: The timer cannot be used on this setting, and will not shift to keep warm "WM" at any point. The griddle will remain on indefinitely until "POWER" is pressed, or the appliance is unplugged.
Do not strike utensils against vessel or cover rim. Glass cover may shatter as a result.
- A small amount of smoke and/or odor may occur upon heating due to the release of manufacturing oils – this is normal.
- Some minor expansion/contraction sounds may occur during heating and cooling – this is normal.
Care and Use for Insulated Carrying Bag (if included):
- Food should not be kept in the insulated carrying bag for more than 2 hours to avoid food spoilage.
- Do not overfill cooking vessel to avoid spilling.
- When removing the cover from heated foods, use care as condensation may have formed on the underside.
- Insulated carrying bag must be completely zipped and carried level to help reduce leaking or spilling.
- Do not put carrying bag in any oven.
- Do not plug appliance into an electrical outlet while the slow cooker is still in the carrying bag.
To Use:
- Unzip insulated carrying bag and open. Position interior straps with one to the front and one to the back.
- Remove cord from slow cooker heating base, fold and place in carrying bag behind back strap. Don't forget to include the cord.
- Place heating base in carrying bag, cooking vessel on base, and slow cooker glass cover on top.
- To secure, carefully lift the back strap over the slow cooker cover, being sure to go through the cover handle. Bring front strap up, insert clip in notch of back strap, securing slow cooker in carrying bag.
- Zip bag closed. Bring exterior handles around bag and secure with Velcro strap.
TEMPERATURE GUIDE
Be sure to cook foods to recommended food-safe temperatures. Always check with a meat thermometer to ensure that the center is cooked completely.
| MEAT | INTERNAL TEMPERATURES | |
| Beef | Rare | 140°F/60°C |
| Medium | 160°F/71°C | |
| Well | 170°F/76°C | |
| Pork | Fresh | 170°F/76°C |
| Smoked | 160°F/71°C | |
| Canned | 140°F/60°C | |
| Lamb | 170°F to 180°F/76°C to 82°C | |
| Veal | 170°F/76°C | |
| Poultry | 180°F/82°C |
HELPFUL HINTS
- Adapting Recipes to Slow Cooking: Many of your favorite oven and range top recipes can be adapted to slow cooking with a few minor changes. Here are some important points to remember:
Amount of Liquid: Because little moisture evaporates during slow cooking, reduce amount of liquid in your recipe by one-half (1 cup of liquid is enough for most recipes). For soup recipes, add all ingredients except water or broth to vessel; add only enough liquid to cover ingredients.
Amount of Seasoning: Reduce amount of seasoning in proportion to reduced amount of liquid. Use whole or leaf herbs and spices rather than crushed or ground.
Slow Cooking Meat: Less tender, less expensive cuts of meat are better suited to slow cooking than expensive cuts of meat. Remove excess fat before slow cooking if desired. Meat can be browned in the cooking pot on top of the range before slow cooking.
Slow Cooking Vegetables: Add partially frozen vegetables, Chinese vegetables and fresh mushrooms during the last hour of cooking. Strong-flavored vegetables such as spinach, eggplant, okra and collard greens should be precooked before adding to cooker. The amount of onion normally used in your recipe should be reduced because its flavor gets stronger during cooking. In most cases, fresh vegetables take longer to cook than meats because liquid simmers rather than boils.
Slow Cooking Raw Meats and Vegetables: Most raw meat and vegetable combinations need at least 4 to 6 hours of cooking at "HI" or 7 to 10 hours at "LO."
Slow Cooking Fish and Seafood: Fresh or thawed seafood and fish fall apart during long hours of cooking. Add these ingredients an hour before serving and cook at "HI."
Slow Cooking Milk, Sweet or Sour Cream and Cheese: Because milk, sour or sweet cream and cheese break down during long hours of cooking, add these ingredients just before serving or substitute undiluted condensed canned soups or evaporated milk. Processed cheese tends to give better results than aged cheese.
Rice and Pasta: Rice and pasta may either be cooked separately, or added uncooked during last hour of cooking time. If added uncooked, make sure there is at least 1 to 112 cups of liquid in vessel and heat is set at "LO" or higher.
Dumplings: Dumplings may be cooked in broth or gravy at "HI." Drop by spoonfuls on simmering broth or gravy. Cook covered for 30 minutes.
Thickening Juices for Graves and Sauces: To thicken juices for gravies and sauces, add 2 to 3 tablespoons of quick cooking tapioca at start, or thicken after cooking by adding a smooth paste made of 2 to 4 tablespoons cornstarch or flour and 14 cup cold water. Bring to a boil at "HI." Solid foods may be removed first.
- Don't Remove Cover During Cooking: To retain heat, moisture and food flavor, don't remove cover during cooking unless necessary for adding additional ingredients.
- Using Cooking Tools on Non-Stick Finish: The following types of cooking tools may be used on the non-stick finish: plastic, rubber or wooden. Do not use sharp edged metal cooking tools (forks, knives, mashers) as these could scratch the non-stick finish.
-
Using Cooking pot on Top of Range: The cooking pot (without heating base) can be used for range top cooking. Place vessel on large range unit. Use medium to low heat. The use of low to medium heat will prevent foods from overcooking, reduce spattering and help retain natural juices. Do not use high heat except for bringing liquids to a boil. If cooking on a gas range, do not let flame extend up side of cooking pot. ALWAYS USE OVEN MITTS WHEN USING COOKING POT AND COVER ON RANGE UNIT.
-
Cooking Meats: When cooking meats, preheat empty cooking pot over medium to medium-low heat for 2 to 3 minutes or until a drop of water sizzles in cooking pot. To prevent sticking of lean meats, you may wish to add a small amount of cooking oil. Add meat and brown as desired. Cover cooking pot and reduce heat to low for cooking on range top OR transfer cooking pot to heating base and cook at desired setting. The shortest cooking time will be at "HI."
- Using Cooking Pot in Oven: The cooking pot (without heating base) can be used in a conventional or convection oven up to preheated temperatures of 350^ / 177^ . Cooking pot may be covered with aluminum foil for oven use. ALWAYS USE OVEN MITTS WHEN USING COOKING POT IN OVEN.
- DO NOT USE THE COOKING POT IN A MICROWAVE OVEN, OVER A CAMPFIRE OR UNDER AN OVEN BROILER UNIT TO PREVENT DAMAGE TO THE COOKING POT OR OVEN.
- Using a Roasting Rack: Your slow cooker includes a small wire rack for roasting meats and poultry. To use the rack, simply place into bottom of cooking pot and place roast, chicken, or ham onto rack. Add a small amount of liquid to cooking pot before cooking. If you wish, the meat can be browned in cooking pot on top of range before roasting. The rack can also be used for steaming fresh vegetables such as broccoli and corn-on-the-cob. Add 1 cup of water to cooking pot to steam vegetables. Cook on top of range over medium to medium-low heat or on heating base at "HI" to desired doneness.
- Bread, Cakes & Desserts: Use an 8 x 4-inch or a 9 x 5-inch loaf pan. Place the roasting rack in the pan before placing the loaf pan. Check to ensure that your pan fits completely into the cooking pot before mixing any ingredients. To prevent condensation from dripping onto food while baking, place double layer of paper toweling and single layer of aluminum foil across top of cooking pot. Cover and bake according to recipe.
CLEANING YOUR 6 QT. VERSATILITY™ COOKER
- Press "POWER" to turn the appliance off. Unplug the cord from the outlet and allow the entire appliance (base, cooking pot, rack, cover) to cool completely before cleaning. Set the cooking pot and cover on a dry, heat-protective surface for gradual cooling. NOTE: Do not run cold water over hot glass cover as it may crack or shatter if cooled suddenly.
- Wipe heating base and cord with a damp cloth.
- The cooking pot, rack, and glass cover may be washed using warm, soapy water by hand or cleaned in the dishwasher. If dishwasher cleaning, avoid contact between pieces to prevent damage. Do not use metal scouring pads or cleansers as damage can occur. Wipe with distilled vinegar to remove water spots or mineral deposits. Rewash with warm, soapy water, rinse and dry.
Cleaning Heating Base: Always unplug cord from electrical outlet and allow base to cool completely before cleaning. With a spoon or baster, remove any fat or grease that has collected on the griddle surface. Wipe oil residue from base with paper towel. Wipe non-stick finish with a damp, soapy dishcloth or nylon-scouring pad recommended for non-stick finishes. Clean finish thoroughly, wiping base several times with a clean, damp cloth to remove soap residue.
If a tacky oil film forms on the non-stick finish of base, wipe with a dry cloth to remove. If this residue is not removed, it will adhere to the finish when reheated and become impossible to remove.
This appliance has no user serviceable parts.
RECIPES
Beef Vegetable Soup
1½ lbs. Beef soup bones or 1 pound beef 2 Ribs celery, chopped
short ribs 2 Potatoes, peeled and chopped
1½ qt. Water 1 Small onion, chopped
1 tsp. Salt 1 Bay leaf
1¼ tsp. Pepper 1 16 oz Can whole tomatoes, undrained
2 Carrots, chopped
- Place soup bone, water, salt, pepper, carrots, celery, potatoes, onion and bay leaf into cooking pot. Cover and slow cook at "LO" for 6 to 7 hours.
- Remove soup bone and cool slightly. Remove meat from bones and return to soup with tomatoes. Cover and slow cook an additional hour. Noodles or barley may be added, if desired.
Herb Pork Roast
1 tsp. Salt 4-5 lbs. Pork roast, boneless or bone-in
1 tsp. Thyme 4 Large cloves garlic, quartered
1 / 2 tsp. Sage 2 tbsp.Water, optional
1 / 2 tsp. Ground cloves 2 tbsp. Cornstarch, optional
1 tsp. Grated lemon peel
- In small bowl combine salt, thyme, sage, cloves and lemon peel. Rub into pork roast. Cut 16 small pockets into roast and insert garlic pieces.
- Place roast in cooking pot. Cover and cook at "LO" for 7 to 9 hours or at "HI" for 4 to 5 hours. Insert meat thermometer into roast to ensure internal temperature is 170^ / 77^ or higher before serving. Allow roast to stand 10-15 minutes before carving. Remove garlic pieces. Juices may be thickened for gravy, if desired. Dissolve 2 tablespoons cornstarch in 2 tablespoons water. Stir slowly into juices until thickened at "HI."
Pepper Steak
1½ lbs Round steak, cut into thin strips 1 Large green pepper, cut into thin
1 Clove garlic, minced strips
1 cup Chopped onion 4 Tomatoes, cut into eighths, or 1 1- 12 tsp. Salt pound can whole tomatoes, undrained 14 tsp. Pepper 1 Ib. Can bean sprouts, drained 14 tsp. Ginger 1 tbsp. Cornstarch
1 tsp. Sugar 12 cup Cold water 12 cup Soy sauce
- Brown steak in cooking pot on range unit over medium heat. Transfer cooking pot to heating base using hot pads.
- In a small bowl, combine garlic, onion, salt, pepper, ginger, sugar and soy sauce. Pour over steak. Cover and slow cook at "LO" for 6 to 8 hours or "HI" for 4 to 5 hours.
- Add green peppers, tomatoes, and bean sprouts, stir to blend. Slow cook an additional hour. Just before serving, increase heat to "HI." Combine cornstarch and water. Gradually add to pepper steak, stirring until thickened. Reduce to keep warm ("WM") for serving.
Corned Beef and Cabbage
3 - 4 lb. Corned beef brisket
1 Clove garlic, minced
1 Medium onion, sliced
1 Bay leaf
1 / 2 tsp. Celery seed
Water
1 / 2 tsp. Mustard seed
1 Small head cabbage, cut into wedges
-
Place brisket with liquid and spices from package in cooking pot. Add onion, celery seed, mustard seed, garlic and bay leaf. Add just enough water to cover brisket (about 4 cups). Cover and cook at "LO" for 7 to 9 hours or until brisket is fork tender.
-
During last hour of cooking, add cabbage wedges and continue cooking at "LO." Discard cooking liquid and spices.
Hearty Chicken Noodle Soup
2 lbs. Chicken parts, skinned if desired
1 tbsp. Instant chicken bouillon
5 cups Water
1 tbsp. Minced parsley
1 Medium onion, chopped
1 tsp. Salt
4 Carrots, cut into 12 -inch pieces
1 / 2 tsp. Dried rosemary
4 Ribs celery, cut into 12 -inch pieces
114 tsp. Pepper
1 16 oz. Can whole tomatoes, cut up
1 cup Uncooked fine egg noodles
- Combine all ingredients, except egg noodles, in cooking pot. Cover and cook at "LO" for 6 to 8 hours or at "HI" for 3 to 4 hours or until chicken and vegetables are tender.
- Remove chicken pieces from cooking pot and set aside to cool slightly. Increase heat to "HI" and add noodles, stirring to blend. Cover and continue to cook for 30 minutes.
- Meanwhile, remove chicken from bones and cut into bite-size pieces. Return meat to cooking pot to heat as noodles finish cooking. Reduce heat to keep warm ("WM") for serving.
Chili
112 Ibs. Ground beef
1 16 oz Can kidney beans, undrained
1 cup Onion, chopped
112 tbsp. Chili powder
1 cup Green pepper, chopped
1 tsp. Salt
1 Clove garlic, minced
1 tsp. Ground cumin
128 oz. Can whole tomatoes, undrained
1 / 2 tsp. Pepper
- Brown ground beef with onion and green pepper in cooking pot over medium heat of range unit. Remove excess grease.
- Transfer cooking pot to heating base using hot pads. Add remaining ingredients, stir to blend. Cover and slow cook at "LO" for 7 to 8 hours. Reduce heat to keep warm ("WM") for serving.
Fish Chowder
2 lbs. Fresh or frozen fish fillets (haddock, 4 cups Hot water
perch, cod, flounder) 1 16 oz Can stewed tomatoes
2 tbsp. Lemon juice 1 cup Diced carrots
4 Slices bacon 2 tsp. Salt
1 cup Chopped onion 1 / 4 tsp. Pepper
1 / 4 cup Diced celery 1 tbsp. Worcestershire sauce
4 Medium potatoes, cut into cubes 2 tbsp. Dry sherry, optional
- Cut fish into chunks and remove bones. Sprinkle with lemon juice. Cover and refrigerate.
- Fry bacon in cooking pot on range top over medium heat until crispy. Drain on paper towel, crumble and set aside.
- Sauté onion and celery in bacon drippings until brown. Transfer cooking pot to heating base using hot pads. Add potatoes, water, tomatoes, carrots, salt and pepper to cooking pot. Stir to combine. Cover and cook at "LO" for 4 to 5 hours or at "HI" for 2 to 3 hours.
- Drain lemon juice from fish. Add fish, Worcestershire sauce and sherry to cooking pot. Simmer for 1 hour or until fish flakes easily with fork. Reduce heat to keep warm ("WM") for serving. Garnish with crumbled bacon.
German Beef Stew
112 Ibs. Beef chuck, cut into 2-inch cubes 1 lb. Can whole tomatoes, undrained
2 tbsp. Flour 2 cups Thinly sliced carrots
1 / 2 tsp. Celery salt 1 / 4 cup Sherry cooking wine
1 / 4 tsp. Garlic powder 1 / 4 cup Dark molasses
1 / 2 tsp. Ground ginger 1 / 4 cup Raisins
1/4 tsp. Pepper
- Place beef in cooking pot. In a small bowl, combine flour, celery salt, garlic powder, ground ginger and pepper. Sprinkle over beef.
- In a bowl, combine tomatoes, carrots, wine and molasses. Pour over beef.
- Cover and place cooking pot on base. Simmer at "LO" for 6 to 8 hours. Add raisins 30 minutes before serving. Reduce heat to keep warm ("WM") for serving. Serve over hot cooked noodles.
Cheese Curried Entree
2 10 oz. Packages frozen chopped 1 cup Water
broccoli, partially thawed 1 / 2 cup Salad dressing or mayonnaise
3 cups (3 / 4 pound) diced cooked ham, 1 / 4 cup Finely chopped onion
turkey or chicken 1 tbsp. Lemon juice
1-11 oz Can condensed cheddar 12 tsp. Curry powder
cheese soup
- Place broccoli evenly in bottom of cooking pot. Add ham, turkey or chicken.
- Combine soup, water, mayonnaise, onion, lemon juice and curry powder in small mixing bowl; stir to blend. Pour soup mixture into cooking pot.
- Place cooking pot on base, cover and simmer at "HI" for 2 hours or "LO" for 3 to 4 hours; or until broccoli is fork tender. Reduce heat to keep warm ("WM") for serving. Serve over toast or hot biscuits.
Country Ribs with Apples 'N Kraut
3 lbs. Lean country-style pork ribs, trimmed of any excess fat
18 oz Can mushrooms stems and pieces, drained
Salt and pepper
1 Large or 2 small apples, cored and cut into wedges
1 16 oz Can sauerkraut, undrained
1/4 cup Brown sugar
1 Medium onion, thinly sliced and separated into rings
1 / 2 tsp. Celery seed
- Preheat cooking pot on electric or gas range top heating unit over medium heat. Add ribs in batches to brown. Season with salt and pepper.
- Return all ribs to cooking pot. Layer sauerkraut, onion, mushrooms, apple wedges and brown sugar over ribs. Sprinkle with celery seed.
- Place cooking pot on base, cover and cook at "LO" for 7 to 9 hours or at "HI" for 3 to 4 hours until meat is tender. Reduce heat to keep warm ("WM") for serving.
Carrot Cake
2 cups Flour
1 cup Vegetable oil
2 cups Sugar
4 Eggs
1 tsp. Baking soda
3 cups Grated carrots
1 tsp. Salt
1 tsp. Cinnamon
- Grease bottom only of a 9 × 5 -inch or 8 × 4 -inch loaf pan with solid hydrogenated shortening. Dust with flour and shake out excess. Set covered cooking pot on base and preheat at "HI" while mixing ingredients.
- In mixing bowl, sift flour, sugar, baking soda and salt. Add vegetable oil and stir until ingredients are moistened. Add eggs one at a time, beating well after each egg is added. Stir in grated carrots and cinnamon until evenly mixed. Pour batter into pan. Place pan in cooking pot.
- Cover and bake at "HI" for 2 hours. Do not remove cover during this time. To test for doneness at end of recommended baking time, insert a metal cake tester in several places including center of cake. If cake tester comes out clean, cake is done. If batter clings to cake tester, continue baking in 15-minute intervals. Remove cake from pan and cool on rack. Frost with softened cream cheese, if desired. Makes a 112 -pound cake.
Cranberry Nut Bread
2 cups (8-ounces) fresh or frozen cranberries
12 tsp. Baking soda 12 tsp. Salt
1 / 2 cupWalnuts
6 tbsp. Butter or margarine
2 cups Flour
1 Egg
1 cup Sugar
1 tbsp. Grated orange peel
112 tsp. Baking powder
1 / 2 cup Orange juice
- Grease 9 × 5 -inch or 8 × 4 -inch loaf pan with solid hydrogenated shortening. Dust with flour and shake out excess. Set covered cooking pot on base and preheat at "HI" while mixing ingredients.
- Grind cranberries and walnuts with coarse blade of food chopper. In a large mixing bowl, combine flour, sugar, baking powder, baking soda and salt. Cut in butter or margarine to form a coarse mixture. Make an indentation in mixture and add egg, orange peel and orange juice. Beat only until lumps disappear. Add chopped cranberries and walnuts. Stir until evenly mixed. Pour batter into pan. Place pan in cooking pot.
- Cover and bake at "HI" for 3 hours. Do not remove cover during this time. To test for doneness at end of recommended baking time, insert a metal cake tester in several places including center of bread. If cake tester comes out clean, bread is done. If batter clings to cake tester, continue baking for 15-minute intervals. Remove bread from pan and cool on rack. Makes a 1 12 -pound loaf.
PRODUCT WARRANTY
Appliance 1 Year Limited Warranty
Focus Products Group International, LLC ("the Company") warrants this appliance from failures in the material and workmanship for one (1) year from the date of original purchase with proof of purchase, provided that the appliance is operated and maintained in conformity with the Instruction Manual. Any failed part of the appliance will be repaired or replaced without charge at the Company's discretion. This warranty applies to indoor household use only.
This warranty does not cover any damage, including discoloration, to any non-stick surface of the appliance. This warranty is null and void, as determined solely by the Company, if the appliance is damaged through accident, misuse, abuse, negligence, scratching, or if the appliance is altered in any way.
THIS WARRANTY IS IN LIEU OF ALL IMPLIED WARRANTYES, INCLUDING WARRANTYES OF MERCHANTABILITY, FITNESS FOR A PARTICULAR PURPOSE, PERFORMANCE, OR OTHERWISE, WHICH ARE HEREBY EXCUSED. IN NO EVENT SHALL THE COMPANY BE LIABLE FOR ANY DAMAGES, WHETHER DIRECT, INDIRECT, INCIDENTAL, FORSEEABLE, CONSEQUENTIAL, OR SPECIAL ARISING OUT OF OR IN CONNECTION WITH THIS APPLIANCE.
If you think the appliance has failed or requires service within its warranty period, please contact the Customer Care Department at (866) 290-1851, or e-mail us at customercare@focuspg.com. A receipt proving the original purchase date will be required for all warranty claims, hand written receipts are not accepted. You may also be required to return the appliance for inspection and evaluation. Return shipping costs are not refundable. The Company is not responsible for returns lost in transit.
Valid only in USA and Canada
REPLACEMENT PARTS
Replacement parts, if available, may be ordered directly from the Company several ways. Order online at www.westbend.com, e-mail customercare@focuspg.com, over the phone by calling (866)290-1851, or by writing to:
Focus Products Group International, LLC.
Attn: Customer Care Dept.
P.O.Box 53
West Bend, WI 53095
To order with a check or money order, please first contact Customer Care for an order total. Mail your payment along with a letter stating the model or catalog number of your appliance, which can be found on the bottom or back of the appliance, a description of the part or parts you are ordering, and the quantity you would like. Your check should be made payable to Focus Products Group International, LLC.
Your state/province's sales tax and a shipping fee will be added to your total charge. Please allow two weeks for processing and delivery.
This manual contains important and helpful information regarding the safe use and care of your product. For future reference, attach dated sales receipt for warranty proof of purchase and record the following information:
Date purchased or received as gift:
Where purchased and price, if known:
Item number and Date Code (shown bottom/back of product):
WestBend.
MIJOTEUSE VERSATILITY™ 6 QT. (5.7LT.)
Mode d'Emploi

Focus Products Group International, LLC.
Attn: Customer Care Dept.
P.O.Box 53
West Bend, WI 53095
Focus Products Group International, LLC.
Atencion: Customer Care Dept.
P.O.Box 53
West Bend, WI 53095

- SAVE THIS INSTRUCTION MANUAL FOR FUTURE REFERENCE
- IMPORTANT SAFEGUARDS
- CAUTION
- SAVE THESE INSTRUCTIONS
- BEFORE USING FOR THE FIRST TIME
- To Use as a Slow Cooker:
- To Use as a Griddle:
- Do not strike utensils against vessel or cover rim. Glass cover may shatter as a result.
- Care and Use for Insulated Carrying Bag (if included):
- To Use:
- TEMPERATURE GUIDE
- HELPFUL HINTS
- CLEANING YOUR 6 QT. VERSATILITY™ COOKER
- RECIPES
- Beef Vegetable Soup
- Herb Pork Roast
- Pepper Steak
- Corned Beef and Cabbage
- Hearty Chicken Noodle Soup
- Chili
- Fish Chowder
- German Beef Stew
- Cheese Curried Entree
- cheese soup
- Country Ribs with Apples 'N Kraut
- Carrot Cake
- Cranberry Nut Bread
- PRODUCT WARRANTY
- Appliance 1 Year Limited Warranty
- REPLACEMENT PARTS
- WestBend.
- MIJOTEUSE VERSATILITY™ 6 QT. (5.7LT.)
Brand : WestBend
Model : Versatility 84966RT
Category : Slow cooker