
Pro PDIC61RD - Loudspeaker Pyle - Free user manual and instructions
Find the device manual for free Pro PDIC61RD Pyle in PDF.
| Product Type | Pair of In-Wall/In-Ceiling Speakers |
| Brand and Model | Pyle Pro PDIC61RD |
| Configuration | 2-way, stereo |
| Peak Power | 200 watts |
| Frequency Response | 70 Hz - 20 kHz |
| Impedance | 4 - 8 ohms |
| Mid/Woofer Speaker | 6.5 inches (16.5 cm) |
| Tweeter | Swiveling 0.5 inch (1.27 cm) Polymer Dome |
| Voice Coil | High temperature, 1 inch (2.5 cm) |
| Overall Dimensions | Diameter 9 inches (22.9 cm), depth 2.75 inches (6.9 cm) |
| Cut-Out Dimensions | Diameter 6.5 inches (16.5 cm), depth 2.625 inches (6.6 cm) |
| Mounting | Flush, wall or ceiling |
| Box Contents | Pair of speakers with grilles, adhesive strips, cut-out template |
| Recommended Use | Custom installation, home theater, background music |
| Frame Material | Rugged plastic (estimated) |
| Color | White (model RD) / Black (model BK) / Silver (model SL) / White (model WT) |
| Maintenance | Clean with a soft dry cloth. Do not use abrasive products. |
| Safety | Respect polarities (+/-) when wiring. Do not force the tweeter beyond 15°. |
| Repairability | Contact a qualified installer or Pyle after-sales service. |
Frequently Asked Questions - Pro PDIC61RD Pyle
User questions about Pro PDIC61RD Pyle
0 question about this device. Answer the ones you know or ask your own.
Ask a new question about this device
Download the instructions for your Loudspeaker in PDF format for free! Find your manual Pro PDIC61RD - Pyle and take your electronic device back in hand. On this page are published all the documents necessary for the use of your device. Pro PDIC61RD by Pyle.
USER MANUAL Pro PDIC61RD Pyle
Home In-Wall/Ceiling Speakers


ENG
PYLE
PyleUSA.com
USER GUIDE
PRODUCT DESCRIPTION
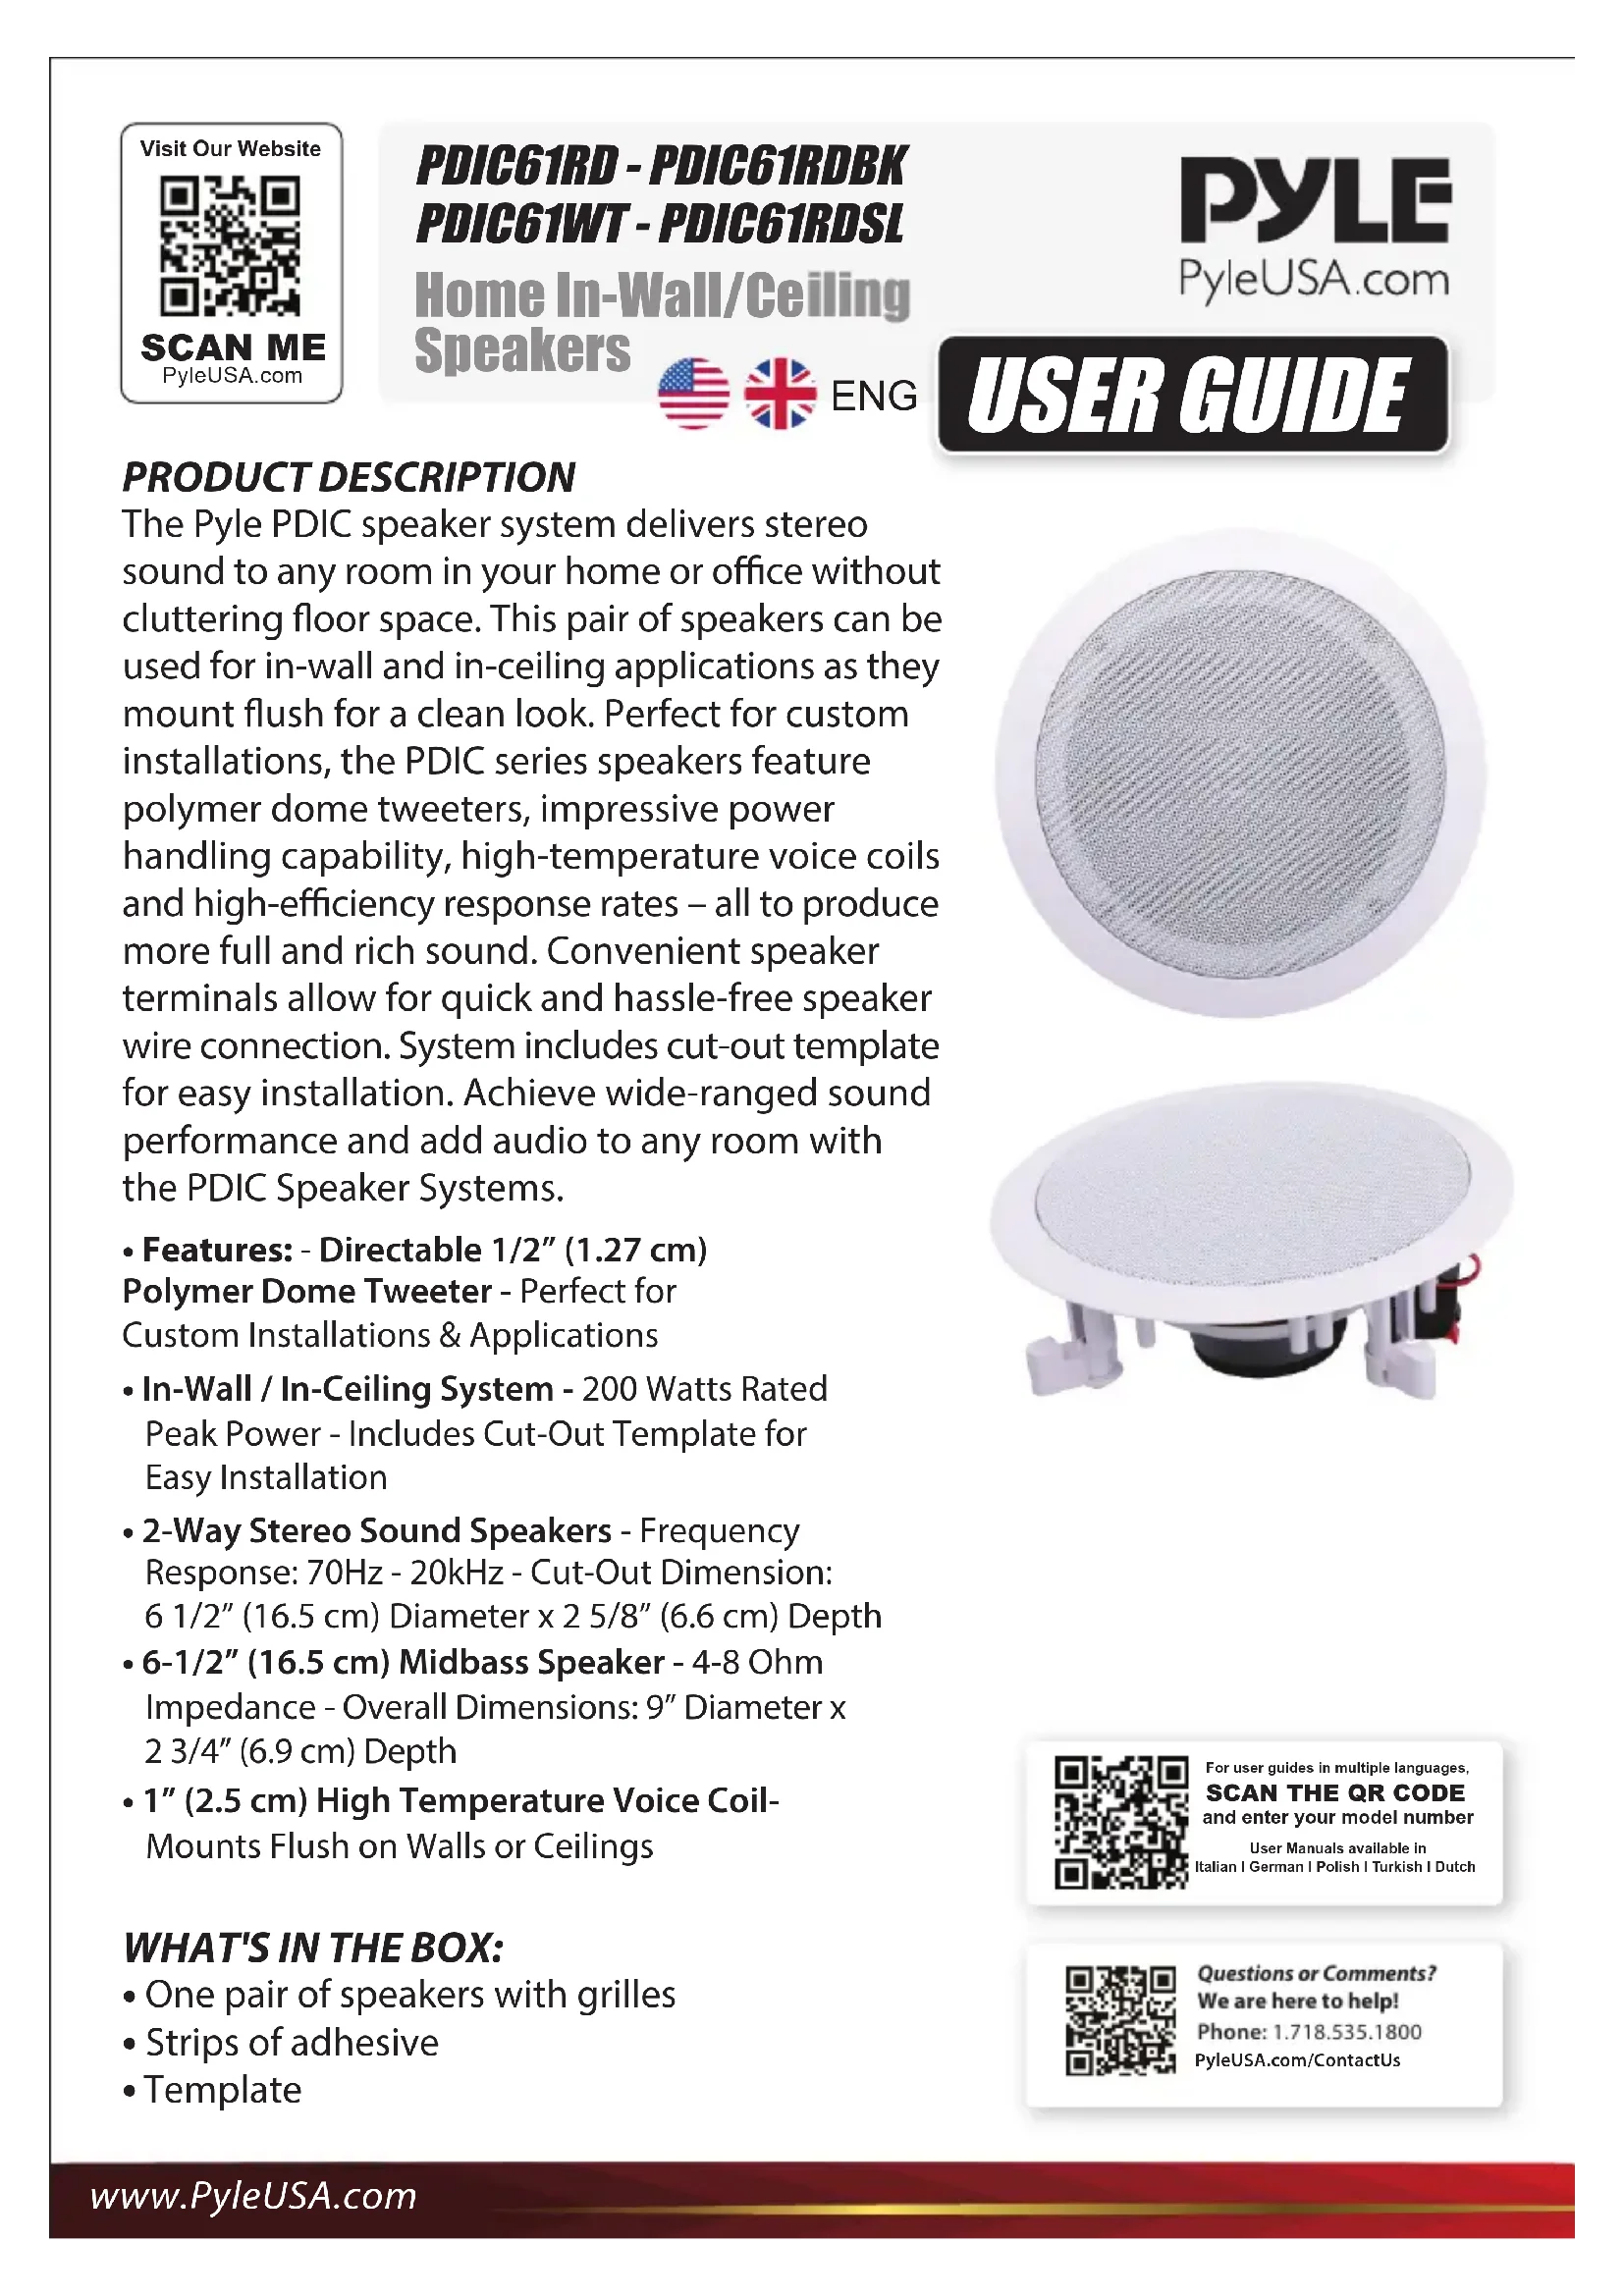
The Pyle PDIC speaker system delivers stereo sound to any room in your home or office without cluttering floor space. This pair of speakers can be used for in-wall and in-ceiling applications as they mount flush for a clean look. Perfect for custom installations, the PDIC series speakers feature polymer dome tweeters, impressive power handling capability, high-temperature voice coils and high-efficiency response rates – all to produce more full and rich sound. Convenient speaker terminals allow for quick and hassle-free speaker wire connection. System includes cut-out template for easy installation. Achieve wide-ranged sound performance and add audio to any room with the PDIC Speaker Systems.
- Features: - Directable 1/2" (1.27 cm)
Polymer Dome Tweeter - Perfect for Custom Installations & Applications - In-Wall / In-Ceiling System - 200 Watts Rated Peak Power - Includes Cut-Out Template for Easy Installation
- 2-Way Stereo Sound Speakers - Frequency Response: 70Hz - 20kHz - Cut-Out Dimension: 6 1/2" (16.5 cm) Diameter x 2 5/8" (6.6 cm) Depth
- 6-1/2" (16.5 cm) Midbass Speaker - 4-8 Ohm Impedance - Overall Dimensions: 9" Diameter x 2 3/4" (6.9 cm) Depth
- 1" (2.5 cm) High Temperature Voice Coil-Mounts Flush on Walls or Ceilings
WHAT'S IN THE BOX:
• One pair of speakers with grilles
- Strips of adhesive
- Template
natural_image
Two white circular speaker or fan components with mesh grille, shown from different angles (top and bottom) against a white background.
For user guides in multiple languages,
SCAN THE QR CODE
and enter your model number
User Manuals available in
Italian | German | Polish | Turkish | Dutch

Questions or Comments?
We are here to help!
Phone: 1.718.535.1800
PyleUSA.com/ContactUs
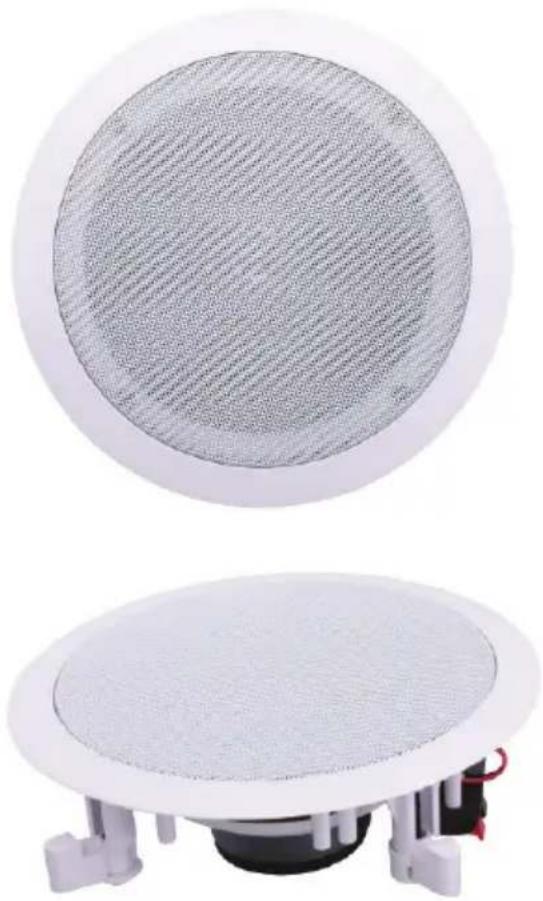
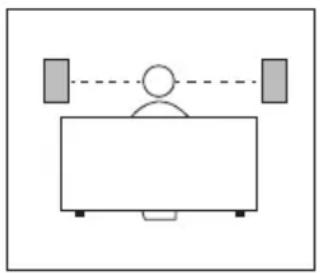
SPEAKER PLACEMENT
FRONT SPEAKERS REAR SPEAKERS


natural_image
Simple line drawing of a person sitting at a desk with two gray bars above, connected by a dashed line (no text or symbols)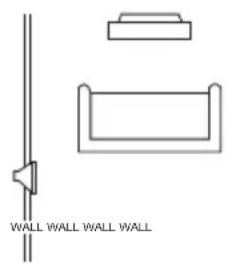
natural_image
Pure architectural line drawing of a wall and wall-mounted structure without any text or symbols
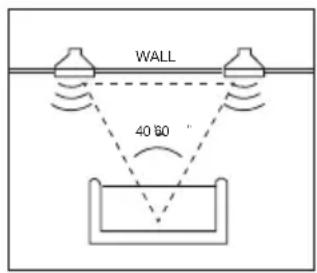
IN-CEILING
- Proper placement of speakers is crucial for achieving the most realistic soundstage.
- Front speakers should be equidistant from each other and the listening position, with tweeters aimed at ear-level height.
- In a home theater setup, surround speakers are ideally placed slightly behind the listening position, facing each other at a level higher than the listener's ears.
natural_image
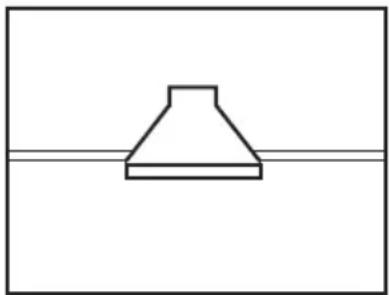
Simple line drawing of a conical shape above a horizontal line (no text or symbols)- If facing each other isn't feasible, they can be placed in a wall or ceiling behind the listener, facing forward.
- Surround speakers should provide ambient sound without drawing attention to themselves, accompanying the main program material from the front speakers.
- In Dolby Digital and DTS systems, tweeters should be aimed toward the listening position at ear-level height.
SPEAKER CONNECTIONS
CONNECTION TIPS
- Ensure that the wires for both speakers are of the same length.
- If one speaker is closer to the amplifier than the other, hide the excess wire behind the wall.
- Speakers and electronics terminals have corresponding (+) and (-) terminals, usually denoted by red for (+) and black for (-).
- Connect both speakers identically, with the (+) terminal on the speaker to the corresponding (+) terminal on the amplifier, and the (-) terminal on the speaker to the corresponding (-) terminal on the amplifier.
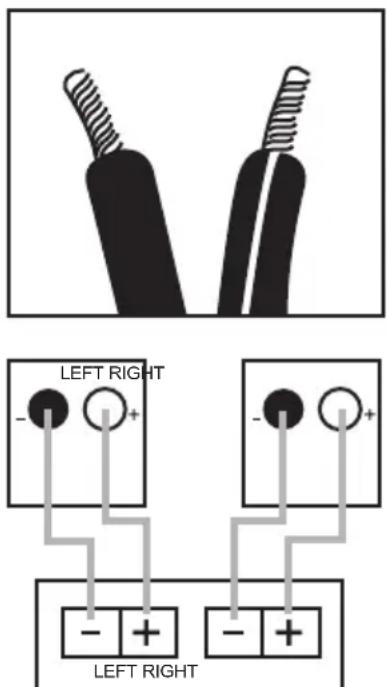
Front or Rear Speaker Outputs
- Incorrect wiring, such as being 'out of phase', can result in thin sound, weak bass, and a poor stereo image.
- With multi-channel surround sound systems, it's crucial to connect all speakers with the correct polarity to preserve proper ambiance and directionality of the program material.
EXISTING CONSTRUCTION IN-CEILING SPEAKERS
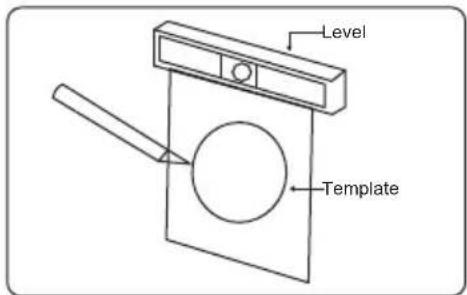
Cut the drywall.
Note: Always allow at least one-half inch between a wall stud and the speaker cutout, or the locking tabs will not be able to swivel into place.
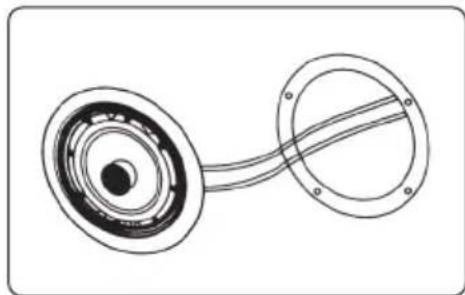
natural_image
Diagram of a mechanical component with concentric rings and a curved shaft (no text or symbols)Connect the speaker wires to the speaker.
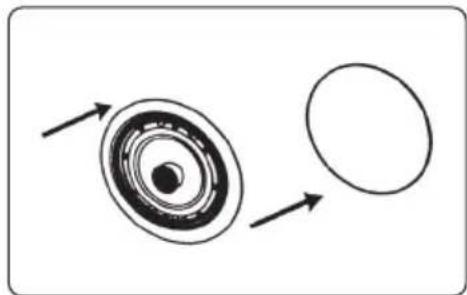
natural_image
Diagram showing a circular object with concentric rings and an outer circle, with directional arrows indicating rotation or flow (no text or symbols)Place the frame assembly in the wall.
Screw down each of the four Phillips head screws.
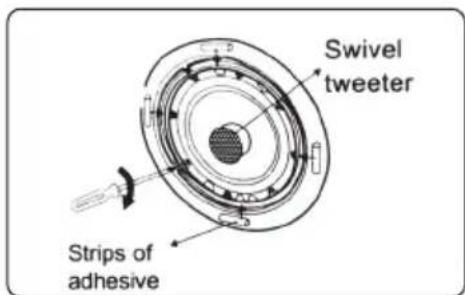
The locking tabs will swivel into place and secure the unit o the rear surface of the drywall. Put in the strips of adhesive to secure the grille.
natural_image
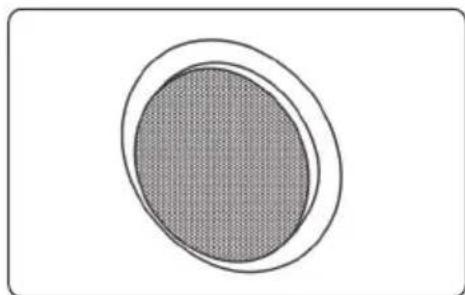
Simple diagram of a circular object with a textured fill, no text or symbols present.Replace the metal grille. for PDIC60/PDIC80 models:
natural_image
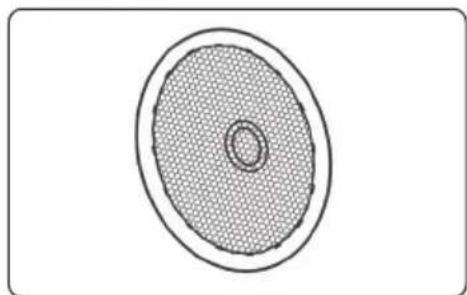
Simple diagram of a circular object with a textured fill and concentric rings, no text or symbols present.After installing the speaker grille, gently press on the mesh of the tweeter to adjust the position of the tweeter.
The in-ceiling speakers feature unique swivel mounts for the tweeters that enable you to aim the very directional high frequencies toward the listening position at ear-level height. Before installing the speaker grille, gently press on the outer edge of the tweeter mount to adjust the position of the tweeter. The tweeter will not swivel more than 15 degrees in any direction; do not attempt to force it to move further.

WARNING: Cancer and Reproductive Harm - www.P65warnings.ca.gov
INSTALLATION
The in-wall/in-ceiling speakers were designed to be easily installed. However, if you are unsure of your ability to properly install these loudspeakers, please contact your dealer or a qualified installer.
TOOLS NEEDED
- Pencil
- Utility knife
• Phillips #2 screwdriver
- Carpenter's level
- Measuring tape
• Awl
TROUBLESHOOTING
If there is no sound from any of the speakers:
- Check if the receiver/amplifier is powered on and a source is playing.
- Inspect all wires and connections between the receiver/amplifier and speakers, ensuring they are properly connected and not damaged.
- Review the proper operation of your receiver/amplifier.
If there is no sound coming from one speaker:
- Verify the "Balance" control settings on your receiver/amplifier.
- Check all wires and connections between the receiver/amplifier and speakers for proper connection and any damage.
If there is low (or no) bass output:
- Ensure correct polarity (+ and -) of connections to the left and right "speaker inputs."
- Consider adding a powered subwoofer to your system for improved bass.
- Verify correct configuration of your receiver/processor, especially in Dolby Digital or DTS modes, ensuring proper setup of subwoofer output and speaker size settings.
If the system plays at low volumes but shuts off as volume is increased:
- Inspect all wires and connections between the receiver/amplifier and speakers, ensuring proper connection and no damage.
- If using multiple pairs of main speakers, check if the impedance requirements of your receiver/amplifier are met.
Register Product
Thank you for choosing PyleUSA. By registering your product, you ensure that you receive the full benefits of our exclusive warranty and personalized customer support.
Complete the form to access expert support and to keep your PyleUSA purchase in perfect condition.

Model Number: PDIC61RD PDIC61RDBK PDIC61WT PDIC61RDSL
PyleUSA.com/register
natural_image
Two white circular speaker or fan components with mesh grille, shown from different angles (top and bottom) against a plain background.
For user guides in multiple languages,
SCAN THE QR CODE
and enter your model number
User Manuals available in
Italian | German | Polish | Turkish | Dutch

Phone: 1.718.535.1800
PyleUSA.com/ContactUs
natural_image
Simple line drawing of a person sitting at a desk with two gray bars above, connected by a dashed line (no text or symbols)


EN TECHO
natural_image
Simple line drawing of a conical shape above a horizontal line (no text or symbols)CONEXIONES DE ALTAVOCES
natural_image
Technical line drawing of a mechanical component with concentric rings and a curved shaft (no text or symbols)natural_image
Diagram showing a circular object with concentric rings and an outer circle, with directional arrows indicating rotation or flow (no text or symbols)natural_image
Simple diagram of a circular object with a shaded inner area, no text or symbols present.natural_image
Simple diagram of a speaker grille with concentric ovals and a central trough (no text or symbols)natural_image
Two white circular speaker or fan components with mesh patterns, shown from different angles (top and bottom) against a white background.
For user guides in multiple languages,
SCAN THE QR CODE
and enter your model number
User Manuals available in
Italian | German | Polish | Turkish | Dutch

Questions ou commentaires?
Phone: 1.718.535.1800
PyleUSA.com/ContactUs
POSITIONNEMENT DES ENCEINTES
ENCEINTES FRONTALES ENCEINTES ARRIÈRE
natural_image
Simple line drawing of a person sitting at a desk with two gray bars above, connected by a dashed line (no text or symbols)


AU PLAFOND
natural_image
Simple line drawing of a conical shape above a horizontal line (no text or symbols)BRANCHEMENTS DES HAUT-PARLEURS
CONSEILS DE CONNEXION
Front or Rear Speaker Outputs
natural_image
Technical line drawing of a mechanical component with concentric rings and a curved shaft (no text or symbols)natural_image
Diagram showing a circular object with concentric rings and an outer circle, with arrows indicating direction (no text or symbols)natural_image
Simple diagram of a circular object with a textured fill, no text or symbols presentnatural_image
Simple diagram of a speaker grille with concentric ovals and central trough (no text or symbols)If the system plays at low volumes but shuts off as volume is increased:
- Inspect all wires and connections between the receiver/amplifier and speakers, ensuring proper connection and no damage.
- If using multiple pairs of main speakers, check if the impedance requirements of your receiver/amplifier are met.
Register Product
Thank you for choosing PyleUSA. By registering your product, you ensure that you receive the full benefits of our exclusive warranty and personalized customer support.
- Home In-Wall/Ceiling Speakers
- PYLE
- USER GUIDE
- PRODUCT DESCRIPTION
- WHAT'S IN THE BOX:
- SPEAKER PLACEMENT
- FRONT SPEAKERS REAR SPEAKERS
- IN-CEILING
- SPEAKER CONNECTIONS
- CONNECTION TIPS
- EXISTING CONSTRUCTION IN-CEILING SPEAKERS
- INSTALLATION
- TOOLS NEEDED
- TROUBLESHOOTING
- If there is no sound from any of the speakers:
- If there is no sound coming from one speaker:
- If there is low (or no) bass output:
- If the system plays at low volumes but shuts off as volume is increased:
- Register Product
- EN TECHO
- CONEXIONES DE ALTAVOCES
- POSITIONNEMENT DES ENCEINTES
- ENCEINTES FRONTALES ENCEINTES ARRIÈRE
- AU PLAFOND
- BRANCHEMENTS DES HAUT-PARLEURS
- CONSEILS DE CONNEXION
Brand : Pyle
Model : Pro PDIC61RD
Category : Loudspeaker