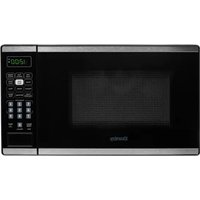
DMW749SS - Microwave Oven DANBY - Free user manual and instructions
Find the device manual for free DMW749SS DANBY in PDF.
| Product type | Microwave oven |
| Brand | Danby |
| Model | DMW749SS |
| Country of origin | China (estimated) |
| Warranty | 1 year (standard) |
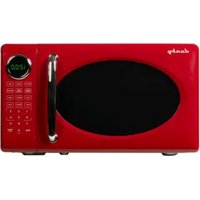
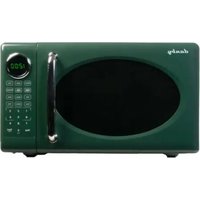
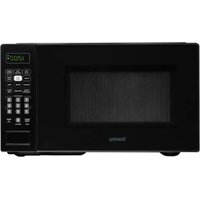
| Color | Stainless steel |
| Dimensions (W x H x D) | 51 x 30 x 41 cm (estimated) |
| Weight | 14 kg (estimated) |
| Power supply | 120 V ~ 60 Hz |
| Microwave power | 1000 W (estimated) |
| Capacity | 26 liters (estimated) |
| Control type | Electronic with touch keys and digital display |
| Cooking functions | Weight cooking, weight defrost, quick defrost, two-step cooking, reheating, popcorn, pizza, potato, beverage, frozen dinner |
| Memory function | Yes (for cooking sequences) |
| Timer | Yes, independent of cooking |
| Built-in clock | Yes, 12/24 h display |
| Turntable | Yes, removable glass |
| Child lock | Yes |
| Cleaning | Interior and exterior with damp cloth; turntable and ring dishwasher-safe |
| Spare parts | Bulb, turntable, roller ring available from manufacturer |
| After-sales service | Danby authorized service center, phone 1-800-263-2629 |
Frequently Asked Questions - DMW749SS DANBY
User questions about DMW749SS DANBY
0 question about this device. Answer the ones you know or ask your own.
Ask a new question about this device
Download the instructions for your Microwave Oven in PDF format for free! Find your manual DMW749SS - DANBY and take your electronic device back in hand. On this page are published all the documents necessary for the use of your device. DMW749SS by DANBY.
USER MANUAL DMW749SS DANBY
CAUTION: Read and follow all safety rules and operating instructions before first use of this product.
Care and Maintenance 12
Warranty 13
FOURÀMICRO-ONDES
Bienvenue 14
Welcome to the Danby family. We're proud of our quality products and we believe in dependable service. You'll see it in this easy to use manual and you'll hear it in the friendly voices of our consumer service department.
Tel: 1-800-26-Danby
(1-800-263-2629)
Best of all, you'll experience these values each time you use your microwave. That's important, because your new microwave will be part of your family for a long time.
Write down the model and serial numbers here. They are on a label located on the back of the oven.
Model Number
Serial Number
Date Purchased
Staple your receipt to this manual. You will need it to obtain service under warranty.
NEED HELP?
Before you call for service, there are a few things you can do to help us serve you better...
Read this manual:
It contains instructions to help you use and maintain your microwave properly.
If you received a damaged oven:
Immediately contact the dealer (or builder) that sold you the oven.
Save time and money:
Check the section titled "Troubleshooting" before calling. This section helps you solve common problems that might occur. If you do need service, you can relax knowing help is only a phone call away.
Tel: 1-800-26-Danby
(1-800-263-2629)
IMPORTANT SAFETY INFORMATION
READ ALL SAFETY INFORMATION BEFORE USING PRECAUTIONS TO AVOID POSSIBLE EXPOSURE TO EXCESSIVE MICROWAVE ENERGY
For your safety the information in this manual must be followed to minimize the risk of fire or explosion or to prevent property damage, personal injury or loss of life.
Do Not Attempt to operate this oven with the door open since open-door operation can result in harmful exposure to microwave energy. It is important not to defeat or tamper with the safety interlocks.
Do Not Place any object between the oven front face and the door or allow soil or cleaner residue to accumulate on sealing surfaces.
Do Not Operate the oven if it is damaged. It is particularly important that the oven door close properly and that there is no damage to the:
1 door (bent),
2 hinges and latches (broken or loosened),
3 door seals and sealing surfaces.
The Oven Should Not be adjusted or repaired by anyone except properly qualified service personnel.
FEDERAL COMMUNICATIONS COMMISSION RADIO FREQUENCY INTERFERENCE STATEMENT (U.S.A. ONLY)
This equipment generates and uses ISM frequencies and if not installed and used properly, that is in strict accordance with the manufacturer's instructions, may cause interference to radio and television reception. It has been type-tested and found to comply with limits for ISM Equipment pursuant to Part 18 of FCC Rules, which are designed to provide reasonable protection against such interference in a residential installation.
However, there is no guarantee that interference will not occur in particular installations. If this equipment does cause interference to radio or television reception, which can be determined by turning the equipment off and on, the user is encouraged to try to correct the interference by one or more of the following:
- Reorient the receiving antenna of radio or television.
- Relocate the microwave oven with respect to the receiver.
- Move the microwave oven away from the receiver.
- Plug the microwave into a different outlet so that microwave and receiver are on different branch circuits.
The Manufacturer is not responsible for any radio or TV interference caused by UNAUTHORIZED MODIFICATION to this microwave oven. It is the responsibility of the user to correct such interference.
SAVE THESE INSTRUCTIONS
IMPORTANT SAFETY INFORMATION (cont'd)
WARNING
To reduce the risk of fire, burns, electric shock, injury to persons or exposure of excessive microwave energy when using your appliance, follow basic precautions, including the following sections.
SAFETY PRECAUTIONS
- Read and follow the specific "Precautions to Avoid Possible Exposure to Excessive Microwave Energy" on page 3.
- This appliance must be grounded. Connect only to a properly grounded outlet. See "Grounding Instructions" section on page
- Do not operate this appliance if it has a damaged power cord or plug, if it is not working properly, or if it has been damaged or dropped.
- Do not cover or block any openings on the appliance.
- Use this appliance only for its intended use as described in this manual. Do not use corrosive chemicals or vapors in this appliance.
- This microwave oven is specifically designed to heat, dry or cook food, and is not intended for laboratory or industrial use.
- Some products such as whole eggs and sealed containers - for example, closed glass jars- may explode and should not be heated in this oven.
- Do not store this appliance outdoors.
- Do not use this product near water-for example, in a wet basement, near a swimming pool or near a sink.
-
Keep power cord away from heated surfaces.
-
Do not immerse power cord or plug in water.
- See door surface cleaning instructions in the Care and Maintenance section(s) of this manual.
- This appliance should be serviced only by qualified service personnel. Contact nearest authorized service facility for examination, repair or adjustment.
- As with any appliance, close supervision is necessary when used by children.
To reduce the risk of fire in the oven cavity:
- Do not overcook food.
- Carefully attend appliance if paper, plastic or other combustible materials are placed inside the oven while cooking.
- Remove wire twist-ties and metal handles from paper or plastic containers before placing them in the oven.
- Do not use the oven for storage purposes. Do not leave paper products, cooking utensils or food in the oven when not in use.
-
Do not use the microwave to dry newspapers.
-
If materials inside oven should ignite, keep the oven door closed, turn the oven off and disconnect the power at the fuse or circuit breaker panel. If the door is opened, the fire may spread.
IMPORTANT SAFETY INFORMATION (cont'd)
SPECIAL NOTES ABOUT MICROWAVING
ARCING
If you see arcing, press the "STOP/Clear" button and correct the problem.
Arcing is the microwave term for sparks in the oven. Arcing is caused by:
Metal or foil touching the side of the oven.
- Foil not molded to food (upturned edges act like antennae).
- Metal, such as twist-ties, poultry pins, or gold-rimmed dishes, in the microwave.
Recycled paper towels containing small metal pieces being used in the microwave.
FOODS
- Only cook popcorn in your microwave oven using a special microwave popcorn accessory dish, unless you use popcorn labeled for use in microwave ovens.
- Some products- such as whole eggs (with shell), sealed containers, and closed jars - will explode and should not be heated in this microwave oven. Heating these products in the microwave oven could result in injury.
- Do not boil eggs in a microwave oven. Pressure will build up inside egg yolk and will cause it to burst, possibly resulting in injury.
- Operating the microwave with no food inside for more than a minute or two may cause damage to the oven and could start a fire. It increases the heat around the magnetron and can shorten the life of the oven.
- Foods with unbroken outer "skin" such as potatoes, hot dogs, sausages, tomatoes, apples, chicken livers and other giblets, and egg yolks should be pierced to allow steam to escape before cooking.
SAFETY FACT: SUPERHEATED WATER
Microwaved water and other liquids do not always bubble when they reach the boiling point; they can actually get superheated and not bubble at all. Superheated liquid can bubble up when it is moved or when something like a spoon or tea bag is put into it. To prevent this from happening and causing injury, do not heat any liquid for more than 2 minutes per cup. After heating, let the cup stand in the microwave for 30 seconds before moving it or putting anything into it. Avoid heating baby food in glass jars, even with the lid off. Make sure all infant food is thoroughly cooked. Stir food to distribute the heat evenly. Be careful to prevent scalding when warming formula. The container may feel cooler than the milk really is. Always test the milk before feeding the baby.
- Spontaneous boiling- Under certain circumstances, liquids may start to boil during or shortly after removal from the microwave oven. To prevent burns from splashing liquid, we recommend the following:
Before removing the container from the oven, allow the container to stand in the oven for 30 to 40 containers such as soft drink bottles, wine flasks and especially narrow-necked coffee cups. Even if the container is opened, excessive steam can build up and cause it to burst or overflow.
-
Don't defrost frozen beverages in narrow-necked bottles (especially carbonated beverages). Even if the container is opened, pressure can build up. This can cause the container to burst, possibly resulting in injury.
-
Hot foods and steam can cause burns. Be careful when opening any containers of hot food, including popcorn bags, cooking pouches and boxes. To prevent possible injury, direct steam away from hands and face.
- Do not overcook potatoes. They could dehydrate and catch fire, causing damage to your oven.
- Cook meat and poultry thoroughly- meat to at least an INTERNAL temperature of 160^ (71.1^) , and poultry to at least an INTERNAL temperature of 180^ (82.2^) . Cooking to these temperatures usually protects against food borne illness.
IMPORTANT SAFETY INFORMATION (cont'd)
MICROWAVE-SAFE COOKWARE
SPECIAL NOTES ABOUT MICROWAVING
Make sure all cookware used in your microwave oven is suitable for microwaving. Most glass casserole, cooking dishes, measuring cups, custard cups, pottery or china dinnerware which do not have metallic trim or glaze with a metallic sheen can be used. Some cookware will be labeled "suitable for microwaving".
-
If you use a meat thermometer while cooking, make sure it is safe for use in microwave ovens.
-
Do not use recycled paper products. Recycled paper towels, napkins, and waxed paper can contain metal flecks which may cause arcing or ignite. Paper products containing nylon or nylon filament should be avoided, as they may also ignite.
-
Not all plastic wrap is suitable for use in microwave ovens. Check the package for proper use.
-
Some styrofoam trays (like those that meat is packaged on) have a thin strip of metal embedded in the bottom. When microwaved, the metal can burn the floor of the oven, or ignite a paper towel.
-
Cookware may become hot because of heat transferred from the heated food. Pot holders may be needed to handle the cookware.
-
"Boilable" cooking pouches and tightly closed plastic bags should be slit, pierced, or vented as directed by package. If they are not, plastic could burst during or immediately after cooking, possibly resulting in injury. Also, plastic storage containers should be at least partially uncovered because they form a tight seal. When cooking with containers tightly covered with plastic wrap, remove covering carefully and direct steam away from hands and face.
-
Paper towels, waxed paper, and plastic wrap can be used to cover dishes in order to retain moisture and prevent splattering. Be sure to vent plastic wrap so steam can escape.
How to test for a microwave-safe dish:
1) Place in the oven both the dish you are testing and a glass measuring cup filled with 1 cup of water.
2) Set the measuring cup either in or next to the dish.
3) Microwave 1 minute on high power.
If the dish heats, it should not be used for microwaving. If the dish remains cool and only the water in the cup heats, then the dish is microwave-safe.
- Use foil only as directed in this manual. TV dinners may be microwaved in foil trays less than 3/4 high; remove the top foil cover and return the tray to the box. When using foil in the microwave, keep the foil at least 1 inch away from the sides of the oven.
- Plastic cookware designed for microwave cooking is very useful, but should be used carefully. Even microwave-safe plastic may not be as tolerant of overcooking conditions as are glass and ceramic materials, and may soften or char if subjected to short periods of over-cooking. In longer exposure to over-cooking, the food and cookware could ignite.
Follow these guidelines:
1) Use Microwave-safe plastics only and use them in strict compliance with the cookware manufacturer's recommendations.
2) Do not microwave empty containers.
3) Do not permit children to use plastic cookware without complete supervision.
GROUNDING INSTRUCTIONS
WARNING: Improper use of the grounding plug can result in a risk of electric shock.
This appliance must be grounded. In the event of an electrical short circuit, grounding reduces the risk of electric shock by providing an escape wire for the electric current. This appliance is equipped with a power cord having a grounding wire with a grounding plug. The plug must be plugged into an outlet that is properly installed and grounded.
Consult a qualified electrician or service technician if the grounding instructions are not completely understood, or if doubt exists as to whether the appliance is properly grounded. If the outlet is a standard 2-prong wall outlet, it is your personal responsibility and obligation to have it replaced with a properly grounded 3-prong wall outlet.
DO NOT under any circumstances cut or remove the third (ground) prong from the power cord.
DO NOT use an adapter plug with this appliance.
DO NOT use an extension cord with this appliance. If the power cord is too short, have a qualified electrician or service technician install an outlet near the appliance.
For best operation, plug this appliance into its own electrical outlet to prevent flickering of lights, blowing of fuse, or tripping of circuit breaker.
OPERATION
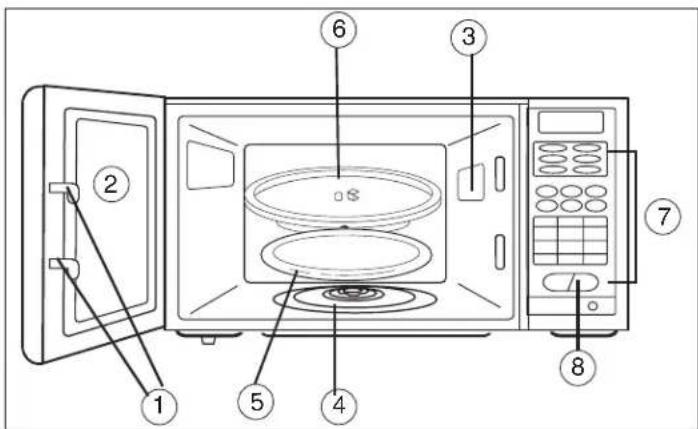
1) Door Safety Lock System
2) Oven Window: Screen allows cooking to be viewed while keeping microwave energy confined in oven.
3) Turntable Shaft
4) Roller Ring
5) Removable Glass Turntable: Turntable and support must be in place when using the oven. The turntable may be removed for cleaning.
6) Control Panel
7) Electronic Display
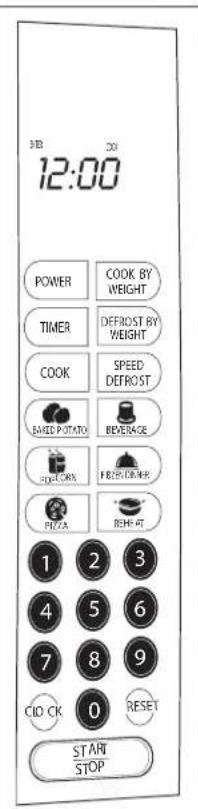
CONTROLS
- DISPLAY: When set, displays clock/timer, shows cooking function (COOK, DEFROST, etc.) and step-by-step word prompts (which tell you which pad to touch) for easy oven setting.
- BAKED POTATO: Automatic program designed for best microwaving potatoes. For small potatoes (3.5-5 oz.) touch once, touch AMOUNT (1 to 4) then START. For large potatoes (6-8 oz.) tap pad twice, touch AMOUNT (1-4) then START.
POPCORN: Automatic one-step setting for a 1/2-3 oz, bag of microwave popcorn. Touch POPCORN pad, then START. See pages on "POPCORN" to reset control for packages of different ounce weight. - PIZZA: Automatic program designed for pizza. Touch once then touch START for reheating 1 slice; tap pad twice, then START for frozen whole microwave pizza.
- BEVERAGE: Automatic setting for cups or mugs of hot beverages (tea/coffee). For cup size (4-6 oz.), touch pad once, touch AMOUNT (1-4) then START. For larger mugs (7-9 oz.), tap pad twice, touch AMOUNT (1-4) then START.
- REHEAT: Automatically programs oven to heat a plate of food evenly. Touch REHEAT pad then START.
- NUMBER PADS: Touch to set cook, speed defrost, timer and clock.
COOK PAD: Cook at one power level for a period of time, then automatically switch to another power level for the remaining cook time.
FROZEN DINNER: Automatic program designed for best reconstituting a variety of frozen single-serving entrees and dinners. For smaller single serving entree (5-7 oz.) touch once, touch AMOUNT then START. For a single larger (TV dinner type) frozen dinner (8-10 oz.) tap pad twice then START.
- POWER PAD: Oven automatically cooks at high power. For a lower power level, set cook time, touch POWER and enter number (1-9) for lower power level.
- TIMER PAD: Independent kitchen timer. Set any time even while oven is operating. Touch TIMER pad, set time then START. Touch RESET to cancel.
COOK BY WEIGHT: Touch COOK pad, enter weight of meat accurately, then START. After partial cooking, oven stops, leaving time on display. Turn over meat when oven stops after partial cooking. Rc-touch START to finish.
DEFROST BY WEIGHT: Automatic defrosting of large meats. Controls power level to thaw without excessive outside warming.
- speed defrost: Automatically programs lower power levels for even defrosting. Touch SPEED DEFROST, set time and START.
CLOCK: Touch pad once, touch number pads and CLOCK to set clock.
- Reset: Touch to clear display of unused time after cooking, also to cancel timer.
- START/STOP PAD: Touch as final step in setting oven. Touch to stop microwaving while oven is in operation (re-touch to continue timing shown on display). Will not stop timer.
SETTING
THE CLOCK A) Setting the clock when the microwave is plugged in:
- When the oven is first plugged into a wall outlet, touch the CLOCK pad once. The display will show 'ENTER CLOCK TIME'.
- Enter the correct time of day by touching the correct number pads. You must set at least 3 digits (one for hour(s) and two for minutes). For minutes less than 10, precede the 'minutes' digit with a 0. (ex. for 5 minutes past two, press 0205 for a time of 2:05). The colon will flash between hour and minute digits. If you prefer not to have the clock displayed, set the clock for 00:00 and the display will only show a colon (:). Touch CLOCK to lock in the time. Colon will stop flashing and clock will begin to keep current time.
OPERATING INSTRUCTIONS
CONTROLS (continued)
After clock has been set, the word prompt clock will always show on the display unless oven is in a cooking operation.
Changing the Clock Time:
-
Touch the CLOCK pad once. The display will show "ENTER CLOCK TIME".
-
Enter the correct time of day by touching the number pads. See Section A on previous page to complete setting the clock time.
SETTING THE CLOCK: If you MAKE A MISTAKE IN SETTING THE CORRECT TIME, start over by pressing the CLOCK pad twice.
To RECALL TIME OF DAY WHILE YOU ARE COOKING: press the CLOCK pad. Time of the day will be displayed for 3 seconds before returning to displaying the remaining cooking time.
In case of POWER FAILURE: when the power has been restored, the oven will be in a clock set mode. Follow the directions on page 11 for setting the clock.
BEEPS DURING OVEN SETTING:
ONE beep: Oven accepts the entry. Information has been entered in the correct sequence.
TWO beeps: Oven does not accept the entry. Check and try again.
SETTING THE OVEN TIMER: Timer works independent from cooking and can be set anytime for various kitchen tasks. Use oven timer though oven is also timing a microwave cooking function. Cooking time countdown will be temporarily replaced on the display while timer is being set. Enter the amount of time you wish to set by touching the correct number pads. Digit time is in minutes and seconds and set left to right. Set one digit (a 5 for 5 seconds) or up to four digits (2405 for 24 minutes, 5 seconds). ENTER TIMER remains on the display- Touch START/STOP pad. The word TIMER will flash and timer countdown will be seen on display for 3 seconds before cooking time is returned to display.
To STOP or RESET TIMER when cooking is not taking place, touch RESET pad. When SETTING TIMER DURING A COOKING OPERATION, take care to set timer correctly. Once the timer is set during cooking, setting cannot be changed without resetting the cooking function at the same time. Touching RESET will not allow you to change timer setting while cooking. When end of time has been reached, one long beep can be heard and timer will leave the display. If oven is not cooking, CLOCK and time of day (if set) will return to
the display. If oven is in cooking operation, one long beep can be heard and TIMER will leave display while oven is continuing cooking time countdown.
SETTING THE COOKING TIME & POWER LEVEL: When cooking at 100% power, simply set cook time by touching number pads (for example, 3 minutes: touch 3-0-0) and START. 100% power is automatically set. For 1-step cooking, you do not have to touch COOK pad before setting time.
TO COOK AT LOWER POWER LEVELS: After setting cook time, touch POWER pad then single digit representing the power level desired. Touch START pad. Since oven automatically assumes 100% power, you must switch power level (when desired) after setting cook time.
| Power Level | % of Power |
| 10 | 100 |
| 9 | 90 |
| 8 | 80 |
| 7 | 70 |
| 6 | 60 |
| 5 | 50 |
| 4 | 40 |
| 3 | 30 |
| 2 | 20 |
| 1 | 10 |
TWO-STAGE COOKING: Two-stage cook function allows you to cook a food at two different power levels with one time setting. For example, rice should be cooked in two stages. Stage 1 starts rice at 100% power for 5 minutes; Stage 2 completes cooking 10-12 minutes at 50% power level.
SET STAGE I: Assuming 100% power, just touch number pads corresponding to the desired length of first stage cooking time (most 2 stage recipes start with 100% power but you can also switch power levels after setting cook time.) DO NOT TOUCH START PAD.
SET STAGE 2: Touch COOK pad then enter proper cooking time and (lower) power level (most 2 stage recipes use lower power for second stage). Touch START pad. First stage of cooking begins. MEM (memory) word prompt shows on the display during Stage 1 Cooking, indicating that the oven is remembering that a second step (stage 2) has been programmed. After Stage 1 time has elapsed, signal may be heard, indicating the beginning of Stage 2.
AFTER TOTAL TIME HAS ELAPSED, 4 longbeeps sound and END appears in display. Touch RESET pad or open oven door to clear END before starting another cooking function.
OPERATING INSTRUCTIONS (cont'd)
CONTROLS (continued)
SETTING "SPEED DEFROST":
A) Speed Defrost automatically sets microwave oven power for quickest thawing of small to medium size foods. Speed Defrost works in conjunction with the Timer, so you must know how much time to set. Speed Defrost thawing times are usually fast enough that you stay close to oven and can attend to the food as it is defrosting. Many foods benefit from being turned over, rearranged or broken apart (if separate pieces are frozen together). This attention makes defrosting faster and more even.
"How do I know whether to set Speed Defrost or Defrost by Weight?" This is determined by the type of food being defrosted and amount of attention that must be paid to the food. The automatic-coded Defrost by Weight requires only turn-over of the meat. Touch SPEED DEFROST pad. Word prompts ENTER DEF TIME shows on the display.
Enter desired Speed Defrost time by touching correct number pads. Digital timer sets minutes and seconds from left to right so a single digit can be set (5 for 5 seconds) or up to 4 digits (2405 for 24 minutes 5 seconds). ENTER DEF remains on the display. Touch START/STOP pad. DEF flashes on the display and defrost time begins counting down.
AFTER TIME HAS ELAPSED signal sounds and END appears in display. Touch RESET pad or open door to clear END before starting another cooking function.
B) To set "SPEED DEFROST" and one or two-stage cooking sequentially: After setting SPEED DEFROST, oven can be programmed to automatically switch to One or Two-Stage cook. This feature is useful for frozen, moist casseroles and similar foods which can be stirred while reconstituting. After defrosting, cook at 100% power level, then reduce to lower settings until bubbling hot. Stir occasionally to break up and redistribute heat.
THESE ARE NORMAL:
- Outside of oven may feel warm.
- Steam may escape from oven or moisture in oven may be seen after cooking.
- Change in interior light intensity, and change in blower sound when lower power setting are used.
- TV or radio interference (similar to interference experienced in other small appliances) may be noticed. NONE OF THE ABOVE INDICATE A MALFUNCTIONING MICROWAVE.
INTERRUPT DEFROSTING (to stir food, turn it over, or provide other attention):
Either touch START/STOP pad or open the oven door. Unelapsed time will show on display; reclose the door and restart to continue. If no additional defrosting is required, touching RESET pad clears the display.
SETTING COOK BY WEIGHT: This feature is for roasting meats in the microwave. Its pre-set times and power levels give better results than microwaving at one power only, and it is easier to microwave meat with this setting than with cookbook instructions because you do not have to calculate "minutes per pound" cooking times. As soon as you enter the code (which tells the oven the type of meat) and the weight, the oven calculates cooking time. Meat must be defrosted and at refrigerated temperature to correspond with the pre-set times in this code. Meat-roast weights in about the 3 to 5 pound range microwave best, COOK BY WEIGHT code allows a setting lower than 3 lb. but no higher than 5 lb. Depending on the code, two beeps signal an error in setting a too-high weight. "Cook by Weight" programs the oven to stop after partial cooking, so meat won't overcook on one side. Turn meat over, then touch START pad to continue cooking.
- Touch COOK BY WEIGHT pad- Word prompt shows ENTER CODE on display. Select desired code from 1 through 3. Door frame (open the door to review) and chart at right describe types of food for each code. Enter the one-digit code by touching the correct number pad. Check weight of meat. Weight must be in pounds and ounces. If label gives weight in pounds only, change the fraction of a pound to ounces using chart on page 11. Enter weight. Word prompt ENTER shows in display and 0's show where LB and OZ should be entered. LB flashes until you enter pound(s) by touching correct number pad. When pound(s) has been entered, LB will stop flashing and OZ will flash. As soon as all these digits have been set, display will immediately show cook time.
OPERATING INSTRUCTIONS (cont'd)
CONTROLS (continued)
SETTING COOK BY WEIGHT (cont'd):
Ounce weights less than 10 must be preceded by a 0. As soon as three digits are set, display immediately shows cook time. Touch START/STOP to start oven, CODE flashes in display as time counts down. Interior light goes on and fan sound is heard. Signal sound after about 1/4 time. If necessary, check thin edges of meat and poultry for shielding (ie. check for aluminum foil layer if microwaving in original packaging). After partial cooking, oven beeps twice and stops. Interior light goes off but time remains on the display. This stop is to prevent meat from overcooking on one side before turning over. After turning meat over, touch START pad to resume the time on display and finish cooking. After total cooking time, 4 long beeps sound and END appears in display. Touch RESET or open oven door to clear END before starting another cooking function. Let roast stand for a few minutes before carving.
CONVERTING FRACTIONS OF A POUND TO OUNCES: Most meat packages show weight in pounds only. Convert fractions of a pound to ounces for COOK BY WEIGHT feature by using chart to the right.
| Food (lb) | Oz. |
| under .03 | 0 |
| .03 to .09 | 1 |
| .10 to .15 | 2 |
| .16 to .21 | 3 |
| .22 to .27 | 4 |
| .29 to .34 | 5 |
| .35 to .40 | 6 |
| .41 to .46 | 7 |
| .47 to .53 | 8 |
| .54 to .59 | 9 |
| .60 to .65 | 10 |
| .66 to .71 | 11 |
| .72 to .77 | 12 |
| .78 to .83 | 13 |
| .84 to .90 | 14 |
| .91 to .97 | 15 |
| .98 to 1.0 | 16 |
DEFROST & ONE STAGE COOKING
Before touching START pad, touch COOK pad, enter time using number pads and power if desired. Then touch START pad. MEM shows on the display until oven switches (beeps twice) to COOK. See page 9 for detailed information on Staged Cooking.
For Defrost and Two Stage Cook, follow steps above. Before touching START pad, enter two COOK programs, using a different (usually lower) power for the second COOK. MEM shows on the display during both Defrost and first COOK stage. Signal sounds when switching stages.
INTERRUPT DEFROSTING (to stir food, turn it over, or provide other attention): Either touch START/STOP pad or open the oven door. Unelapsed time will show on display; reclose the door and restart to continue. Or if no additional defrosting is required, touching RESET pad clears the display.
SETTING COOK BY WEIGHT: This feature is for roasting meats in the microwave. Its pre-set times and power levels give better results than microwaving at one power only, and it is easier to microwave meat with this setting than with cook book instructions because you do not have to calculate "minutes per pound" cooking times. As soon as you enter the code (which tells the oven the type of meat) and the weight, the oven calculates cooking time. Meat must be defrosted and at refrigerated temperature to correspond with the pre-set times in this code. Meat-roast weights in about the 3 to 5 pound range microwave best, COOK BY WEIGHT code allows a setting lower than 3 lb. but no higher than 5 lb. Depending on the code, two beeps signal an error in setting a too-high weight. "Cook by Weight" programs the oven to stop after partial cooking, so meat won't overcook on one side. Turn meat over, then touch START pad to continue cooking.
Touch COOK BY WEIGHT pad. Word prompt shows ENTER CODE on display. Select desired code from 1 through 3. Door frame (open the door to review) and conversion chart above describe types of food for each code. Enter the one-digit code by touching the correct number pad. Check weight of meat. Weight must be in pounds and ounces. If label gives weight in pounds only, change the fraction of a pound to ounces using chart above. Enter weight. Word prompt ENTER shows in display and 0's show where LB and OZ should be entered. LB flashes until you enter pound(s) by touching correct number pad. When pound(s) has been entered, LB will stop flashing and OZ will flash. As soon as all these digits have been set, display will immediately show cook time.
Ounce weights less than 10 must be preceded by a 0. As soon as three digits are set, display immediately shows cook time. Touch START/STOP to start oven, CODE flashes in display as time counts down. Interior light goes on and fan sound is heard. Signal sound after about 1/4 time. If necessary, check thin edges of meat and poultry for shielding. After partial cooking, oven beeps twice and stops. Interior light goes off but time remains on the display. Stop is to prevent meat overcooking on one side before turning over. After turning meat over, touch START pad to resume the time on display and finish cooking.
After total cooking time, 4 long beeps sound and END appears in display. Touch RESET oropen oven door to clear END before startinganother cooking function.Let roast stand fewminutes before carving.
- When oven switches power levels, you may observe change in lighting intensity and/or change in blower sound. This is normal.
OPERATING INSTRUCTIONS (cont'd)
SETTING SAFETY LOCK
The safety lock prevents unsupervised operation by little children. During idle mode, press and hold the RESET pad for 3 seconds to activate the child lock function. To cancel the child lock, press and hold the RESET pad for 3 seconds again in idle mode.
ONE TOUCH COOKING
ABOUT "ONE TOUCH"COOKING: Your oven has 6 "ONE TOUCH"cooking programs for microwaving popular foods. When selecting a "ONE TOUCH"setting, check visual guide on pad for correct setting. Where dots (. are shown on a "ONE TOUCH"pad, more than one size of food can be cooked. Three "ONE TOUCH"settings allow you to cook several amounts (one or more items) of the same food. These include the "FROZEN DINNER", "BAKED POTATO" and "BEVERAGE".
After you touch these pads, AMT (amount) appears on the display as a reminder to program the number of items you are microwaving into the ovens control. The categories which have dots corresponding to two sizes of foods include: "FROZEN DINNER", "BAKED POTATO", "PIZZA" AND "BEVERAGE". In each "ONE-TOUCH COOK" category, smaller size food is set by touching pad once. One dot (. ) below picture of smaller size food signifies one touch of the pad. The large size can be set by tapping the picture pad twice. Two dots (. ) below the picture of large size food signifies two taps of the pad. Where AMT appears with "ONE TOUCH" settings, setting a greater number of items than allowed will result in two beeps, signaling an error. The following pages give the maximum number of items allowed for each setting.
SETTING "POPCORN": The "POPCORN" control automatically sets the correct COOK time for a 3 1/2oz. bag of microwave popcorn. YOU CAN CHANGE THE POPCORN SETTING TO "REMEMBER" A DIFFERENT COOK TIME. You may wish to do this if your favorite size of popcorn is something other than 3 1/2 oz. Sizes from the individual 2 oz.size up to the larger "family size" packages are now available. If you do change the popcorn setting, however, the oven will continue to select the new setting each time you touch the POPCORN pad until you reset it again.
TO AVOID DISCOLRATION ON YOUR OVEN TURNTABLE, set microwave popcorn packages on a microwaveable saucer or other small plate. The "this side down" side of microwave popcorn bags contains a heat-absorbing lining which gets very hot. Placing a saucer between the bag and the turntable prevents the bags dyes from staining the turntable when hot.
TIPS TO KNOW ABOUT MICROWAVE POPCORN:
Check popcorn as it pops and stop when pops slow down to 3 seconds apart. Do not try to re-pop unpopped kernels. Unless you have a microwave recommended utensil for popping corn, use only commercial bags of microwave popcorn. Using glass or ceramic dishes or paper bags may cause harm to oven. Be careful when handling hot bags of popcorn. To prevent steam burns, keep hands to sides of package, rather than the top. Especially warn children of high heat in popcorn bags.
1) Touch POPCORN Pad, COOK appears on the display, along with time setting of 2:40 (2 min.40 sec.). This pre-set cook time has been coordinated with the oven's wattage for best results of a regular-size 3 1/2 oz. bag of popcorn.
2) Touch START pad. Word prompt COOK flashes while the timer counts down during cooking operation. Interior light goes on and fan sound is heard. Turntable rotates (for single popcorn bag, leaving turntable on gives best cooking results).
3) To reset POPCORN time: Tap POPCORN pad twice. ENTER TIME appears on display. Touch number pads to enter minutes and seconds. Touch START pad. This new cook time will remain whenever you use the POPCORN pad until your reset it.
OPERATING INSTRUCTIONS (cont'd)
ONE TOUCH COOKING (cont'd)
SETTING "BAKED POTATO": The "POTATO" automatic setting allows you to easily set the microwave to cook a variety of potatoes. A built-in standing time helps equalize the potatoes temperature during the microwave process. Touch once for small to average (3.5 to 5 oz.) potatoes. Tap twice for 6 to 8 oz.dinner-size. After you select the size of potato, you must set the number of potatoes you are cooking. With the POTATO pad, you can cook up to 4 potatoes of either size.:
1) For 4 to 6 oz. potatoes, touch POTATO pad once. ENTER AMT appears on display. Enter number of potatoes (up to 4) by touching number pads from 1 to 4. Cook times for small-medium potatoes are as follows: 1 potato: 4 min.11 sec., 2 potatoes: 7 min.34 sec., 3 potatoes: 10 min.46 sec., 4 potatoes: 13 min.20 sec.
2) For large 8 to 10 oz. potatoes, tap POTATO pad twice. ENTER AMT and number of potatoes as described above. Cook times for large potatoes are as follows:
1 potato: 6 min.32 sec., 2 potatoes: 11 min.01 sec., 3 potatoes: 15 min.23 sec., 4 potatoes: 19 min. 29 sec.
3) CODE and the correct amount of cook time depending on amount (number) of potatoes, appears on display. Touch START pad. CODE flashes on display and time begins to countdown.
SETTING "PIZZA": With the automatic PIZZA pad you can reheat single serving of leftover cooked pizza or a whole frozen microwave pizza. The amount depends on how you set the pad. For a thick slice (or two thin ones-about 4 or 5 ounces total) of reheated pizza, touch the PIZZA pad once. For a whole frozen microwavepizza, tap the PIZZA pad twice.
1) REHEATING A SLICE (OR TWO THIN ONES) OF LEFTOVER PIZZA: Touch PIZZA pad once. CODE and 0;45 (45 sec.) appears.
2) HEATING A WHOLE PROZEN MICROWAVE PIZZA: Tap PIZZA pad twice. CODE and 2:40 (2min.40 sec.) appears.
3) Touch START. CODE flashes on display and cook time begins to count down.
SETTING "BEVERAGE": The BEVERAGE pad is automatically programmed to let you microwave cups of beverages (tea/coffee) in two sizes. For small "coffee cup" serving, touch the BEVERAGE pad once. With large coffee mugs, tap the BEVERAGE pad twice. After you have selected the coffee cup size, you must set amount of cups to be microwaved. If you skip the AMOUNT step, the oven assumes 1 cup.
1) For 5 to 7 oz.coffee cups, touch BEVERAGE pad once. ENTER AMT (amount) appears on display. Enter number of cups (up to 4) by touching number pads from 1 to 4. Cook times for coffee cups are as follows: 1 cup: 1 min., 2 cups: 1 min.50 sec., 3 cups: 2 min.40 sec., 4 cups: 3 min.30 sec.
2) For the large 7 to 9 oz.coffee mugs, tap BEVERAGE pad twice. ENTER AMT (amount) appears on display. Enter number of mugs (up to 4) by touching number pads from 1 to 4. Cook times for coffee mugs are as follows: 1 mug: 1 min.35sec., 2 mugs: 3 min.05 sec., 3 mugs: 5 min., 4 mugs: 6 min.30 sec.
3) CODE and the correct amount of cook time (depending on amount of cups or mugs) appearson display. Touch START. CODE flashes on display and time begins to count down.
SETTING "FROZEN DINNER": This automatic setting is very useful for easily microwaving your favorite single-serving entrees and dinners. This setting may take slightly longer than the microwave time given on the package. That's because of the built-in standing time included in the oven's automatic program. The program's specially designed sequence of power levels plus the automatic standing time allows one setting to microwave a great variety of frozen foods.
1) MICROWAVE 1 OR 2 SMALL SIZE (7~9 oz.) FROZEN DINNERS: Touch FROZEN DINNER pad once. ENTER AMT (amount) appears on the display. You can skip the amount step for 1 entree, just touch START. For 2 entrees, touch the "2" number pad. Cook times for small-size entrees are as follows: 1 entree: 4 min.15 sec., 2 entrees: 7 min.30 sec.
2) MICROWAVING ONE LARGER 10~12 oz. FROZEN PLATED DINNER: Tap FROZEN DINNER pad twice. ENTER AMT (amount) appears on the display. You can skip the amount step for 1 entree, just touch START. For 2 entrees, touch the "2" number pad. Cook times for small-size entrees are as follows: 1 entree: 6 min., 2 entrees: 11min..
3) CODE and correct amount of cook time appears on display. Touch START pad. CODE flashes on display and time begins to count down.
OPERATING INSTRUCTIONS (cont'd)
ONE TOUCH COOKING (cont'd)
SETTING "REHEAT": This setting lets you reheat a dinner plateful of chilled leftovers with good results. Its automatic program has been designed to tolerate a large variety of food combinations when arranged together.
Remember some of the following tips when preparing foods to reheat on the REHEAT setting. How you arrange foods on the plate affects how evenly they cook. Consider the amount and density of each food. DENSE FOODS SUCH AS MEATS (large or bulky pieces or thick slices of precooked meats) AND COMPACT VEGETABLE such as mashed potatoes or potatoes au gratin should be placed around edges of plate and spread out as much as possible to expose them to microwave energy. LARGE AMOUNT OF FOODS should be spread out to receive more microwave energy than smaller amounts. Covering dry meat slices with sauce or gravy also helps speed their heating. LIGHT, AIRY FOODS such as rice, small pieces of vegetables, delicate seafood, small chicken nuggets, or small amounts of food absorb microwaves quickly. Place these in the center of the plate where they will be somewhat shielded by foods on the outside edges. TEMPERATURE OF FOODS determine how evenly they cook together. A can of freshly opened vegetables (food is at room temperature) will probably heat more quickly than foods which are started from the refrigerator. DELICATE DINNER ROLLs, if desired, should be added only the last few seconds. COVER plate with wax paper to hold steam around most foods. EXCEPTION: Do not cover to warm rare meats and foods with crisp exteriors.
1) Touch REHEAT pad. CODE appears on the display and 3:00 (3 min.) is set. This coded setting includes three automatic cooking levels which allow for even cooking of many food combinations and types.
2) Touch START pad. CODE flashes on display and cooking time begins counting down.
3) When cooktime has elapsed, END appears on display. Open oven door or touch RESET pad to return clocktime (if set) to display.
CARE AND MAINTENANCE
1) Turn off the oven and remove the power plug from the wall socket before cleaning.
2) Keep the inside of the oven clean. When food splatters or spilled liquids adhere to oven walls, wipe with a damp cloth. Mild detergent may be used if the oven gets very dirty. Avoid the use of spray and other harsh cleaners as they may stain, streak or dull the door surface.
3) The outside surfaces should be cleaned with a damp cloth. To prevent damage to the operating parts inside the oven, water should not be allowed to seep into the ventilation openings.
4) Wipe the window on both sides with a damp cloth to remove any spills or spatters.
5) Do not allow the control panel to become wet. Clean with a soft, damp cloth. When cleaning the control panel, leave oven door open to prevent oven from accidentally turning on.
6) If steam accumulates inside or around the outside of the oven door, wipe with a soft cloth. This may occur when the microwave oven is operated under high humidity conditions; this is normal.
7) It is occasionally necessary to remove the glass tray for cleaning. Wash the tray in warm sudsy water or in a dishwasher.
8) The roller ring and oven floor should be cleaned regularly to avoid excessive noise. Simply wipe the bottom surface of the oven with mild detergent. The roller ring may be washed in mild sudsy water or dishwasher. When removing the roller ring from cavity floor for cleaning, be sure to replace in the proper position.
9) Remove odors from your oven by combining a cup of water with the juice and skin of one lemon in a deep bowl, microwave for 5 minutes. Wipe thoroughly and dry with a soft cloth.
10) When it becomes necessary to replace the oven light, please consult a dealer to have it replaced.
11) When cleaning surfaces of door and oven that comes together on closing the door, use only mild, non abrasive soaps or detergents applied with a sponge or soft cloth.
BIENVENCE
COMMANDE POTATO (POMME DE TERRE AU FOUR):
For service, contact your nearest service depot or call:
1-800-26-Danby
(1-800-263-2629)
to recommend a depot in your area.
Microwave Oven
The model number can be found on the serial plate located on the back panel of the unit.
All repair parts available for purchase or special order when you visit your nearest service depot. To request service and/or the location of the service depot nearest you, call the TOLL FREE NUMBER.
When requesting service or ordering parts, always provide the following information:
Product Type
- Model Number
- Part Description