
HLC1700AXW - Washing machine HAIER - Free user manual and instructions
Find the device manual for free HLC1700AXW HAIER in PDF.
Download the instructions for your Washing machine in PDF format for free! Find your manual HLC1700AXW - HAIER and take your electronic device back in hand. On this page are published all the documents necessary for the use of your device. HLC1700AXW by HAIER.
USER MANUAL HLC1700AXW HAIER
- Read all instructions before using the appliance.
Use this appliance only for its intended purpose as described in this use and care guide.
- Do not use this appliance for commercial clothes washing. To reduce the risk of fire, electric shock, or injury to persons when using your appliance, follow basic precautions, including the following: IMPORTANT SAFETY INSTRUCTIONS
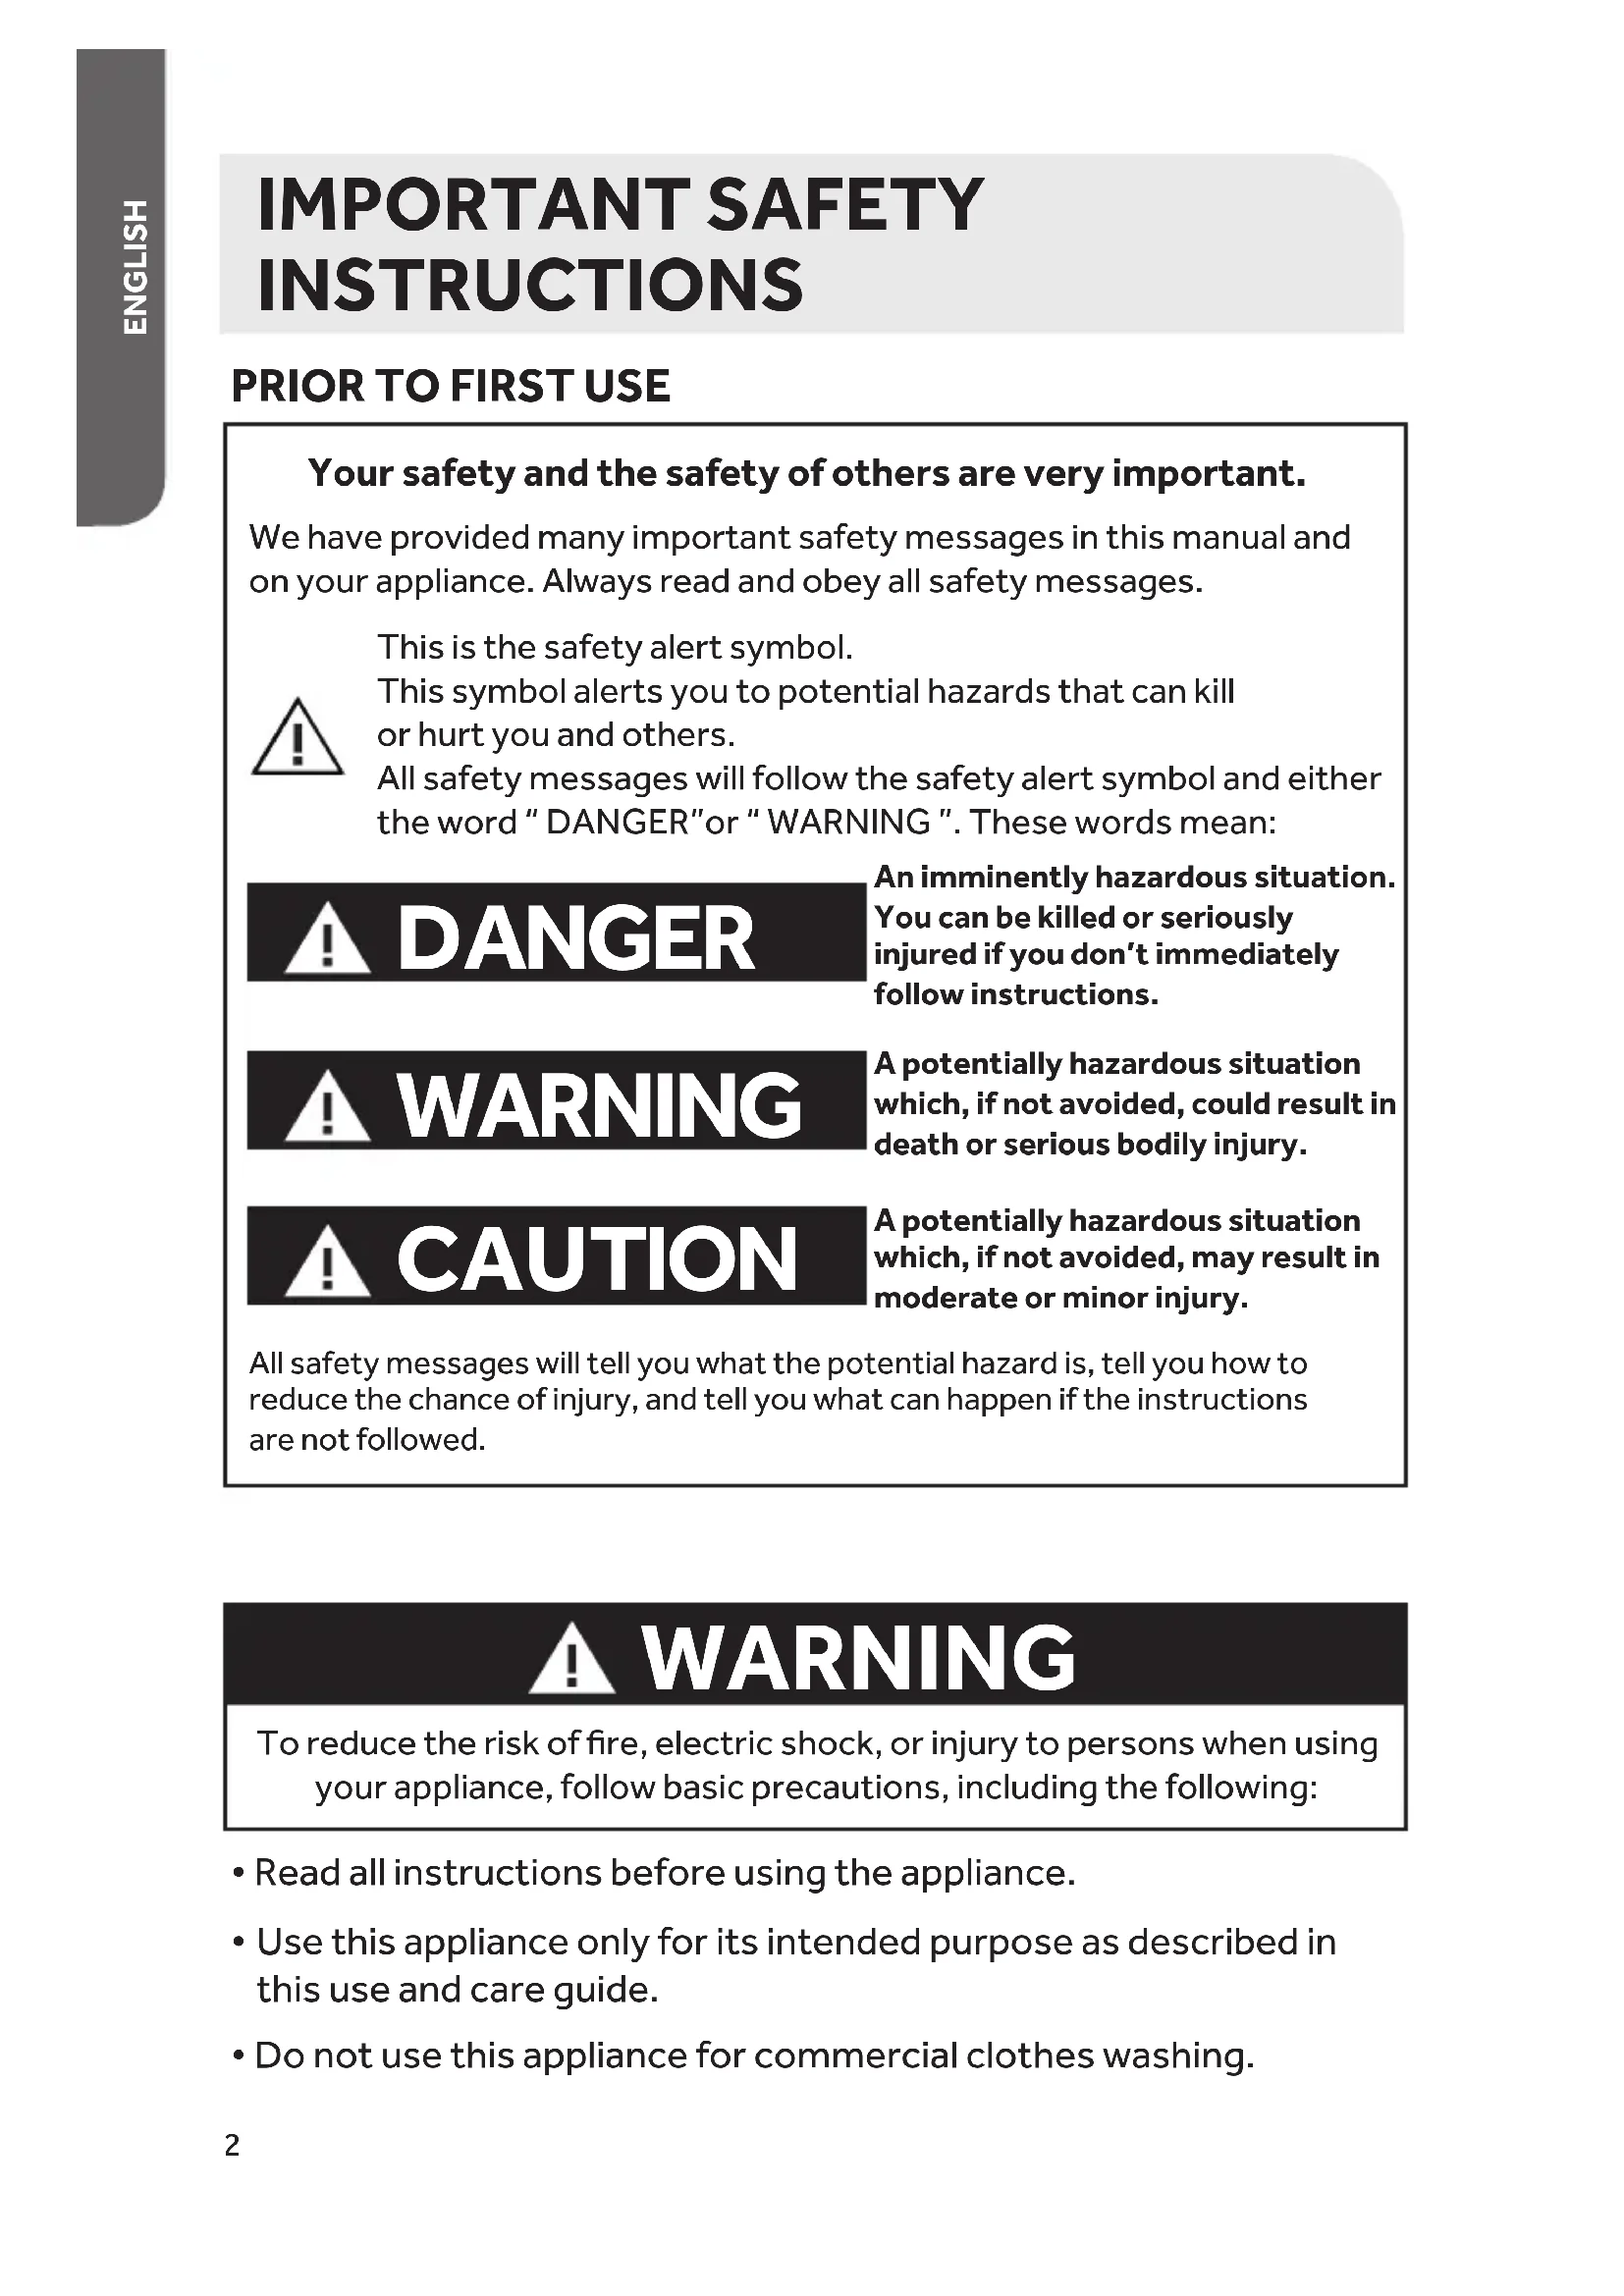
WARNING DANGER Your safety and the safety of others are very important. We have provided many important safety messages in this manual and on your appliance. Always read and obey all safety messages. This is the safety alert symbol. This symbol alerts you to potential hazards that can kill or hurt you and others. All safety messages will follow the safety alert symbol and either the word “ DANGER”or “ WARNING ”. These words mean: An imminently hazardous situation. You can be killed or seriously injured if you don’t immediately follow instructions. WARNING A potentially hazardous situation which, if not avoided, could result in death or serious bodily injury. CAUTION A potentially hazardous situation which, if not avoided, may result in moderate or minor injury.All safety messages will tell you what the potential hazard is, tell you how to reduce the chance of injury, and tell you what can happen if the instructions are not followed.ENGLISH
Use only detergents or softeners recommended for use in this appliance and keep them out of the reach of children.
- Do not install or store this appliance where it will be exposed to the weather.
This appliance must be connected to proper electrical outlet with the correct electrical supply.
Proper grounding must be ensured to reduce the risk of shock and fire. DO NOT CUT OR REMOVE THE GROUNDING PLUG. If you do not have a three-prong electric receptacle outlet in the wall, have a qualified electrician install the proper receptacle. The wall receptacle MUST be properly grounded.
- Do not operate this appliance unless all enclosure panels are properly in place.
- Do not allow children to play on or in the appliance. Close supervision of children is necessary when the appliance is used near children.
- This appliance must be properly installed in accordance with the installation instructions before it is used.
- Do not operate your appliance when parts are missing or broken. Risk of child entrapment. Before you throw away your old appliance, take off the door so that children may not easily get trapped inside. Suffocation Hazard DANGER
- Under certain conditions, hydrogen gas may be produced in a hot water system that has not been used for 2 weeks or more. HYDROGEN GAS IS EXPLOSIVE. If the hot water system has not been used for such a period, before using a washing machine, turn on all hot water faucets and let the water flow from each for several minutes. This will release any accumulated hydrogen gas. As the gas is flammable, do not smoke or use an open flame during this time.4 ENGLISH
SAVE THESE INSTRUCTIONS
- Do not use fabric softeners or products to eliminate static unless recommended by the manufacturer of the fabric softener or product.
- Never unplug your appliance by pulling on the power cord. Always grasp the plug firmly and pull straight out from the outlet.
- Replace immediately worn power cords, loose plugs/power outlets.
- Unplug your appliance before cleaning or before making any repairs.
- Before the appliance is removed from service or discarded, remove the door to the washing/drying compartments.
- Do not operate your appliance in the presence of explosive fumes.
- Do not place items exposed to cooking oils in your appliance. Items contaminated with cooking oils may contribute to a chemical reaction that could cause a load to catch fire.
- Do not wash/dry articles that have been previously cleaned in
- Do not add gasoline, dry-cleaning solvents, or other flammable or explosive substances to the wash water. These substances give off vapors that could ignite or explode
washed/dried in, soaked in, or spotted with gasoline, dry cleaning solvents, or other flammable or explosive substances, as they give off vapours that could ignite or explode.
- Do not use heat to dry articles containing foam rubber or similarly textured rubber-like materials.
- Do not tamper with controls.
- Do not repair or replace any part of the appliance or attempt any servicing unless specifically recommended in the user-repair instructions, which you understand and have the skill to carry out. Note: if for any reason this product requires service, we strongly recommend that a qualified technician perform the service.
Do not reach into the appliance if the tub or agitator is moving.
- Do not reach into the appliance if the drum is moving. RECORD KEEPING Thank you for purchasing this Haier product. This user manual will help you get the best performance from your new washer. For future reference, record the model and serial number located behind the door, and the date of purchase. Staple your proof of purchase to this manual to aid in obtaining warranty service if needed.
Date of purchasePARTS AND FEATURES Height Adjustable Feet (4)
Dispenser Drawer Button Trap (Located behind the access panel) Control Panel with LED Screen Access Panel Door with Viewing Window ENGLISH 5Cold Water Inlet Valve Hot Water Inlet Valve Back Plate Caps (4) Back Plate Screws (4) Drain Hose Clips Drain Hose (80") Transportation Bolts (4)
We recommend that your new washer/dryer be installed by a qualified appliance technician. If you feel that you have the skills to install the washer/dryer, please read the installation instructions carefully before installing. ENGLISH Install the clothes dryer according to the manufacturer’s instructions and local codes to reduce the risk of fire. To reduce the risk of severe injury or death, follow all installation instructions. WARNING If, after completing these step, you are unsure that the washer/dryer is properly installed, contact a qualified appliance technician. WARNING TOOLS NEEDED You will need to have the following tools to help you in the installation of your washer:
- Gloves PARTS SUPPLIED Water Hoses (2) (Flat washers are pre- installed) Wrench (Used to tighten locknuts and remove transportation bolts) Drain Hose (Support Bracket)
SAVE THESE INSTRUCTIONS
IMPORTANT: If your washer was just delivered and the outside temperature was below freezing, do not operate until the washer warms up to room temperature. Fire Hazard
- The washer must be installed on a solid floor to minimize vibration during the spin cycle.
- The floor should be level with maximum slope of 1" (25mm) under entire washer.
- A suitable location is protected from direct sunlight and heat sources such as radiators, baseboard heaters, cooking appliances, etc.
- Do not install on carpeting.
- The location must have a grounded electrical outlet located within 4ft. (1.2m) of the power cord on the back of the washer.
- Hot and cold water faucets must be present within 3ft. (0.9m) of the hot and cold connections on the washer.
- A water heater must supply hot water with a temperature of at least 120ºF (49ºC).
- The water pressure should be between 20-100 psi (138-690 kPa).
- This appliance must be operated at room temperature.
- Do not install or operate this appliance in an area where the ambient temperature can fall below freezing.
UNIT DIMENSIONS AND CLEARANCES
23-7/16" Front View Side View 22-15/32" 40-23/32" Open Door 20" 33-9/32" Minimum Installation Clearances / Detergent Minimum Alcove Closet Front n/a 1" (25mm) Sides and Rear 1" (25mm) 1" (25mm) 1" (25mm) 1" (25mm)Top of Control ENGLISH
Front ventilation openings are required for closet installations: 24 square inches-3inches from bottom. 48 square inches-3 inch from top. Louvered door with equivalent openings is acceptable.Replace back cover by inserting it in the two gaps at the top of the opening and replace the four screws that hold it in place. Remove bolts on the rear side and take out plastic spacers and rubber grommets from inner side of the machine.
UNPACKING YOUR APPLIANCE
Remove all packing materials, including the foam base and all adhesive tape holding the washer accessories inside and outside. NOTE: Small amounts of water may be found inside the packaging and inside the washer. This is normal and is the result of water tests performed at the factory.
REMOVE TRANSPORTATION BOLTS
NOTE: The transportation bolts must be removed before using the washing machine. Four transportation bolts are installed by the factory to prevent damage to the wash system that can occur from shock during transportation.
back plate of the washing machine by removing the four screws that hold it in place.
4. Fill shipping bolt
holes with plastic hole plugs. To avoid danger of suffocation, keep plastic bag and other packing materials away from babies and children. Do not use this bag in cribs, carriages and playpens. The plastic bag could block nose and mouth and prevent breathing. This bag is not a toy. WARNING NOTE: Save all transportation parts for future use. All parts should be reinstalled before transporting the washing machine.
Suffocation Hazard ENGLISH
- The height of the standpipe drain or sink rim for the drain hose should be between 2'6" and 3'3" from the bottom of the washer.
- Use the supplied Drain Hose Support Bracket to loop the drain hose down into the wall, standpipe or laundry tub.
- The standpipe drain requires a minimum diameter standpipe of 2" (50 mm). The minimum carry-away capacity can be no less than 17 gal. (64 L) per minute. Wall Standpipe Laundry tub The drain hose shakes as water is being pumped out of the washer. Make sure that the end of the drain hose is secured to the drain or sink. The support bracket has a mounting hole to assist you in doing this.
- Ta k e care to ensure all hose connections are tight. 30” - 39" (76 - 99 cm) 30” - 39" (76 - 99 cm) IMPORTANT: The end of the drain hose cannot be immersed in water for the combination washer / dryer to work properly. ENGLISH11 WATER CONNECTIONS IMPORTANT: Use the new water hoses supplied with the washer. Old hoses should not be used.
1. Check that a flat washer is present and firmly in place in each end of the water
inlet hoses. Flat washers are pre-installed at the factory. NOTE: Do not insert additional washers into the water hoses.
2. Connect the elbow coupling end of the water hoses to the inlet valves on the
washer. Then, connect the straight coupling end to the proper faucet. NOTE: The washer's inlet valves have metric threads. The elbow coupling end of the supplied water hoses have matching metric threads.
3. Connect the cold water faucet to the valve on the washer marked "C" and the hot
water faucet to the valve marked "H". NOTE: Take care not to cross connect the hoses.
4. Check for hose connection leaks by fully opening the faucets. You may have to
use pliers to tighten connections. NOTE: Do not over tighten hoses; this could cause damage to the washing machine's valves. C H Pre-installed Flat Washer
ENGLISHY ADAPTER CONNECTION
If you have a single faucet connection, you can purchase a "Y Adapter" from a hardware store to connect the washer as shown below. IMPORTANT: This machine dries clothes with condensing drying technology. The condenser relies on cold water to function. If hot or warm water is supplied to the "C" valve, the dryer will not work and damage can occur to components of the washing machine.
NOTE: Make sure that only cold water is turned on while using the dryer function. Water Inlet Valves Water Supply Hose Y Adapter Drain Hose Support Bracket Drain Hose SINK ENGLISH• The washer is equipped with a power cord that has a 3 prong plug. Do not cut or remove the grounding prong from the power cord.
- The power cord must be plugged into a mating, 3 prong outlet, grounded in accordance with local codes and ordinances. If a mating outlet is not available, contacted a licensed electrician to have one installed.
- Do not use a 3 prong plug adapter.
- If you are not sure if your outlet is properly grounded, contact a licensed electrician.
- Do not use an extension cord. ELECTRICAL REQUIREMENTS WARNING WARNING
- If the electric supply provided does not meet the above requirements, contact a licensed electrician. Risk of injury or death from electric shock. The washer must be connected to a properly grounded 120 Volt, 60 Hz., AC only, 15 Amp, fused electrical supply. A time-delay fuse or circuit breaker is recommended. Electrical Shock Hazard Risk of injury or death from electric shock. This appliance must be grounded. In the event of an electrical short circuit, grounding reduces the risk of electric shock by providing an escape route for the electrical current. Electrical Shock Hazard ENGLISH
13POSITION AND LEVEL THE WASHER
IMPORTANT: Because the drum of this washer spins at very high speeds, up to 1,200 RPM, the washing machine must rest firmly on a solid surface to minimize vibration, noise, and unwanted movement. This washer is equipped with four adjustable feet to compensate for an uneven floor.
1. Move the washer into location and position it where it will be used.
2. Level the washer from side to side and front to back. Make sure that all four feet
are firmly in contact with the floor and the washer rests solidly in position.
3. Leveling feet can be adjusted by turning them clockwise to extend (raise the
washer) or counterclockwise to retract (lower the washer).
4. When the washer is level, use a wrench to securely tighten all four locknuts
against the bottom of the washer cabinet. IMPORTANT: Do not replace height adjustable feet with casters.
Use this button to select a spin speed. Available selections vary for each cycle. The desired setting will blink during the selection process.
Soil level (wash time) is preset for each cycle.As you press this button,the cycle time will increase or decrease in the Time Remaining display.
Use this button to select wash/rinse water temperatures. Available selections vary for each cycle. The desired setting will blink during the selection process.
Use this button to select a dry level. Available selections vary for each cycle. The desired setting will blink during the selection process.
Press once to turn the washer / dryer ON. Press again to turn the washer / dryer OFF. If the washer / dryer is left on for more than 2 minutes without any buttons being touched, the power automatically turns off.
Press this button to start a cycle. Once started, only the selected cycle and settings will be displayed on the LED screen. Pressing the button a second time will pause the operating cycle and the time display will blink. During a pause, settings and options can be modified and selected, however the original cycle cannot be changed. If you don not press the Start/Pause button to start a cycle again, the operating cycle and the time display will blink all the time. Pressing the button again will resume the active cycle. If the “Drying Level” option has been selected, the washer will automatically begin drying after completing a wash cycle. NOTE: An operating cycle can be cancelled at any time by pressing Power ON/OFF button. NOTE: Lower soil level settings will help reduce tangling and wrinkling.
CYCLE SELECTOR The knob can be turned in either direction to choose a wash or dry cycle. The selected cycle will blink on the LED screen. Each cycle has preset water temperature,soil level,spin speed,dry level ,and options.In certain cycles the setting can be manually programmed to suit your needs. ENGLISHOPTIONS BUTTONS The options buttons allow you to select additonal cycle options and will blink when selected. Not all options are available with all cycles. Available options will grow orange, current selections will blink. You can decrease or increase the drying time for Timed Dry Only cycle by pressing options buttons. By pressing the “ ” button, you can select:
DELAY MODE Press and hold “Soil Level” and “Dry Level” button at the same time in order to get into “Delay” mode. The Delay icon will be turned on .The time can be adjusted by pressing “ ” and “ ” up to “24 hr”. A press and hold of the “ ” or “ ” button will cause the display to count continuously between 1 hour and 24 hours (by one hour increments) and the OFF position. Another way to cancel the delay is to press and hold "Soil Level" and "Dry Level" button at the same time. After displaying “OFF”, display will quickly go back to the normal wash time. After selecting this option, you have to press the "Start/Pause" button to activate a delayed start. Once started, only the selected cycle and settings will be displayed in a steady state, the clock icon will blink, and the time display will count down in 1 minute increments. By pressing the “ ” button, you can select: NOTE: An activated delay start can be cancelled at any time by pressing POWER ON/OFF button. NOTE: Double check the Soil Level and Dry Level settings after activating or canceling the Delay Mode. The cycle settings could have changed by not pressing both buttons at the same time.
IMPORTANT: Do not attempt to dry a full wash load. A half load is the maximum for all dry cycles. Half Load ENGLISH 17LED SCREEN The LED screen displays available cycles, settings, estimated cycle time, icons for active options, lock indicators, and an operating status(SOAK, WASH, RINSE, SPIN,DRY). Use the buttons along the bottom of the display to adjust settings. See “CYCLE GUIDE” for available settings on each cycle.Not all settings are available with all cycles. ENGLISH
The washer / dryer door will automatically lock during operation. A lock icon will appear on the LED screen when the door is locked. NOTE: If a wash operation is paused, the door will unlock within 2 seconds. If a dry operation is paused, the door will unlock after the inside temperature cools to a safe temperature. The cooling time can take several minutes.
After starting the washer, press the "Wash Temp" and "Spin Speed" buttons at the same time for 2 seconds to activate the Child Lock feature. A child icon will appear on the LED screen. This feature is intended to prevent accidental changes to the operating machine. To cancel, press the "Wash Temp" and "Spin Speed" buttons again for 2 seconds. The child icon will disappear from the LED screen. NOTE: This feature does not lock out the POWER ON/OFF button.
CYCLE SIGNAL INDICATOR
This signal is helpful when you are removing items from hte washer as soon as it stops. press the Spin Speed and Soil Level buttons for 2 seconds to activate the cycle signal feature. A signal icon will appear on the LED screen. To cancel, press the Spin Speed and Soil Level buttons again at the same time. The signal icon will disappear from the LED screen. POWER-OFF MEMORY This machine has a power-off memory feature. In case of power failure or if the power is interrupted during an operating cycle, the settings will be saved, and operation will resume after pressing the POWER ON /OFF button when the power is restored. ENGLISH 18CYCLE DESCRIPTIONS Whites: This cycle is preset to use hot water to deep clean white garments. Heavy Duty: This cycle is preset to use hot water to deep clean heavily soiled durable colorfast fabrics. Bulky: Use this cycle to wash large items such as blankets and comforters. Normal: This cycle is for normally soiled cottons, linens, and mixed garment loads. Perm Press: This cycle is preset for a low spin speed to help maintain wrinkle-free clothing and reduce crease in synthetic fabrics. Delicates: This cycle is intended to gently wash delicate garments and lingerie with sheer fabrics with lace trim. Quick Wash: This cycle is intended for lightly soiled garments that are needed in a hurry. Rinse & Spin: This cycle is useful for relaxing wrinkles, removing excess detergent, and refreshing clean garments. Spin Only: This cycle is useful in extracting water from sink washed or clean wet garments. Soak: Use the cycle to help remove small spots of set-in stains on fabrics. Clean Washer: Use the cycle once a month to keep the inside of your washer clean. NOTE: Do not place garments or other items in the washer during the Clean Washer cycle. Use this cycle with an empty wash drum. Auto Dry: the drying time may vary depending on the weight, size of clothing, type of fabric, moisture, etc. Timed Dry: Drying time is set to 30 minutes by default. press the “ ” and “ ” button to decrease or increase the drying time in 10 minute increments. the cycle can last up to 120 minutes. Timed Dry No Heat: Drying time is set to 30 minutes by default. press the “ ” and “ ” button to decrease or increase the drying time in 1 minute increment within half an hour, and in 5 minute increments after half an hour.the cycle can last up to 60 minutes.
ENGLISHCYCLE GUIDE NOTE: It is important to check garment label wash instructions to select the proper wash settings. The wrong settings could damage and discolor clothing. Certain clothes should only be dry cleaned. NOTE: To protect your clothing, all options and settings are not available for all cycles. The shaded Speed and Temp. Settings are the default selections for the indicated cycle. ENGLISH
More Less Normal More Less Normal More Less Normal More Less Normal More Less Normal Cool Cold Tap Cold High Low No Spin Extra Heavy Heavy Light Extra Light Presoak Prewash Ex Rinse Water + Delay Warm Low Light Cool Cold Tap Cold Medium No Spin Heavy Normal Extra Light Presoak Ex Rinse Water + Delay Warm Extra High Light Hot Cool Cold Tap Cold High Medium Low No Spin Normal Extra Light Ex Rinse Water + Delay Tap Cold Extra High Off High Medium Low Ex Rinse Delay Water + Delay Extra High Off High Medium Low Quick Wash Cottons, linens, and mixed garments Delicates Lingerie, sheer fabrics with lace trim Perm Press Wrinkle-free and synthetic fabrics Full(Wash) Half(Dry) Spin Only Clean, soaking wet garments N/A N/A Rinse & Spin Unsoiled garments N/A N/A N/A N/A N/A Full(Wash) Half(Dry) 0:59 0:32 0:28 0:28 0:12 Quarter Half Full(Wash) Half(Dry)CYCLE GUIDE NOTE: It is important to check garment label wash instructions to select the proper wash settings. The wrong settings could damage and discolor clothing. Certain clothes should only be dry cleaned.
NOTE: To protect your clothing, all options and settings are not available for all cycles. The shaded Speed and Temp. Settings are the default selections for the indicated cycle. ENGLISH CYCLE FABRIC TYPE ESTIMATED TIME MAX. LOAD WASH TEMP SPIN SPEED SOIL LEVEL DRY LEVEL AVAILABLE OPTIONS Warm No Spin Normal Hot Cool Cold Tap Cold Extra Heavy Heavy Light Extra Light Hot DelayN/A N/A Delay Normal More Less Delay Normal Delay No Heat Delay Clean Washer Do not put clothes in the washer with this cycle. N/A N/AN/A Soak Heavily soiled fabrics N/A N/A Half Auto Dry Cottons, linens, and mixed garments N/A N/A N/A Timed Dry No heat Cottons, linens, and mixed g arments N/A N/A N/A HalfTimed Dry Cottons, linens, and mixed garments N/A 0:33 0:58 3:20 0:30 0:30 Half Three- quarterGETTING STARTED
1. Press once Power ON/OFF button and active the LED screen.
2. turn the knob to select the desired wash cycle. The selected cycle
will blink on the LED screen.
3. Preset wash/rinse temperatures,spin speed and dry level will also blink on the LED
screen. Press the Wash Temp, Spin Speed, Soil Level and Dry Level buttons to modify the settings. Select from the available options: Presoak, Prewash, Ex Rinse, Water +, and Delay. Press the “Start/Pause” button to confirm all selections and immediately begin the selected cycle or initiate a delay start countdown.
To reduce the risk of fire, electric shock, or injury to persons, read the IMPORTANT SAFETY INSTRUCTIONS before operating this appliance. WARNING ENGLISHWASHING METHODS
SORTING AND PREPARATION
- Separate whites, darks, light colors and non-colorfast garments.
- Separate items that produce lint (flannel, fleece and towels) from items that collect lint (knits, corduroy and synthetic fabrics).
- Sort by fabric type (cottons, permanent press and delicate) and by the amount of soil.
- Close zippers, snaps and hooks.
- Empty pockets and turn them inside out.
- Remove pins or other sharp objects from clothes to prevent scratching interior parts.
- Repair loose seams and minor tears.
- Pre-treat spots, stains and heavily soiled areas. LOADING
- Load each garment loosely; do not place folded items into the washer.
- Do not overload the washer.
- Close the door properly after loading clothes. Take care to ensure that garments are not caught in the gasket. IMPORTANT: If you intend to use the Drying option , load the washer only half full with clothes. Do not completely fill the washer with a full load. Clothes must have room to tumble freely in the drum.
ENGLISH Half LoadPREWASH COMPARTMENT If the "Prewash" option is selected, use only powdered HE detergent in both the prewash and main wash compartments. The compartment will be flushed with water during the prewash. IMPORTANT: Liquid detergent poured into the main wash compartment will immediately flow into the wash drum and be used during the prewash.
The dispenser drawer is located in the upper left corner of the washer. Open the drawer by pulling it straight out. There are three separate compartments for loading detergent and fabric softener. Use only High Efficiency (HE) detergent. ENGLISH
MAIN WASH COMPARTMENT
If the "Prewash" option is selected, use only powdered HE detergent, otherwise liquid HE detergent can be used. The compartment will be flushed with water during the wash cycle.
FABRIC SOFTENER COMPARTMENT
Use liquid fabric softener as recommended by the manufacturer. However, do not exceed the max fill mark shown in the compartment. This is necessary to ensure complete flushing during the final rinse and to avoid overflow in the dispenser drawer. IMPORTANT: The dispenser is designed to work only with liquid fabric softener. Do not use powdered fabric softener; it will clog the dispenser by not completely dissolving. DETERGENT Use only High Efficiency detergent. HE detergents are specifically formulated with ingredients to avoid problems caused by too many soap suds. Excess suds will prevent the complete rinsing of detergent residue from clothes. Washer performance will be diminished by soap build up and damage can occur if soap suds get into areas of the machine like the condensing dryer compartment. IMPORTANT: Use only powdered HE detergent when both the Prewash and Main Wash compartments are used. Liquid detergent immediately flows into the wash drum and both amounts would be used during the first wash program.NOTE: The proper amount of detergent depends on the size of the load, the soil level of the clothes, and the softness of the water being supplied to the washer. DRYING METHODS
SORTING AND LOADING CLOTHES
- Separate heavy fabrics from lightweight fabrics.
- Separate items that produce lint (flannel, fleece and towels) from items that collect lint (knits, corduroy and synthetic fabrics).
- Sort by fabric type (cottons, permanent press and delicates)
- Permanent press items should be dried together with enough space to tumble freely. Promptly remove garments from the dryer and fold or hang right away. To reduce the risk of fire, do not dry items containing foam rubber or similarly textured rubber-like materials. IMPORTANT: Load the machine half-full with clothes. Do not completely fill the drum with a full load. Clothes must have room to tumble freely in the drum. WARNING
CLEANING AND MAINTENANCE
- Use a damp or sudsy cloth for cleaning control panel. To avoid any kind of damage to cabinet finish, wipe appliance cabinet as needed. If you spill liquid/powdered softener, bleach or detergent on the cabinet, wipe cabinet immediately because it can damage the finish. Do not use any abrasive, harsh chemicals, ammonia, chlorine bleach, concentrated detergent, solvents or metal scouring pads. Some of these chemicals may dissolve, damage and/or discolor your appliance. The Detergent Dispenser Compartment has a removable insert. Over time, this compartment may accumulate dried detergent, dirt and debris. You must remove the insert, then rinse in a sink or remove debris with a soft brush. Risk of injury or death due to electric shock. Always unplug your appliance before cleaning.
Before using cleaning products, always read and follow manufacturer’s instructions and warnings to avoid personal injury or product damage. WARNING
The Button Trap is designed to capture small loose items such as buttons and coins, to keep them from damaging your machine.1. Using a coin or screwdriver, pull down on the catch of the access panel, and lower the panel door to open.2. Unclip the drain hose, pull it out and place the end of the drain hose in a pan or bucket to catch the water.
a Drain Hose b Plug c Tra p 3. Remove the plug from the drain hose and allow the water to drain completely.4. Turn the button trap counterclockwise to unlock and remove. Remove debris from the trap and rinse clean.NOTE: A small amount of water will drain from the trap. Use a shallow pan or place a towel on the oor before removing the Button Trap.5. Reinsert the trap and turn it clockwise to lock it into place.6. Replace the plug in the drain hose and clip it into place. Close the access panel.IMPORTANT: Make sure the button trap and plug are rmly seated and locked into place to avoid leaks. VACATIONING PRECAUTIONS
Unplug the electrical cord from the wall outlet. Turn off the water supply faucets. This will eliminate the potential for water damage if the hoses accidentally rupture or become loose. Dry the wash drum and leave the door open so moisture can evaporate to help prevent the growth of mold and mildew.MOVING OR STORAGE PRECAUTIONS
- Unplug the electrical cord from the wall outlet.
- Turn off the water supply faucets.
- Disconnect the water hoses and place them in the washtub.
- Remove the drain hose from the drain and snap it back into the clips located on the back of the washer.
- Retract adjustable feet. Loosen locking nuts as far as possible and thread feet into the cabinet as far as possible.
- Reinstall the transportation hardware as shown below. Install the Transportation Bolts with the original four screws. Remove the back plate by removing (4) screws Position the (4) rubber grommets and plastic spacers Replace the back plate and the (4) screws to hold it in place Insert the bolts and tighten with wrench
TROUBLE POSSIBLE CAUSE POSSIBLE REMEDY
Washer/Dryer does not start The appliance is not properly plugged in. Insert the plug into the power socket securely. The wash/dry cycle does not start A. The door has not been closed properly. B. The delay start has been selected. A. Close the door and try it again. B. Cancel the delay start The washer does not take in water A. The inlet hose is not connected to the tap. B. The water tap has not been opened. C. The faucet or valve may need to be open more fully. D. There is no water supply in the house or the water pressure is too low. A. See "installation" (p12-13) B. Open the water tap. C. Make sure water hoses are not kinked, twisted, or tangled. D. Check another faucet in the house to make sure that household water pressure is adequate. There is water on the floor
The water leakage could be caused by an improperly connected drain hose or water hose. B. You may have a clogged or slow draining sink or standpipe. C. You may have used incorrect or too much detergent A. Check all connections. B. Check plumbing or consult a professional plumber. C. Make sure to use HE (High Efficiency) detergent only. The water will not drain from the washer A. This could be caused by your drain hose set up. The drain hose support bracket should be looped over a sink or into a standpipe that is between 2'6" and 3'3" high. B. Button trap may be full A. Make sure the end of the hose is not immersed in water. B. Check to see that the button trap is clean and dust free.
NORMAL OPERATING SOUNDS
The following sounds are normally heard during the operation of the washer: • Tumbling sounds: This is normal as the heavy wet clothes in the washer are continuously being tossed around.
- Air rushing noise: This happens when the washer tub spins at a very high RPM.
- Wash and rinse cycles going on and off will also make clicking sounds as well as spraying and water splashing sound.
- Drain pump operational sound, when dirty water is being drained. TROUBLESHOOTING TROUBLESHOOTING ENGLISH30
TROUBLE POSSIBLE CAUSE POSSIBLE REMEDY
The washer/dryer is making noise A. The drum was not unlocked correctly during installation. B. Coins, loose change, buttons or other heavy objects have been left in pockets. C. The support feet have not been adjusted. D. The washer load may need to be re-balanced, as the load may be uneven. A. Remove shipping bolts [See "installation"] (p10) B. Make sure to empty pockets before loading the washer. C. Check the correct levelling of the appliance. D. Evenly distribute clothing in the wash basket. Unsatisfactory washing results A. Clothes are too wrinkled. This is due to improper sorting, overloading, and washing in overly hot water repeatedly. B. Soap Residue. Detergent may not be dissolving in water. C. Spots or stains on your clothes. May be due to incorrect use of fabric softener. D. Clothes are grayed or yellowed: This is due to not using enough detergent for large loads. E. Clothes are ripped and have holes/excessive water & tear: This is due to sharp objects such as pins and belt buckles left in pockets. F. Oversudsing or low cleaning performance. A. Avoid overloading and resort your load. Do not mix heavy clothes such as work clothes with light clothes such as blouses, light shirts and delicate items. You may need to wash in warm or cold water. B. Check water temperature. Use less detergent. C. Read the instructions on the detergent container and follow proper directions for using the softener. D. You may have to add more detergent to the load. E. Remove small loose sharp objects prior to washing. Fasten belts, zippers, metal snaps etc. F. Must use HE Detergent The dryer is working but not drying the clothes A. Unit may be over loaded. B. Dryer load needs to be resorted. C. Clothes dry unevenly. D. Water supply is not properly connected (T ypically when using Y-Adapter) A. The dryer drum should only be half full during the dry cycle. This is to allow clothes to tumble B. Heavy clothes may need to be separated from regular clothes. C. Clothes in the dryer may need to be resorted. D. Make sure that only cold water is turned on [see “water connection”] [ p13] ENGLISH31 ERROR CODES
The washer cannot drain the water within 4 minutes. Stop running Clear the pump. Service Needed.
Cannot lock the door after 20s. Stop running Service Needed.
After 8 minutes, the selected water level has not been reached. Stop running Check plumbing and water hose connections. Service Needed F7 Motor circuit error Stop running Service Needed
The water is above the warning l evel.
Dryer sensor circuit problem. Stop running Service Needed
Water level sensor circuit problem. Stop running Service Needed
No feedback signal from driver unit. Stop running Service Needed Fd The dryer heating is abnormal. Stop running Service Needed FE The dryer motor is abnormal. Stop running Service Needed Unb Unbalanced load Spin low speed and cancel drying Evenly distribute clothing in the wash basket.
TROUBLE POSSIBLE CAUSE POSSIBLE REMEDY
Door will not open after completion of a dry cycle (Door lock is activated) The temperature inside has not cooled down to a safe temperature. Wait for the inside temperature to cool down. The cooling time can take several minutes.IMPORTANT TECHNICAL SPECIFICATION ENGLISH Model HLC1700AXW Voltage/Frequency AC 120V~60Hz Rated Current 10A Water Pressure (PSI) 4.4~145 (30~1000KPa) Capacity 2.0 cu. ft. Dimensions 23-7/16" (W) X 23-5/8" (D) X 33-9/32" (H), 40-23/32" (D with door open) 595 mm (W) X 600 mm (D) X 845 mm (H), 1034 mm (D with door open) Net Weight 160.6 lbs. (73 kg) Max. Spin Speed 1,200 rpm ENGLISH
FULL ONE YEAR WARRANTY
For 12 months from the date of original retail purchase, Haier will repair or replace any part free of charge including labor that fails due to a defect in materials or workmanship. LIMITED WARRANTY After one year from the original retail purchase date, Haier will provide a part at no cost, as indicated below, to replace said part as a result of a defect in materials or workmanship. Haier is solely responsible for the cost of the part. All other costs such as labor, trip charge, etc are the responsibility of the owner. Second through Fifth Year Haier will provide the cabinet assembly should the cabinet rust through. Second through Tenth Year Haier will provide the inner stainless steel wash tub. NOTE: This warranty commences on the date the item was purchased and the original purchase receipt must be presented to the authorized service representative before warranty repairs are rendered. Exceptions: Commercial or Rental Use Warranty 90 days labor from date of original purchase 90 days parts from date of original purchase No other warranty applies
FOR WARRANTY SERVICE
Contact your nearest authorized service center. All service must be performed by a Haier authorized service center. For the name and telephone number of the nearest authorized service center please call 1-877-337-3639. Before calling please have available the following information: Model number and serial number of your appliance.The name and address of the dealer you purchased the unit from and the date of purchase. A clear description of the problem. A proof of purchase (sales receipt). This warranty covers appliances within the continental United States, Puerto Rico and Canada. What is not covered by this warranty: Replacement or repair of household fuses, circuit breakers, wiring or plumbing. A product whose original serial number has been removed or altered. Any service charges not specifically identified as normal such as normal service area or hours. Damage to clothing. Damage incurred in shipping. Damage caused by improper installation or maintenance. Damage from misuse, abuse accident, fire, flood, or acts of nature. Damage from service other than an authorized Haier dealer or service center. Damage from incorrect electrical current, voltage or supply. Damage resulting from any product modification, alteration or adjustment not authorized by Haier. Adjustment of consumer operated controls as identified in the owners manual. Hoses, knobs, lint trays and all attachments, accessories and disposable parts. Labor, service transportation, and shipping charges for the removal and replacement of defective parts beyond the initial 12-month period. Damage from other than normal household use. Any transportation and shipping charges. THIS LIMITED WARRANTY IS GIVEN IN LIEU
OF ALL OTHER WARRANTIES, EXPRESSED
OR, INCLUDING THE WARRANTIES OF
MERCHANTABILITY AND FITNESS FOR A
PARTICULAR PURPOSE. The remedy provided in this warranty is exclusive and is granted in lieu of all other remedies. This warranty does not cover incidental or consequential damages, so the above limitations may not apply to you. Some states do not allow limitations on how long an implied warranty lasts, so the above limitations may not apply to you. This warranty gives you specific legal rights, and you may have other rights, which vary, from state to state. Haier America Wayne, NJ 07470 LIMITED WARRANTY ENGLISH
1. Retirer la plaque
PROBLÈME CAUSE POSSIBLE CORRECTION POSSIBLE
La laveuse/ sécheuse ne s’allume pas L’appareil n’est pas correctement branché. Brancher fermement le cordon d’alimentation à la prise murale. Le programme de lavage/ séchage ne démarre pas A. La porte n’est pas fermée correctement. B. Le démarrage diéré est sélectionné. A. Fermer la porte et réessayer. B. Annuler le démarrage diéré La laveuse n’est pas alimentée en eau A. Le tuyau d’arrivée d’eau n’est pas branché au robinet. B. Le robinet d’arrivée d’eau n’est pas ouvert. C. Le robinet doit peut-être être ouvert davantage. D. L’arrivée d’eau du domicile est coupée ou la pression est trop basse. A. Voir la section “Installation” (p 40) B. Ouvrir le robinet d’eau. C. Vérier que les tuyaux d’arrivée d’eau ne sont pas pincés, écrasés ou tordus. D. Vérier avec un autre robinet du domicile que la pression d’eau est adéquate. De l’eau s’est répandue au sol A. La fuite d’eau peut être causée par un tuyau de vidange ou un tuyau d’arrivée d’eau mal raccordé. B. L’évier ou le collecteur de vidange peut être bouché ou l’écoulement n’est pas susamment rapide. C. Un détergent inadéquat ou en quantité excessive a été utilisé. A. Contrôler tous les raccords. B. Vérier la tuyauterie ou contacter un plombier professionnel. C. Veiller à utiliser uniquement un détergent Haute ecacité (“HE”).61
PROBLÈME CAUSE POSSIBLE CORRECTION POSSIBLE
L’eau ne se vide pas de la laveuse A. L’installation du tuyau de vidange est peut-être incorrecte. La crosse de support du tuyau de vidange doit être coudée par-dessus un évier ou dans un collecteur de vidange à une hauteur comprise entre 2’6” et 3’3”. B. Le piège à boutons est peut- être plein A. Vérier que l’extrémité du tuyau de vidange n’est pas immergée dans l’eau. B. Vérier que le piège à boutons est propre et dépourvu de débris. La laveuse/ sécheuse fait du bruit A. Les accessoires de transport n’ont pas été correctement dégagés du tambour lors de l’installation. B. Des pièces, boutons ou autres objets lourds sont restés dans les poches. C. Les pieds de nivellement n’ont pas été réglés. D. La charge dans la laveuse doit être rééquilibrée si elle n’est pas homogène. A. Retirer les vis de transport [voir la section “Installation” p 40] B. Veiller à vider les poches avant de charger des vêtements dans la laveuse. C. Vérier que l’aplomb de l’appareil est correct. D. Répartir uniformément le linge dans le tambour de lavage. Linge mal lavé A. Linge trop froissé. Linge mal trié, surcharge et lavage répété dans une eau trop chaude. B. Résidus de détergent. Le détergent se dissout mal dans l’eau. C. Marques ou taches sur les vêtements. Utilisation incorrecte de l’assouplissant pour tissus. D. Les vêtements ressortent grisâtres ou jaunis : détergent en quantité insusante pour les charges importantes. E. Vêtements déchirés, troués et mal essorés: objets pointus tels que broches et boucles de ceinture laissés sur les vêtements. F. Excès de mousse ou lavage médiocre. A. Éviter de surcharger la machine et trier à nouveau le linge. Ne pas mélanger les vêtements lourds, tels que vêtements de travail, et les vêtements légers, tels que chemisiers, chemises légères et autres articles délicats. Il faudra peut-être les laver à l’eau tiède ou froide. B. Vérier la température de l’eau. Utiliser moins de détergent. C. Suivre les instructions gurant sur l’emballage du détergent et de l’assouplissant. D. Une plus grande quantité de détergent est peut- être nécessaire. E. Retirer les petits objets pointus de la charge de lavage. Fermer les ceintures, fermetures à glissière, boutons pressions métalliques, etc. F. Utiliser impérativement un détergent HE62
PROBLÈME CAUSE POSSIBLE CORRECTION POSSIBLE
WARNING Electrical Shock Hazard Risk of injury or death from electric shock. The washer must be connected to a properly grounded 120 volt, 60 Hz., AC only, 15 Amp, fused electrical supply. A time-delay fuse or circuit breaker is recommended.