
XR-C503 - Car stereo SONY - Free user manual and instructions
Find the device manual for free XR-C503 SONY in PDF.
| Product type | Cassette car stereo with FM/MW/LW tuner and CD/MD changer compatibility |
| Dimensions (W x H x D) | 188 x 58 x 177 mm |
| Mounting dimensions | 182 x 53 x 162 mm |
| Weight | 1.3 kg |
| Power supply | 12 V DC (car battery, negative ground) |
| Maximum output power | 35 W x 4 (at 4 ohms) |
| FM frequency ranges | 65.0 – 74.0 MHz (30 kHz step) and 87.5 – 108.0 MHz (50 kHz step) |
| MW / LW ranges | MW: 531 – 1602 kHz / LW: 153 – 281 kHz |
| Cassette section | 4 tracks, 2 stereo channels, response 30 – 20,000 Hz |
| Signal-to-noise ratio (Dolby B ON, type II/IV) | 67 dB |
| Tuning functions | BTM (best tuning memory), station memory, name list-up |
| Cassette playback functions | Intro Scan, Repeat, Shuffle, Blank Skip, ATA (auto tuner activation) |
| CD/MD changer functions | Intro Scan, Repeat, Shuffle, Disc Memo, Bank (track selection), list-up |
| Detachable front panel | Yes, with audible alarm if the key is turned off without removing the panel |
| Connector cleaning | Cotton swab soaked in alcohol, clean regularly to avoid display defects |
| Playback head maintenance | Use a Sony cleaning kit, once a month |
| Fuse | Replace with a fuse of the same amperage |
| Supplied remote controls | Rotary remote RM-X2S, wireless remote RM-X41 (optional) |
| BUS cable | Supplied with RCA cable for changer connection |
Frequently Asked Questions - XR-C503 SONY
User questions about XR-C503 SONY
0 question about this device. Answer the ones you know or ask your own.
Ask a new question about this device
Download the instructions for your Car stereo in PDF format for free! Find your manual XR-C503 - SONY and take your electronic device back in hand. On this page are published all the documents necessary for the use of your device. XR-C503 by SONY.
USER MANUAL XR-C503 SONY
For installation and connections, see the supplied installation/connections manual.
© 1996 by Sony Corporation
Welcome !
Thank you for purchasing the Sony Cassette Player. This unit lets you enjoy a variety of features by using either a rotary remote or a wireless remote.
In addition to the tape playback and the radio operations, you can expand your system by connecting an optional CD/MD changer.
Table of contents
This Unit Only
Getting Started
Resetting the unit 4
Detaching the front panel 4
Preparing the rotary remote 5
Setting the clock 5
Cassette Player
Listening to the tape 6
Playing the tape in various modes 7
Radio
Memorising stations automatically
— Best Tuning Memory (BTM) 7
Memorising only the desired stations. 7
Receiving the memorised stations. 8
Storing the station names Station Memo 8
Locating a station by name -List-up 9
Other Functions
Using the rotary remote 9
Adjusting the sound characteristics 10
Muting the sound. 10
Changing the sound and display settings.... 11
With Optional Equipment
CD/MD Changer
Playing a CD or MD 11
Scanning the tracks
— Intro Scan 12
Playing tracks repeatedly
— Repeat Play 12
Playing tracks in random order Shuffle Play 12
Labeling a CD — Disc Memo 13
Locating a disc by name List-up 14
Selecting the specific tracks for playback Bank 14
Additional Information
Precautions 15
Maintenance. 15
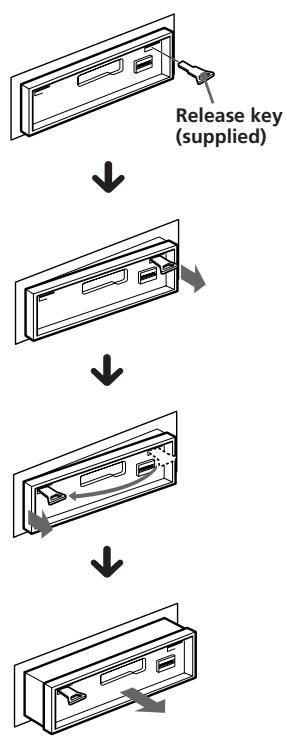
Dismounting the unit 16
Location of controls 17
Specifications 19
Troubleshooting guide 20
Index 22
EN
Getting started
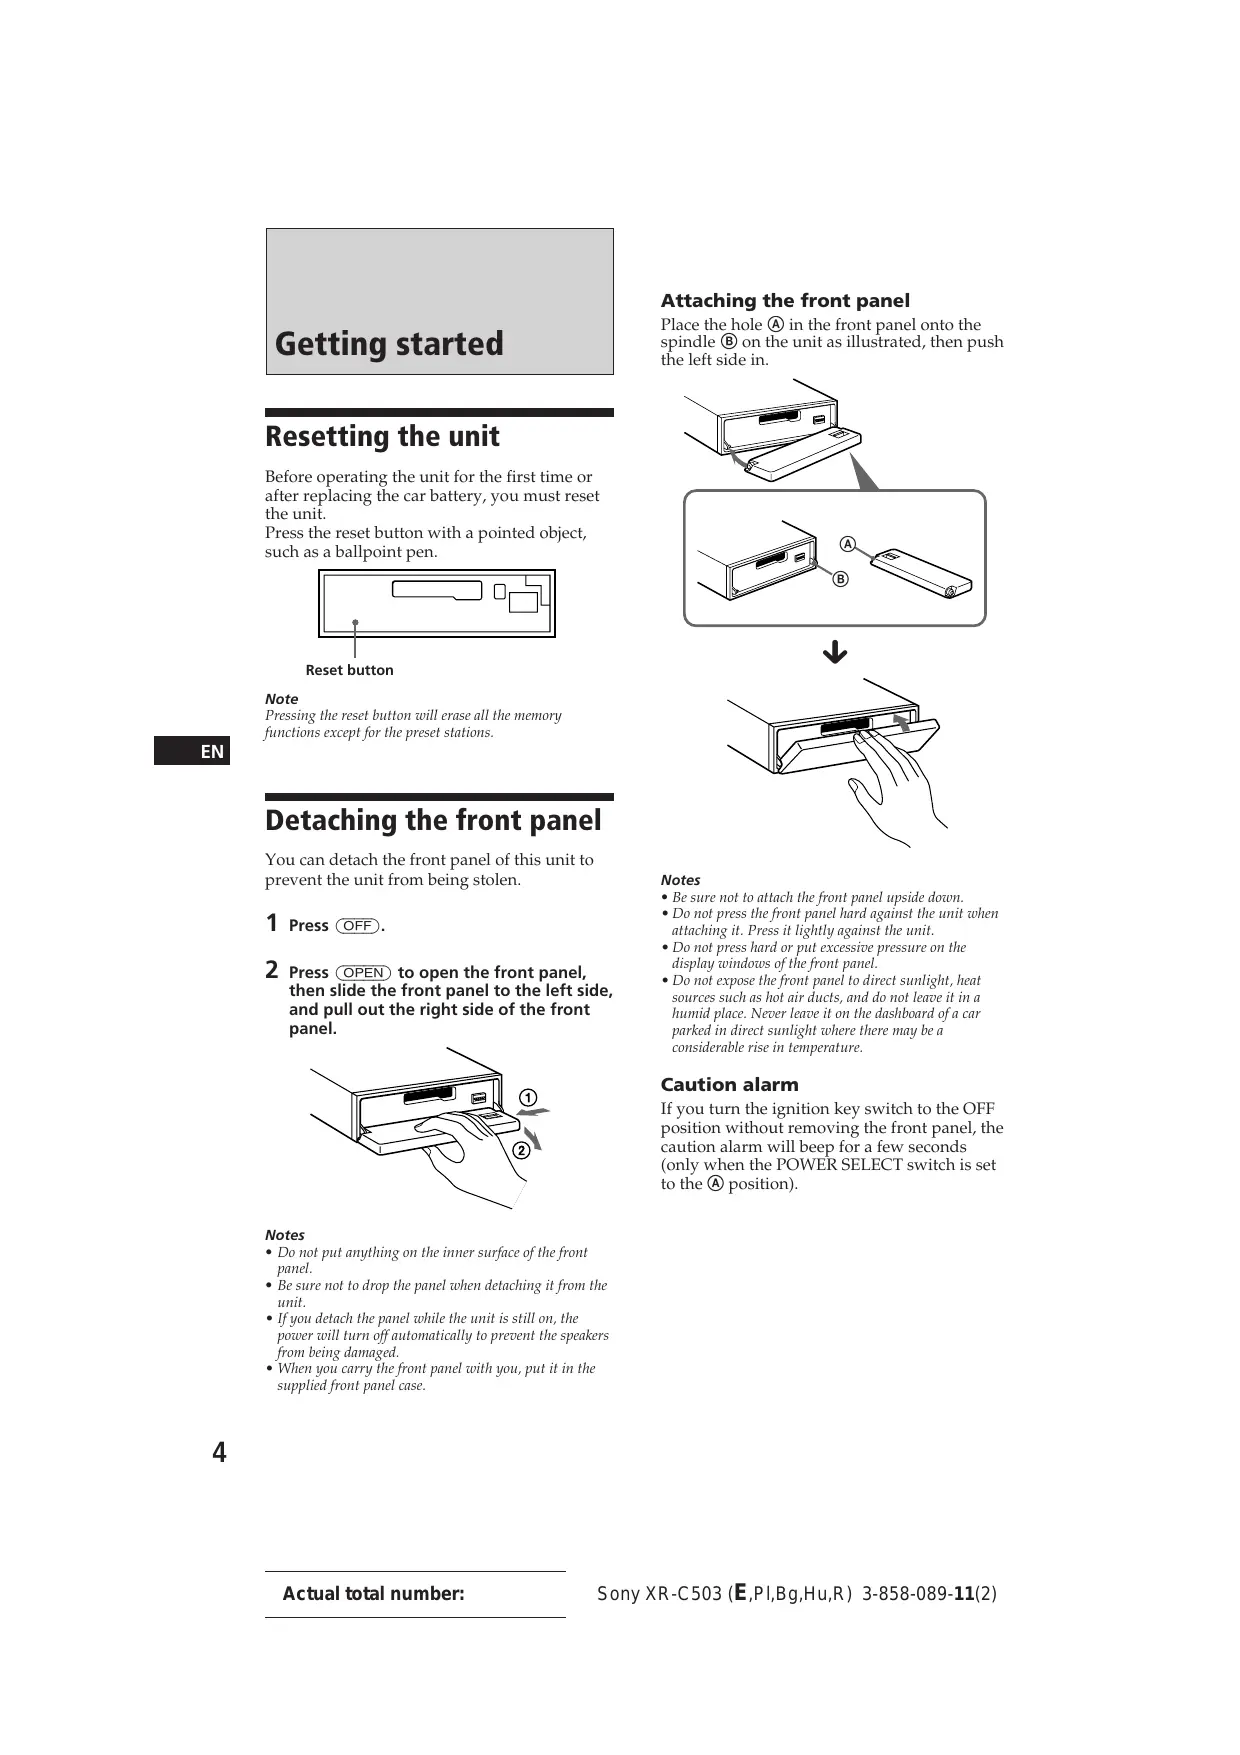
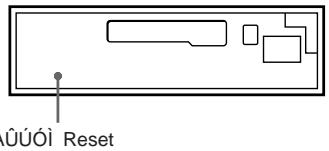
Resetting the unit
Before operating the unit for the first time or after replacing the car battery, you must reset the unit.
Press the reset button with a pointed object, such as a ballpoint pen.

Reset button
Note
Pressing the reset button will erase all the memory functions except for the preset stations.
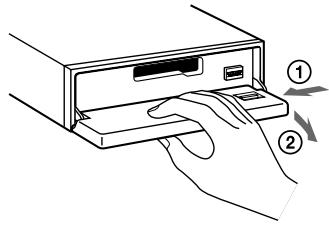
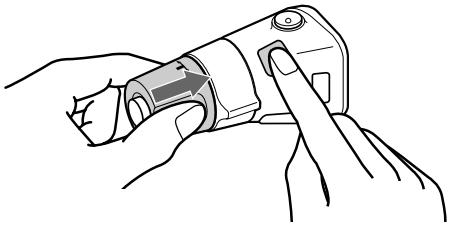
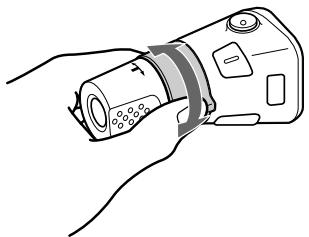
Detaching the front panel
You can detach the front panel of this unit to prevent the unit from being stolen.
1 Press OFF.
2 Press OPEN to open the front panel, then slide the front panel to the left side, and pull out the right side of the front panel.
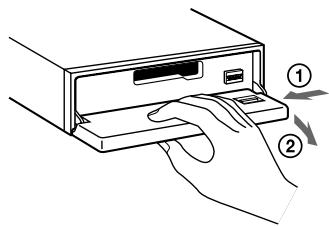
Notes
- Do not put anything on the inner surface of the front panel.
- Be sure not to drop the panel when detaching it from the unit.
- If you detach the panel while the unit is still on, the power will turn off automatically to prevent the speakers from being damaged.
- When you carry the front panel with you, put it in the supplied front panel case.
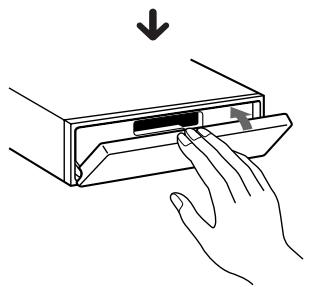
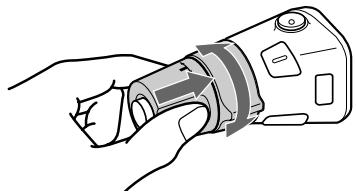
Attaching the front panel
Place the hole A in the front panel onto the spindle 8 on the unit as illustrated, then push the left side in.
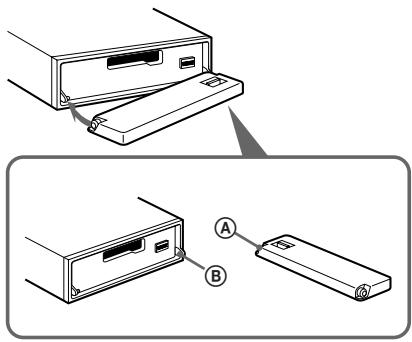

Notes
- Be sure not to attach the front panel upside down.
- Do not press the front panel hard against the unit when attaching it. Press it lightly against the unit.
- Do not press hard or put excessive pressure on the display windows of the front panel.
- Do not expose the front panel to direct sunlight, heat sources such as hot air ducts, and do not leave it in a humid place. Never leave it on the dashboard of a car parked in direct sunlight where there may be a considerable rise in temperature.
Caution alarm
If you turn the ignition key switch to the OFF position without removing the front panel, the caution alarm will beep for a few seconds (only when the POWER SELECT switch is set to the A position).
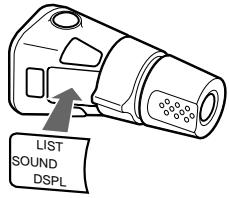
Preparing the rotary remote
When you mount the rotary remote, attach the label in the illustration below.
Setting the clock
The clock has a 12-hour digital indication.
Example: Set the clock to 10:08
1 Press SHIFT, then press ② (SET UP).

1 Press (4)()

The hour digit flashes.
2 Set the hour.


Press (4)()

The minute digits flash.
4 Set the minute.


2 Press (SHIFT).

The clock starts.
Note
If the POWER SELECT switch on the bottom of the unit is set to the 5 position, turn the power on first, then set the clock.
Cassette Player
Listening to the tape
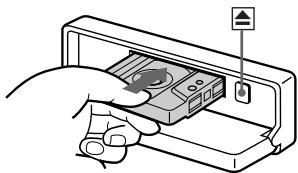
1 Press (OPEN) and insert the cassette.

Playback starts automatically.
2 Close the front panel.
If the cassette is already inserted, press (SOURCE) until "FWD" or "REV" appears to start playback.
The side facing up is being played.

The side facing down is being played.

Tips
To change the tape transport direction, press (7)
- "METAL" appears in the display when you insert the metal or CrO2 tape (Auto Metal function).
| To | Press |
| Stop playback | OFF |
| Eject the cassette | OPEN then▲ |
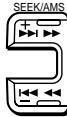
Fast-winding the tape
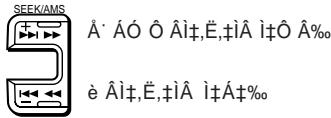
During playback, press either side of (SEEK/AMS) for one second.

Fast-forward
Rewind
To start playback during fast-forwarding or rewinding, press (▶).
Locating the beginning of the tracks
Automatic Music Sensor (AMS)
You can skip up to nine tracks at one time. During playback, press either side of (SEEK/AMS) momentarily.
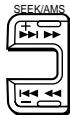
To locate the succeeding tracks
To locate the previous tracks
Note
The AMS function may not work when :
- the blanks between tracks are shorter than four seconds.
- there are noises.
- there are long sections of low volume or quiet sections.
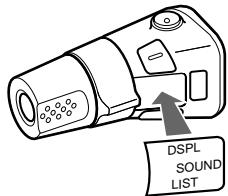
Changing the displayed items
Each time you press DSPL, the item changes as follows:

- While the ATA function is activated.
Playing the tape in various modes
You can play the tape in various modes:
- INTRO (Intro Scan) lets you play the first 10 seconds of all the tracks.
- REP (Repeat Play) repeats the current track.
- NR (Dolby NR) lets you select the Dolby* NR B system.
- ATA (Automatic Tuner Activation) turns on the tuner automatically while fast-winding the tape.
-
BL.SKP (Blank Skip) skips blanks longer than eight seconds.
-
Dolby noise reduction manufactured under license from Dolby Laboratories Licensing Corporation. "DOLBY" and the double-D symbol □ are trademarks of Dolby Laboratories Licensing Corporation.
1 Press SHIFT.
Every time you press (SHIFT), only the items you can select light up.
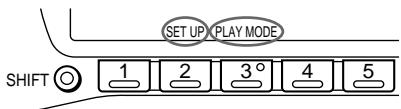
2 Press (3) (PLAY MODE), repeatedly until the desired play mode appears.
Each time you press ③ , the item changes as follows:
INTRO REP NR ATA BL.SKP

3 Press (4)()
to select "ON."
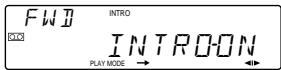
Playback starts.
To go back to the normal playback mode, select "OFF" in step 3 above.
Radio
Memorising stations automatically
Best Tuning Memory (BTM)
The unit selects the stations with the strongest signals and memorises them in the order of their frequencies. You can store up to 10 stations on each band (FM1, FM2, MW and LW).
Caution
When tuning in the station while driving, use Best Tuning Memory to prevent accidents.
1 Press (SOURCE) repeatedly to select the desired band (FM1, FM2, MW or LW).
2 Press SHIFT, then press 6 (BTM).
The unit stores stations in the order of their
frequencies on the number buttons.
A beep sounds and the setting is stored.
Notes
- The unit does not store stations with weak signals. If only a few stations are received, some number buttons remain empty.
- When a preset number is indicated in the display, the unit starts storing stations from the one currently displayed.
Memorising only the desired stations
You can store up to 10 stations on each band (20 for FM1 and FM2, 10 for MW or LW) in the order of your choice.
1 Press desire
SOURCE repeatedly to select the red band.
2 Press either side of (SEEK/AMS) to tune in the station that you want to store on the number button.
3 Keep the desired number button (1 to 10) pressed for two seconds until you hear a beep tone.
The number button indication appears in the display.
Note
If you try to store another station on the same number button, the previously stored station will be erased.
Receiving the memorised stations
1 Press (SOURCE) repeatedly to select the desired band.
2 Press the number button (1 to 10) momentarily, where the desired station is stored.
If you cannot tune in a preset station
Press either side of (SEEK/AMS) momentarily to search for the station (automatic tuning).
Scanning stops when the unit receives a station. Press either side of (SEEK/AMS) repeatedly until the desired station is received.
Note
If the automatic tuning stops too frequently, press (SHIFT), then press 3 (PLAY MODE) repeatedly until "LOCAL" (local seek mode) is displayed. Then press 4 () to select "ON."
Only the stations with relatively strong signals will be tuned in.
Tip
If you know the frequency of the station you want to listen to, press and hold either side of (SEEK/AMS) for two second, until the desired frequency appears (manual tuning).
Receiving FM stereo stations — POLAR modulation
The POLAR modulation function automatically changes and retunes the stations within 65.0 to 74.0MHz in the PILOT tone mode or POLAR tone mode.
The stations within 87.5 to 108.0MHz are received only in the PILOT tone mode.
If FM stereo reception is poor — Monaural Mode
1 Press SHIFT, then press 3 (PLAY MODE) repeatedly until "MONO" appears.
2 Press (4) () repeatedly until "MONO-ON" appears. The sound improves, but becomes monaural ("STEREO" disappears).
To go back to the normal mode, select "MONO-OFF" in step 2 above.
Changing the displayed items
Each time you press DSPL, the item changes as follows:
Frequency Clock
Storing the station names
— Station Memo
You can assign a name to each radio station and store it in memory. The name of the station currently tuned in appears in the display. You can store up to eight characters for a station.
Storing the station names
1 Tune in a station whose name you want to store.
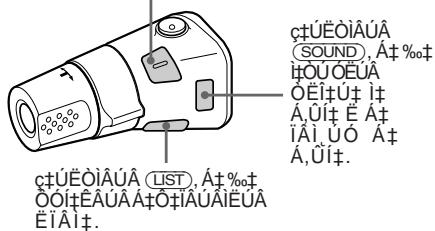
2 Press LIST for two seconds.

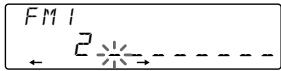
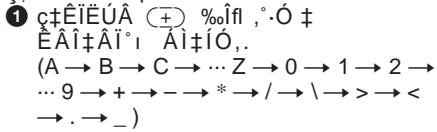
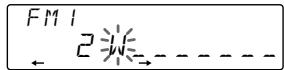
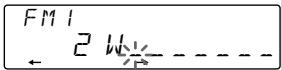
3 Enter the characters.
Press + to select the desired characters.
$$ \begin{array}{l} (\mathsf {A} \to \mathsf {B} \to \mathsf {C} \to \dots \mathsf {Z} \to 0 \to 1 \to 2 \to \ \dots 9 \to + \to - \to^ {*} \to / \to \backslash \to > \to < \ \to . \to_ {-}) \end{array} $$
If you press - , the characters appear in the reverse order.
If you want to put a blank space between characters, select "_ " (underbar).
Press ④ () after locating the desired character.
The flashing cursor moves to the next space.
If you press 1 () , the flashing cursor moves to the left.
Repeat steps 1 and 2 to enter the entire name.
4 To return to the normal radio reception, press LIST for two seconds.
Tip
To erase/correct a name, enter " _ " (under-bar) for each character.
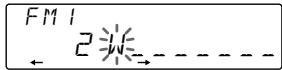
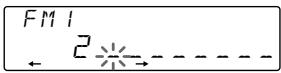
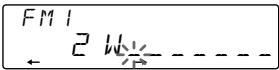
Displaying the station name
Press DSPL during radio reception.
FM1 2 WRK I55
Each time you press DSPL, the item changes as follows:
Station name* Frequency Clock
- If the station name is not stored, "NO NAME" appears in the display for one second.
Erasing the station name
1 Tune in any station and press (LIST) for two seconds.
2 Press DSPL for two seconds.
3 Press + or - to select the name that you want to erase.
4 Press ⑤ (ENTER) for two seconds.
The name is erased.
Repeat steps 3 and 4 if you want to erase other names.
5 Press LIST for two seconds.
The unit returns to the normal radio reception mode.
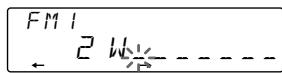
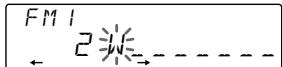
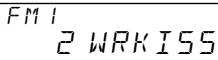
Locating a station by
name—List-up
1 Press LIST momentarily.
The name assigned to the station currently playing appears in the display.
LST 2 WRR LSS
2 Press LIST repeatedly until you find the desired station.
3 Press ⑤ (ENTER) to tune in the desired station.
Note
Once the station name or frequency has been displayed for five seconds, the display goes back to its normal mode. To turn off the display, press DSPL.
Other Functions
Using the rotary remote
The rotary remote works by pressing buttons and/or rotating controls.
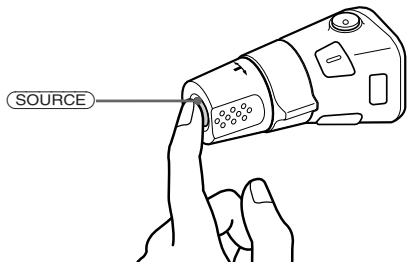
You can control the optional CD or MD changer with the rotary remote.
By pressing the button (the SOURCE button)
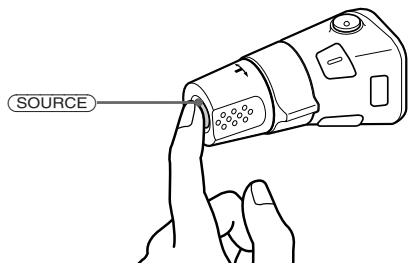
Each time you press SOURCE, the source changes as follows:
FM1 FM2 MW LW CD1 CD2 MD1 MD2 TAPE
Tip
You can turn on this unit by pressing (SOURCE) on the rotary remote.
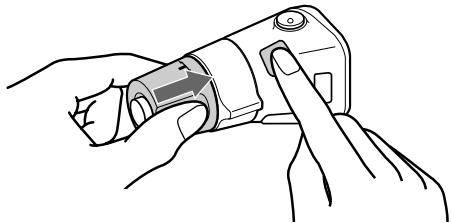
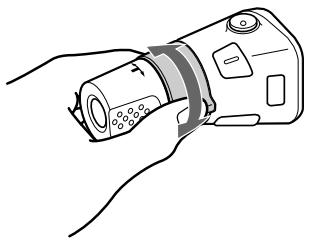
By rotating the control (the SEEK/AMS control)
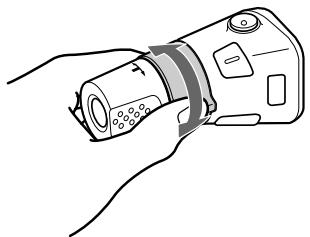
Rotate the control momentarily and release it to:
- Locate the beginning of the tracks on the tape. Rotate and hold the control, and release it to fast-wind the tape. To playback, rotate and hold the control again, and release it.
- Locate a specific track on a disc. Rotate and hold the control to locate the specific point in a track, then release it to start playback.
- Tune in the stations automatically. Rotate and hold the control to tune in the specific station.
By rotating the control while pushing (the PRESET/DISC control)
Rotate the control while pushing it to:
- Receive the stations memorised on the preset buttons.
- Change the disc.
Other operations
Rotate the VOL control to adjust the volume.

Press DSPL to change the displayed items.
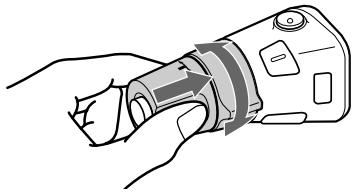
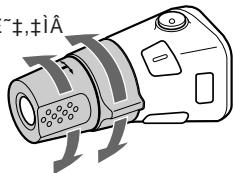
Changing the operative direction
The operative direction of controls is factory preset as in the illustration below.
To decrease
If you need to mount the rotary remote on the right of the steering column, you can reverse the operative direction of the controls.
Press DSPL two seconds while pushing the VOL control.
Tip
You can control the operative direction of controls with the unit.
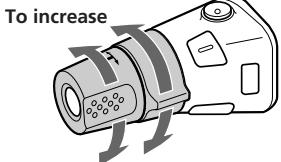
Adjusting the sound characteristics
You can adjust the bass, treble, balance and fader.
Each source can store the bass and treble level respectively.
1 Select the item you want to adjust by pressing SOUND repeatedly.
VOL (volume) BAS (bass) TRE
(treble) BAL (balance) FAD (fader)
2 Adjust the selected item by pressing (+) or (-) .
Adjust within three seconds after selecting. (After three seconds, the buttons work as volume control buttons.)
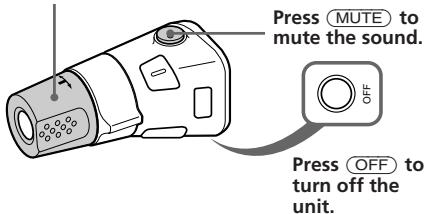
Muting the sound
Press MUTE.
"MUTE-ON" flashes.
To restore the previous volume level, press MUTE again.
Tip
The unit decreases the volume automatically when a telephone call comes in (Telephone-mute function).
Changing the sound and display settings
You can set:
- AMBER/GREEN to change the illumination colour to amber or green.
- BEEP to turn on or off the beeps.
- DIM (dimmer) to change the brightness of the display.
D. INFO (dual information) to display the clock and the play mode at the same time (ON) or to display the information alternately (OFF). - LOUD (Loudness) to enjoy bass and treble even at low volume. Bass and treble will be reinforced.
- RM (Rotary Remote) to change the operative direction of the controls of the rotary remote. — Select "NORM" to use the rotary remote as the factory preset position.
— Select "REV" when you mount the rotary remote on the right of the steering column.
1 Press SHIFT, then press ② (SET UP).
2 Press (2) (SET UP) repeatedly until the desired setting mode appears.
Each time you press (2) (SET UP), the item changes as follows:
CLOCK AMBER/GREEN BEEP DIM D.INFO LOUD RM
3 Press (4) () to select the desired setting (for example: ON or OFF).
4 Press SHIFT. When the mode setting is complete, the normal playback mode appears.
With Optional Equipment
CD/MD Changer
You can control up to 10 CD changers and MD changers with this unit.
Playing a CD or MD
Press SOURCE until the desired changer appears.
CD/MD playback starts.
When a CD or MD changer is connected, all the tracks play from the beginning.
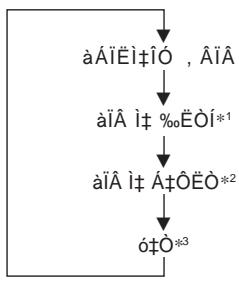
Changing the displayed items
Each time you press DSPL during CD/MD playback, the item changes as follows:
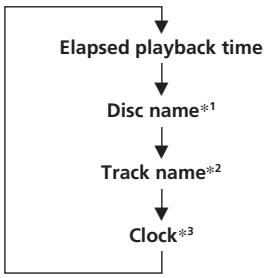
1 If there is no prerecorded name for an CD or MD, "NO NAME" appears in the display.
2 If the track name of an MD is not prerecorded, "NO NAME" appears in the display.
*3 If the dual information is on, clock does not appear in the display.
Tip
If the name of the MD is too long, you can scroll it across the display by pressing (SHIFT), then (1) () .
Automatically scrolling a disc name — Auto Scroll
The Auto Scroll function automatically scrolls the disc or track name of the MD when you press DSPL and the name length exceeds eight characters.
1 Press SHIFT, then press 2 (SET UP) repeatedly until "A.SCRL" appears.
2 Press ④ () to select "A.SCRL-ON."
To cancel Auto Scroll, select "A.SCRL-OFF" in step 2 above.
Displaying the recording date of the currently selected MD
Press DSPL for two seconds during MD playback.
The recording date of the track is displayed for about three seconds.
Locating a specific track
Automatic Music Sensor (AMS)
During playback, press either side of (SEEK/AMS) once for each track you want to skip.

To locate succeeding tracks
To locate previous tracks
Locating a specific point in a track
— Manual Search
During playback, press and hold either side of (SEEK/AMS). Release the button when you have found the desired point.

To search forward
To search backward
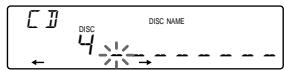
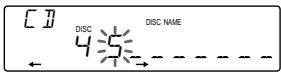
Locating a disc by disc number
Direct Disc Selection
Press the number button that corresponds with the desired disc number.
The desired disc in the currently selected changer begins playback.
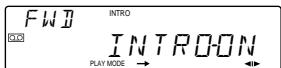
Scanning the tracks
— Intro Scan
You can play the first 10 seconds of all the tracks on the currently selected disc.
1 During playback, press (SHIFT), then press ③ (PLAY MODE) repeatedly until "INTRO" appears.
2 Press (4) repeatedly until "INTRO-ON." Intro Scan starts.
To go back to the normal playback mode, select "INTRO-OFF" in step 2 above.
Playing tracks repeatedly
Repeat Play
You can select:
- REP-1 to repeat a track.
- REP-2 to repeat a disc.
- REP-3 to repeat all the discs in the current changer.
1 During playback, press (SHIFT), then press (3) (PLAY MODE) repeatedly until "REP" appears.
2 Press (4) () repeatedly until the desired setting appears.

Repeat play starts.
To go back to the normal playback mode, select "REP-OFF" in step 2 above.
Playing tracks in random order — Shuffle Play
You can select:
- SHUF-1 to play the tracks on the current disc in a random order.
- SHUF-2 to play the tracks in the current changer in a random order.
- SHUF-3 to play all the tracks in a random order.
1 During playback, press (SHIFT), then press (3) (PLAY MODE) repeatedly until "SHUF" appears.
2 Press (4) () repeatedly until the desired setting appears.

Shuffle play starts.
To go back to the normal playback mode, select "SHUF-OFF" in step 2 above.
Labeling a CD
— Disc Memo
(CD changer with custom file function)
You can label each disc with a personalized name. You can enter up to eight characters for a disc. If you label a CD, you can locate a disc by name and select the specific tracks for playback (page 14).
1 Play the CD and press LIST for two seconds.
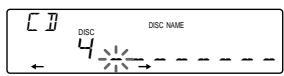
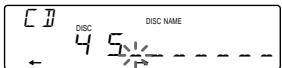
2 Enter the characters.
Press + to select the desired characters.
$$ \begin{array}{l} (\mathsf {A} \to \mathsf {B} \to \mathsf {C} \to \dots \mathsf {Z} \to 0 \to 1 \to 2 \to \ \dots 9 \to + \to - \to^ {*} \to / \to \backslash \to > \to < \ \to . \to_ {-}) \end{array} $$

If you press - , the characters appear in the reverse order.
If you want to put a blank space between characters, select "_ " (underbar).
Press (4) () after locating the desired character.
The flashing cursor moves to the next space.
If you press ① () , the flashing cursor moves to the left.
Repeat steps 1 and 2 to enter the entire name.
3 To return to the normal CD playback mode, press LIST for two seconds.
Tip
To erase/correct a name, enter " _ " (under-bar) for each character.
Displaying the disc memo
Press DSPL during CD playback.

Each time you press DSPL during CD playback, the item changes as follows:

Erasing the disc memo
1 Press (SOURCE) to select the CD changer.
2 Press LIST for two seconds.
3 Press DSPL for two seconds.
4 Press ① or 一 to select the name that you want to erase.
5 Press ⑤ (ENTER) for two seconds.
The name is erased.
Repeat steps 3 and 4 if you want to erase other names.
6 Press LIST for two seconds.
The unit returns to the normal CD playback mode.
Locating a disc by name
List-up (CD changer with custom file function or MD changer)
You can use this function for the discs that have been assigned a custom name. For more information on disc names, refer to "Labeling a CD" (page 13).
1 Press LIST momentarily.
The name assigned to the disc currently playing appears in the display.

2 Press LIST repeatedly until you find the desired disc.
3 Press (5) (ENTER) to play back the disc.
Notes
- Once a disc name has been displayed for five seconds, the display goes back to its normal playback mode. To turn off the display, press DSPL.
- The track names are not displayed during MD playback.
- If there are no discs in the magazine, "NO DISC" appears in the display.
- If a disc has not been assigned a custom file, "**" appears in the display.
- If the disc information has not been read by the unit, "NOT READ" appears in the display. To load the disc, first press the number button, then choose the disc that has not been loaded.
- The information is appears only in upper cases. There are also some letters which cannot be displayed (during MD playback).
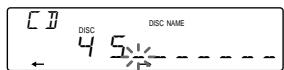
Selecting the specific tracks for playback
Bank
(CD changer with custom file function)
If you label the disc, you can set the unit to skip tracks and play only the tracks you want.
1 Start playing the disc and press SHIFT. Then press ③ (PLAY MODE) for two seconds.
Bank edit mode

Note
If you have not labeled the disc, the bank edit mode does not appear.
2 Press either side of (SEEK/AMS) to select the track number you want to skip and press (5) (ENTER).

The indication changes from "PLAY" to "SKIP." If you want to return to "PLAY," press ⑤ (ENTER) again.
3 Repeat step 2 to set the "PLAY" or "SKIP" mode on all the tracks.
4 Press ③ (PLAY MODE) for two seconds.
Notes
- You can set the "PLAY" and "SKIP" mode on up to 24 tracks.
- You cannot set the "SKIP" mode on all the tracks.
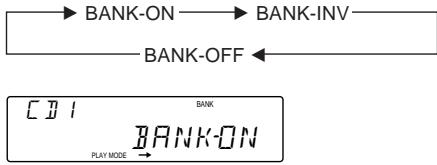
Playing the specific tracks only
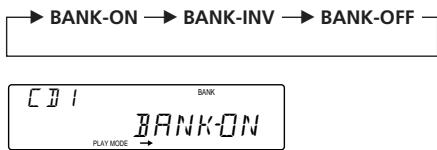
You can select:
- BANK-ON to play the tracks with the "PLAY" setting.
- BANK-INV (inverse) to play the tracks with the "SKIP" setting.
1 During playback, press (SHIFT), then press (3) (PLAY MODE) repeatedly until "BANK" appears.
2 Press (4)() repeatedly until the desired setting appears.
Playback starts from the track following the current one.
To go back to the normal playing mode, select "BANK-OFF" in step 2 above.
Additional Information
Precautions
- If your car was parked in direct sunlight resulting in a considerable rise in temperature inside the car, allow the unit to cool off before operating it.
- If no power is being supplied to the unit, check the connections first. If everything is in order, check the fuse.
- If no sound comes from the speakers of a two-speaker system, set the fader control to the centre position.
- If your car is equipped with a power aerial, note that it will extend automatically while the unit is operating.
If you have any questions or problems concerning your unit that are not covered in this manual, please consult your nearest Sony dealer.
Notes on cassette deck tape heads
- Long use of cassette tapes contaminates the tape head causing poor sound quality or complete sound dropout. Therefore, we recommend cleaning the tape head once a month or so with the separately available Sony Cassette Cleaning Set. If the sound does not improve after using a cleaning cassette, please consult your nearest Sony dealer.
- In case of old or inferior cassette tapes, the tape head gets contaminated much more quickly. Depending on the tape, one or two playbacks may cause poor sound.
Cassette care
- Do not touch the tape surface of a cassette, as any dirt or dust will contaminate the heads.
- Keep cassettes away from equipment with built-in magnets such as speakers and amplifiers, as erasure or distortion on the recorded tape could occur.
- Do not expose cassettes to direct sunlight, extremely cold temperatures or moisture.
- When the tape is played back for a long period, the cassette shell may become warm because of the built-in power amplifier. However, this is not a sign of a malfunction.
Cassettes longer than 90 minutes
The use of cassettes longer than 90 minutes is not recommended except for long continuous play. The tapes used for these cassettes are very thin and tend to be stretched easily. Frequent playing and stopping of these tapes may cause them to be pulled into the cassette deck mechanism.
Maintenance
Fuse replacement
When replacing the fuse, be sure to use one that matches the amperage described on the fuse. If the fuse blows, check the power connection and replace the fuse. If the fuse blows again after replacement, there may be an internal malfunction. In such a case, consult your nearest Sony dealer.

Warning
Never use a fuse with an amperage rating exceeding the one supplied with the unit as this could damage the unit.
Cleaning the connectors
The unit may not function properly if the connectors between the unit and the front panel are not clean. To prevent this, open the front panel by pressing (OPEN), then detach it and clean the connectors with a cotton swab dipped in alcohol. Do not apply too much force. Otherwise, the connectors may be damaged.
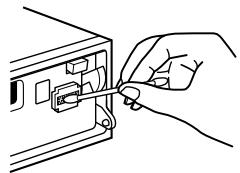
Main unit
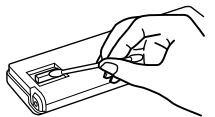
Back of the front panel

Dismounting the unit
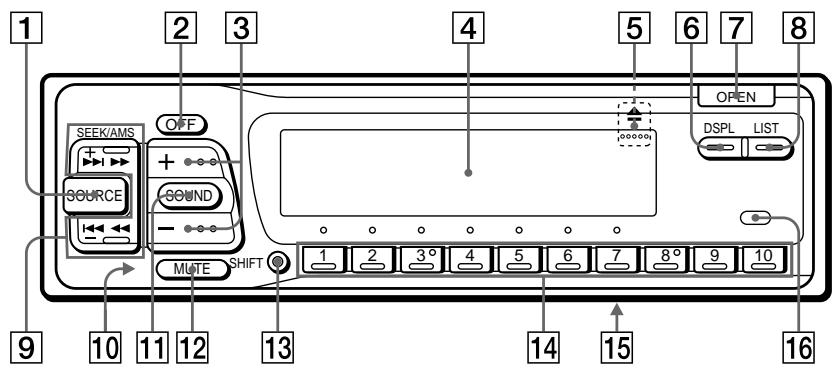
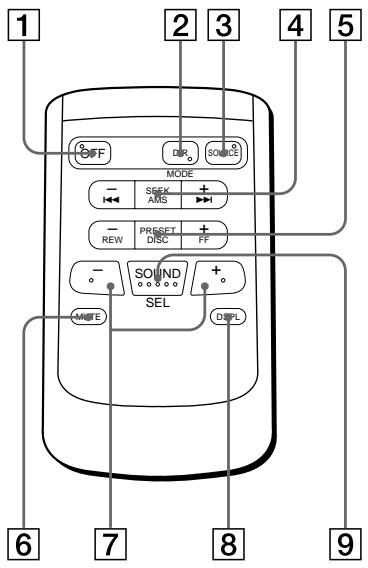
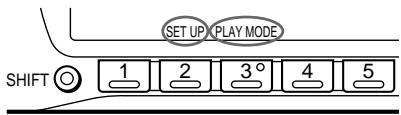
Location of controls
Refer to the pages for details.
SOURCE (source select) button 6, 7, 8, 11, 13
OFF button 4,6
3 (+) (volume/bass/treble/balance/fader control) button 5,8,9,10,13
4 Display window
5 (eject) button (located on the front side of the unit hidden by the front panel) 6
DSPL (display mode change) button 6, 8, 9, 11, 12, 13
7 OPEN button 4,6,15
8 LIST button
Disc Memo 13
List-up 9, 14
Station Memo
9 SEEK/AMS (seek/Automatic Music Sensor/manual search) button 6,7,8, 12,14
10 Reset button (located on the front side of the unit hidden by the front panel) 4
11 SOUND button 10
12 MUTE button 10
13 SHIFT button BTM7 SETUP5,11 PLAYMODE7,8,12,14
14 During radio reception: Preset number buttons 7,8 During CD/MD playback: Direct disc selection buttons 12
15 POWER SELECT switch (located on the bottom of the unit) See "POWER SELECT switch" in the Installation/Connections manual.
16 Receptor for optional wireless remote
EN
Location of controls
Optional wireless remote (RM-X41)
EN
Buttons with the same functions as those on this unit.
1 OFF button
3 SOURCE button
4 SEEK/AMS button
5 PRESET/DISC button You cannot do the manual search and manual tuning with the wireless remote.
6 MUTE button
7 + buttons
8 DSPL button
9 SOUND button
Buttons with different function than those on the master unit.
DIR button Changes the playback side of the cassette.
When the POWER SELECT switch is set to the position, the unit cannot be operated with the wireless remote unless SOURCE on the unit is pressed or a cassette is inserted to activate the unit first.
Specifications
Cassette player section
Tape track
4-track 2-channel stereo
Wow and flutter
0.08% (WRMS)
Frequency response
30 - 20,000Hz
Signal-to-noise ratio
| Cassette type | Dolby B NR | Dolby NR off |
| TYPE II, IV | 67 dB | 61 dB |
| TYPE I | 64 dB | 58 dB |
Tuner section
FM
Tuning range
65.0-74.0MHz
(at 30kHz step)
87.5-108.0MHz
(at 50kHz step)
External aerial connector
10.7 MHz
9 dBf
75 dB at 400 kHz
65 dB (stereo).
68 dB (mono)
Harmonic distortion at 1kHz
0.5% (stereo),
0.3% (mono)
35 dB at 1 kHz
Frequency response
30 - 15,000Hz
2 dB
- There are the numerical values measured at 87.5 - 108.0 MHz.
MW/LW
Tuning range
MW: 531 - 1,602kHz
LW: 153 - 281 kHz
Aerial terminal
External aerial connector
10.71 MHz/450 kHz
Sensitivity
MW: 30~ V
LW: 50~ V
Power amplifier section
Outputs
Speaker outputs
(sure seal connectors)
Speaker impedance
4-8ohms
Maximum power output 35W× 4 (at 4 ohms)
General
Outputs
Line outputs (2)
Power aerial relay control
lead
Power amplifier control
lead
Tone controls
Bass ± 8 dB at 100Hz
Power requirements
Treble ± 8 dB at 10kHz
12 V DC car battery
(negative ground)
Approx. 188× 58× 177mm
(w/h/d)
Approx. 182 × 53 × 162 ~mm
(w/h/d)
Mass
Approx. 1.3kg
Parts for installation and
connections (1 set)
Front panel case (1)
Rotary remote RM-X2S
Wireless remote RM-X41
BUS cable (supplied with
an RCA pin cord)
Design and specifications are subject to change without notice.
EN
Troubleshooting guide
The following check helps you remedy most problems that you may encounter with your unit. Before going through the checklist below, check the connection and operating procedures.
General
| Problem | Cause/Solution |
| No sound | • Adjust the volume with ⊙. • Set the fader control to the centre position for two-speaker systems. |
| The contents of the memory have been erased. | • The power cord or battery has been disconnected. • The reset button has been pressed. → Store again into the memory. |
| Indications do not appear in the display. | Remove the front panel and clean the connectors. See “Cleaning the connectors” (page 15) for details. |
Tape playback
| Problem | Cause/Solution |
| Playback sound is distorted. | Contamination of the tape head. → Clean the head. |
| The AMS does not operate correctly. | ·There is a noise in the space between tracks. ·A blank space is too short (less than four seconds). ·►on (SEEK/AMS) is pressed immediately before the following tracks. ·►on (SEEK/AMS) is pressed immediately after the track starts. ·A long pause, or a passage of low frequencies or very low sound level is treated as a blank space. |
Radio reception
| Problem | Cause/Solution |
| Preset tuning is not possible. | • Memorise the correct frequency. • The broadcast is too weak. |
| Automatic tuning is not possible. | The broadcast is too weak. → Use manual tuning. |
| The "STEREO" indication flashes. | • Tune in the frequency correctly. • The broadcast signal is too weak. → Set to the monaural mode (page 8). |
Error displays (when the optional CD/MD changer is connected)
The following indications flashes for about five seconds, and an alarm sound will be heard.
| Display | Cause | Solution |
| NO MAG | The disc magazine is not inserted in the CD/MD changer. | Insert the disc magazine with discs into the CD/MD changer. |
| NO DISC | No disc is inserted in the CD/MD changer. | Insert the discs in the CD/MD changer. |
| ERROR*1 | A CD is dirty or inserted upside down.*2 | Clean or insert the CD correctly. |
| An MD does not play because of some problem.*2 | Insert another MD. | |
| BLANK*1 | No tracks have been recorded on an MD.*2 | Playback an MD with recorded tracks on it. |
| RESET | The CD/MD changer cannot be operated because of some problem. | Press the reset button of the unit. |
| NO REACH | The lid of the MD changer is open or MDs are not inserted properly. | Close the lid or inserted the MDs properly. |
| HI TEMP | The ambient temperature is more than 50°C. | Wait until the temperature goes down below 50°C. |
1 When an error occurs during playback of an MD or CD, the disc number of the MD or CD does not appear in the display.
2 The disc number of the disc causing the error appears in the display.
If the above-mentioned solutions do not help improve the situation, consult your nearest Sony dealer.
Index
A
Automatic Music Sensor (AMS) 6, 12
Automatic tuning 8
Automatic Tuner Activation (ATA) 7
Auto Metal 6
Auto Scroll 11
B
Balance 10
Bank Play 14
Bass 10
Beep tone 11
Best Tuning Memory (BTM) 7
Blank Skip 7
C
Changing the displayed items 6,8,11
Caution alarm 4
CD playback 11
Clock 5
D, E
Direct disc selection 12
Disc Memo 13
Display 6,8,9,11
Dolby 7
Dual information 11
F, G, H
Fader 10
Front panel 4, 15
Fuse 15
I, J, K
Illumination colour 11
Intro Scan 7,12
L
List-up 9,14
Locating
adisc 12,14
a specific track 12, 14
a station 9
Loudness 11
M, N, O
Manual search 12
Memorising a station 7
METAL 6
MD playback 11
Monaural mode 8
Mute 10
P, Q
PLAY MODE
ATA 7
BANK 14
BL.SKP 7
INTRO 7,12
LOCAL 8
MONO 8
NR 7
REP 7,12
SHUF 12
POLAR modulation 8
R
Radio 7
Repeat Play 7,12
Reset 4
Rotary remote 5,9,11
s
SET UP
AMBER 11
A.SCRL 11
BEEP 11
CLOCK 5
DIM 11
D.INFO 11
GREEN 11
LOUD 11
RM 11
Shuffle Play 12
Station Memo 8
T, U
Tape playback 6
Telephone-mute 10
Treble 10
V
Volume 10
W, X, Y, Z
Wireless remote 18
Witamy!
iO U OEOU, O A+ OIfI+ I+ CD/MD
C'AO OEA,AE%tI A'OUCDE MD 13
eA,IAE%+IAI+OEOEUA —iUlI'EfI Intro Scan 14
eO,U+I'O O A;AO OEAAE%oI A I+ AtOEOT -iUilEfl Repeat Play 14
C:AO OEA,AE%oI AIT AOTOOE,O EAA,OIAI Aoo
—iUifEfl Shuffle Play. 14
c+EIAO,iA iCD —iUlif Disc Memo. 14
c+I E +IA I+ %oEoi OO EiA -1UilEfl List-up 15
aA · E I · I · O O ‰ A A A O O A ; AO OE , A ‰ I — I I I Bank. 16
NOO'IIIEUAIi EIUo iEi
aA IEA±AAO0±OIOU 17
eO%o: EtiA 18
NAIOIUE tIA tOt u 18
eA0IOEAEIAI tU A%EUAAu
UO tIAE
iAIIE-AOIEI+IUAEOUEIE 21
é'o,O%oO'U,óA†óUO'U‡In,‡IA‡ IAEAÖ †IOOÜE 22
ai%Aio 24
c‡~‡IIE ‰AÉOú,ÉfI
éAɪ+OÜ OÉ,ɪAɪ+O+U+
eA%oE O',O1t+tiIO,iU,tIA tI +Ot+U+EIE OIA%OInl+tiUIUI+UO tU+ UAEi+UOIO-EI+Uf,%o+ OAIuOUEUA+U+U.0A+OUOE,tAO 'AUO iIni+,O A%u, I+O EIA iEIEi+I
a†-AɪAÉɪ‡
eɪtUεOɪtAɪt-UUoit Aɪ O Altʊ OE,tiA, CEA
A tIé-EUA,OE tE A tO tI AUAiE UUIEE O
EAIi-AIEA i t A%o,t EUAII o tʊ O AɪEUA
‰EOOU tEE.
, i f i 1 % · I O A U O , I A I A
aOÉAUAAoT,IEUAO A%IOUOuT-IoA T UO IAI EAI UOA E O T A%o T A%oU, tEUAOUI %I AU.
1 cTuEoiAUA (OFF).
2 c UÉOIIAU (OPEN), A % O,O- 0 % EUA O A%oIQUO U+IO A+U O+IAIEA, OIA%o,UO,tO'AIUAO A%oIQUO U+IO i+fl,O EEA. O+EUA t, i %oflO+U+ IU OU t+
a±.AIAEIE
cA OOU+fEUA I'E'O, iU, U A-IU+Oo, iOOU+O A%IOU+I.OA+UO+IAEA
CIÉI, EÜA%o iEAEOUoiAùU tIOUO AúU O, IAIÉAO EÖ, tfiAUIO IU OU tO tU.
COIU+E, A0, HIEUA O A%oIQUO U+IOA+U,TAIEA O E, iJ -AI +U, A+I, tAUO,UOITUEIOA OAEII-E,A%oO A%oOU, +UEOO, AE%o+IAtEOOIO,O EUAIEUA.
aO,tUO,AEtUAO:OOA,AOE O A%IOUOUt-IoA tUO tIAEIAO,NEUA,O%OOt,IEN O tOtOOA'EtAi tIu.
eOU+flA iO A%IOUO U+Io A+UO+IAIEA
eOuT,AUAOU,O@iO A%oIOUOuT.iOAtUO tIAIE,A'U'EUU'AUO BtOtUt,iUO AOOiAIO tUE,uT EoiAooU,t iUEOIAUAIn,tU OtI tI,U.A.

a±.AIAEIE
CIETI EUA%IOAOU, EUA O A%O UO UoA O UO IAIIEAOOuU O UoO tI,O A.
cA tUEOIEUAOEIOAOUOTIOA UO IU AEA I I TOU E O OOOUI EIOEAUAIAIUEOI.
cA iUEOH EUA OEII O I O EIT, EUA EAIEIO UOIEIA: iAI tEUA iO A%IOU Ot IO A+ UO ±IAEIA.
CAEAIT,EOAO%IOUOT-IOATU,OIAIEA I
E%AIUTIOT-A,T,O,AUIET,I EAUOT-E I
OOIEIOTUOTEIAOTUOTI,UOIEI
EIAOTOUATIETIOUOTI
"OOUATIETUOTU OIOUOTI
"OOUOTIETUOTU OIOUOTI
t.UOIOE1OTIJEIOTIOO%AEAIUTIOT-A,t
O,AUIET,I%AUOUAOTAUOTI,UOAUO
IOEA%OAOE-TUOUUEAIIO
éA%oUO A%oEUAIAI OE,1+I
C O I U ~E, ~A A, ~U E U A II, ~A A
A†O‡,IIA,OOIÖEAIEA OFF·AA‰† OU A, †IIEI E O A%I OUO U‡-IO A† UO †IAI E A, A O A,UEO A%O U A%EUAIAIOE,†I
O O%o:1EAIEAI+ IInIoiO AaiU%o E (OiO
±I O A.ii.±UAI FI U POWER SELECT A
OooUa,OOIOEaieA (A).
èO‰,óUÓ,í‡ i‡
OU+E0IOUO
UOU OEOU,OA
UO , E
C·AÖ OÖÄ, Aɉ‡IAOU IAIU‡
1 c UÉOIÀUÀ (OPEN) E OO U†,AUA†OÀU†.
C'AO OEA, AEE%+I A/UO A+OO', +, UOi+UE'IO.
2 a†U,ô AUAO A%ó IÜO U‡ IÓA‡ UO ‡,IÁEÀ.
C OIU+E, A I OAU+U A, A' OOOU+,AI+, UEOIAUA (SOURCE) %OITUOAOOfl,fU "FWD" EIE "REV", A+ %O+ A'O'O-'A, AO OEAA%+I.A.
C:AO OEA,AE%o:t AOAU,Oi:tU,OU t:

C:AO OEA,AE%oA OAU%oIiU OU iI.

e.AUE
- àt%oI OIAIEU AOOOIOU tI %o,EEAI EA, IUEOIUA7
cA1i+OAOHn,tEi%Ei+EfUt,IO,uO OOOU,EUA iOAU+UEOIAU+IECrO2 (UII'En Auto Metal).
| ᇉ‡ | ç‡UÉÖIÀUÀ |
| ëÖAUÀ | OFF |
| ;ÁO ÓEA,ÄE‰‡IÀUÓ | |
| àÁ,‡‰ÉUÀ†‡OÀU‡Ü‡ | OPEN OÍA‰ ÚO,‡▲ |
A' AO O Aɪ+,E,ɪʌ Aɪ +ɪʌU+ʌ
eO,AIAI,'AOOEAAE%o,tIA, IUEOIIAA 工 _ 0 ^ 工 OU:UUOIEUA t (SEEK/AMS),O 工 _ 0 ^ 工 :IEAIIEA t Aoo t OAIUI%t.
at%o+A+OoIAA,OEA,AE%oIIAoo AIA I OAI, E,I A I O A%o EIE Ia%%, I+UEOIAUA ⑦ (▲▶).
cīIÈ tɪA tɪˈtɪOʊ O tɪ ᘆOÉO — iUilEfl Automatic Music Sensor (AMS)
aOÉAUA%oT AÖIOTÉUAA%O%A,AUA±OÉO‡ I+,A‰I·E.
eO, AIA I; AO OEA, AEE%I; IA, IUEOIUAIIOAIU A%EI OU -UUOIEUA (SEEK/AMS).

EIUO ^ Efi
COAIEO'U,IO'UO'UUEOIUA.UUOi
DSPL,OOI+A,tUt EIUO tEfl O
EAIAIfI ‡IUO OIA‰,‡:
oAQUOU+→oT
a+O+I A'Ufl,+I A i+
EIAI+U+1+ †‰E0Où+RÉEU
— iUl^Efl Station Memo
aOÉAUAA.0 EÖ,OEUEA EIAI ,Ofi
%EOOU+I'EnE%+,OA+OiAUEUA.aiAUo+
%EOOU+I'EfU+,IOfIUO EAI±UA,IOIAIu
OAOfl,fl, AI aOEAAU%o
A±O±iAUEUAA%O OOAi-UI,EA±A%o±
%EOOUsErl
aOiAUN,tiA iEiAi
%EOOU
1 c°OU OEUAit %oEOOUiEri, EAUO
EIAEOI±UA%±A±O±IAUEU.A
2 C†UÉOIÁU A LIST , O ‰·IÉAIÉA I † %o, A OAIUI%E.
3 C. % AúEúA.
1 c+UEOi+EUA 已 A+‰+EA-AAUA EAI+IEUAAI+E. (A→B→C→...Z→0→1→2→ ...9→+→-→*→/→ ->< →.→-)
C O I U T E, A I T U E O I A U A (二), A I T E U A O A O O f l, f t U, O. t U A I A%o.
COIU+E,AEOiU%A%oOOU+EUA EIU A+IIAEoU Ai+E,EA.AAU “(Oo%oA U+).
2 c†UÉOIÁUÀ ④ (→ OIÅ%ú†UÖ OUÀ
i+IA EIE EAI+IeA i+I. eEIE, +EfuU IO OAO AIaOu, † %oOOIA%o, +OUOOIA.
aO'UO iUUEOIUAU (1)
O EIE,+EfiU iU OO OAEIAOU,
,fl,O.
3 eO, UO AUA OU OIE E2, A+‰
,AA%AUA^fIQUO EIA.
4 a%oOÀ , iAùA i'i o iTiIó
%EOO EAIiA,IUEOIUAU LIST
O O%o.1EAIIEA I%o.A OAIUI%o.E
e',A U
a%E A U E A U A I O E, E, +U A E I A, ,A%oA U A "
(00 ‰)^ A U ) , IAOUO, OAI E AI I.
eOiA,iA iEIAUo i
%E0Ou+EfU+
cüÜÖIJAU (DSPL) OO, AïA Jt
O EAIiA i+‰EOOU±rEn.
COAIE O'U,IO'UO I'UEOIJAU (DSPL)
OoiA,t+U EiUO i+Efl O A O iAi fIiUO 0A%o,t:

C OIU+E, A I A A+O+IUAIIO EIAUO I+‰EOOU+I'EIUI, IAI+O A OI+A, +O'O-AIEAUO "NO NAME".
aAUE,tIA tEIAUO t
%EOOUjEfl
1 c°O U OÉU A IiOfI ‰‰EÖÜU†I E fI E I tUEOIÀU A (LIST), O ‰‰'IÉAIÉA I ‰‰, A OAIUI‰E.
2 C†UÉÖIÀUÁ (DSPL), O ‰°·IÉAIÉA I ‰. A OÄIÜI‰E.
3 c UEOIAU EIE ,A ‰E.A.AUA EIAUO,IAOUOEoiUAA EAUEUA.
4 c†ÜÉÖIÁUÀ (ENTER), O O‰ IÉAIÉA I‡ ‰, A OAIÜI‰E. àIAUOAEAU EÜO. èO, UO AUA OÜ'OE 3 E 4, †IÖEÖIúA‰EAU EAUAEAA‰ U,EEIAI‡.
5 c†UÉOIIAU A LIST , O EAI†IA I ‰,A OAI†%E.
AÖ‡ ð’U OÄ, ″†, iO iIäi AEEi
A†‡‰EÖÖ EAI†IÀ.
c+iiE +iA i+ †‰E0Ou+I'EfIoOeiaUo
- iUlEfl List-up
1 cúEoiAUA A iOIAiu (LIST). aiAUO,O EO,OAIOT +‰EOOUiEFlU, IOfluO OIu+U,A,IoiAIU+O A OOf,fl,t I A i+I.
LST 2 WRTSS
2 cTuEOkTeUAOIa%o,tuAIIO (LIST), %oOItUO tIA EUA EAI tU+ %oEOOU tEfl.
3 c'UÉOIÁU (ENTER), A% †I'OU OÉU A EAI I I U +‰EÖOÜ I 'Efl.
a. A I A E I eiAooIuEOU+Ou+EouE-AOUoU+ · ‰ ± U O O I ± At E, O ‰ ± IEA E A ± OAU OAI ± E, Ai+U OAA,0UO,OIO+TAI AEEi.
a. ^ ‰ ± EAI-EUA AI+tI,UEOIAU (DSPL).
N U, E UUI^E E
aAOOIAU,tIA tOuEoiOuO UOU OEOU,Ot UO,tIAE
eOuEoiUOou OeOU,OAuO uAIAIE A-OUE OIUEoIiA I+UOOIE E/EIE UREOA,UtuoE. CEAIOEAA%oU tfi,tUA %ooTIIEAUO UOEOU,OAtOfl CD/MD OOOIOuOu+OuEoiUO UO OEOUO
ó AÀ iúEÖiúA iú·UÜOiú (·UÜOIsOURCE)
COAIE O'U, Ió. túO ëUEOI AUA
SOURCE,EAUO-IEI'U OAOiAif 1+UO OIA%o:
FM1 FM2 MW LW CD1 CD2 MD1 MD2 TAPE
^, CEAIOEAEUA % 出 ,I,EEUA 0 U+AA I+UEOIiIAI+UUOITSOURCEI OU+EOIIOUO % EOU + I^0U0+I
ó AÀ, ÚfīE OÀ A, ÜIúúO E (A, ÜIúúO 'U SEEK/AMS)
aT,UAUAtOIAUUnEflOA A,UtUO E,OOO,O%UAA±%t:
CTIA EUA I+IIOU I A+OEOEUA,I U IAUIu,at;UAUA E A+‰.EUAA,UITUO tE,OOO,O%AUAAt-AO OAI,tEA,tIA I+IAUIu,tAt, AO OEA,AE%tA,I.AUA E A+‰.EUA A,UITUO tE,OOO,O%AUAA
CTIA EUA OO A%AIAI±OEO;IU %EOI. at; UAAE A+‰. EUA A,UITUO t, A+‰tIJA EUA OAO%AIAIIOUOOAU+OEO+EOIAo UO,t,OOO-A%AAUAA+‰A+OO-IAOEA,AE+%AIOU.
cTOU OEUATUOITUEIO AEOOUIEEUA.ATUUAE ATOO AUAA.UtUO ATOU OEU A tOO AAIAtoEOOUfI.
ó AÁ Á†, ÚiA i† A, UIúO Ú ÙA%, IúO OUA, O iUÉOI‡Ié (A, UIúO Ú PRESET/DISC)
a†, UAU A, U†UO †, OIA‰I‡UO OUA, O I‡UEOI‡E, A†‰‡:
eEAIU A%EOOUiEE,AtOiAUAIEO IOIAE tIEU.AUOIE.
eIAIIEUAA%EOI.

N U, E UUIEE
tUEOIAUA (DSPL), A%‰+ OOIIEUA OOI+A, tU+E iUO iT+En.
é Oiflɪt ë-ÜUIÉUÀ OOOIÉ
eI-OUIEUAOOOieI A,UItUO EUAOT Ut-EIOU OAI E,IUO A OOIAt UE,Ut.
a±U,AiE-±,iA
a+ i+in, iA
C O IU-ET, A U fl., %o%I OIE t'UA OU+EOIIOUCOU OEOU, A%EOU+I EOI O U+IAIEA OU%oIfoIIO I+OIT+IAO-10%oEIO A%oO:IAUA+OUIEUAOOOIEI A.UHJOUEJA
CUUO DSPL)O%IAEIAI 0AIOE,IUO O-A,AIAIO OUA IUEOIIE AUIUO VOL.
A U CEA EITUAA,AIOEIOOUDUO ± IIN,tUA OUIEJAODOOIEI AUTUEO EUAO UOUEOUO.
c±OU OE,IA I± I±IUA EOUUEIEUA I± A,U1
aOEAUA%tIou OEUAEIAIEOUE,EOOIEUA \~AOUUE, · + IOT E · + IOT IAEE AIOU O A%oIE EA%oIE,EOOIO,O EUAEIE aT,OAI EAU OIEIO,U O O,AUIO %O A O' tIfU tO OEIUEA A tEOIE E,EOOE \~AOUUE
1 aA-A AUA tIUA EOUEtU,IOflUO EOItUA%oIOTU OEUVA'AA OOOIA%O,tUAIIO tUEOItIA tI SOUND
VOL (OEt) BAS (IEtOEt) TRE (EoEt) BAL (-tI+IO) FAD (-tI+O O A%oI-E-A%oI Et)
2 c OU OEUAAE. I U I UA EOUEi A I UEOIiA I EIE c OU OEUAA, tIIEUA I U EOAIUI%E OIA%EA-O (eiA%U EOAIUI%E, UOIEUA UUI-EOE U OUIO,O I UO A,UIO E I OEI U I A,UI.)
a+,IU-,iA I+ A,Ui+
CtUÉOIAU A (MUTE).
e, A U, ‡ “MUTE-ON”.
aT%%o, AOUtIO,EUAO A%oEIOU O,IOTOEITU tA,UIt, IUEOIUA OUIO,O (MUTE).
^, AOT U U, UOITUEI O tIitn, OEITU t A,Ut
O EUAIAUoiOOA,in,tA (UUifEfl
Tele hone-mute).
e Oifl i+ iOU OEIEUEA I+ A,UI+ E Aí +I+
CEAIOEAUAA%tU OEUVA:
AMBER/GREEN, A‡‰† OÖiAiEUA^, A܇ i‡ OÖ, AÜiAiEÀUÖ.
BEEP, A+, II, +I A E EAI, +I A I+ OE,IIEU.A
DIM (EÄ·IÂ%öIfi,†IÂ), Ň OÖfIfi‡ i‡ fi IÖUÜU‡i‡ Aï‡i‡.
D.INFO (% ,0,E0I EIUO I 一 ^ 一 EfI),A AIO,I,AIIIO OOItA,tIA t AEEIEUA ATO,O,IEE,AOEAAE % ± 1 (ON) EIE t 0,AU EIUO tEE,AAU,tEOA(OFF).
- LOUD(OO%oOEIAE),A+‰EAOEUTUA U%oO,IoiU,EAOUIEOIEUAE,EOOIEUA ~AOUUE,‰O E O EOT: † OEIT A,UIT cEOIIE,EOOIÉ ~AOUÜE0A00%oEIT,U.
RM(OUt'EOIIO%EOUt'EOIIO),A%O OIAIEUA t'OUIEUAOOOOIEi A,UtUO EUAt'OUt'EOIIOUQJOU OEOU,O A%EOUT'EOILOU t'IAIEA.
-aa.AAUA'NORM',A+‰EAOIAU,±U AOU+EOIIOAUOUEOU,OAt UO+IAIEAOIA,O+,U+U+E+I tOU OEt.
-aa.A,AUA"REV",IO, UOEOIHTUA%oI OUE tUA OUfEOIIOO%EOUIT EOI OOU OEOU,O0%fIOIOT,IOT.
1 c†UÉOIIAUASHIFT, ‡OIA%o UO,I‡UÉOIIAU (2) (SET UP).
2 cTuEoiEua OoOIa%o, tUAIIO ② (SET UP), %OiTuO Oa OOf, E EAItIeI AEEI iT Iou OEi.
CLOCK AMBER/GREEN BEEP DIM D.INFO LOUD RM
3 cTuEoiAUA 4(→),A+‰EAAUAEAIiU+IOUOEiI (IOEIA:ON EIE OFF).
4 c'UÉOIIAU (SHIFT). eiA%i i+Ii t+OU OEt+U t+I%o%Aief AEEi, +Ot+U'U OA, ,IO i+IIEi AEEi i+, AO OEA,A%o+I.A.
é‰O’IIEUAIIO O-ó U%,IÀ iOU OÉOU,OÁ† OIfI‡ I‡ CD/MD
éUOAE±O†±UQEAEAOEAUA%±UO‡,fɪn,úA%o 10 UOU OÉOU, ± A±Ofni‡ iCD E MD.
C’AÖ OÉÁ, Aɉ‡IAOU CD É MD
cTuOEtEUA (SOURCE),%oItuO A OOf,EEAIIOUQUOU OEOU,O aOO-,A'O OEAAe%%tIA OCD/MD.
aO,tUO A,O,AtOuOEOU,OAtOinI t CDEIE MD,OEIEAOTOOU OtIOU O tIOA,AO OEAAE%o.
eOifI+I OOI+A,I+U EIU O I EOI COAIIEO'U,IO,IOUIOUEOIUAU (DSPL)O AIAI+,A0OEAAE%oI AOU CD/MD, EIUOTEfIuO AO OIAiIfUO iAio
1 C O I U +EUA, I O, +U O i nI +O A%o, +EUAII O A+OEOI O EIA I +CD EIE MD, I A I tI O A O OfI, fI + "NO NAME".
^2 C O I U +E, A I nI +O e%%, E U A I I O A t O E O t I O EIA I A t O E O OU MD, I A I t I O A O O n f, T "NO NAME".
^*3 C O IU+E, A A +IUE, E tI UUI+EnU A t%o,OEi EIOU+En, +OO,I E'U IA OAOf,n,t IAI tI.
^ e E IIO,O %o,I,0EIAI MD,IOEAUA%o,t,0
O O'AUUA,IuO,O%o,EEEUA,inO,E%oIOOO
AI tO OOOt+ (SHIFT) E OIA%o UO,tO ①
(<-).
A,UOiIUE-IO O A, UIiA I EIAUO I %Eoi - iUlI-Efl Auto Scroll iUlEFluA Auto Scroll +UOI+UE-OOiA, +fIOUO EIAI %EOiT EIE I A+OEOT OU MD, IO,UOiIUEOIUA (DSPL) E IIO EIAUO A O O,O'AUO OOA AI+I.
1 cúÉOIÀUÀ (SHIFT), ñOÀ‰ UO, ñ E ② (SET UP) OÖOÀ‰O, ñUAIO, ‰OlI UO O A OOfI, ñ “A. SCRL”.
2 cúEÜOIÁUÀ (→, Á±‰; EÁ·A'ÁUÀ "A. SCRL-ON".
a ± % ± O A I ± U E U A % A E O U , E A U O I ± U U I ^ E I F U ± Auto Scroll, E4-A A'U'A "A.SCRL-OFF", OU'O12O0-,"O A.
eOiA,iA i%uUuI A0EoI UAIUEf MD
CtUEOIIAUADSPL),O 念 _ 0 ^ 念 IEAIEA1%oA OAIUI%E OO,AIAI tAO EEA,AE%tIA OUMNtUtU,tIOflUOAItO AAtOEOtOA OOIAt,Ai tAtOIOU E OAIUI%E.
cīE iA iO O A%AI AI A♂OÉO — iUil'EfI Automatic Music Sensor (AMS)
eO,AIAI,t,AOOEAAE%o,tIA, tUEOIAUAA%o,tOUO tIEUAI t(SEEK/AMS) OO A%oEI O'UAt,OAIEtOEO,IOEUOEOTUA%oT AOIO-EUA.
a+‰+IiA EUU A0A‰,+E A+OEOE
C'AO OE'A, A'E%oIIA I+ A#OEOE, O OEA,OIAI
A‰ —üUlǐ'Éfl Shuffle Play
aOÉAU%o+EÀ- A'AU:
- SHUF-1Át; 'AÖEÄ, AÊ%àIáI; 'AúOÉÖÉ OÜ UAIU'Ef%oEÖI, O OEA,OIAI A%o.
SHUF-2A, 'AO OEA, A%oI AI I ATOEEOU AQUAI'OUOOU OEOU,O OEA,OIAI A%o
SHUF-3 A‡, 'AÖ ÓEÅ, Aɉ‡I Å I‡, O'E~I E ņOÉÖ,E OÉA,OIAI A‰.
1 eO, AIAI, 'AO OEA, AEE%oI,A, IUEOIUA (SHIFT), OIA%o UO,I +UEOI+EUAOOI%o,UAIIO ③ (PLAY MODE), %oI+UO O'Of,E "SHUF".
2 c U E O i I E U A O O I A % O I u I AII O () , % O I u O O A O O n, E A I i I u I O U O E I .

aTOO,;AO OEA,AE%oI A,O OEA,OIAIA%o.
a† ‰† OÀ, iAúA, iO i†iAi AÉEi i†
; AO OEA, Aɉ†iA, EÁ-à AúA “SHUF-OFF”, OU OI‡2OÖ-, O Å.
c‡EIAIO,‡IA CD
— iUiEfl Disc Memo (IOU OEOU, O A+ OIf1+ CD O O OO.U,A1+ U+E10, + UUIEfi)
CEA EITUAAIIOEIOU%tIETIAO,tUA OAIIEoIO OOO.UAOIEOAIEA.oEAUA%t ,AuaOAOAi tAOIEOI. eAooUo%oAUAEiCD,CEAIOEUA%tIIA EUo%oAIooOEIOEIAUOE%t EA.AAUOAAIAIEAOTOEEA t AO OEAAE%tI (OU tIe+16).
1 eUoiAUCD%o; AOEEAe%%oE iUEOIAUA LIST, OO%iEAIIEA i2 OAIUI%E.
2 C. A% A A 且 A .
1 CtUEOIeEUA 已 _ 十 A+%oEAAUAEAIiEUAAiE.
(A→B→C→...Z→0→1→2→…9→+→--*→/→ >><→.→)
C O I U ^+ E, i tUEOIAUA (一) AitEUA OAOIa,tU,O-tuaA 心 COUI ^+ E,AEIOtUA%oOU,EUA EIUA ,iIAEooAitE,EAAUA" (OO%oA u).
2 c†UÉOIÁUÀ (→) OIA%úIúO Iä EUA EAI±IÉiA±I. e EIE, ±EflUIU OO AÖ AIAO, ‡ %OOIA%o,I'ÜOOIA.
C O I U E, A E A A A U A (1) O E I E m;E fI U I O O O A O AIAOU, +fI,O.
3 eO, UO AUA OU'OIE 1 E 2 A%o; ,A%oAUA 'fIOUO EIA.
3 à‡‰† OÅ, iAúA iI oI iIAI AEEi I, 'AO OEA, AɉtI A I t CD, IüEÖIAU A (LIST) AóIóIó ‰, A OAIù%E.
e',A U a ± % t EAU EAU AIO A, E tUAA%o%AIOEiA; A%uA'
" (OO%o~A U+); A, OAiE Ai+1.
éOiA, iA iAöEo iOuO, OiAuUi %oEoi
CtUEOIIAUADSLO,AIAI,AOOEAAE%+IAOUDC.

CQAIE O'UIO,tUO tUUEOtUA (DSPL)OO AIA I;AO OEA,AE%oI ACD, EIUO tEtuO OA EAIaIN tUO OIA%o,t:

aAUEiA iOiAUXi%EOI
1 cTuEoiAUA (SOURCE), A+‰E4-A AUA UOU OEOU,OAtOIfi t CD.
2 c†UÉÖIÀUÀ (LIST), O ‰: IÉAIÉA i †, %o, A OAIUI%E.
3 CúEÖIÀUÁ (DSPL), O Ó‰·IÉAIÉA I ‰, A OAIùI‰E.
4 c UEOIAU EIE , A ± ‰.E.A.AUA EIAU,OIAUOEOITUA ± EAUU EAA
5 cúUÉOIÁUÀ (ENTER), O O‰;IÉAIÉA I ‰, A OAIUI‰E. aiAUOÖAEAU E. eO,UfIÉUA OÜ'OIÉ OÜ 3‰O4, tIO EÖIUTAU‰tEAU EAUAAU‰U,EEIAI.
6 c†UÉOIÁUÀ (LIST), O 0‰·IÉAIÉA i †, %°A OAIJ‰E. AO‡ U'U OÅ, †, IO i†iAI AEEI †, AO OEIA,AE‰iA i † CD.
- iUiléFl List-up (UOU OÉOU, O A‡ Oifl‡ i‡ CD O'O OÜ·OÜ, A† U‡ EIO, ‡ UUIfE¶ EIE UOU OÉOU, O A‡ Oifl‡ i‡ MD)
aOÉAU%A%EAOIIAU, tUA UAEUUII'EnA t%%EOI,A,IIOEUO; EIE O EOIQAIEAI. aOO, A~ AEIU O I'EnOUIOOI EAIiU t %EOI,OUA,O AO ~EUA I"t, + "C+EIAO,I tAI CD" (OU tIE #14).
1 cúUEOIAU (LIST) AúIóIaI. aiAUO, O EO,OAIOT%oEoi,IOEUOAO; AO OEA,AE%o,t, iOIAUIO A OOf,fl,t I ± AI t.

2 CúÉOiIéUÀ OOOIà%ó,úAIIO (LIST), %óIúO IáIÀ EUA EAIizIeN%éOI.
3 c†ÜÉOIÁUÀ (ENTER), Á‡‰†
A†OÖIÁUÀ‰†, ÅO OÉA, AɉcúAÓU
‰EÖI†.
O O%o.1E+,+I+OIA%o,+U+OU+Ie+

a±·AIAEiE
CAoI E OIAoI UO EIAU OI %EOI A-EIOIAtIO,O%IEAIEA I OAU OAIUI%EAI tU OAI,OTIO,O,OfIO IAIAEIAt,AO OEA,A%Ia %EAIUEA AI tI,tUEOIUA (DSPL).
aiAitAtAfoEUEUAOAOIAtUOO,AIA t:AO EAAEOI A OMD.
C O I U E, ifi 1% EOIO,A, i,t,aEliOUO UO OEOU,O,iA t iO A OOf,fl.t "NO DISC".
• COIU+E, I0, +UO i ‰%EOIIA A -EIO O EO, OAI0
EIAI +OO-OU, AI U+Ei, I ai +IOT A OONf, +
C O IU-Te,IO, UO EIUOT-EIUT A % EOIATA AH 1EIT O'AUAIOTU+ITAI+OAOHn,tT "NOTREAD"at % AEAUEA % EOIt, IET-IOT A % tUEOIAUAIEiEIT-UOJ, OIA % UO,tEA-AUA % EOI,OAA-EIAt A\%AI.
aiUO It EiU O A OoiA, t o iO O ,t iE -uiE. aiT, O' U+ tIIOE AI+ t, IOEUO IA IO,tU %o+ · 心 _ 0 + U OOIaTiA tAI t (OO,AIA t ; AO EOA,AE%oHA OU MD).
aA-E #IA iO O A%AIAEA+OEOEA+, AO OEAAE%+IA
—iUilEfl Bank (iOU OEOU, O A+ Oifl+ I+ CD O UUI Efl A+ OO.OU,AI U±E1)
C OIU+E, iEIAIO,U A%EOI,CEA IOEAUA%oOU OEUAtO+U%oAOIOT ATOEOE Eoo, A OEA,A%oAOIEOAIIEUA ATOEOE
1 a†OÖIÀUÀ%o‡, 'AÖ EEA, AÉ%oú AÜ OÜ
‰EÖI‡ E I†UEOIÀUAA (SHIFT). eɪA%o UÖ, † I†UEOIÀUAA 3 (PLAY MODE), O O%o. iEAIEA I †, A OAIUI%oE.
eAEEI A‡ A%oIüE tI A I † O%o. E tIéAUO

a+,AIAEi+ CIOU+E, AIA OUA I+EIAIO, EIOI, I+ A1+IA OAOIIA AEiAt A%oIUE iA iO%o. EtieAUO.
2 cUÉOIÁUAA%ó tOÜO tIeUA (SEEK/AMS), A t %o ëA. A U'A I OIA tI A tOEOt, IOEUXOEOI tUAA tO AOIO-EUA E tUÉOIÀU A 5 (ENTER).

ai‰Ei‡ EflU‡ OA OI¶I OU “PLAY” i‡ “SKIP”. c‡UEOIÁUÀ (5) (ENTER) OUIO, O, IÖ EOI‡ UA ‰ OA, IAU A I“PLAY”.
3 eO, UO AUA OU OI2, A+‰+I+OU OEUA A‰E I OU AEEIEUA "PLAY" EIE "SKIP" A+,OE~IE A+OEOE.
4 C UÉOIÀUÀ (3) (PLAY MODE), O 己 _ 0 ^ IÉAIÉA I ± % , OAIUI%E.
a±·AIAEiE
aOEAUA%tIou OEUAAEEIEUAPL"E "SKIP"A tIe-IIO,O24 ATOEo.
cA A, AIOEIO % ± I+OU OEU,AE-iE A+OEOE, AEEI "SKIP".
C'AO OEA,AE%oI A OIO I OO A%AIAIIEAOTOEOE
aOÉAU%o+EÀ-ÅA'UÀ
BANK-ON,Á±‰+, 'AÖ OÉA,Äɉ+UAA†OÉÖE O‡OÜ Oɇ "PLAY".
BANK-INV (E,I,A OIO), A†‰†; AO OE,A,E%‡U,A,O'E'1E'A†OEOE0I†OU OE† "SKIP".
1 eO, AIA I†, 'AO OÉA, Aɉ‡IÀ, I†UÉOIÁUÀ (SHIFT), ‡OIA‰ UO; ‡OOIÀ‰O, ‡UAILO (3) (PLAY MODE), ‰OI‡UÖ OÄ OOf, E "BANK".
2 cúUEOiEUA OOIA%oO,úAIIO (4) →, %oIúUO OA OOf, E EAIiIuIou OEiI.
C'AO OEA,AE%tIAUOAtO'O, tOU OIA%,EflA tOEO,OfU OAIUEF.
a†‰†OÀ, iAúA Ó. tUíO, iO i†iAIAEEIáT, AÖ OÉA, AɉiA, EÁ-A AUA'BANK-OFF', OÜ Oɪt 2 OÖ,-O A.
OIA%oUO,+,OO,+,IAAUEO~EOUAU
O; A, EUA IAIIE O OiUI, iUOAOI
IIOI. C A O E I. EUA.OfIIO UOEIEA.C
eEOUE 4-OEOUE2-1iHIOU A O
NÀ,É+Éflo ÉU AÓUÁIà 0,08% (WRMS)
oAQUOUIiAiUt
C,E,O E,E,I±I-UI
| íEO lIÓAUÉ | Dolby B NR | Dolby NR ÓAII. |
| TYPE II, IV | 67 dB | 61 dB |
| TYPE I | 64 dB | 58 dB |
e+‰E0
FM*
é-1,úÁ ò ÷OÜ ìi ë 65,0-74,0 MHz
(Ö E OÜ'ÖI‡ 30 kHz)
87,5-108,0 MHz
(Ö E OÜ Öݱ 50 kHz)
AùIóÁ±túAùI± tī tèEiÉi A± .i'
jiUAI
aAɉEiī~°AÖUÓU± 10,7 MHz
aAOOIA, ± A U, OU, EUAIIOOU
9 dBf
75dB0400kHz
cE,O OEtI-1- UI 65dB(OUA AO),
68 dB (I0I0)
iI OIE-EE EAI E,f,tiEfl OE 1 kHz
0.5%(OUA AO),
0.3% (I0iO)
e±A%oAifiA
35dB0E1kHz
OAOUOUIiAIUt
30-15.000Hz
cE,O1t A1,tU
2 dB
*ó,±ó,°EU O,EUAOUOEIOUE,EAI AIEO E
87,5 - 108,0 MHz.
eC/NC
e-1,tU A tO U OEi
eC: 531 - 1.602 kHz
NC:153-281kHz
AùIòtá túAùt
c+1 #EiEi A+, i-1
iUAI
aAEE%EiI~AOUOuT
10,71 MHz/450 kHz
6U,OU,EUAIOO
eC:30 V
NC: 50~ V
iOeI, ± UA
aA,O%oE
aA0%EAt
EOOIO,O'O EUAIE(O'O
OÉ,UIO A±i,±iA)
eO OUE,IAEIAI.EOOIO,O,EUAIEUA
4-8 ohms
a+IOEiIIT EAI0%oI-TOIOU
35W× 4 (O E 4 ohms)
é·E
aA,O%oE
aEIAEIEEA.0%E(2)
iO,fi,° Oó,ó%oEi
A±AIAI±.UOI±UE-1
iUAI
é O,O%oIΕIÁ
UO±,IAEAEA UOEi,±UAI
cEOIE±8dB O E 100 Hz
CEOJE±8dB O E 10kHz
aAEOi, iEfi i' A+1 iAUO
12VDCOU+IUIUI+UO
(A‡A¶i#,‡I A i‡
OU E*UAIiI iAIi
eAiaE
éIóIó. 188× 58× 177 II
( - 1, / % 0 )
éIóIó. 182× 53× 162 II
(-1, / %)
éloiO.1,3I.
NOOUf,filEfiOAOE
NAU+EIEA+EIOU+EIA
E O, A, ±I A
(1 JóIoiIáIú)
aI'U A ± O A%oI'OUO
± (1)
JOU OEOUOAt
%EQUI EOIIO
UÖ ±.IÄIÉA RM-X2S
NOO'IIEUAIIE tIOAOE
AAAE'IO%EQUIEOJIO
UÖ ±IÄIÉR M-X41
BUS±·AI(‰Oܱ.flOÀ O
RCA-ÖEÖIÖ, I‡-A¶
RC-61 (1 I), RC-62 (2 I)
RCA-ÖEIO, I±·A1
RC-63 (1 i), RC-64 (2 i),
RC-65 (5 i)
NOO'IIEUEAUIO O.OU%oIAI
jOU OEOU.OA±OJf1±
CD
CDX-71, CDX-72
CDX-81, CDX-91
(10%EOI)
CDX-T62, CDX-T65
(6‰EÖ݇)
iOU OEOU.O AToOnit
MD
MDX-60
aA-O iEAUo-IEI
XA-C30, E'U.I.
I'EtU±O'EtA±O'At±O'UO'EtO'OIAIe
Ioiou UReiU+EUAiE-AOIEUAi+IUA EOUUEI
A AAO A%EAAOUEA
e’IO,O%oOu,O A+ OUOu +Ifl,IA I+ IAEAO+,IOOUE
NóIIEHu IOI U OAI IEOU 'A CE OIOI,IA %o† A'EU AOO,A'AUO O-IAI, OIOEUEOIEAUA%o† OAOIOTUAOE †OU T OCT EFl O+U.
e A%oE%o†O +O, EUAO O, A I+OIOU OII EFlEOUO-O%OUI, O A AUAAEOU, EFlU+O0O, A,IAIUOE †OU T O+O+T U+
é·E
| è Ó-ɪʌi | è Ó-Éi‡/èʌ-AIΕʌ |
| çfl‡ Á, Üi | · éʌ, ÜiE †EUÀ OÉi‡út á, Üi‡ Õ Ñ. |
| · éOʊ†, AʌA, †fɪtɪO‡ IAɉU O À‰IÉUÀ EÁ †‰IÉUÀ IɔIóIÉ, O À‰IOOIÖEAIÉAO EOEOUA‡ Ú‰, †, EOOIé, O, O EUAfn. | |
| ë‰, ëtIÉAUÓ i‡ OɪIÀUúT A A‡IÉ-ÄIó. | · à‡, A‡U i‡ A.I. A‡†, tI, IAUO ëI‡ i‡ IUIIUTUO ‡ A - ëI †A‡-Al. |
| · AÜUOi' U A‡ O Oɪnt i‡ IOTU OÉi‡út A - ëI tUEOI‡ U. → e, †IAU'A OUIDO, O †IAUU‡. | |
| aI‰Ei‡-EEUÀ Ià OÀ OÖI‡A, tU i‡ A¶ i‡. | e,IUAO A‰IQUOúT-IQA‡UO ‡IAEA EÖO-ÉUÀUÀ O, 'A, †'EUA IIAE' (I‡ ÚU tI¶-‡ 18) A‡ O%o O-IOOUÉ. |
C:AO OEA,AE%+I A O'U IAIu+
| è Ú-ɪʌi | è ë-ΕΙ†/èʌ-AIΕʌ |
| a,üi-ú A O ëAí E,,fl,tɪEfl. | át+ó,flEfl OÓ ,l,tú+ú tɪ+óAúOúOí. →eO'ÉOU'AU,A,tú+ú. |
| ɪÜi-éflú+ AMS iA Uüi-éOIE ‡ ò,ÉiIó. | • ñi, ñAú+ú IAE‰úAúOÉOE. • ñAú+ú IAE‰úAúOÉOE Aú, ″‰Aí tú+ú (Oó-íflú+ó%o, A OAIú%oE). • ➔Ii (SEEK/AMS) A túUEOl+ú UO-tó O A%o ñOÀ%o, t'éU A tóOÉE. • ➔Ii (SEEK/AMS) A túUEOl+ú UO-tó O I%A‰ túO átOēOt A tóO'-tI. • Nt, ñOú+í ñEó ñOú ñIó ñOÉE ~AùOuÜE ñEIIó, ñOt+ú ñEiú ñAù ñEü túOʊOúT. |
e%%E0EEAiTIA
| è Ó·ÎÄI | è É~É·/èÀ~ÂIë |
| è ʼn,† Eú· ièòU OÉi‡ iA A , 'ÂIÖÉi‡. | • àtÓtɪAùAUO ‡,ÉilúTú~ÂIàʊOú. • èt‰EÖEÂI~,TiAUO Å U, ‰Å Oî‡-Ó. |
| Ä,UÖiúE~üi‡ ièòU OÉi‡ iA A , 'ÂIÖÉi‡. | èt‰EÖEÂI~,TiAUO Å U, ‰Å Oî‡-Ó. →aAÖOIAU,tiEUA ~i tóU OÉi‡. |
| àI‰Éi‡~Efú† "STEREO" Ó,AÜÉ O IÉ,†~ ë,O,AUIÉi‡. | • c tÓU OÉUÅO ± EilóAùOúOúTú. • èE,ɪtɪ'U i t EAI~,tiA Å U, ‰Å Oî‡.. →e AïÉIÂUÅ, iOIO AEEI (Où ëIÉ~± 8). |
éOíÁ,ÍA iI , A'IEUÁ (O E O, ÁIó %oO'HIIÉUAIIO UOÜ OEOU,á ñ ñfli‡ iCD/MD)
eI %0I EUA EI 已 EE O,AuI U,O 己 IEAIAI OIOHOAU OAIUI 己 E O A\~U, %0%0%0
| Öi ði | è E~Éi‡ | èA~AIEA |
| NO MAG | àt, tAEIQUOùOÜO, OEOU, OIAA OOU†, AIO, UOU OEOU, OUOÁ†, ùflit‡ t‡ CD/MD. | èO܆, AUA%oEOIó, Efn†, tAEI O' O At, A%oAIE%oEOIó, AUOU OEOU, OUO At, ùflit‡ t‡ CD/MD. |
| NO IISC | cflit, OOO†, AII %oEoi, UU OEOU, OUOÁ†, ùflit‡, CD/MD. | èO܆, AUA%oEOIó, AUOU OEOU, OUO At, ùflit‡ t‡ CD/MD. |
| ERROR*1 | aOIIOTIú %oEoi', U A AIT, OAI EIE A OOU†, AIO, ùUIO, *2 | èO'EOUAUEIIEOOU†, AUAO †, EIIO CD. |
| NEOI'U MD IÀ, A'OEA, AEE%o‡ O O ±%oE iñfí†, O O-IAI. *2 | èO܆, AUA%o U, MD. | |
| BLANK*1 | cflit, ATOEOE, i'U MD. *2 | èUOIUAIAT, 'AO OEA, AEE%oIIA MD O iT O, AIE ATOEOE iT I, O. |
| RESET | iOU OEOU, OUOÁ, ùflit‡, tCD/MD IAOEA%o, t: OUFUO, †%oE iñfí†, O O-IAI. | çtUEOIUA, 'UUO†, ATOI†, ùO'flit‡, t tOU OÉI†, U†, ùO†, ùT. |
| NO REACH | eU, O AI O I T- AUO I UOU OEOU, OUOÁ, ùflit‡, tMD EIE IA O T OOO†, AIE O, EIIO MD. | atU, O AUAI†, ùAUOEIEOOU†, AUA O †, EIIO MD. |
| HI TEMP | éIOLI†, UAIO, ùU, ùAO, A'AU 50, ±%oU†, AIAEE. | aA'tEUA%oI†, UOU'AIOA †UU †U O ADOIEEEO%o50, ±%oU†, AIAEE. |
¹ éÓ, āiA i†; ကO OÉA, Aɉ‡I A ÚCD/MD, IÖ, †úO OÀ OÖfl,E , A⁻†, I‡ Ai †‡ I A OÀ OÖfl,fl,‡ IóI A †‡ CD EīE MD.
² CÓIÁ ðú ‰‰ÉÖi‡, IÖEUÖ O ʼnEÀ,Ei † O ûAɪ û A O OOf, E i † Ai †i.
COI`E,`A,O A UO OIAiUEUA AAI EflA OIO,1U%oO U OU tEUA O.IAI,tIOUIUE tEUA OAO E I EIAI F U `O,IOE OOO AoiEiT Sony.
ai%%Aio
A
A.UOiUE\~AI%uTUÉIÁ±AÖEO(AMS) 6.13
I'Ull Efl Auto Scroll
iUlEfl Bank 16
iUlEfl Disc Memo 14
iUlEfl Direct Disc Selection 13
iUlEfl Manual Search 13
iUllEfl Intro Scan 7,14
üUlEfl List-up 10, 15
iUllEflRepeatPlay7,14
iUlEfl Shuffle Play 14
iUll^Efl Station Memo 9
n
n,fU iO,O,AUAIEAUX 12
ó, o, o, o, u, u
óO,O,IIéIa 5
dv^^_sk!
ä BTM (Best Tuning Memory = legiobban
foghatU adUk beprogramoz-sa) funkciU .... 7
MEly hangok 100 Hz-en
±8 dB
Magas hangok 10 kHz-en
±8 dB
jramell-t-s
12 V egyen-ram
autUakkumul-tor
(negativ f'dl)
MÈretek
kb.188 58 177 mm
(szE/ma/mE)
kb. 182 53 162 mm
(szE/ma/mE)
BeszerelEsimEretek
kb. 1,3 kg
SzerelikEszlet az
zembehelyezEshez/
OOIE C'UOuIó,EEIi'AtEe,tIeI,
*OOIE UUII'En ATA tUE,E O,tI.
CóòO ÓEA, A%AIÉA
IAI'U°, AIE~I
AEEEi
C°IÖEAUÁ,OOO OEÁ,O%ÉU,IAIUU, ±AIÉ-1; AEEi±:
INTRO(aIU OOIiE O,tiEÀ)OÀ,OfIHAU Cti,OOO OEÁ,0%EU,OA, A10OAIUI%o ,OAI U iAIUO.
- REP(éó,úO IAO CDO OÉA,AA,OIEA),OO OEÁ,0%EÜUUAI'EEU ‡,IAI U Oo,uo iO.
- NR (Dolby NR) OÓÁ, ÓlflAú C‡i,° - ÑU, ÓÉOUAɪ Dolby*NR B.
- ATA (Ä, UÖI ñÜ~AÖIÓ AäIUE, É O, tIEA et‰EOO EAIIEI) †, UÖI ñÜ~AÖIÉ ,II ~ tAU †‰EOO EAIIEI , O , Afl ·°U OE OA AIOUIE IAIU.
BL.SKP (eOUoIiEIAeIUA)OOUoiAUXU O%OIEUEUAIOOU.0IAA,OJOEAIU%o.
*eEOUAI ± NOI.E % IIn OIEAEAiE ± UIt, E"OU,OAIiTnIOIEAIEEUEI°NOI-E aT.OtUOEaEOAIOEI,aOIO "E.i eIO.DOLBY,NeaA,aEOOOUnEEE"‰,UI ,UID,OEOI nIuONUoI,Uo,t"UE UI NOI.E aT.OU E"atEOAIOEI, aoIO "E-I.
1 cEIEUASHIFT). aE%E tAOEItETUEEE SHIFT 0A\~E,tUOfI UOI,IO UA Ot tAU , IOUO A CTOEAUA , tU.
2 aio,oi tUIO iEiEUA 3 (PLAY MODE) % _ 0 O OOfI,AIEflt % _ 0 EOOIAA EAIaIO,O AEEi,t,OO OEAA,OAIeI. atE % _ 0 E tAOEtUEE ③ Ot tAU EAIaIFAUOFOI % _ 0 U -EIO- tAOI: INTRO REP NR ATA BL.SKP

3 艹 ± E I E U A (204 () %ifl,°-O+“ON”.
C0O O OEAA, A%oAIeAI+Et+AUOf1.
NlO, A, +AIeIIO. -IoiU AEEIU OOO EAA%oAIeI, -A EUA "OFF", OOEoIIOI, -A -3.
ꇉEÖO EAIiEi
A, UOi+UE~AOIOA AIAOAIEA OU1E E, OiflU
—áóOÉiIIEA Oó éOÜEiI,IOE cóU OÉiA (BTM)
eE.O.EtAU OUTEE OIT E0IAA OEIEOE,ITIEE ATOOEU E,OtfuOOfAOA AIOOUEE+OUOC IOEAUAATAOUE,OTfIu, % 0 10 OUITEE I tEooI % E+OaOI (FM1, FM2, aW Lw).
eA%oOUA AEAiEA
eEtOUEIA tOuE,O,AIfI UO,tAIEfl,tUOIO-EAI%fI OAAOU,tAIEft,EEEOOOIAUEUA UUI-E,aTOIEiEfloo eOUEI,IOE cTOUOEIA.
1 aiO,oi tUIO tEIEUA (SOURCE) %if! ,°O ± EAI±AIO,O%E±O+AOI‡ (FM1, FM2, MW EIE LW).
2 cEIEUASHIFT, A+UAI tEIEUA 6 (BTM). e E-O AIOOEOUOTEE,OtfiU, O0% IOIA I'EtI,E-tE,Oo1%oA OAAIOOUEITOUO. eE,tI ^tE AUIA OAI + AU, UO UOuIO,tAiaOAI,tOfuiU.
eEIA*iEfl
eE-O IA AIOOEU,OTInU,OUTIEE OO OIT:IE OE,IIIE.OOIE O EIEIATAUOn UOI IAIAt EUAI IOA IOE:AOU,OUTI'EE, iAIouoAIOIAI AII,ETEOUOTUoi IAAiINU'IE.
OOIEO A%oUO+IO,JIAI E IOIA EIooE-E UAUOff t%EOOIAA,O E-O IEtAU A+IAOAIE OUTIEE,OITIU,O EIoE-E UAIo,O ,tOUONEEIOIAIUIOIA.
á†IAOAIÉA, O†iflu, UO1,I0 EAI‡AI°I OU†I'EE
C'IOEAA A tIAOUE, OtfiU ,00 10
OUtEE I tEoi OEtOAOI (20 t FM1 E
FM2, 10 t MW EIE LW), EAI tAIOI
OOf%dA
1 aiO,oi tUo iEiEUA SOURCE %0fI ,°O EAItAiO,O%EeOtAOiT.
2 cEIEU A O%I U EA OU OI IIT, E (SEEK/AMS) %I I IOTU OEE I T OUI E, IOU O U C'IOUEUA AIAOUE, OITI U, O0%IOIA IOE IIT, E-AE.
3 NAEUEAIAIUIIOIAI U I E UO100U AIEA%o,U OAIUIooI IA UOI-EUA OE,1I.E AUIA.
ai%EiEi %oIIOE IOIA IOE iI, E-OAIeI AUI %EOOIAA
e EIA*iEA OIOE CooO'UaAou AiaOUE,OtInu, % U^ , OUtEoooUOEEAIOIaIOE ltEAE,OAAooU+AtiaOAlit,OtInU, OUtERU%AUOUAUt.
eEAI A+IAOAIi, O+ifU, OU+I'EE
1 aiO,oi tUIO itEiEUA SOURCE %0fI ,°O EAItAIO,O%EeOtAOiT.
2 A°OU O iEiEUA IOIA IU, IIT, E- U (O ① OO 10), OOOIOU OEA tIAOAI t, OtfIu, EAI tI tOUI tEi.
OÖIE C° IA IOEÀUÀI±OU OÉU,OfI± O A‰UOù±IO,IAIù, OÜtI^E.
A°OU iEIEUÀI O%iU E A OU OI
iiE E SEEK/AMS %Of I OEOI†
OUiEEE (I, UOIUE-AOIiI OU OEi†)
eiI E O,IEA OOUiI, IE, AUOf, I0, %o†
O EInuI iIiI-IE-O OUiE¶.
cEEIeUA i O%oi E A OU OI iiE, E E (SEEK/AMS) %OUAIO, OOIiA O%Au
OEiU EAIiI Ou iE¶.
eEIA\~IEA
OOIE+UOITUE-AOTnIou OEt
OOU+IT,IE,AUOnOIIE-IOU,OtEIEUA
IIET-EU SHIFT),A+UAI IIO,OITUO tEIEUA ③ (PLAY MODE) % _ 0 口 _ 0 fI,AIEnI % _ 0 口 _ 0 AIAA
"LOCAL"(AEEI1OITIO,OOEoIT).a+UAI
tEIEUA4 () % _ 0 口 _ 1 , -O+ON".
cOU OET. % _ 0 AUO EOA % _ 0 EU ONUO IOT
OUt'EE OUIOOEUA,I0EOI.IE OE,tI+IIE.
eO,AU
OOIE C+I EAAOUIT+OUOUTUOTEE,IOUO U
C'OUEUA OOOUI-E,U,ITIEUEA E%oA EEUA
0%uE AOU OOI II-E (SEEK/AMS),UA-AIEA
ooiOAIUI%oIOTAAOFlEUOTEAIATI+TOUOT
(UTIITOUOEIT).
e EAI OUA AO O, II iac — aO%UIfEPI POLAR iUI'EfIO%UflEE POLAR t,UOItUE-AOI EAIInAU EOA A1tOU tAUXtEE, EIA,AI AOU 65.0%O 74.0 ME', UOI,t,I' E AEEPILOT EIE UOI,t,I' E AEEI POLAR. eUtEE, EIA,AtA OU 87.5%o 108.0ME' O EIEt, UOI,IO, UOI,t,IOA AEEIA PILOT.
e E Oɪt.ɔI O E Aɪ A O U A A O O O, tll iæC — eAEEI aOIO
1 cEIEUASHIFT),A+UAI IIo,oi tUIO I EIEU A 3 (PLAY MODE) %oO OofI,IAIeFlt%oEOOIAA“MONO”.
2 aIó,OI tUIO iEiEUEA 4 () %oO OOfl,IAEfl "MONO-ON." a,UI UUI-EUOfl,IO.U%oAU IoiOUOE-AOIEI ("STEREO"EO'AAtAU O %oE0iAf).
Nif,OA,tAieFlI O.~IOU AEEIU ,A EUA "MONO-OFF",OOE0+IIOI,-A 2
aAIAIAEAOI AUO,,,O%oEiI%oEOIAE
aE%oE tAO EItEtUEE (DSPL) O+ IAU
EAIAIfAUOfOI%oU, Eoi. AOI:
oOuOu←oO
á‡IAOAIÉA,O‡IflU, I‡A,¶EE O܆I'EE
—áóOoiEiTiEÀeUtiEe
C°IOEAUA O EO,OEU, EIn I+E%oE +%EOOUtI'EE EA tIAOUE A,O,OtINU,aIn O EIEtAIOE,IouON'EE IOIAU OUTI'EE ,AoiA u t%EOOOIA.NiF O%IOE OUTI'EE C°IOEAUA A tIAOUE,OtINU, %oO,O,IE Al+IO.
aIAOAIEA,OfIu,IA,IEOUtE
1 GtOU OEUAO, tOuIe, EIN IOUO OE C°IOUEUA AIAOUE, OfInu.
2 cTeEUEA LIST i%o,A OAIUI%o.
3 C.A%EUA AI±Ie.
OOIE C° I+EIAU A, AI+I E OAIILUU, O- tUIO IO f%iA.
OOIE Q° I'OUEU A, OU, EU, O-AI IAE%U A1+I+I, I+EIEUA " (IEEIAA UEA).
2 eOIOA UO,O, iI C° iT-I E EAIaE AIiI, tEIEU A (→). aE,EE IU OO OA AIA+AUOfI OIAooAeOOAE.
OOIE C° iEIAU A (←), IEEIUEIU OO OAIAOUEUOn,IA,O.
aTe%E tAO EItEtUEE SOURCE
EOUO~IEI IAIflAUOfOI %0· EOI-O. tAOi:
FM1 FM2 MW LW CD1 CD2 MD1 MD2 TAPE
eO,AU C'IOEUAU,II-EU, % _ 0 十 日 E-O tEUEAIIET-EOUREOUtEOLIOUUAEOUtEOILO,O UO tIAiEn.
e OIOIO, t'AIIEfl A,UIfUO (A,UIfUO SEEK/AMS)
- A, UOI t E~A O I E e A U A I t I, I E eAIO (AMS)
Có, Aífí, OÓO ÓÉA, A%àIéfí lúEIEUÁ
Ió%oI U E A OUO OI IIT,E-E
SEEK/AMS OO%IOI U tAU tE%U.
%O OEEIU,IOUO U, C° IQUEUA
OOOUUEU,
Nif i1O'AEiEi
OOIAAU, EIOO EAI
Nif1tO'AEiEfl
O A%‰ U'Et %o OEAI
C1OÉ%AIIEA OO A%AIAIIO,O IAOU±
I 1 % O EEA—eU'IOE OOEOI
Có, Aín, ÓOÖ OÉA, A%o AIén I+EIEUÀ E
(3) (PLAY MODE) %oO O'fl, IAI'Efl
%EOOIAA "INTRO".
2 aiO,óí ÚIó iEiÉUÀ (4) → %o
Oófl,läiEfl‡‰EÖOIAA“INTRO-ON”.
EiAùOùIéO, iE A.
Nif,OA, ± Aiefi O.1oiAEEIU
eAIfEfl ± OAOUIO,OIAEA
aOIE AOU,O A,UIO,1%o OEAi
4-‰O OEA~1OÅ2-
j+1 JOA OUA AO
eɪt,ɪEÀ E‰ OÉtɪEÀ A,Uɪt
0.08% (WRMS)
oTOUOUIE%EToAoi
30-20.000 E
eUIO-AIEA OOIAAIO OEi+1-UUU
| iEOI‡OOAU | eEOUAI‡ Dolby B NR i, ~A i‡ | eEOUAI‡ Dolby N R ,°i1, ~A i‡ |
| TYPE II, IV | 67‰A | 61‰A |
| TYPE I | 64‰A | 58‰A |
éAíÉfī ±‰ EÖO EäiEi
iac*
aiUÀfɪtóU OÉIE
65,0-74,0aE
(Ö-+OÖI 30 iE')
87.5-108.0 aE
(Ö'±,ÖI 50 IÉ')
AùAùHè , 10‰
EIAA%O,JAJAÉ
iUAI
35 ‰ A O E 1 I É
oTOUOUIE%oEToAOi
30-15.000 E'
iO,AI
2 ‰ A
- u'UÉ. Aî'Éi° ÉAÀ Aî° O E ~±OùÓUÀ 87.5 -
108.0 aE
eC/NC
aiUÀ,īIiOù OÉIE
eC:531-1.602IÉ
NC:153-281JE
AùAùIà°E ,10%
EIAA%O,JAJAÉ
eOIAEUEUoI+TtOuOu
iUAli
O,U,O,E,U,A,I,O,U
10,71 aE/450 iE
.. 30~ V
NC:50 V
éAíEn UOEIEUAFI IóIóUÉ
C°1O%o
C'ó‰ ‰fl
OIO.O.O EUAIAE
(OOA%oEiEUAI,iE
UEIOUO tIE)
eO OUEIAE, OIO,O,O EUAIAE
EUAAE
4-8
A,UOItUEAOITfO UO EEt 8
A,UOI+UE-AOIEE aUaI+I,IEe AIOO
(AMS) 6,13
A,UOI±UE-AOI0A AiUE,E o,tiE A
e±‰EÖO EAIIEI (ATA) 7
A,UOItUE-AOIOAE 0% OIEAIEA 13
Auto Metal 6
A
AaIiO 12
A††I OE O,I†OÀ A%oI EI E A%oI Ei
OIIO,O,OEUAIAE 12
AAO-UIIOA a,U*iEIA 12
C
CDOO OEA,AA%AIIEAIOTiU%EOI† 13
COCO OEA,AA,AIEAEIE- 念 EO13
CÖÜÖ OEA,AA%AIIEAÖO°-ÖIA 16
C°O 16
QOOIEA 一 1OUOU° 12
E
ÉóiIOOU, 12