
DR 690 - Radio MOULINEX - Free user manual and instructions
Find the device manual for free DR 690 MOULINEX in PDF.

| Product type | Internet Radio / DAB+ / FM / Bluetooth / CD |
| Brand | Moulinex |
| Model | DR 690 |
| Display | 2.8" color TFT screen (320 x 240 pixels) |
| Dimensions (W x H x D) | 380 x 160 x 220 mm |
| Weight | 3100 g |
| Power supply | Mains adapter: input 100-240 V~ 50/60 Hz 0.8 A, output 12 V / 2.5 A; standby consumption < 1 W, operating 2 W |
| Network connectivity | WiFi 802.11 b/g/n with WEP, WPA, WPA2; WPS |
| Supported audio formats | MP3, AAC, AAC+, WMA, FLAC (32-320 kbps) |
| Main functions | Internet Radio, DAB/DAB+, FM (RDS), Bluetooth, CD player, UPnP/DLNA, Media Center, alarm (3 alarms), sleep timer, equalizer (7 presets + manual), weather and stock display |
| Connections | DC IN jack, 3.5 mm auxiliary audio input, 3.5 mm headphone output, FM antenna (adapter included) |
| Included accessories | Remote control, mains adapter, user manual |
| Care and cleaning | Unplug the device before cleaning; use a soft, dry cloth. Avoid abrasive products. |
| Safety | Use only the supplied adapter; do not expose to moisture; do not open the casing; choking hazard (small parts). |
| Spare parts and repairability | Contact after-sales service (Albrecht/Alan Electronics); repairs by authorized center. |
| General information | 2-year warranty (excluding wear parts); compliant with Directive 2014/53/EU; WEEE recycling. |
Frequently Asked Questions - DR 690 MOULINEX
User questions about DR 690 MOULINEX
0 question about this device. Answer the ones you know or ask your own.
Ask a new question about this device
Download the instructions for your Radio in PDF format for free! Find your manual DR 690 - MOULINEX and take your electronic device back in hand. On this page are published all the documents necessary for the use of your device. DR 690 by MOULINEX.
USER MANUAL DR 690 MOULINEX
$$ A a B b \dots Z z \% & # _ {-} \wedge \sim {}^{\prime \prime}, \therefore ?! ^{\star} - + @ < = > {\mid} [ \backslash ] (/) $$
$$ 0 1 \dots 9 _ {L E} ^ {D} $$
Internet and Digital Radio
Instruction Manual English
Table of Contents
-
Remote control 29
-
.Overview of DR 690 CD radio 30
2.1. Buttons and connections 31
2.2. Symbols in the display 31
3.Delivery content. 31
- First steps 32
4.1. Network requirements 32
4.2.Preparing the network 32
4.3. Navigation through menus 32
4.4. Getting started 32
4.5.AirMusic Control App 34
-
Main menu 35
-
Internetradio 35
6.1.My Favorite 35
6.2. Radio station / music 36
6.3. Local Station 36
6.4. Sleep radio 36
6.5. History 36
6.6. Service 36
-
My mediaU 37
-
DAB/DAB+ radio 38
8.1. Scanning for stations 38
8.2. Searching for and selecting stations 38
8.3. Station information and slideshow 38
8.4.Save favorites 38
8.5. Recalling favorites 38
- Media center 39
9.1. UPnP 39
9.2.DLNA 40
- Bluetooth 40
- FM radio. 41
11.1.Setting the station 41
11.2.Favorite 41
- CD Mode 42
13.Information center. 43
13.1. Weather Information 43
13.2. Financial Information 43
13.3. System Information 43
- Settings 44
14.1.Time Display 44
14.2. Manage my mediaU 44
14.3. Network 45
14.4.Date & Time 46
14.5.Alarm 47
14.6. Timer 48
14.7.Scheduled Playing 48
14.8.Language 48
14.9.Dimmer 48
14.10. Display 49
14.11.Power Management 49
14.12.Sleep timer 49
14.13. Internet Radio 50
14.14. Weather 50
14.15.DAB/FM Setup 50
14.16. Local Radio Setup 51
14.17.Playback Setup 51
14.18.DLNA-Setup 51
14.19. Equalizer 52
14.20Resume When Power On 52
14.21. Software-Update 52
14.22. Factory Reset 52
15.Troubleshooting 53
16. Specifications 54
17. Important Safety Notes 55
18. Warranty and Recycling Information 56
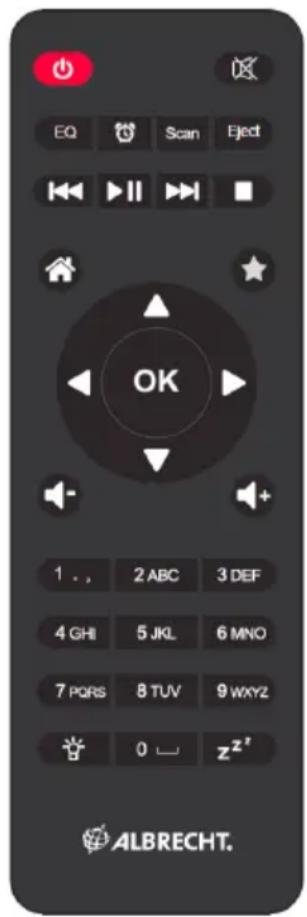
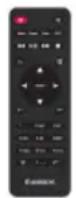
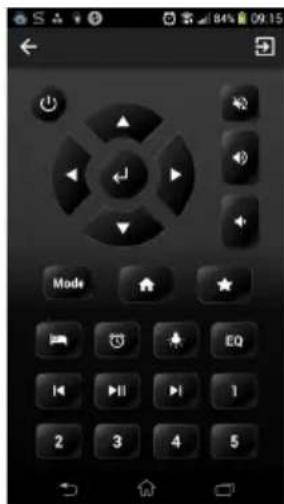
1. Remote control
| On/Off Turn the radio | on or off (Standby) | |
| Mute Mute the sound | of the radio | |
| EQ Equalizer Choose an equalizer setting | ||
| Alarm Open the alarm menu | ||
| SCAN Search Automatic scan in DAB+ or FM mode | ||
| Eject CD tray Open or close the CD tray | ||
| Backward Go to the previous song | ||
| Play/Pause Start or pause music playback | ||
| Forward Go to the next song | ||
| Stopp Stops music playback | ||
| HOME Go to the Main menu | ||
| Favorite | Show favorite list Long press: save favorite | |
| Navigation up Move up | up through menus | |
| Navigation left | Go back to previous menu | |
| OK | Enter | Confirm a selection in the menu |
| Navigation right | Confirm a selection in the menu and go to the next submenu | |
| Navigation down | Move down in menus | |
| Volume - | Decrease the volume | |
| Volume + | Increase the volume | |
| 0-9 | Favorite 0-9 | Recall a saved favorite station |
| Dimmer | Select display background brightness | |
| z^z | Sleep Timer | Activate the sleep timer Long press: open sleep radio menu |
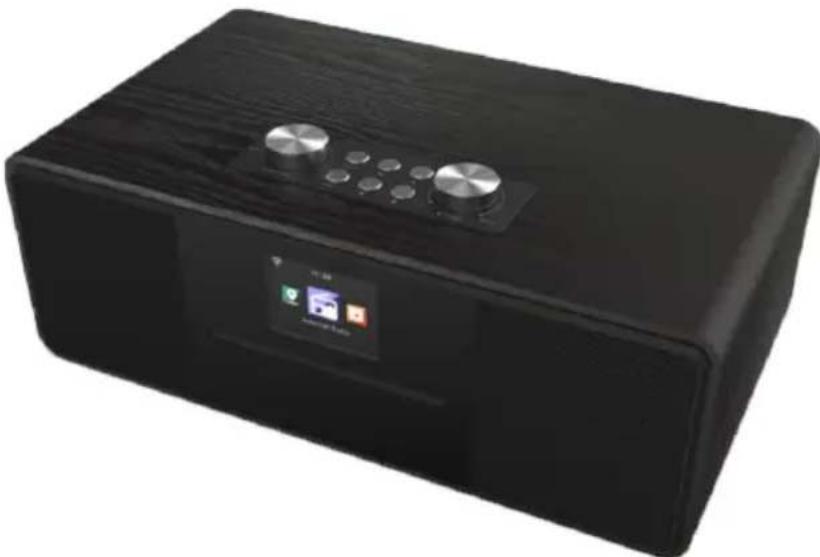
2. .Overview of DR 690 CD radio
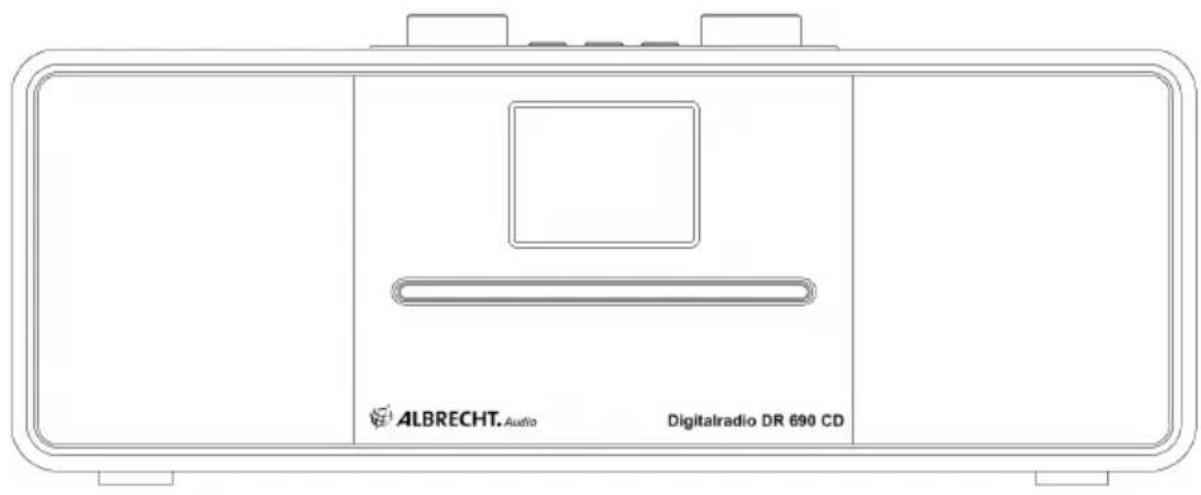
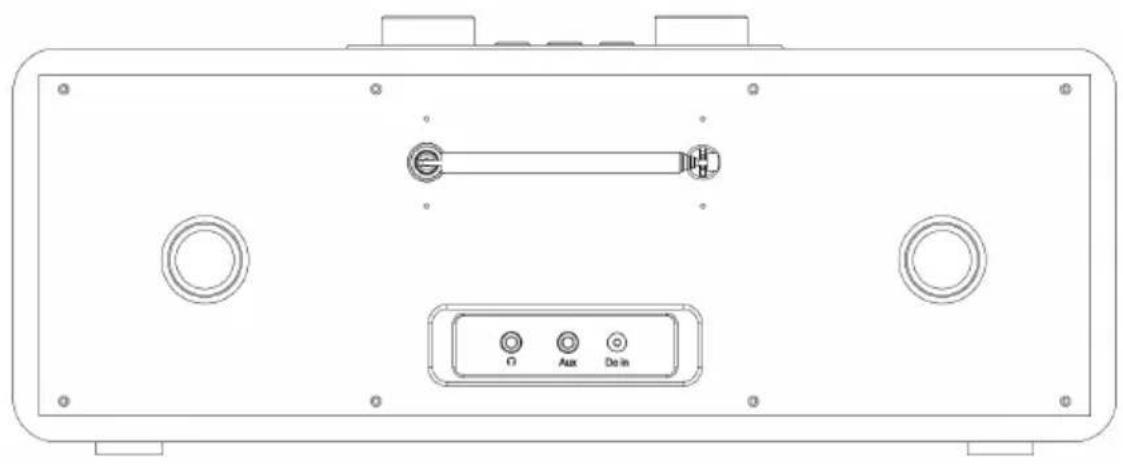
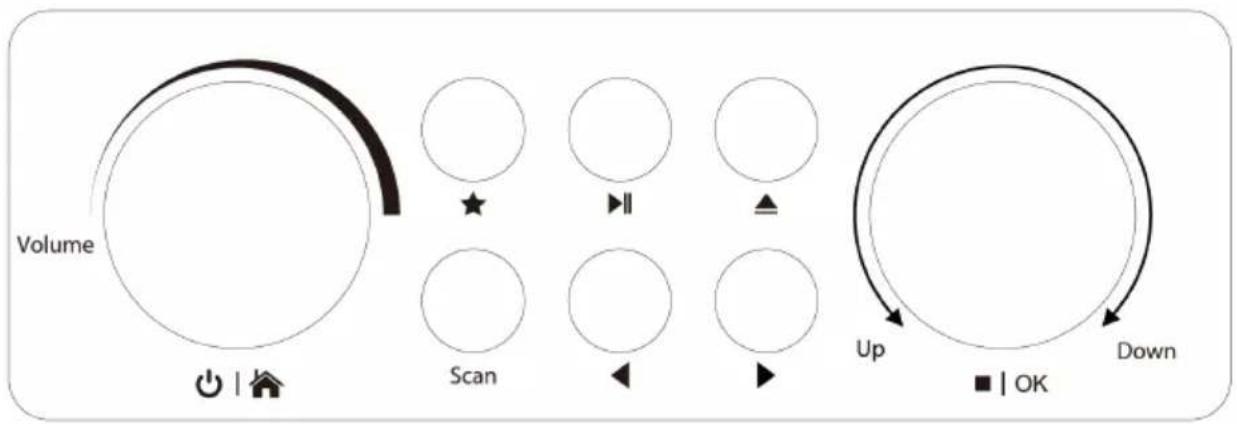
2.1. Buttons and connections
| Headphones 3.5mm connection for headphones | |
| Aux Aux | In 3.5mm connection on for external audio sources (like MP3 player) |
| DC-In Power supply Use the | included wall adapter to connect to the mains |
| On-Off/Home Turn radio on or off / open Main menu | |
| Volume Volume Turn the knob to change the volume | |
| Favorites Recall one of your saved favorites | |
| Play / Pause Start or pause music playback | |
| Eject Open or closes the CD tray | |
| Scan Scan | Scan for availab e DAB+ or FM stations |
| Left Go back to p previous menu | |
| Right Go to next submenu | |
| / OK | Stop / OK |
2.2. Symbols in the display
| Symbol | Description | Symbol | Description |
| ·· | Connection is being established Mute | ·× | |
| · | No Wifi connection | · | Search |
| · | Wifi connected | · | Alarm |
| · | Radio reception in mono | · | Internet radio saved as favorite |
| (·) | Radio reception in stereo | · | FM radio station saved as favorite |
| · | Aux In mode |
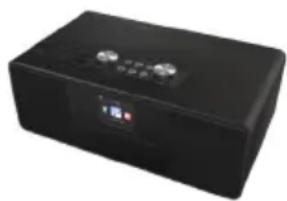
3. Delivery content
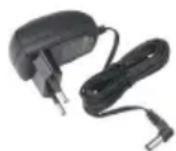
The following accessories are included in the delivery:
- DR 690 CD radio
- Power supply
- Remote control
- Manual
4. First steps
4.1. Network requirements
Before using the DR690CD, the following requirements must be met:
- Broadband connection with a wireless access point, router or similar network device.
The network device must support WLAN (802.11b/g/n) wireless connection. - If you want to remotely control the DR690CD via DLNA, you will need a PC or smartphone connected to the same network as the DR690CD.
4.2.Preparing the network
- Establish a WLAN connection as follows:
- Make sure that the WLAN indicator on the wireless access point or router is lit.
Please refer to the corresponding user manual for further information.
Please note: WLAN allows data transmission over short distances up to 20m without cables. Walls or ceilings reduce the range of the WLAN connection. Therefore, place the DR690CD and/or the access point within this distance as much as possible and avoid obstacles between the devices.
4.3. Navigation through menus
With the button, you can access the main menu of the DR690CD at any time.
Use the arrow buttons to move through the individual menus. Always confirm a selection with the OK button. Use the button to go to the next menu and use the button to return to the previous menu. The possible buttons are shown at the bottom right and left of the display.
4.3.1. Text entry
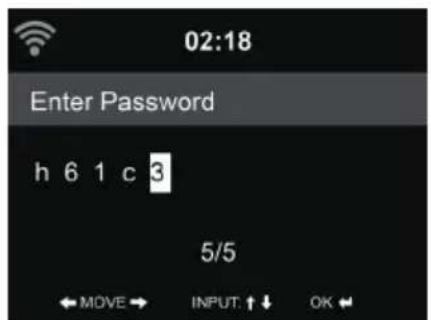
When you add the address of an online radio station or your wirless network key, you need to enter text. It is the same procedure to set the time, date or the alarm.
To enter upper/ lower case letters, symbols, or numbers:
- Press the up/down navigation button to select a character from the following:
$$ \begin{array}{l} A a B b...Z z \% \& # _ ^{\wedge\sim^{\prime\prime},\therefore ;?!^{\star}-+ @< = >{| }}\backslash \ 0 1 \dots 9 _ {\text {L E}} ^ {D} \ \end{array} $$
- Press the right navigation button to proceed to the next. Press the enter button when done.
NOTE: When entering numbers the numeric keys on the remote control can also be used.
4.4. Getting started
Connect the mains adapter to the back of the DR690CD and connect the mains plug to an electrical outlet. Connect the supplied antenna to the antenna input on the back. Alternatively, connect your antenna system/indoor antenna with the supplied antenna adapter.
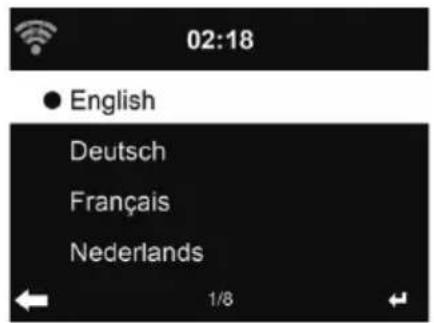
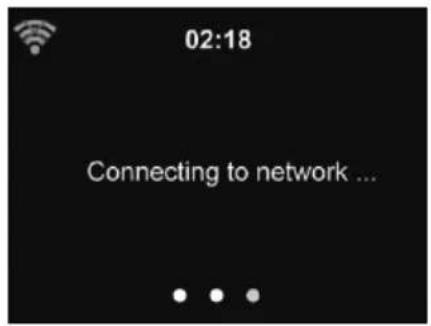
When using the device for the first time, please select a language and a wireless network.

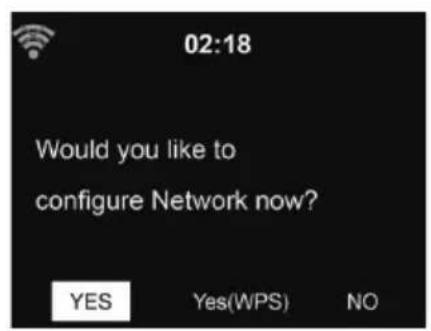
See Section 14.3 Network for detailed network configurations. You can set the network connection at the first start or later.
- Press (On/Off) to enter standby mode. The time, date and active alarms are shown on the display.
- If you have set up the network connection and use the DR690CD again within the network, the connection will be established automatically. If you would like to change the network, call up Settings to change the corresponding connection.
- Enter the network password using the keypad on the remote control or via and . If the desired character is displayed, press to navigate to the next entry. At the end of the input, press OK to confirm. Alternatively, press to navigate to the previous entry.
4.5. AirMusic Control App
The DR690CD can be controlled with your smartphone via WiFi. It is recommended to use the AirMusic Control App. Additionally to controlling the radio, the app is able to play the smartphone's music files on the DR690CD. Due to frequent updates of the app the manual is only available online. Please visit www.alan-electronics.de and enter the article number 27690 into the search. You will find the
DR690CD product page. On the tab Downloads you will find the AirMusic Control Manual.
The app itself is available for Android and iOS. It can be downloaded from here:

Apple iOS

Android

5. Main menu


You can reach the main menu from any mode by pressing the Home button
In the main menu you can select the following modes: Internet Radio, Media Center, FM, DAB+, CD, Information Center, Configuration and My mediaU (if activated, see chapter 7 My mediaU).
6. Internetradio
To switch to Internet Radio mode, press , select Internet Radio and confirm with OK. After connecting to a station, the logo of the station and information about the currently played song are displayed.
6.1. My Favorite
Create a list of your favorite preset stations. The radio supports 250 favorite entries including stations and folders.
To store a station, press and hold and select the required memory with / and confirm with OK. You may replace a previous saved station with a new one.
You can also save the station to your favorites while scrolling through the station list. When the station is highlighted you can press to enter this menu where you can add the station to your favorites.
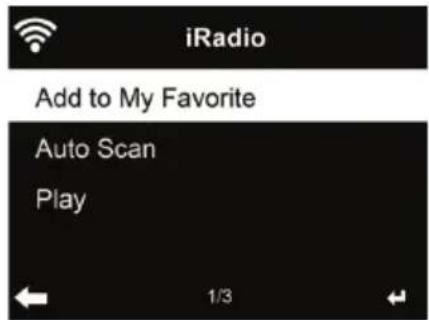
When you choose Auto Scan, the radio introduces every station in the list by playing it for 30 seconds. This is stopped when every station is played or you press the OK button.
In the preset station list, move to your station, press OK to listen. You may also press to enter its submenu to Delete, Shift Up/Down (move station to a different memory slot), Rename or Play.
6.2. Radio station / music
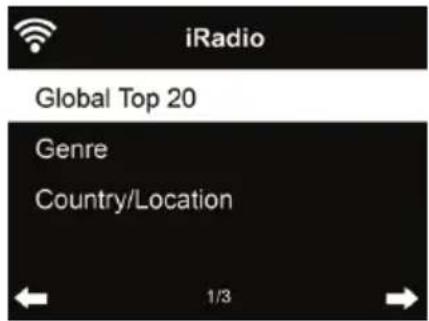
Stations are categorized into Global Top 20, Genre and Country/Location. Enter to continue the subcategories and choose a station to listen.
6.3. Local Station
In this menu all stations of your local area will be displayed. You can set the local radio setup as described in chapter 12.15. In the default setting the radio recognizes your location automatically.
6.4. Sleep radio
Select this option if you want to hear relaxing background sounds to fall asleep. You have a choice between:
Birds
Piano
Rain
- Spa (relaxation)
Space
Wave (sea noise)
By pressing and holding the sleep timer button (only possible in Internet radio mode!), you can go directly to the menu. If the device switches off automatically, the sleep timer must also be activated, see Chapter 14.12 Sleep timer.
6.5. History
Shows you a list of last listened stations. It can save up to 10 history stations.
6.6. Service
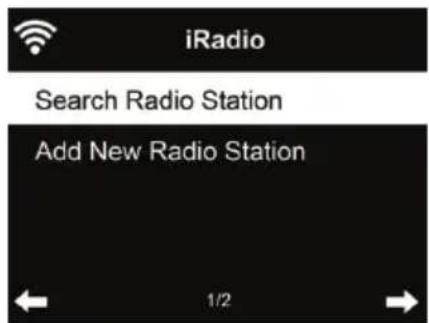
Search radio station - Enter your keyword to search radio station from the list.
Add new radio station - The added stations will be stored in My Favorite.
Tip: Loading the data from the server can take several seconds, especially if the WLAN connection is poor, as long as blank appears on the display.
7. My mediaU
Display and playback your own mediaU station list on the mediaU server. Set your account first.


To activate your own station list, follow the steps below:
- Access http://www.mediayou.net/
- Join my mediaU membership
- Login to the website
- Enter the wireless MAC addresses of DR690CD to the mediaU website. This information can be obtained in Information Center > System Information > Wireless Info
- After successfully configuring, you are able to save and view your own mediaU station playlist(s).Username and password are not required to enter to DR690CD.
- If there are different accounts stored in DR690CD, you can choose the one you currently use under Configuration menu.
After registration please turn off the radio and log in again.
Each time you have made any updates on the playlist from the website, go to Configuration
If enabled, My mediaU is displayed in the main menu.
If there are several mediaU accounts for the DR690CD, select the default account with which you want to log in. See Chapter 14.2 Manage my mediaU for more information about mediaU account setup.
8. DAB/DAB+ radio
The DAB radio mode receives DAB/DAB+ digital radio and displays information about the stations. To switch to DAB mode, press select DAB radio and confirm with OK.
For the best playback quality, the antenna must be aligned in such a way that the highest signal strength and thus the best sound quality are achieved. The icon at the top left of the display shows the strength of the received transmission signal.
8.1. Scanning for stations
The first time you select the DAB radio mode the DR690CD automatically performs a full scan to see what stations are available.
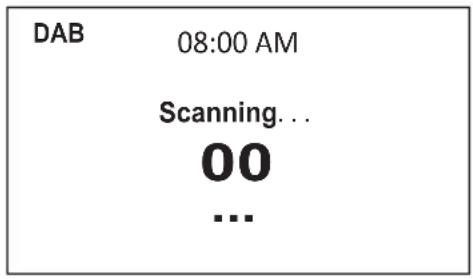
Once the scan is complete, the radio shows a list of available stations. If you want to perform another DAB station search later, press the button twice. If you want to overwrite the old station list, select Yes. Select No to add new stations to the old station list or ESC to not perform the search.
8.2. Searching for and selecting stations
To switch to the next/previous station, press / on the remote control during music playback. Alternatively, you can go to the complete station list with . Here you can see an overview of all available stations and select a desired station.
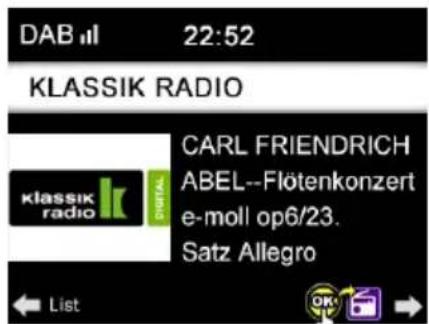
8.3. Station information and slideshow
Use the button to switch between the station information and the slideshow.
- Station name
Radio text (DLS)
Genre - Sampling rate and bit rate
- Signal strength
- Channel/frequency
- Multiplex name
8.4. Save favorites
To store a station, press and hold and select the desired memory with / and confirm with OK.
8.5. Recalling favorites
To recall a favorite, press , select the desired station with / and confirm with OK. Or just use the numeric keypad.
In the favorites list, press the button to go to a menu to delete or move the saved station. Saved stations cannot be saved again.
9. Media center
With the DR690CD, you can play music tracks using UPnP or DLNA. The difference between the two technologies lies in the direction of access.
The UPnP server can be accessed from the DR690CD and its music will be played back. Control and navigation are done by the DR690CD.
With DLNA, playback can be started on a PC, for example, and the DR690CD is only selected as a playback device.

9.1. UPnP
To enjoy music streaming from your PC, the following steps are to be done on the PC:
- Connect the PC to the network.
- Ensure the DR690CD is powered on and connected to the same network.
- Open the UPnP platform Windows Media Player (11 or later). Alternatively, other platforms or server such as Windows Media Connection may be used

- Allow to share your media to ALBRECHT DR690CD zu.
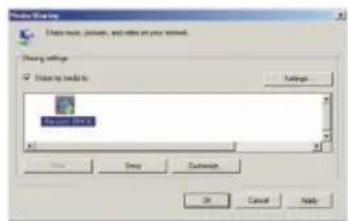
Add the audio files and folders you want to share with DR690CD to the media library.
You may also enjoy the streaming music from other music server, such as smart phone (Android platform):
- Connect the mobile to the network
- Search and install media sharing apps from Google Play.
- Add the audio files from your mobile you want to share.
After setup the shared server, choose the music and control playback on the DR690CD.
If you have set up shared media, you should see the shared media from UPnP. If you have more than one computer sharing media, the alternatives are listed. Select the shared media you want to play.
In the main menu, select Media Center and choose UPnP. It may take a few seconds for the radio to complete the scan for available UPnP servers, especially when the WiFi connection is bad. If no UPnP servers are found, it will show Empty. After a successful scan is done, select your UPnP server.
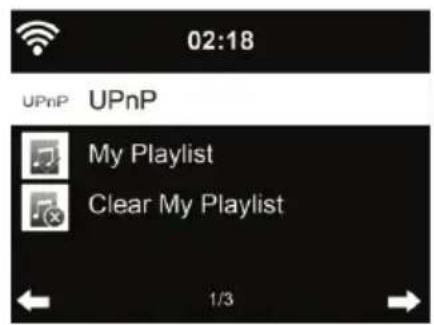
The radio will show the media categories available from the UPnP server, e.g. 'Music', 'Playlists' etc. Choose the media files that you wish to play.
Press / / / on the remote control and OK to play or stop. to stop or play. Press to view the display information of the playing track.
Tips: The radio can only read the track of file names with less than 40 characters. And the characters should be in European language. If you encounter failure of reading the track under UPnP mode, you may try to rename the file.
However, if the track is still unable to play, you can try converting the file to a different format.
9.1.1. My Playlist
You can create a playlist of favorite music from UPnP. When you play the music, press and hold OK to save it into My Playlist.
9.1.2. Clear My Playlist
You can delete all tracks from the playlist
9.2.DLNA
The default device name for DLNA is "ALBRECHT DR690CD". Alternatively, you can customise the name individually (see Section 14.18 DLNA-Setup).
See Chapter 9.1 UPnP for information on how to set up media streaming from your PC or other media servers. Also take a look at the instructions of your software or app.
The music files must be in MP3/AAC/AAC+/WMA/FLAC 32kbps->320kbps format for streaming via the DR690CD.
10. Bluetooth
To switch to Bluetooth mode, press and select Bluetooth.
Then enable Bluetooth on your mobile device (e.g. smartphone, tablet, etc.), search for active devices and connect the DR690CD.
If the radio is successfully connected, music can now be streamed to the DR690CD.
11. FM radio
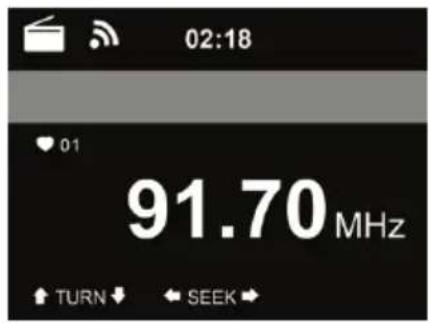

The FM radio mode receives analogue radio in the FM band and displays information from the station if it is sent via RDS. For the best playback quality, the antenna must be aligned in such a way that the highest signal strength and thus the best sound quality are achieved. The icon at the top left of the display shows the strength of the transmission signal received from the device.
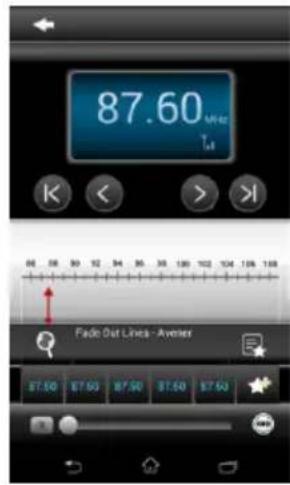
11.1. Setting the station
To switch to FM mode, press and select FM.
Press and hold / to search for FM stations. The search is interrupted as soon as a station is received.
Press / to set a station manually. Each search step is 0.05MHz .
The radio can also perform a complete station search and save all found stations in the favorites. Simply press OK in FM mode to start a full search of the complete FM band.
Attention: the complete scan will delete ALL your previously saved favorite stations!
11.2. Favorites
Press and hold save a station to your favorites. Select a memory slot and save the station with OK.
Up to 20 stations can be saved. To recall a favorite, short press select the desired station from the list with / and confirm with OK. Alternatively a saved station can be recalled directly via the numeric keypad.
12. CD Mode
Select CD mode from the main menu. Alternatively press Eject the CD tray will open and the radio switches automatically to CD mode.
Operation buttons for CD playback:
Play/Pause: Starts or pauses the CD playback
Stop: Stops the CD playback
Back: Jumps to the beginning of the current track. If you press the button again, it goes back to the previous song.
Forward: Skips forward to the next track on the CD
Left arrow: Opens the complete songwriter of the CD
In the menu Menu/Configuration/Playback Setup (see chapter „14.17. Playback Setup" auf Seite 51) you can select the repeat options for CD playback:
- Off: stops the CD playback at the end of the CD.
- Repeat all: repeats all tracks
- Repeat One: repeats only one track unlimited times
- Shuffle: plays the songs in random order
13. Information center
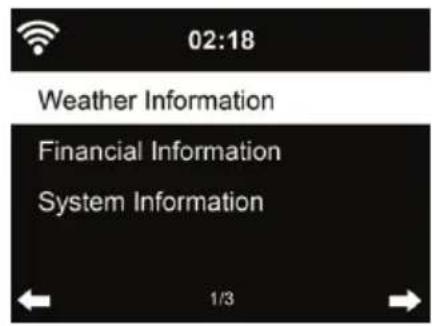

13.1. Weather Information
There are weather information and forecasts for over 5000 cities. Select the country and then the city for the weather details.

Press / to see the weather forecasts.
It is possible to display the weather information on the standby mode. On the weather information page, press OK to set the city to be displaying on the standby mode. Then turn on the weather display in Standby as mentioned in chapter „14.14. Weather" auf Seite 50
13.2. Financial Information
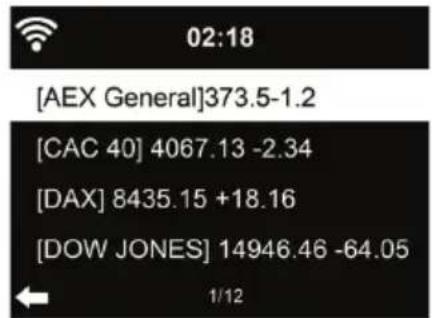
View the stock index from around the world.
13.3. System Information
Check out the version of the system, and the details of connected network. The information includes MAC address which you are required to fill in when registration of my mediaU membership.
13.3.1. SW version
The software version of the device is displayed here.
13.3.2. Radio network info
It displays the following information:
Status (WLAN)
- MAC address
- SSID (router)
- IP address
- Subnet
- Gateway
DNS1
DNS2
14. Settings
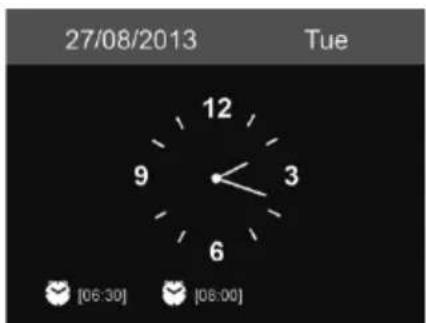
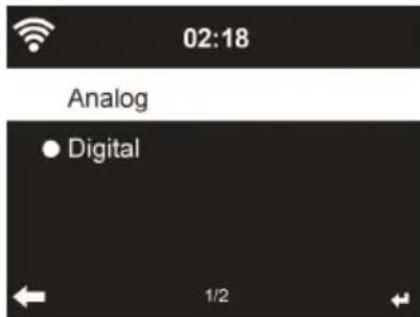
14.1. Time Display
Choose the style of clock during standby mode: Analog or Digital.
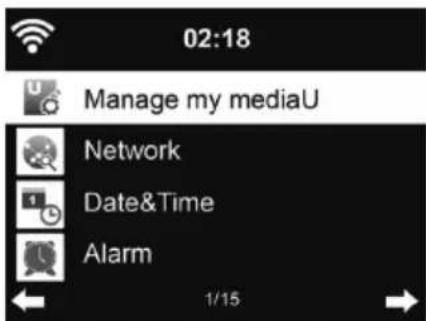
14.2. Manage my mediaU
When it is enabled, My mediaU will be shown in the main menu.
If various mediaU accounts exist in the DR690CD, Select the default login account in here. Refer to chapter 11 for more information of mediaU account setup.
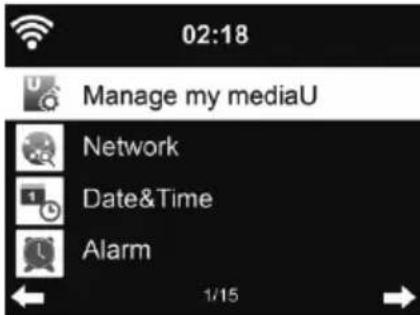
14.3. Network
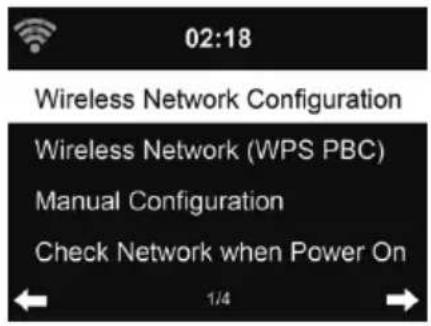

14.3.1. Wireless Network Configuration
Enable / disable WiFi network. When you enable the WiFi network, the system will automatically connect to the network
Select your required AP.
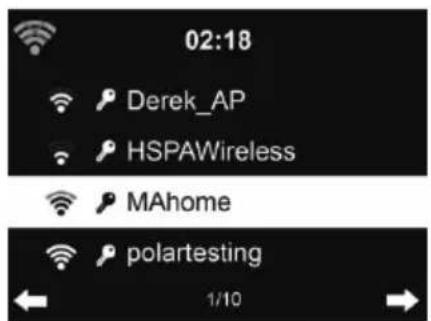
Enter WEP or WPA code to connect the WiFi.
If you would like to change/correct an entry, press to correct.
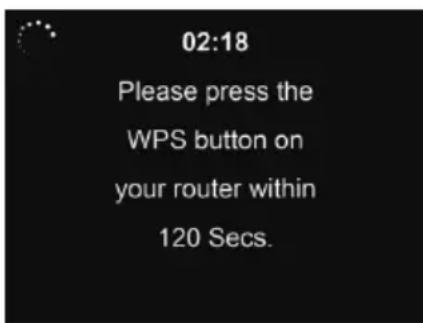
14.3.2. Wireless Network (WPS)
If you are using a router with WPS/QSS button, you may set up the network connection simple via WPS function. Enter it and go to press the WPS/QSS button on your router within 120 seconds. The connection between the router and the DR690CD will then be configured automatically.
14.3.3. Manual Configuration
You can choose DHPC (which IP assigned automatically) or manually input IP address for wireless network connection.
When you select manual setting for wired connection, the followings have to be entered:
- SSID (the name of Access Point);
- IP Address;
- Subnet Mask;
- Default Gateway;
- Preferred DNS Server;
- Alternate DNS Server.
You may choose (Manage) specific network if you have setup more than one network connection within an area.
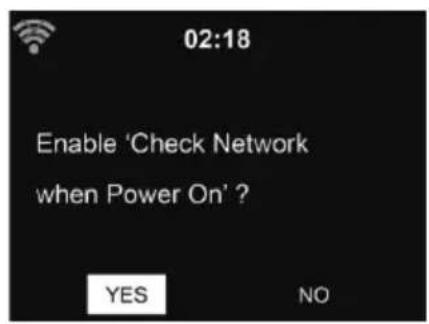
14.3.4. Check Network when Power On
"Enable / disable WiFi network":
When you enable the WiFi network, the system will automatically search the available AP. Select your required AP.
Enter WEP or WPA code to connect the WiFi.
If the wireless network connection is not existed or failed, the „No Wifi connection“ icon will be shown at the top left corner.
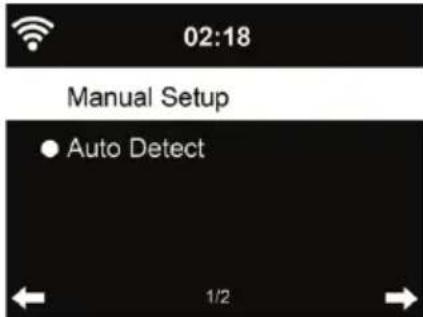
14.4. Date & Time
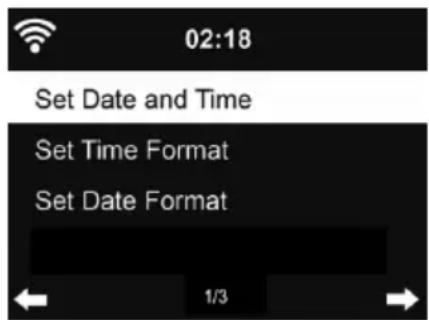
- Press Set Date and Time and choose between Manual Setup and Auto Detect.
- Setup the date and time
-
Set time format display as 12 Hour or 24 Hour (default). Only for manual setup required.
-
Set date format in the positions of YY (year), MM (month) and DD (day) - YY/MM/DD, (default) or MM/DD/YY.
- Turn on/off (default) the Daylight Saving Time (DST).Available only on manual setup
With a wireless network connected, GMT (+00:00) is the reference for time setting. Add or deduce the hour according to your time zone when you set the time.
14.5. Alarm
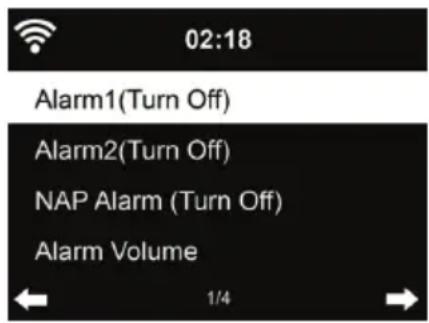
You can choose between 2 regular alarms (Alarm 1 and Alarm 2) or the NAP Alarm in this menu.
Press on the remote control to enter the menu directly.
To set Alarm 1 or Alarm 2, press and turn it on. Now choose the frequency (daily, once or on specific days of the week, e.g. Monday to Friday). Next choose the desired alarm source: Beep tone, Melody, Internet Radio, FM Radio or DAB/DAB+ Radio. Afterwards you can leave the settings by pressing or
At the time of the alarm the radio connects to the Internet if the set network is available. Therefore there may be some delay before the radio starts playing your station. If no network connection is established within one minute, the alarm will change automatically to Melody.
If the NAP alarm is activated, it alarms once after 5/10/20/30/60/90/120 minutes depending on which one you have set.
You may choose Alarm Volume to configure the volume of the alarms. During the alarm the volume will increase automatically up the set value (Crescendo function).
When an alarm is set, there will be a clock icon at the top of the display. The clock icon with alarm time will also be displayed on the standby screen.
During alarm, press any key to enter snooze mode. It will alarm again after 5 minutes. Press the
key to stop the alarm.
14.6. Timer

Press to set the timer, press OK to start. The timer will count down and play beep sound when it reaches 00:00. To cancel the timer, enter the timer screen and press OK again. When the timer is running, you can change the mode, the remaining time is then displayed in the top right of the display.
14.7. Scheduled Playing
This function allows to automatically play the radio at a scheduled time.
Turn on the function and select how often you want to repeat it (daily, once or only on specific week days). Then select the scheduled start and stop time and decide which mode (Internet, DAB or FM radio) should be played.
14.8. Language
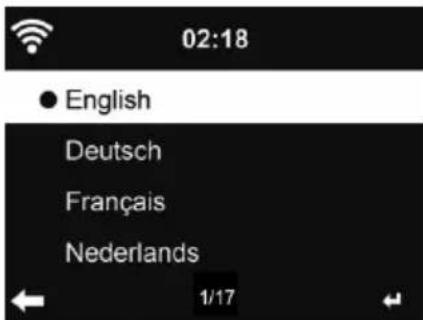
Select the OSD language: English / Deutsch / Espanol / Francais / Portugues / Nederlands / Italiano / Pusskny / Svenska / Norsk / Dansk / Magyar / Cesky / Slovenský / Polski / Türkei / Suomi
14.9. Dimmer
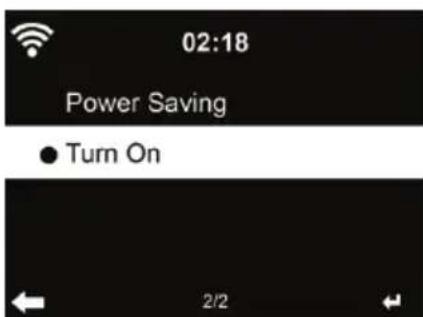
Configure the brightness of backlight on the display.
If you select Power Saving you can select the level to which the display is dimmed down when the radio enters the Standby mode or when the radio gets no key input for 15 seconds.
The Turn On options keeps the display always illuminated. If you select it you can set the display brightness.
See below table how the Dimmer settings will affect the screen illumination:
| Choice Brightness level On Playing On | Standby | ||
| Power Saving As you set | After 15s, the screen brightness switches to Power saving brightness level you set | After 15s, the screen brightness switches to Power saving brightness level you set | |
| Turn On As you set | The screen stays always on the set brightness level | After 15s, the screen brightness switches to Power saving brightness level you set | |
14.10. Display
Choose the style of display: Color or Monochrome

Choose the power management timer (5/15/30mins) to set the duration of the radio to switch to the standby mode automatically when no network connection is available.
Choose "Turn off" to ignore the power management function.
14.12. Sleep timer
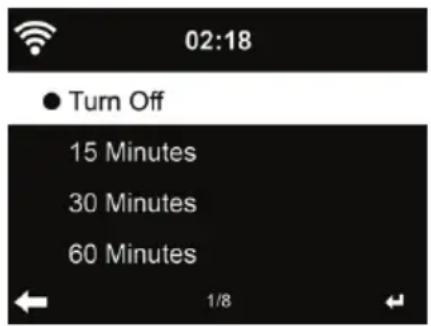
Turn off or set the sleep time to 15/30/60/90/120/150/180 minutes. Once the time is set, there will be a bed icon with remaining minutes at the top right corner. The DR690CD will go to Standby once the time runs out. Press Sleep on the remote control for the shortcut of this function. Pressing and holding the button calls up the sleep radio, see Chapter 6.4 Sleep radio
14.13. Internet Radio
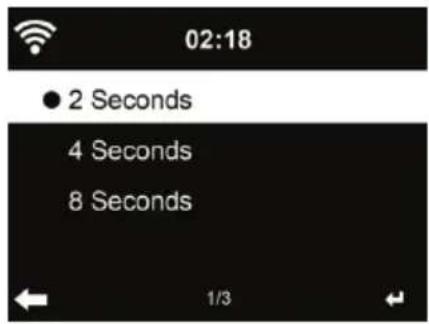
In the menu Buffer you can configure the buffer time of the music playback to 2/4/8 seconds. In the menu Sound Quality you can choose between High and Low quality.
14.14. Weather

DR690CD is able to display current weather information under standby mode. Turn on Show on Standby and set Temperature Unit (^ or ^ F) to get the weather displayed at the standby mode. When it is turned on, the display will switch between time and weather while being in standby mode.
14.15. DAB/FM Setup
In the menu FM Mode you can choose between Mono/Stereo reception of FM radio.
Select FM or DAB Threshold to set the Seek or Stereo threshold to one of 3 levels.
Under FM or DAB service following you can select whether the radio should offer the option to switch to Internet radio. If the currently played FM or DAB station is also available via Internet radio, 2 icons are displayed in the bottom right corner.
Press and hold the OK button to switch to the current station in Internet radio mode. This can be useful if the station has a weak reception in FM / DAB.
14.16. Local Radio Setup

There is a shortcut Local Radio under Internet Radio (see section 9.2 DLNA) so that you can easily go to the station list of your location.
You may Manual Setup your location or let the system Auto Detect your current location. The system detects the location according to the IP address of your connected network.
14.17.Playback Setup
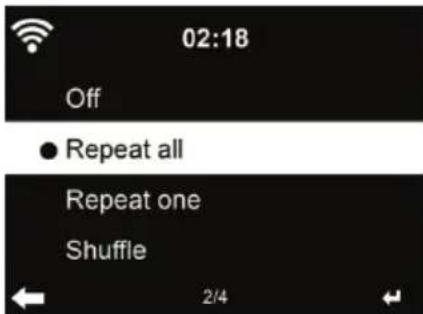
Select the repeat options for CD playback:
- Off: stops the CD playback at the end of the CD.
- Repeat all: repeats all tracks
- Repeat One: repeats only one track unlimited times
- Shuffle: plays the songs in random order
14.18. DLNA-Setup
The default device name for DLNA is ALBRECHT DR690CD. You may rename it for DLNA setup on the PC or mobile.
14.19. Equalizer
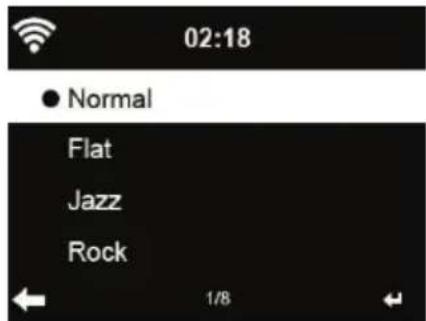
Default equalizer is Rock, you may change to Normal, Jazz, Rock, Flat, Soundtracks, Classical, Pop, or News.
If you press in the equalizer menu, you can individually change each preset and select Treble, Bass and Loudness.
14.20. Resume When Power On
The system is default set to resume internet radio playback if you were listening to internet radio or media center before switching off the unit. If you turn this setting off, the system will start in the main menu when starting the radio.
14.21. Software-Update
Update software. If there is an updated software version on the server, the system will notify you when you return to the main menu.
14.22. Factory Reset
Restore the default settings.
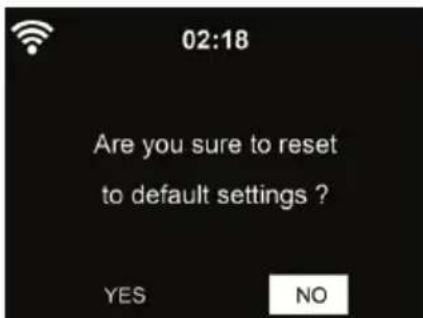
After DR690CD is reset, the system will move to Language setting menu. And it will automatically turn to Network setting menu once the OSD language is selected
15. Troubleshooting
| Error Remedy | |
| The device does not switch on. 1. | Check if the power adaptor is connected properly. 2. The device may malfunction when used in areas with strong radio interference. The device will work properly again once there is no more interference. |
| No sound 1. Turn on the sound as | it may be muted 2. Increase the volume. |
| No network connection can be established. | 1. Check the WIFI function. 2. Try to set an IP address at the device. 3. Activate the DHCP function on the router and make the connection again at the device. 4. A firewall is activated on the network - set the respective program in such a way that access is possible. 5. Reboot the unit to try. |
| WIFI connection cannot be established. | 1. Check the availability of WIFInetwork on the access point. 2. Place the device closer to the router. 3. Make sure the WEP/WPA password is correct. |
| No station is found. 1. Check the | network as well as the access point and firewall. 2. The station may not be available currently, try it again later or select another station. 3. The link of the station is changed or the station no longer transmits - ask the provider for information. 4. The link of manual added station is not correct, make sure it is correct and re-enter. |
| Hiss in DAB/FM mode. 1. Check | move the DAB/FM antenna. 2. Move the radio to a different location. 3. Please check if the radio is close to other electrical sources and therefore under influence of interferences |
| Alarm does not work. 1. Switch on | the alarm. 2. Due to the volume setting, refer to the solutions of "No sound". 3. The source of alarm was set to be station but there is no network connection. Change the source of alarm or reconfigure the connection. |
| Unable to do DLNA streaming. 1. | Check the connection of the network. DR690CD and your device need to be in the same network; and test if the network in good condition. 2. Make sure the settings on your device are correct. |
| System freezes suddenly. 1. The | radio is overloaded, reboot the unit. 2. The normal function of the product may be disturbed by strong Electro-Magnetic Interference. If so, simply reset the product to resume normal operation by following the instruction manual. In case the function could not resume, please use the product in other location. |
16. Specifications
| Model number DR690CD | |
| Description Radio with Internet Radio/DAB+/FM/Bluetooth/CD | |
| Display 2.8" / 320 x 240 TFT-color display | |
| Network supported IEEE802.11b/g/n (WiFi) | |
| WiFi key WEP, WPA, WPA2 (PSK) and WPS | |
| Transmission frequencies and power WiFi i: 2,3995 - 2,4845 GHz; 100 mW Bluetooth: 2,402 - 2,480 GHz; 1 mW | |
| Streaming UPnP, DLNA | |
| Supported playback formats MP3/AAC/A | AC+/WMA/FLAC 32kbps => 320kbps |
| Power Adapter | Input: 100-240V, 50/60Hz, 0.8A Output: 12V/2.5A |
| Standby mode power consumption | 2 W |
| Operating temperature | -10°C - 40°C |
| Connectors | DC IN power supply socket LINE In 3.5mm Headphone 3.5 mm |
| Dimensions | 380 mm (W) x 160 mm (H) x 220 mm (L) |
| Weight | 3100 g |
17. Important Safety Notes
- Read and keep these instructions.
Heed all warnings. - Follow all instructions.
- Do not use this apparatus near water.
- Clean only with dry cloth.
Do not block any ventilation openings. Install in accordance with the manufacturer's instructions. - Do not install near any heat sources such as radiators, heat registers, stoves, or other apparatus (including amplifiers) that produce heat.
- Protect the power cord from being walked on or pinched particularly at plugs, convenience receptacles, and the point where they exit from the apparatus.
- Only use attachments / accessories specified by the manufacturer.
- Unplug this apparatus during lightning storms or when unused for long periods of time.
Refer all servicing to qualified service personnel. Servicing is required when the apparatus has been damaged in any way, such as power-supply cord or plug is damaged, liquid has been spilled or objects have fallen into the apparatus, the apparatus has been exposed to rain or moisture, does not operate normally, or has been dropped. - This appliance shall not be exposed to dripping or splashing water and no object filled with liquids such as vases shall be placed on the apparatus.
- Do not overload wall outlet. Use only power source as indicated.
- Use replacement parts as specified by the manufacturer.
- The product may be mounted to a wall only if recommended by the manufacturer.
Upon completion of any service or repairs to this product, ask the service technician to perform safety checks
18. Warranty and Recycling Information
We are legally obliged to include disposal and warranty information as well as EU declaration of conformity with the use instructions in different countries for every unit. Please find this information on the following pages.
2-Year Warranty from Date of Purchase
The manufacturer/retailer guarantees this product for two years from date of purchase. This warranty includes all malfunctions caused by defective components or incorrect functions within the warranty period excluding wear and tear, such as exhausted batteries, scratches on the display, defective casing, broken antenna and defects due to external effects such as corrosion, over voltage through improper external power supply or the use of unsuitable accessories. Defects due to unintended use are also excluded from the warranty.
Please contact your local dealer for warranty claims. The dealer will repair or exchange the product or forward it to an authorized service center. You can also contact our service partner directly. Please include your proof of purchase with the product and describe the malfunction as clearly as possible.
WEEE and Recycling

The European laws do not allow any more the disposal of old or defective electric or electronic devices with the household waste. Return your product to a municipal collection point for recycling to dispose of it. This system is financed by the industry and ensures environmentally responsible disposal and the recycling of valuable raw materials.
Service Address And Technical Hotline (for units sold in Germany)
Contact our service hotline by phone +49 (0) 6103 9481 66 (regular costs for German fixed network) or e-mail at service@albrecht-midland.de
Declaration of Conformity
Hereby, Alan Electronics GmbH declares that the radio equipment type DR690CD is in compliance with Directive 2014/53/EU. The full text of the EU declaration of conformity is available at the following internet address: www.alan-electronics.de

Printing errors reserved.
Information in this user manual are subject to change without prior notice.

ALBRECHT
ALBRECHT DR 690 CD
9.1.2. Cancellation Playlist

- Table of Contents
- Remote control
- .Overview of DR 690 CD radio
- Buttons and connections
- Symbols in the display
- Delivery content
- First steps
- Network requirements
- 4.2.Preparing the network
- Navigation through menus
- Text entry
- Getting started
- AirMusic Control App
- Main menu
- Internetradio
- My Favorite
- Radio station / music
- Local Station
- Sleep radio
- History
- Service
- My mediaU
- DAB/DAB+ radio
- Scanning for stations
- Searching for and selecting stations
- Station information and slideshow
- Save favorites
- Recalling favorites
- Media center
- UPnP
- My Playlist
- Clear My Playlist
- 9.2.DLNA
- Bluetooth
- FM radio
- Setting the station
- Favorites
- CD Mode
- Operation buttons for CD playback:
- Information center
- Weather Information
- Financial Information
- System Information
- SW version
- Radio network info
- Settings
- Time Display
- Manage my mediaU
- Network
- Wireless Network Configuration
- Wireless Network (WPS)
- Manual Configuration
- Check Network when Power On
- Date & Time
- Alarm
- Timer
- Scheduled Playing
- Language
- Dimmer
- Display
- Sleep timer
- Internet Radio
- Weather
- DAB/FM Setup
- Local Radio Setup
- 14.17.Playback Setup
- DLNA-Setup
- Equalizer
- Resume When Power On
- Software-Update
- Factory Reset
- Troubleshooting
- Specifications
- Important Safety Notes
- Warranty and Recycling Information
- 2-Year Warranty from Date of Purchase
- WEEE and Recycling
- Service Address And Technical Hotline (for units sold in Germany)
- Declaration of Conformity
- ALBRECHT
- ALBRECHT DR 690 CD
- Cancellation Playlist
Brand : MOULINEX
Model : DR 690
Category : Radio