
RM-VLZ620T - Universal remote SONY - Free user manual and instructions
Find the device manual for free RM-VLZ620T SONY in PDF.

| Product type | Universal remote control |
| Brand | Sony |
| Model | RM-VLZ620T |
| Dimensions (W × H × D) | 52 × 236 × 26 mm |
| Weight (with batteries) | Approx. 158 g |
| Power supply | 2 R6 (AA) batteries not included |
| Battery life | Approx. 1 year with alkaline batteries (300 operations/day) |
| Effective range | Approx. 11 m |
| Number of controllable devices | Up to 8 devices |
| Compatible device types | TV, projector, decoder, satellite/terrestrial receiver, IPTV, DVR, PVR, DVD player/recorder, Blu-ray/HD-DVD player, VCR, CD player, cassette deck, DVD home theater, amplifier, tuner amplifier, audio accessory |
| Main functions | Centralized control, Sony pre-programming, manufacturer code registration, code search, learning new functions, channel assignment to numeric keys, macro programming, key lock, factory reset |
| Special controls | Volume +/-, mute, guide, menu, Fastext, PIP, input, PROG, colored keys, SYSTEM CONTROL keys (4 macros) |
| LED indicators | SET indicator and device selection keys |
| Care and cleaning | Wipe with a soft, slightly damp cloth; do not use solvents |
| Safety | Keep out of reach of young children and pets; lock keys to prevent danger |
| Used batteries | Do not dispose of with household waste; return to appropriate collection point |
| Product disposal | End-of-life electrical device: do not dispose of with household waste; recycle via collection point |
| General information | Compliant with European directives; manufacturer: Sony Corporation, Japan; EU representative: Sony Deutschland GmbH |
Frequently Asked Questions - RM-VLZ620T SONY
User questions about RM-VLZ620T SONY
0 question about this device. Answer the ones you know or ask your own.
Ask a new question about this device
Download the instructions for your Universal remote in PDF format for free! Find your manual RM-VLZ620T - SONY and take your electronic device back in hand. On this page are published all the documents necessary for the use of your device. RM-VLZ620T by SONY.
USER MANUAL RM-VLZ620T SONY
Integrated Remote Commander
Operating Instructions GB
Mode d'emploi FR
RM-VLZ620T

Disposal of Old Electrical & Electronic Equipment (Applicable in the European Union and other European countries with separate collection systems)
This symbol on the product or on its packaging indicates that this product shall not be treated as household waste. Instead it shall be handed over to the applicable collection point for the recycling of electrical and electronic equipment. By ensuring this product is disposed of correctly, you will help prevent potential negative consequences for the environment and human health, which could otherwise be caused by inappropriate waste handling of this product. The recycling of materials will help to conserve natural resources. For more detailed information about recycling of this product, please contact your local Civic Office, your household waste disposal service or the shop where you purchased the product.

Disposal of waste batteries (applicable in the European Union and other European countries with separate collection systems)
This symbol on the battery or on the packaging indicates that the battery provided with this product shall not be treated as household waste.
On certain batteries this symbol might be used in combination with a chemical symbol. The chemical symbols for mercury (Hg) or lead (Pb) are added if the battery contains more than 0.0005% mercury or 0.004% lead.
By ensuring these batteries are disposed of correctly, you will help prevent potentially negative consequences for the environment and human health which could otherwise be caused by inappropriate waste handling of the battery. The recycling of the materials will help to conserve natural resources.
In case of products that for safety, performance or data integrity reasons require a permanent connection with an incorporated battery, this battery should be replaced by qualified service staff only. To ensure that the battery will be treated properly, hand over the product at end-of-life to the applicable collection point for the recycling of electrical and electronic equipment.
For all other batteries, please view the section on how to remove the battery from the product safely. Hand the battery over to the applicable collection point for the recycling of waste batteries.
For more detailed information about recycling of this product or battery, please contact your local Civic Office, your household waste disposal service or the shop where you purchased the product.
Notice for customers: the following information is only applicable to equipment sold in countries applying EU directives
The manufacturer of this product is Sony Corporation, 1-7-1 Konan Minato-ku Tokyo, 108-0075 Japan. The Authorized Representative for EMC and product safety is Sony Deutschland GmbH, Hedelfinger Strasse 61, 70327 Stuttgart, Germany. For any service or guarantee matters please refer to the addresses given in separate service or guarantee documents.
The validity of the CE marking is restricted to only those countries where it is legally enforced, mainly in the countries EEA (European Economic Area).
IMPORTANT
Be sure to place the remote control out of the reach of small children or pets, and lock the controls using the Hold function (page 26). Devices such as air conditioners, heaters, electric appliances, and electric shutters or curtains receiving an infrared signal can be dangerous if misoperated.
Features
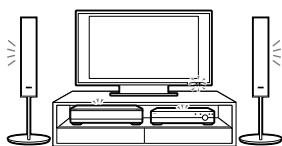
The RM-VLZ620T provides centralised control of all of your Audio Video devices, saving the trouble of operating other A/V devices with different remote controls.
The following are its main features.
You can centralise control of all of your Sony devices (page 10).
The RM-VLZ620T is preset at the factory to operate any Sony device.
You can also control non-Sony devices (page 12).
The RM-VLZ620T can be used to operate major manufacturer's A/V devices by setting the manufacturer's code.
You can teach the RM-VLZ620T new functions (page 18).
The RM-VLZ620T can learn infrared signals from devices such as lighting, etc.
You can perform a consecutive procedure by simply pressing one button.
- The RM-VLZ620T can assign channel numbers to the number buttons, allowing you to select any channel directly with one button (page 23).
- The RM-VLZ620T can programme up to 12 consecutive procedures to the SYSTEM CONTROL or Device Select buttons (page 24).
You can control up to eight devices.
The RM-VLZ620T can control devices assigned to any of the eight Device Select buttons.
You can assign the following devices:
TV
Projector
Cable set top box
Satellite receiver/DVB-T*receiver
IPTV
DVR (digital video recorder)
PVR (personal video recorder)
DVD player
DVD recorder
Blu-ray Disc player
HD-DVD player
VCR
CD player
Cassette deck
DVD Home Theatre
Amplifier
Receiver
Audio accessory
- DVB-T (Digital Video Broadcasting - Terrestrial)
For a Sony Device
Turn on your device by the Device Select button (page 10).
Sony TV
For a Non-Sony Device
Set the manufacturer's code (page 12).
Brand
Code No.
A.R. Systems
00037,00556
Accent
00037
Acer
01339
Acoustic Solutions
01037,01523,01667
Action
00650
Addison
00108.00653
Admiral 00463
00463
AEG
01037.01163.01556
Aftron 00891
00891
Aiko
00037,01681
Aim
00037.00706.00753
Akai
00037.00178.00208.00556.00702.00714.00753
m - 1 0 ;
00812.01675.02232
Akashi
00860
Akiha
00037
Akira
00753.01733
Akito 00037
If the manufacturer's code cannot be found
Search for the manufacturer's code (page 14).

Searching...
Operate your device with the preset function (page 32).

Advanced Features
Teach signals (page 18).
If the Manufacturer's code cannot be found
For more convenient features
Programme a consecutive procedure (page 24).
Features 3
Flow Chart for Setting Up Your RM-VLZ620T 4
Getting Started
Installing the Batteries 8
Location of Controls. 9
Controlling Devices
Controlling Sony Devices with the RM-VLZ620T 10
Setting the Manufacturer's Code for Non-Sony Devices. 12
Setting the manufacturer's code. 12
Searching for the Manufacturer's Code for Non-Sony Devices 14
Checking the manufacturer's code you have set. 15
Adjusting the Volume 16
Controlling volume via an amplifier. 16
Teaching the RM-VLZ620T New Functions (Learning Function) 18
Teaching the Device Select or SYSTEM CONTROL buttons 21
Additional Features
Assigning a Channel to Each Number Button 23
Programming the RM-VLZ620T Consecutive Procedures 24
Locking the Controls (Hold Function) 26
Restoring the Factory Settings 27
Other Information
Precautions. 29
Maintenance 29
Specifications. 29
Troubleshooting 30
Table of Preset Functions
TV button 32
TV. 32
Projector 33
DVD button 33
DVD player/recorder 33
BD button 34
Blu-ray Disc/HD-DVD player 34
SAT (CBL) button 35
Satellite receiver/DVB-T receiver 35
Cable set top box. 35
DVR (PVR) button 36
Digital video recorder/personal video recorder 36
VCR button 36
VCR 36
CD button 37
CD player 37
Cassette deck 37
AMP button 38
Amplifier/receiver 38
DVDHome Theatre 38
Index 39
Quick Setup Guide 40
Installing the Batteries
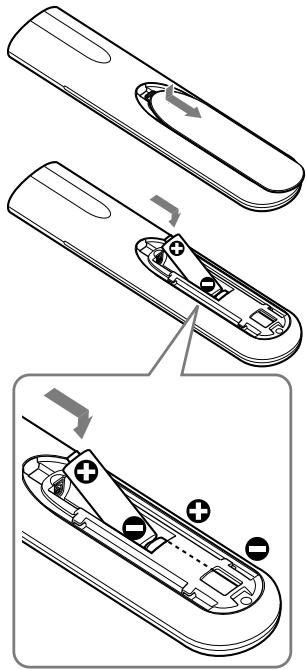
Slide open the battery compartment lid and insert two R6 (size AA) dry batteries (not supplied). Insert the batteries (negative end first) into the battery compartment as shown below.
Note
Even if you replace the batteries, your manufacturer's code settings or learned/programmed remote signals remain stored.
Battery life
Under normal conditions, LR6 (size AA) alkaline batteries will last up to one year. If the RM-VLZ620T does not operate properly, the batteries might be drained. If this happens, replace both batteries with new ones.
Notes on batteries
- Do not use an old battery with a new one, or mix different types of batteries together.
- If the electrolyte inside the battery should leak, wipe the contaminated area of the battery compartment with a cloth and replace the old batteries with new ones. To prevent electrolyte from leaking, remove the batteries if you plan not to use the RM-VLZ620T for a long period of time.
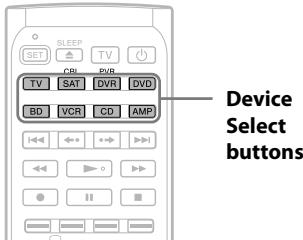
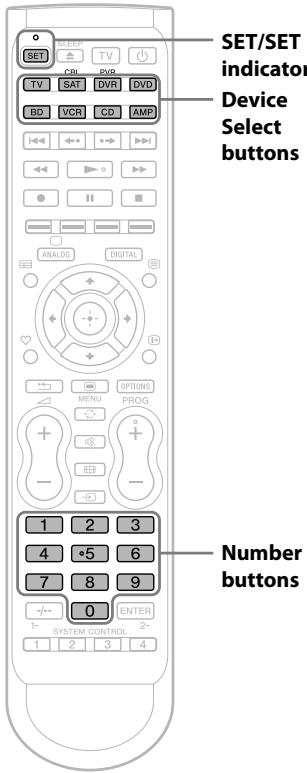
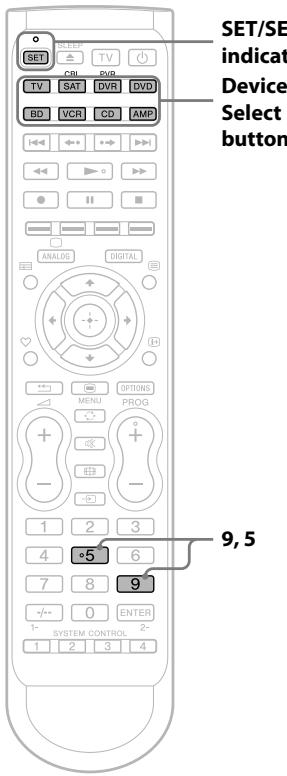
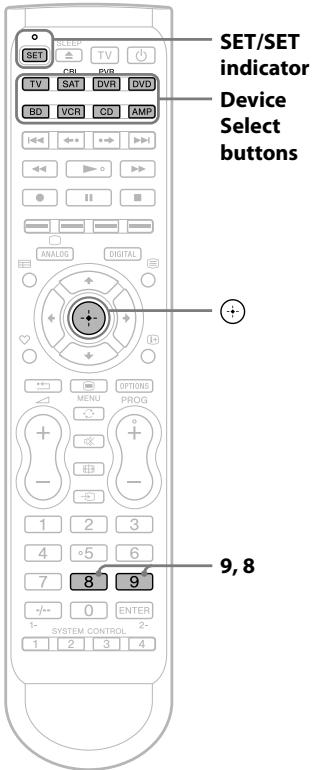
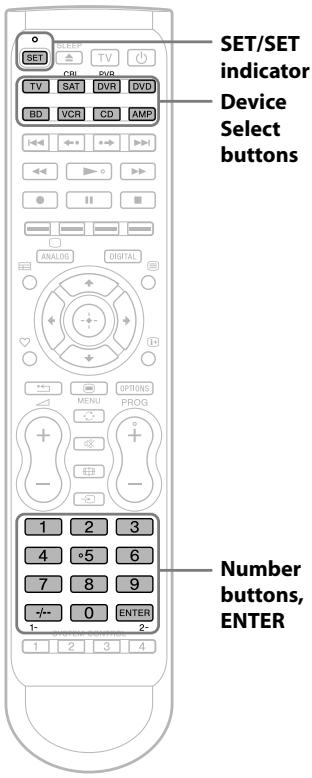
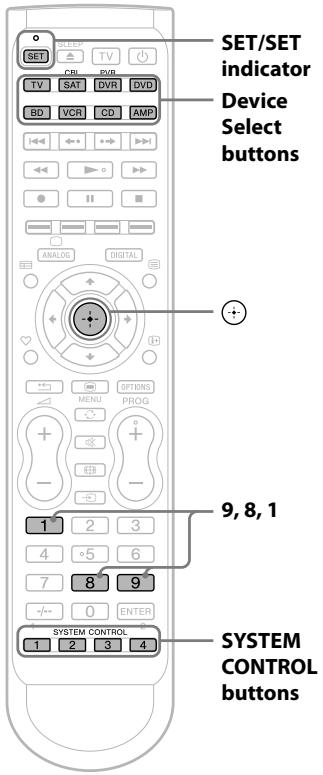
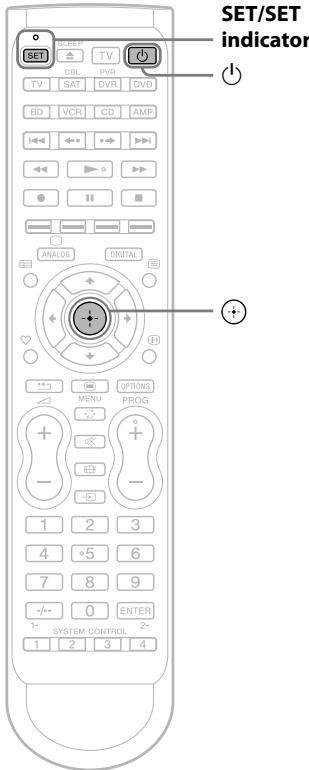
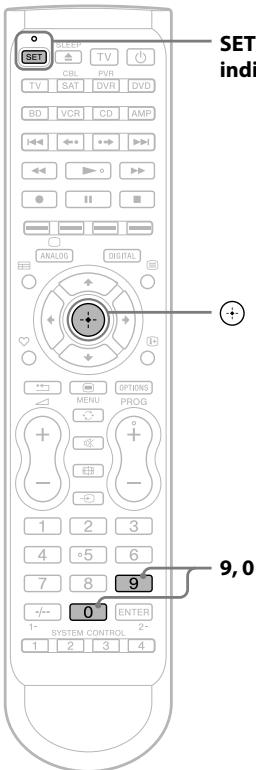
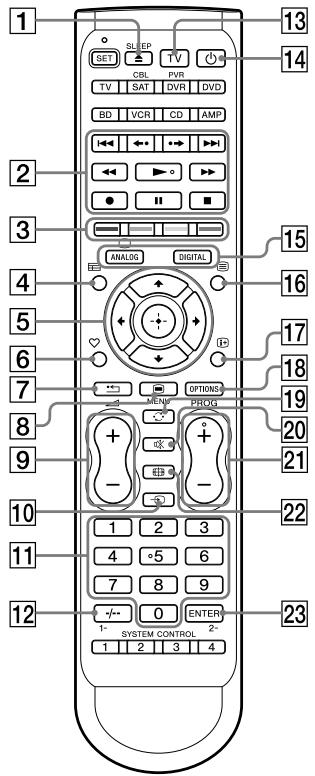
Location of Controls
The function of the buttons varies depending on settings/operating modes.
The "Table of Preset Functions" (page 32) shows how the RM-VLZ620T generally operates for each device in the factory preset mode.
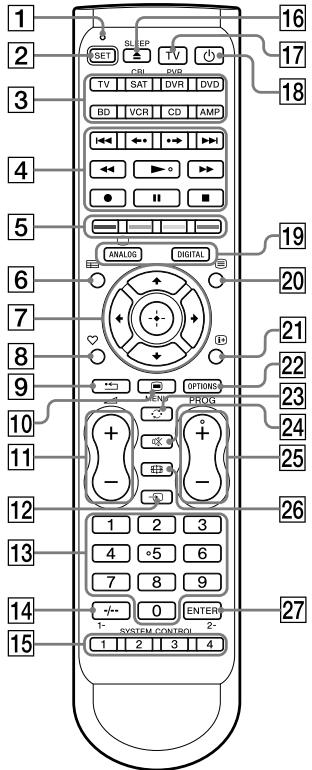
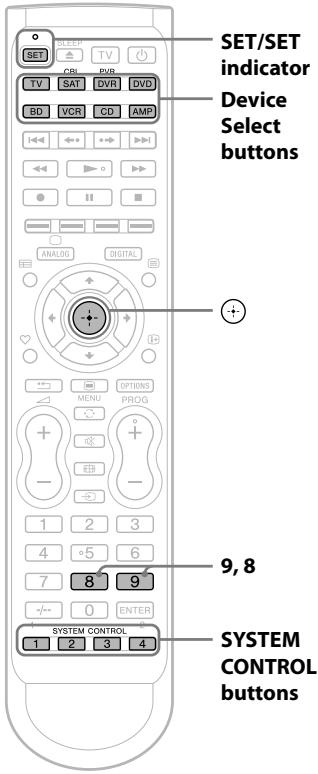
SETindicator
Lights or flashes during settings.
2 SET button
Device Select buttons
Light with the button press to indicate the current device mode.
4 Player Control buttons
Colour (Fastext) buttons
[guide] button
7 / / / / buttons
8 (favourite) button
9 (return) button
10 一 MENU button
11 (volume) +/- buttons
12 (input select) button
13 Number buttons
14 -- button
15 SYSTEM CONTROL buttons
16 (open/close)/SLEEP button
17 TV button
Turns the TV on or off.
18 (power) button
19 ANALOG/ (TV ON) button, DIGITAL button
20 (Teletext) button
21 (display) button
22 OPTIONS button
23 C(recall) button
24 (muting) button
PROG (programme) + / - buttons
26 (screen mode) button
27 ENTER button
About tactile dots
The number 5, PROG +, and buttons each have a tactile dot for ease of use.
Controlling Sony Devices with the RM-VLZ620T
The RM-VLZ620T is preset at the factory to operate Sony brand A/V devices set to any of the Device Select buttons (see the table below).
| Device Select button | Preset device | Factory setting* |
| TV | Sony TV | 02476 |
| SAT (CBL) | Satellite receiver (non-Sony) | 40847 |
| DVR (PVR) | Sony digital video recorder | 22676 |
| DVD | Sony DVD player | 11033 |
| BD | Sony Blu-ray Disc player | 11516 |
| VCR | Sony VCR | 60032 |
| CD | Sony CD player | 70000 |
| AMP | Sony receiver | 82586 |
- The five-digit code is the preset manufacturer's code.
Notes
- For button functions for each device, see "Table of Preset Functions" (page 32).
- The remote control signals may be different for some devices or functions. In this case, teach the remote control appropriate signals to the RM-VLZ620T (page 18).
- To control other Sony devices that are not preset at the factory, set the manufacturer's code for the device (page 12).
- Some devices that do not support infrared signals will not work with the RM-VLZ620T.
Example: To operate a Sony DVD player
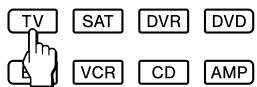
1 Press the desired Device Select button.
The selected Device Select button lights up when you press it, and turns off when you release it.

2 Press any button to control the device.
See "Table of Preset Functions" (page 32) for the functions of buttons for each device.
Note
If the device does not automatically turn on, press to turn it on.
To clear automatic power-on control for a Sony device

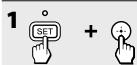
The Device Select buttons are preset to automatically turn on the selected device when pressed. To clear auto power-on control, perform the procedure below.
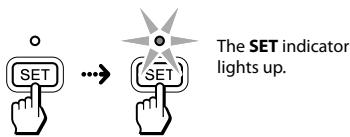
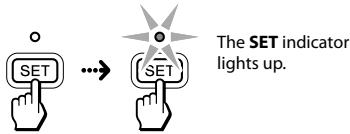
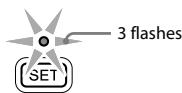
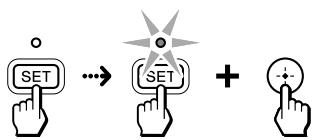
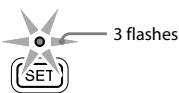
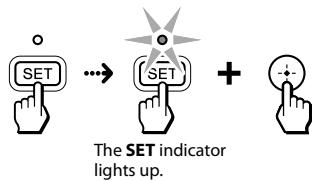
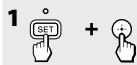
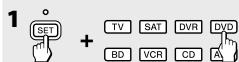
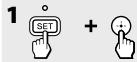
1 Press and hold SET for more than 3 seconds. While keeping SET held down, press + , then release both buttons.
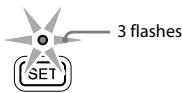
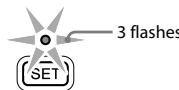
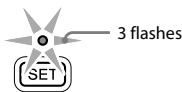
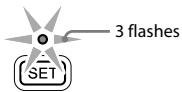
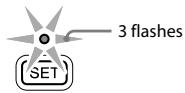
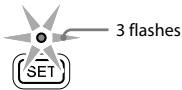
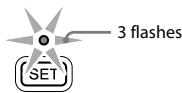
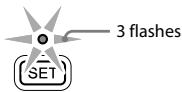
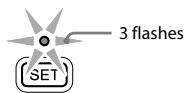
The SET indicator flashes three times to indicate that the setting mode has been entered.
3 Press the Device Select button you want to change.
The SET indicator flashes three times, and the indicators turn off.

To cancel the process
Press SET anytime.
To check which Device Select button is set for a Sony device
Press in Step 3 above. The Device Select buttons set for Sony devices will flash in sequence.
Device Select buttons set for non-Sony devices will not flash.
To set automatic power-on control again
Perform the same procedure as when you clear the automatic power-on control.
Notes
- If you set the manufacturer's code of a non-Sony device on a Device Select button, you cannot set the automatic power-on control on the button.
If you change to the code of a non-Sony device after setting automatic power-on control, the control will be cleared. - If you attempt automatic power-on control for a non-Sony device, the SET indicator will flash once and turn off (to indicate that you cannot set this control).
- If you teach a signal or program a consecutive procedure to a Device Select button to which the automatic power-on control is set, the control will not work. To activate the control, clear the learned signal or programmed consecutive procedure from the Device Select button.
Setting the Manufacturer's Code for Non-Sony Devices
You can use the RM-VLZ620T for major brand A/V devices. To use with non-Sony A/V devices, or Sony devices that are not preset at the factory (see table below for factory setting), you need to set the manufacturer's code for each device to any of the eight Device Select buttons.
| Device Select button | Preset device | Factory setting* |
| TV | Sony TV | 02476 |
| SAT (CBL) | Satellite receiver (non-Sony) | 40847 |
| DVR (PVR) | Sony digital video recorder | 22676 |
| DVD | Sony DVD player | 11033 |
| BD | Sony Blu-ray Disc player | 11516 |
| VCR | Sony VCR | 60032 |
| CD | Sony CD player | 70000 |
| AMP | Sony receiver | 82586 |
- The five-digit code is the preset manufacturer's code.
Notes
- Only a TV or projector can be assigned to the TV Device Select button. You can assign any device to the other Device Select buttons. For button functions for each device, see "Table of Preset Functions" (page 32).
- If no operations are performed for 10 seconds while setting, the setting will be cancelled, and must be restarted.
- Some devices that do not support infrared signals will not work with the RM-VLZ620T.
Setting the manufacturer's code
Example: To set up a Philips TV (01454)
1 Refer to the supplied "Manufacturer's Code List," and find the five-digit manufacturer's code for the desired device.
If more than one manufacturer's code is listed, use the code that is listed first.
It is recommended to keep a note of the codes for your devices, for easy reference later.
| Device | Manufacturer's code |
| TV | (01454) |
| SAT | |
| DVR | |
| DVD | |
| BD | |
| VCR | |
| CD | |
| AMP |
Note
If you cannot find the manufacturer's code, use the Search function (page 14).
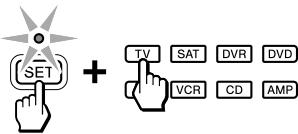
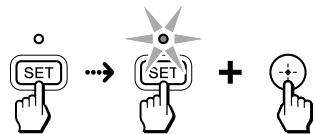
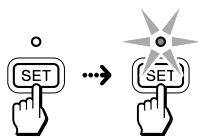
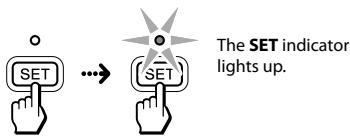
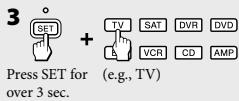
2 Press and hold SET for more than 3 seconds.
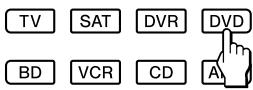
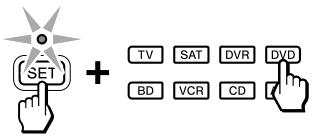
While keeping SET held down, press the desired Device Select button, then release both buttons.
The selected Device Select button lights up.
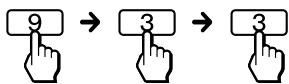
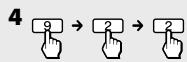
3 Enter the manufacturer's code (01454).

The SET indicator flashes three times, and the indicators turn off.

To cancel the process
Press SET anytime.
Note
If the setting is incomplete, the SET indicator flashes once and the indicators turn off. Start again from the beginning. If you enter a manufacturer's code that is not listed in the supplied "Manufacturer's Code List," the setting will be cancelled.
To operate the device
1 Press the Device Select button for the device you want to operate. The Device Select button flashes.
2 Press to turn on the device.
3 Press any button to control the device. See "Table of Preset Functions" (page 32) for the functions of buttons for each device.
If the RM-VLZ620T does not seem to be working
- First, try repeating the setup procedure using another manufacturer's code (if listed for your device).
- Try setting the code number using the Search function (page 14).
- The remote control signals may be different for some devices or functions. In this case, teach the remote control appropriate signals to the RM-VLZ620T (page 18).
To clear a manufacturer's code setting
You can reset the code of any Device Select button to its factory setting.
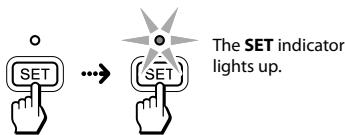
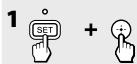
1 Press and hold SET for more than 3 seconds. The SET indicator lights up. While keeping SET held down, press + .
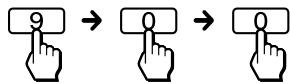
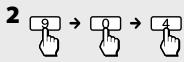
2 Enter 9-0-2. The SET indicator flashes three times.
3 Press the Device Select button you want to reset. The SET indicator flashes three times and the indicators turn off.
To cancel the process, press SET anytime.
Notes
- When you reset a Device Select button, the learned function or programmed consecutive procedure will also be cleared from the button.
To clear all the settings of the RM-VLZ620T, see page 27.
Searching for the Manufacturer's Code for Non-Sony Devices
If you cannot find the manufacturer's code in the supplied "Manufacturer's Code List," set the code using the Search function.
Note
If no operations are performed for 10 seconds while setting, the setting will be cancelled, and must be restarted.

Example: To set the manufacturer's code for your TV
1 Power on the device with its power switch.
2 Aim the RM-VLZ620T at the device you want to set.
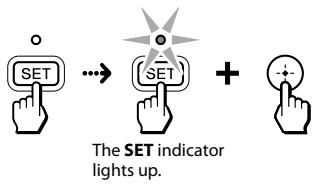
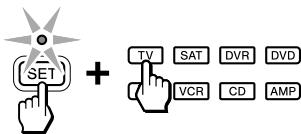
3 Press and hold SET for more than 3 seconds.
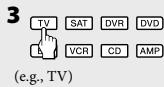
While keeping SET held down, press the desired Device Select button, then release both buttons.
The selected Device Select button lights up.
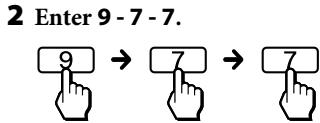
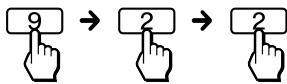
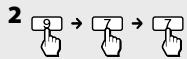
4 Enter 9-2-2.
The SET indicator flashes three times to indicate that the setting mode has been entered.
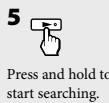
5 Press and hold to start searching.

6 When the device turns off, release the button.
If you overshoot the required code, you can search for the next or previous code using the
or button.
7 Press

The SET indicator flashes three times, and the indicators turn off.

To cancel the process
Press SET anytime.
Notes
- If all codes have been cycled through once, the SET indicator and selected Device Select button flash once and turn off.
- If the setting is incomplete, the SET indicator flashes once and the indicators turn off.
- If you still cannot operate the device, even after setting the manufacturer's code using the Search function, another code may be available. Repeat the above steps to search for another code that works for most functions of your device.
Checking the manufacturer's code you have set
You can check the manufacturer's code number you have set.
Example: To check the code number (50831) you have set for the TV
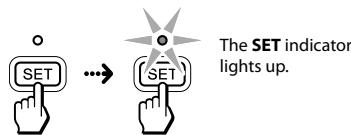
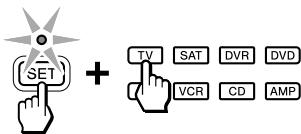
1 Press and hold SET for more than 3 seconds.
While keeping SET held down, press the desired Device Select button, then release both buttons.
The selected Device Select button lights up.
2 Enter 9-3-3.
The SET indicator flashes three times to indicate that the setting mode has been entered.
3 Press

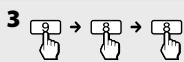
4 The SET indicator and selected Device Select button flash in sequence according to the manufacturer's code you set. Count the number of flashes to determine the code number.

| Digit | SET | TV | Code |
| First | flashes once | flashes 5 times | = 5 |
| Second | flashes twice | flashes rapidly* | = 0 |
| Third | flashes 3 times | flashes 8 times | = 8 |
| Fourth | flashes 4 times | flashes 3 times | = 3 |
| Fifth | flashes 5 times | flashes once | = 1 |
- Flashing rapidly indicates "0."
If you want to check once more, press
5 Press SET to finish.
The indicators turn off.
Adjusting the Volume
Press (volume) + / - to control the volume. Press ※ (muting) to mute the sound.
When a video device is selected, the TV's volume is controlled. When an audio device is selected, the amplifier's volume is controlled.
Video devices are:
TV, Cable set top box, Satellite receiver, IPTV, DVR (digital video recorder)/PVR (personal video recorder), DVD player, DVD recorder, Blu-ray Disc/ HD-DVD player, VCR
Audio devices are:
CD player, Cassette deck, Amplifier, Receiver, Audio accessory
The factory setting for each Device Select button is as follows.
| Device Select button | Controls the volume of |
| TV, SAT, DVR, DVD, BD, VCR | TV |
| CD, AMP | Amplifier |
Notes
- It is recommended that you first set the TV and AMP manufacturer's code before setting up any other devices.
- When a projector or DVD Home Theatre is selected, its volume can be independently controlled.
Controlling volume via an amplifier
If your TV (or other video device) is connected to an amplifier or DVD Home Theatre, you may want to hear the sound from the speakers via your amplifier. In this case, change the factory preset so that you can control the volume of your audio device without switching the controlling device from video to audio each time.
To change the factory preset of the volume control
Example: To set the DVD Device Select button to control the volume via the amplifier
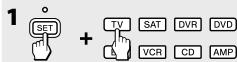
1 Press and hold SET for more than 3 seconds.
While keeping SET held down, press the Device Select button for the device you want to control the volume via the amplifier, then release both buttons.
The selected Device Select button lights up.
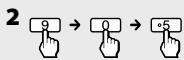
2 Enter 9-5-5.
The SET indicator flashes three times to indicate that the setting mode has been entered.
3 Press the Device Select button to which the connected amplifier is assigned.

The SET indicator flashes three times and the indicators turn off.

To cancel the process
Press SET anytime.
To reset the volume control
1 Press and hold SET for more than 3 seconds. The SET indicator lights up. While keeping SET held down, press the Device Select button you want to reset.
2 Enter 9-5-5. The SET indicator flashes three times.
3 Press the same Device Select button you pressed in Step 1. The SET indicator flashes three times and the indicators turn off.
Teaching the RM-VLZ620T New Functions (Learning Function)
If you cannot control a device, even after correctly setting the manufacturer's code, you can teach the RM-VLZ620T new functions by using the original remote control supplied with the device.
You can teach a function to all the buttons (except SET) for any device mode.
To teach the Device Select or SYSTEM CONTROL buttons, see page 21.
You may find it useful to write down the functions you have taught.
Notes
- Use new batteries in both remote control units.
- Certain remote control signals may not be learned.
- If the function has already been learned, it will be overwritten with the new one.
- You cannot teach a number button to which you have already assigned a channel (page 23).
- You can also teach the signals of a computer's remote control (including a built-in tuner type) to control the monitor.
- If you do not perform learning steps for 10 seconds at any point during the process, the learning procedure is cancelled.
Example: To teach a function to the (play) button in DVD mode
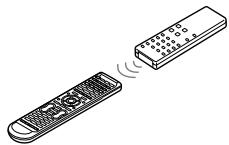
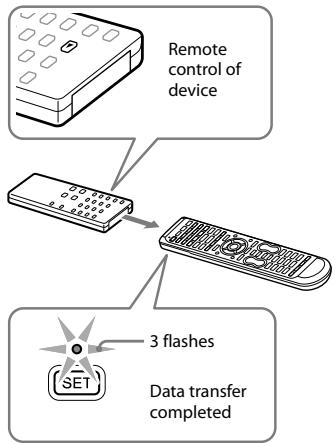
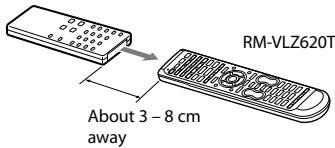
1 Place the RM-VLZ620T head to head with your device's remote control.
Remote control for your device
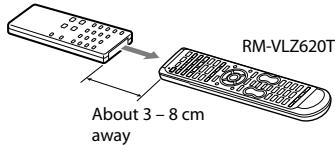
2 Press and hold SET for more than 3 seconds. While keeping SET held down, press , then release both buttons.

3 Enter 9-8-8.
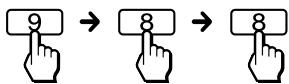
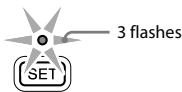
The SET indicator flashes three times to indicate that the setting mode has been entered.
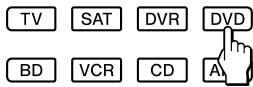
4 Press the Device Select button for the device you want to control.
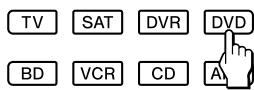
The selected Device Select button lights up.

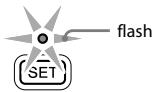
5 Press the button on the RM-VLZ620T you want to teach.

The SET indicator flashes with the button press. (Learning function standby.)
Note
Perform the next step within 30 seconds. Otherwise, the SET indicator flashes once and the learning procedure returns to Step 4.
6 Press the button on the original remote control to transmit the signal to the RM-VLZ620T.
During signal transfer, only the SET indicator stays lit, and the Device Select button turns off. After signal transfer is complete, the SET indicator flashes three times, and the RM-VLZ620T returns to the state in Step 4.
Note
If the SET indicator flashes only once, it indicates that learning is incomplete. Repeat from Step 4 again.
7 Repeat Steps 4 to 6 to teach other new functions.
8 Press SET to finish teaching.
The SET indicator turns off.
To cancel the process
Press SET anytime.
Notes
- If you teach a signal to a button, the learned function will remain even after you set a manufacturer's code.
- You cannot teach a simultaneous button operation (for example + ) to the two buttons on the RM-VLZ620T at a time.
In this case, teach the signal to a single button while pressing two buttons on the original remote control at the same time.
To teach an air-conditioner's functions
If you adjust the setting of the air-conditioner according to the season, reset the parameters of the air conditioner's remote control (temperature, air strength and direction, etc.), and teach the new remote signals to the RM-VLZ620T.
When the power button on the remote control for an air-conditioner, etc., toggles between power-on and off with each press, the power-on/off operation may not be learned correctly. In this case, teach the power-on/off signals to two separate buttons on the RM-VLZ620T.
1 Teach the power-on signal to a button (transmit the power-on signal by pressing the power button when the device is turned off).
2 Teach the power-off signal to another button (transmit the power-off signal by pressing the power button when the device is turned on).
The two learned buttons of the RM-VLZ620T now control the power-on/off signals of the device respectively.
Note
Devices such as air conditioners and heaters receiving an infrared signal can be dangerous if misoperated. Be sure to place the RM-VLZ620T out of the reach of small children or pets, and lock the controls using the Hold function (page 26).
Tips for teaching accurately
- Do not move the remote control units during the learning procedure.
- Use new batteries in both remote control units.
- Avoid performing the learning procedure in places subject to direct sunlight, or strong fluorescent light. (Noise may interfere with the learning procedure.)
- The remote control detector area may differ depending on each remote control unit. If the RM-VLZ620T does not learn signals, try changing the positions of the two remote control units.
- When you teach the signals of an interactive signal exchange system remote control unit (supplied with certain Sony's amplifiers) to the RM-VLZ620T, the response signal of the main unit may interfere with the learning of the RM-VLZ620T. In such a case, move to a place where the signals will not reach the main unit (e.g., another room).
To clear the learned function of a single button
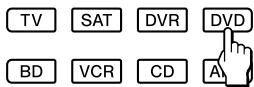
Example: To clear the learned function from number button 1 in DVD mode
1 Press and hold SET for more than 3 seconds.
While keeping SET held down, press , then release both buttons.

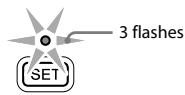
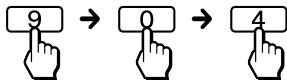
2 Enter 9-0-4.
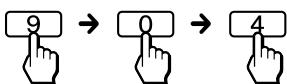
The SET indicator flashes three times to indicate that the setting mode has been entered.

3 Press the desired Device Select button.
The selected Device Select button lights up.
4 Press the learned button you want to reset.

When the learned function is cleared, the SET indicator flashes three times and the indicators turn off.

Note
To clear another function, repeat Steps 3 and 4.
5 Press SET to finish setting.
The SET indicator turns off.
To cancel the process
Press SET anytime.
To clear all the learned functions under a specific device mode
Example: To clear all learned functions under DVD mode
1 Press and hold SET for more than 3 seconds.
While keeping SET held down, press , then release both buttons.
The SET indicator lights up.
2 Enter 9-0-5.


The SET indicator flashes three times to indicate that the setting mode has been entered.

3 flashes
3 Press the desired Device Select button.
TV
SAT
DVR

BD
VCR
CD

When the learned functions is cleared, the SET indicator flashes three times and the indicators turn off.

3 flashes

To cancel the process
Press SET anytime.
Teaching the Device Select or SYSTEM CONTROL buttons
For example, if you want to switch your amplifier to DVD input, teach an input select signal to the DVD Device Select button so that the amplifier is automatically switched to DVD simply by pressing the DVD Device Select button. (For this operation, the amplifier should first be turned on.)
Notes
- Use new batteries in both remote control units.
- If a consecutive procedure has been programmed to the button (page 24), the setting procedure will be cancelled.
Example: To teach the DVD input signal of your amplifier to the DVD Device Select button (when the DVD input can be selected with one button press)
1 Place the RM-VLZ620T head to head with your device's remote control.
Remote control for
your device
Note
If you do not perform learning steps within 10 seconds at any point during the process, learning mode is cancelled.
2 Press and hold SET for more than 3 seconds.
While keeping SET held down, press , then release both buttons.

The SET indicator lights up.
3 Enter 9-8-8.
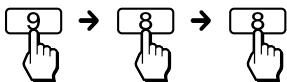
The SET indicator flashes three times to indicate that the setting mode has been entered.
4 Press and hold the Device Select button you want to teach for more than 3 seconds.
The selected Device Select button lights up.

Notes
- When teaching a SYSTEM CONTROL button, use a short press. Note that the selected button does not light up.
- If you do not perform the next step within 30 seconds, the SET indicator flashes once. Repeat from Step 4 again.
5 Select the DVD input on the original remote control.
After data transfer is complete, the SET indicator flashes three times, and the RM-VLZ620T returns to the state in Step 4.
Note
If the SET indicator flashes only once, it indicates that learning is incomplete. Repeat from Step 4 again.
6 Repeat Steps 4 and 5 to teach other functions.
7 Press SET to finish teaching.
The SET indicator turns off.
To cancel the process
Press SET anytime.
To clear the learned function from the Device Select button or SYSTEM CONTROL button
1 Press and hold SET for more than 3 seconds.
The SET indicator lights up.
While keeping SET held down, press ·
2 Enter 9-0-4.
The SET indicator flashes three times.
3 Press and hold the Device Select button for more than 3 seconds, or press the SYSTEM CONTROL button you want to reset.
When the learned function is cleared, the SET indicator flashes three times.
4 Press SET to finish setting.
The SET indicator turns off.
Assigning a Channel to Each Number Button
Channel selecting procedures can be programmed to the number buttons (0 - 9) for each device mode, which allows you to select any channel number directly with a single press of a number button.
Notes
- If another channel has already been set on a button, it will be overwritten with the new one.
- If the button has already learned a function, you cannot assign a channel.
- Once a number button has been programmed, it cannot function as a regular number button.
Example: To assign a channel to number button 9 in SAT mode
1 Press and hold SET for more than 3 seconds.
The SET indicator lights up.
While keeping SET held down, press the desired Device Select button, then release both buttons.

The selected Device Select button lights up.
2 Enter 9-7-1.
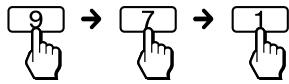
The SET indicator flashes three times to indicate that the setting mode has been entered.
3 Press the number button where you want to assign the channel.

The SET indicator flashes three times.

4 Enter the desired channel number.
Notes
- You can press up to four buttons among the number buttons, --, and ENTER.
If you press any other button, the SET indicator flashes once and turns off, and the setting is cancelled.
- If you press four buttons, the setting mode ends and the channel will be programmed.
5 Press SET to complete the programming.
The SET indicator flashes three times, and the indicators turn off.
You can now select the channel by pressing just the number 9 button.
To cancel the process
Press and hold SET for more than 3 seconds. The indicators turn off.
To clear the programme
1 Press and hold SET for more than 3 seconds. The SET indicator lights up.
While keeping SET held down, press the desired Device Select button.
2 Enter 9-7-1.
The SET indicator flashes three times.
3 Press and hold the programmed number button you want to reset for more than 3 seconds.
When the programme is cleared, the SET indicator flashes three times and turns off.
Programming the RM-VLZ620T Consecutive Procedures
You can programme a consecutive procedure and perform them by pressing just one button.
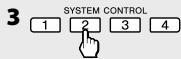
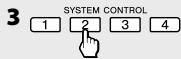
You can programme up to 16 consecutive steps to each of the SYSTEM CONTROL buttons (1 - 4) or the Device Select buttons.
To perform the programmed procedure:
- Press the programmed SYSTEM CONTROL button.
- Press and hold the programmed Device Select button for more than 2 seconds*.
- If you release the button within 2 seconds, the Device Select button will function to select the device mode.
Notes
- If another consecutive procedure has already been set on the button, it will be overwritten with the new one.
- If the button has already learned a function, the setting procedure will be cancelled. Clear the learned function (page 22).
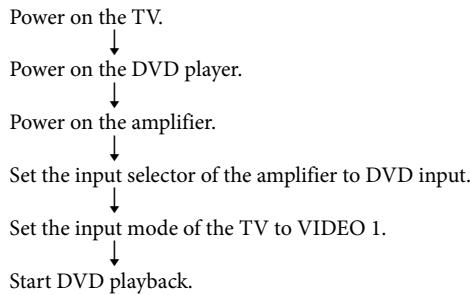
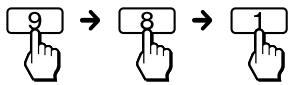
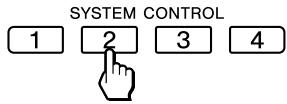
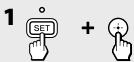
Example: To programme a consecutive procedure to watch a DVD to the SYSTEM CONTROL 2 button:
1 Press and hold SET for more than 3 seconds.
While keeping SET held down, press , then release both buttons.
The SET indicator lights up.
2 Enter 9-8-1.
The SET indicator flashes three times to indicate that the setting mode has been entered.
3 Press a SYSTEM CONTROL button or Device Select button you want to programme.
4 Programme a consecutive procedure.
With this example, press the buttons in sequence as below*:
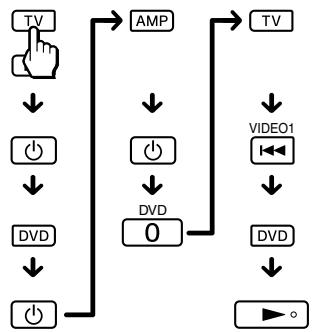
- The procedure may differ depending on your device. Programme the correct procedure for your device.
Notes
- You can press any button other than the SET or SYSTEM CONTROL buttons.
- You can skip the button for Sony devices by using automatic power-on control instead.
- If you have programmed an incorrect operation by mistake, the setting is cancelled. Start from the beginning.
- If you press a Device Select button in a consecutive procedure, the function already learned on the button will not be programmed.
5 Press SET to complete the programming.
The SET indicator flashes three times and turns off.
To cancel the process
Press and hold SET for more than 3 seconds. The
SET indicator turns off.
To clear a programmed procedure
1 Press and hold SET for more than 3 seconds. The SET indicator lights up. While keeping SET held down, press
2 Enter 9-8-1.
The SET indicator flashes three times.
3 Press and hold the programmed button you want to reset for more than 3 seconds. When the programmed procedure is cleared, the SET indicator flashes three times and turns off.
If your device does not accept consecutive remote control signals
If the device does not respond to the next signal immediately after the power-on signal, you can insert other signals or an interval by pressing the same Device Select button.
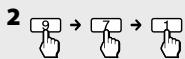
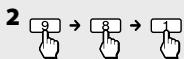
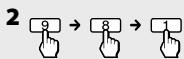
For Example, if TV power-on and input select do not work properly:
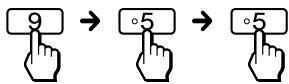
- Insert another device signal by pressing
$$ \mathbf {T V} \rightarrow \oslash \rightarrow \mathbf {D V D} \rightarrow \oslash \rightarrow \mathbf {T V} \rightarrow \oslash $$
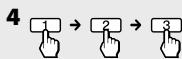
- Insert a 0.3 second interval between each signal by pressing
$$ \mathbf {T V} \rightarrow \mathbb {O} \rightarrow \mathbf {T V} \rightarrow \mathbb {O} $$
(Added signals are underlined.)
Notes
- If you interrupt the procedure at any point for over 10 seconds, the setting mode ends.
Start again from the beginning. - If you try to programme more than 16 steps, the setting mode ends, and the 16 steps you have programmed are registered.
- If you change the manufacturer's code or teach a new signal on a button that has been programmed for a consecutive procedure, the new signal will be transmitted when you press the corresponding Device Select button.
Locking the Controls (Hold Function)
To prevent accidental operation, you can lock all the buttons with the Hold function.
It is recommended to use this function to prevent children from misoperating devices such as air conditioners.
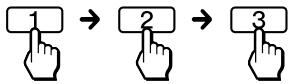
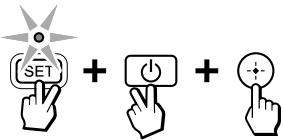
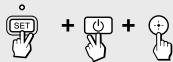
1 Press and hold SET for more than 3 seconds.
2 While keeping SET held down, press , then , and release three buttons at the same time.
The SET indicator flashes three times and turns off.
The hold function is set.
While all the buttons are locked, no function can be operated.
If you press any key except SET, the SET indicator will flash three times.
To unlock the controls
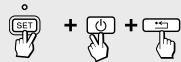
1 Press and hold SET for more than 3 seconds.
The SET indicator lights up.
2 While keeping SET held down, press , then and release three buttons at the same time.
The SET indicator flashes three times and turns off.
All the buttons will be unlocked.
Restoring the Factory Settings
You can clear all the settings (manufacturer's codes, learned functions, and programmed consecutive procedures), and reset the RM-VLZ620T to its factory settings.
If you want to clear the settings for any Device Select button, see page 13.
SET/SET indicator
1 Press and hold SET for more than 3 seconds. While keeping SET held down, press , then release both buttons.
2 Enter 9-0-0.
The Device Select buttons start flashing in sequence.
If you want to clear all the settings, go to Step 3. To cancel, press any button except . The SET indicator flashes once and turns off.
3 Press

When all the settings have been cleared, the SET indicator flashes three times and turns off.
Precautions
- Do not drop the unit or give a shock to the unit, or it may cause a malfunction.
- Do not leave the unit in a location near heat sources, or in a place subject to direct sunlight, excessive dust or sand, moisture, rain or mechanical shock.
- Do not put foreign objects into the unit. Should any liquid or solid object fall into the unit, have it checked by qualified personnel before operating the unit any further.
- Do not expose the remote control detectors of your devices to direct sunlight or other strong illumination. Too much light there can interfere with remote control operations.
- Place the remote control out of the reach of small children or pets. Devices such as air conditioners, heaters, electric appliances, and electric shutters or curtains receiving an infrared signal can be dangerous if misused.
Maintenance
Clean the surface with a soft cloth slightly moistened with water or a mild detergent solution.
Do not use any type of solvent such as alcohol, benzene or thinner as they may damage the finish of the surface.
Specifications
Operating distance
Approx. 11m (varies depending on devices of different manufacturers)
Power requirements
Two R6 (size AA) dry batteries (not supplied)
Battery life
Approx. 1 year when using LR6 (size AA) alkaline batteries (varies depending on frequency of button use - up to approx. 300 times per day.)
Dimensions
Approx. 52 × 236 × 26 ~mm(w × h × d)
Mass
Approx. 158g (including batteries)
Design and specifications are subject to change without notice.
If you have problems setting up or using the RM-VLZ620T, first check the batteries (page 8), then check the items below.
| Symptom | Remedy |
| You cannot operate the device. | ·Move closer to the device. The maximum operating distance is approximately 11 m. ·Aim the RM-VLZ620T directly at the device. ·Remove any obstacles in the path between the RM-VLZ620T and the device. ·Power on the devices first, if necessary. ·Make sure you have pressed the correct Device Select button. ·Check that the device has infrared remote capability. For example, if your device did not come with a remote control, it probably is not capable of being controlled by the RM-VLZ620T. ·You have assigned a different device to the Device Select button. Check the device assigned to that button and the manufacturer's code. |
| You cannot control the volume. | ·Your video devices (e.g., DVD player) may be connected to an audio system. Change the factory preset of the volume control (page 16). |
| The Device Select buttons flash at a constant interval when you press a button. | ·The batteries are weak. Replace them with new ones. |
| The SET indicator flashes once and turns off during setting. | ·The manufacturer's code cannot be set. Refer to the supplied "Manufacturer's Code List" and set the manufacturer's code again (page 12). ·If no operations are performed for 10 seconds while setting, the setting will be cancelled, and must be restarted from the beginning. |
| The SET indicator flashes once when you press any button. | ·The Hold function is on. Unlock the Hold function (page 26). |
| You cannot operate the device even after setting the manufacturer's code. | ·Set the manufacturer's code correctly. If the first code that is listed does not work, set other codes in the order they are listed in the supplied "Manufacturer's Code List." ·Some features may not be preset. If some or all of the buttons do not function correctly even after you have set the manufacturer's code, then teach the RM-VLZ620T new functions by using the original remote control supplied with the device (page 18). ·The device may be operated with a manufacturer's code that is not listed in the "Manufacturer's Code List." Set a manufacturer's code again with the search function (page 14). |
| The signals of the remote control supplied with the device cannot be transmitted to the RM-VLZ620T. | ·When you teach signals of an interactive signal exchange system remote control unit (supplied with some of Sony's amplifiers) to the RM-VLZ620T, the response signal of the main unit may interfere with the learning of the RM-VLZ620T. In such a case, move to a place where the signals will not reach the main unit (e.g., another room, etc.). |
| The RM-VLZ620T failed to learn the signals of the remote control supplied with the device. | ·Avoid learning in places under direct sunlight or strong fluorescent light. ·Turn off any nearby infrared devices, such as an air-conditioner or headphones. ·Avoid learning near a plasma TV, or turn off the plasma TV while learning. ·When teaching the signals, keep the distance between the RM-VLZ620T and the other remote control about 3 - 8 cm. ·The RM-VLZ620T supports infrared signals only. RF signals or two-way communication signals are not supported. ·The batteries are weak. Use new batteries in both remote control units. |
| You cannot operate the device even after teaching the RM-VLZ620T. | ·Make sure that you teach the RM-VLZ620T the correct signals (page 18). ·The volume, cursor, and some other buttons continue to work when pressed down for some seconds. If you teach the signals of such buttons, the RM-VLZ620T may not learn the signals accurately. Teach the signal by holding down the button on the remote control of the other device. ·The consecutive procedure has been already programmed on the button. Clear the programme (page 26). ·There are no available buttons for teaching. Clear the infrequently used learned functions (page 20), and teach the signals again. |
| After programming the power-on signal of the device, pressing that Device Select button does not function correctly. | ·You have already set a new function or consecutive procedure on the Device Select button. Clear the learned function or programmed procedure. This function is for Sony devices only. |
| A consecutive procedure does not work properly. | ·When you programme a consecutive procedure, make sure to follow the correct steps (pages 24). ·Change the direction the RM-VLZ620T is aimed. If the problem persists, position the programmed devices closer together. ·Remove any obstacles in the path between the RM-VLZ620T and the devices. ·Position the devices back to the way they were before you set a consecutive procedure. ·Some devices may not always be powered on by a consecutive procedure. This is because the power of the device turns on and off alternately when receiving the power on/off signal. In this case, check the operating device's power on/off status beforehand. ·If you change the manufacturer's code or teach a new signal on a button that has been programmed for a consecutive procedure, the new signal will be transmitted when you press the corresponding Device Select button. ·Some devices may not respond to the next signal immediately after the power-on signal. In this case, you can insert an interval by the following means. - Change the button order. - Press the same Device Select button again. Each time you press the button, you can insert an interval (page 26). ·The button has already learned a function. Clear the learned function (page 20). ·Check the status of the device and make sure that you have set the device properly to receive signals. |

For customers in Europe
Customer Service
If you have any questions or problems concerning the RM-VLZ620T that are not covered in this manual, please call the customer remote helpline. The number is mentioned in the warranty card.
The function of the buttons varies depending on settings/operating modes. The following table (page 32 through page 38) shows how the RM-VLZ620T generally operates for each device in the preset mode.
You can assign another device to any of the Device Select buttons except TV. Once you set a Device Select button to a different type of device, the entered manufacturer's code becomes effective. In this case, the function of the buttons may be different from the following table.
Notes
- The reference numbers correspond with the KEY DISPLAY in the following table.
- There may be some devices or functions that cannot be operated with RM-VLZ620T.
- To use the original device setting, set the manufacturer's code again (page 12).
- If you enter a new brand's manufacturer's code without clearing the previous learned functions on that Device Select button, the previously learned functions remain effective. Clear functions you do not use frequently.
- When you press the (record) button, be careful not to accidentally erase the previously recorded contents.
TV button
The buttons operate as below in the factory preset mode.
TV
| KEY DISPLAY | FUNCTION |
| 1 SLEEP | Enables the Sleep function (when available). |
| 2 ↓ | Selects VIDEO 1 input. |
| 2 ← | SelectsVIDEO 2 input. |
| 2 • | Selects HDMI input. |
| 2 ▶ | Selects RGB input. |
| 2 ← | PIP INPUTChanges the input of the “window” picture. |
| 2 ▶ | PIPTurns the “window” picture on and off. |
| 2 ▶ | PIP MOVEMoves the location of the “window” picture. |
| 2 II | PIP STILLFreezes the “window” picture. |
| 2 ■ | PIP SWAPSwitches between “main” and “window”picture. |
| 3 Red/Green/Yellow/Blue | Fastext buttons |
| 4 ☑ | Displays the programme guide (EPG). |
| 5 ↑/↓/←/→ | Moves the cursor to select a menu item. |
| 5 + | Enters the selected item. |
| 6 ∠ | Enables the Favourite function. |
| 7 ← | Returns to the previous display/exists themenu. |
| 8 ☑ MENU | Calls up the menu display. |
| 9 +/- | Turns the volume up/down. |
| 10 - | Changes the input mode. |
| 11 23 1-9,0,ENTER | Changes the channel. For example, to change to channel 5, press 0 and 5 (or, press 5 and ENTER). |
| 12 -/- | +10Selects numbers 10 and above. |
| 13 TV | Turns the TV on and off. |
| 14 ☐ | Turns on and off. |
| 15 ANALOG/☐(TV ON) | Displays analogue channels/switches from Teletext to TV. |
| 15 DIGITAL | Displays digital channels. |
| 16 ☑ | Switches to Teletext. |
| 17 ☑ | Displays programme information. |
| 18 OPTIONS | Displays the options menu. |
| 19 - | Selects the channel previously selected. |
| 20 ☑ | Mutes the volume. Press again to turn muting off. |
| 21 PROG +/- | Switches the channel up and down. |
| 22 ☑ | Changes the screen format. |
Projector
| KEY DISPLAY | FUNCTION |
| 1 SLEEP | Enables the Sleep function (when available). |
| 5 ↑/▼/◆/◆ | Moves the cursor to select a menu item. |
| 5 + | Enters the selected item. |
| 8 MENU | Calls up the menu display. |
| 9 +/- | Turns the volume up/down. |
| 10 - | Changes the input mode. |
| 11 1 | Selects VIDEO 1 input. |
| 11 2 | Selects VIDEO 2 input. |
| 11 3 | SelectsVIDEO 3 input. |
| 11 4 | SelectsVIDEO 4 input. |
| 11 5 | Selects S-VIDEO input. |
| 11 6 | Selects COMPONENT VIDEO input. |
| 11 7 | Selects HDMI input. |
| 13 TV | Turns the TV on and off. |
| 14 0 | Turns on and off. |
| 20※ | Mutes the volume. Press again to turn muting off. |
To use Fastext
You can access a Fastext page with one button press. When a Fastext page is broadcast, a colour-coded menu will appear at the bottom of the screen. The colours of this menu correspond to the red, green, yellow, and blue buttons on the RM-VLZ620T. Press the button which corresponds to the colour-coded menu. The page will be displayed after a few seconds.
DVD button
The buttons operate as below in the factory preset mode.
DVD player/ recorder
| KEY DISPLAY | FUNCTION |
| 1▲ | Opens/closes the disc tray. |
| 2↓ | Skipping to the previous chapter/track. |
| 2←● | Briefly replays the scene (Flash -). |
| 2●→ | Briefly fast forwards the scene (Flash +). |
| 2▶↑ | Skipping to the next chapter/track. |
| 2▲ | Fast reverses. |
| 2▼ | Plays. |
| 2▶ | Fast forwards. |
| 2● | Records (for DVD recorder). |
| 2|| | Pauses. |
| 2■ | Stops. |
| 3Red | SET UP Calls up the system/setup menu. |
| 3Green | SUBTITLE Switches the subtitle. |
| 3Yellow | AUDIO Changes the sound. |
| 3Blue | CLEAR Cares the setting. |
| 4= | Displays the programme guide (EPG). |
| 5★/♣/◆/♦ | Moves the cursor to select a menu item. |
| 5⊕ | Enters the selected item. |
| 6♥ | TOP MENU Displays the Top Menu. |
| 7← | Returns to the previous display/exists the menu. |
| 8■ | Displays the DVD menu. |
| 10= | Changes the input mode. |
| 111-9,0 | Number buttons |
| 12-/- | +10 Selects numbers 10 and above. |
| 13TV | Turns the TV on and off. |
| 14◇ | Turns on and off. |
| 15ANALOG | HDD Selects the internal HDD (hard disk drive). |
| 15DIGITAL | DVD Selects the DVD drive. |
| 16≡ | Displays the Title List. |
| 17◇ | DISPLAY Displays the playback information. |
| 18OPTIONS | Displays the options menu. |
| 19← | DRIVE SELECT Switches between HDD and DVD. |
| 21PROG+/− | Switches the channel up/down (for DVD recorder). |
| 22 | Changes the screen format. |
| 23 | Enters the selected item. |
BD button
The buttons operate as below in the factory preset mode.
Blu-ray Disc/HD-DVD player
| KEY DISPLAY | FUNCTION |
| 1▲ | Opens/closes the disc tray. |
| 2↓ | Skipping to the previous chapter/track. |
| 2←● | Briefly replays the scene (Flash -). |
| 2●→ | Briefly fast forwards the scene (Flash +). |
| 2▶ | Skipping to the next chapter/track. |
| 2▲ | Fast reverses. |
| 2▶ | Plays. |
| 2▶ | Fast forwards. |
| 2● | Records (for BD recorder). |
| 2|| | Pauses. |
| 2■ | Stops. |
| 3Red | SET UPCalls up the system menu. |
| 3Green | SUBTITLESwitches the subtitle. |
| 3Yellow | AUDIOChanges the sound. |
| 3Blue | CLEARClears the setting. |
| 4 | Displays the programme guide (EPG). |
| 5↑/▼/◆ | Moves the cursor to select a menu item. |
| 5+ | Enters the selected item. |
| 6♥ | TOP MENUDisplays the Top Menu. |
| 7← | Returns to the previous display/exists themenu. |
| 8■ | Displays the Pop-up Menu/Disc Menu. |
| 10→ | Changes the input mode. |
| 111-9,0 | Number buttons |
| 12-/- | +10Selects numbers 10 and above. |
| 13TV | Turns the TV on and off. |
| 14 | Turns on and off. |
| 15ANALOG | HDDSelects the internal HDD (hard disk drive). |
| 15DIGITAL | BDSelects the BD drive. |
| 17 | DISPLAY |
| 18OPTIONS | Displays the playback information. |
| 22# | Changes the screen format. |
| 23ENTER | Enters the selected item. |
SAT (CBL) button
The buttons operate as below in the factory preset mode.
Satellite receiver/DVB-T receiver
| KEY DISPLAY | FUNCTION |
| 1 SLEEP | Enables the Sleep function (when available). |
| 2 ↓ | Proceeds to the previous location. |
| 2 ← | Briefly replays the scene (Flash -). |
| 2 • → | Briefly fast forwards the scene (Flash +). |
| 2 ▷ ↓ | Proceeds to the next location. |
| 2 ← | Fast reverses. |
| 2 ▶ | Plays. |
| 2 ▶ → | Fast forwards. |
| 2 ● | Records. |
| 2 ↓ ↓ | Pauses. |
| 2 ■ | Stops. |
| 3 Red/Green/ Yellow/Blue | Fastext buttons (For details about Fastext, see page 33.) |
| 4 ☑ | Displays the programme guide (EPG). |
| 5 ↑ / ↓ / ← / ← | Moves the cursor to select a menu item. |
| 5 ⊙ | Enters the selected item. |
| 6 √ | Enables the Favourite function. |
| 7 ← | Returns to the previous display/exists the menu. |
| 8 ☐ MENU | Calls up the menu display. |
| 10 → | TV/SAT Switches the output between SAT and TV (when connecting a TV). |
| 11 23 1 - 9, 0, ENTER | Changes the channel. For example, to change to channel 5, press 0 and 5 (or, press 5 and ENTER). |
| 12 -/-- | +10 Selects numbers 10 and above. |
| 13 TV | Turns the TV on and off. |
| 14 ↦ | Turns on and off. |
| 15 ANALOG | Page down |
| 15 DIGITAL | Page up |
| 16 ↤ | Displays the title of recorded programme/ PVR menu. |
| 17 ↗ | Displays programme information. |
| 18 OPTIONS | Displays the Satellite dish menu/Station Index. |
| 19 ↦ | Tunes to the last tuned station. |
| 21 PROG +/- | Switches the channel up/down. |
Cable set top box
| KEY DISPLAY | FUNCTION |
| 1 SLEEP | Enables the Sleep function (when available). |
| 2 ↓ | Proceeds to the previous location. |
| 2 ← | Briefly replays the scene (Flash -). |
| 2 • | Briefly fast forwards the scene (Flash +). |
| 2 ▷ | Proceeds to the next location. |
| 2 ↓ | Fast reverses. |
| 2 ▷ | Plays. |
| 2 ▷ | Fast forwards. |
| 2 ● | Records. |
| 2 ■ | Pauses. |
| 2 ■ | Stops. |
| 3 Red | A button |
| 3 Green | B button |
| 3 Yellow | C button |
| 3 Blue | Live TV Displays Master Guide. |
| 4 E | Displays the programme guide (EPG). |
| 5 ↑/↓/←/→ | Moves the cursor to select a menu item. |
| 5 + | Enters the selected item. |
| 6 ∨ | Enables the Favourite function. |
| 7 ← | Returns to the previous display/exits the menu. |
| 8 MENU | Calls up the menu display. |
| 10 → | Changes the input mode. |
| 11 23 1 - 9, 0, ENTER | Changes the channel. For example, to change to channel 5, press 0 and 5 (or, press 5 and ENTER). |
| 12 +/- | +10 Selects numbers 10 and above. |
| 13 TV | Turns the TV on and off. |
| 14 ↓ | Turns on and off. |
| 15 ANALOG | Page down |
| 15 DIGITAL | Page up |
| 16 ≈ | Displays the title of recorded programme. |
| 17 ↑ | Displays programme information. |
| 18 OPTIONS | Displays the options menu. |
| 19 ← | Switches between the current and previous channel. |
| 21 PROG +/- | Switches the channel up/down. |
DVR (PVR) button
The buttons operate as below in the factory preset mode.
Digital video recorder/personal video recorder
| KEY DISPLAY | FUNCTION |
| 1▲ | Opens/closes the disc tray. |
| 2↓ | Proceeds to the previous location. |
| 2←● | Briefly replays the scene (Flash -). |
| 2●→ | Briefly fast forwards the scene (Flash +). |
| 2▶ | Proceeds to the next location. |
| 2▲ | Fast reverses. |
| 2▼ | Plays. |
| 2▶ | Fast forwards. |
| 2● | Records. |
| 2|| | Pauses. |
| 2■ | Stops. |
| 3Red | REPLAY*Enables the Replay function for DVR/Replay TV. |
| 3Green | Live TV*Displays Master Guide. |
| 4■ | Displays the programme guide (EPG). |
| 5★/★/★/★ | Moves the cursor to select a menu item. |
| 5⊕ | Enters the selected item. |
| 7← | Returns to the previous display/exists the menu. |
| 8■MENUM | Calls up the menu display. |
| 10- | Changes the input mode. |
| 11 1-9,0 | Number buttons |
| 12-/- | +10Selects numbers 10 and above. |
| 13TV | Turns the TV on and off. |
| 14◇ | Turns on and off. |
| 15ANALOG | Page down/Thumbs* down |
| 15DIGITAL | Page up/Thumbs* up |
| 16≡ | Displays the title of recorded programme. |
| 17|| | DISPLAYDisplays the playback information. |
| 19- | Selects the channel previously selected. |
| 21PROG+/- | Switches the channel up/down. |
| 23ENTER | Enters the selected item. |
- These buttons correspond to TiVo service or the Replay service. Refer to its instruction manual for details.
VCR button
The buttons operate as below in the factory preset mode.
VCR
| KEY DISPLAY | FUNCTION |
| 1▲ | Ejects a tape. |
| 2▲ | Rewinds. |
| 2▲ | Plays. |
| 2▲ | Fast forwards. |
| 2● | Records. |
| 2■ | Pauses. |
| 2■ | Stops. |
| 5▲/▼/◆/◆ | Moves the cursor to select a menu item. |
| 5⊕ | Enters the selected item. |
| 10- | Changes the input mode. |
| 11 1-9,0 | Number buttons |
| 13 TV | Turns the TV on and off. |
| 14 ⊙ | Turns on and off. |
| 17 ⊕ | DISPLAY Displays the playback information. |
| 18 OPTIONS | ANT/SW Switches the aerial output. |
| 19- | DRIVE SELECT Selects the deck. |
| 21 PROG +/- | Switches the channel up/down. |
| 22 ⊕ | Changes the screen format. |
| 23 ENTER | Enters the selected item. |
CD button
The buttons operate as below in the factory preset mode.
CD player
| KEY DISPLAY | FUNCTION |
| 1▲ | Opens/closes the disc tray. |
| 2↓ | Selects the previous track. |
| 2▶ | Selects the next track. |
| 2← | Fast reverses. |
| 2▶ | Plays. |
| 2▶ | Fast forwards. |
| 2● | Records. |
| 2|| | Pauses. |
| 2■ | Stops. |
| 5▲/▼/◆/◇ | Moves the cursor to select a menu item. |
| 5+ | Enters the selected item. |
| 9←+/- | Turn the amplifier's volume up/down. |
| 10→ | DISC SKIP Selects the next disc. |
| 111-9,0 | Selects the track number. 0 selects track 10. |
| 12-- | +10 Selects numbers 10 and above. |
| 14◇ | Turns on and off. |
| 17|| | DISPLAY Switches the display on and off. |
| 20※ | Mutes the amplifier's volume. Press again to turn muting up. |
| 23ENTER | Enters the setting. |
Cassette deck
| KEY DISPLAY | FUNCTION |
| 1 SLEEP | Enables the Sleep function (when available). |
| 2 ▲ | Rewinds. |
| 2 ▲ | Plays. |
| 2 ▲ | Fast forwards. |
| 2 ● | Records. |
| 2 ▲ | Pauses. |
| 2 ▲ | Stops. |
| 3 Red | Reverses. |
| 3 Blue | Reverses*. |
| 5 ↑ | Plays*. |
| 5 ↓ | Pauses*. |
| 5 ↑ | Fast forwards*. |
| 5 ↓ | Rewinds*. |
| 6 ∅ | Records*. |
| 9 ▲+/- | Turn the amplifier's volume up/down. |
| 10 ▲ | DECK A/B Switches between deck A and deck B (dual cassette deck only). |
| 14 ▲ | Turns on and off. |
| 17 ▲ | Stops*. |
| 20 ▲× | Mutes the amplifier's volume. Press again to turn muting up. |
- Activated when using a dual cassette deck (for deck A of Sony device).
AMP button
The buttons operate as below in the factory preset mode.
Amplifier/receiver
| KEY DISPLAY | FUNCTION |
| 1 SLEEP | Enables the Sleep function (when available). |
| 2 ▲ | Fast reverses. |
| 2 ▲ | Plays. |
| 2 ▲ | Fast forwards. |
| 2 ● | Records. |
| 2 ▼ | Pauses. |
| 2 ▼ | Stops. |
| 9 ▲+/- | Turns the volume up/down. |
| 10 ▷ | Changes the input mode cyclically. |
| 11 1 | Selects VIDEO 1 input. |
| 11 2 | SelectsVIDEO 2 input. |
| 11 3 | Selects AUX input. |
| 11 4 | Selects TUNER input. |
| 11 5 | Selects CD input. |
| 11 6 | Selects TAPE input. |
| 11 7 | Selects MD/DAT input. |
| 11 8 | Selects TV input. |
| 11 9 | Selects PHONO input. |
| 11 0 | Selects DVD input. |
| 13 TV | Turns the TV on and off. |
| 14 ▲ | Turns on and off. |
| 19 ▲ | BAND Selects FM/AM. |
| 20 △ | Mutes the volume. Press again to turn muting off. |
| 21 PROG +/- | Presents or tunes frequency up/down. |
DVD Home Theatre
| KEY DISPLAY | FUNCTION |
| 1▲ | Opens/closes the disc tray. |
| 2↓ | Skipping to the previous chapter/track. |
| 2←● | Briefly replays the scene (Flash -). |
| 2●→ | Briefly fast forwards the scene (Flash +). |
| 2▶■ | Skipping to the next chapter/track. |
| 2▲ | Fast reverses. |
| 2● | Plays. |
| 2▶ | Fast forwards. |
| 2● | Records. |
| 2■ | Pauses. |
| 2■ | Stops. |
| 3Red | SET UPCalls up the system/setup menu. |
| 3Green | SUBTITLESwitches the subtitle. |
| 3Yellow | AUDIOChanges the sound. |
| 3Blue | CLEARClears the setting. |
| 4■ | Displays the programme guide (EPG). |
| 5★/●/◆ | Moves the cursor to select a menu item. |
| 5+ | Enters the selected item. |
| 6♥ | TOP MENUDisplays the Top Menu. |
| 7← | Returns to the previous display/exists the menu. |
| 8■MENU | Displays the DVD menu. |
| 9▲+/- | Turns the volume up/down. |
| 10- | Changes the input mode. |
| 111-9,0 | Number buttons |
| 12-/- | +10Selects numbers 10 and above. |
| 13TV | Turns the TV on and off. |
| 14● | Turns on and off. |
| 16● | Displays the Title List. |
| 17■ | DISPLAYDisplays the playback information. |
| 18OPTIONS | Displays the amplifier menu. |
| 19● | BANDSelects FM/AM. |
| 20× | Mutes the volume. Press again to turn muting off. |
| 21PROG+/- | Presents or tunes frequency up/down. |
| 22● | Changes the screen format. |
| 23ENTER | Enters the selected item. |
Index
A
Adjusting the volume 16 Amplifier volume for video devices 16
B
Batteries 8
C
Clearing Consecutive procedures 26
Learned signal 20, 22
Power-on control 10
Controlling Non-Sony devices 12
Sony devices 10
D
Device Select buttons Programming a consecutive procedure 24 Teaching a new function 21
F
Factory setting 10, 12, 27
Features 3
G
Getting started 8
H
Hold function 26
1
Installing the batteries 8
L
Learning function 18, 21
Location of controls 9
Locking the controls 26
M
Maintenance 29
Muting button 16
N
Number buttons 12, 23
P
Power-on control 10
Precautions 29
Preset devices 10, 12
Preset manufacturer's code 10, 12
Programming
Assigning a channel 23
Consecutive procedures 24
R
Restoring the factory settings 27
S
Searching
Manufacturer's code for Non-Sony devices 14
Setting
Manufacturer's code 12
Specifications 29
SYSTEM CONTROL buttons
Programming a consecutive procedure 24
Teaching a new function 21
T
Table of preset functions 32
Teaching a new function 18
Troubleshooting 30
V
Volume 16
Volume buttons 16
This guide shows you how to set the RM-VLZ620T to operate your device. For details on settings, read the reference page.
Symbol convention
- : Press the buttons at the same time.
: Press the buttons in turn.
Setting the manufacturer's code (page 12)

over 3 sec.
Searching for the manufacturer's code (page 14)
1 Turn on your device.
2 Aim the RM-VLZ620T at the device.
6 When the device turns off, release the button.

Automatic power-on control (page 10) (Sony devices only)
[To clear]
Press SET for over 3 sec.
[To set]
Perform the same procedure.
Changing the volume control setting (page 16)
[To set the volume controls to AMP]
Press SET for (e.g., DVD) over 3 sec.


Teaching the new functions (page 18)
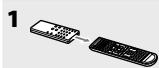
Place the RM-VLZ620T head to head with your device's remote control.

Press SET for over 3 sec.

Press the Device Select button for the device you want to control (e.g., DVD)

Press the button on the RM-VLZ620T you want to teach (e.g., >).
6 Press the button on the other remote control.
7 Repeat Steps 4 to 6 to teach other functions.

[To teach to a SYSTEM CONTROL or Device Select button] (page 21)
In Step 4 above, press the SYSTEM CONTROL button, or press the Device Select button for over 3 sec., then skip Step 5.
Clearing the learned function (page 20)
[from a single button] (e.g., clear the learned function from number button 1 in DVD mode)


Press SET for over 3 sec.
[from a SYSTEM CONTROL or Device Select button] (page 22)
In Step 3 above, press the SYSTEM CONTROL button, or press a Device Select button for over 3 sec., then skip Step 4.
[all the learned functions under a specific device mode]

Press SET for over 3 sec.
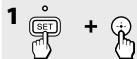
Assigning a channel to each number button (page 23)
[e.g., assign to number button 9 in TV mode]


Press SET for (e.g., TV) over 3 sec.
[To clear]
Perform Steps 1 and 2, then press the programmed number button for over 3 sec.
Programming the consecutive procedures (page 24)
4 programme a consecutive procedure.

Press SET for over 3 sec.
[To clear]
Perform Steps 1 and 2, then press the programmed button for over 3 sec.
Locking the controls (page 26)
[To lock]
[To unlock]
Press SET for over 3 sec.
Press SET for over 3 sec.
Restoring the factory settings (page 27)


Press SET for over 3 sec.
(To cancel, press any button except before Step 3.)

4Programmez la Procedure consecutive.
Procedures consecutives 24
R
Recherche en cours
Procedures consecutives 26
Programmation de procedures consecutives (page 24)
- Integrated Remote Commander
- Disposal of Old Electrical & Electronic Equipment (Applicable in the European Union and other European countries with separate collection systems)
- Disposal of waste batteries (applicable in the European Union and other European countries with separate collection systems)
- Notice for customers: the following information is only applicable to equipment sold in countries applying EU directives
- IMPORTANT
- Features
- You can centralise control of all of your Sony devices (page 10).
- You can also control non-Sony devices (page 12).
- You can teach the RM-VLZ620T new functions (page 18).
- You can perform a consecutive procedure by simply pressing one button.
- You can control up to eight devices.
- For a Sony Device
- Turn on your device by the Device Select button (page 10).
- For a Non-Sony Device
- Set the manufacturer's code (page 12).
- Brand
- Code No.
- Search for the manufacturer's code (page 14).
- Operate your device with the preset function (page 32).
- Advanced Features
- Programme a consecutive procedure (page 24).
- Getting Started
- Controlling Devices
- Additional Features
- Other Information
- Table of Preset Functions
- Installing the Batteries
- Note
- Battery life
- Notes on batteries
- Location of Controls
- About tactile dots
- Controlling Sony Devices with the RM-VLZ620T
- Notes
- Example: To operate a Sony DVD player
- Press the desired Device Select button.
- Press any button to control the device.
- To clear automatic power-on control for a Sony device
- To cancel the process
- To check which Device Select button is set for a Sony device
- To set automatic power-on control again
- Setting the Manufacturer's Code for Non-Sony Devices
- Example: To set up a Philips TV (01454)
- Refer to the supplied "Manufacturer's Code List," and find the five-digit manufacturer's code for the desired device.
- Press and hold SET for more than 3 seconds.
- Enter the manufacturer's code (01454).
- To operate the device
- If the RM-VLZ620T does not seem to be working
- To clear a manufacturer's code setting
- Searching for the Manufacturer's Code for Non-Sony Devices
- Example: To set the manufacturer's code for your TV
- Checking the manufacturer's code you have set
- Example: To check the code number (50831) you have set for the TV
- Press and hold SET for more than 3 seconds.
- Enter 9-3-3.
- Press
- Press SET to finish.
- Adjusting the Volume
- Video devices are:
- Audio devices are:
- Controlling volume via an amplifier
- To change the factory preset of the volume control
- Example: To set the DVD Device Select button to control the volume via the amplifier
- Enter 9-5-5.
- Press the Device Select button to which the connected amplifier is assigned.
- To reset the volume control
- Teaching the RM-VLZ620T New Functions (Learning Function)
- Example: To teach a function to the (play) button in DVD mode
- Press the button on the RM-VLZ620T you want to teach.
- Press the button on the original remote control to transmit the signal to the RM-VLZ620T.
- Repeat Steps 4 to 6 to teach other new functions.
- Press SET to finish teaching.
- To teach an air-conditioner's functions
- Tips for teaching accurately
- To clear the learned function of a single button
- To clear all the learned functions under a specific device mode
- Teaching the Device Select or SYSTEM CONTROL buttons
- Example: To teach the DVD input signal of your amplifier to the DVD Device Select button (when the DVD input can be selected with one button press)
- Place the RM-VLZ620T head to head with your device's remote control.
- Enter 9-8-8.
- Press and hold the Device Select button you want to teach for more than 3 seconds.
- Select the DVD input on the original remote control.
- Repeat Steps 4 and 5 to teach other functions.
- Press SET to finish teaching.
- To clear the learned function from the Device Select button or SYSTEM CONTROL button
- Assigning a Channel to Each Number Button
- Example: To assign a channel to number button 9 in SAT mode
- Enter the desired channel number.
- Press SET to complete the programming.
- To clear the programme
- Programming the RM-VLZ620T Consecutive Procedures
- Example: To programme a consecutive procedure to watch a DVD to the SYSTEM CONTROL 2 button:
- Enter 9-8-1.
- Press a SYSTEM CONTROL button or Device Select button you want to programme.
- Programme a consecutive procedure.
- To clear a programmed procedure
- If your device does not accept consecutive remote control signals
- Locking the Controls (Hold Function)
- To unlock the controls
- Restoring the Factory Settings
- Precautions
- Maintenance
- Specifications
- Operating distance
- Power requirements
- Dimensions
- Mass
- For customers in Europe
- Customer Service
- TV button
- TV
- To use Fastext
- DVD button
- BD button
- SAT (CBL) button
- Satellite receiver/DVB-T receiver
- Cable set top box
- DVR (PVR) button
- Digital video recorder/personal video recorder
- VCR button
- VCR
- CD button
- AMP button
- Index
- A
- B
- C
- D
- F
- G
- H
- 1
- L
- M
- N
- P
- R
- S
- T
- V
- Symbol convention
- Setting the manufacturer's code (page 12)
- Searching for the manufacturer's code (page 14)
- Automatic power-on control (page 10) (Sony devices only)
- Changing the volume control setting (page 16)
- Teaching the new functions (page 18)
- [To teach to a SYSTEM CONTROL or Device Select button] (page 21)
- Clearing the learned function (page 20)
- Assigning a channel to each number button (page 23)
- Programming the consecutive procedures (page 24)
- Locking the controls (page 26)
- Restoring the factory settings (page 27)
- Programmation de procedures consecutives (page 24)
Brand : SONY
Model : RM-VLZ620T
Category : Universal remote