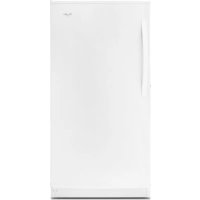
WZF57R16FW - Freezer WHIRLPOOL - Free user manual and instructions
Find the device manual for free WZF57R16FW WHIRLPOOL in PDF.


User questions about WZF57R16FW WHIRLPOOL
0 question about this device. Answer the ones you know or ask your own.
Ask a new question about this device
Download the instructions for your Freezer in PDF format for free! Find your manual WZF57R16FW - WHIRLPOOL and take your electronic device back in hand. On this page are published all the documents necessary for the use of your device. WZF57R16FW by WHIRLPOOL.
USER MANUAL WZF57R16FW WHIRLPOOL
THANK YOU for purchasing this high-quality product. Register your freezer at www.whirlpool.com. In Canada, register your freezer at www.whirlpool.ca.
For future reference, please make a note of your product model and serial numbers. These numbers can be found inside your freezer. Model Number
Serial Number
TABLE OF CONTENTS
SAFETY 1
Location Requirements. 3
Electrical Requirements 3
Water Supply Requirements (on some models) 4
Connect the Water Supply (on some models) 4
Remove and Replace the Handle. 5
Freezer Door. 5
Freezer Leveling and Door Closing. 6
Ensuring Proper Air Circulation. 7
Using the Control 7
Key Eject Lock (on some models) 8
Ice Maker (on some models). 8
Freezer Features. 8
CARING FOR YOUR FREEZER. 9
Cleaning Your Frost-Free Freezer 9
Changing the Light Bulb 10
TROUBLESHOOTING 10
Power Interruptions. 10
Moving Care. 10
Freezer Operation. 11
Ice Production 12
Ice Quality. 12
WARRANTY 13
SAFETY
Your safety and the safety of others are very important.
We have provided many important safety messages in this manual and on your appliance. Always read and obey all safety messages.

This is the safety alert symbol.
This symbol alerts you to potential hazards that can kill or hurt you and others.
All safety messages will follow the safety alert symbol and either the word "DANGER" or "WARNING."
These words mean:
DANGER
WARNING
You can be killed or seriously injured if you don't immediately follow instructions.
You can be killed or seriously injured if you don't follow instructions.
All safety messages will tell you what the potential hazard is, tell you how to reduce the chance of injury, and tell you what can happen if the instructions are not followed.
IMPORTANT SAFETY INSTRUCTIONS
WARNING: To reduce the risk of fire, electric shock, or injury when using your refrigerator, follow these basic precautions:
Plug into a grounded 3 prong outlet.
- Do not remove ground prong.
Do not use an adapter.
Do not use an extension cord.
- Disconnect power before servicing.
Replace all parts and panels before operating.
Remove doors from your old refrigerator.
Connect to a potable water supply only.
Use nonflammable cleaner.
- Keep flammable materials and vapors, such as gasoline, away from refrigerator.
Use two or more people to move and install refrigerator.
- Disconnect power before installing ice maker (on ice maker kit ready models only).
Use a sturdy glass when dispensing ice (on some models). - Do not hit the refrigerator glass doors (on some models).
This appliance is not intended for use by persons (including children) with reduced physical, sensory or mental capabilities, or lack of experience and knowledge, unless they have been given supervision or instruction concerning use of the appliance by a person responsible for their safety.
Children should be supervised to ensure that they do not play with the appliance.
SAVE THESE INSTRUCTIONS
State of California Proposition 65 Warnings:
WARNING: This product contains a chemical known to the State of California to cause cancer.
WARNING: This product contains a chemical known to the State of California to cause birth defects or other reproductive harm.
Proper Disposal of Your Old Freezer or Refrigerator
WARNING
Suffocation Hazard
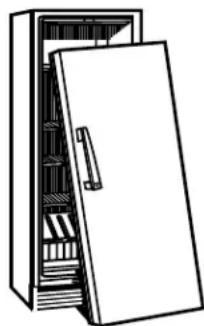
Remove doors or lid from your old freezer or refrigerator.
Failure to do so can result in death or brain damage.
IMPORTANT: Child entrapment and suffocation are not problems of the past. Junked or abandoned freezers or refrigerators are still dangerous - even if they will sit for "just a few days." If you are getting rid of your old refrigerator or freezer, please follow these instructions to help prevent accidents.
Before You Throw Away Your Old Freezer or Refrigerator:
Take off the doors or lid.
Leave the shelves in place so that children may not easily climb inside.
Important information to know about disposal of refrigerants:
Dispos of freezer in accordance with Federal and Local regulations. Refrigerants must be evacuated by a licensed, EPA certified refrigerant technician in accordance with established procedures.
Excessive Weight Hazard
Use two or more people to move and install freezer.
Failure to do so can result in back or other injury.
When Moving Your Freezer:
Your freezer is heavy. When moving the freezer for cleaning or service, be sure to cover the floor with cardboard or hardboard to avoid floor damage. Always pull the freezer straight out when moving it. Do not wiggle or "walk" the freezer when trying to move it, as floor damage could occur.
Remove Packaging Materials
■Remove tape and glue residue from surfaces before turning on the freezer. Rub a small amount of liquid dish soap over the adhesive with your fingers. Wipe with warm water and dry.
Do not use sharp instruments, rubbing alcohol, flammable fluids, or abrasive cleaners to remove tape or glue. These products can damage the surface of your freezer. For more information, see "Safety."
Clean Before Using
After you remove all of the packaging materials, clean the inside of your freezer before using it. See the cleaning instructions in the "Caring for Your Freezer" section.
Important information to know about glass shelves and covers:
Do not clean glass shelves or covers with warm water when they are cold. Shelves and covers may break if exposed to sudden temperature changes or impact, such as bumping. Tempered glass is designed to shatter into many small, pebble-size pieces. This is normal. Glass shelves and covers are heavy. Use both hands when removing them to avoid dropping.
Location Requirements
WARNING
Explosion Hazard
Keep flammable materials and vapors, such as gasoline, away from freezer.
Failure to do so can result in death, explosion, or fire.
Ventilation and Clearance
-
Keep flammable materials and vapors, such as gasoline, away from freezer.
-
Do not cover the freezer with items such as blankets, sheets, tablecloths, etc. This reduces air circulation.
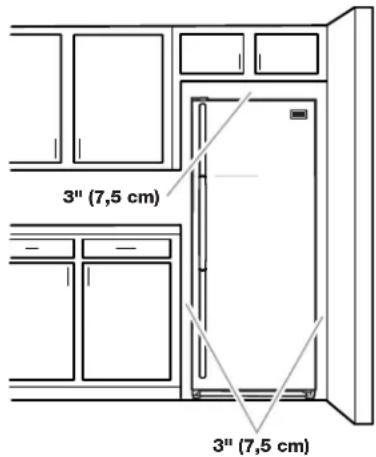
- Allow at least 3'' (7.5 cm) of air space at the top and on both sides of the freezer and 1'' (2.5 cm) between the back of the freezer and the wall. If the freezer is to be next to a fixed wall, leave extra space on the hinge side so the door can open wider.
Temperature
Your freezer operates most efficiently when located in an area where the temperature will not fall below 40^ (5^) . Place your freezer in a location where the temperature will not fall below this recommended temperature.
Upon Moving to Final Location
NOTE: Allow for a 3'' (7.5 cm) clearance at the top and sides and a 1/4'' (6.4 mm) clearance between the appliances.
Electrical Requirements
WARNING
Electrical Shock Hazard
Plug into a grounded 3 prong outlet.
Do not remove ground prong.
Do not use an adapter.
Do not use an extension cord.
Failure to follow these instructions can result in death, fire, or electrical shock.
Before you move your freezer into its final location, it is important to make sure you have the proper electrical connection.
Recommended Grounding Method
A 115 Volt, 60Hz AC-only, 15- or 20-amp fused, grounded electrical supply is required. It is recommended that a separate circuit serving only your freezer be provided. Use an outlet that cannot be turned off by a switch. Do not use an extension cord.
NOTE: Before performing any type of installation, cleaning, or removing a light bulb, press and hold TEMP SETTING for 3 seconds to turn off cooling, and then disconnect the freezer from the electrical source.
Over Temp Reset
Temp Settings
Cooling On/Off Hold 3 Sec
Water Supply Requirements
(on some models)
Gather the required tools and parts before starting installation. Read and follow the instructions provided with any tools listed here.
Tools Needed
Flat-blade screwdriver
14" nut driver
716" and 1/2" open-end or 2 adjustable wrenches
14" drill bit
Cordless drill
NOTE: Your freezer dealer has a kit available with a 1/4 " (6.35 mm) saddle-type shut-off valve, a union, and plastic tubing. Before purchasing, make sure a saddle-type valve complies with your local plumbing codes. Do not use a piercing-type or 3/16 " (4.76 mm) saddle valve which reduces water flow and clogs more easily.
IMPORTANT:
If you turn the freezer on before the water line is connected, turn the ice maker off.
All installations must meet local plumbing code requirements.
Use plastic tubing and check for leaks. Install plastic tubing only in areas where temperatures will remain above freezing.
Water Pressure
A cold water supply with water pressure of between 30 and 120 psi (207 to 827kPa is required to operate the water dispenser and ice maker. If you have questions about your water pressure, see "Troubleshooting" or call a licensed, qualified plumber.
Reverse Osmosis Water Supply
If a reverse osmosis water filtration system is connected to your cold water supply, the water pressure to the system needs to be a minimum of 40 to 60 psi (276 to 414kPa
If the water pressure to the reverse osmosis system is less than 40 to 60 psi (276 to 414kPa a booster pump can be inserted into the small tubing that goes from the cold water line to the reverse osmosis system.
If the water dispenser is still not dispensing water properly:
Check to see whether the sediment filter in the reverse osmosis system is blocked. Replace the filter if necessary.
- Allow the storage tank on the reverse osmosis system to refill after heavy usage.
If your refrigerator has a water filter, it may further reduce the water pressure when used in conjunction with a reverse osmosis system. Remove the water filter.
If you have questions about your water pressure, refer to "Troubleshooting" or call a licensed, qualified plumber.
Connect the Water Supply
(on some models)
Connect to Water Line
- Unplug freezer or disconnect power.
- Turn off main water supply. Turn on nearest faucet long enough to clear line of water.
- Locate a 1 / 2 to 1% (12.7 mm to 3.18 cm) vertical cold water pipe near the freezer.
IMPORTANT:
Make sure it is a cold water pipe.
Horizontal pipe will work, but drill on the top side of the pipe, not the bottom. This will help keep water away from the drill and normal sediment from collecting in the valve.
- Determine the length of plastic tubing you need. Measure from the connection on the lower-left rear of freezer to the water pipe. Add 7 ft (2.1 m) to allow for cleaning. Use 14 " (6.35 mm) O.D. (outside diameter) plastic tubing. Be sure both ends of plastic tubing are cut square.
- Using a cordless drill, drill a 1/4'' (6.35 mm) hole in the cold water pipe you have selected.
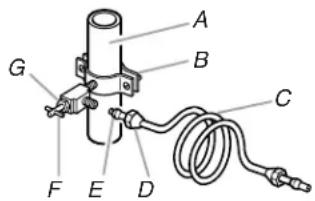
A. Cold water pipe
E. Compression sleeve
B. Pipe clamp
F.Shut-off valve
C. Plastic tubing
G. Packing nut
D. Compression nut
-
Fasten the shut-off valve to the cold water pipe with the pipe clamp. Be sure the outlet end is solidly in the 14 (6.35 mm) drilled hole in the water pipe and that the washer is under the pipe clamp. Tighten the packing nut. Tighten the pipe clamp screws slowly and evenly so washer makes a watertight seal. Do not overtighten or you may crush the plastic tubing.
-
Slip the compression sleeve and compression nut on the plastic tubing as shown. Insert the end of the tubing into the outlet end squarely as far as it will go. Screw compression nut onto outlet end with adjustable wrench. Do not overtighten.
- Place the free end of the tubing in a container or sink and turn on the main water supply. Flush the tubing until water is clear. Turn off the shut-off valve on the water pipe. Coil the plastic tubing.
Connect to Freezer
- Attach the plastic tube to the valve inlet using a compression nut and sleeve as shown. Tighten the compression nut. Do not overtighten.
- Use the tube clamp on the back of the freezer to fasten the tubing to the freezer as shown. This will help avoid damage to the tubing when the freezer is pushed back against the wall.
- Turn shut-off valve on.
- Check for leaks. Tighten any connections (including connections at the valve) or nuts that leak.
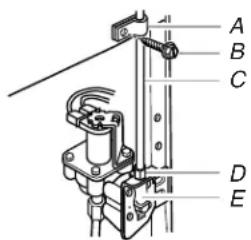
A. Tube clamp
D. Compression nut
B. Tube clamp screw
E. Valve inlet
C. Plastic tubing
- The ice maker is equipped with a built-in water strainer. If your water conditions require a second water strainer, install it in the 1/4'' (6.35 mm) water line at either tube connection. Obtain a water strainer from your nearest appliance dealer.
AWARNING
Electrical Shock Hazard
Plug into a grounded 3 prong outlet.
Do not remove ground prong.
Do not use an adapter.
Do not use an extension cord.
Failure to follow these instructions can result in death, fire, or electrical shock.
- Plug into a grounded 3 prong outlet.
Remove and Replace the Handle
To Remove the Handle:
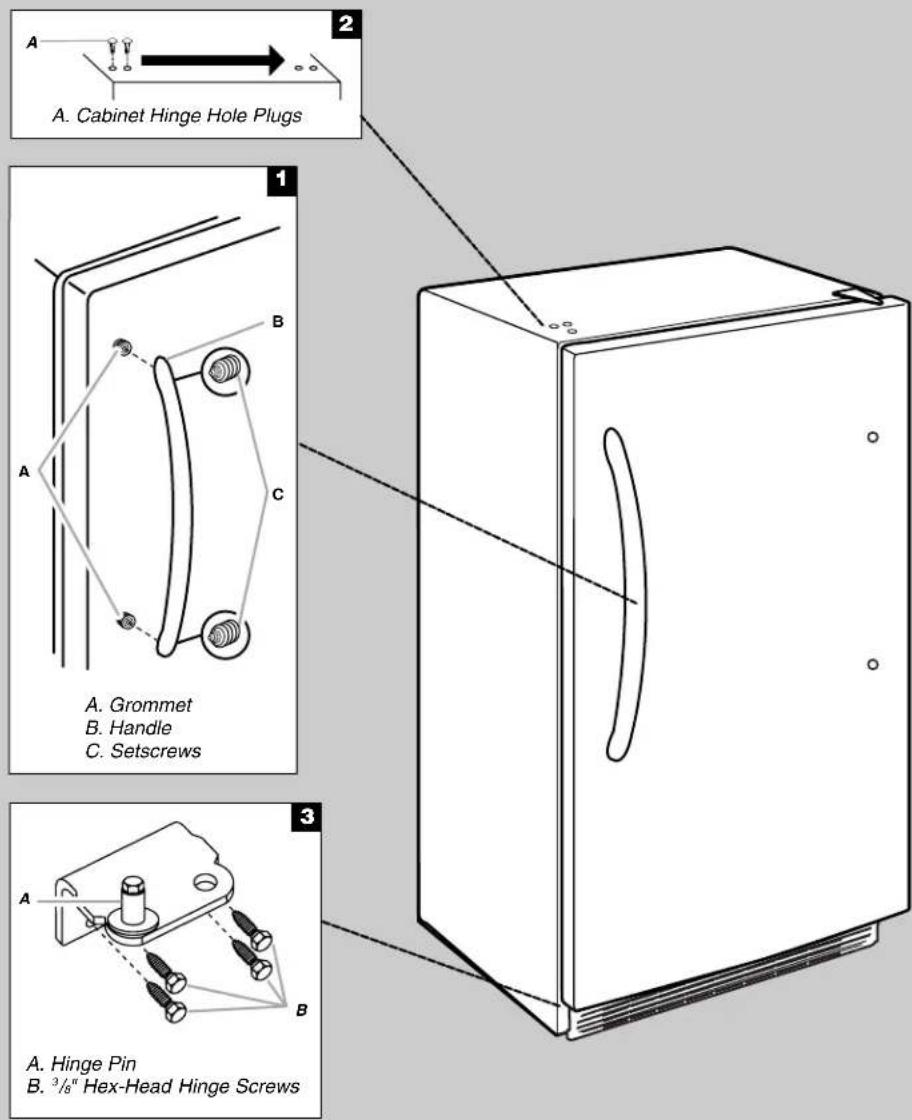
- Loosen the setscrews located on the side of handle at each end. See "Door Swing Reversal and Handle Removal" graphic.
- Remove the handle from the grommets.
To Replace the Handle:
- Place the handle onto the grommets making sure the grommets are fitted into the handle holes.
- Tighten the upper and lower setscrews with the hex key provided. See "Door Swing Reversal and Handle Removal" graphic. Do not overtighten the setscrews.
Freezer Door
Tools Needed: % " hex-head socket wrench, % " hex-head socket wrench, flat 2" putty knife.
IMPORTANT:
All graphics referenced in the following instructions are included later in this section after "Final Steps." The graphics shown are for a right-hand swing door (hinges factory installed on the right).
If you only want to remove and replace the door, see the "Remove Door and Hinges" and "Replace Door and Hinges."
Before you begin, turn the control OFF and remove food and adjustable door or utility bins from door.
Remove Door and Hinges
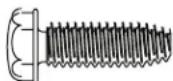
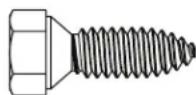
Hex-head hinge screws
- Unplug freezer or disconnect power.
- Keep the freezer door closed until you are ready to lift it free from the cabinet.
NOTE: Provide additional support for the door while he hinges are being moved. Do not depend on the door magnets to hold the door in place while you are working.
- Remove the parts for the top hinge as shown in Top Hinge graphic in the "Door Swing Reversal and Handle Removal" section.
- Lift the freezer door free from the lower hinge and cabinet and set aside.
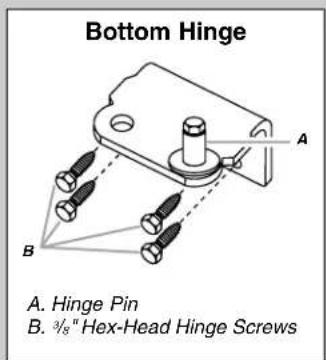
- Remove the 4 hex-head hinge screws and bottom hinge assembly. See Bottom Hinge graphic in the "Door Swing Reversal and Handle Removal" section.
Reverse Door (optional on some models)
IMPORTANT: If you want to reverse your door so that it opens in the opposite direction, continue with "Reverse Door (optional on some models)" instructions. If you are not reversing the door, see "Replace Door and Hinges."
Cabinet
- Remove the cabinet hinge hole plugs from the cabinet top and move them to the opposite side hinge holes as shown in Graphic 2 in "Door Swing Reversal and Handle Removal" section.
- Remove the bottom hinge pin from the hinge bracket.
- Remove the decals covering the holes on the opposite side of the bottom hinge.
- Reinstall the bottom hinge pin in the alternate hole in the hinge bracket. See Graphic 3 in "Door Swing Reversal and Handle Removal" section.
- Reinstall the hinge bracket to the cabinet with the 4 hex-head hinge screws.
Door
- Remove the hinge thimble hole plug from the top of the door.
- Remove the door stop from the bottom of the door.
- Move the door stop to the opposite side, making sure that the hole in the door stop plate is aligned perfectly with the hole in the door for the bottom hinge pin.
- Using the screws removed in Step 2, fasten the door stop bracket to the bottom of the door.
- Tighten all screws. Set aside the door until the bottom hinge is in place.
Replace Door and Hinges
NOTE: Graphic may be reversed if door swing is reversed.
- Replace the parts for the bottom hinge as shown and tighten screws. See Bottom Hinge graphic. Replace the freezer door. NOTE: Provide additional support for the door while the hinges are being moved. Do not depend on the door magnets to hold the door in place while you are working.
- Assemble the parts of the top hinge as shown in the Top Hinge graphic in the "Door Swing Reversal and Handle Removal" section. Do not tighten the screws completely.
Final Steps
- Check all holes to make sure that hole plugs and screws are in place. Reinstall top hinge cover. See Top Hinge graphic.
- Using the provided decals, cover the remaining holes located on the opposite side from the bottom hinge.
WARNING
Electrical Shock Hazard
Plug into a grounded 3 prong outlet.
Do not remove ground prong.
Do not use an adapter.
Do not use an extension cord.
Failure to follow these instructions can result in death, fire, or electrical shock.
- Plug into a grounded 3 prong outlet.
- Reset the control. See "Using the Control."
- Return all removable door parts to door and food to freezer.
Door Removal & Replacement
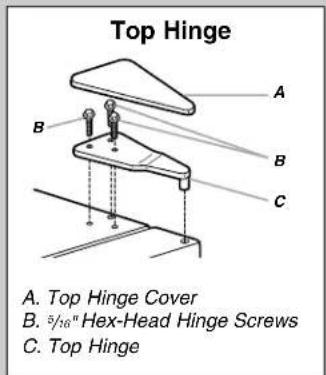
Door Swing Reversal and Handle Removal (optional)
Freezer Leveling and Door Closing
Style 1—without Grille
- Locate the 2 front leveling legs taped among the packing materials.
- Screw these legs into the front holes on the bottom of the freezer. The back of the freezer rests on 2 fixed supports.
- Adjust the front legs enough to lift the cabinet up off the floor.
- Place a leveling tool on top of the freezer first side to side, then front to back. Turn leg counterclockwise to raise a corner. Turn leg clockwise to lower a corner.
- Repeat Step 4 until freezer is level.
- After freezer is fully loaded with food, recheck with level as in Step 4.
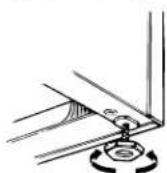
Style 2—with Grille
Your freezer has 2 front adjustable legs — one on each side. The back of the freezer rests on 2 fixed rollers. The base grille covers the adjustable brake feet and roller assemblies located at the bottom of the freezer below the freezer door. Before making any adjustments, remove the base grille and move the freezer to its final location.
Tools Needed: 14 " hex driver, Phillips head screwdriver
- Remove the base grille screws. Grasp the grille firmly and pull it toward you. Open the freezer door to access the brake feet.
NOTE: To allow the freezer to roll more easily, raise the brake feet by turning them counterclockwise. The front rollers will be touching the floor.
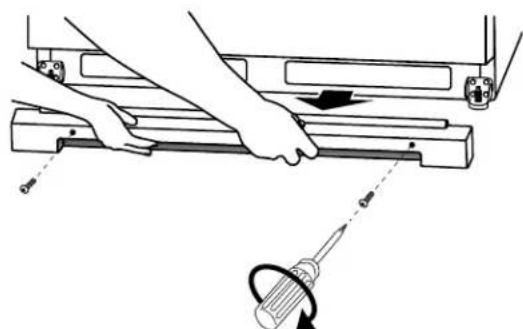
- Move the freezer to its final location.
- Lower the brake feet, by turning them clockwise, until the rollers are off the floor and both brake feet are snug against the floor. This keeps the freezer from rolling forward when you are opening the freezer door.
IMPORTANT: If you need to make further adjustments involving the brake feet, you must turn both brake feet the same amount to keep the freezer level.
- Make sure the door closes easily. If you are satisfied with the door opening and closing, skip the next section. If, however, the door does not close easily or the door pops open, adjust the tilt.
To Adjust the Cabinet Tilt:
NOTE: Having someone push against the top of the freezer takes some weight off the brake feet. This makes it easier to turn them. Open the freezer door. Use a 14 hex driver to turn both brake feet clockwise the same amount. This will raise the front of the freezer. It may take several turns to allow the door to close more easily.
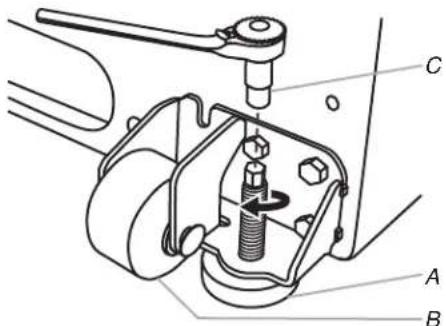
A. Brake foot B. Front roller
- Make sure the freezer is steady. If the freezer seems unsteady or rolls forward when the door is pulled open, adjust the brake feet.
To Steady the Refrigerator:
-
Open the freezer door. Using a 14 " hex driver, turn both brake feet clockwise the same amount until the brake feet are snug against the floor. Check again. If not satisfied, continue to adjust the brake feet by half turns of the screw until the freezer does not roll forward when the door is opened.
-
Replace the base grille by aligning the ends of the grille with the leveling assemblies on each side and snapping the grille into place. Reinstall the Phillips screws.
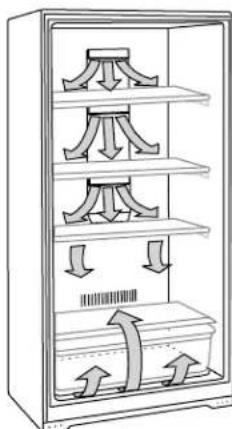
In order to ensure proper temperature, you need to permit proper airflow in the freezer. As shown in the illustration, cool air enters from the freezer wall and moves down. The air then recirculates through the vent near the bottom.
Do not block any of these vents with food packages. If the vents are blocked, airflow will be restricted and temperature and moisture problems may occur.
IMPORTANT: To avoid odor transfer and drying out of food, wrap or cover foods tightly.
Using the Control
The temperature control is located at the top front of the freezer compartment.
Temperature Control
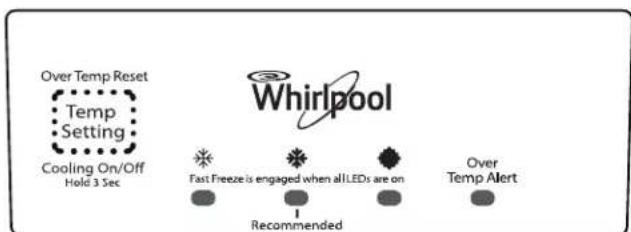
For your convenience, the temperature control is preset at the factory. When you first install your freezer, check that the control is still set to the recommended setting as shown.
IMPORTANT:
The recommended setting is designed to maintain the temperature at or near 0^ (-17.8^) under normal operating conditions.
- Allow the freezer to cool 6 to 8 hours before filling with frozen food.
- When the freezer is first started, the compressor will run constantly until the freezer is cooled. It may take up to 6 or 8 hours (or longer), depending on room temperature and number of times the freezer door is opened. After the freezer is cooled, the compressor will turn on and off as needed to keep the freezer at the proper temperature.
The outside of your freezer may feel warm. This is normal. The freezer's design and main function is to remove heat from packages and airspace inside the freezer. The heat is transferred to the room air, making the outside of the freezer feel warm.
Adjusting Control
If you need to adjust the temperature in the freezer compartment, press TEMP SETTING to display the desired temperature setting from the snowflake on the left (least cold) to the snowflake on the right (coldest).
NOTE: Except when starting the freezer, do not adjust the control more than one setting at a time. Wait 24 hours between adjustments for the temperature to stabilize.
Cooling On/Off
Your freezer will not cool when cooling is turned off.
To turn cooling off, press and hold TEMP SETTING for 3 seconds. In the Off condition, none of the lights on the control panel will be illuminated. The main freezer light bulb will still operate.
To turn cooling on, press and hold TEMP SETTING for 3 seconds. When cooling is On, the control panel lights will be illuminated.
Fast Freeze
Use this feature before adding large amounts of unfrozen food. For the best food quality, do not exceed 3 lbs (1,361 g) per cu. ft. (28.32 L) of freezer space.
To activate Fast Freeze, press TEMP SETTING until all the snowflake positions are illuminated simultaneously.
The freezer will remain in the Fast Freeze setting for 24 hours after the extra-low temperature is reached. Once the time has expired, the freezer will return to the previous temperature setting. Fast Freeze may be manually turned off by pressing TEMP SETTING to select the desired temperature setting from the snowflake on the left (least cold) to the snowflake on the right (coldest).
Over Temperature Alert (on some models)
The Over Temperature Alert lets you know if the freezer temperature has risen to 19^ (-7^) or higher. This alert feature will sound a continuous alert tone and repeatedly flash a red light on the control panel. The tone can be turned off by pressing TEMP SETTING on the control panel once. As you press TEMP SETTING, the red light will then also change from flashing to continuously illuminated. The red light will remain illuminated until the freezer temperature falls below 19^ (-7^) .
NOTE: If the red light on the control panel is repeatedly flashing, but the alert tone is not sounding, this means that an over-temperature condition has occurred, but the freezer temperature has since returned to below 19^ (-7^) . To turn off the red light indicator for this condition, press TEMP SETTING on the control panel once.
Door Ajar Alarm (on some models)
The Door Ajar alarm lets you know when the freezer door has been open for 5 minutes or longer and the cooling is turned on. This alarm feature will sound an alert tone that will repeat every 2 minutes. Close the door to turn off the tone. The feature is reset and will reactivate when the door is again left open for 5 minutes.
NOTE: To mute the alert tone while keeping the door open, such as while cleaning the inside of the freezer, press TEMP SETTING on the control panel. The alert tone will be temporarily turned off.
Key Eject Lock (on some models)
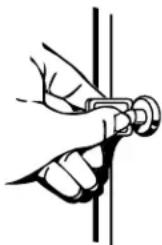
To lock or unlock the freezer, you must hold the key in the lock while turning. The lock is spring loaded, so the key cannot be left in the lock.
If the key is lost, contact your dealer for a replacement. Always give the model and serial number of your freezer when requesting a replacement key.
NOTE: Keep the key out of the reach of children. Do not keep the key close to the freezer/refrigerator.
Ice Maker (on some models)
To Turn the Ice Maker On/Off
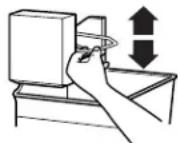
NOTE: Do not force the wire shut-off arm up or down.
To turn the ice maker on, simply lower the wire shut-off arm.
NOTE: Your ice maker has an automatic shutoff. As ice is made, the ice cubes fill the ice storage bin and the ice cubes will raise the wire shut-off arm to the Off (arm up) position.
To manually turn the ice maker off, lift the wire shut-off arm to the Off (arm up) position and listen for the click to make sure the ice maker will not continue to operate.
Ice Production Rate
The ice maker should produce approximately 7 to 9 batches of ice in a 24-hour period. If ice is not being made fast enough, press TEMP SETTING to display the next colder setting. Wait 24 hours and, if necessary, set the temperature control to the highest setting, waiting 24 hours between each increase.
Remember
- Allow 24 hours to produce the first batch of ice. Discard the first three batches of ice produced.
The quality of your ice will be only as good as the quality of the water supplied to your ice maker. Avoid connecting the ice maker to a softened water supply. Water softener chemicals (such as salt) can damage parts of the ice maker and lead to poor quality ice. If a softened water supply cannot be avoided, make sure the water softener is operating properly and is well maintained. - Do not store anything on top of the ice maker or in the ice storage bin.
Freezer Features
This manual covers several different models. The freezer you have purchased may have some or all of the items listed. The locations of the features may not match those of your model.
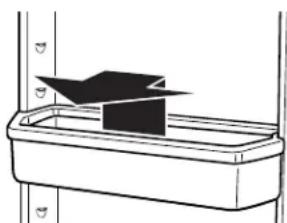
Door Bin
To Remove and Replace the Bin:
- Remove the bin by tipping the front of the bin forward and sliding out.
- Replace the bin by sliding it in above the desired support, tilting it back into place.
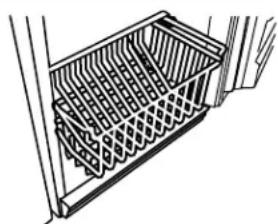
Storage Basket (on some models)
The slide-out basket provides separate storage space for items that are difficult to store on freezer shelves. To remove the basket, pull out and lift up.
Storage Gate (on some models)
To Remove the Storage Gate:
- Lift up the top of the gate and out of the supports.
- Return the gate to original position. Lower the gate into the supports.
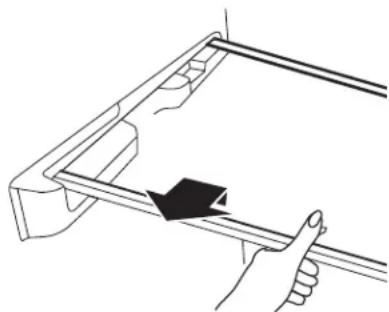
Freezer Shelves
Store similar foods together and adjust the shelves to fit different heights. This reduces the time the freezer door is open and saves energy.
To Remove and Replace a Shelf:
- Remove the shelf by lifting straight up and pulling the shelf out.
- Replace the shelf by lowering the shelf onto the supports on the side wall.
CARING FOR YOUR FREEZER
Cleaning Your Frost-Free Freezer
WARNING
Explosion Hazard
Use nonflammable cleaner.
Failure to do so can result in death, explosion, or fire.
Frost-free means that you will not have to defrost your freezer. Frost is removed by air moving and collecting any moisture and depositing it on the cooling coil. The cooling coil periodically warms up enough to melt the frost, and it then flows down to the drain pan (located behind the base grille) where it is evaporated. Complete cleaning should be done at least once a year.
- Press and hold TEMP SETTING for 3 seconds to turn off cooling.
- Unplug freezer or disconnect power.
- Remove all frozen food. Wrap frozen food in several layers of newspaper and cover with a blanket. Food will stay frozen for several hours. You may also store frozen food in a cooler, additional refrigerator-freezer, or in a cool area.
- Remove all removable parts from inside, such as shelves, bins, etc.
-
Hand wash, rinse, and dry removable parts and interior surfaces thoroughly. Use a clean sponge or soft cloth and a mild detergent in warm water.
-
Do not use abrasive or harsh cleaners such as window sprays, scouring cleansers, flammable fluids, cleaning waxes, concentrated detergents, bleaches or cleansers containing petroleum products on plastic parts, interior and door liners, or gaskets. Do not use paper towels, scouring pads, or other harsh cleaning tools. These can scratch or damage materials.
To help remove odors, you can wash interior walls with a mixture of warm water and baking soda (2 tbs to 1 qt [26 g to 0.95 L] of water).
-
Replace the removable parts.
-
Use the appropriate cleaning method for your exterior finish. Painted metal: Wash exteriors with a clean sponge or soft cloth and a mild detergent in warm water. Do not use abrasive or harsh cleaners or cleaners designed for stainless steel. Dry thoroughly with a soft cloth.
- Clean the condenser coils regularly. Coils may need to be cleaned as often as every other month. This may help save energy.
Open the freezer door and remove the base grille by removing 2 Phillips-head screws and pulling the grille toward you.
Use a vacuum with an extended attachment to clean the condenser coils when they are dusty or dirty.
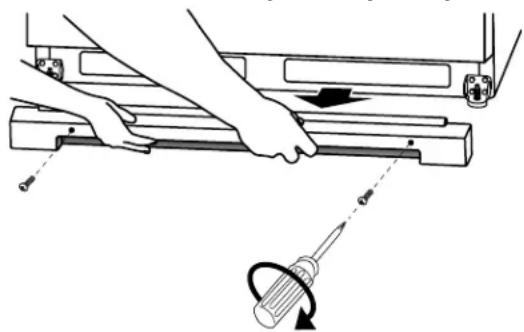
Replace the base grille by aligning the ends of the grille with the leveling assemblies on each side and snapping the grille into place. Reinstall the screws.
- Replace all frozen food.
- Plug in freezer or reconnect power.
- Set temperature control to desired setting. See "Using the Control."
Changing the Light Bulb
NOTE: Not all appliance bulbs will fit your freezer. Be sure to replace the bulb with an appliance bulb of the same size, shape, and wattage.
- Unplug freezer or disconnect power.
- Remove the light shield by squeezing the lens from the sides, pushing back and pulling down.
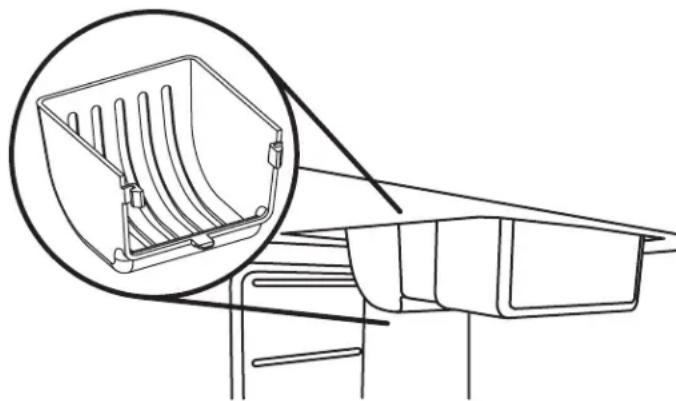
- Replace bulb with a 40-watt maximum appliance b or an LED rated for wet/damp locations.
NOTE: Some LED replacement light bulbs are not recommended for wet/damp environments. Refrigerator fresh food and freezer compartments are considered wet/ damp environments. Read and follow all instructions on the LED packaging when replacing the factory installed LED bulb. A replacement LED bulb can be purchased from an authorized dealer.
- Replace the light shield.
- Plug in freezer or reconnect power.
Power Interruptions
If the power will be out for 24 hours or less, keep the door closed to help food stay cold and frozen.
If the power will be out for more than 24 hours, do one of the following:
Remove all frozen food and store it in a frozen food locker.
If a food locker is not available, consume or can perishable food at once.
REMEMBER: A full freezer stays cold longer than a partially filled one. A freezer full of meat stays cold longer than a freezer full of baked goods. If you see that food contains ice crystals, it may be refrozen, although the quality and flavor may be affected. If the condition of the food is poor, dispose of it.
Moving Care
When you are moving your freezer to a new home, follow these steps to prepare it for the move:
- Remove all frozen food.
- Unplug the freezer.
- Take out all removable parts, wrap them well, and tape them together so they don't shift and rattle during the move.
- Clean the freezer thoroughly.
- Tape the freezer shut and tape the electrical cord to the cabinet.
When you get to your new home, refer to the "Installing Your Freezer" and "Operating Your Freezer" sections for information on installation and setting the controls.
TROUBLESHOOTING
First try the solutions suggested here. If you need further assistance or more recommendations that may help you avoid a service call, refer to the warranty page in this manual and scan the code there with your mobile device, or visit www.whirlpool.com/product_help for recommendations that may help you avoid a service call. In Canada, visit http://www.whirlpool.ca.
Contact us by mail with any questions or concerns at the address below:
In the U.S.A.:
Whirlpool Brand Home Appliances
Customer eXperience Center
553 Benson Road
Benton Harbor, MI 49022-2692
Please include a daytime phone number in your correspondence.
In Canada:
Whirlpool Brand Home Appliances
Customer eXperience Centre
200-6750 Century Ave.
Mississauga ON L5N 0B7
| WARNING |
| Electrical Shock Hazard Plug into a grounded 3 prong outlet. Do not remove ground prong. Do not use an adapter. Do not use an extension cord. Failure to follow these instructions can result in death, fire, or electrical shock. |
| AWARNING |
| Explosion Hazard Use nonflammable cleaner. Failure to do so can result in death, explosion, or fire. |
| PROBLEM RECOMMENDED | SOLUTIONS |
| Freezer Will Not Operate Check | Check that the freezer is not running an Automatic Defrost cycle. Check that it is plugged into a grounded 3 prong outlet. Check that the temperature control is turned on. Replace the fuse or reset the circuit breaker. NOTE: If problems continue, contact an electrician. |
| Lights Do Not Work Check that | it is plugged into a grounded 3 prong outlet. Check that the light bulb is tight in the socket and is not burned out. |
| Water in Defrost Drain Pan | It is normal for water to drip into the defrost drain pan when freezer is defrosting. When humidity is high, it is normal for water in the defrost pan to take longer to evaporate. |
| Motor Seems to Run Too Much | Check that door closes properly. Defrost and clean the freezer to remove excessive frost. Adding a large amount of food warms the freezer causing the freezer to run longer to cool back down. If this is the situation, wait approximately 6 to 8 hours to allow the freezer to reach the correct temperature. Remove all items out at one time, keep food organized, and close door as soon as possible. Check that the door gasket is sealed all the way around. If not, contact a qualified person or technician. Check that space around freezer meets air circulation requirements. See “Location Requirements.” NOTE: If none of the above, your new freezer will run longer than your old one due to its high-efficiency motor. |
| Temperature Is Too Warm | Check that air vents are clear. See “Ensuring Proper Air Circulation” for air vent locations. Remove all items out at one time, keep food organized, and close door as soon as possible. Adding a large amount of food warms the freezer causing the freezer to run longer to cool back down. Check that the temperature control is set correctly for surrounding conditions. |
| The Door Will Not Close Completely or Is Difficult To Open | Check that there are no food packages blocking the door. On some models, check that the shelves and basket are in the correct position. Check that gaskets are clean. See the “Caring for Your Freezer” section. Check that the freezer is stable. See “Freezer Leveling and Door Closing.” |
| Freezer Makes Loud Buzzing/Clicking Sound | If the freezer has recently been plugged in or turned on following a defrost or product move, or if there has been an extended power failure, turn off the temperature alarm for the next 24 hours. Adding a large amount of food warms the freezer. It can take several hours for the freezer to return to normal temperature. Turn the temperature alarm off for the next 24 hours. |
WARNING
Electrical Shock Hazard
Disconnect power before servicing.
Replace all parts and panels before operating.
Failure to do so can result in death or electrical shock.
Ice Quality
| PROBLEM RECOMMENDED | SOLUTIONS |
| Ice Maker Produces No Ice or Very Little Ice | If ice maker has just been installed, wait 72 hours for full ice production to begin. Check that the temperature control is cold enough. Check that the wire shut-off arm is in the On (arm down) position. Check that the water supply is properly connected and turned on. Check that the ejector arm is not blocked by an ice cube. If a large amount of ice has been removed recently, allow 24 hours to produce more ice. NOTE: If not due to any of the above, there may be a problem with the water line. Call for service. |
| PROBLEM RECOMMENDED | SOLUTIONS |
| Off Taste, Odor, or Gray Color in the Ice | Discard the first few batches of ice. If there is unusually high mineral content in the water supply, the water may need to be treated. If there is mineral scale buildup, clean your ice maker mold. If the ice cubes have been stored too long, throw the old ice away and make a new supply. Check that the freezer and ice bin are clean. |
| Thin, Soft, or Clumps of Ice | If there is unusually high mineral content in the water supply, the water may need to be treated. If there is mineral scale buildup, clean your ice maker. If there are clumps of ice in the bin and if ice is not used regularly, it will melt and form clumps. Break the clumps with the ice scoop provided. |
WHIRLPOOL® MAJOR APPLIANCE LIMITED WARRANTY
ATTACH YOUR RECEIPT HERE. PROOF OF PURCHASE IS REQUIRED TO OBTAIN WARRANTY SERVICE.
Please have the following information available when you call the Customer eXperience Center:
Name, address and telephone number
■Model number and serial number
A clear, detailed description of the problem
Proof of purchase including dealer or retailer name and address
IF YOU NEED SERVICE:
- Before contacting us to arrange service, please determine whether your product requires repair. Some questions can be addressed without service. Please take a few minutes to review the Troubleshooting or Problem Solver section of the Use and Care Guide, scan the QR code on the right to access additional resources, or visit www.whirlpool.com/product_help.
- All warranty service is provided exclusively by our authorized Whirlpool Service Providers. In the U.S. and Canada, direct all requests for warranty service to:
Whirlpool Customer eXperience Center
In the U.S.A., call 1-800-253-1301. In Canada, call 1-800-807-6777.
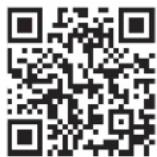
www.whirlpool.com/product_help
If outside the 50 United States or Canada, contact your authorized Whirlpool dealer to determine whether another warranty applies.
ONE YEAR LIMITED WARRANTY
WHAT IS COVERED WHAT IS NOT COVERED
For one year from the date of purchase, when this major appliance is installed, operated and maintained according to instructions attached to or furnished with the product, Whirlpool Corporation or Whirlpool Canada LP (hereafter "Whirlpool") will pay for Factory Specified Replacement Parts and repair labor to correct defects in materials or workmanship that existed when this major appliance was purchased, or at its sole discretion replace the product. In the event of product replacement, your appliance will be warranted for the remaining term of the original unit's warranty period.
YOUR SOLE AND EXCLUSIVE REMEDY UNDER THIS LIMITED WARRANTY SHALL BE PRODUCT REPAIR AS PROVIDED HEREIN. Service must be provided by a Whirlpool designated service company. This limited warranty is valid only in the United States or Canada and applies only when the major appliance is used in the country in which it was purchased. This limited warranty is effective from the date of original consumer purchase. Proof of original purchase date is required to obtain service under this limited warranty.
- Commercial, non-residential, multiple-family use, or use inconsistent with published user, operator or installation instructions.
- In-home instruction on how to use your product.
- Service to correct improper product maintenance or installation, installation not in accordance with electrical or plumbing codes or correction of household electrical or plumbing (i.e. house wiring, fuses or water inlet hoses).
- Consumable parts (i.e. light bulbs, batteries, air or water filters, preservation solutions, etc.).
- Defects or damage caused by the use of non-genuine Whirlpool parts or accessories.
- Conversion of products from natural gas or L.P. gas.
- Damage from accident, misuse, abuse, fire, floods, acts of God or use with products not approved by Whirlpool.
- Repairs to parts or systems to correct product damage or defects caused by unauthorized service, alteration or modification of the appliance.
- Cosmetic damage including scratches, dents, chips, and other damage to the appliance finishes unless such damage results from defects in materials and workmanship and is reported to Whirlpool within 30 days.
- Discoloration, rust or oxidation of surfaces resulting from caustic or corrosive environments including but not limited to high salt concentrations, high moisture or humidity or exposure to chemicals.
- Food or medicine loss due to product failure.
- Pick-up or delivery. This product is intended for in-home repair.
- Travel or transportation expenses for service in remote locations where an authorized Whiripool servicer is not available.
- Removal or reinstallation of inaccessible appliances or built-in fixtures (i.e. trim, decorative panels, flooring, cabinetry, islands, countertops, drywall, etc.) that interfere with servicing, removal or replacement of the product.
- Service or parts for appliances with original model/serial numbers removed, altered or not easily determined.
The cost of repair or replacement under these excluded circumstances shall be borne by the customer.
DISCLAIMER OF IMPLIED WARRANTY
IMPLIED WARRANTY, INCLUDING ANY IMPLIED WARRANTY OF MERCHANTABILITY OR IMPLIED WARRANTY OF FITNESS FOR A PARTICULAR PURPOSE, ARE LIMITED TO ONE YEAR OR THE SHORTEST PERIOD ALLOWED BY LAW. Some states and provinces do not allow limitations on the duration of implied warranties of merchantability or fitness, so this limitation may not apply to you. This warranty gives you specific legal rights, and you also may have other rights that vary from state to state or province to province.
DISCLAIMER OF REPRESENTATIONS OUTSIDE OF WARRANTY
Whirlpool makes no representations about the quality, durability, or need for service or repair of this major appliance other than the representations contained in this warranty. If you want a longer or more comprehensive warranty than the limited warranty that comes with this major appliance, you should ask Whirlpool or your retailer about buying an extended warranty.
LIMITATION OF REMEDIES; EXCLUSION OF INCIDENTAL AND CONSEQUENTIAL DAMAGES
YOUR SOLE AND EXCLUSIVE REMEDY UNDER THIS LIMITED WARRANTY SHALL BE PRODUCT REPAIR AS PROVIDED HEREIN. WHIRLPOOL SHALL NOT BE LIABLE FOR INCIDENTAL OR CONSEQUENTIAL DAMAGES. Some states and provinces do not allow the exclusion or limitation of incidental or consequential damages, so these limitations and exclusions may not apply to you. This warranty gives you specific legal rights, and you also may have other rights that vary from state to state or province to province.
Customer eXperience Centre
553 Benson Road
200-6750 Century Ave.
Benton Harbor, MI 49022-2692
Mississauga ON L5N 0B7
Customer eXperience Centre
200-6750 Century Ave.
Mississauga ON L5N 0B7
Funcionamento del congelador
ADVERTENCIA
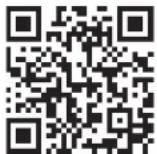
www.whirlpool.com/product_help