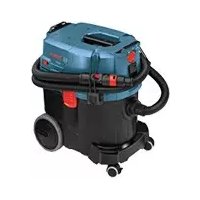
VAC090S - Vacuum Cleaner BOSCH - Free user manual and instructions
Find the device manual for free VAC090S BOSCH in PDF.


| Brand | Bosch |
| Model | VAC090S |
| Product type | Wet/dry multi-purpose vacuum |
| Voltage | 120 V |
| Frequency | 60 Hz |
| Rated power | 9.5 A |
| Tank capacity | 9 gallons (approx. 34 L) |
| Airflow | 150 ft³/min (4.25 m³/min) |
| Suction pressure | 242 mbar |
| Noise level | 70 dB |
| Weight | 28 lb (approx. 12.7 kg) |
| Cord length | 5 m |
| Hose length | 3 m |
| Filter cleaning system | Semi-automatic (NSF) by airflow reversal |
| Filter type | Filter cartridge (paper, PES, or optional HEPA) |
| Usage | Indoor/outdoor, dry and liquid debris |
| Power tool outlet | Yes, with automatic activation function |
| Power Broker function | No (available on A models) |
| Max liquid capacity | Automatic shut-off via level sensors |
Frequently Asked Questions - VAC090S BOSCH
User questions about VAC090S BOSCH
0 question about this device. Answer the ones you know or ask your own.
Ask a new question about this device
Download the instructions for your Vacuum Cleaner in PDF format for free! Find your manual VAC090S - BOSCH and take your electronic device back in hand. On this page are published all the documents necessary for the use of your device. VAC090S by BOSCH.
USER MANUAL VAC090S BOSCH
Call Toll Free for Consumer Information & Service Locations
Read and understand all instructions before using this appliance.
and/or serious personal injury.
SAVE THESE INSTRUCTIONS
Work Area
- Keep Oyour Owork Oarea Oclean Oand Owell2. Cluttered and dark areas invite accidents. p
Don't Oexpose Ovacuum Oto Orain Oor Owet
conditions. OThis vacuum can be used for picking up non-flammable liquids but it is not intended to be immersed or submerged in a fluid. Electric shock may occur.
Do Onot Operate Ovacuums Oin Oexplosive atmospheres, Osuch as in the Opresence Oof flammable Oliquids, Ogases, Oor Odust.
Appliances create sparks, which may ignite the dust or fumes.
Do not handle Oplug or appliance with wet hands. OElectric shock may occur.
Do not abuse the cord. Never use the cord to Ocarry Othe Ovacuum, Opull Othe Ovacuum Oank Othe Oplug Ofrom Oan Ooutlet. OKep Ocor
Keep Obystanders, Ochildren, Oand Ovisitors away Owhile Ooperating the Ovacuum.ODo n allow to be used as a toy. Close attention is necessary when used by or near children.
away Ofrom Oheat, Ooil, Osharp Oedges Oor moving Oparts. OReplace Odamaged Ocords immediately. Don't drive over it or close a door on it. Damaged cords increase the risk of electric shock.
Electrical Safety
This Ovacuum Ocleaner Ointended Ofor Ouse indoor O/ Ooutdoor Oand Ofor Odry Oor Owet up.
et Opick
The power tool outlet is grounded and the vacuum Omust Obe Oplugged Ointo Oan Oo properly Oinstallled Oand Ogrounded Oin accordance Owith Oall Ocodes Oand ordinances. ONever Oremove Othe Ogroundi prong Oor Omodify Othe Oplug Oin Oany Ow not Ouse Oany Oadapter Oplugs. OCheck Ow qualified electrician if you are in doubt as to Owhether Othe Ooutlet Os Properly grounded.OIf the vacuum should electrically malfunction or break down, grounding provides a low resistance path to carry electricity away from the user.
When operating a vacuum outside, use an outdoor extension Ocord Omarked O"W-A" or
"W".OThese cords are rated for outdoor use that reduce the risk of electric shock. Refer to Recommended sizes of Extension Cords in the Accessory section of this manual.
Personal Safety and Vacuum Use Stay alert, Owatch Owatch Oyou are Odoing Oand Use Ocommon Osense Owhen Ooperating Oa
vacuum. ODo not use vacuum while tired or under the influence of drugs, alcohol, or medication. A moment of inattention while operating vacuum may result in serious personal injury.
Do Onot Oinsert Oobjects Olike Opaper Oclip screwdrivers Ointo Opower Otool Ooutlet.OT outlet is live when the vacuum is plugged into power source and switch is set to power tool activation mode or filter cleaning mode. Electric shock may occur.
Avoid Obody Ocontact Owith Ogrounded surfaces such as pipes, radiators, ranges and refrigerators. OThere is an increased risk of electric shock if your body is grounded. If operating the vacuum in damp locations is unavoidable; a Ground Fault Circuit Interrupter must be used to supply the power to your vacuum. Electrician's rubber gloves and footwear will further enhance your personal safety.
Avoid Oaccidental Ostarting. OBe Osure vacuum and tool switches are OFF before plugging in or putting vacuum switch into power Otool Oactivation Omode Oor Ofilter cleaning Omode. ODo Onot Okeep Opower Otool plugged into the vacuum cleaner's power tool Ooutlet Oduring Onnormal Ovacuuming. Plugging in vacuums or tools that have the switch ON invites accidents.
Do Onot Ooverreach. OKep Oproper Ofooting and balance both for you and the vacuum at all times. Use extra care when cleaning on Ostairs.OProper footing and balance enables better control of the vacuum in unexpected situations.
Do Onot Ovacuum Oburning, Osmoking Oor smoldering Othings Olike Ocigarettes, matches Oor Ohot Oashes.OFire inside the vacuum tank may occur.
Do not use to vacuum flammable liquids, alcohol, gases, or explosive dusts, like gasoline or other fuels, lighter fluid, varnish, polyurethane coatings, cleaners, oil-based paints, natural gas, hydrogen, coal dust, magnesium dust, grain dust, or gun powder. Electric motors create sparks which may ignite the dust or fumes.
Dress properly. Do not wear loose clothing or jewelry. Contain long hair. Keep your hair, clothing, and gloves away from moving parts. Loose clothes, jewelry, or long hair can be caught in moving parts, hose, and suction nozzles. Keep handles dry, clean and free from oil and grease.
Do not hold the hose against any body parts during operation. Static electricity build-up in the hose during operation may result in static shock.
WARNING Use safety equipment. Always wear eye and hearing protection. Dust mask, non-skid safety shoes, hard hat, or hearing protection must be used for appropriate conditions.
This product contains chemicals, including lead, known to the State of California to cause cancer, and birth defects or other reproductive harm. Wash hands after handling.
WARNING Bosch HEPA filters must be used when using this
vacuum for EPA Lead Based Paint Renovation, Repair and Painting Program (RRP), where lead may be present. Not using Bosch HEPA filters for EPA RRP program may cause health and environmental hazards.
WARNING Not suitable to vacuum hazardous or toxic
substances or dusts e.g.asbestos. Neither the standard filter or the optional HEPA filter is able to capture all hazardous particles and may cause health hazards.
Do not use with damaged cord or plug. If appliance is not working as it should, has been dropped, damaged, left outdoors, or dropped into water, return it to a service center.
Do not put any object into openings. Do not use with any opening blocked; keep free of dust, lint, hair, and anything that may reduce air flow.
Turn off all controls before unplugging.
Use only accessories that are recommended by the manufacturer for your model. Accessories that may be suitable for one vacuum may become hazardous when used on another vacuum.
Connect to a properly grounded outlet only. See Grounding Instructions.
Grounding Instructions
This appliance must be grounded. If it should malfunction or breakdown, grounding provides a path of least resistance for electric current to reduce the risk of electric shock. This appliance is equipped with a cord having an equipment-grounding conductor and grounding plug. The plug must be inserted into an appropriate outlet that is properly installed and grounded in accordance with all local codes and ordinances.
WARNING Improper connection of the equipment-grounding conductor can result in a risk of electric shock. Check with a qualified electrician or service person if you are in doubt as to whether the outlet is properly grounded. Do not modify the plug provided with the appliance - if it will not fit the outlet, have a proper outlet installed by a qualified electrician.
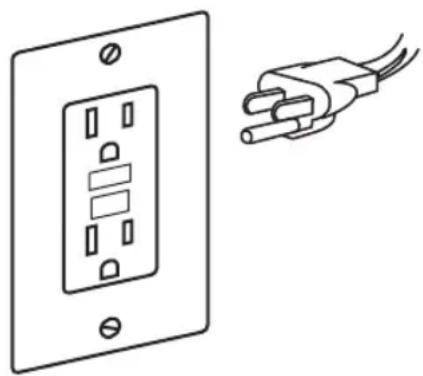
This appliance is for use on a nominal 120-V circuit and has a grounding attachment plug that looks like the plug illustrated. Make sure that the appliance is connected to an outlet having the same configuration as the plug. No adaptor should be used with this appliance.
Vacuum Cleaner Safety Rules
Vacuum Care
WARNING
Once this vacuum is used for EPA OLead OBased OPaint
Renovation, Repair and Painting Program (RRP) where lead Omay be present, Oit is recommended that it always be used for RR
Residual hazardous substances in the vacuum may cause health and environmental hazards.
WARNING
When Ousing this vacuum for OEPA OLead OBased OPa
Renovation, Repair Oand Painting Program (RRP), Othis Ovacuum Ois Onot Orecommen for Ovacuuming Ocarpets and rugs. OVacuur
may not be able to completely remove all hazardous substance may cause health and environmental hazards.
Do Onot Ouse Ovacuum Oif Oswitch Odoes turn it ON or OFF.OAny vacuum that cannot be controlled with the switch is dangerous and must be repaired.
Disconnect Othe Oplug Ofrom Othe Opower source Obefore Omaking Oany Oadjustment changing Oaccessories, Oor Ostoring Othe
vacuum.OSuch preventive safety measures reduce the risk of starting the vacuum accidentally.
When Ousing Othe OPower OBroker™ feature the Ocombination Oof Othe Otool Oand Ovac current Odraw Omust Onot Oexceed Othe O of Othe Obranch Ocircuit Othe Ovacuum Ois
plugged Ointo. OExceeding the branch circu rating could cause the vacuum and branch circuitry to overheat, presenting a risk of fire.
Do Onot Ovacuum Odust Owhen Oliquid/fluid contained Oin Othe Ovacuum Otank. ODo Ovacuum liquids/fluids Owhen dust Ois in Oth
tank. In either case empty the tank and/or remove dust bag before use so that dust does not cake and harden inside the tank.
Dry filters completely after wet vacuuming or Ouse Oa Osecond Odry Ofilter Oset Ofor Odust vacuuming.ODamp or wet filters will cake with dust or develop mold or mildew.
Store idle vacuum out of reach of children and other untrained persons. OVacuums are dangerous in the hands of untrained users.
Maintain Ovacuum Owith Ocare. OProperly maintain Ovacuum Oto Okeep Ohose
Inobstructed. ODo Onot Oput Oany Oobject Oint o openings. ODo Onot Ouse Owith Oany Oopening
cked; Okeep Ofree Oof Odust, Olint, Ohair Oan
manything Othat Omay Oreduce Oair Oflow.OAny
alteration or modification is a misuse and may result in a dangerous condition.
Check Ofor Omisalignment Oor Obinding Oof
Onoting parts,Obreakage of Oparts,and Oany
other Ocondition Othat Omay Oaffect Othe
vacuums operation. If damaged, have the
vacuum Oserviced Obefore Ousing.OPoorly
maintained vacuums cause many accidents.
sDevelop a periodic maintenance schedule for
your vacuum.
Service
Only Oqualified Orepair Opersonnel Omust perform Ovacuum Oservice.OService or
maintenance performed by unqualified personnel could result in a risk of injury. For example: internal wires may be misplaced or pinched.
1When Oservicing Oa Ovacuum, Ouse Oonly identical Oreplacement Oparts. OFollow instructions in the Maintenance section of
This Omanual.0Use of unauthorized parts or failure to follow the Maintenance Instructions may create a risk of electric shock or injury.
Certain cleaning agents such as gasoline, carbon tetrachloride, ammonia, etc. may damage plastic parts.
Functional Description and Specifications
Semi-Automatic Filter Cleaning Vacuum Cleaner (VAC090S & VAC140S)
FIG.1
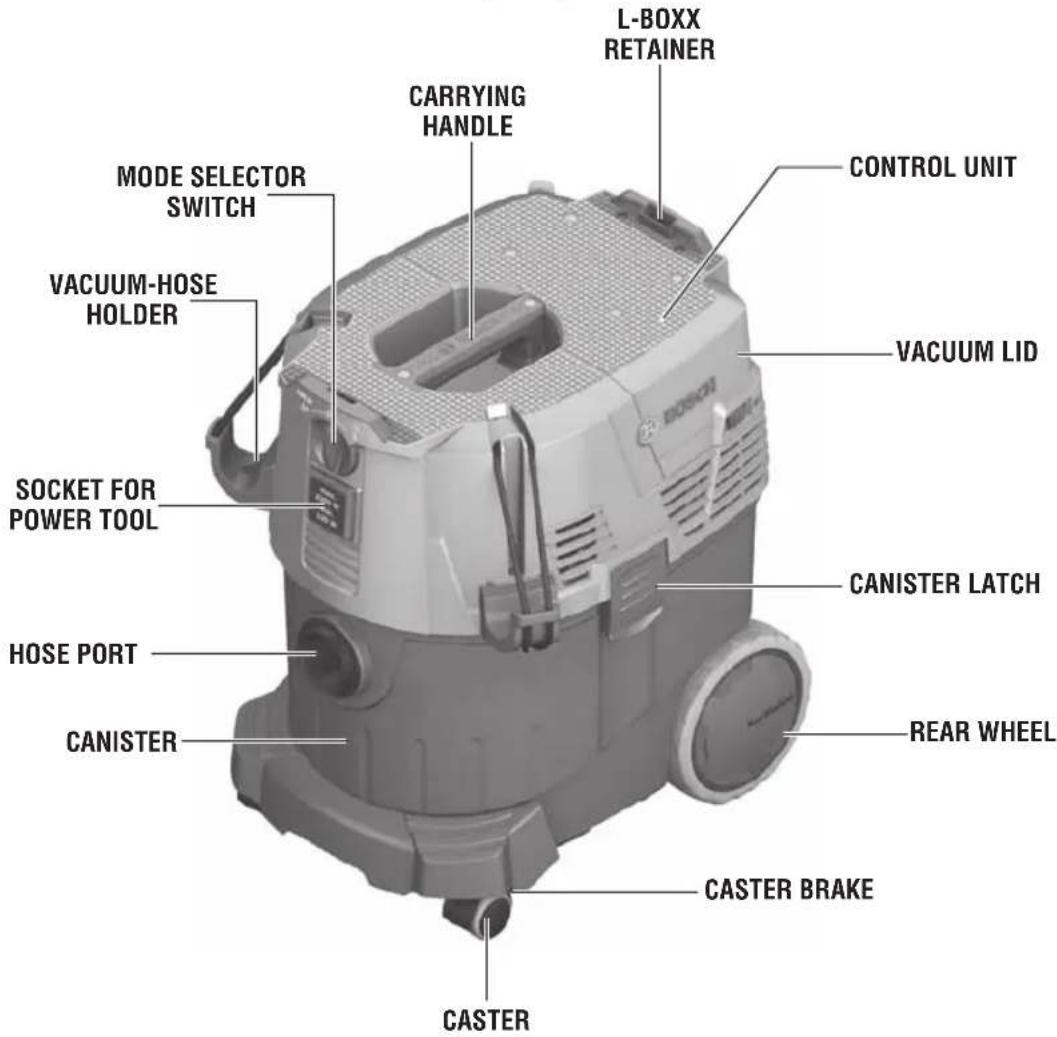
* 9 gallon canister shown. See page 7 for 14 gallon canister
Functional Description and Specifications
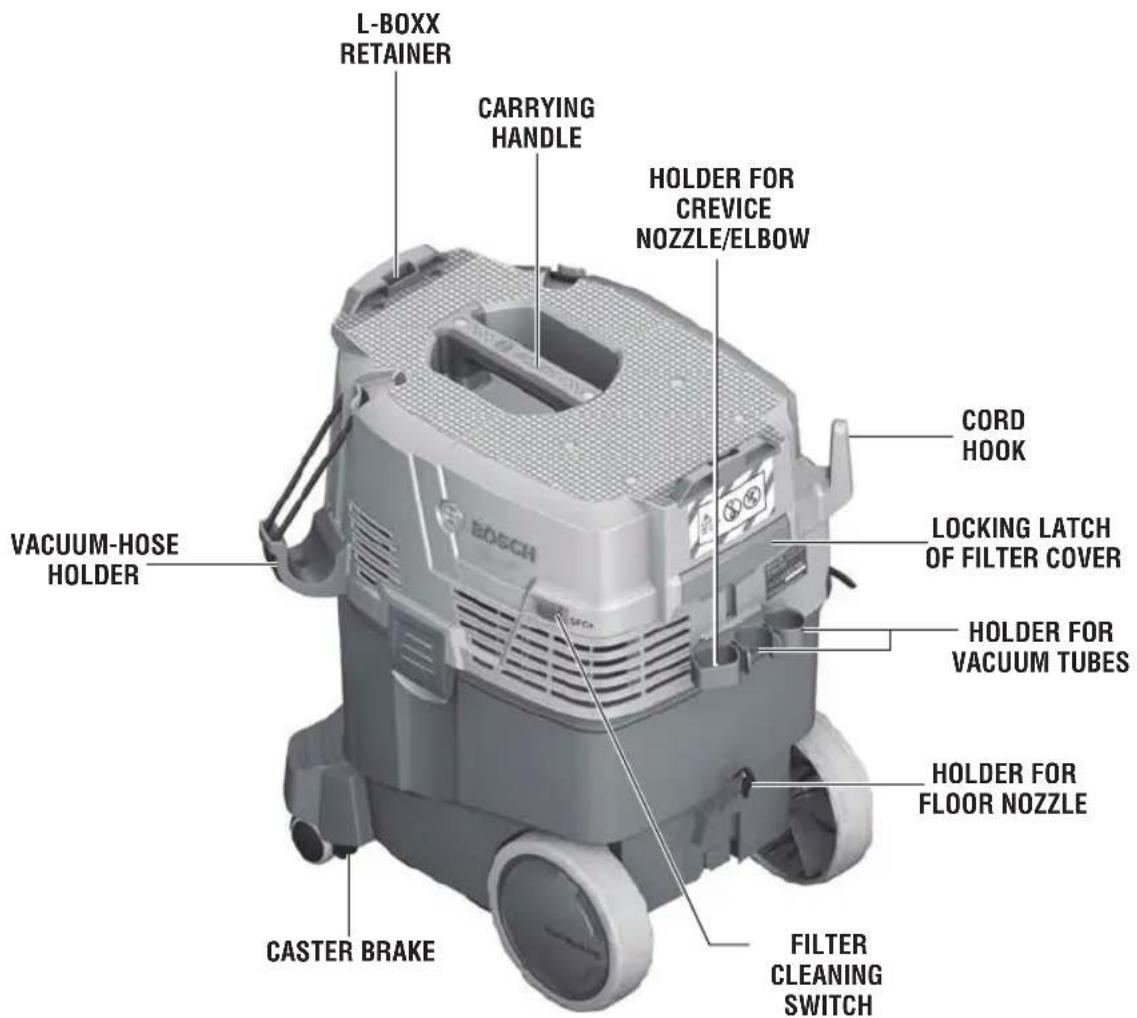
FIG.2
Functional Description and Specifications
Automatic Filter Cleaning Vacuum Cleaner (VAC090A & VAC140A)
FIG.3
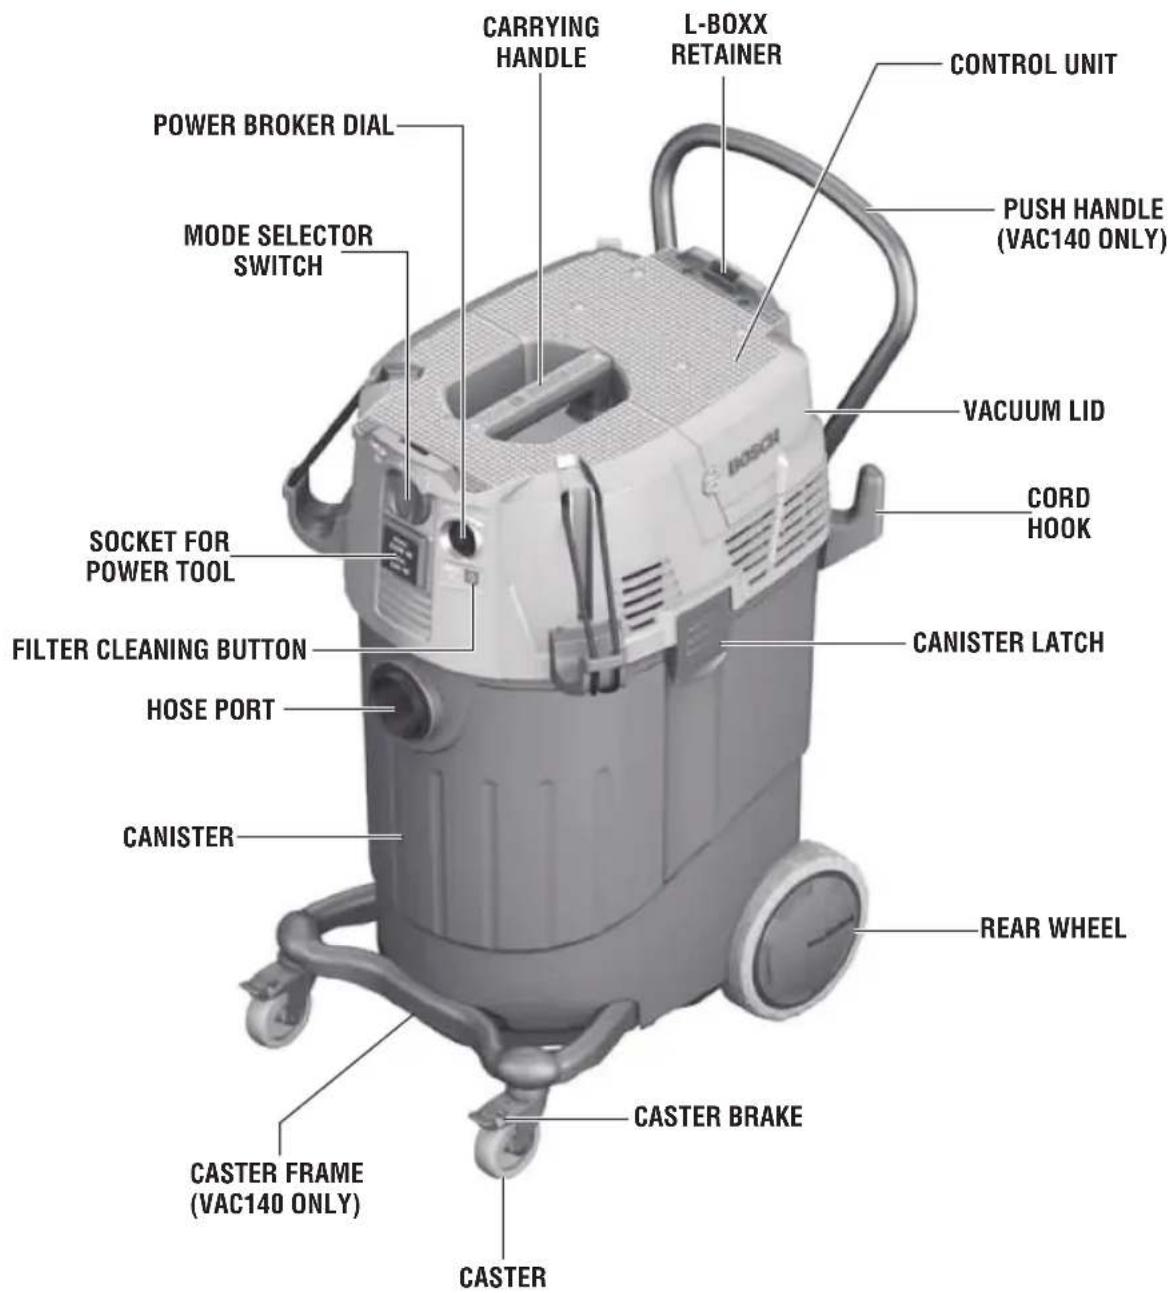
* 14 gallon canister shown. See page 5 for 9 gallon canister
Functional Description and Specifications
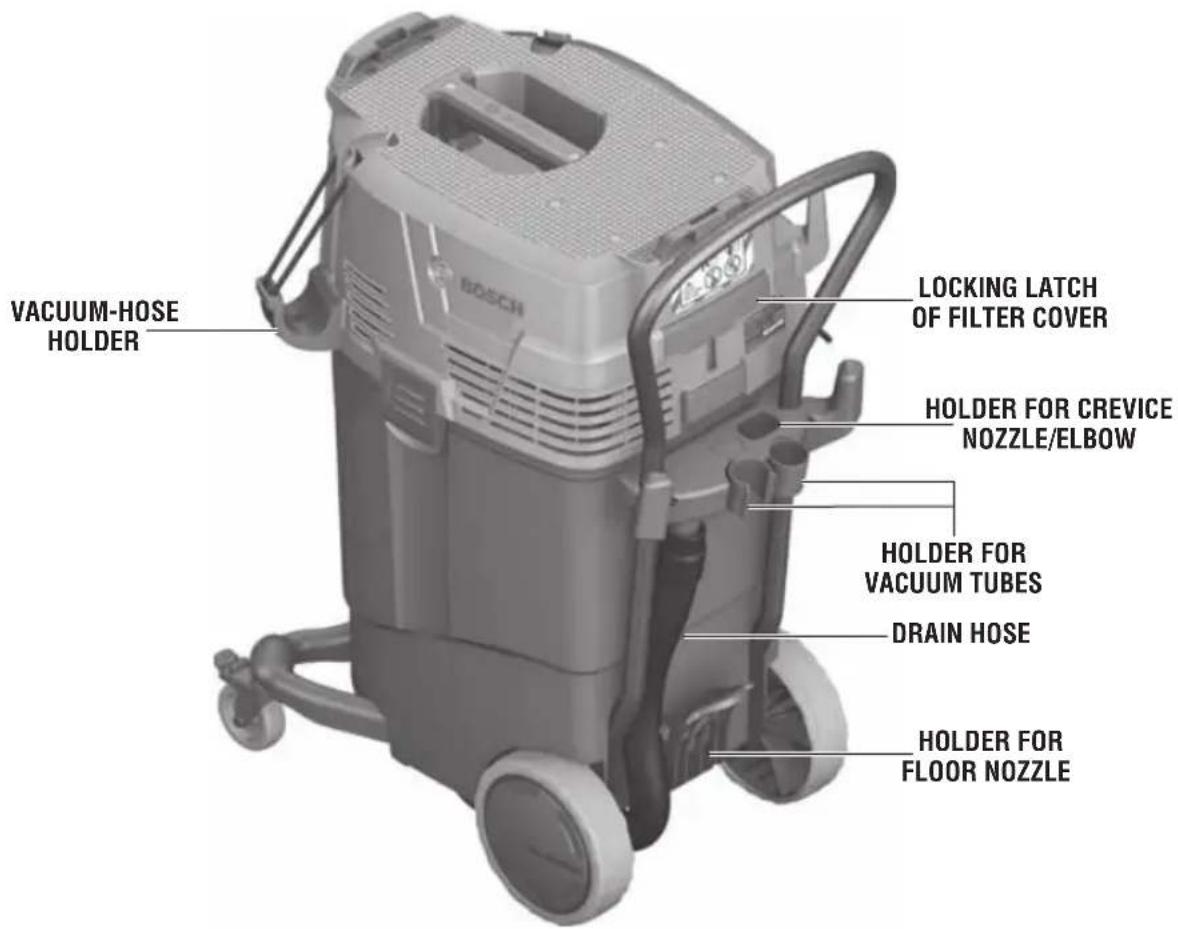
FIG.4
Specifications:
Model Number VAC090A VAC090S VAC140A VAC140S
Voltage 120V 120V 120V 120V
Frequency 60Hz 60Hz 60Hz 60Hz
Rated Power 9.5 Amps 9.5 Amps 9.5 Amps 9.5 Amps
Max power tool draw 7.5 Amps 5.5 Amps 7.5 Amps 5.5 Amps
Filter Cleaning Automatic Semi-Automatic Automatic Semi-Automatic
Canister Volume (gross) 9 Gal 9 Gal 14.5 Gal 14.5 Gal
Air Flow (CFM) 150CFM 150CFM 150CFM 150CFM
Static Water Lift 97in 97in 97in 97in
Suction Pressure 242mbar 242mbar 242mbar
Sound pressure level 70 dB 70 dB 70 dB
Weight 28 lb 28 Ib 38 Ib 37 Ib
Cord Length 16.4' (5m) 16.4' (5m) 16.4' (5m) 16.4' (5m)
Hose Length 9.84' (3m) 9.84' (3m) 9.84' (3m)
Assembly & Preparation
WARNING Disconnect Othe plug Ofrom Othe power Osource Obefore Omaking Oany assembly, adjustments or changing accessories. Such preventive safety measures reduce the risk of starting the tool accidentally.
When unpacking, make sure that all of the standard equipment is present and that there is no transportation damage.
Before Operating Oany Owork Oon Othe machine itself, disconnect the power plug.
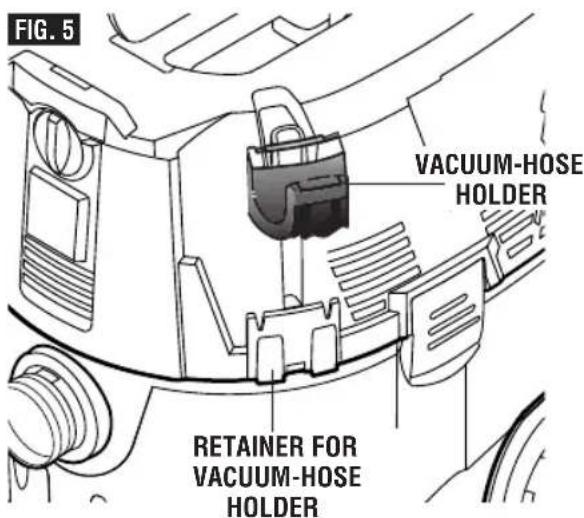
ATTACHING VACUUM HOSE HOLDERS
Slide each vacuum holder firmly into place. Vacuum holders will snap into the vacuum when fully engaged.
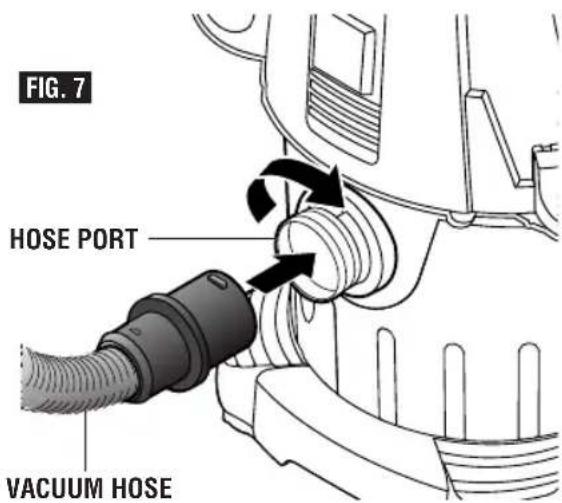
ATTACHING THE VACUUM HOSE
The hose can be connected to optional accessories, including the wand kit and the dust extraction hoods on various power tools and accessories, including those on Bosch router, planer, grinder, sander, jigsaw, and hammer/drill tools and accessories.
The canister's hose port also accept many other vacuum hoses, including most 1-1/4" hoses, 1-1/2" hoses, 2-1/2" hoses and other Bosch hoses. (See Accessories, page 15 & 16)
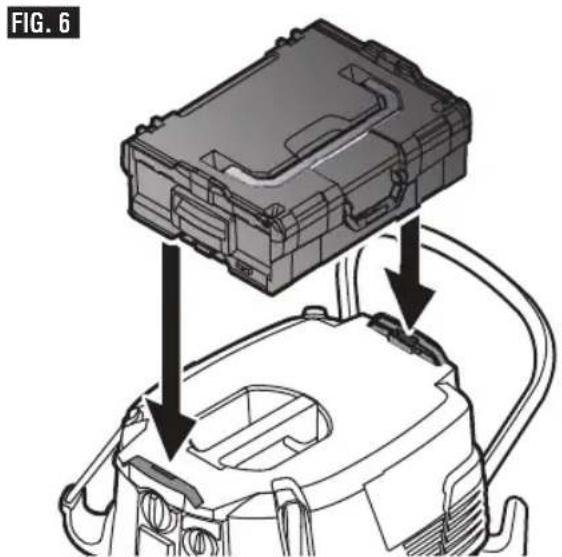
ATTACHING L-BOXX
WARNING
Only attach one (1) L-BOXX weighing less than 30 lbs to
the top of a VAC model vacuum.OMore than one (1) L-BOXX or more than 30lbs in weight may cause the vacuum to become unstable when being transported.
WARNING
Do Onot Ocarry Oor Ohoist O vacuum Oby Othe OL-Boxx
handle.0The L-Boxx handle may break and cause property damage or personal injury.
To attach the L-BOXX to the vacuum, align the L-BOXX with the retainers and click the L-BOXX onto the vacuum. To remove, simultaneously depress the red release levers and lift L-BOXX off the vacuum.
DUST COLLECTION OPTIONS
There are five dust collection options: plastic bag, fleece bag, paper bag, slurry bag or no bag.
- The filter must be installed whether or not any of the bags are used.
Dry Vacuuming Notes:
-
When dry-vacuuming such materials as dust from drywall, plaster, cement, soot, and flour, a dust bag should be inserted.
-
Using a paper, fleece or slurry dust bag extends the amount of time the unit operates at high performance and extends the amount of time it takes for the filter cartridge to become clogged.
-
A plastic bag can handle a heavier load without tearing than the paper or slurry bags.
-
Using any of the four types of Bosch dust bags also makes waste disposal much easier, eliminating the cloud of dust that is created when canister contents are simply poured out, helping to protect you and the environment from exposure to the unwanted particles and debris.
Wet Vacuuming Notes:
- The heavy-duty slurry bags can be used when vacuuming wet materials. They are ideally suited for slurry-suction applications.
- The paper bags should not be used when wet vacuuming because the water will cause the bag to come apart.
- The plastic bags should not be used when wet vacuuming because the bag may tear when removed if it is fully loaded with liquid.
See WET VACUUMING section for more information.
CAUTION Semi Oautomatic Ofilter cleaning Oand Oautomatic
filter Ocleaning must be Otturned off Owhen using paper bags. The reversal of air during filter cleaning may damage the paper bag.
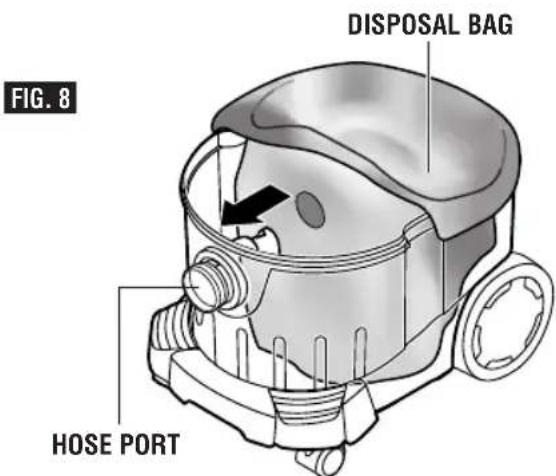
INSTALLING A DUST BAG
- Unlock the canister latches and remove the control unit.
- Grasp a new dust bag at the flange. Push it over the internal dust port first and then over the raised ring. Make sure the entire flange is seated in the recessed area of the internal dust port. Make sure that the dust bag is not folded over on itself and the full length of the bag faces the front and bottom of the canister.
- For plastic bags only - After the plastic bag has been attached to the internal dust port, wrap the upper edges of the plastic bag over
all four sides of the rim at the top of the canister. Make sure that the plastic bag does not interfere with the canister latches.
- Re-attach the control unit.
- Lock the canister latches.
REMOVING THE DUST BAG
- Unlock the canister latches and remove the control unit.
If a plastic bag is used:
- Align the top of the plastic bag. Peel the cover off the adhesive strip and fold over onto the plastic bag to seal the top closed.
- Remove the plastic bag from the internal dust port by pulling the bag towards the rear of the canister.
- Remove the bag from the canister and twist the top of the bag.
- Tie off the plastic bag below the port opening and dispose of properly.
If a paper, fleece, or slurry bag is used:
- Remove the bag from the internal dust port by pulling the flange towards the rear of the canister.
2.Pull the tab on the flange up until the opening has been closed off by the paper cover. - Remove the bag from the canister and dispose of properly.
Operating Instructions
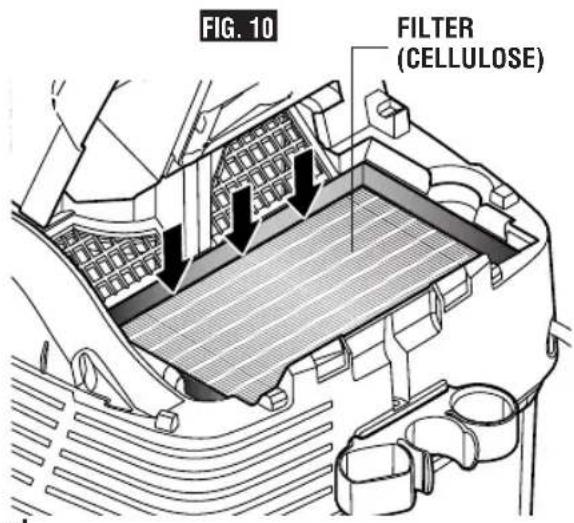
REMOVING AND REPLACING FILTER
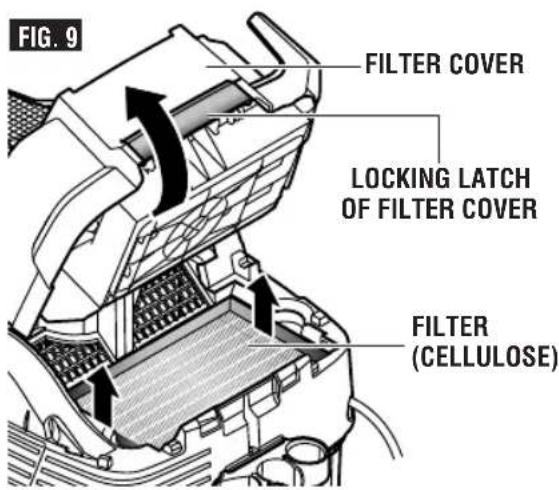
- Pull the locking latch for the filter cover and open cover. When cover is fully open, it will click into place
- Grasp the filter by the edge, pull up and remove
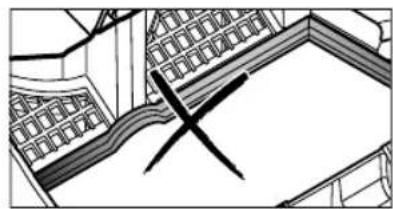
- Before inserting new filter, use a moist cloth and remove any dust and debris from the filter compartment.
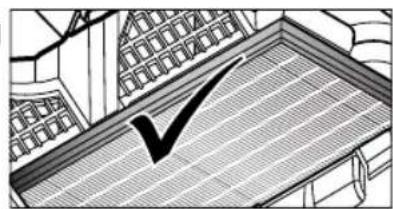
- Insert new filter and make sure the filter is seated firmly in place
- Shut the filter cover, ensuring cover locks into place
WARNING Avoid accidental Ostarting. Be Osure Ovacuum Oand Otool switches Oare OOFF Obefore Oplugging Oin Oor putting Ovacuum Oswitch Ointo Opower Otool activation Omode. ODo Onot Okeep Opower Otool
plugged Ointo Othe vacuum cleaner's power tool Ooutlet Oduring Onormal Ovacuuming. Plugging in vacuums or tools that have the switch ON invites accidents.
WARNING When Ousing Othis Ovacuum for OEPA OLlead OBased OPaint
Renovation, Repair and OPainting Program (RRP), Othis Ovacuum Ois Onot Orecommended for Ovacuuming Ocarpets Oand Orugs. OVacuum
may not be able to completely remove all hazardous substance may cause health and environmental hazards.
WARNING Not Osuitable Oto Ovacuum hazardous Oor Otoxic
substances Oor dusts Oe.g. asbestos. ONeithey
the standard filter or the optional HEPA filter is able to capture all hazardous particles and may cause health hazards.
NORMAL VACUUMING MODE
Switching Othe OUnit OOn:OSet mode selector switch to on "ON".
Switching Othe OUnit OOff:OSet mode selector switch to off "OFF".
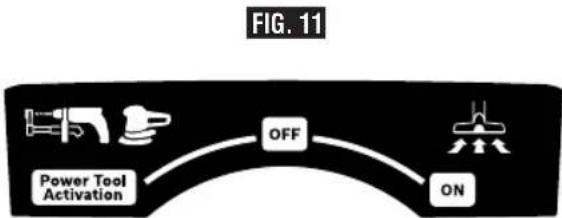
POWER TOOL ACTIVATION MODE
In the Power-Tool Activation mode when the power tool is switched on, the power tool automatically switches on the vacuum cleaner.
(Models VAC090A & VAC140A only)
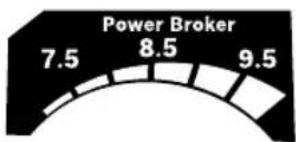
The Power Broker feature allows optimal allocation of the power available between the vacuum cleaner and power tool.
Before connecting power tool, set POWER BROKER™ dial as follows:
- Get tool amp rating from tool dataplate.
- Subtract tool amp rating from 15A.
- Set dial to the difference. Tool amp and dial setting must not exceed 15A
Notes:
- The building's circuit breaker can trip if the combination of power tool amp rating and the dial setting exceeds the building circuit's amp rating.
- If full vacuum cleaner power is needed with a power tool that draws high amps, it may be necessary to plug the power tool into a separate circuit. However, in this situation, the Power Tool Activation feature cannot be used.
Switching the Vacuum Cleaner ON
- Make sure the power tool is switched off, and then plug it in to the power tool socket on the vacuum.
- Turn the mode selector switch to POWER TOOL ACTIVATION position.
- When the power tool is switched on, the power tool automatically switches on the vacuum cleaner.
Switching The Vacuum Cleaner OFF
Turn the mode selector switch to "OFF" position to turn off the vacuum cleaner.
In order to empty the hose, the vacuum cleaner switches off after a 7 second delay.
FILTER CLEANING
Before using the Filter Cleaning mode, we suggest to advise those in Ohearing Orange about the sound of this feature.
The Bosch Airsweep family offers 2 types of filter cleaning vacuums: Automatic filter cleaning and Semi-automatic filter cleaning.
CAUTION
Semi Oautomatic Ofilter cleaning Oand Oautomatic
filter Ocleaning Omust Obe Otturned Ooff Owhen using HEPA filter. The reversal of air during filter cleaning will damage the HEPA filter.
CAUTION
Semi Oautomatic filter cleaning Oand Oautomatic
filter Ocleaning Omust Obe Otturned Ooff Owhen using paper bags. The reversal of air during filter cleaning may damage the paper bag.
Filter cleaning is not recommended when using the fleece bag. The reversal of air may damage the bag. The fleece bag will act as a primary filter, preventing most debris from accumulating in the vacuum filter.
Automatic Ofilter Ocleaning O(AFC)O(Available on models VAC090A, VAC140A)
Air reversals will clean the filters every 15 seconds, maintaining the highest level of suction power. Vacuum suction will be maintained as the filters are being cleaned.
To deactivate the AFC feature, press the red membrane button the front of the vacuum. The LED will turn off to signal this feature is deactivated. To reactivate, press the red membrane button a second time and the greed LED light will turn on signaling the AFC feature is activated.
Semi-automatic Ofilter Ocleaning O(SFC) (Available on models VAC090S, VAC140S)
Air reversals will clean the filters when either the actuator on the hose is depressed, or the airflow is blocked by covering the end of the hose. No suction will be available as the filters are being cleaned.
To deactivate the SFC function, slide the red switch on the side of the vacuum towards the front of the vacuum. To reactivate, slide the red switch towards the rear of the vacuum.
FILTER CLEANING Notes:
- The sound of the Filter Cleaning system may surprise those near the work area. Before using Filter Cleaning, alert those in the vicinity of the vacuum cleaner of this feature and the associated sound it makes.
- Do not keep power tool plugged into vacuum during normal vacuum cleaning mode, because any connected power tool will receive power when vacuum cleaner is moved from normal vacuum cleaning mode to Filter Cleaning mode.
- The Filter Cleaning system must be activated when the suction power decreases to the point of being insufficient.
-
The Filter Cleaning system should be activated regularly to keep the filter cartridges clean. The proper frequency for activating the Filter Cleaning system depends on the type and amount of dust. With regular usage, the maximum vacuuming performance is maintained longer.
-
To prevent siphoning or spillage, lift the suction hose out of the liquid before draining the vacuum cleaner.
- Before opening and emptying, move the switch to the OFF position.
- Before opening and emptying, always disconnect the vacuum cord from the power supply.
- In order to avoid mildew, after wet vacuuming, remove the bag (if one is installed) and remove the filter and allow it to dry thoroughly. Dry the filter and control unit thoroughly so that dust cannot adhere to moist parts.
- Use a dry filter for subsequent dry vacuuming. We suggest purchasing extra filter when frequently alternating between wet and dry vacuuming and swap them out as appropriate.
Clean the canister and accessories with water. Wipe the top section with a moist cloth.
WET VACUUMING
WARNING
Do Onot Ouse Oto Ovacuum flammable liquids, gases, or
explosive dusts, Olike Ogasoline Oor Oother fuels, Olighter Ofluid, Ovarnish, Opolyurethane coatings, cleaners, oil-based paints, natural gas, hydrogen, coal dust, magnesium dust, grain dust, or gun Opowder. OElectric motors create sparks, which may ignite the dust or fumes.
The filer must be installed for wet vacuuming.
Before wet vacuuming, empty the canister to prevent encrustation of the canister.
Do not use a paper or plastic bag when wet vacuuming. If a bag is to be used when vacuuming wet materials, a slurry bag must be used.
- Do not activate the Filter Cleaning mode when the contents of the vacuum cleaner are wet.
- The unit is equipped with water level sensors. The unit switches off when the maximum filling height is reached. The unit still has power, but will not operate. The unit must be switched off and emptied before it can be switched on again.
- When the unit is shut off, some water may flow out of the hose.
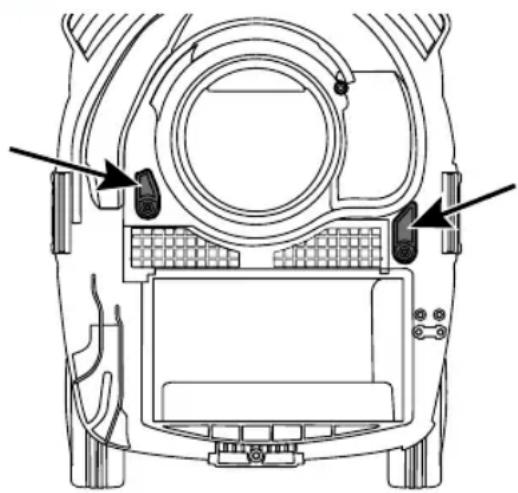
FIG.12
WATER-LEVEL SENSORS
WATER-LEVEL SENSOR MAINTENANCE
Clean the water level sensors occasionally:
- Unlock the canister latches and remove the control unit.
- Clean the water level sensors with a soft cloth.
- Reattach the control unit again
- Lock the canister latches.
EMPTYING THE CANISTER (Models VAC090A & VAC090S only)
- Switch the unit off.
- Disconnect from the power supply.
- Open the canister latches.
- Remove control unit.
- Remove the filter bag; dump out the canister, or drain out the canister as appropriate.
EMPTYING THE CANISTER (Models VAC140A & VAC140S only)
- Switch the unit off.
- Disconnect from the power supply.
- Position vacuum in area where the contents of the canister can be drained.
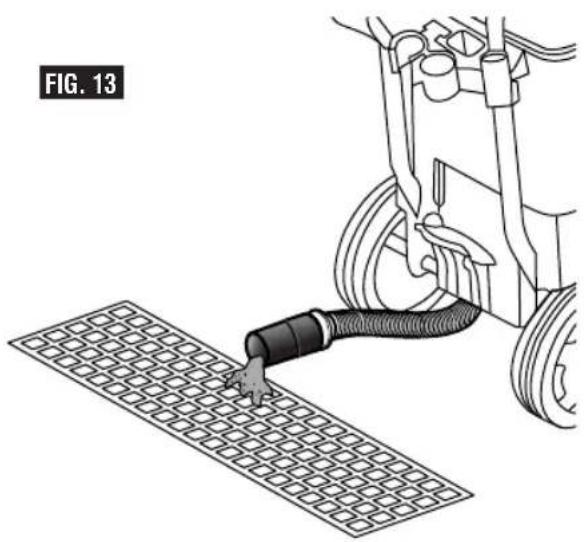
- Detach drain hose from stored position on vacuum and lay hose on the ground (Fig. 13).
- Once canister is emptied, secure drain hose and allow canister to air dry.
CANISTER MAINTENANCE
Wipe out the canister from time to time with a commercially available, non-scouring cleaning agent and allow to dry.
Maintenance
WARNING
Service
Preventive Omaintenance must Obe Operformed Oby C
Bosch OFactory OService OCenter Oor OAurized OBosch OService OStation.OService performed by unauthorized per so n nel may result in misplacing of internal wires and components which could cause serious injury.
TOOL LUBRICATION
Your Bosch tool has been properly lubricated and is ready to use.
dry air. Always wear safety gog gles when cleaning tools with compressed air.
Ventilation openings and switch levers must be kept clean and free of foreign matter. Do not attempt to clean by inserting pointed objects through openings.
See also the sections THOROUGH CLEANING OF THE FILTER CARTRIDGES, CLEANING THE MOTOR PROTECTION FILTERS, WATER-LEVEL SENSOR MAINTENANCE and CANISTER MAINTENANCE.
WARNING
To Oavoid Oaccidents Oalway dis connect Othe Otool Ofrom
the Opower Osupply before Ocleaning Oor performing any main tenance.0The tool may be cleaned most effectively with compressed
CAUTION
Certain Ocleaning Oagents and Osol vents Odamage
Plastic Oparts.OSome of these are: gasoline, carbon tetrachlo ride, chlo rinated cleaning solvents, ammonia and house hold detergents that contain ammonia.
Extension Cords

WARNING
If Oan Oextension Ocord Ois necessary, Oa Ocord Owith
RECOMMENDED SIZES OF EXTENSION CORDS 120 VOLT ALTERNATING CURRENT TOOLS
adequate size conductors that is capable of carrying the current necessary for your tool Omust Obe Oused. OThis will prevent excessive voltage drop, loss of power or overheating. Grounded tools must use 3-wire extension cords that have 3-prong plugs and receptacles.
NOTE: The smaller the gauge number, the heavier the cord.
The length of the vacuum cleaner cord must be included in calculating the total length of cord.
| Tool's Ampere Rating | Cord Size in A.W.G. | Wire Sizes in mm2 | ||||||
| Cord Length in Feet | Cord Length in Meters | |||||||
| 25 | 50 | 100 | 150 | 15 | 30 | 60 | 120 | |
| 3-6 | 18 | 16 | 16 | 14 | 0.75 | 0.75 | 1.5 | 2.5 |
| 6-8 | 18 | 16 | 14 | 12 | 0.75 | 1.0 | 2.5 | 4.0 |
| 8-10 | 18 | 16 | 14 | 12 | 0.75 | 1.0 | 2.5 | 4.0 |
| 10-12 | 16 | 16 | 14 | 12 | 1.0 | 2.5 | 4.0 | — |
| 12-16 | 14 | 12 | — | — | — | — | — | — |
Accessories

WARNING
Use of any other accessories not specified in this manual may create a hazard.
BNA Model
Product description
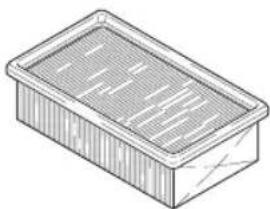
Vacuum Filters
VF100
VF110
VF120H
Flat Paper Filter
Flat PES Filter
Flat HEPA Filter

Vacuum Bags
VB090
VB140
VB090F
VB140F
VB090S
VB000P
VB090R
Paper Filter Bag - 9 Gal
Paper Filter Bag - 14 Gal
Fleece Filter Bag - 9 Gal
Fleece Filter Bag - 14 Gal
Wet Filter Bag - 9 Gal
Disposable Plastic Bag - 9/14 Gal
Reusable Fleece Filter Bag - 9 Gal
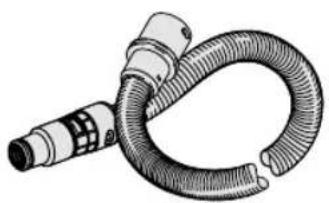
Vacuum Hoses
VH1635
VH1635A
VH1622A
VH1035
VH1022
16ft, 35mm Hose
Anti-static 16ft, 35mm Hose
Anti-static 16ft, 22mm Hose
10ft, 35mm Hose
10ft, 22mm Hose
Accessories
BNA ModelIOptuct description
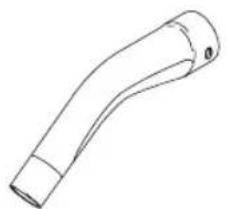
VX100 Bend, Anti-static
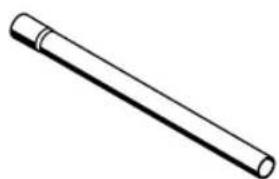
VX110 3 Piece Chrome Extension Tube (3ft Total Length)
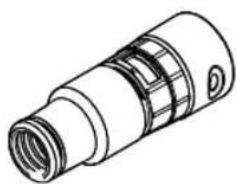
VX120 Powertool Adapter 22/35 mm
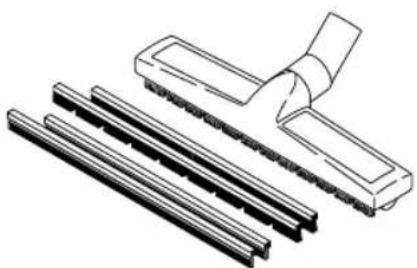
VX130 Floor Nozzle Set
| BOSCH VACUUM ADAPTERs Various vacuum adapters are available as optional accessories. | ||
| VAC003 | Hose Adapter - Connects 35mm hose to tool port sized for 1-1/4" hoses | |
| VAC004 | Hose Adapter - Connects 35mm hose to tool port sized for 2-1/2" hoses | |
| VAC020 Hose Adapter - Connects 2-1/2" hose to wands, nozzles and tool ports sized for 35 mm hoses | ||
| VAC024 Hose Adapter - Connects 1-1/4" & 1-1/2" hoses to most Bosch power tool hose ports | ||
7.5 A 5.5 A 7.5 A 5.5 A
Robert Bosch Tool Corporation ("Seller") warrants to the original purchaser only, that all BOSCH portable and benchtop power tools will be free from defects in material or workmanship for a period of one year from date of purchase. SELLER'S SOLE OBLIGATION AND YOUR EXCLUSIVE REMEDY under this Limited Warranty and, to the extent permitted by law, any warranty or condition implied by law, shall be the repair or replacement of parts, without charge, which are defective in material or workmanship and which have not been misused, carelessly handled, or misrepaired by persons other than Seller or Authorized Service Station. To make a claim under this Limited Warranty, you must return the complete portable or benchtop power tool product, transportation prepaid, to any BOSCH Factory Service Center or Authorized Service Station. For Authorized BOSCH Power Tool Service Stations, please refer to your phone directory.
THIS LIMITED WARRANTY DOES NOT APPLY TO ACCESSORY ITEMS SUCH AS CIRCULAR SAW BLADES, DRILL BITS, ROUTER BITS, JIGSAW BLADES, SANDING BELTS, GRINDING WHEELS AND OTHER RELATED ITEMS.
ANY IMPLIED WARRANTYSHALL BE LIMITED IN DURATION TO ONE YEAR FROM DATE OF PURCHASE. SOME STATES IN THE U.S., SOME CANADIAN PROVINCE DO NOT ALLOW LIMITATIONS ON HOW LONG AN IMPLIED WARRANTY LASTS, SO THE ABOVE LIMITATION MAY NOT APPLY TO YOU.
IN NO EVENT SHALL SELLER BE LIABLE FOR ANY INCIDENTAL OR CONSEQUENTIAL DAMAGES (INCLUDING BUT NOT LIMITED TO LIABILITY FOR LOSS OF PROFITS) ASING FROM THE SALE OR USE OF THIS PRODUCT. SOME STATES IN THE U.S. AND SOME CANADIAN PROVINCES DO NOT ALLOW THE EXCLUSION OR LIMITATION OF INCIDENTAL OR CONSEQUENTIAL DAMAGES, SO THE ABOVE LIMITATION OR EXCLUSION MAY NOT APPLY TO YOU.
THIS LIMITED WARRANTY GIVES YOU SPECIFIC LEGAL RIGHTS, AND YOU MAY ALSO HAVE OTHER RIGHTS WHICH VARY FROM STATE TO STATE IN THE U.S., PROVINCE TO PROVINCE IN CANADA AND FROM COUNTRY TO COUNTRY.
THIS LIMITED WARRANTY APPLIES ONLY TO PORTABLE AND BENCHTOP ELECTRIC TOOLS SOLD WITHIN THE UNITED STATES OF AMERICA, CANADA AND THE COMMONWEALTH OF PUERTO RICO. FOR WARRANTY COVERAGE WITHIN OTHER COUNTRIES, CONTACT YOUR LOCAL BOSCH DEALER OR IMPORTER.