LD32V167 - TV SABA - Free user manual and instructions
Find the device manual for free LD32V167 SABA in PDF.



| Product type | Color TV with remote control |
| Brand | Saba |
| Model | LD32V167 |
| Category | Television |
| Screen diagonal | 32 inches (approx. 81 cm) |
| Screen resolution | HD (1366 x 768 pixels) |
| Dimensions with stand (W x H x D) | 735 x 478 x 185 mm |
| Dimensions without stand (W x H x D) | 735 x 438 x 87 mm |
| Weight | 6.55 kg |
| Power supply voltage | 220-240 V ~ 50 Hz |
| Power consumption (max) | 65 W |
| Standby power consumption | 0.5 W |
| Audio power | 2 x 6 W RMS |
| Tuner types | DVB-T (terrestrial), DVB-C (cable) |
| Number of storable channels | 1000 |
| Connectors | HDMI, SCART, VGA, USB, SCART, YPbPr, Headphone, SPDIF |
| Main functions | USB recording, time shift, teletext, parental control, EPG guide |
| Cleaning | Unplug before cleaning, use a soft dry cloth |
| Safety instructions | Do not expose to moisture, do not obstruct ventilation, use in temperate climate |
| Included accessories | Remote control, user manual (batteries not included) |
Frequently Asked Questions - LD32V167 SABA
User questions about LD32V167 SABA
0 question about this device. Answer the ones you know or ask your own.
Ask a new question about this device
Download the instructions for your TV in PDF format for free! Find your manual LD32V167 - SABA and take your electronic device back in hand. On this page are published all the documents necessary for the use of your device. LD32V167 by SABA.
USER MANUAL LD32V167 SABA
Connexions (Connections)....6
Mise sous/hors tension....7
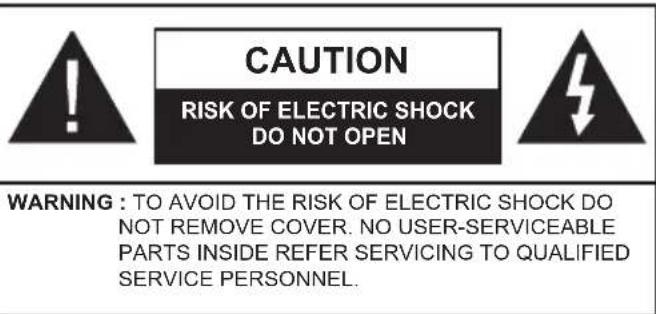
RISQUE D'ELECTROCUTION NE PAS OUVRIR

ATTENTION: POUR EVITER TOUT RISQUE D'ELECTROCUTION, NE RETIREZ PAS LE COUVERCLE.L'ENTRETIEN DES PIÈCES INTERNES EST INTERDIT AUX UTILISATEURS. VEUILLEZ CONFIER L'ENTRETIEN A UN PERSONNEL QUALIFIE.
natural_image
Front view of a flat-screen computer monitor with blank screen (no text or symbols)natural_image
Close-up of two cylindrical batteries with positive and negative terminals, no visible text or symbols on the body.Connexions (Connections)
natural_image
Front view of a flat-screen monitor with blank screen and stand (no text or symbols)natural_image
Close-up of a cylindrical electronic component with labeled terminals and internal features (no readable text or symbols)natural_image
Front view of a blank whiteboard with a black border (no text or symbols)natural_image
Diagram of a battery cell with electrodes and polarity indicators (no text or symbols)natural_image
Front view of a flat-screen computer monitor with blank screen (no text or symbols)Colocar as pilhas no controlo remoto
natural_image
Close-up of a cylindrical electronic component with labeled terminals and polarity indicators (no readable text or symbols)Security instructions 61

Please read all the instructions before
installation or operation. 62
Getting started....63
Notifications & Characteristics & Accessories .....63
Functions....63
Television's command buttons....63
Connecting the power cord ....64
Remote control 65
Connections....66
Turning the TV on/off....67
First time installation....67
Reading media through the USB input....67
Recording a programme....68
Time shift recording 68
Instant Recording 68
Watching recorded programmes 68
Media browser menu....69
Quick Menu 69
Options and functions of the TV menu ....70
Channel list 72
Use of the channel list....72
Setting of parental control settings....72
Electronic Program Guide (EPG) 73
Software update 73
Troubleshooting and tips 73
Typical PC Input Display Modes ....75
Formats of files supported in USB mode....75
AV and HDMI Signal Compatibility .....75
Security instructions
To operate your TV in extreme ambient conditions may cause the damage of the device.

In case of storm or lightening, or if you are not going to use the TV for some time, (during holidays for example) disconnect the power cord from the wall outlet. The electricity plug is used to disconnect the television from the main power and should therefore always be easy to operate.

The exclamation mark inside the equilateral triangle is used in the documentation provided with this device, to indicate to users instructions that are important for the proper operation and maintenance of the device.
Note : Please follow the instructions that appear on your screen concerning the activation of related functionalities.
IMPORTANT - Please read these instructions fully before installing or operating
WARNING: Never let people (including children) with reduced physical, sensory or mental capabilities or lack of experience and / or knowledge use electrical devices unsupervised.
- For ventilation purposes, leave a free space of at least 10 cm all around the set.
- The ventilation should not be impeded by covering the ventilation openings with items, such as newspapers, table- cloths, curtains, etc...
- Do not place the TV on sloping or unstable surfaces, the TV may tip over.
- The apparatus shall be used in moderate climates only.
- The power cord plug should be easily accessible. Do not place the TV, furniture, etc. on the power cord. A damaged power cord/plug can cause fire or give you an electric shock. Handle the power cord by the plug, do not unplug the TV by pulling the power cord. Never touch the power cord/plug with wet hands as this could cause a short circuit or electric shock. Never make a knot in the power cord or tie it with other cords. If the supply cord is damaged, it must be replaced by the manufacturer, its service agent or similarly qualified persons in order to avoid a hazard.
- Do not use this TV in a humid or damp place. Do not expose the TV to liquids. The apparatus shall not be exposed to dripping or splashing. No objects filled with liquids, such as vases, shall be placed on the apparatus. If any liquid falls into the cabinet unplug the TV and have it checked by qualified personnel before operating it any further.
- Do not expose the TV to direct sunlight or other heat sources.
- The TV should not be placed near to open flames or sources of intense heat such as an electric heater.
- Excessive sound pressure from earphones and headphones can cause hearing loss.


- Ensure that no open flame sources, such as lit candles, are placed on top of the TV.
- To prevent injury, this TV must be securely attached to the wall in accordance with the installation instructions (if the option is available).
- Occasionally, a few non-active pixels may appear on the screen as a fixed blue, green or red point. Please note that this does not affect the performance of your product. Take care not to scratch the screen with fingernails or other hard objects.
- Before cleaning, unplug the TV from the wall socket. Only use a soft, dry cloth while cleaning.
CAUTION: Danger of explosion if battery is incorrectly replaced. Replace only with the same or equivalent type. Different types of batteries or new and used batteries are not to be mixed. Batteries are to be inserted with the correct polarity. Exhausted batteries are to be removed from the product. Batteries shall be disposed off in a safe way. Only dispose off batteries in specific collection containers (contact your retailer for more information) in order to protect the environment
| Warning | Serious injury or death risk |
| Risk of electric shock | Dangerous voltage risk |
| Caution | Injury or property damage risk |
| Important | Correctly the system operate |
| Notice | Additional notes marked |
Getting started
Notifications & Characteristics & Accessories
Information relating to the environment
This television is designed to consume less power in a bid to protect the environment. In order to effectively reduce your electric energy consumption, you have to follow the steps below:
If you set the energy economy mode to Eco, TV will enter energy economy mode. The energy economy mode can be found at the level of the 'Image' submenu under the main menu. Note that some image settings cannot be changed.
If the option "disabled Image" is selected, the message "the screen will turn off in 15 seconds" will appear on the screen. Select the CONTINUE option and press OK to continue. The screen will turn off automatically.
Turn the television of and disconnect it when not in use. This good practice will also help you to economise energy.
Standby notifications
-
If the television does not receive any incoming signal (an antenna or an HDMI source for example) for 5 minutes, it will go on standby. The next time it is turned on, the following message will appear: "Standby mode if no signal" Press OK to continue.
-
If the television stays inactive for 4 hours, it will enter standby mode. The next time it is turned on, the following message will appear: "Standby mode if no signal" Press OK to continue.
Functions
• Colour television with remote control.
- Digital tuner cable and High definition TNT (DVB-T/C)
- The HDMI ports are meant for devices with HDMI plugs.
- USB ports.(with digital video tape-recorder function)
- OSD Settings Menu.
- Jack socket for external devices (video camera, video game, audio player, etc.)
- Stereo sound system.
- Teletext.
- Headphone jack.
• Automatic settings system.
- Manual setting.
• Automatic shutdown which can be set between 2 to 6 hours maximum without using the remote control.
- Programmable shutdown.
- Parental control lock
- Automatic sound-off when there's no transmission.
- NTSC Video.
• AVL (Automatic Volume Limitation) - PLL Tuner (Frequency scanning).
• PC port with Plug & Play function. - Instant Plug&Play for Windows 98,) ME, 2000, XP, Vista.
• Gaming mode (optional)
Accessories included
- Remote control
- User manual
- Batteries not included
Television's command buttons
natural_image
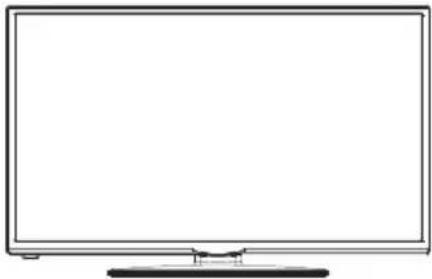
Front view of a flat-screen television displaying (no text or symbols visible)The control button & the Functioning of the TV
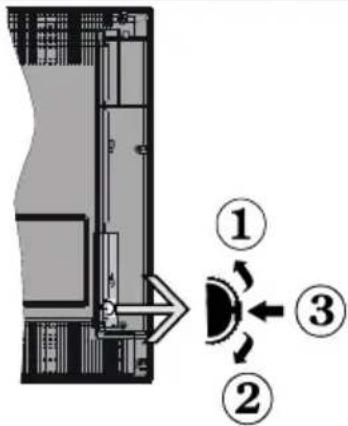
- Previous
- Next
- Program / Volume / AV / Standby command selection
The button makes it possible to control the "Volume" / "Program" / "Source" functions and to Enable Standby Mode on your television.
To adjust the volume: Increase the volume by pressing the Up button. Reduce the volume by pressing the Down button.
To change channels: Press the centre of the button for information on the channel to appear on the screen. Browse through stored channels by pressing the Up or Down button.
To change source: Press the centre of the button for the list of sources to appear on the screen. Browse through stored channels by pressing the Up or Down button.
To turn off the television : Press and hold down the centre of the Down button for a few seconds until the television enters Standby mode.
Putting batteries in the remote control
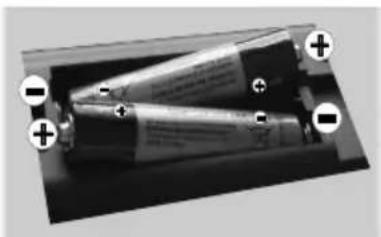
Lift the cover at the back of the remote control Insert two AAAsize batteries. Make sure that the + and – ends of the batteries match the in the battery compartment (respect the right polarity). Put the cover back in place. Don't mix different type of batteries or new and used batteries.
natural_image
Close-up of a cylindrical battery with two connectors and a label indicating positive charge (no readable text or symbols)Connecting the power cord
IMPORTANT: This television is designed to operate solely with a 220-240V \~ 50 Hz. power supply. After taking the television out of its package, wait a bit for the TV to reach ambient temperature before connecting it to the electricity plug. Connect the power cord to the main plug.
Connecting the antenna/Cable
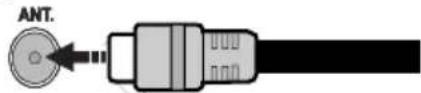
Connect the antenna or the SDSq antenna cable to the ANTENNA INPUT (ANT) found at the back of the TV set.
Notification
Manufactured under licence from Dolby Laboratories MANUFACTURED UNDER LICENCE
"Dolby" and the double D symbol are trademarks of Dolby Laboratories.
HDMI, the HDMI logo and the high definition multimedia interface are marks or registered trademarks of HDMI Licensing LLC.
HDMI
HIGH-DEFINITION MULTIMEDIA INTERFACE
Information applicable to users in relation to disposal of old devices and batteries
[European Union only]
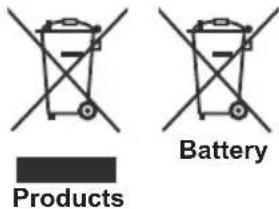
This symbol indicates that the equipment should not be disposed of as household waste. If you have to discard the TV set or the batteries, consider using collection systems or infrastructure for appropriate recycling.
Note: The Pb sign inscribed on the batteries indicates that the battery contains lead.
Technical details
| TV Frequency (tuner) | VHF (BAND I/III) - UHF (BAND U) - HYPERBAND |
| Number of memorable channels | 1000 |
| Audio standard German | +Nicam Stereo |
| On screen display On Screen Display | |
| RF Input Socket 75 Ohms | (unbalanced) |
| Operating voltage: 220-240V ~, 50HZ | |
| AUDIO OUTPUT POWER (WRMS.) (10% THD) | 2 x 6 WRMS |
| Power consumption 65W (max) | |
| st-by power consumption | 0,5 W (max) |
| Weight Stand 6,55 kg | |
| TV Dimensions DxLxH (with foot) | 185 x 735 x 478 mm |
| TV Dimensions DxLxH (without foot) | 77/97 x 735 x 438 mm |
| Operating temperature and humidity | 0°C up to 40°C, 85% humidity max |
Remote control
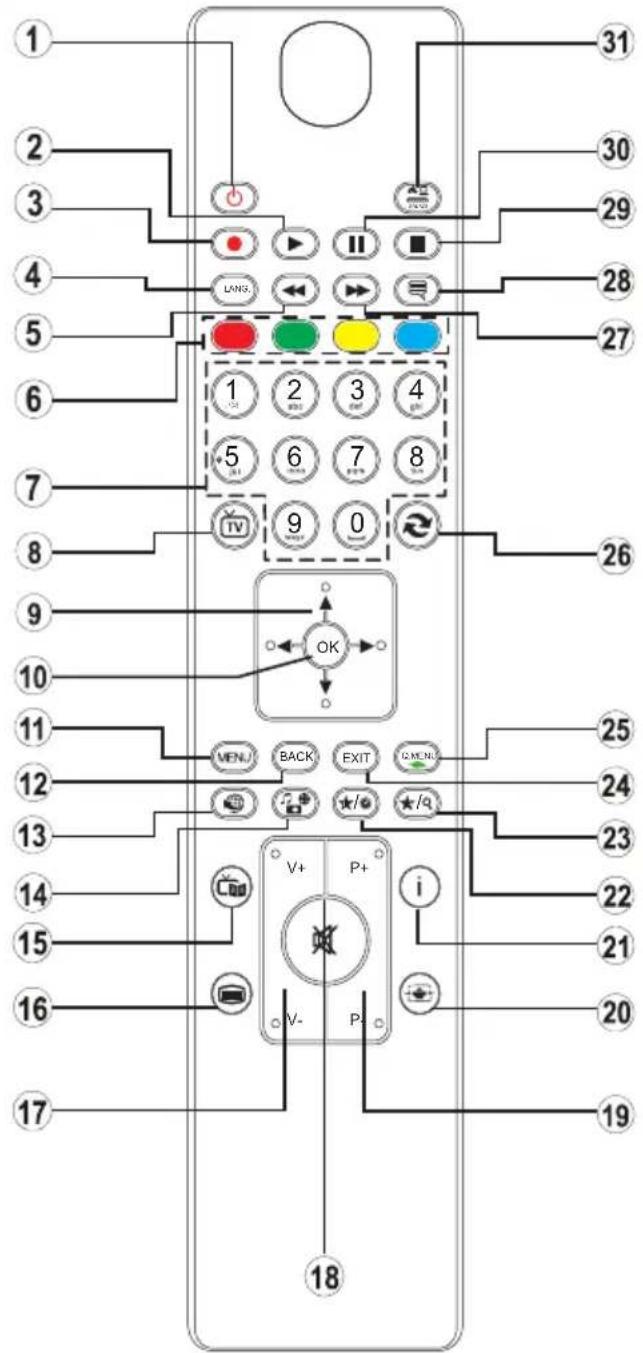
How to use My button 1
Browse to the desired source, channel, or link, press and hold MY BUTTON 1 for five seconds, until this message "MY BUTTON HAS BEEN SET" appears on the screen. This message confirms that the MY BUTTON option selected is now associated to the selected function.
How to use My button 2
Browse to the desired source, channel, or link, press and hold MY BUTTON 2 for five seconds, until this message "MY BUTTON HAS BEEN SET" appears on the screen. This message confirms that the MY BUTTON option selected is now associated to the selected function.
- Standby / On
- Play (in media browser mode)
- Programme recording
- Mono-Stereo Dual I-II / Current language (in DVB channels)
- Rapid reverse (in media browser mode)
- Coloured buttons (Red, Green, Yellow, Blue)
- Numeric buttons
- Channel list
- Navigation buttons
- OK (Confirm) / Hold (in TXT mode)
- Menu on / off
- Return / Back / Index page (in TXT mode)
- No function
- Media browser
- Electronic programme guide (in DVB channels)
- Teletext / Mix
- Volume up / down
- Mute button
- Programme up / down
- Image size
- Info / Reveal (in TXT mode)
- My button 1 (*)
- My button 2 (**)
- Exit
- Quick Menu
- Previous programme
- Rapid advance (in media browser mode)
- Subtitle on-off (in DVB channels & media browser mode)
- Stop (in media browser mode)
- Pause (in media browser mode) / Timeshift recording
- AV / Source
Connections
| Connector Type | No cable or accessory provided Device | ||
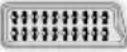 | External device Connection (behind) |  | 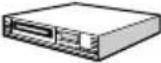 |
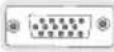 | VGA Connection (behind) |  | 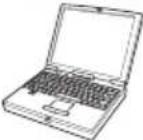 |
AV ON THE SIDE | PC Audio Connection (side) | 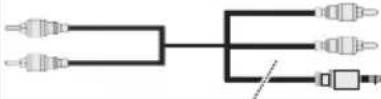 audio connection cable (not supplied) audio connection cable (not supplied) | 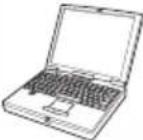 |
 | HDMI Connection (behind) | 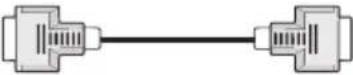 | 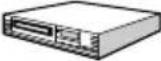 |
 SPDIF SPDIF | SPDIFF Connection (behind) |  | 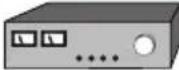 |
AV ON THE SIDE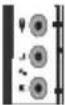 | Lateral AV Audio / Video Connection (side) | 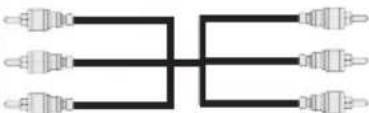 (not supplied) (not supplied) | 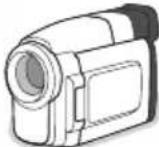 |
HEADPHONE | Headphone Connection (side) |  | |
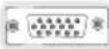 | YPbPr Video Connection (behind) | 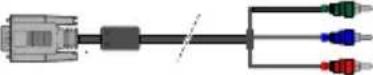 |  |
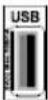 | USB Connection (side) |  | 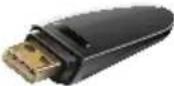 |
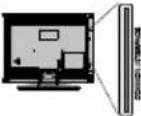 | CI Connection (side) |  | 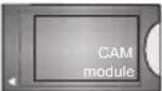 |

You may use a VGA-compatible YPbPr cable (not provided) to enable the YPbPr signal via the VGA port. | You will no longer be able to use the VGA and YPbPr simultaneously. | For the YPBR or PC port, you have to connect the audio output of your device to the television's audio AV input. | When an external device is connected to the jack socket of your TV, the TV will enter AV mode automatically when you turn on the external device. | When you are in digital mode (tuner, usb, hdmi) you will not have audio-video signal output through the jack socket. | If you use a wall-mounted kit, un, it is advisable to connect all your cables before fixing your TV to the kit. | Insert or delete the CI module CI only when the television is off. Consult the module's instruction manual for more information on its settings.
First time installation - USB connections
Turning the TV on/off
Turning the TV on/off
Connect the power cord to a 220-240V \~ 50 Hz socket To turn on the TV from standby mode, you can either
- Press the “○”, P+ / P- button or a digital button on the remote control,
- Press the side-function button until the TV leaves standby mode.
Putting the TV on standby
Press the "button" on the remote control or the multi-function button on the side of the TV until the TV enters standby mode.
To turn off the television completely, unplug the power cord from the power socket.
Note: When the television is in standby mode, the indicator light flashes to indicate that options such as Standby search mode, automatic download or Timer are enabled. The LED may also flash when you turn on the television from standby mode.
First time installation
When you turn on the television for the first time the language selection menu appears. Select the language you want and press OK.
The First time installation (FTI) screen appears during first installation. Set your preferences using the browsing buttons. When you are through, press OK to continue.
IMPORTANT : If you chose France or Italy as an alternative, the PIN code menu will appear and you will have to enter 4-digit code. You will not be able to use 0000 as code (you are advised to write down this code on your instruction manual so that you can remember it when you need to use it). Enter a PIN code and confirm by entering it again. Press the OK button to continue.
WARNING : When prompted to enter a PIN code to access a menu item, you have to use the code you set during first installation. If you forget the said code, use the main code 4725.
Demo Mode
If you want to use your television inside a home, you are advised to select the home mode.
If you choose the shop mode, you will have to confirm your choice.
Choosing TV receiver mode
You will have to choose your reception mode, antenna or cable. If you choose the ANTENNA option from the Type of search screen, the digital television will search for digital terrestrial broadcasts.

NOTE: You can press the MENU button to cancel.
Once all the available channels have been saved, the list of the channels will appear on the screen. If you find the said channels interesting, depending on the LCN(*) , select Yes, then press OK.
Press the MENU button to exit the list of channels and watch the television.
(*) LCN Channel number system which displays channels in the order established by government agencies.
Installing the cable
If you choose the CABLE option and press the OK button on the remote control. You can set the frequencies manually or press OK to start an automatic search.
Note: The duration of the search will depend on the search zone selected.
Reading media through the USB input
You can connect external hard drives (hard drives with or without external power cables, depending on their voltage) or a USB port to your TV through your TV's USB ports.
IMPORTANT! Backup your files before making any connection to the TV. Note that the manufacturer shall not be held accountable if files are damaged or data lost. Some types of USB devices (MP3 players for example) or USB “hard drives / memory cards” “may be incompatible with this television. This television supports FAT32 and NTFS disk formatting. However, you will not be able to record with NTFS formatted disks.
If your hard drive's capacity is above 1TO, you may experience some issues with formatting. Avoid disconnecting your reader quickly after inserting it in the television's USB port. This can physically damage the USB reader and the USB device itself. Never remove the USB while a file is being read.
Recording a programme
IMPORTANT: When using a new USB hard drive reader, it is advisable to first format the disk using the "Format disk" option of your television.
Note: To record a programme, you first have to connect a 2.0 compatible USB device at least, if not an error message will appear, to your television which you would have turned off before this. Then turn on the TV set in order to enable the record function.
To use the record function, you have to connect a USB key or an external hard drive to the television. The USB key connected should have a capacity of 1 GB at least. A 4 Go key is recommended.
Note: Programmes recorded are saved on your USB device. You can "copy" these recordings on a computer if you want. However, they can be read only on your television.
Note: You cannot record radio broadcasts. The maximum duration of a recording is unlimited. During simultaneous recording (time shift) an image-sound gap may occur.
Programmes recorded are divided into 4 GB partitions. If the write speed of the USB device connected is insufficient, the recording may fail and the time shift option may not be available.
As such, it is advisable to use USB devices that are HD compatible.
Avoid disconnecting your USB device during recording. If you do, you may damage the device.
It is possible to have multiple partitions on your device (maximum of 2). The television can support a maximum of two different partitions. The first partition of the USB disk will be used for the recording function (PVR).
Due to some antenna issues, it will not be possible to record some signal data. Also, the images may be blurry during playback.
The Record, Play, Pause, Display buttons (for PlayListDialog) are not active in Teletext mode. If a recording starts from the timer when the teletext is active, the latter will be disabled automatically. Teletext does not function in multimedia mode.
Time shift recording
Press the ⌘(PAUSE) button while watching a programme to switch to delayed replay mode. When you use this mode, the programme pauses and the recording continues.
Press the ▶(PLAY) button again to watch the paused programme. Press the STOP button to stop recording and return to real time broadcast
Note: This function is not available in radio mode. You may use the fast forward /fast rewind buttons to browse.
Note: You cannot use the fast rewind and fast forward buttons if you are not in play mode.
Instant Recording
Press the (RECORD) button to start instant recording of a programme while you're watching it. The recording will be done based on the EPG. You can press the (RECORD) button on the remote control again to record the next programme on the EPG (Electronic Programme Guide). In this case, the programmes scheduled for recording will be displayed on the screen. Press the (STOP) button to cancel instant recording.
Note: In instant recording mode, you cannot change channels or watch a source other than that being recorded. When recording a programme during a time shifting, a warning message will appear on the screen if your USB device's speed is not sufficient.
Watching recorded programmes
Select the Recordings in library option under the media browser menu. Select one of the recordings in the list. Press the OK button to display the play options. Select an option and press the OK
Note: The display of the main menu and the submenus are not available when playing recordings.
Press the STOP) button to stop playing and return to the recordings in the Library.
Slow forward
If you press the (PAUSE) button while watching a recorded programme, the slow forward option will be available. You can use the button for the slow forward. To modify the slow forward speed, press the button.
Record settings
Select Record settings option in the Settings menu to configure recording parameters.
Format the disc : You can use the disk formatting option to format the connected USB disc. Your PIN code will then be asked.
The default PIN code can change depending on the country selected.
If a PIN code is required to display a menu option, enter one of the following codes: 4725.0000 or 1234.
IMPORTANT : Note that all the data contained in the USB device will be lost and the device will be formatted using FAT32. Also, if your USB device does not function properly, you can try to format it. In most cases, formatting the USB device solves the problem, however, ALL the data contained in the USB disc are lost in the same situation.
Note: If the message "USB too slow" appears on the screen at the start of a recording, try starting the recording again. If the same error message appears, it is possible that your USB disk does not have the required speed. Try to connect another USB disc.
Media browser menu
You can view picture, music and video files stored in a USB device by connecting this device to your TV set. Connect a USB stick to one of the USB ports located on the side of the TV set. For video, photo and music files, you can access a settings sub menu (image, sound and others) by pressing the MENU button. This function does not work with recordings done on the TV set. By pressing the MENU button again the display disappears. You can set the preferences of your media browser through your settings menu.
| Functioning of the Random / Repeat mode | |
| Launch playback with ▶ and enable 📄 | The TV set reads the next file and closes the list. |
| Launch playback with ▶ and enable 📄 | The same folder will be read repeatedly. |
| Launch playback with OK ▶ and enable 📄 | The folders concerned will be read randomly. |
Quick Menu
The quick parameters menu ensures quick access to certain options. This menu includes Power economy mode, Picture mode, equalizer settings, favorites and Programmed shutdown options. Press the Q.MENU button of the remote control to display the quick menu. See subsequent chapters for details of listed functions.
Options and functions of the TV menu
| Content of the image menu | |
| Mode | You can edit the image mode according to your preferences and demands. The Image mode can be set on one of these options : Cinema , Game, Dynamic and Natural. |
| Contrast | Adjusts the brightness and darkness of the screen. |
| Brightness | Adjusts the brightness of the screen. |
| Sharpness | Defines the sharpness of objects displayed on the screen. |
| Colour | Adjusts the colour value, adjusts colours. |
| Power Saving Mode | If you choose the Power saving mode set to Eco, you can enable or disable the screen . (When the mode is Dynamic, the Power saving mode set to Eco is automatically disabled.) |
| Back-lighting (optional) | This parameter controls the back-light level. The back-light function will be inactive if the Power saving mode is set to Eco. The Back-light mode cannot be enabled in VGA mode Multimedia navigator or when Image mode is defined on the Game. |
| Noise reduction | If the broadcasting signal is weak and the image noisy, use the noise reduction functionality to reduce the intensity of the noise. |
| Advanced settings | |
| Dynamic contrast | You can adjust the dynamic contrast ratio at your convenience. |
| Colour temperature | Adjusts the desired colour tone. |
| Image zoom | Adjusts the size of images in the images zoom menu.Note: Auto (Available only in Scart mode with SCART PIN8 high/low voltage switch) |
| HDMI True Black (optional) | When you watch the television from the HDMI source, this option is visible in the Image setting menu. You can use this option to increase image darkness. |
| Film Mode | Films are recorded at a number of frames per second different from normal television programs. Enable this function when you are watching films so as to better visualize the accelerated images. |
| Skin tone | The skin tone function can be edited between -5 and 5. |
| Colour editing | Adjusts the desired colour tone. |
| RGB gain | You can configure the colour temperature values using the RGB Gain functionality. |
| Reset | Resets the image settings to the default values (except Game mode). |
| Auto-position (in PC mode) | Automatically optimises display. Press OK to optimise. |
| Position H (in PC mode) | This section changes the image horizontally towards the right or left side of the screen. |
| Position V (in PC mode) | This element moves the image vertically towards the upper or lower part of the screen. |
| Frequency guide (in PC mode) | The pilot frequency settings correct interferences which appear as vertical lines in the image for displays such as worksheets, paragraphs or texts in smaller font sizes. |
| Phase (in PC mode) | Depending on the resolution and the scanning frequency you enter for the television, you can see a fogged or sound image on the screen. In such a case you can use this element to get a clear image through trial and error. |
| In VGA mode (PC), certain elements of the image menu will be unavailable. On the contrary, the parameters of the VGA mode will be added to the Image parameters in PC mode. | |
Options and functions of the TV menu
| Content of Sound menu | |
| Volume | Adjusts the volume level. |
| Equaliser | You can choose from 4 pre-set modes or make your own settings by selecting the user mode. |
| Balance | This parameter is used to highlight the balance of the left or right loudspeakers. |
| Headphone | Adjusts the volume of the headphone. |
| Sound mode | You can choose stereo or select language in dual -I or dual -II mode if the transmission includes this option. . |
| AVL (Automatic Volume Limitation) | This function is used to limit the volume differences between programmes. |
| Digital output | To be adjusted depending on the type of appliance attached to this plug. |
| Content of the Settings menu | |
| Conditional access | Controls the conditional access modules when they are available. |
| Language | Configures language parameters (can vary depending on the country chosen). The favourite parameters and current ones will be available. The current settings can only be edited if the broadcaster takes charge of them. |
| Parental control | Enter the correct password to edit parental control settings. You can easily adjust menu lock and parental control from this menu. You can also enter a new pin code (See the chapter on setting of parental parameters on page 12). |
| Timer | This function is used to set sleep mode and to program recordings made on your USB device. |
| Record settings | Displays the record settings menu, accessible if your (USB device is connected. |
| Date/Time | Selects the date and time. |
| Sources | Enables or disables selected Source options. |
| Other settings: Displays other television setting options: | |
| OSD display time | Defines the menu display time. |
| Encoded channels search | When this parameter is enabled, the search process locates scrambled channels as well. |
| Blue Screen | In Active mode, it displays a blue screen when there is no signal. |
| Software update | Updates the software package of your television. |
| Application version: | Displays the software version of your television. |
| Hearing-impaired | Enables specific functions for the hearing-impaired broadcast by the channels. |
| Audio description | Audio description refers to an extra narration path reserved for the visually and hearing impaired. You can only use this option if the broadcaster takes it in charge. Note: The audio sound description functionality cannot be available during recording or when the time- lag mode is active. |
| TV Automatic shutdown | When this function is enabled, it defines the time at which your television automatically stops (between one and six hours). |
| Standby search mode (optional) | If the Standby search mode is enabled, available channels will be searched when the television is on standby. If the television finds missing or new channels, a menu screen is displayed, asking if you wish to apply these changes or not. The channels list is updated and edited after this process. |
Options and functions of the TV menu
| Storage Mode(optional) | Enables or disables the Demo mode.. |
| Turn on mode | This parameter configures preferences of the power on mode.Always enabled : the television comes on when the main power on/off button is pressedStandby: the television always comes on in standby mode. / Last view : the television comes on on the last channel/source selected. |
| Installation | |
| Automatic channel search | If you wish to install or update new channels, you can use this menu. It displays automatic setting options. Digital antenna : Searches and stores DVB channels. Digital cable : Searches and stores DVB cable television channels Analogue : Searches and stores analogue stations. Analogue and digital antenna : Search and store DVB and analogue channels. Analogue and digital cable : Search and store analogue and DVB stations.. |
| Automatic channel search | Used to search or directly store a channel if the frequency is known. |
| Network channel search | Searches channels related to the transmission system. |
| Fine tune (analogue) | You can use this option to fine-tune analogue channels. It is only available if analogue channels are stored. |
| Initial Installation | Deletes all television settings and takes you back to the first installation. |
Channel list
Use of the channel list
You can configure the channel list by moving, deleting, renaming and locking them to your liking.
Setting of parental control settings
To prevent certain programs from being watched, channels and menus can be locked through the parental control system.
To display lock menu option, enter the PIN code. By default, the set factory code is 0000. After entering the appropriate PIN code, the Parental control settings menu will be displayed :
Menu lock : The Menu lock option enables or disables access to the menu.
Maturity lock: After installation, this option searches information related to parental programs and if this parental level has been disabled, access to broadcast is not enabled.
Parental control lock: When the Parental lock option is selected, the television can only be controlled with a remote control. In this case, the control panel buttons will not be active.
PIN code setting: Defines a new PIN code.
The default PIN code can change depending on the country selected.
If a PIN code is required to display a menu option, enter one of the following codes: 4725, 0000 or 1234.
Electronic Program Guide (EPG)
Some channels, not all, display information concerning the on-going program and the next one. Press the button to get access to the EPG menu.
Through this menu, you will have access to the following information: Channels program, and summary of selected program. Press the INFO button of the remote control, reserve or record a selected program.
Red button (Previous day) displays the previous day's programs.
Green button (Next day) : displays the next day's programs.
Yellow button (Zoom): Displays more information concerning the program.
Blue button (filter : Displays filter options.
SUBTITLE : Press the button to see menu of the type selected. By using this functionality, you can check the program guide database depending on the type selected. Information available in the program guide will be searched and the results corresponding to your criteria will be listed.
INFO: Displays detailed information on the selected program.
Digital buttons (Skip): Go straight to your favourite channel by using digital buttons.
OK : After selecting a program, if you press the OK button, you access the following functions : View channel, Store, and / or Reserve the selected program.
Text (Search): Displays the EPG search menu. (Search guide).
(Info) : Displays information related to ongoingprograms.
(RECORDING): The television starts to record the selected program. You can press again to stop recording.
P+P- : More info on the events
IMPORTANT : Connect your USB device only when your television is turned off. Then turn on the TV set in order to enable the record function.
Note: During recording, it is not possible to change the channel or Source.
Note: It is impossible to record two channels at the same time.
Software update
Your television can, through the antenna or cable, search and provide updates.
Software update search via the user interface
Simply go through the main menu. Choose Settings and select other settings menu. In the Other settingsmenu, select Software update and press the OK button to open the Update options menu.
3 Search and update mode
When the TV set receives signal from the antenna. If the Automatic search option in the Update options menu is active, the television automatically turns on at 3:00 a.m. and launches the search for broadcasting channels in order to update the new software. If new software is found and downloaded successfully, the television begins to work with the new software version when next it is turned on.
Note: If the television does not come on after the update, disconnect it for two minutes, then connect it again.
Troubleshooting and tips
The TV is not coming on
Check to ensure that the electricity plug is safely connected to the wall socket or that the batteries of the remote control are functional.
Poor picture quality
- Check if your antenna is properly connected. A poor signal level can negatively affect image quality.
- If you carried out manual settings, verify that you entered the right channel frequency.
- Image quality may be affected negatively when two devices are connected to the television set at the same time. If such is the case, disconnect one of the devices.
No image
- No image indicates that your TV is not receiving a signal. Have you selected the correct buttons on the remote control? Try once more. Also make sure that you have selected the right input source.
• Is the antenna connected properly?
• Is the antenna cable damaged? - Are suitable plugs used to connect the antenna?
- If you are not sure, please consult your supplier.
No sound
- Has the mute button been pressed? If that is the case, press the "button, or increase the volume.
- Only one speaker is producing sound. Is the balance well placed in the middle? Consult the Sound menu.
The remote control is not working
• The batteries may be down. Replace the batteries.
Input sources cannot be selected.
- If you cannot select an input source, it is possible that no device is connected.
- Check the AV cables and connections if you have tried to connect a device.
Recording not available
To record a programme, you first have to connect your USB device to your television which you have to shut down first. Then turn on the TV set in order to enable the record function. If you are unable to record, try turning off the television and inserting the USB device again.
The USB device is too slow
If the message "USB too slow" appears on the screen at the start of a recording, try starting the recording again. If the same error message appears, it is possible that your USB device does not have the required speed. Try to connect another USB device.
Teletext
Press the button to enter teletext mode. Press again to enable the Mix mode. Press one more time to exit. Follow the instructions displayed on the digital teletext screen.
Digital teletext (United Kingdom only)
Press on the button to display information related to the digital teletext. Use the coloured buttons, the cursor buttons and the OK button to adjust. The operating method may differ, depending on the content of the digital teletext. Follow the instructions displayed on the digital teletext screen. When the button is pressed, TV switches back to television broadcast.
Typical PC Input Display Modes
The following table is an illustration of some of the typical video display modes. Your TV cannot support all resolutions. It can support up to 1920x1080.
| Index Resolution Frequency | ||
| 1 640x4 | 80 60 Hz | |
| 2 800x6 | 00 56 Hz | |
| 3 800x6 | 00 60 Hz | |
| 4 1024x7 | 768 60 Hz | |
| 5 1024x7 | 768 66 Hz | |
| 6 1280x7 | 768 60 Hz | |
| 7 1280x9 | 960 60 Hz | |
| 8 | 1280x1024 | 60 Hz |
| 9 1360x7 | 768 60 Hz | |
| 10 | 1400x1050 | 60 Hz |
| 11 | 1600x1200 | 60 Hz |
| 12 | 1920x1080 | 60 Hz |
AV and HDMI Signal Compatibility
| Source Supported Signals Available | |||
| EXT SCART | PAL 50/60 O | ||
| NTSC 60 O | |||
| RGB 50 O | |||
| RGB 60 O | |||
| Lateral AV | PAL 50/60 O | ||
| NTSC 60 O | |||
| PC/YPBPR) | 480I, 480P 60Hz O | ||
| 576I, 576P 50Hz O | |||
| 720P | 50Hz 60Hz | O | |
| 1080I | 50Hz 60Hz | O | |
| 1080P | 50Hz 60Hz | O | |
| HDMI1 HDMI2 | 480I 60Hz O | ||
| 480P 60Hz O | |||
| 576I, 576P 50Hz O | |||
| 720P | 50Hz 60Hz | O | |
| 1080I | 50Hz 60Hz | O | |
| 1080P | 24Hz, 25Hz 30Hz, 50Hz, 60Hz | O | |
(X: Not Available, O: Available)
In some cases, the images on the television's screen may fail to display properly. It might be an issue of incompatibility with the standards of the source equipment (DVD, decoder, etc.). If you do experience such a problem please contact your dealer and also the manufacturer of the source equipment.
Formats of files supported in USB mode
| Media | File extension | Format | Remarks | |
| Video | Audio | (Maximum resolution/Bit rate, etc.) | ||
| Movie | mpg, mpeg | MPEG1, MPEG2 | MPEG1: 768x576 @30PMPEG2: 1920x1080 @ 30P | |
| vob | MPEG2 | 1920x1080 @ 30P | ||
| mp4 | MPEG4, Xvid , H.264 | |||
| mkv | H.264, MPEG4, VC-1 | |||
| avi | MPEG2, MPEG4, Xvid , H.264 | |||
| flv | H.264/VP6/Sorenson | H.264/VP6: 1920x1080 @ 30PSorenson: 352x288 @30P | ||
| 3gp | MPEG4, H.264 | 1920x1080 @ 30P | ||
| Music | .mp3 | - | MPEG 1 Layer 1 / 2 (MP3) | 32Kbps ~ 320Kbps (Bit rate)32K, 44.1k, 48k Hz,16K, 22.05K, 24K Hz,8K, 11.025K, 12K Hz (Sampling rate) |
| Photo | .jpg .jpeg | Basic JPEG - | max WxH = 17,000x10,000 4,147,200 bytes | |
| . | Progressive JPEG | - | max WxH = 4,000x4,000 3,840,000octets | |
| .bmp | - | - | max WxH = 9,600x6,400 3,840,000 bytes | |
| Subtitle | .sub .srt | - | - | - |
FICHE PRODUIT
| MARQUE SABA | ||
| REFERENCE LD32V167 | ||
| CLASSE D'EFFICACITE ENERGETIQUE A | ||
| DIAGONALE VISIBLE ECRAN 81 CM 32 POUCES | ||
| CONSOMMATION ELECTRIQUE EN MODE MARCHE | 41 Watt | |
| CONSOMMATION D'ENERGIE ANNUELLE | 59 kWh/an | |
| CONSOMMATION ELECTRIQUE EN MODE VEILLE | 0,5 Watt | |
| CONSOMMATION ELECTRIQUE EN MODE ARRET | - | |
| RESOLUTION DE L'ECRAN | 1366 x 768 | |


- Colocar as pilhas no controlo remoto
- Security instructions
- IMPORTANT - Please read these instructions fully before installing or operating
- Getting started
- Notifications & Characteristics & Accessories
- Information relating to the environment
- Standby notifications
- Functions
- Accessories included
- Television's command buttons
- The control button & the Functioning of the TV
- Putting batteries in the remote control
- Connecting the power cord
- Connecting the antenna/Cable
- Notification
- [European Union only]
- Remote control
- How to use My button 1
- How to use My button 2
- Connections
- First time installation - USB connections
- Turning the TV on/off
- Putting the TV on standby
- To turn off the television completely, unplug the power cord from the power socket.
- First time installation
- Demo Mode
- Choosing TV receiver mode
- Installing the cable
- Reading media through the USB input
- Recording a programme
- Time shift recording
- Instant Recording
- Watching recorded programmes
- Slow forward
- Record settings
- Media browser menu
- Quick Menu
- Channel list
- Use of the channel list
- Setting of parental control settings
- Electronic Program Guide (EPG)
- Software update
- Software update search via the user interface
- Search and update mode
- Troubleshooting and tips
- The TV is not coming on
- Poor picture quality
- No image
- No sound
- The remote control is not working
- Input sources cannot be selected.
- Recording not available
- The USB device is too slow
- Teletext
- Digital teletext (United Kingdom only)
- Typical PC Input Display Modes
Brand : SABA
Model : LD32V167
Category : TV