— Game — Mode d'emploi PDF")
Fire Emblem Radiant Dawn (Wii) - Game NINTENDO - Free user manual and instructions
Find the device manual for free Fire Emblem Radiant Dawn (Wii) NINTENDO in PDF.

User questions about Fire Emblem Radiant Dawn (Wii) NINTENDO
0 question about this device. Answer the ones you know or ask your own.
Ask a new question about this device
Download the instructions for your Game in PDF format for free! Find your manual Fire Emblem Radiant Dawn (Wii) - NINTENDO and take your electronic device back in hand. On this page are published all the documents necessary for the use of your device. Fire Emblem Radiant Dawn (Wii) by NINTENDO.
USER MANUAL Fire Emblem Radiant Dawn (Wii) NINTENDO
NEED HELP WITH INSTALLATION, MAINTENANCE OR SERVICE?
Nintendo Customer Service
SUPPORT.NINTENDO.COM or call 1-800-255-3700
www.nintendocom games, featurewalkthroughs, frequently-asked questions, and codes for many of our games. If your answer isn't there, check out our forums where you canexchange links with other gamers online.
For more information about our forums, visit www.nintendoe.com/community.
If you don't have access to the web site, recorded tips for many titles are available on Nintendo's Power Line at (425) 885-7529. This may be a long-distance call, so please ask permission from whoever pays the phone bill.
BESOIN D'AIDE POUR L'INSTALLATION, L'ENTRETIEN OU LA REPARATION?
The Official Seal is your assurance that this product is licensed or manufactured by Nintendo. Always look for this seal when buying video game systems, accessories, games and related products.
- Some people (about 1 in 4000) may have seizures or blackouts triggered by light flashes or patterns, and this may occur while they are watching TV or playing video games, even if they have never had a seizure before.
- Anyone who has had a seizure, loss of awareness, or other symptom linked to an epileptic condition, should consult a doctor before playing a video game.
- Parents should watch their children play video games. Stop playing and consult a doctor if you or your child has any of the following symptoms:
Convulsions Eye or muscle twitching Altered vision Loss of awareness Involuntary movements Disorientation
-
To reduce the likelihood of a seizure when playing video games:
-
Sit or stand as far from the screen as possible.
- Play video games on the smallest available television screen.
- Do not play if you are tired or need sleep.
- Play in a well-lit room.
- Take a 10 to 15 minute break every hour.
WARNING - Repetitive Motion Injuries and Eyestrain
Playing video games can make your muscles, joints, skin or eyes hurt. Follow these instructions to avoid problems such as tendonitis, carpal tunnel syndrome, skin irritation or eyestrain:
- Avoid excessive play. Parents should monitor their children for appropriate play.
Take a 10 to 15 minute break every hour, even if you don't think you need it. - If your hands, wrists, arms or eyes become tired or sore while playing or if you feel symptoms such as tingling, numbness, burning or stiffness, stop and rest for several hours before playing again.
- If you continue to have any of the above symptoms or other discomfort during or after play, stop playing and see a doctor.
CAUTION - Motion Sickness
Playing video games can cause motion sickness in some players. If you or your child feels dizzy or nauseous when playing video games, stop playing and rest. Do not drive or engage in other demanding activity until you feel better.
IMPORTANT LEGAL INFORMATION:ed for use with
any unauthorized device. Use of any such device will invalidate your Nintendo product warranty. Copying of any Nintendo game is illegal and is strictly prohibited by domestic and international intellectual property laws. "Back-up" or "archival" copies are not authorized and are not necessary to protect your software. Violators will be prosecuted.
REV-E
WARRANTY & SERVICE INFORMATION
REV-P
You may need only simple instructions to correct a problem with your product. Try our website at support.nintendo.com or call our Consumer Assistance Hotline at 1-800-255-3700, rather than going to your retailer. Hours of operation are 6 a.m. to 7 p.m., PacificTime, Monday - Sunday (times subject to change). If the problem cannot be solved with the troubleshooting information available online or over the telephone, you will be offered express factory service through Nintendo. Please do not send any products to Nintendo without contacting us first.
HARDWARE WARRANTY
Nintendo of America Inc. ("Nintendo") warrants to the original purchaser that the hardware product shall be free from defects in material and workmanship for twelve (12) months from the date of purchase. If a defect covered by this warranty occurs during this warranty period, Nintendo will repair or replace the defective hardware product or component, free of charge. The original purchaser is entitled to this warranty only if the date of purchase is registered at point of sale or the consumer can demonstrate, to Nintendo's satisfaction, that the product was purchased within the last 12 months.
GAME & ACCESSORY WARRANTY
Nintendo warrants to the original purchaser that the product (games and accessories) shall be free from defects in material and workmanship for a period of three (3) months from the date of purchase. If a defect covered by this warranty occurs during this three (3) month warranty period, Nintendo will repair or replace the defective product, free of charge.
SERVICE AFTER EXPIRATION OF WARRANTY
Please try our website at support.nintendo.com or call the Consumer Assistance Hotline at 1-800-255-3700 for troubleshooting information and repair or replacement options and pricing. In some instances, it may be necessary for you to ship the complete product, FREIGHT PREPAID AND INSURED FOR LOSS OR DAMAGE, to Nintendo. Please do not send any products to Nintendo without contacting us first.
WARRANTY LIMITATIONS
THIS WARRANTY SHALL NOT APPLY IF THIS PRODUCT: (a) IS USED WITH PRODUCTS NOT SOLD OR LICENSED BY NINTENDO (INCLUDING, BUT NOT LIMITED TO, NON LICENSED GAME ENHANCEMENT AND COPIER DEVICES, ADAPTERS, AND POWER SUPPLIES); (b) IS USED FOR COMMERCIAL PURPOSES (INCLUDING RENTAL); (c) IS MODIFIED OR TAMPERED WITH; (d) IS DAMAGED BY NEGLIGENCE, ACCIDENT, UNREASONABLE USE, OR BY OTHER CAUSES UNRELATED TO DEFECTIVE MATERIALS OR WORKMANSHIP; OR (e) HAS HAD THE SERIAL NUMBER ALTERED, DEFACED OR REMOVED.
ANY APPLICABLE IMPLIED WARRANTY, INCLUDING WARRANTY OF MERCHANTABILITY AND FITNESS FOR A PARTICULAR PURPOSE, ARE HEREBY LIMITED IN DURATION TO THE WARRANTY PERIODS DESCRIBED ABOVE (12 MONTHS OR 3 MONTHS, AS APPLICABLE). IN NO EVENT SHALL NINTENDO BE LIABLE FOR CONSEQUENTIAL OR INCIDENTAL DAMAGES RESULTING FROM THE BREACH OF ANY IMPLIED OR EXPRESS WARRANTY. SOME STATES DO NOT ALLOW LIMITATIONS ON HOW LONG AN IMPLIED WARRANTY LASTS OR EXCLUSION OF CONSEQUENTIAL OR INCIDENTAL DAMAGES, SO THE ABOVE LIMITATIONS MAY NOT APPLY TO YOU.
This warranty gives you specific legal rights. You may also have other rights which vary from state to state or province to province.
Nintendo's address is: Nintendo of America Inc., P.O. Box 957, Redmond, WA 98073-0957 U.S.A.
This warranty is only valid in the United States and Canada.
DOLBY PRO LOGIC II
Manufactured under license from Dolby Laboratories. Dolby, Pro Logic, and the double-D symbol are trademarks of Dolby Laboratories.
This game is presented in Dolby Pro Logic II. To play games that carry the Dolby Pro Logic II logo in surround sound, you will need a Dolby Pro Logic II, Dolby Pro Logic or Dolby Pro Logic IIx receiver. These receivers are sold separately.
© 2007 Nintendo/INTELLIGENT SYSTEMS. TM,® and the Will logo are trademarks of Nintendo. © 2007 Nintendo.
PROLOGUE
Three years have passed since the northern kingdom of Daein invaded neighboring Crimea and sparked a war that nearly consumed the continent of Tellus.
Daein's armies were defeated, however, and after the people of Crimean crowned the late king's daughter as their new queen, they began rebuilding their beleaguered nation. Daein, on the other hand, came under the rule of the powerful Begnion Empire.
Slowly, each nation took its first, halting steps toward recovery, but like a shattered mirror, what had been broken could not be put together again.
Daein, under the tyrannical occupation of the Begnion army, has lost all hope of ever seeing a new dawn shine upon its people.
To break free from the grip of Beqnion oppression, a handful of young revolutionaries bands together in the Daemin capital of
Nevassa. Calling themselves the Dawn Brigade, these proud few share the simple goal of saving the lives of their countrymen. Their small act of defiance sets off a series of events that will shake the entire continent...
CONTENTS
Basic Controls 5 Command Menu 15
Getting Started 7 Map Menu 17
Saving Your Game 9 Base & Combat
Basic Rules 10 Preparation Menus 18
Unit Status 13 Unit Types 19
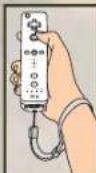
CAUTION: WRIST STRAPUSE
Please use the wrist strap to help prevent injury to other people or damage to surrounding objects or the Wii Remote in case you accidentally let go of the Wii Remote during game play.
Also remember the following:
- Make sure all players put on the wrist strap properly when it is their turn.
Do not let go of the Wii Remote during game play.
Dry your hands if they become moist.
- Allow adequate room around you during game play and make sure that all areas you might move into are clear of other people and objects.
- Stay at least three feet from the television.
SYSTEM MENU UPDATE
Please note that when first loading the Game Disc into the Wii console, the Wii will check if you have the latest system menu, and if necessary a Wii system update screen will appear. Press OK to proceed.

Getting Started
Insert the First Emblem: Radiant Dawn Game Disc into the Wii Disc Slot. This turns on the power to the Wii console.

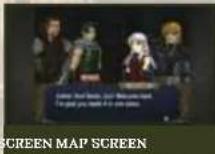
After you turn the Wii on, the screen on the right will appear.
Read it carefully and press(A) to proceed.
The same screen will come up if you turn on the Wii console first and then insert the Game Disc.


Point to the Disc
Channel on the Wii Menu and press A
Point the Wii Remote toward the screen to control the cursor.
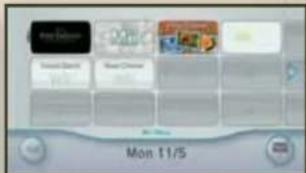

Point to Start on the Channel
Preview screen and press A
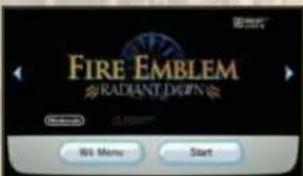

When the title screen appears,
hold the Wii Remote sideways.
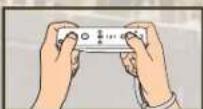
If you are using a Classic Controller or GameCube Controller, or holding the Wii Remote vertically, see P6 for basic controls.
PLAYING FOR THE FIRST TIME
On the title screen, press 2 to bring up the menu screen. Follow the on-screen instructions to create a game file. (To create a game file, there must be at least 6 empty blocks in the Wii system memory.) Once the file is created, select New Game and then No Data. Finally, select a game difficulty, and you're ready to go! See the Wii Operations Manual for information on how to delete files from the Wii system memory.
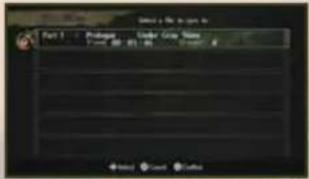
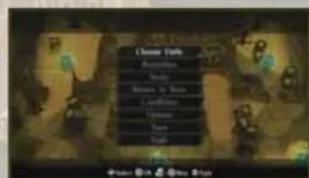
The Menu Screen
Once you have a save file, you'll see the options listed here. (Some of them won't always be available.)
Resume Chapter Resume a game from suspended save data.
Start Chapter Begin or resume a game from save data.
Copy File Copy save data to another file.
Delete File: Delete a save data file.
New Game Start a new game
Extras Check out the bonus features (Extras appears after you save a game).
Difficulty Level
Choose from three game difficulty levels: Easy, Normal, and Hard. We recommend Easy for players who are new to the Fire Emblem series.
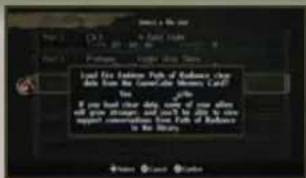
Importing Fire Emblem: Path of Radiance Save Data
If you have beaten Fire Emblem: Path of Radiance, you can import your completed save data, or "clear data."
into Fire Emblem: Radiant Dawn
Before beginning a new game, insert a Nintendo GameCube Memory Card that has clear data for Fire Emblem: Path of Radiance into GameCube
Memory Card slot A of the Wii console.
Select New Game From the menu screen, then choose No Data. Follow the on-screen instructions to load your clear data.
Importing clear data adds many enhancements to your game experience.
Saving Your Game
There are two huge ways of saving your progress: Save and Suspend. You can have up to six saved games, but you can suspend only one game at a time. If you are playing in Easy or Normal difficulty modes, Battle Save will replace Suspend on the menu (see below).
Turning the power off while saving may result in corrupted save data and may cause the console to malfunction.
Save
You may save the game at any of the points listed below. To resume, select Start Chapter and choose a save file. You may load from the same save data file multiple times.
APter Finishing a chamber
In the Beta Memo
In The Combat
Preparation Menu
During a Battle
→P17
The save-data screen appears automatically after you clear a map. Simply choose a file and save your progress.
The Serve command appears on the base menu. Select it to move to the save data screen.
The Save command also appears on the combat-preparation menu. Select it to move to the save-data screen.
In Easy and Normd difficulty modes, the Bottle Save command appears in the map menu. Select it to move to the save-data screen.
Suspend
In Hard mode, you can create a temporary save file midchapter by choosing Suspend from the map menu P17 during the Player phase P11 then confirm the decision. To resume the game, select Resume Chapter from the file menu screen. Suspend data can be used only once. Selecting Resume Chapter, Start Chapter, or New Game automatically erases your suspend data.
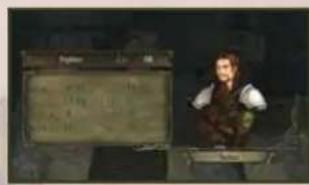
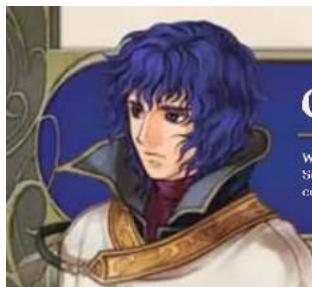
LEONARDO
Leonardo is a member of the Dawn Brigade. He dreams of becoming a master archer and trains ceaselessly. Serious and thoughtful, Leonardo always keeps a cool head, even in times of crisis. Edward thinks he nags too much.
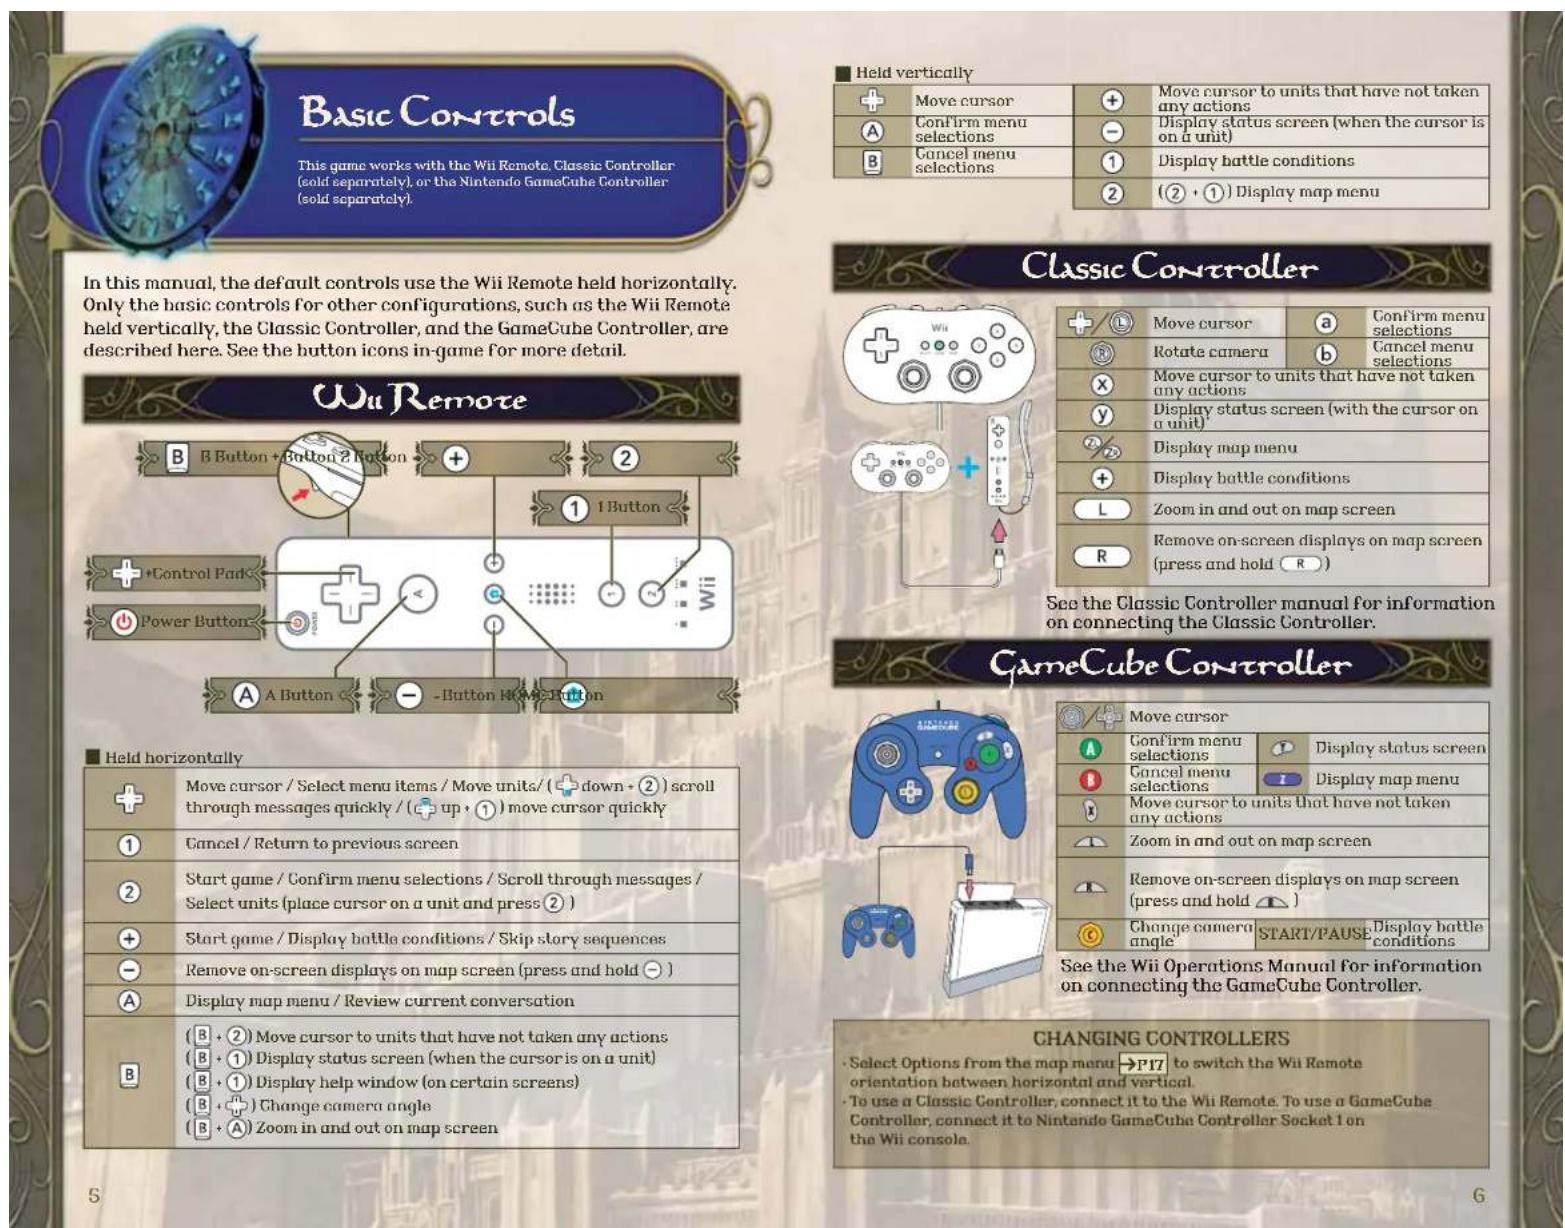
Basic Rules
Fire Emblem: Radiant Dawn is a tactical role-playing game set in a world of grim conflict and dauntless heroes. Choose your warriors, give them your orders, and strike against your enemies to end oppression on the continent of Tellus.
Game Flow
The game is divided into chapters, and you must complete each chapter to progress through the game. Chapters can be broken down into the following stages: Story events, base preparations (which become available in Chapter 4), more story events, combat preparations, actual combat, completion or failure of map objectives, and end of chapter. Map objectives vary from chapter to chapter. The conditions screen shows the current objective.
Base and combat preparations do not appear until Chapter 4.
Turns
This game is divided into turns. Each turn is made up of phases that occur in the following order: Player phase, Ally phase, Enemy phase, and Other phase. You can give orders to your units during the Player phase only.
EDWARD
Edward is a member of the Dawn Brigade. While his youth and inexperience tend to make him a reckless swordsman, his sunny disposition makes him hard to dislike. Leonardo tries to teach him a sense of responsibility.
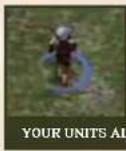
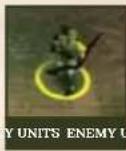
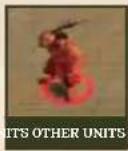
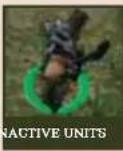
Arnies
The individual characters that appear on the map are called units. You can see which army a unit belongs to by looking at the color of the hand at its feet. Note that this circle turns gray when a unit has completed an action.

Controlling Units
To select a unit, place the cursor over that unit and press. Press and hold 1 to increase the cursor's speed.
1 Select a unit, choose where you want to move it with ^+ and press ②. Some terrain may restrict your movement range, and different terrain heights can give you advantages and disadvantages in battle.
The command menu P15-16 appears automatically once the unit has moved. From here you can select an action, such as Attack or Shove. When the action is complete, the unit becomes inactive and unavailable until the next Player phase. Mounted units and members of the bird tribe of laguz can keep moving up to their maximum range after they take an action.
3 The Player phase ends when all allied units have taken action. To end a Player phase earlier, select End from the map menu→P17.

Leveling Up
As units earn Exp, they gain levels and eventually change classes. Experience points are earned by engaging in combat, using staves, and performing other specific actions. Units automatically gain a level whenever they earn 100 Exp. Most units automatically upgrade to a more powerful class at level 21.
Winning and Losing
When units lose all of their HP (hit points), they vanish from the map. Units who fall in battle are lost forever, but the game goes on. However, if your leader unit is defeated or the victory conditions are not met, your game will end. If this happens, try playing the chapter again using your most recent save data.
RECOVERING HP
There are several ways to recover a wounded unit's HP.
| Using Items | Select items from the unit menu and use an item,like the vulnary. |
| Terrain Effects | Ending a turn on certain squares restores some HP automatically at the start of the next Player phase. |
| Skill Effects | Certain skills restore HP when specific conditions are met. |
| Staves and Magic | Certain staves and magic restore HP to allies or steal HP from enemies when used from the unit menu. |
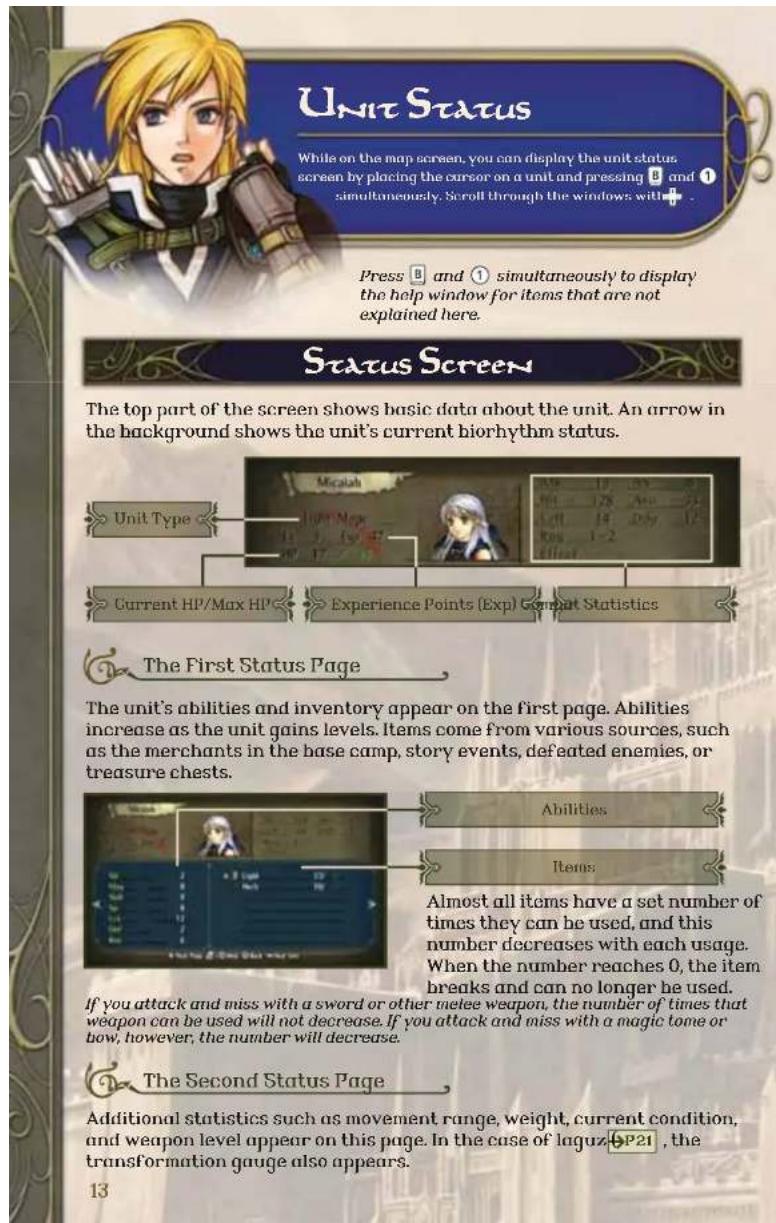
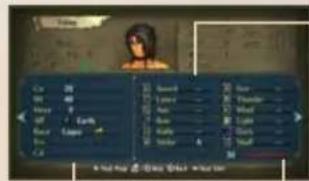
Personal Data
Weapon Level
This displays the types of weapons, magic, and staves that a unit can use, along with the corresponding weapon levels. Weapon levels increase when the item is used a set number of times. Weapon levels are as follows (from worst to best): E > D > C > B > A > S.
Transformation Gauge
Laguz do not use weapons, relying instead on natural combat skills. However, laguz can attack only while in animal form. The transformation gauge rises at the beginning of each turn when a laguz is in human form and drops each turn when he or she is in animal form. When the gauge is empty, units revert back to human form.

The Third Status Page
This page details any skills and support relationships the unit might have.


Skills
These are the unit's special abilities. Select Manage in the base menu P18 to add or remove skills. Note, however, that locked skills are intrinsic to that unit and cannot be removed.
Support
Any unit that shares a support relationship with this unit appears here. Also shown here are the support level they share (C, B, A, with A being the best) and the bonuses they each receive when they are within three spaces of each other.

The Fourth Status Page
The unit's associations and biorhythm appear on the final page.
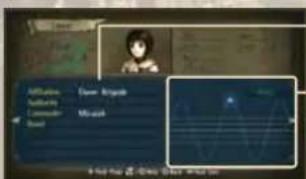
Associations
Biorhymin
Shows the unit's emotional and physical well-being. Biorhythm influences the unit's combat effectiveness.
14
Commander
When a unit finishes moving, the command menu appears. Select an option from the menu for your unit to take. The commands available vary with the unit's type and conditions.
Select Guide from the map menu P17 to see details on each command.
Regular Commands
| Attack | The command to choose for glorious combat. Select a weapon to use, then choose a target. The bottle is joined, and the two units attack one another. There are three types of attacks, each with different ranges: direct, indirect, and long range. Warbons Triangle Combat Window HP Gauge |
| Staff | Use a staff. Staves usually heal allies. |
| Shove | Slam into another unit, pushing it one space over. Units can shove only units whose Wt (weight) does not exceed their own by more than two. Mounted units cannot shove. |
| Rescue | Pick up an Ally, Partner, or Other unit and have it travel with you in safety. A unit can rescue another only if the rescued unit's Wt (weight) is at least two less than the rescuing unit's weight. A rescued unit can't be attacked, but the speed and skill of the rescuing unit is reduced by half. |
| Drop | Place a rescued unit in an adjacent space. Dropped units cannot act on the turn they are dropped. |
| Give Tuke | Transfer a rescued unit to an adjacent unit. The rescued unit can be given or taken only if its Wt (weight) is at least two less than the receiving unit's. |
| Item | Equip, use, or discard items from the unit's inventory. Items that cannot be accessed are grayed out. |
| Trade | Swap items with an adjacent allied unit. |
| Wait | End this unit's actions for this turn. |
Conditional Commands
These commands appear only when circumstances allow.
| Talk | Speak with a unit in an adjacent space. Talking lets you gain new allies and gather important information. |
| Visit | Enter certain homes-you might be shown some hospitality. Move fast, though enemy thieves, bandits, and berserkers will destroy unguarded houses. |
| Door Ghct | Unlock an adjacent door or chest with a key. Thieves can open locks without keys. |
| Order | This command can be used only by the leader unit. Units that do not receive specific commands from the player will follow these orders. |
| Direct | This command can be used only by the leader unit. Partner units will move according to the leader's directions during the Partner phase. |
| Seize | Choose this command to clear the map when the leader reaches certain squares. |
| Escape | Use this when a unit moves onto a space that allows him or her to flee the battle. If the leader unit escapes, the map is cleared. |
| Arrive | Use this when one of your units moves onto a target space to clear the map. |
| Steal | Steal an item or unequipped weapon from an adjacent enemy unit. A unit's strength and speed may prevent it from stealing some items. |
| Galdr | Choose a galdr to use. Galdrar are magical chants that can aid your other units in various ways. |
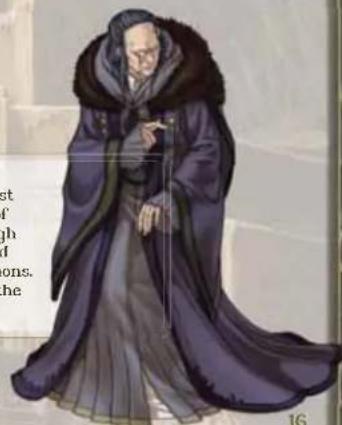
IZUKA
Scholar and court naturalist for the late King Ashnard of Daein, Izuka was held in high regard for his research and development of living weapons. He has been missing since the war with Crimea.
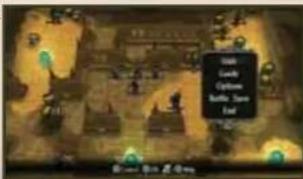
Map Menu
Press on the map screen to display the map menu. The map menu contains essential commands for progressing through the game.
Map Menu Commands
On the map menu, you can choose from the following commands.
| Unit | View eight pages of data for all deployed units. Use the cursor to select a data category, and press ② to sort. |
| Guide | Watch in-game tutorials. New tutorials become available as you progress. They contain information on rules and controls, as well as fundamental strategic advice. |
| Options | Adjust a variety of game settings. Select this to switch between horizontal and vertical modes for the Will Remote. |
| Suspend | Select Suspend to create a temporary save file during battle and exit the game. Available in hard mode only! |
| Battle Save | Available only in Easy and Normal modes, this command allows you to create save data midbottle. When you create a new bottle save, the previous bottle save data is overwritten. Bottle save differs from the suspend command used in Hard mode in that battle save data is not erased when you use it to continue playing. |
| End | Select End to end the player phase of a turn. |
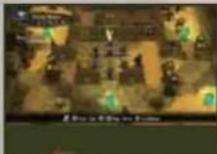
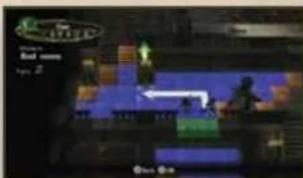
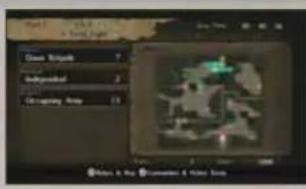
BATTLE CONDITIONS
Press on the map screen to display the battle conditions. This screen shows information about the deployed armies as well as a scaled-down map of the battlefield. Press here to see the victory conditions and other information.
Base & Combat Preparation Menus
Before a battle, you can manage your army from either the base menu or the combat preparation menu. The base menu becomes available after Chapter 4.
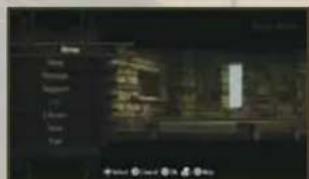
Base Menu
In the base, you can check your units and make sure they are properly equipped before a fight. If you want more information about the base options, use the in-game help window (B·1).

Awarding Experience
Choose Manage from the base menu to make your units stronger. Select Award Exp to distribute bonus experience points, gained when you complete chapters, to your units. Select Skills to assign skills gained from certain items P14 or remove and reassign pre-existing skills.
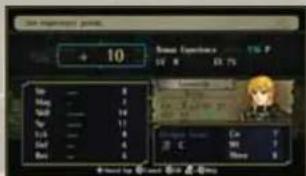
You cannot remove locked skills. You can assign only as many skills as the unit's skill capacity allows.
CombatPreparationMenu
The combat-preparation menu appears on the map screen before a battle, and allows you to manage your army and change a variety of options. Use the in-game help window (B+1) if you want more details about the menu.
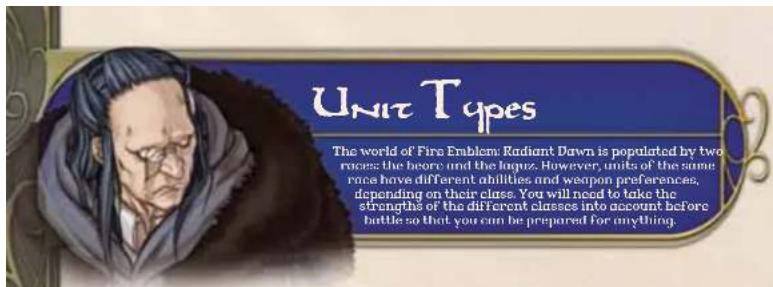
Beorc and Lagu3
Your units will be either heorc or laguz. The heorc, whose name means "children of wisdom," use weapons and magic in battle. The laguz, whose name means "children of strength," transform into beasts or birds during battle and attack with razor-sharp claws and talons.
BEORCUNITS
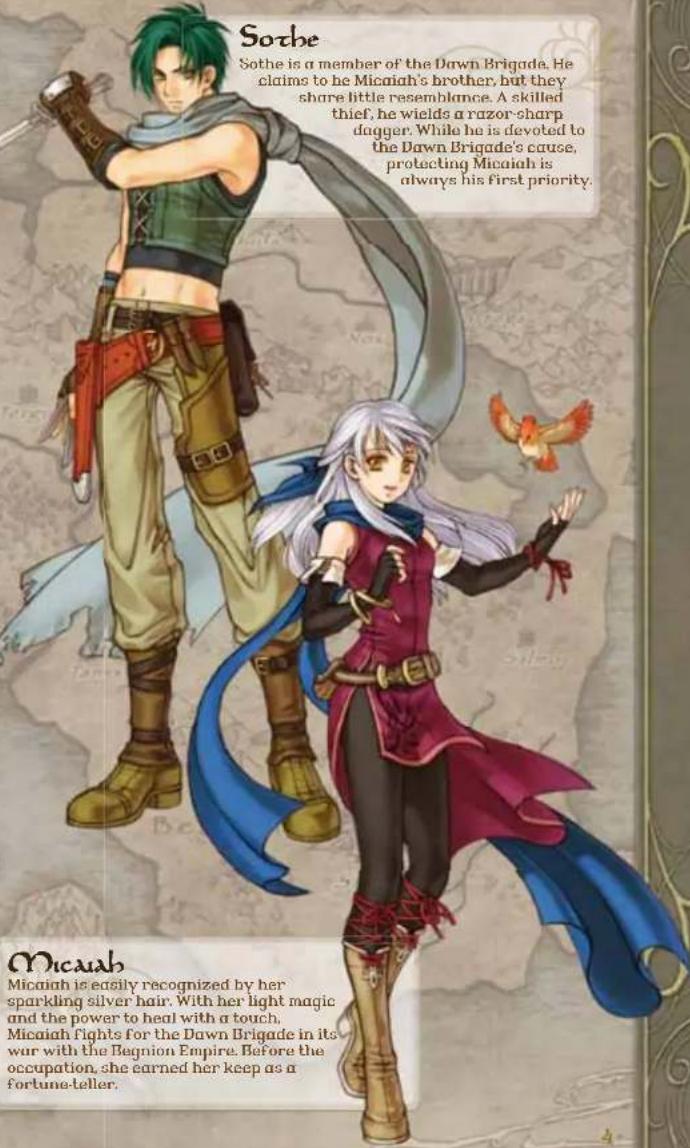
| Light Mage | Micaiah is the only light mage in the game. She specializes in light magic, which is strong against dark magic but weak against fire, thunder, and wind. |
| Light Sage | A light mage who has changed classes. Can use staves as well as light magic. |
| Myrmidon | A unit devoted to the study of the sword. Has excellent skill and speed, but low defense. |
| Sword Master | A myrmidon who has changed classes. Frequently ends battles with a single, terrible blow. |
| Soldier | A unit specialized in spears and lances. Extremely well-rounded, with no particular weaknesses. |
| Halberdier | A soldier who has changed classes. Veteran of many battles, a solid and reliable fighter. |
| Fighter | A robust unit specializing in axes. High HP and strength, but poor defense. |
| Warrior | A Fighter who has changed classes. Can use crossshows as well as axes. |
| Archer | A unit specializing in bows. Cannot engage in direct combat. |
| Sniper | An archer who has changed classes. Can use crossshows as well as bows. |
| Armored Lance Armored Axe Armored Sword | Units whose sturdy armor gives great defense. Weapon specialization is denoted by class. |
| General | An armored unit that has changed classes. Lance generals use lances and axes,axe generals use axes and swords, and sword generals use swords and axes. |
| Thief | A light-footed unit that can steal enemies' items and open locks. Fights using concealable weapons such as knives and daggers. |
| Rogue | A thief who has changed classes. Speed is unrivaled, but other stats suffer for it. |
| Bandit | Rampaging axe-wielders who destroy houses and villages. High HP and strength, but poor defense. |
| Mage | Units that wield the three forms of elemental magic. Specialists are called fire, thunder, or wind mages. |
| Sage | A mage who has changed classes. There are fire, thunder, and wind sages. |
| Priest | A unit that aids allies with the power of holy staves. Unable to attack, but can counterattack with staves. |
| Bishop | A priest who has changed classes. Can use light magic as well as staves. |
| Axe Knight Bow Knight Lance Knight Sword Knight | A mounted unit with exceptional mobility. Weapon specialization is denoted by unit type. |
| Axe Paladin Blade Paladin Bow Paladin Lance Paladin | A knight who has changed classes. Weapon specialization is denoted by unit type. |
| Pegasus Knight | A mounted unit that rides a pegasus and wields lances. Flight gives outstanding mobility, but makes the unit vulnerable to hows and wind magic. |
| Falconknight | A pegasus knight who has changed classes. Can use swords as well as lances. |
| Dracoknight | A mounted unit that rides a wyvern and wields axes. Wycems are tough and mobile, but vulnerable to magic, especially thunder. |
| Dragonmaster | A dracoknight who has changed classes. Can use lances as well as axes. |
PELEAS
A young man that Izuka introduces to Micaiah and her friends as the orphaned son of King Ashnrd. While he seems gentle and unassuming, his fierce passion drives him to rebuild Doein at any price.
LAGUZUNITS
The Beast Tribe

Tigers
A unit that transforms into a tiger to fight. High in strength, but is vulnerable to fire magic.
Cats
A unit that transforms into a cat to fight.
Excels in speed, but is vulnerable to fire magic.
Wolfe
A unit that transforms into a wolf to fight. Possesses great skill, but is vulnerable to fire magic.
The Bird Tribe

Hawks
A unit that transforms into a hawk to fight.
Has great skill and mobility, but is vulnerable to bows and wind magic.
Ravons
A unit that transforms into a raven to fight. Has great speed and mobility, but is vulnerable to bows and wind magic.
RAFIEL Prince of Serenes, the lost heron country crushed by the Begnion Empire. Like all heron laguz, he is unable to fight, but he aids his allies by singing magical galdrar of great power.
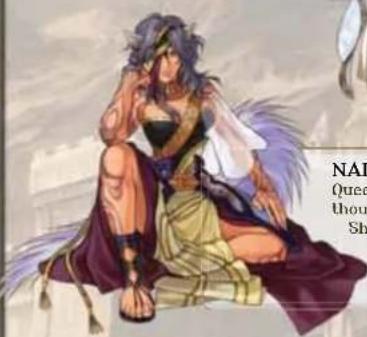
NAILAH
Queen of the wolf laguz, a clam long thought by the beast tribe to be extict. She meets Micaiah's party inside ancient ruins in the Desert of Death, the vast waste that stretches across eastern Tellius.
STAFF CREDITS
Producers
Thoru Narihiro HitoshiYano
Aitoshi Yamagami
Project Management
Director
Taeko Kaneda
Assistant Director
Sachiko Wada
Technical Supervisor
Takafumi Kaneko
Technical Director
Takashi Akiyama
Graphic Chief
Masahiro Higuchi
Map Director
Minoru Noda
2.DArtDirect
2.4.1.1 Director Daiyukeluka
Sound Director
Yoshino Hira
Supervisor (Sound)
Yuka Tsujiyoko
Scenario
Ken Yokoyama
Scenario Assistance
Koubei Maeda
Suzuyo Umezawa
Yune Hattori
Main System Programming
Takashi Akiyama
Script & Conversa
System Programming
Takafumi K.
Iap & Battle
System Programming
Succurly Sequencing
Gmap Programming
Yusuke Murakami
Assistant Programming
Naohiro Yasunara
Level Design
Sachiko Wada
Toyohisa Tanabe(Engines)
Yoshimasa Anita(1)
Kanji Imai
Ryuchryu Kojuschi
Yoshihisa Iss
Shingo Igata
Tutorial Design & Script
Makoto Kat
Character Design
Sachiko Wada
Ghio Taxaya
Character Illustration
Senn Kita (Engines)
Face Graphic
Senri Kita (Engines)
Mayuko Tsukamoto
Chie Takaya
Unit Design
Daisuke Izuka
Chile Takaya
Battie Unit Work
Masahiro Higuchi
Moshi Ogi
Masayo Shiraogawa
Moussa Taoufawa
Mayuko Isuki
Chikawa
Chie Kawabe
Suzuki Kobayashi
Sayuri Kobayashi
Matsuda Murakami
Shingo Igar
Map Unit Work
Ikuko Nishikawa
Hiroyuki Hayashi
Chie Takaya
Takako Sakai
Mayuko Isukamoto
Masaka Mochizuki
Madoka Murakami
Map Design
Minoru Nod
Department of Mathematics, University of Sydney
Kyouko Nakazawa
Isutomu Ie
Battle Field Design
Minoru Noda
Tsutomu Tei
Battle Camera Setting
Koji Kawasaki
Tautomu Tei
Event Illustration
Daizuke Izuka
Naoko Tukamoto
Background Illustration
Dasuke 2uki
Hirom Tanaka
Kawasaki Mokai
Kyouko Nakazawa
Effects Design
Koj Kwasak
Hiroyuki Tashiro
Layout
Takako Sakai
Event Storyboard
Daisuke 120
Kolchiro Yamada
Event Script
Makoto Katayama
Ryuichirou Kouguchi
Yakanoi/Hai Cheong
Yun Ohnshin Sugu mu lehpin
Event Assit
Daisuke Nakajima
Kochiro Yamada
Battle Unit Motion
Yuki Takonaka (1)
Jitsuo Ishiguro (Proge)
Yuys Yamaguchi (Proge)
Satoshi Yoshida (Project)
Auta (Pra)
Taubasa Ishida (Proge)
Tetsuya kakumoto (Proge)
Kensuke Morita (Proge)
Satoshi Kishida (Proge)
Kosel Nishimura (Proge
Movie & Main Composition
Yoshito Hirano
Movie Sound Effect
& Main Sound Effect
Saki Haruyama
Composition
Chika Sekigawa
Naoko Mitome
Naoto Miyatake
Sound Effects
Saki Kurata
Masanobu Matsunaga
Song
Tochinori Shmizu
YokoFuji
Aoi Tsujiyoko
[Dawn Awakens]
Vocal
Toshinori Shimizu
Noriko Adki
Lynds
Ken Yokoyama
Prics Supp
Munis & Arrangement
Yoshito Hirano
Voice Actors
Ed Bodnarzik
Janet Day
M
Lay Litherman
Lani Minjia
Jeff Minnerly
James Parker
Joey Pepi
Project Assistance
Masayuki Horikawa
Production Management
Kenji Ima
Publicity
Yusuke Kitanishi
Ryuta Kaimoto
Artwork
Takashi Hosoi
Yoshinori Oda
Yasuo Inoue
Debug
Ryosuke Yamada
Kari Ando
Super Mario Club
North American Localization
Management
Jeff Miller
Leslie Swan
Bill Trinen
Nate Binidorff
North American
Localization
Rich Amtower
Texas Tech
TIM O'Leary
Makeway
Makaryama Robert Jhaeme
Robert Hebert
Innovation Xerobius
Sethan Yockley
Chika Bird
DriRr Timmons
Kamalea Kott
Greg Berry
Tyler Carpenter
Special Thanks
Kozo Ikuno
Toshiyuki Nakamura
Kenji Nakajima
Kenji Yamada
Misao Kunizawa
Digital Frontier Artifiction
Arts Vision Engineer
Engine
Proge
TroDesign
Executive Producer
ByoichiKitanishi
Satoru Iwata
VEUILLEZ LIRE ATTENTIVEMENT L'INTEGRALITE DU MODE D'EMPLOI DE LA WII AVANT D'UTILISER VOITRE SYSTÉME, VOITRE DISQUE DE JEU, OU VOS ACCESSOIRES WII. CE MODE D'EMPLOI COMPRED D'IMPORTANTES INFORMATIONS SUR VOITRE SANTÉ ET VOITRE SECURÉT.
INFORMATIONS IMPORTANTES CONCERNANT VOITE SECURITE: VEUILLEZ LIRE LES PRECAUTIONS SUIVANTES AVANT QUE VOUS OU VOITE ENFANT NE JOUIEZ A VOS JEUX VIDEO.
Gauwargend, warts you know interviewers can
suuegeuuaa huius ouvouz intorponn ond s
difficulty easy on normal bottle bottles
Suehna Tanahe(Fenning)
Yoshimura Arai (Enjin)
Kenilma
Byuichirou Kouyuchi
Yoshinisa Isa
Shingo Igata
Deslan du tutoriel & Script
Makoto Katayama
Design des person
Sachiko Wada
Chie Tekaya
Chiu Kue Bae
Sampuri Kobay
Madaoka Murakami
Shingo Iqata
Technical Supervisor
Takafumi Kaneko
Technical Director (T)
TAKAsn AKIyarn
Graphic Chieft
Masahiro Higuchi
Map Director
Mihofu Noda
2-D Art Directio
Daisuke Izu
Sound Director
Yoshio Hirano
Supervisor (Sound)
Yuka Tsujiyoko
Scenario
Ken Yokoyama
Cenio
Sueh
Yuri Halteri
Main System Programming
Takashi Akiya
Script & Conversation
System Programming
Takalumi Kanoke
Man & Battle
System Programming
Susumu Ishihara
Oman Programming
YusukeNurakami
Assistant Programming
Naohiro Yasuhara
Level Design
Sachiko Wada
Toyohisa Tanabe(Engine)
Yoshimasa Arila(Er)
Kenilma
Ryuichirou Kouguchi
Yosinisa Isa
Shingo Igata
Tutorial Design & Script
Makoto Katayama
Character Design
Sachiko Wao
Chio Takaya
Character Illustration
Senn Kita (Engines)
Face Graphic
Senri Kita (Engines)
Mayuko Tsukamoto
Chie Takaya
Unit Design
Daisuke Izuka
Chie Takaya
Battie Unit Work
Masahiro Higuchi
Mesayo Shiragawa
Mayuko Tsukamoto
Chie Kawabe
Sayuri Kobayashi
Madoka Murakami
Shingo Igata
Map Unit Work
Ikuo Nishikawa
Hiroyuk Hayash
Chie Takaya
Takako Saka
Mayuko Tsukamoto
Madoka Murakami
Map Design
Minoru Noda
Kyouko Nakazawa
Tautomu Tei
Battie Field Design
Minory Neda
Tsuomi Tei
Battie Camera Setting
Koji Kawasaki
Tsutomu Tei
Event Illustration
Daisuke Izuka
Nagko Tukamoto
Background Illustration
Daisuke Izuk
Hiromi Tanaka
Kyouko Nakazawa
Effects Design
Ko: Kawasak
Hiroyuki Tashiro
Layout
Takako Sakai
Event Storyboard
Daisuke Izuka
Koichiro Yamada
Event Script
Makoto Katayama
Ryuichirou Kouguch
Takanor Hino
Yuji Onashi
Susumu Ishihara
Event Assistance
Daisuke Nakajima
Koichiro Yamada
Battie Unit A
Yuki Takedaka (Propel)
Jitsuo Ishiguto (Proge)
Yuya Yamaguchi (Proge)
Saloru Yamamura (Proge)
Alto (Proge)
Tsubasa Ishida (Proge)
Teisuya Kakumolo (Proge)
Kensuke Morita (Proge)
Safoshi Kishida (Proge)
Kosei Nishimura (Proge)
Movie & Main Composition
Yoshito Hirano
Movie Sound Effect
A Main Sound Effect
Saki Haruyama
Composition
Chika Sekigawa
Napko Mitome
Naoto Miyatake
Sound Effects
Saki Kurata
Masanobu Matsunaga
Song
Toshinori Shmizu
Yoko Fujii
Aoi Tsujiyok
Dawn Awakens
Vocal
Ioshinori Shimizu
NORIKO AOKI
Lynet
Ken Yokoyama
y
10
Yoshida Hirasawa
…
Voice Actors
Saon Adkin
1
特此公告。
Layliberman
Lani Minella
Jeff Minnerly
James Parker
Joe Pepi
Project Assistance
Masayuki Honikawa
Production Management
Kenji Imai
Publicity
Yusuke Kitanishi
Ryuta Kalmoto
Artwork
Takashi Hosoi
Yoshinori Oda
Yasuo Inoue
Debug
Byotsuke Yamada
Kan Ando
Super Mario Club
North American Localization
Management
Jeff Miller
Leslie Swan
Bill Triner
Nate Bihldorf
North American
Localization
Rich Amtower
Tim O'Leary
Max Yamane
Robert Heiro
Jonathan Yeckley
Duke University
CHKB BFG
Koralee
Cone Borel
Tyrer Carpanier
Special Thanks
Kozukiuno
Toshiyuki Nakamura
Ken Nakajim
Kenji Yamada
Misao Kunizawa
Digital Frontier
Art Visio
Engine
F
108
Executive Producer
RyoichiKitanishi
Satoru Iwata