— Game — Mode d'emploi PDF")
Mario Party 9 (Wii) - Game NINTENDO - Free user manual and instructions
Find the device manual for free Mario Party 9 (Wii) NINTENDO in PDF.
User questions about Mario Party 9 (Wii) NINTENDO
0 question about this device. Answer the ones you know or ask your own.
Ask a new question about this device
Download the instructions for your Game in PDF format for free! Find your manual Mario Party 9 (Wii) - NINTENDO and take your electronic device back in hand. On this page are published all the documents necessary for the use of your device. Mario Party 9 (Wii) by NINTENDO.
USER MANUAL Mario Party 9 (Wii) NINTENDO
natural_image
Illustration of a yellow star with a smiling face surrounded by radiating stars against a blue background (no text or symbols)NEED HELP WITH INSTALLATION, MAINTENANCE OR SERVICE?
Nintendo Customer Service SUPPORT.NINTENDO.COM or call 1-800-255-3700
For game play assistance, we recommend using your favorite Internet search engine to find tips for the game you are playing. Some helpful words to include in the search, along with the game's title, are: "walk through," "FAO," "codes," and "tips."
BESOIN D'AIDE POUR L'INSTALLATION, L'ENTRETIEN OU LA RÉPARATION?
Product recycling information: visit recycle.nintendo.com
The Official Seal is your assurance that this product is licensed or manufactured by Nintendo. Always look for this seal when buying video game systems, accessories, games and related products.
- Some people (about 1 in 4000) may have seizures or blackouts triggered by light flashes or patterns, and this may occur while they are watching TV or playing video games, even if they have never had a seizure before.
- Anyone who has had a seizure, loss of awareness, or other symptom linked to an epileptic condition should consult a doctor before playing a video game.
- Parents should watch their children play video games. Stop playing and consult a doctor if you or your child has any of the following symptoms:
Convulsions Eye or muscle twitching Altered vision Loss of awareness Involuntary movements Disorientation
• To reduce the likelihood of a seizure when playing video games:
- Sit or stand as far from the screen as possible.
- Play video games on the smallest available television screen.
- Do not play if you are tired or need sleep.
- Play in a well-lit room.
- Take a 10 to 15 minute break every hour.
WARNING - Repetitive Motion Injuries and Eyestrain
Playing video games can make your muscles, joints, skin or eyes hurt. Follow these instructions to avoid problems such as tendinitis, carpal tunnel syndrome, skin irritation or eyestrain:
- Avoid excessive play. Parents should monitor their children for appropriate play.
• Take a 10 to 15 minute break every hour, even if you don't think you need it. - If your hands, wrists, arms or eyes become tired or sore while playing, or if you feel symptoms such as tingling, numbness, burning or stiffness, stop and rest for several hours before playing again.
- If you continue to have any of the above symptoms or other discomfort during or after play, stop playing and see a doctor.
CAUTION - Motion Sickness
Playing video games can cause motion sickness in some players. If you or your child feel dizzy or nauseous when playing video games, stop playing and rest. Do not drive or engage in other demanding activity until you feel better.
IMPORTANT LEGAL INFORMATION
This Nintendo game is not designed for use with
any unauthorized device. Use of any such device will invalidate your Nintendo product warranty. Copying of any Nintendo game is illegal and is strictly prohibited by domestic and international intellectual property laws. "Back-up" or "archival" copies are not authorized and are not necessary to protect your software. Violators will be prosecuted.
REV-E
WARRANTY & SERVICE INFORMATION
REV-R
You may need only simple instructions to correct a problem with your product. Try our website at support.nintendo.com or call our Consumer Assistance Hotline at 1-800-255-3700, rather than going to your retailer. Hours of operation are 6 a.m. to 7 p.m., Pacific Time, Monday - Sunday (times subject to change). If the problem cannot be solved with the troubleshooting information available online or over the telephone, you will be offered express factory service through Nintendo. Please do not send any products to Nintendo without contacting us first.
HARDWARE WARRANTY
Nintendo of America Inc. ("Nintendo") warrants to the original purchaser that the hardware product shall be free from defects in material and workmanship for twelve (12) months from the date of purchase. If a defect covered by this warranty occurs during this warranty period, Nintendo will repair or replace the defective hardware product or component, free of charge.* The original purchaser is entitled to this warranty only if the date of purchase is registered at point of sale or the consumer can demonstrate, to Nintendo's satisfaction, that the product was purchased within the last 12 months.
GAME & ACCESSORY WARRANTY
Nintendo warrants to the original purchaser that the product (games and accessories) shall be free from defects in material and workmanship for a period of three (3) months from the date of purchase. If a defect covered by this warranty occurs during this three (3) month warranty period, Nintendo will repair or replace the defective product, free of charge.*
SERVICE AFTER EXPIRATION OF WARRANTY
Please try our website at support.nintendo.com or call the Consumer Assistance Hotline at 1-800-255-3700 for troubleshooting information and repair or replacement options and pricing.*
*In some instances, it may be necessary for you to ship the complete product, FREIGHT PREPAID AND INSURED FOR LOSS OR DAMAGE, to Nintendo. Please do not send any products to Nintendo without contacting us first.
WARRANTY LIMITATIONS
THIS WARRANTY SHALL NOT APPLY IF THIS PRODUCT: (a) IS USED WITH PRODUCTS NOT SOLD OR LICENSED BY NINTENDO (INCLUDING, BUT NOT LIMITED TO, NON-LICENSED GAME ENHANCEMENT AND COPIER DEVICES, ADAPTERS, SOFTWARE, AND POWER SUPPLIES); (b) IS USED FOR COMMERCIAL PURPOSES (INCLUDING RENTAL); (c) IS MODIFIED OR TAMPERED WITH; (d) IS DAMAGED BY NEGLIGENCE, ACCIDENT, UNREASONABLE USE, OR BY OTHER CAUSES UNRELATED TO DEFECTIVE MATERIALS OR WORKMANSHIP; OR (e) HAS HAD THE SERIAL NUMBER ALTERED, DEFACED OR REMOVED.
ANY APPLICABLE IMPLIED WARRANTIES, INCLUDING WARRANTIES OF MERCHANTABILITY AND FITNESS FOR A PARTICULAR PURPOSE, ARE HEREBY LIMITED IN DURATION TO THE WARRANTY PERIODS DESCRIBED ABOVE (12 MONTHS OR 3 MONTHS, AS APPLICABLE). IN NO EVENT SHALL NINTENDO BE LIABLE FOR CONSEQUENTIAL OR INCIDENTAL DAMAGES RESULTING FROM THE BREACH OF ANY IMPLIED OR EXPRESS WARRANTIES. SOME STATES DO NOT ALLOW LIMITATIONS ON HOW LONG AN IMPLIED WARRANTY LASTS OR EXCLUSION OF CONSEQUENTIAL OR INCIDENTAL DAMAGES, SO THE ABOVE LIMITATIONS MAY NOT APPLY TO YOU.
This warranty gives you specific legal rights. You may also have other rights which vary from state to state or province to province.
Nintendo's address is: Nintendo of America Inc., P.O. Box 957, Redmond, WA 98073-0957 U.S.A.
This warranty is only valid in the United States and Canada.
DOLBY. PRO LOGIC II
Dolby, Pro Logic, and the double-D symbol are trademarks of Dolby Laboratories. Manufactured under license from Dolby Laboratories.
This game is presented in Dolby® Pro Logic® II surround sound. Connect your game console to a sound system with Dolby Pro Logic, Dolby Pro Logic II, or Dolby Pro Logic Iix decoding to experience the excitement of surround sound. You may need to enable "Dolby Pro Logic II" in the audio options menu of the game.
© 2012 Nintendo. TM, * and the Wii logo are trademarks of Nintendo. © 2012 Nintendo.
natural_image
Cartoon character with red cap and star badge, pointing upward (no text or symbols)CONTROLS
Mario Party 9 is played using only the Wii Remote™ controller. Up to four people can play Mario Party 9 at once. Each player will need his or her own Wii Remote.
To play this game in English, change your language settings in the Wii System Settings.

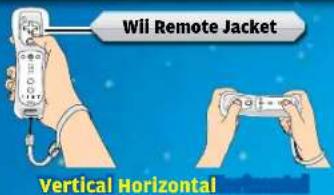
Holding the Wii Remote Controller

Marlo Party 9 is primarily played by holding the Wii Remote vertically. However, some minigames require the Wii Remote to be held horizontally. Please hold your Wii Remote according to the instructions that appear on-screen.
text_image
Will Remote Jacket Vertical Horizontal

CAUTION: WRIST STRAP USE
Please use the wrist strap to help prevent injury to other people or damage to surrounding objects or the Wii Remote in case you accidentally let go of the Wii Remote during game play. Also remember the following:
• Make sure all players put on the wrist strap properly when it is their turn.
- Do not let go of the Wii Remote during game play.
• Dry your hands if they become moist.
- Allow adequate room around you during game play and make sure that all areas you might move into are clear of other people and objects.
- Stay at least three feet from the television.
- Use the Wii Remote Jacket.

SYSTEM MENU UPDATE
Please note that when first loading the Game Disc into the Wii console, the system will check if you have the latest version of the system menu, and if necessary a Wii system menu update screen will appear. Select OK to proceed with the update. Please note that the Wii console must have the latest version of the Wii system menu in order to play the Game Disc.
When the system menu is updated, unauthorized hardware and/or software modifications may be detected and unauthorized content may be removed causing the immediate or delayed inoperability of your console. Failure to accept the update may render this game, and future games, unplayable. Please note that Nintendo cannot guarantee that unauthorized software or accessories will continue to function with the Wii console after this or future updates of the Wii system menu.

WII Remote Controls
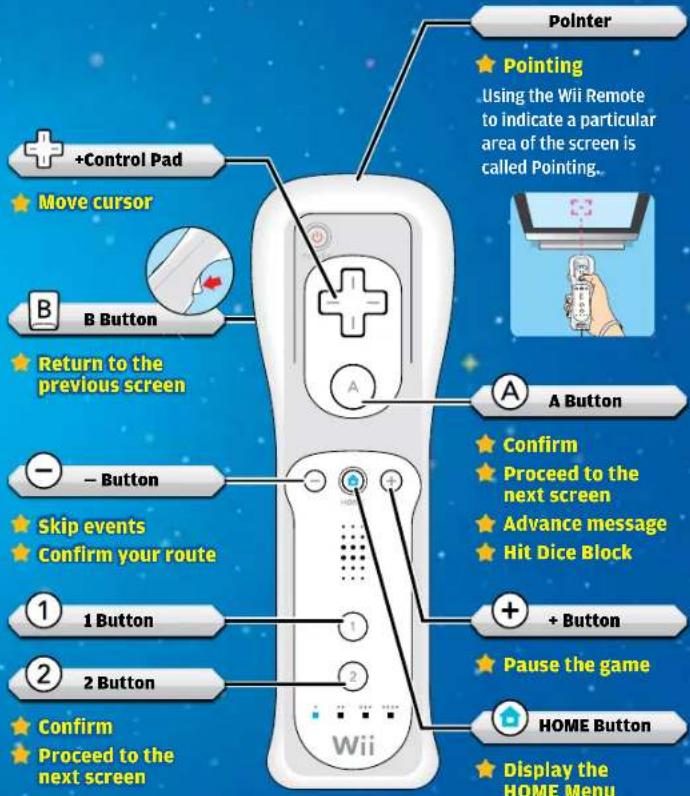
You can move the cursor in menus by pointing the Wii Remote at the screen or by using the +Control Pad. You can confirm your selections by pressing For minigame controls, please check the Controls screen that appears before the start of each minigame.
text_image
Pointer ★ Pointing Using the Wii Remote to indicate a particular area of the screen is called Pointing.. +Control Pad ★ Move cursor B Button ★ Return to the previous screen — Button ★ Skip events ★ Confirm your route 1 Button 2 Button ★ Confirm ★ Proceed to the next screen A Button ★ Confirm ★ Proceed to the next screen ★ Advance message ★ Hit Dice Block + Button ★ Pause the game HOME Button ★ Display the HOME Menu
natural_image
Cartoon character wearing green helmet and cap, saluting with star background (no text or symbols)GAME MODES
On the title screen, press And simultaneously to go to the Main Menu. Here you can choose from one of the following five modes:

Party
Players collect Mini Stars as they proceed through stages, playing minigames and participating in captain events. See pages 6-9 for detailed information on this mode. There are seven stages in all, although some will not be available until certain conditions are met.

Minigames
Play minigames by themselves or in fun modes with a variety of different rules and settings.
*Some modes will not be available until certain conditions are met.

Solo
Play a single-player mode in which you proceed through each of the stages in order. Collect as many Mini Stars as you can to earn a good ranking!

Extras
Play special versions of certain minigames in this mode.

Museum
Here you can spend Party Points you've earned to unlock a variety of prizes (page 9).
Saving the Game Saving the Game
Your records and Party Points are automatically saved to the Wii Console. Progress in Solo mode is also saved automatically, allowing you to resume the next available stage after ending a game. However, quitting a stage before completing it will require you to restart that stage from the beginning.
natural_image
Cartoon character wearing a white mushroom hat inside a star-shaped frame (no text or symbols)PLAYING PARTY MODE
Players climb aboard a vehicle and proceed through stages as they compete to collect the most Mini Stars. The player(s) with the most Mini Stars at the end of the stage are crowned the Superstar!

Getting Started


Set the Number of Human and COM Players
Party mode can be played with up to four players, including computer-controlled (COM) opponents.


Choose Characters
Decide which character each player will use. Choose Random to have your characters picked for you.
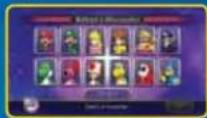
*Some characters will not be available until certain conditions are met.

Choose a Stage
Decide which stage you'll play on.
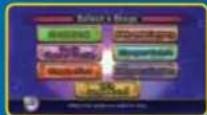
*Some stages will not be available until certain conditions are met.

Adjust Settings
Use the settings to create the play experience you prefer. Select Start! to begin the game.
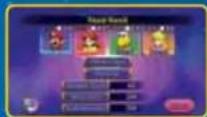
| COM Difficulty | Sets the difficulty level of COM opponents. |
| Handicap | Allows different players to start the game with a certain number of Mini Stars. |
| Minigame Types | Gives the option to play all minigames on a stage or only easier ones. |
| Bonus Stars | When this is turned on, players will be rewarded with extra Mini Stars at the end of the stage for a variety of accomplishments, such as passing over the most spaces or using the most Special Dice Blocks. |
| Guide Messages | When this is turned on, Toad will give helpful advice during play. |

Rules

Players proceed through each stage in the vehicle as a group. During every turn, one player becomes the captain and hits Dice Blocks to move everyone the number of spaces shown.

Hitting Dice Blocks
When it's your turn, you get to choose an available Dice Block. Once the Dice Block starts spinning, press A to hit and stop it. At first, only the normal Dice Block will be available. You can acquire other Special Dice Blocks later by landing on Dice Block Spaces (page 8).
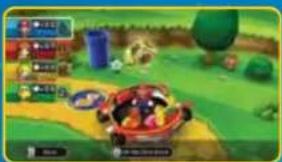
natural_image
Game scene with character, game board, and environment (no readable text or symbols)
Dice Blocks

Dice Block
Dice Block numbered 1 through 6

1-2-3 Dice Block
Dice Block numbered 1 through 3

4-5-6 Dice Block
Dice Block numbered 4 through 6

0-1 Dice Block
Dice Block numbered only 0 and 1

1-10 Dice Block
Dice Block numbered 1 through 10
Slow Dice Block
Dice Block allowing choices from 1 through 6

The Captain
The captain receives any Mini Stars and Special Dice the group picks up while moving along the board. He or she will also receive a Captain Bonus of additional Mini Stars after defeating one of Bowser's minions in a Boss Battle minigame.

Mini Stars vs. Mini Ztars
When the captain passes through Mini Stars in a stage, he or she adds them to his or her total. However, any Mini Ztars picked up will subtract that number of Mini Stars from the total.

Spaces
Depending on the space you land on as the captain, you might gain Mini Stars, kick off a special event, or start a minigame. Certain spaces can't be passed over, regardless of the number hit on the Dice Block.

Spaces
 | Green Space | Nothing happens. |
 | Dice Block Space | Receive one Special Dice Block. |
 | Lucky Space | Earn Mini Stars in an event. |
 | Unlucky Space | Lose Mini Stars in an event. |
 | Event Space | A variety of events may occur. |
 | Shuffle Space | Switches the order in which players become the captain. |
 | Dash Space | Hit a Dice Block to keep moving forward. |
 | Back Space | Hit a Dice Block to move backward. |
 | Spin Space | Spins a wheel with a variety of results, such as receiving a Special Dice Block or earning Mini Stars. |
 | Bowser Space | Spins a wheel with results that meddle with the players' progress. |
 | Mini Star Space | Receive the number of Mini Stars written on the space. |
 | Mini Ztar Space | Lose the number of Mini Stars written on the space. |
 | Captain Event Space | An event takes place led by the current captain. *Players must stop on this space, regardless of the number hit on the Dice Block. |
 | Boss Battle Space | Begins a minigame battle against one of many bosses. *Players must stop on this space, regardless of the number hit on the Dice Block. |
 | Free-for-All Space | Begins a Free-for-All minigame. |
 | 1-vs.-2 / 1-vs.-3 Space | Begins a 1-vs.-Rivals minigame. |
 | Bowser Jr. Space | Begins a Bowser Jr. minigame. |
 | Battle Space | Mini Stars are collected from all of the players, and then a Free-for-All minigame begins. The Mini Stars are then distributed back to players based on the results. |

Minigames
Fulfilling certain conditions on a stage will often cause a minigame to begin. There are four types of minigames, and depending on their results, players may gain or lose Mini Stars.
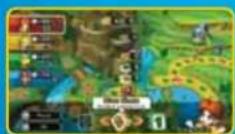
natural_image
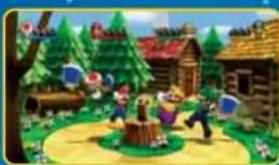
Colorful cartoon scene of a children's play in a forested park with wooden houses and trees (no visible text or symbols)| Free-for-All | It's everyone for themselves! The better you perform in this minigame, the more Mini Stars you'll earn. |
| Bowser Jr. | Two players team up in a battle against Bowser Jr. Winning will earn both players Mini Stars, while losing will cause Bowser Jr. to take Mini Stars from each player. |
| 1-vs. Rivals | One player faces off against everyone else, with the winning side getting the Mini Stars. |
| Boss Battle | All of the players join forces against a boss. Players earn points by attacking the boss, with the player landing the Final Attack getting an extra bonus. These points decide which players get the most Mini Stars after the battle ends. |

Final Results
After defeating the stage boss, Bonus Stars are distributed based on certain conditions, and the player with the most Mini Stars is crowned the Superstar.
text_image
You are the SUPERSTAR!Party Points and MuseumPart
Every time you play Mario Party 9, you earn Party Points. These can be used in Museum to unlock stage music, new vehicles, and more!
text_image
My Points and Museum
Notes
VEUILLEZ LIRE ATTENTIVEMENT L'INTÉGRALITÉ DU MODE D'EMPLOI DE LA Wii™ AVANT D'UTILISER VOTRE CONSOLE, VOTRE DISQUE DE JEU OU VOS ACCESSOIRES Wii. CE MODE D'EMPLOI CONTIENT D'IMPORTANTES INFORMATIONS SUR VOTRE SANTÉ ET VOTRE SÉCURITÉ.
INFORMATIONS IMPORTANTES CONCERNANT VOTRE SÉCURITÉ : VEUILLEZ LIRE LES PRÉCAUTIONS SUIVANTES AVANT QUE VOUS OU QUE VOTRE ENFANT NE JOUIEZ À DES JEUX VIDÉO.
natural_image
Cartoon character with red cap and star badge, pointing upward (no text or symbols)COMMANDES
natural_image
Cartoon character in green helmet saluting, standing on a star-shaped star (no text or symbols)MODES DE JEU
natural_image
Cartoon character wearing a red and white helmet, sitting on a star-shaped platform (no text or symbols)JOUER AUX JEUX DE SOCIÉTÉ
natural_image
Game scene with character in red car and surrounding environment (no readable text or symbols)
Dés

Dé normal
natural_image
Colorful cartoon scene of a girl dancing in a park with houses, trees, and floating blue objects (no text or symbols visible)natural_image
Cartoon character with red cape and star badge, pointing upward (no text or symbols)CONTROLES
natural_image
Cartoon character in green helmet and uniform saluting, standing on a star-shaped star (no text or symbols)MODOS DE JUEGO
natural_image
Cartoon character wearing a white and red helmet with a star background (no text or symbols)natural_image
Game scene with character, game controller, and environment elements (no readable text or symbols)
Tipos de dados

Dado
Dado normal numerado del 1 al 6

Dado 1-2-3