ST 1800 - Screwdriver HILTI - Free user manual and instructions
Find the device manual for free ST 1800 HILTI in PDF.
| Product Type | Electric cladding screwdriver |
| Brand | Hilti |
| Model | ST 1800 |
| Nominal input power | 600 W |
| Weight | 1.9 kg |
| No-load speed | 0 – 1900 rpm |
| Maximum tightening torque | 22 Nm |
| Chuck type | Hexagonal 1/4" |
| Protection class | II (double insulation) |
| Operating temperature | -17 °C to 60 °C |
| Storage temperature | -20 °C to 70 °C |
| Power supply | Mains (power cable) |
| Main applications | Screwing profiles, sheets, sandwich panels in metal construction |
| Torque adjustment | By adjustment ring, multiple levels |
| Speed variator | Electronic, variable |
| Direction of rotation | Reversible (right/left) |
| Continuous operation | Switch lock possible |
| Depth stop | Adjustable, supplied (ST-DG 17) |
| Supplied items | Screwdriver, depth stop, instruction manual |
| Maintenance and cleaning | Clean ventilation slots with a dry brush; housing with a slightly damp cloth |
| Repairability | Use only original Hilti spare parts; repair by qualified service center |
| Safety | Double insulation, detailed safety instructions in the manual |
Frequently Asked Questions - ST 1800 HILTI
User questions about ST 1800 HILTI
0 question about this device. Answer the ones you know or ask your own.
Ask a new question about this device
Download the instructions for your Screwdriver in PDF format for free! Find your manual ST 1800 - HILTI and take your electronic device back in hand. On this page are published all the documents necessary for the use of your device. ST 1800 by HILTI.
USER MANUAL ST 1800 HILTI
text_image
Technical diagram of a handheld electric drill with numbered parts for identification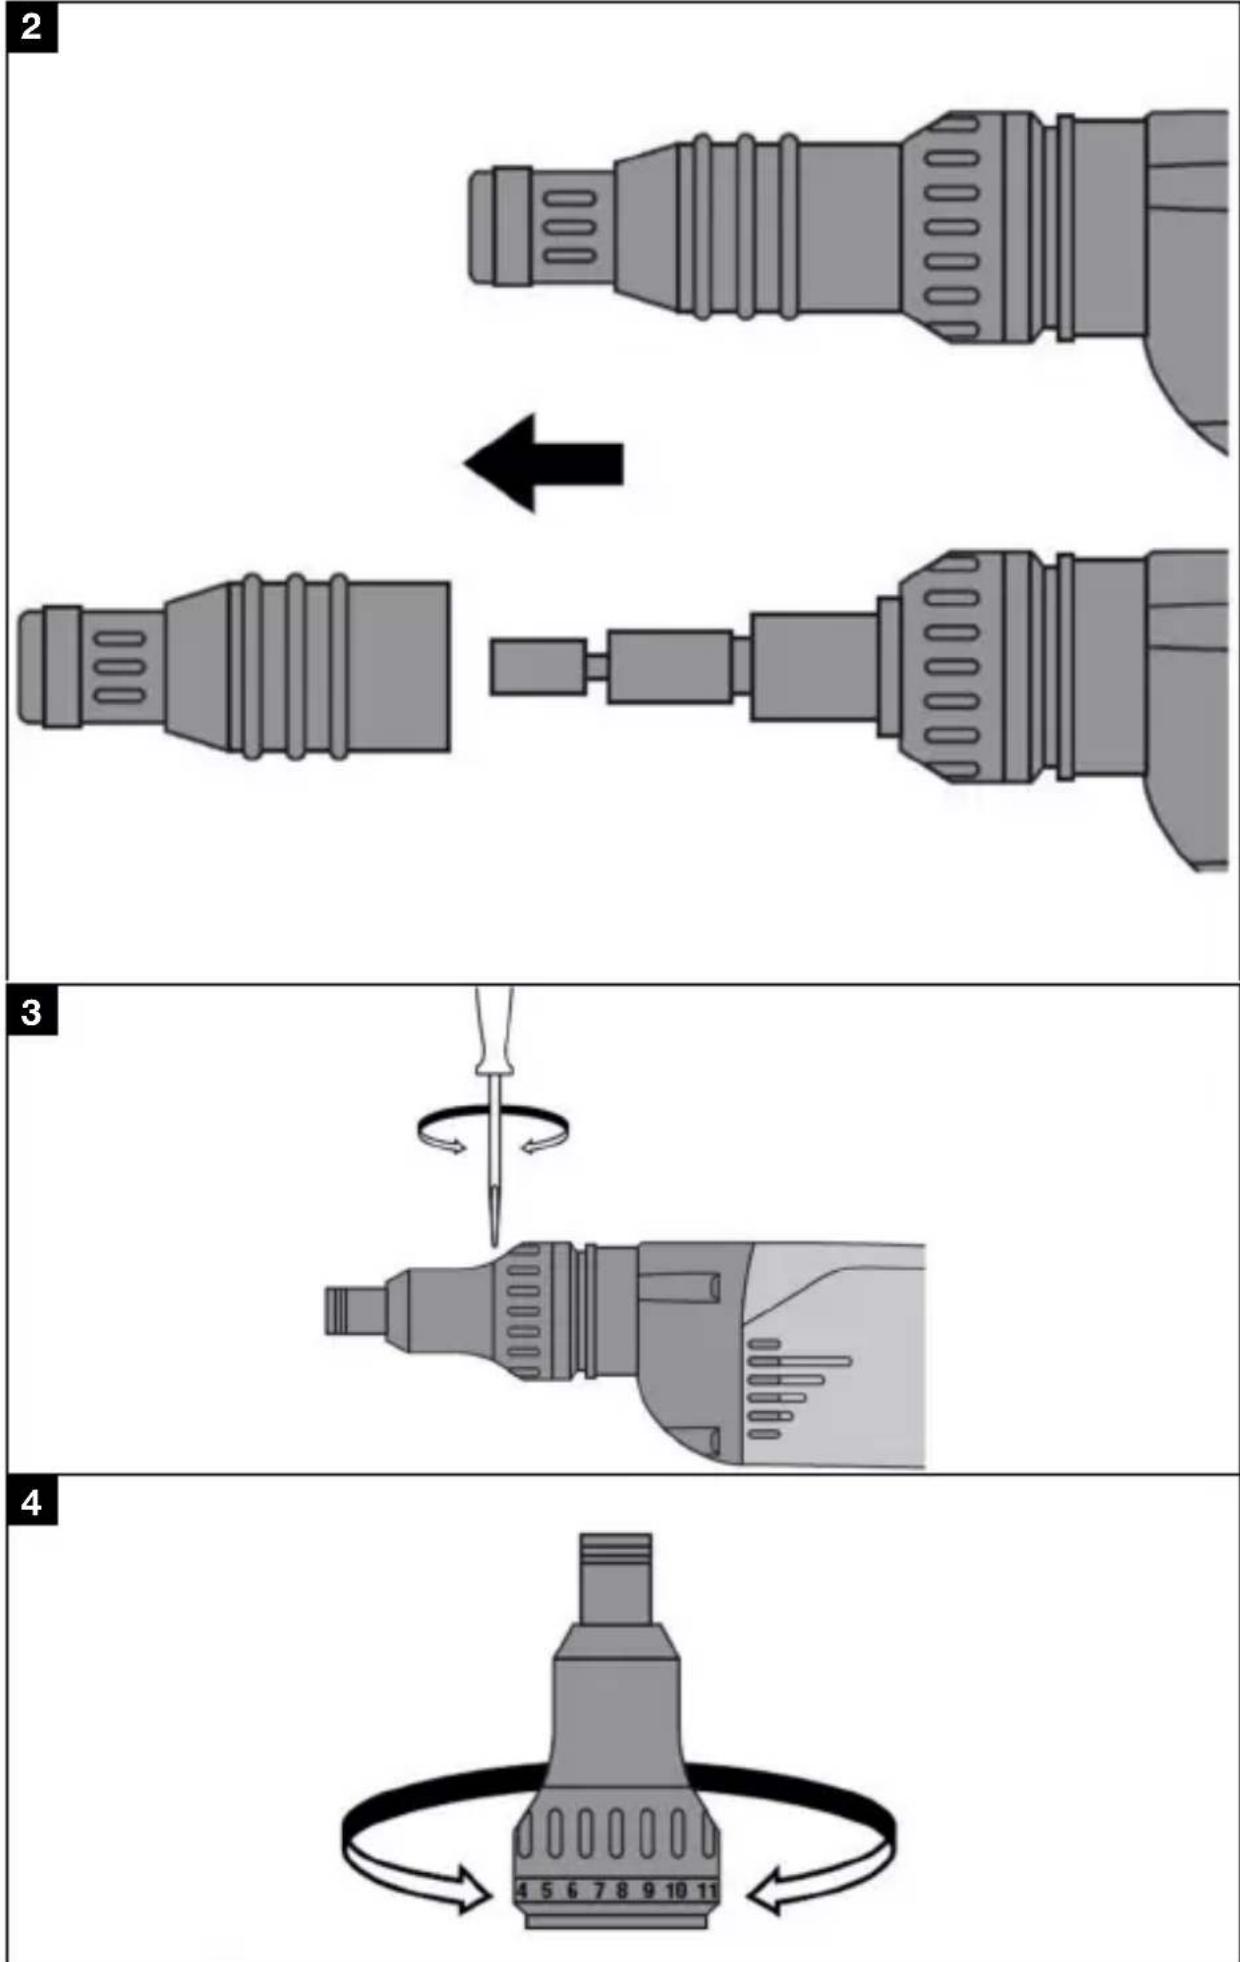
natural_image
Illustration of a medical or surgical tool with four sequential steps showing motion and rotation (no text or symbols)ST 1800
en Original operating instructions .....
Original operating instructions
1 Information about the documentation
1.1 About this documentation
- Read this documentation before initial operation or use. This is a prerequisite for safe, trouble-free handling and use of the product.
- Observe the safety instructions and warnings in this documentation are on the product.
- Always keep the operating instructions with the product and make such that the operating instructions are with the product when it is given other persons.
1.2 Explanation of symbols used
1.2.1 Warnings
Warnings alert persons to hazards that occur when handling or using t product. The following signal words are used:

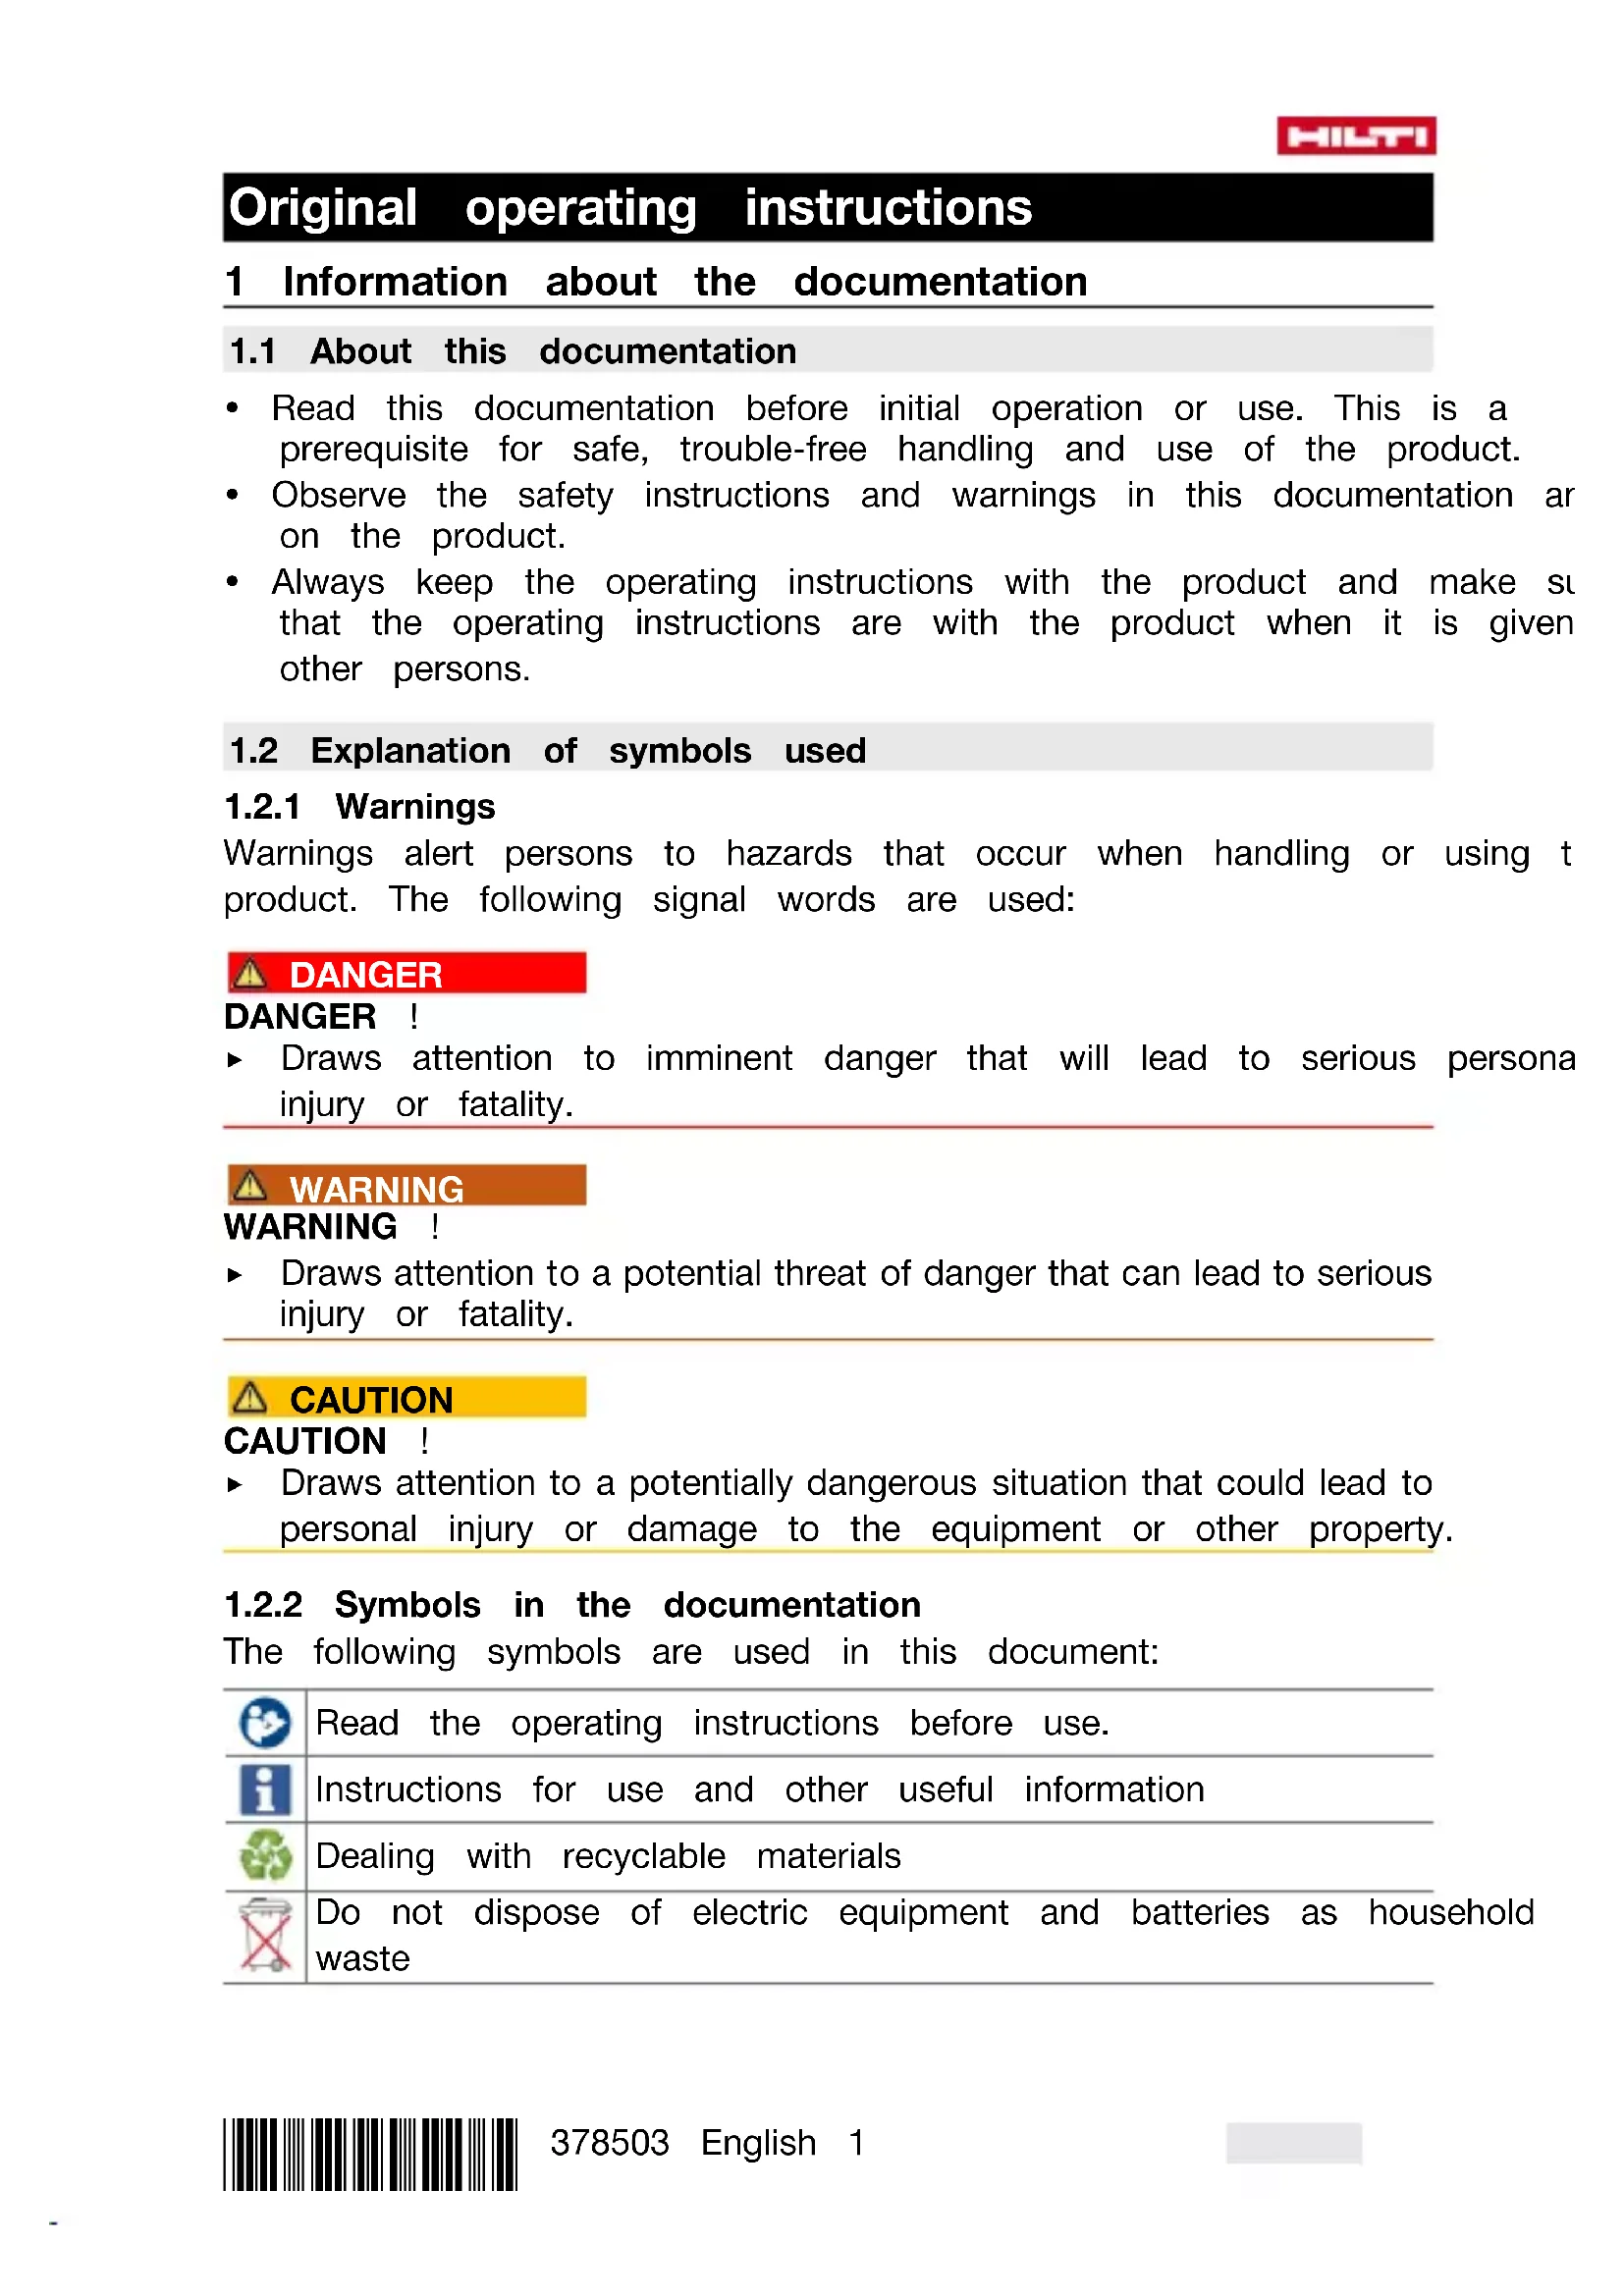
DANGER
DANGER !
- Draws attention to imminent danger that will lead to serious personal injury or fatality.

WARNING
WARNING !
- Draws attention to a potential threat of danger that can lead to serious injury or fatality.

CAUTION
CAUTION !
- Draws attention to a potentially dangerous situation that could lead to personal injury or damage to the equipment or other property.
1.2.2 Symbols in the documentation
The following symbols are used in this document:

Read the operating instructions before use.

Instructions for use and other useful information

Dealing with recyclable materials

Do not dispose of electric equipment and batteries as household waste
1.2.3 Symbols in the illustrations
The following symbols are used in illustrations:
| 2 | These numbers refer to the corresponding illustrations found at the beginning of these operating instructions |
| 3 | The numbering reflects the sequence of operations shown in the illustrations and may deviate from the steps described in the text |
| 11 | Item reference numbers are used in the overview illustrations and refer to the numbers used in the product overview section |
| 3! | This symbol is intended to draw special attention to certain points when handling the product. |
1.3 Product-dependent symbols
1.3.1 Symbols on the product
The following symbols can be used on the product:
| The device supports near-field communication (NFC) technology compatible with iOS and Android platforms. | |
| Protection class II (double-insulated) | |
| If applied on the product, the product has been certified by this certification body for the US and Canadian markets according to the applicable standards. |
1.4 Product information
HILTI products are designed for professional users and only trained, authorized personnel are permitted to operate, service and maintain the products. This personnel must be specifically informed about the possible hazards. The product and its ancillary equipment can present hazards if used incorrectly by untrained personnel or if used not in accordance with the intended use.
The type designation and serial number are printed on the rating plate.
- Write down the serial number in the table below. You will be required to state the product details when contacting Hilti Service or your local H organization to inquire about the product.
Product information
| Metal construction screwdriver ST 1800 | |
| Generation 01 | |
| Serial no. |
2 Safety
2.1 General power tool safety warnings
WARNING Read all safety warnings, instructions, illustrations and specifications provided with this power tool. Failure to follow all instructions listed below may result in electric shock, fire and/or serious injury. Save all warnings and instructions for future reference.
The term "power tool" in the warnings refers to your mains-operated (c) power tool or battery-operated (cordless) power tool.
Work area safety
- Keep work area clean and well lit. Cluttered or dark areas invite accidents.
- Do not operate power tools in explosive atmospheres, such as the presence of flammable liquids, gases or dust. Power tools can sparks which may ignite the dust or fumes.
- Keep children and bystanders away while operating a power too. Distractions can cause you to lose control.
Electrical safety
- Power tool plugs must match the outlet. Never modify the plug any way. Do not use any adapter plugs with earthed (grounded power tools. Unmodified plugs and matching outlets will reduce risk electric shock.
- Avoid body contact with earthed or grounded surfaces, such as pipes, radiators, ranges and refrigerators. There is an increased risk of electric shock if your body is earthed or grounded.
- Do not expose power tools to rain or wet conditions. Water entering a power tool will increase the risk of electric shock.
- Do not abuse the cord. Never use the cord for carrying, pulling unplugging the power tool. Keep cord away from heat, oil, shared edges or moving parts. Damaged or entangled cords increase the of electric shock.
- When operating a power tool outdoors, use an extension cord suitable for outdoor use. Use of a cord suitable for outdoor use reduces the risk of electric shock.
- If operating a power tool in a damp location is unavoidable, use a residual current device (RCD) protected supply. Use of an RCD reduces the risk of electric shock.
Personal safety
- Stay alert, watch what you are doing and use common sense operating a power tool. Do not use a power tool while you are or under the influence of drugs, alcohol or medication. A moment of inattention while operating power tools may result in serious person injury.
HILTI
▶ Use personal protective equipment. Always wear eye protection.
Protective equipment such as a dust mask, non-skid safety shoes, hard hat or hearing protection used for appropriate conditions will reduce personal injuries.
- Prevent unintentional starting. Ensure the switch is in the off-position before connecting to power source and/or battery pack, picking up or carrying the tool. Carrying power tools with your finger on the switch or energising power tools that have the switch on invit accidents.
- Remove any adjusting key or wrench before turning the power to on. A wrench or a key left attached to a rotating part of the power may result in personal injury.
- Do not overreach. Keep proper footing and balance at all times. This enables better control of the power tool in unexpected situations.
- Dress properly. Do not wear loose clothing or jewellery. Keep you hair and clothing away from moving parts. Loose clothes, jewellery long hair can be caught in moving parts.
- If devices are provided for the connection of dust extraction and collection facilities, ensure these are connected and properly used. Use of dust collection can reduce dust-related hazards.
- Do not let familiarity gained from frequent use of tools allow you to become complacent and ignore tool safety principles. A careless action can cause severe injury within a fraction of a second.
Power tool use and care
- Do not force the power tool. Use the correct power tool for your application. The correct power tool will do the job better and safer at the rate for which it was designed.
- Do not use the power tool if the switch does not turn it on an Any power tool that cannot be controlled with the switch is dangerous and must be repaired.
- Disconnect the plug from the power source and/or remove the battery pack, if detachable, from the power tool before making an adjustments, changing accessories, or storing power tools. Such preventive safety measures reduce the risk of starting the power tool accidentally.
- Store idle power tools out of the reach of children and do not allow persons unfamiliar with the power tool or these instructions to operate the power tool. Power tools are dangerous in the hands untrained users.
-
Maintain power tools and accessories. Check for misalignment or binding of moving parts, breakage of parts and any other condition that may affect the power tool's operation. If damaged, have the power tool repaired before use. Many accidents are caused by poor maintained power tools.
-
Keep cutting tools sharp and clean. Properly maintained cutting tools with sharp cutting edges are less likely to bind and are easier to
- Use the power tool, accessories and tool bits etc. in accordance with these instructions, taking into account the working condition and the work to be performed. Use of the power tool for operation different from those intended could result in a hazardous situation.
- Keep handles and grasping surfaces dry, clean and free from o grease. Slippery handles and grasping surfaces do not allow for saf handling and control of the tool in unexpected situations.
Service
- Have your power tool serviced by a qualified repair person using only identical replacement parts. This will ensure that the safety of power tool is maintained.
2.2 Safety warnings for screwdrivers and impact wrenches
- Hold the power tool by insulated gripping surfaces, when perform an operation where the fastener may contact hidden wiring or its own cord. Fasteners contacting a "live" wire may make exposed materials parts of the power tool "live" and could give the operator an electric shock.
2.3 Additional safety precautions for screwdrivers
Personal safety
- Use the product and accessories only when they are in perfect work order.
▶ Never tamper with or modify the product or accessories in any way
▶ Use auxiliary handles supplied with the product. Loss of control can cause personal injury.
▶ Always hold the product with both hands on the grips provided. Ke the grips clean and dry. - Do not touch rotating parts - risk of injury!
- Wear suitable eye protection, a hard hat, ear protection, and light respiratory protection while the product is in use.
- Wear protective gloves when changing the accessory tool. Touching the accessory tool can result in cuts and burns.
▶ Wear eye protection. Flying fragments can injure the body and eyes.
HILTI
- Dust produced by grinding, sanding, cutting and drilling can contain dangerous chemicals. Some examples are: lead or lead-based paints; brick, concrete and other masonry products, natural stone and other products containing silicates; certain types of wood, such as oak, beech and chemically treated wood; asbestos or materials that contain asbestos. Determine the exposure of the operator and bystanders by means of the hazard classification of the materials to be worked. Implement the necessary measures to restrict exposure to a safe level, for example by the use of a dust collection system or by the wearing of suitable respiratory protection. The general measures for reducing exposure include:
▶ working in an area that is well ventilated,
- avoidance of prolonged contact with dust,
- directing dust away from the face and body,
- wearing protective clothing and washing exposed areas of the skin with water and soap.
Take frequent breaks and do physical exercises to improve the blood circulation in your fingers. High vibration during long periods of work lead to disorders of the blood vessels and nervous system in the finger hands and wrists.
Electrical safety
Before beginning work, check the working area for concealed electric cables or gas and water pipes. External metal parts of the product c give you an electric shock or cause an explosion if you accidentally damage an electric cable or a gas or water pipe.
Power tool use and care
- Switch the product off immediately if the accessory tool jams. The product might twist off-line.
▶ Wait until the product stops completely before you lay it down.
3 Description
3.1 Overview of the product 1
① Chuck
② Protective sleeve
③ Click connection between depth gauge and power tool
④ Torque adjustment
⑤ Control switch lockbutton
⑥ Supply cord
⑦ Control switch
⑧ Forward / reverse switch
⑨ Depth gauge adjustment
3.2 Intended use
The product described is a hand-held electric screwdriver for fastening profile metal sheets, metal sheets and sandwich panels in metal construction.
The power tool is designed for driving and removing screws in drywall installation work.
It is possible to use a stand-up tool extension for driving collated scre
3.3 Main applications / torque settings
| Application Screw type Diam- | eter in mm | Torque setting | |
| Sheet metal to sheet metal S-MD | 4.2 | 1 - 2 | |
| S-MD | 4.8 | 1 - 8 | |
| S-MS | 4.8 | 1 - 8 | |
| Sheet metal to steel profile S-MD 51 + S-MD 21 | 5.5 | 8 - 13 | |
| 5.5 | 6 - 11 | ||
| S-MD 53 + S-MD 23 | 6.3 | 4 - 12 | |
| S-MP 52 | |||
| Sheet metal to steel beam S-MD 55 + S-MD 21 | 5.5 | 2 - 7 | |
| 6.5 | 8 - 14 | ||
| S-MP 53 | |||
| Sheet metal to timber S-MP 53 6.5 14 - 18 | |||
| Fiber-cement board on steel profile S-FD 03 6.3 6 - 12 | |||
| Fiber-cement board on steel beam S-FD 05 6.3 12 - 15 | |||
| Fiber-cement board on wood S-FD 01 6.5 12 - 18 | |||
| Sandwich panel to steel profile S-CD 63 | 5.5 | 2 - 7 | |
| Sandwich panel to steel beam S-CD 65 | 5.5 | 2 - 9 | |
| Sandwich panel to wood S-CDW 61 | 6.5 | 5 - 8 | |
3.4 Items supplied
Metal construction screwdriver, ST-DG 17 depth guage, operating instructions.

Spare parts, consumables and accessories approved by Hilti for use with the product can be found at your local Hilti Store or online at: www.hilti.group | USA: www.hilti.com
4 Technical data

For rated voltage, rated current, frequency and/or input power, refer to the country-specific type identification plate.
If the tool is powered by a generator or transformer, the generator or transformer's power output must be at least twice the rated input power
HILTI
shown on the rating plate of the tool. The operating voltage of the trans- or generator must always be within +5 % and -15 % of the rated volta the tool.
| ST 1800 | |
| Rated power input | 600 W |
| Weight | 1.9 kg(4.2 lb) |
| Speed (running under no load) | 0 /min ...1,900 /min |
| Max. torque | 22 Nm(16 ftlp) |
| Chuck | 14 " hex socket |
| Protection class | II |
| Operating temperature | -17 °C ... 60 °C(1 °F ... 140 °F) |
| Storage temperature | -20 °C ... 70 °C(-4 °F ... 158 °F) |
5 Operation
5.1 Preparations at the workplace
CAUTION
Risk of injury! Inadvertent starting of the product.
▶ Unplug the supply cord before making adjustments to the power tool before changing accessories.
Observe the safety instructions and warnings in this documentation and or the product.
5.1.1 Fitting the scaffold hook
- Push the scaffold hook onto the tool from the front.
- Turn scaffold hook into the desired position.
- Secure the scaffold hook by tightening the knurled thumb screw.
- Check that the scaffold hook is fitted securely.
5.1.2 Fitting the depth gauge
WARNING
Electrical hazards There is a risk of electric shock if a screw is driven a concealed electric cable and, at the same time, the bit holder or dep-gauge is touched.
▶ Hold the product only by the grip when driving or removing screws.
-
Remove the protective sleeve. → page 9
-
Fit the depth gauge.
5.1.3 Removing the depth gauge
CAUTION
Risk of injury The depth gauge may hinder the operator if fitted but
- Remove the depth gauge from the tool.
- Remove the protective sleeve. → page 9
- Pull the depth gauge forward, away from the power tool.
5.1.4 Removing the protective sleeve
- Insert the tip of a screwdriver between the protective sleeve and the power tool.
- Release the protective sleeve by levering with the screwdriver.
- Pull the protective sleeve off toward the front of the tool.
5.1.5 Changing the bit
CAUTION
Risk of injury by the accessory tool! The accessory tool might be have sharp edges.
▶ Wear protective gloves when changing the accessory tool.
- Remove the depth gauge. → page 9
- Pull the sleeve back and hold it securely.
- Change the bit.
- Release the sleeve and allow it to slide forward.
- Fit the depth gauge. → page 8
5.1.6 Adjusting the depth gauge
5.1.6.1 Screw sealing washer compressed too much
If the screw sealing washer is compressed too much, turn the depth g to the right.
5.1.6.2 Screw sealing washer is not compressed enough
If the screw sealing washer is not compressed enough, turn the depth to the left.
5.2 Types of work
CAUTION
Risk of damage by incorrect handling!
- Do not operate the switches for direction of rotation and/or function selection during operation.
Observe the safety instructions and warnings in this documentation and the product.
5.2.1 Switching on

Press the control switch slowly all the way.
▶ Press the control switch slowly all the way.
5.2.2 Activating continuous running mode
- Press the control switch.
- Press the lockbutton.
- To switch off when in continuous running mode, press the control sw ▶ The lockbutton returns to its original position.
5.2.3 Setting the torque
▶ Turn the adjusting ring to the desired torque setting.
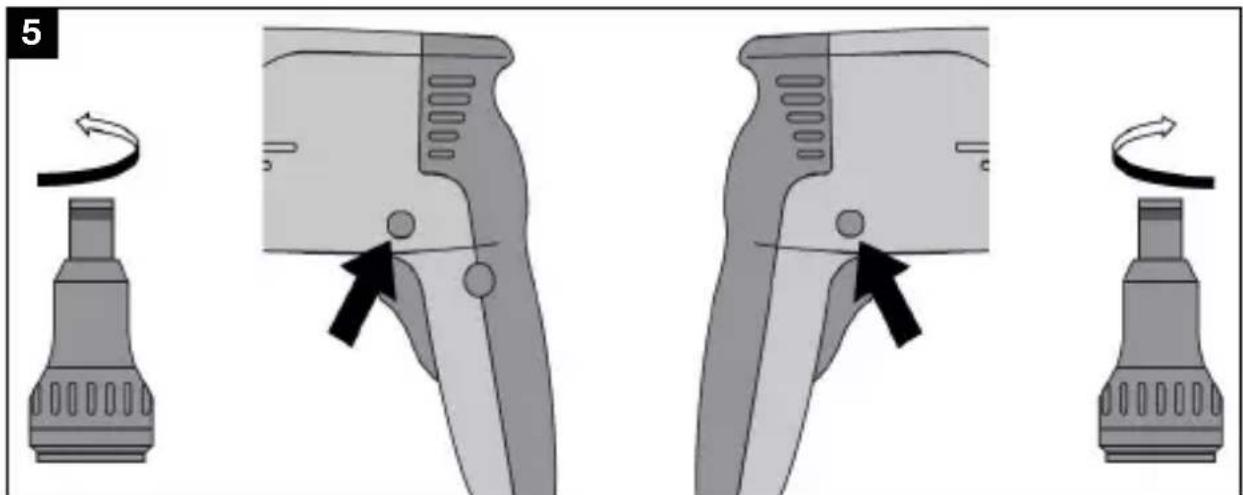
5.2.4 Setting forward or reverse rotation
▶ Set the forward/reverse switch to the desired position.
5.2.5 Removing screws
- Remove the depth gauge. → page 9
- Set the forward/reverse switch to the desired position. → page 10
- Remove the screw.
6 Care and maintenance

WARNING
Electric shock hazard! Attempting care and maintenance with the supply cord connected to a power outlet can lead to severe injury and burns.
▶ Always unplug the supply cord before carrying out care and maintaining tasks.
Care
- Carefully remove stubborn dirt from the tool.
- Clean the air vents carefully with a dry brush.
- Use only a slightly damp cloth to clean the casing. Do not use clear agents containing silicone as they can attack the plastic parts.
Maintenance

WARNING
Danger of electric shock! Improper repairs to electrical components may lead to serious injuries including burns.
- Repairs to the electrical section of the tool or appliance may be carried out only by trained electrical specialists.
-
Check all visible parts and controls for signs of damage at regular intervals and make sure that they all function correctly.
-
Do not operate the product if signs of damage are found or if par malfunction. Have it repaired immediately by Hilti Service.
- After cleaning and maintenance, fit all guards or protective devices a check that they function correctly.

To help ensure safe and reliable operation, use only genuine Hilti's parts and consumables. Spare parts, consumables and accessories approved by Hilti for use with the product can be found at your Hilti Store or online at: www.hilti.group.
7 Transport and storage
- Do not transport electric tools with accessory tools fitted.
• Always unplug the supply cord before storing an electric tool or app - Store tools and appliances in a dry place where they cannot be ac by children or unauthorized persons.
- Check electric tools or appliances for damage after long periods of transport or storage.
8 Disposal
Most of the materials from which Hilti tools and appliances are manufactured can be recycled. The materials must be correctly separated by they can be recycled. In many countries, your old tools, machines or ances can be returned to Hilti for recycling. Ask Hilti Service or your Hilti representative for further information.

- Do not dispose of power tools, electronic equipment or batteries household waste!
9 Manufacturer's warranty
- Please contact your local Hilti representative if you have questions about the warranty conditions.