Pyper MK2749 - Watch Michael Kors - Free user manual and instructions
Find the device manual for free Pyper MK2749 Michael Kors in PDF.


| Product Type | Wristwatch |
| Brand | Michael Kors |
| Model | Pyper MK2749 |
| Movement | Battery Quartz |
| Display | Analog with hands |
| Main Functions | Chronograph, date, 24 hours |
| Water Resistance | 5 ATM (50 m) – resists splashes and short immersion |
| Case Material | Stainless Steel |
| Strap Material | Stainless Steel (link) |
| Case Diameter | 38 mm (approx) |
| Case Thickness | 10 mm (approx) |
| Approximate Weight | 100 g |
| Power Source | Button cell battery (type SR626SW or similar) |
| Battery Life | Approximately 2 years |
| Glass | Mineral |
| Date Adjustment | By crown in position 2 or 3 depending on movement |
| Chronograph Reset | Button B or crown in position 3 + buttons A/B |
| Maintenance and Cleaning | Use a soft cloth with water; do not immerse if not water-resistant |
| Precautions | Do not set the date between 9 PM and 1 AM; avoid shocks |
| Repairability and Spare Parts | Contact an authorized watchmaker for battery replacement and repairs |
| Warranty | 2 years (depending on retailer) |
| General Information | User manual included; manual available in multiple languages upon request |
Frequently Asked Questions - Pyper MK2749 Michael Kors
User questions about Pyper MK2749 Michael Kors
0 question about this device. Answer the ones you know or ask your own.
Ask a new question about this device
Download the instructions for your Watch in PDF format for free! Find your manual Pyper MK2749 - Michael Kors and take your electronic device back in hand. On this page are published all the documents necessary for the use of your device. Pyper MK2749 by Michael Kors.
USER MANUAL Pyper MK2749 Michael Kors
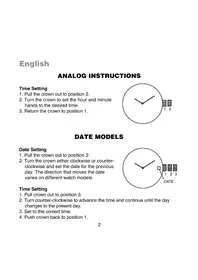
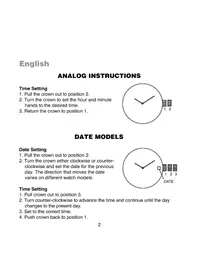
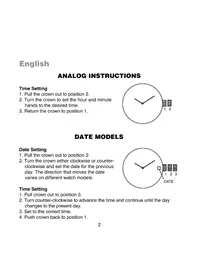
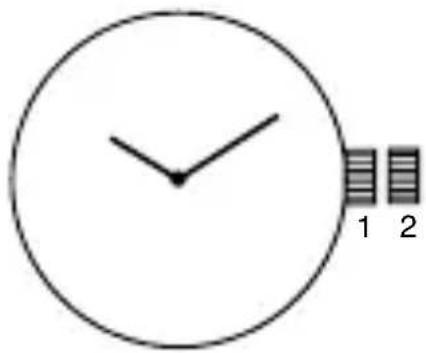
- Pull the crown out to position 2.
- Turn the crown to set the hour and minute hands to the desired time.
- Return the crown to position 1.
text_image
1 2DATE MODELS
Date Setting
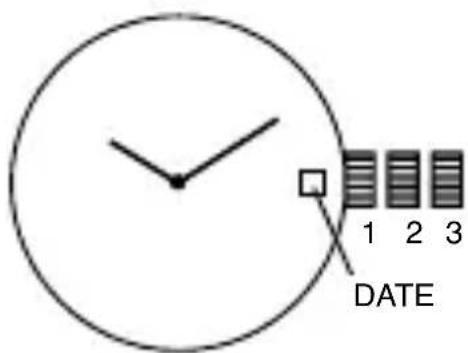
- Pull the crown out to position 2.
- Turn the crown either clockwise or counterclockwise and set the date for the previous day. The direction that moves the date varies on different watch models.
text_image
1 2 3 DATETime Setting
- Pull crown out to position 3.
- Turn counter-clockwise to advance the time and continue until the day changes to the present day.
- Set to the correct time.
- Push crown back to position 1.
THREE EYE MULTIFUNCTION VX3J
(1 crown)
text_image
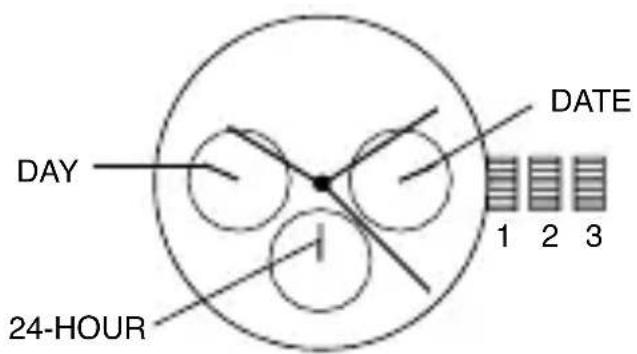
DAY DATE 1 2 3 24-HOURDate Setting
- Pull crown out to position 2.
- Turn clockwise to advance the date hand.
- Push crown back to position 1.
Day and Time Setting
- Pull crown out to position 3.
- Turn clockwise to advance hour and minute hands.
The hand showing days of the week will also move with the hour and minute hands. Keep turning until you have reached the desired day.
24-Hour Sub-Dial Setting
The movement of the 24-hour hand corresponds to the hour and minute hands. When setting the time be sure to check that the 24-hour hand is set properly.
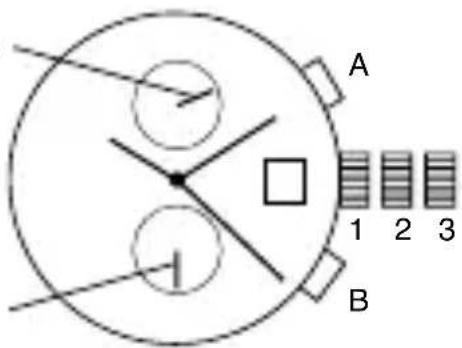
CHRONOGRAPH VD51B
CHRONO SECOND HAND
text_image
A 1 2 3 BCHRONO MINUTE HAND
Time/Date Setting
- Before setting the time, make sure the chronograph second and minute hands are at the 12:00 position and the chronograph is not running. See Chronograph Operation instructions below.
- Pull crown out to position 2.
- Rotate crown clockwise until the previous day's date is displayed in date window.
- Pull crown out to position 3 when the second hand is in the 12:00 position. Second hand will stop.
- Rotate crown clockwise to set time.
- Return crown to position 1.
NOTE: Make sure that AM/PM is set correctly. Do not set date between 9:00 p.m. and 1:00 a.m. or day may not change properly.
Chronograph Operation
- Press A to start/stop the chronograph.
- Press B to reset.
Split Time
- Press B while the chronograph is running.
- Press B again to return to the chronograph.
- Press A to finalize timing.
- Press B to reset.
Chronograph Zero Reset
- Pull crown out to position 3.
- Press A to reset the chronograph second hand to 12:00 (zero) position. Each press advances the chronograph second hand one mark. If A is held down for over 2 seconds, the chronograph second hand advances continuously.
NOTE: Chronograph minute hand moves simultaneously with chronograph second hand.
-
Press B to reset the chronograph minute hand. Repeat step 2 instructions.
-
Return crown to position 1 when chronograph hands are reset to zero.
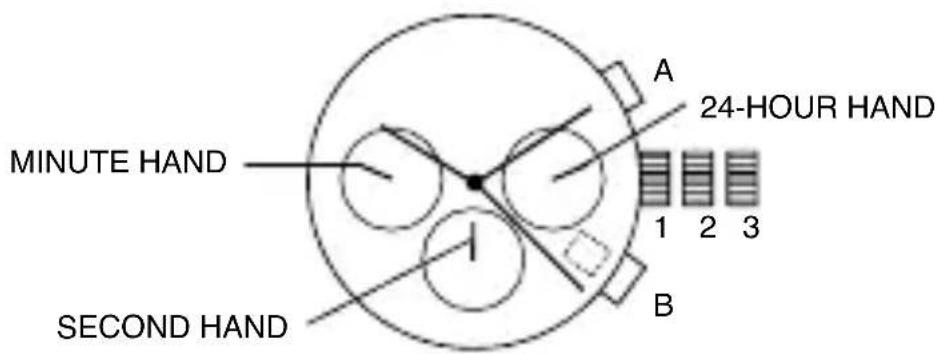
CHRONOGRAPH STOPWATCH VD54 (with date-VD53)
(1 crown/2 pushers)
text_image
MINUTE HAND SECOND HAND A 24-HOUR HAND 1 2 3 BTime and Date Setting
- Before setting the time, make sure the chronograph is stopped and set to zero (12:00) position.
- Pull crown out to position 2.
- Turn crown clockwise until the previous day's date is displayed.
- Pull crown out to position 3 when the second hand is at the 12:00 position.
- Turn crown to set time.
NOTE: The movement of the 24-hour hand corresponds to the hour and minute hands. When setting the time be sure to check that the 24-hour hand is set properly.
- Return crown to position 1.
NOTE: When the crown is in position 2, do not press the pushers. Otherwise the chronograph hands will move.
Chronograph
- Press A to start/stop the chronograph.
- Press B to reset to zero.
Split Time
- Press B while the chronograph is running.
- Press B again to return to the chronograph.
- Press A to finalize timing.
- Press B to reset.
Chronograph Zero Reset
- If either of the chronograph hands is not at the zero (12:00) position, pull crown out to position 3.
- Press A to move hands clockwise; press B to move hands counterclockwise.
- Return crown to position 1.
CHRONOGRAPH STOPWATCH VD55 (with date-VD57)
(1 crown/2 pushers)

text_image
1/10 SECOND HAND MINUTE HAND SECOND HAND A 1 2 3 BTime Setting
- Pull crown out to position 3.
- Set time by turning the crown clockwise.a
- Push back to position 1 to start the watch.
Using the Stopwatch
- Press A to start/stop the stopwatch.
- Press B to control the split time and reset.
Stopwatch Hand Adjustment
- Pull crown out to position 3.
- Press A to reset the stopwatch 1/10 second hand to the "0" position.
-
Press B to reset the second and minute hands. The hands only move clockwise.
-
With each press of A or B, the hands move one position. They move quickly if the pushers are held down.
NOTE: If the stopwatch hands function improperly, pull out crown and press A and B at the same time for over 2 seconds. When the pushers are released, the stopwatch second and 1/10 second hands will spin around and return to "0." This will indicate that the internal circuit has been reset.
Date Setting (on some models only)
- Pull crown out to position 2.
- Turn clockwise until desired date appears in window.
- Push crown back to position 1.
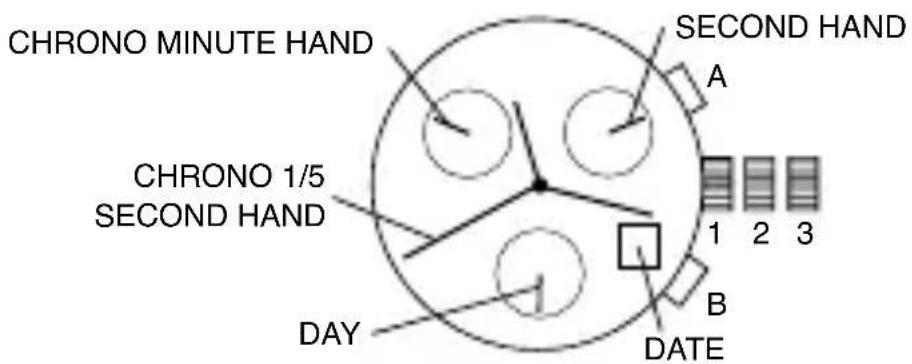
CHRONOGRAPH ISA 8172/220
(1 crown/2 pushers)
text_image
CHRONO MINUTE HAND SECOND HAND A 1 2 3 B DATE CHRONO 1/5 SECOND HAND DAYTime/Day Setting
- Pull crown out to position 3.
-
Rotate crown to set time.
-
To adjust day, continue rotating crown 24 hours until day is correct.
- Return crown to position 1.
Date Setting
- Pull crown out to position 2.
- Rotate crown clockwise until the correct date is shown in the date window.
- Return crown to position 1.
Chronograph Operation
- Press A to start/stop the chronograph.
- Press B to reset.
NOTE: After 2 hours of continuous running, the chronograph will automatically stop and reset to save the battery.
Split Time
- Press B while the chronograph is running.
- Press B again to return to the chronograph.
- Press A to finalize timing.
- Press B to reset.
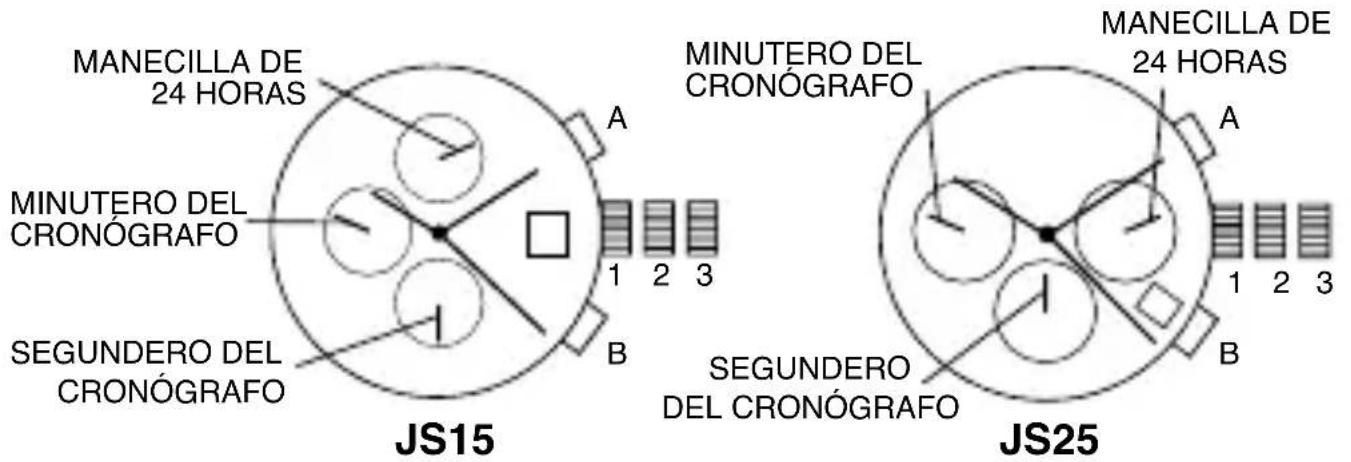
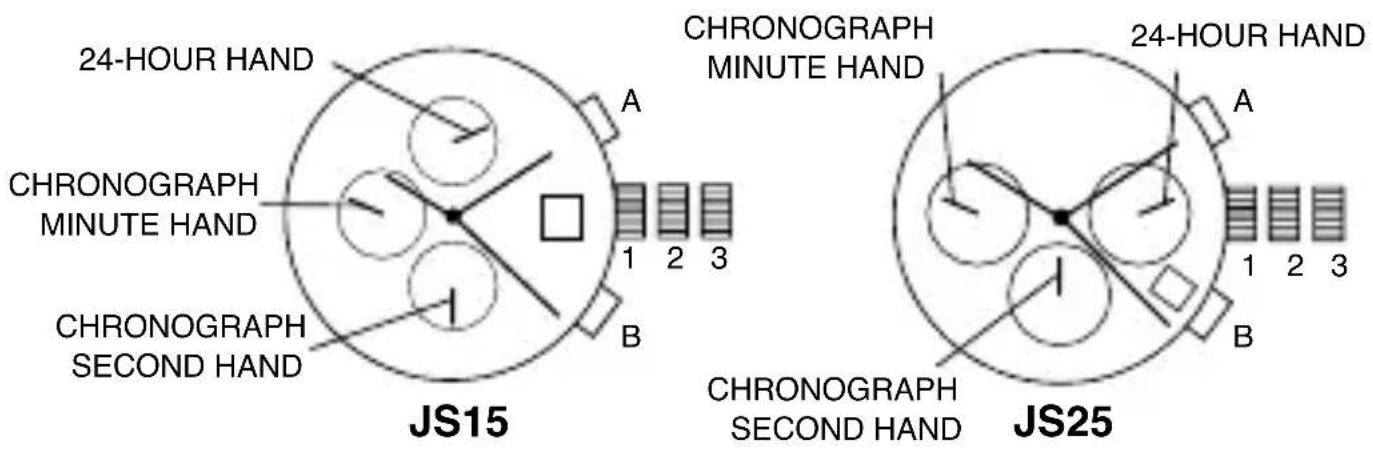
CHRONOGRAPH JS15, JS25
text_image
24-HOUR HAND CHRONOGRAPH MINUTE HAND CHRONOGRAPH SECOND HAND A 1 2 3 B JS15 CHRONOGRAPH MINUTE HAND 24-HOUR HAND A 1 2 3 B JS25 CHRONOGRAPH SECOND HANDTime and Date Setting
- Pull crown out to position 2.
- Rotate crown clockwise until the previous day's date is shown in the date window.
- Pull crown out to position 3.
- Rotate crown clockwise until the correct date is shown in the date window.
- Continue to rotate crown to set correct am/pm time.
NOTE: The movement of the 24-hour hand corresponds to the hour and minute hands. When setting the time be sure to check that the 24-hour hand is set properly.
- Return crown to position 1.
NOTE: When the crown is in position 2, do not press the pushers. Otherwise the chronograph hands will move.
NOTE: Do not set the date between 9:00 p.m. and 1:00 a.m. to ensure accuracy.
Chronograph
- Press A to start/stop the chronograph.
- Press B to reset to zero.
Chronograph Zero Reset
- If either of the chronograph hands is not at the zero (12:00) position, pull crown out to position 3.
- Press A to move hands clockwise; press B to move hands counterclockwise. Each press of A or B will move the chronograph hands by one increment/decrement. Or press and hold A or B for fast increment/decrement.
- When both hands are in the zero position, reset time and return crown to position 1.
NOTE: Chronograph minute hand will synchronize with chronograph second hand during chronograph zero reset.
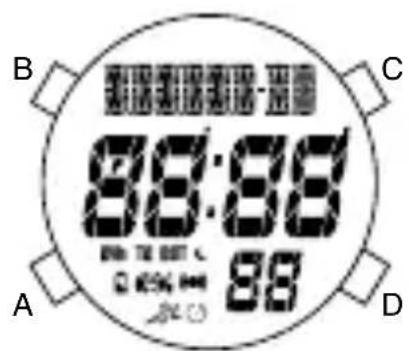
DIGITAL X1
text_image
B C 86:88 86 TO 100 C A 86 DNormal Time Display
- Press A to change mode. Mode sequence is alarm, countdown timer, and chronograph.
- Press and hold A 3 seconds to toggle auto EL on/off.
- Press B for EL.
- Press C to toggle hourly chime on/off.
- Press D to flash time zone 2. Press and hold D 3 seconds to toggle normal time display/time zone 2.
NOTE: In any mode, press and hold C 3 seconds to change to chronograph mode.
NOTE: At any point in any setting mode, press B to exit setting mode.
NOTE: In any setting mode, if no pusher is operated for 30 seconds, all changes will be saved and the setting will automatically return to display mode.
Time and Calendar Setting
-
In normal time display, press and hold B 3 seconds; hour will begin flashing.
-
Press C to increase digit; press D to decrease digit. Press and hold C or D for fast increment/decrement.
- Press A to set and advance to next setting value.
- Repeat steps 2 and 3 through setting sequence. Setting sequence is: hour, minute, second, year, month, date, 12/24-hour format, month/date or date/month format.
- Press B to exit setting mode.
- To set Time Zone 2, press and hold D 3 seconds to change to Time Zone 2. Then use steps 1-5 to set.
NOTE: Weekday is automatically updated upon exiting setting mode.
Recall Mode
-
Press A to change to recall mode. NOTE: If no data is stored, display will show NO DATA. If data is saved, display will show the current set (1-9).
-
Press C to toggle through set data: total time, best time, average time, and each lap (up to 100 laps).
- Press D to display current set; press D again to scroll to next set.
- Press and hold D 3 seconds to delete all stored data in the current set.
NOTE: At any point in recall displays, press A to exit and change to alarm mode.
Alarm Mode
- Press A to change to alarm mode.
- Press C to toggle alarm on/off.
- Press D to toggle alarm 1/alarm 2.
Alarm Setting
- In alarm mode, press and hold B 3 seconds; hour will begin flashing.
- Press C to increase digit; press D to decrease digit. Press and hold C or D for fast increment/decrement.
- Press A to set and advance to next setting value.
- Repeat steps 2 and 3 through setting sequence. Setting sequence is: hour, minute, time zone 1/time zone 2.
- Press B to exit setting mode.
NOTE: Alarm will sound for 20 seconds. Press any pusher to silence alarm.
Countdown Timer
- Press A to change to timer mode. Default setting is 5 minutes.
- Press C to start timer; press D to stop the timer.
- Press and hold D 3 seconds to clear the countdown and reset the timer.
NOTE: Alarm will sound for 20 seconds when countdown reaches zero. Press any pusher to silence alarm.
Timer Setting
- In timer mode, press and hold B 3 seconds to enter setting mode; hour will begin flashing.
- Press C to increase digit; press D to decrease digit. Press and hold C or D for fast increment/decrement.
- Press A to set and advance to next setting value.
- Repeat steps 2 and 3 through setting sequence. Setting sequence is: hour, minute, seconds.
- Press B to exit setting mode.
Chronograph Mode
- In any mode, press and hold C 3 seconds to change to chronograph mode.
- Press C to start the chronograph; press D to stop the chronograph.
- Press and hold D 3 seconds to reset to zero.
Lap Counting
- Press C while the chronograph is running for lap reading.
NOTE: If no other pusher is pressed after C is pressed, display will automatically show total chronograph time after 5 seconds, then next lap running time after another 5 seconds. - Press B to return to chronograph next lap (up to 100 laps).
- Press D to stop chronograph.
- Press and hold B 3 seconds to save set data, or press and hold D 3 seconds to reset to zero.
NOTE: Upon saving, display will show next empty set available (1-9) or MEMORY FULL. Change to Recall Mode to scroll through saved data.
AUTOMATIC WINDING MOVEMENTS
A timepiece with an automatic winding movement obtains the power to wind itself by the movement of your wrist, there is no battery. Therefore, not wearing the timepiece for several consecutive days could exhaust the power reserve. If your watch stops, it is recommended that you manually wind the movement by rotating the crown clockwise to achieve the necessary power reserve.
It is important that your timepiece is adjusted to match the size of your wrist. A loose fit may result in a loss in capacity of the timepiece to wind itself. When fully wound, your timepiece has a power reserve of approximately 38 hours.
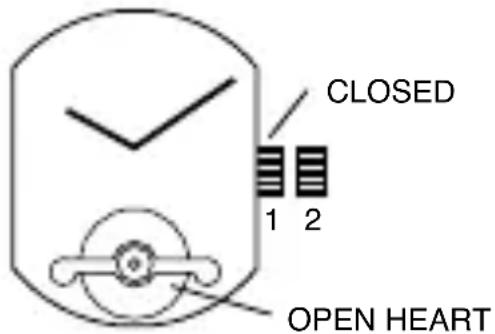
OPEN HEART TY605
(23 Jewels, 1 crown)
Time Setting
- Pull crown out to position 2.
- Turn crown clockwise to rotate hour and minute hands to desired time.
- Push crown back to position 1.
text_image
CLOSED 1 2 OPEN HEARTAUTOMATIC 2505
text_image
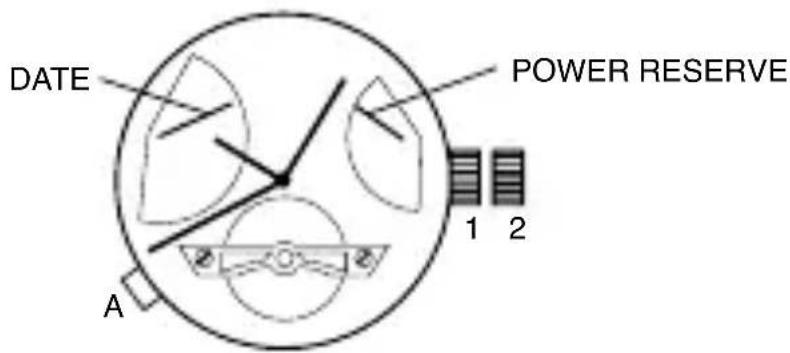
DATE POWER RESERVE 1 2 A- To start time-keeping, rotate the crown clockwise 15-20 times in position 1 until power reserve hand moves from “-” low reserve to “+” full reserve. Pull crown out to position 2 and rotate clockwise to set time. Push crown back to position 1.
- Press A to set date. Each press of pusher A will advance the date by one increment. Hand in upper left indicates date and will automatically reset to "1" at the end of a 31-day month.
NOTE: Do not set date and between 10 p.m. and 2 a.m. (22 o'clock and 2 o'clock). Doing so could damage the movement's accuracy.
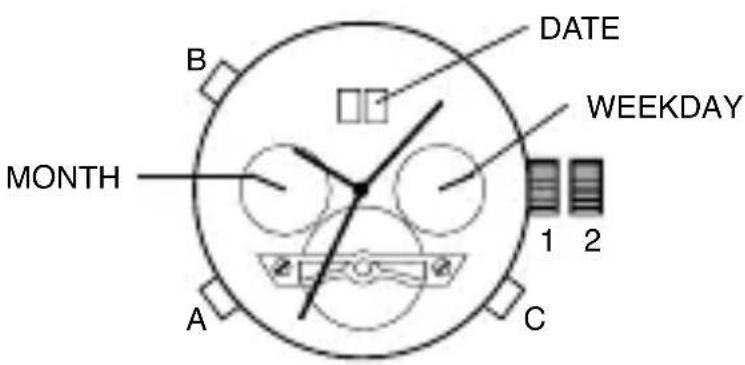
AUTOMATIC 2525
text_image
DATE WEEKDAY MONTH 1 2 A C- To start time-keeping, rotate the crown clockwise 15-20 times in position 1.
- Pull crown out to position 2 and rotate clockwise to set time. Push crown back to position 1.
- Press A to set month.
- Press B to set date.
- Press C to set weekday.
NOTE: Each press of the pushers will advance the values by one increment.
NOTE: Do not set date and week between 10 p.m. and 2 a.m. (22 o'clock and 2 o'clock). Doing so could damage the movement's accuracy.
USE PRECAUTIONS - RESISTANCE TO WATER
| Indication Water-related Use | ||||||
| Depth | Caseback Marking | Light spray perspiration, light rain, etc. | Bathing, etc. | Swimming, etc. | Skin diving (Diving without oxygen cylinder) | Water-resistant characteristics |
| - | - | NO NO NO NO | Non-water-resistant; must be kept away from water. | |||
| WATER-RESISTANT 30m (3 bar) | 3 ATM | OK NO NO NO | Normal daily water contact. | |||
| WATER-RESISTANT 50m (5 bar) | 5 ATM | OK OK NO NO | Suitable for bathing, but cannot be worn for swimming or diving. | |||
| WATER-RESISTANT 100m-200m (10bar-20bar) | 10 ATM-20 ATM | OK OK OK OK | Suitable for skin diving. | |||
| Always set the crown in the normal position. Tighten screw-lock crown completely. | ||||||
- Clean your watch with a soft cloth and water only. Do not submerge your watch under water unless it is water rated (see caseback).
• After salt water use, rinse watch under tap water and wipe dry with a soft cloth.
• Metal watch bands should be washed periodically to keep them looking beautiful. Clean with a soft brush dipped in mild, soapy water. Be sure to wipe dry thoroughly with a soft cloth.
Deutsch
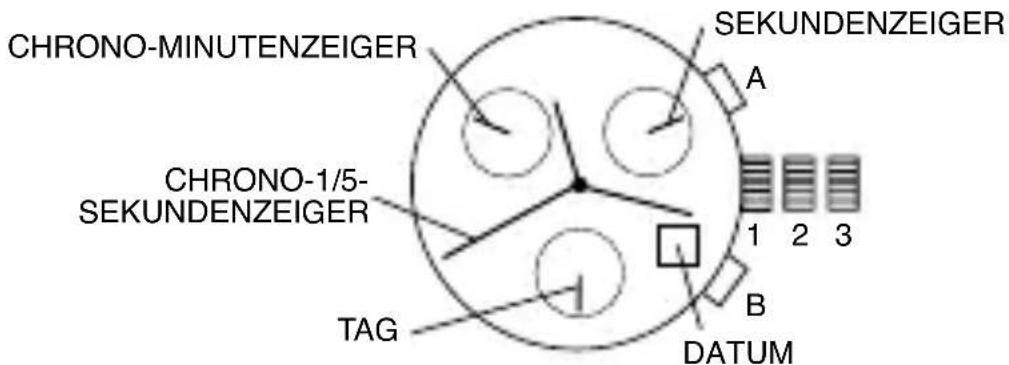
ISA CHRONOGRAPH 8172/220
(1 Krone, 2 Drücker)
text_image
CHRONO-MINUTENZEIGER CHRONO-1/5- SEKUNDENZEIGER TAG SEKUNDENZEIGER A 1 2 3 B DATUMCHRONOGRAPH JS15, JS25

text_image
24-STUNDEN-ZEIGER MINUTENZEIGER DES CHRONOGRAPHEN SEKUNDENZEIGER DES CHRONOGRAPHEN A 1 2 3 B JS15 MINUTENZEIGER DES CHRONOGRAPHEN 24-STUNDEN- ZEIGER A 1 2 3 B JS25 SEKUNDENZEIGER DES CHRONOGRAPHENMODÈLES AVEC INDICATION DE LA DATE
Réglage de la Date
CHRONOMÈTRE ISA 8172/220
text_image
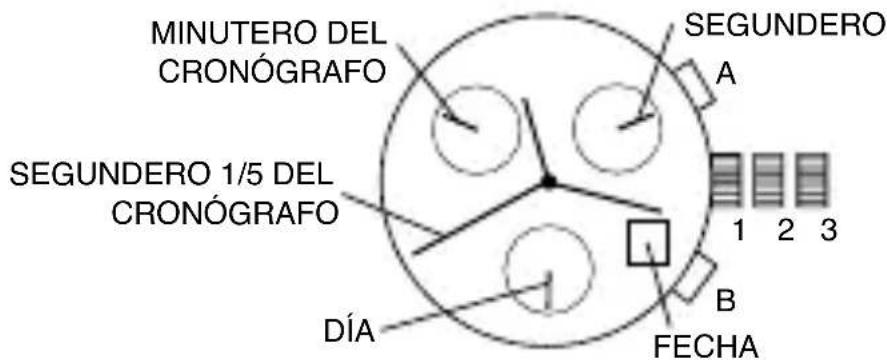
B C 86:88 86:88 A DCRONÓGRAF O ISA 8172/220
(1 corona/2 pulsadores)
text_image
MINUTERO DEL CRONÓGRAFO SEGUNDERO A SEGUNDERO 1/5 DEL CRONÓGRAFO DÍA 1 2 3 B FECHACRONÓGRAF O JS15, JS25