TTEQM10RD - Electric cooking appliance Taco Tuesday - Free user manual and instructions
Find the device manual for free TTEQM10RD Taco Tuesday in PDF.
| Product Type | Electric Quesadilla Maker |
| Brand | Taco Tuesday |
| Model | TTEQM10RD |
| Power Supply | 120 V AC |
| Rated Power | Approx. 1000 W |
| Cooking Surface | 10 inches (25.4 cm) pocket-shaped |
| Coating | Non-stick |
| Indicator Lights | Red light (power), green light (ready) |
| Preparation Types | Quesadillas, reheating |
| Capacity | Up to 2 10-inch tortillas |
| Cooking Time | 3 to 7 minutes |
| Safety | Polarized plug, short cord, no auto shut-off, cool handle |
| Cleaning | Wipe with a damp cloth, do not immerse, do not put in dishwasher |
| Maintenance | Periodically oil the non-stick surface |
| Included Accessories | Printed recipes |
| Warranty | 1 year (United States and Canada) |
| Country of Design | United States |
| Dimensions (approx.) | Approx. 30 x 25 x 10 cm (to be verified) |
| Weight (approx.) | Approx. 1.5 kg |
Frequently Asked Questions - TTEQM10RD Taco Tuesday
User questions about TTEQM10RD Taco Tuesday
0 question about this device. Answer the ones you know or ask your own.
Ask a new question about this device
Download the instructions for your Electric cooking appliance in PDF format for free! Find your manual TTEQM10RD - Taco Tuesday and take your electronic device back in hand. On this page are published all the documents necessary for the use of your device. TTEQM10RD by Taco Tuesday.
USER MANUAL TTEQM10RD Taco Tuesday
All products are trademarks of Nostalgia Products LLC.
Worldwide design & utility patented or patents pending.
© 2019 Nostalgia Products LLC.
www.nostalgiaproducts.com
(rev. 12/10/19 TK)
text_image
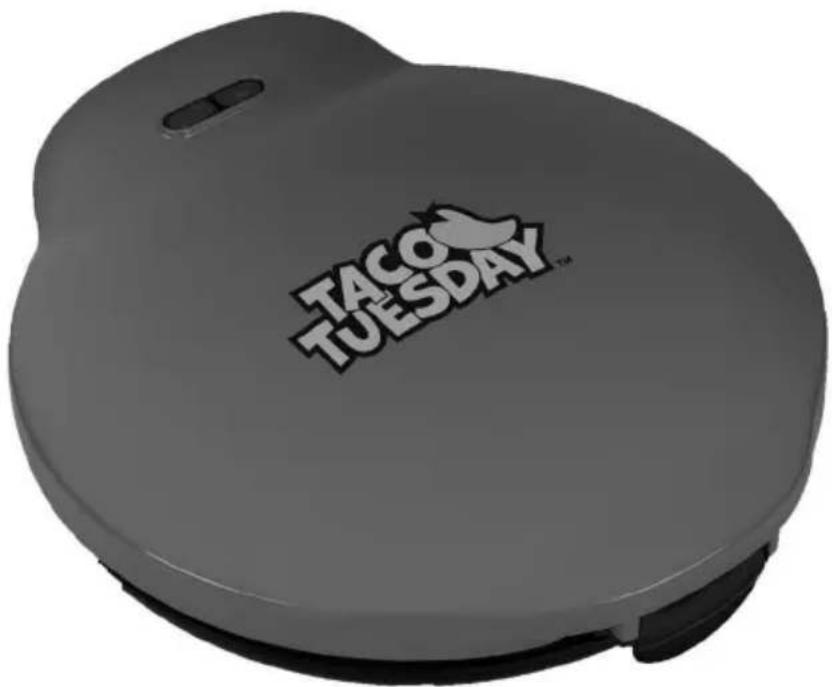
TACO TUESDAY™Deluxe 10-Inch Quesadilla Maker Máquina de Quesadilla de lujo de 10 Pulgadas Machine à Quesadilla de luxe de 10 Pouces
Instructions and Recipes Instrucciones y Recetas Instructions et recettes
Make every day a party!
Visit www.nostalgiaproducts.com for more fun products.
CONTENTS
SAFETY 2
IMPORTANT SAFEGUARDS 3
ADDITIONAL IMPORTANT SAFEGUARDS 3
INTRODUCTION 4
PARTS & ASSEMBLY 5
HOW TO OPERATE 5
HELPFUL TIPS 7
CLEANING & MAINTENANCE 8
RECIPES 9
RETURNS & WARRANTY 12
SAFETY
Your safety and the safety of others is very important.
We have provided many important safety messages in this manual and on your appliance. Always read and obey all safety messages.

This is the safety alert symbol.
This symbol alerts you to potential hazards that can cause serious injury to you and others.
All safety messages will follow the safety alert symbol.
All safety messages will tell you what the potential hazard is, tell you how to reduce the chance of injury, and tell you what can happen if the instructions are not followed.
Appliance Specifications:
120 Volts, 60 Hz, 900 Watts

THIS PRODUCT IS FOR USE IN 120V AC OUTLET ONLY.
Refer to www.nostalgiaproducts.com/user-manuals/ for the most updated manual.

IMPORTANT SAFEGUARDS
A person who has not read and understood all operating and safety instructions is not qualified to operate this appliance. All users of this appliance must read and understand this Instruction Manual before operating or cleaning this appliance.
When using electrical appliances, basic safety precautions should always be followed, including:
- Read all instructions before operating this appliance.
- DO NOT TOUCH the hot surfaces. Use handles or knobs.
- This appliance is NOT A TOY.
- Keep out of reach of children.
- Unsupervised young children and cognitively challenged individuals should never operate this appliance.
- Close supervision is necessary when any appliance is used by or near children.
- To protect against electrical shock do not immerse cord, plug or any part of this unit in water or other liquids.
- Do not operate this appliance when parts are missing or broken.
- Unplug from outlet when not in use, before removing parts and before cleaning. Allow to cool before putting on or taking off any parts, and before cleaning.
- DO NOT operate any appliance with a damaged cord or plug, or after the appliance malfunctions, or if the appliance has been damaged in any manner. Return the appliance to the nearest repair shop for examination, repair or adjustment.
- The manufacturer does not recommend the use of accessory attachments other than what is provided by the manufacturer. Use of attachments may cause injuries.
- DO NOT use the appliance for other than its intended use.
- DO NOT use outdoors. FOR HOUSEHOLD USE ONLY.
- DO NOT place on or near a hot gas or electric burner, or in a heated oven.
- DO NOT put any parts of this appliance in dishwasher.
- DO NOT let cord hang over edge of table or counter, or touch not surfaces.
- NEVER leave unit unattended while in use or when plugged into an outlet.
- To disconnect, turn any control to "off," then remove plug from wall outlet.

ADDITIONAL IMPORTANT SAFEGUARDS
Operating Safety Precautions
- Extreme caution must be used when opening and closing the Lid on this unit. Use an oven mitt or potholder when opening and closing the Lid for additional safety.
- The use of metal items, such as spatulas, is not recommended with this unit as they may damage the non-stick cooking surface.
- DO NOT store any objects in the appliance, such as cardboard, plastic, paper, etc.
- DO NOT cover any part of the appliance with metal foil.
Instructions for the Electrical Cord and Plug
- This appliance has a polarized plug (one blade is wider than the other). To reduce the risk of electrical shock, this plug is intended to fit into a polarized outlet only one way. If the plug does not fit fully into the outlet, reverse the plug. If it still does not fit, contact a qualified electrician. Do not attempt to modify the plug in any way.
- A short power supply cord is provided to reduce the risk resulting from becoming entangled or tripping over a long cord.
-
If a long detachable power-supply cord or extension cord is used:
-
Extension cords can be used if care is exercised in their use.
- The marked electrical rating of the cord or extension cord should be at least as great as the electrical rating of the appliance.
- When using a longer cord or extension cord, make sure that the cord does not drape over a countertop or tabletop where it can be pulled on or tripped over unintentionally.
The manufacturer does not recommend using this machine in countries that do not support 120V AC even if a voltage adapter, transformer, or converter is in use.
SAVE THESE INSTRUCTIONS!
INTRODUCTION
Thank you for purchasing the DELUXE 10-INCH QUESADILLA MAKER!
We are confident that you, your family and friends will enjoy the fun food experience of creating unique and delicious quesadillas with your DELUXE 10-INCH QUESADILLA MAKER.
- Use a variety of meats, cheeses and vegetables in your quesadillas
- Quesadillas bake crispy on the outside and hot & juicy on the inside, not soft and soggy like those made in the microwave
- Unique plate design has pockets that create sectional pieces to seal in the flavorful ingredients
- Red Power Light (on/off) and Green Ready Light
- Non-stick coating
- Stand on edge storage
- Recipes (included)
• Cook time is only 3-7 minutes - Easy to use, easy to clean
PARTS & ASSEMBLY
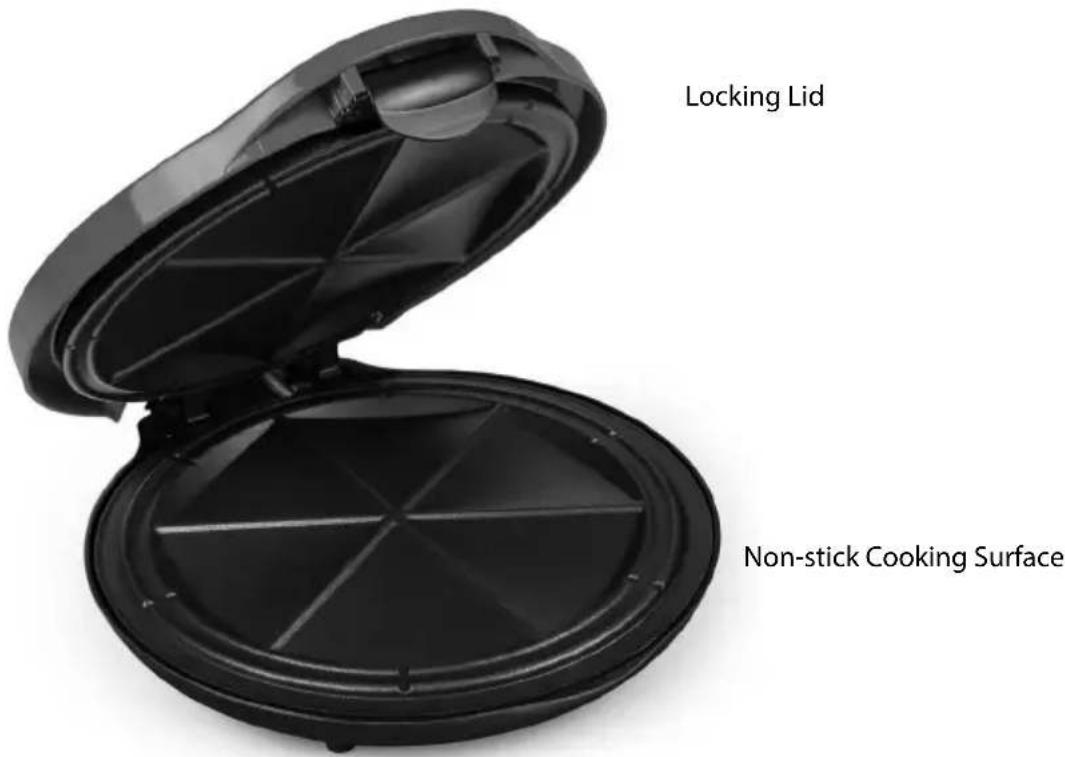
text_image
Locking Lid Non-stick Cooking SurfaceHOW TO OPERATE
- Before first use, wipe down all surfaces with a damp cloth and dry.
- The Cooking Surface should be lightly coated with a small amount of vegetable oil. This can be applied with a paper towel, or use a non-stick oil spray. The oil will help protect the Non-stick Cooking Surface. This should be done periodically to maintain the non-stick quality.
- Find a dry, suitable, level surface near an electrical outlet.
- Preheat the appliance by closing the Lid and plugging into an electrical outlet.
- When the power is on, the Red Power Light will come on. The Green Ready Light will stay off while the appliance is preheating.
- While the appliance is preheating, you may prepare the ingredients for your homemade quesadilla.
- When the appliance is hot and ready to cook your quesadilla, the Green Ready Light will come on.
-
REMINDER: NEVER leave the appliance unattended.
-
The appliance should preheat for a minimum of 3-7 minutes. During this time, you may notice slight smoking or a slight odor; this is normal with most new appliances. The smoking and odor is caused by the residues burning off the Cooking Surface and the Heating Element. Allow the appliance to preheat until smoke and odor no longer exists. The Green Ready Light will turn on when the appliance is ready to cook.
- Raise the quesadilla maker Lid, always using the front Handle to prevent accidental burns. For additional safety use an oven mitt or a pot holder to open the Lid.
- Place a tortilla, centered, on the lower Cooking Surface.
- Add desired ingredients evenly on top of the bottom tortilla. When all ingredients have been added, top with the second tortilla.
- Close the Lid using a pot holder or oven mitt.
- Lock the Lid after lowering.
- There are two locking positions for the Lid:

natural_image
Simple line drawing of a mechanical component or tool (no text or symbols)POSITION
1

natural_image
Pure mechanical diagram showing a lever and pivot (no text or symbols)POSITION
2
- Lock Lid in Position 1 for thinner quesadillas. Lock Lid in Position 2 for more thickly stuffed quesadillas.
- DO NOT force the Lid to lock.
- Steam may be released from appliance during cooking. For your safety, avoid contact with steam, as it is very hot and can cause burns.
- The cooking time will range between 3-7 minutes, depending on the type of fillings, the amount of fillings and personal taste. DO NOT overcook! This will cause the cheese and other food fillings used to melt excessively and run out of tortillas.
- Once the quesadilla has completed cooking, raise the Lid with a pot holder or oven mitt. Remove the quesadilla from the Cooking Surface with a flat plastic or wooden utensil. DO NOT use metal utensils, as they may scratch and damage the Non-stick Cooking Surface.
- If cooking more than one quesadilla in a session, after removal of the first quesadilla, lower the Lid to maintain heat until ready to cook the next quesadilla.
- After unplugging the appliance, make sure the Red Power Light is off to prevent any sparking from the outlet.
HELPFUL TIPS
NEVER leave the unit unattended while operating.
- Tortillas are recommended for use in your DELUXE 10-INCH QUESADILLA MAKER. Make sure they are fresh tortillas, not old nor stale.
- Make sure fillings are evenly distributed on the bottom tortilla to about 12 inch from the edge, so that the edges of the tortilla can seal together and ingredients stay inside of tortillas.
- Use soft ingredients: shredded cheeses, prepared salsa, and thinly cut or shredded cooked meat, chicken and vegetables. Never use anything with bones or pits included, nor anything uncooked such as raw meats, chicken, etc.
- Avoid processed cheeses as they liquefy quickly and will drain out of the quesadilla.
- Do not use more than 14 cup of shredded cheese or 12 cup of salsa, as they will leak out while cooking your quesadilla.
- The average time for cooking a quesadilla, if not overfilled, is 3-7 minutes.
- Crisping of the tortilla occurs while cooking. Therefore, less time cooked = less crisping.
- Longer cooking will create a crispier quesadilla. DO NOT overcook quesadilla.
- NEVER force the Lid to lock, this could result in damage to the hinge of the Lid.
- Should melting occur that causes leakage of the tortillas, gently wipe up melted cheese, etc. from the Non-stick Cooking Surface before cooking the next quesadilla. This will prevent burning or scorching of previously melted cheeses, etc.
- You can reheat previously cooked quesadillas by placing the quesadilla on the preheated unit, lining up the grill marks on the quesadilla with the Plate Pockets, lowering the Lid, and reheating for 1-3 minutes.
- Always allow the appliance to cool before wiping out the interior for cleaning.
- Your quesadilla has been over-filled if it looks like this:
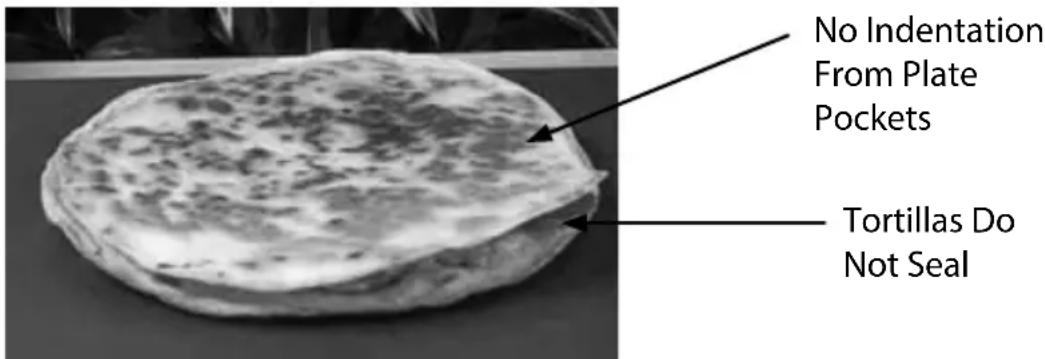
text_image
No Indentation From Plate Pockets Tortillas Do Not Seal- To prevent over-filling, make sure that you do not fill tortilla on lower plate past the inner rim:

text_image
Inner Rim Do Not Fill to This Point- Also, make sure that Lid is locked in correct position (see How To Operate) to ensure that tortillas seal properly.
CLEANING & MAINTENANCE
Please take care of your DELUXE 10-INCH QUESADILLA MAKER by following these simple instructions and precautions. Cleaning is a snap.
- Disconnect from the electrical outlet by unplugging the appliance.
- Wipe the Non-stick Cooking Surface with a damp, non-abrasive cloth or paper towel and dry.
- Wipe the exterior with a damp, non-abrasive cloth and dry.
It is that simple. Remember to periodically coat the Cooking Surface with vegetable oil to preserve the non-stick finish. This also helps the crisping process.
RECIPES
With the DELUXE 10-INCH QUESADILLA MAKER, you can use your imagination and choose your favorite ingredients to create your very own homemade quesadilla.
You can even create two different types of quesadillas at the same time by adding your favorite ingredients to one half of a tortilla and folding it. Then add ingredients to one half of a second tortilla and fold it. Place the two halved tortillas on the Cooking Surface, filling out the space of one whole tortilla. Close the Lid and cook for 3 - 5 minutes. When done, separate the two halves and serve. Be creative and ENJOY your DELUXE 10-INCH QUESADILLA MAKER!
BASIC CHEESE QUESADILLA
- 2 Flour Tortillas
- 14 Cup finely shredded Cheese (Cheddar, Monterey Jack or your preference)
- 12 Cup prepared Salsa (Note: you may want to drain off some of liquid if runny)
• Guacamole or small chunks of Avocado (optional)
Preheat the DELUXE 10-INCH QUESADILLA MAKER as directed.
Place 1 tortilla on the lower Cooking Surface.
Evenly distribute your choice of cheese(s) on tortilla (up to a 12 inch from the edge of the tortilla). Top with salsa, spreading evenly over cheese.
Add guacamole or avocado, if desired, by spreading evenly over cheese and salsa.
Top with the second tortilla.
Close the Lid and cook for 3-7 minutes, depending on desired crispness and thickness of fillings.
Open Lid with a pot holder or oven mitt.
Remove with wooden or plastic utensil. Place on plate and serve with additional salsa, if desired, and top with sour cream.
BREAKFAST QUESADILLA
- 2 Tortillas
• ¼ Cup scrambled Eggs - 14 Cup precooked and chopped Breakfast Sausage
- 14 Cup Salsa
- 14 Cup finely shredded Cheddar Cheese
Preheat the DELUXE 10-INCH QUESADILLA MAKER as directed.
Place one tortilla on the lower Cooking Surface.
Spread scrambled eggs evenly to within 12 inch of the edge of the tortilla. Evenly distribute sausage bits. Spread salsa evenly, and top by sprinkling the Cheddar cheese evenly over all.
Place the other tortilla on top and close the Lid. Cook as directed for 3-7 minutes. Open Lid with pot holder or oven mitt; serve with salsa or picante sauce.
BASIC QUESADILLA PLUS
- 2 Flour Tortillas
- 14 Cup finely shredded Cheese (Cheddar, Monterey Jack or your preference)
- 14 Cup cooked Chicken, Beef or your favorite Meat torn into thin shreds or pieces.
- 14 Cup prepared Salsa
• Guacamole or small chunks of Avocado (optional)
Preheat the DELUXE 10-INCH QUESADILLA MAKER as directed.
Place 1 tortilla on the lower Cooking Surface. Evenly distribute your choice of cheese(s) on the tortilla (up to a 12 inch from the edge of the tortilla).
Top with an evenly distributed amount of meat or chicken.
Evenly distribute guacamole or avocado, if desired, over cheese and salsa.
Top with second tortilla.
Close the Lid and cook for 3-7 minutes, depending on desired crispness and thickness of fillings.
Open Lid with a pot holder or oven mitt.
Remove with wooden or plastic utensil. Place on plate and serve with additional prepared salsa, and sour cream.
VEGGIE QUESADILLA
• 2 Tortillas
- 14 to 12 Cup precooked or thawed frozen Bell Pepper, Onions or any combination of your favorite Vegetable
• ½ Tsp. Mexican or Fajita seasonings
- 14 Cup shredded Cheddar Cheese and/or prepared Salsa
Preheat the DELUXE 10-INCH QUESADILLA MAKER as directed.
Combine the vegetables and the seasonings in a bowl.
Place one tortilla on the lower Cooking Surface.
Evenly spread the combined vegetables and seasoning, up to a 12 inch from the edge of the tortilla.
Close the Lid and cook for 3-7 minutes depending on desired crispness and thickness of fillings.
Cut into triangles; serve with sour cream and salsa.
PB & J QUESADILLA
• 2 Tortillas
• 2 Tbsp. Peanut Butter
• 1-2 Tbsp. Jam or Fruit Preserves
Preheat the DELUXE 10-INCH
QUESADILLA MAKER as directed.
Evenly spread a thick layer of peanut butter onto one tortilla and an even layer of your choice of either jam or fruit preserves onto the other tortilla.
Carefully place first tortilla on the lower cooking surface, peanut butter side up.
Place the other tortilla on top, jam side down.
Close the cover and cook for 3-7 minutes depending on the thickness, and preference of crispness desired. Cut into triangles; serve with a drizzle of honey for extra sweetness.
Feel free to add slices of fruit, such as bananas.
DELICIOUS DESSERT QUESADILLA
- 2 Tortillas
• 2 Tbsp. Hazelnut Spread - 14 Cup Bananas, thinly sliced
- 12 Cup Strawberries
• 1 Tsp. Powdered Sugar
Preheat the DELUXE 10-INCH
QUESADILLA MAKER as directed.
Spread a thick layer of hazelnut spread onto one tortilla.
Carefully place tortilla with hazelnut spread onto the lower Cooking Surface, hazelnut spread side up.
Spread banana slices evenly to within 12 inch of the edge of the tortilla.
Place the other tortilla on top and close the Lid. Close the Lid and cook for 3-7 minutes. Open Lid with pot holder or oven mitt.
Garnish with strawberries and sprinkle lightly with powdered sugar.
RETURNS & WARRANTY
SHOULD YOUR UNIT NOT WORK OR IF DAMAGED WHEN YOU FIRST TAKE IT OUT OF THE BOX, PLEASE RETURN IT TO THE PLACE OF PURCHASE IMMEDIATELY.
DELUXE 10-INCH QUESADILLA MAKER / TTEQM10RD
Should you have any questions, please contact us via email or at the customer service number listed below between the hours of 8:00 AM and 5:00 PM, Monday through Friday, Central Standard Time.
Distributed by:
Nostalgia Products LLC
1471 Partnership Dr.
Green Bay, WI 54304-5685
Customer Service
Phone: (920) 347-9122
Web: www.nostalgiaproducts.com
Customer Service Inquiry
To submit a Customer Service inquiry, go to www.nostalgiaproducts.com and fill out the Customer Service Inquiry form and click the Submit button.
A representative will contact you as soon as possible.
Product Warranty Terms
Nostalgia Products LLC (the "Company") hereby warrants that for a period of one (1) year from the date of original purchase, this product will be free of defects in material and workmanship under normal home use, provided that the product is operated and maintained in accordance with the operating instructions. As the sole and exclusive remedy under this warranty, the Company will at its discretion either repair or replace the product found to be defective, or issue a refund on the product during the warranty period. This warranty is only available to the original retail purchaser of the product from the date of initial retail purchase, and is only valid with the original sales receipt, as proof of purchase date is required to obtain warranty benefits. All warranty claims must be brought to the attention of the Company within the warranty period and no later than 30 days of the failure to perform. This warranty does not cover normal wear or damage caused by shipping, mishandling, misuse, accident, alteration, improper replacement parts, or other than ordinary household use. You may be required to return the product (with shipping prepaid by you) for inspection and evaluation. Return shipping costs are not refundable. The Company is not responsible for returns damaged or lost in transit. Unless otherwise specifically permitted by the operating instructions, this warranty applies to indoor household use only. In order to obtain service under this warranty, please contact the Company at the telephone number listed above or by filling out the Customer Service Inquiry Form located at www.nostalgiaproducts.com. Warranty valid only in USA and Canada.
This warranty is in lieu of all other warranties, expressed or implied, including warranties of merchantability and fitness for a particular purpose, which are hereby excluded to the extent permitted by law. In no event shall the Company be liable for any indirect, incidental, consequential, or special damages arising out of or in connection with this product or the use thereof. Some states, provinces or jurisdictions do not permit the exclusion or limitation of incidental or consequential damages, so the foregoing exclusion or limitation may not apply to you.
This warranty does not apply to re-manufactured merchandise.
Please read the operating instructions carefully. Failure to comply with the operating instructions will void this warranty.
For more information, visit us online at www.nostalgiaproducts.com.
Like us on Facebook at www.facebook.com/NostalgiaElectrics.
Follow our boards on Pinterest at www.pinterest.com/nostalgiaelctrx.
Tweet along with us on Twitter at www.twitter.com/NostalgiaElctrx.
natural_image
Pure mechanical diagram showing a curved component with a handle and base, without any text or symbols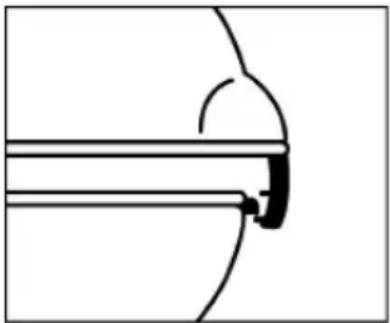
natural_image
Pure mechanical diagram showing a lever and pivot (no text or symbols)Nostalgia Products LLC
1471 Partnership Dr.
Green Bay, WI 54304-5685
Servicio al cliente
120 Volts, 60 Hz, 900 Watts

CE PRODUIT EST POUR UTILISATION DANS UNE PRISE DE 120V AC UNIQUEMENT.
CONSERVEZ CES INSTRUCTIONS! INTRODUCTION
natural_image
Open black plastic coffee maker with a triangular lid and side grating (no text or symbols visible)Couvercle de
Verrouillage
Surface de Cuisson
Anti-Adhésive
COMMENT FAIRE FONCTIONNER
natural_image
Pure mechanical diagram showing a curved component with a handle and base, without any text or symbols
natural_image
Pure mechanical diagram showing a lever and pivot (no text or symbols)Nostalgia Products LLC
1471 Partnership Dr.
Green Bay, WI 54304-5685