
DCR-PC101E - Camcorder SONY - Free user manual and instructions
Find the device manual for free DCR-PC101E SONY in PDF.


| Product type | Mini DV Digital Camcorder |
| Brand | Sony |
| Model | DCR-PC101E |
| Recording format | DV (SP/LP) |
| Sensor | 1/6-type CCD, approx. 800,000 pixels (total), 340,000 effective pixels (video and photo) |
| Lens | Carl Zeiss, F=1.7-2.2, focal length 3.3-33 mm (10x optical zoom), filter diameter 25 mm |
| Digital zoom | 20x or 120x (adjustable in menu) |
| Viewfinder | 0.44 cm (0.18-type) black-and-white electronic, 113,000 pixels |
| LCD screen | 5.6 cm (2.2-type) color, 123,200 pixels, touchscreen |
| Microphone | Stereo, built-in electret condenser |
| Storage media | Mini DV cassette (tape) and Memory Stick (memory card) |
| Power supply | InfoLITHIUM M battery (supplied NP-FM50, 7.2 V, 8.5 Wh) or AC adapter AC-L10A/L10B/L10C (100-240 V, 50/60 Hz) |
| Battery life (NP-FM50 battery) | Recording with viewfinder: 155 min (continuous), 90 min (typical); with LCD: 125 min (continuous), 70 min (typical) |
| Dimensions (W x H x D) | Approx. 121 x 87 x 147 mm |
| Weight | Approx. 540 g (without battery or cassette), 580 g with NP-FM50 battery and DVM60 cassette |
| Main functions | NightShot, Super NightShot, Colour Slow Shutter, backlight, manual exposure, white balance, picture effects, digital effects, fade, Memory Mix, titling, interval recording, frame-by-frame recording, photo on tape, photo on Memory Stick, MPEG, digital program editing, i.LINK (DV), USB streaming |
| Maintenance and cleaning | Clean the LCD screen with the supplied cloth. Use a cleaning cassette for the video heads. Avoid humidity and high temperatures. |
| Supplied accessories | AC adapter, NP-FM50 battery, A/V cable, wireless remote control, batteries for remote, lens cap, 8 MB Memory Stick, USB cable, CD-ROM, cleaning cloth, 21-pin adapter (European models) |
| Repairability | Spare parts available from Sony. Have any repairs carried out by qualified personnel. |
Frequently Asked Questions - DCR-PC101E SONY
User questions about DCR-PC101E SONY
0 question about this device. Answer the ones you know or ask your own.
Ask a new question about this device
Download the instructions for your Camcorder in PDF format for free! Find your manual DCR-PC101E - SONY and take your electronic device back in hand. On this page are published all the documents necessary for the use of your device. DCR-PC101E by SONY.
USER MANUAL DCR-PC101E SONY
Digital Video Camera Recorder Mini D ^V Digital Video Cassette
Operating Instructions
Before operating the unit, please read this manual thoroughly, and retain it for future reference.
natural_image
Illustration of a video camera with lens and control panel (no text or symbols)Digital Handycam


DCR-PC101E
English
Welcome!
Congratulations on your purchase of this Sony Handycam. With your Handycam you can capture life's precious moments with superior picture and sound quality.
Your Handycam is loaded with advanced features, but at the same time it is very easy to use. You will soon be producing home video that you can enjoy for years to come.
WARNING
To prevent fire or shock hazard, do not expose the unit to rain or moisture.
To avoid electrical shock, do not open the cabinet. Refer servicing to qualified personnel only.
Memory Stick

N50
NOTICE ON THE SUPPLIED AC POWER ADAPTOR FOR THE CUSTOMERS IN THE UNITED KINGDOM
A moulded plug complying with BS1363 is fitted to this equipment for your safety and convenience.
Should the fuse in the plug supplied need to be replaced, a 5 AMP fuse approved by ASTA or BSI to BS1362 (i.e., marked with ⏻ or ⏰ mark) must be used.
If the plug supplied with this equipment has a detachable fuse cover, be sure to attach the fuse cover after you change the fuse. Never use the plug without the fuse cover. If you should lose the fuse cover, please contact your nearest Sony service station.
For the customers in Europe ATTENTION
The electromagnetic fields at the specific frequencies may influence the picture and sound of this camcorder.
This product has been tested and found compliant with the limits set out in the EMC Directive for using connection cables shorter than 3 meters. (9.8 feet)
Notice
If static electricity or electromagnetism causes data transfer to discontinue midway (fail), restart the application or disconnect and connect the USB cable again.
For the customers in Germany
Directive: EMC Directive 89/336/EEC. 92/31/EEC
This equipment complies with the EMC regulations when used under the following circumstances:
- Residential area
- Business district
• Light-industry district
(This equipment complies with the EMC standard regulations EN55022 Class B.)
Русский
Добро пожаловать!
Checking supplied accessories
Make sure that the following accessories are supplied with your camcorder.
① AC-L10A/L10B/L10C AC power adaptor (1), Mains lead (1) (p. 23)
2 NP-FM50 battery pack (1) (p. 22, 23)
3 A/V connecting cable (1) (p. 59)
4 Wireless Remote Commander (1) (p. 310)
5 R6 (size AA) battery for Remote Commander (2) (p. 311)
6 Lens cap (1) (p. 34)
7 "Memory Stick" (1) (p. 148)
8 USB cable (1) (p. 215)
9 CD-ROM (SPVD-008 USB Driver) (1)
(p. 222)
10 Battery terminal cover (1) (p. 22)
11 Cleaning cloth (1) (p. 293)
12 21-pin adaptor (1) (p. 60)
European models only
Contents of the recording cannot be compensated if recording or playback is not made due to a malfunction of the camcorder, storage media, etc.
- Viewing moving pictures recorded on tapes using USB cable (p. 230)
- Viewing images recorded on "Memory Stick" s using the USB cable (p. 235, 241)
- Capturing images on your computer from your camcorder using the USB cable (p. 232)
-
Converting an analog signal into digital to capture images onto your computer (p. 243)
-
Recording moving pictures on tapes (p. 34)
• Recording still images on tapes (p. 65) - Playing back tapes (p. 52)
- Recording still images on “Memory Stick”s (p. 61, 161)
- Recording moving pictures on "Memory Stick" s (p. 180)
- Viewing still images recorded on "Memory Stick" s (p. 194)
- Viewing moving pictures on "Memory Stick" s (p. 199)
Other uses
Functions to adjust exposure in recording
- BACK LIGHT (p. 44)
• NightShot/Super NightShot/Colour Slow Shutter (p. 45)
•PROGRAM AE (p. 79) - White balance (p. 67)
- Adjusting the exposure manually (p. 82)
- Flexible Spot Meter (p. 83)
Functions to give images more impact
• Digital zoom [MENU] (p. 40)
The default setting is set to OFF. (To zoom greater than 10×, select the digital zoom power in D ZOOM in the menu settings.)
• Fader (p. 71)
• Picture effect (p. 74)
• Digital effect (p. 76)
- Titles (p. 139)
• MEMORY MIX (p. 172)
Functions to give a natural appearance to your recordings
• Sports lesson (p. 79)
• Landscape (p. 79)
- Manual focus (p. 85)
- Spot Focus (p. 87)
Functions to use after recording
• END SEARCH/EDITSEARCH/Rec Review (p. 50)
• DATA CODE (p. 54)
• Tape PB ZOOM (p. 99)
• ZERO SET MEMORY (p. 101)
• TITLE SEARCH (p. 102)
• Digital program editing (p. 113, 187)
natural_image
Illustration of a person using a camera to interact with a digital camera (no text or symbols present)natural_image
Illustration of a person working at a desk with computer and documents, no visible text or symbolsПрочие применения
- Recording on a tape 12
- Recording on a "Memory Stick" .... 14
Getting started
Using this manual 20
Step 1 Preparing the power supply ...... 22
Installing the battery pack 22
Charging the battery pack 23
Connecting to a wall socket 27
Step 2 Setting the date and time ...... 29
Step 3 Inserting a cassette .... 31
Step 4 Using the touch panel .... 32
Recording - Basics
Recording a picture 34
Shooting a backlit subject - BACK LIGHT 44
Shooting in the dark - NightShot/Super NightShot/ Colour Slow Shutter 45
Self-timer recording 48
Checking the recording - END SEARCH/ EDITSEARCH/ Rec Review .... 50
Playback - Basics
Playing back a tape 52
To display the screen indicators - Display function .... 54
Viewing the recording on TV 59
Advanced Recording Operations
Recording still images on a “Memory Stick” during recording on a tape 61
Recording a still image on a tape
- Tape Photo recording .... 65
Adjusting the white balance manually ..... 67
Using the wide mode 69
Using the fader function 71
Using special effects - Picture effect ...... 74
Using special effects - Digital effect ...... 76
Using the PROGRAM AE 79
Adjusting the exposure manually .... 82
Using the spot light-metering function
- Flexible Spot Meter 83
Focusing manually 85
Using the spot focus function
- Spot Focus .... 87
Interval recording 88
Frame by frame recording
- Frame recording .... 91
Using the viewfinder 93
Advanced Playback Operations
Playing back a tape with picture effect ..... 95
Playing back a tape with digital effect ..... 97
Enlarging images recorded on tapes
- Tape PB ZOOM 99
Quickly locating a scene
- ZERO SET MEMORY .... 101
Searching the boundaries of recorded tape by title – TITLE SEARCH ...... 102
Searching a recording by date
- DATE SEARCH .... 104
Searching for a photo
- PHOTO SEARCH/PHOTO SCAN .... 106
Editing
Dubbing a tape 109
Dubbing only desired scenes
- Digital program editing (on tapes) ... 113
Recording video or TV programmes ..... 128
Inserting a scene from a VCR
- Insert editing .... 132
Audio dubbing.... 134
Superimposing a title 139
Making your own titles 143
Labelling a cassette 145
"Memory Stick" Operations
Using a "Memory Stick"- Introduction ... 148
Recording still images on “Memory Stick”s – Memory photo recording .... 161
Recording an image from a tape as a still image 168
Superimposing a still image in the "Memory Stick" on an image - MEMORY MIX.... 172
Recording moving pictures on “Memory Stick”s – MPEG movie recording...... 180
Recording a picture from a tape as a moving picture.... 183
Recording edited pictures from a tape as a moving picture – Digital program editing (on “Memory Stick”s) ...... 187
Copying still images from a tape
- PHOTO SAVE 192
Viewing a still image
- Memory photo playback .... 194
Viewing a moving picture
- MPEG movie playback 199
Enlarging still images recorded on
"Memory Stick"s
- Memory PB ZOOM 203
Playing back images in a continuous loop
- SLIDE SHOW 205
Preventing accidental erasure
- Image protection 207
Deleting images - DELETE 208
Writing a print mark - PRINT MARK ..... 211
Using the optional printer 213
Viewing images with your computer
Viewing images with your computer
- Introduction ...... 215
Connecting to your computer with USB port
- For Windows users 219
Viewing images recorded on a tape on your
computer – For Windows users ...... 230
Viewing images recorded on a
"Memory Stick" on your computer
- For Windows users 235
Connecting to your computer with USB
port - For Macintosh users 238
Viewing images recorded on a "Memory
Stick" on your computer
- For Macintosh users 241
Capturing images from an analog video
unit on your computer
- Signal convert function 243
Customising Your Camcorder
Changing the menu settings 245
Troubleshooting
Types of trouble and how to correct
trouble 262
Self-diagnosis display 269
Warning indicators and messages ...... 270
Additional Information
Usable cassettes.... 282
About the "InfoLITHIUM"
battery pack 285
About i.LINK 288
Using your camcorder abroad 290
Maintenance information
and precautions 291
Specifications 301
Quick Reference
Identifying the parts and controls...... 305
Index 314
Colour Slow Shutter 45
Quick Start Guide - Recording on a tape
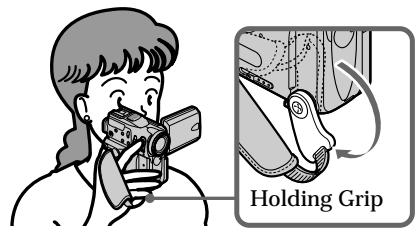
This chapter introduces you to the basic features to record pictures on tapes of your camcorder. See the page in parentheses “( )” for more information.
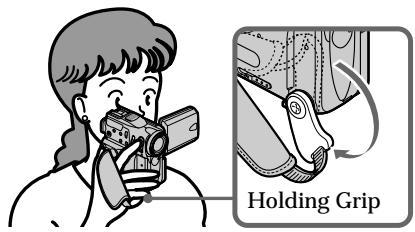
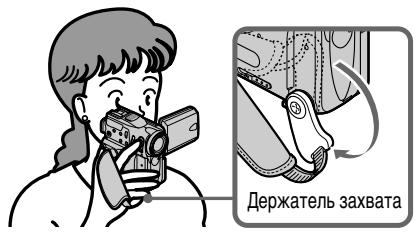
Pull down the Holding Grip to hold your camcorder as illustrated.
1 Connecting the mains lead (p. 27)
Use the battery pack when using your camcorder outdoors (p. 22).
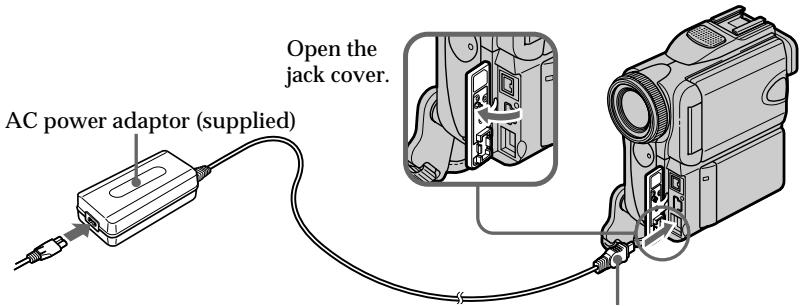
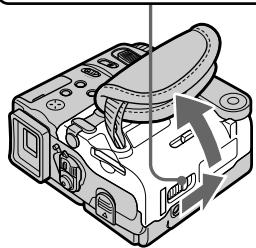
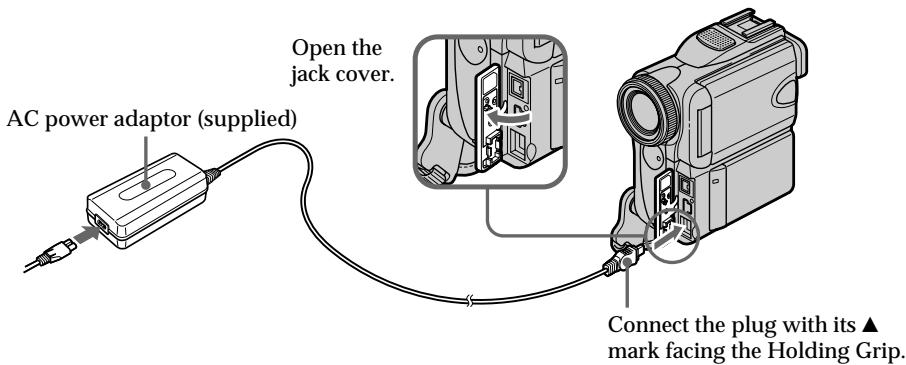
Connect the plug with its ▲ mark facing the Holding Grip.
2 Inserting a cassette (p. 31)
① Slide OPEN/ ▲EJECT in the direction of the arrow and open the lid.

2 Push the middle portion of the back of the cassette to insert. Insert the cassette in a straight line deeply into the cassette compartment with the window facing out.
3 Close the cassette compartment by pressing the PUSH mark on the cassette compartment. After the cassette compartment goes down completely, close the lid until it clicks.
natural_image
Diagram of a digital camera module with directional arrows indicating motion or rotation (no text or symbols present)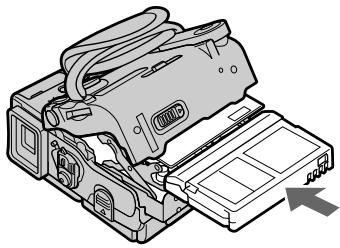
natural_image
Technical line drawing of a device with internal components and an arrow indicating direction (no text or symbols)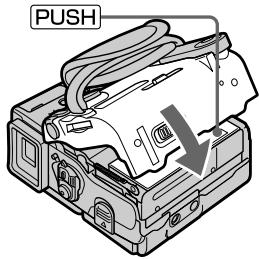
3
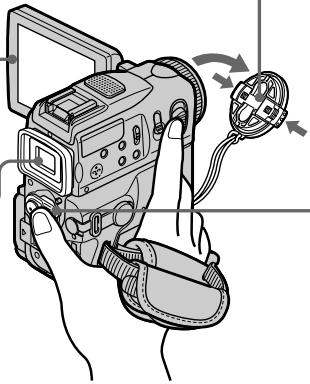
Recording a picture (p. 34)
1 Remove the lens cap.
3 Press OPEN to open the LCD panel. The picture appears on the screen.
Viewfinder
When the LCD panel is closed, pull out the viewfinder until it clicks. Adjust the viewfinder lens to your eyesight (p. 39).
natural_image
Illustration of a hand holding a digital camera with attached cable and sensor (no text or symbols)When you purchase your camcorder, the clock setting is set to off. If you want to record the date and time on a picture, set the clock setting before recording (p. 29).
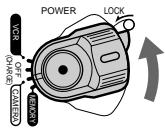
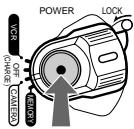
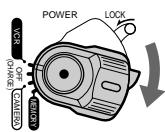
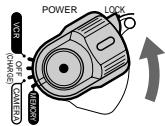
2 Set the POWER switch to CAMERA while pressing the small green button.
4 Press START/STOP. Your camcorder starts recording. To stop recording, press START/STOP again.
4
Monitoring the playback picture on the LCD screen (p. 52)
1 Set the POWER switch to VCR while pressing the small green button.
natural_image
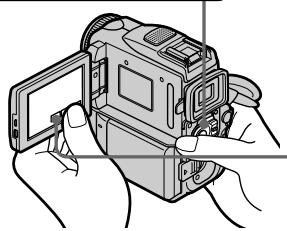
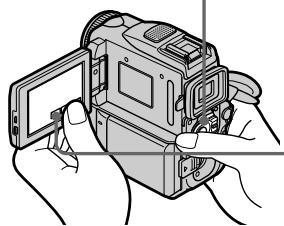
Illustration of hands holding a digital camera module (no text or symbols visible)2 Press ◀◀◀ of the touch panel to rewind the tape.

3 Press ▶ II of the touch panel to start playback.

NOTE
When using the touch panel, press operation buttons lightly with your thumb supporting the LCD screen from the rear of it. Do not press the LCD screen with sharp-pointed objects such as a pen.
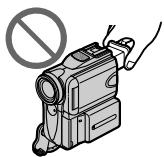
NOTE
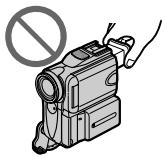
Do not pick up your camcorder by the viewfinder, the LCD panel, the battery pack or the jack cover.
natural_image
Illustration of a video camera with a hand holding a device and a prohibition symbol (no text or labels)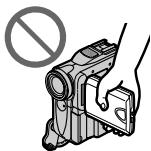
natural_image
Illustration of a hand holding a handheld device with a prohibition symbol (no text or labels present)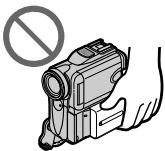
natural_image
Illustration of a hand holding a handheld device with a prohibition symbol above (no text or labels)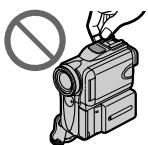
natural_image
Illustration of a handheld device with a prohibition symbol (no text or labels)Quick Start Guide – Recording on a "Memory Stick"
This chapter introduces you to the basic features to record on a “Memory Stick” of your camcorder. See the page in parentheses “( )” for more information.
Pull down the Holding Grip to hold your camcorder as illustrated.
1 Connecting the mains lead (p. 27)
Use the battery pack when using your camcorder outdoors (p. 22).
2 Inserting a "Memory Stick" (p. 151)
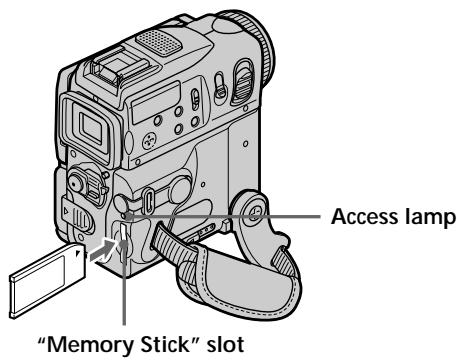
Insert a “Memory Stick” in the “Memory Stick” slot as far as it can go with the ▶ mark facing up as illustrated.
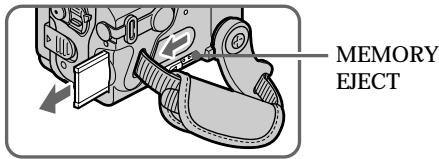
When you eject the “Memory Stick,” slide MEMORY EJECT in the direction of the arrow.
3
Recording a still image on a "Memory Stick" (p. 161)
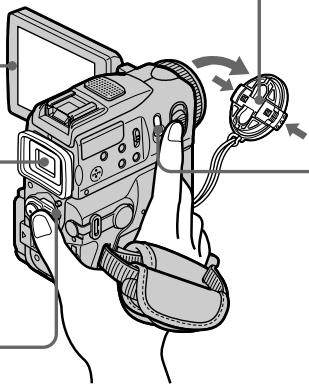
1 Remove the lens cap.
3 Press OPEN to open the LCD panel. The picture appears on the screen.
Viewfinder
When the LCD panel is closed, pull out the viewfinder until it clicks. Adjust the viewfinder lens to your eyesight (p. 39).
2 Set the POWER switch to MEMORY while pressing the small green button. Make sure that the LOCK switch is set to the right (unlock) position.
natural_image
Illustration of a digital camera with attached cable and sensor, showing hand positioning and control buttons (no text or symbols)4 Press PHOTO lightly.

5 Press PHOTO deeper.

When you purchase your camcorder, the clock setting is set to off. If you want to record the date and time on a picture, set the clock setting before recording (p. 29).
4
Monitoring the still image on the LCD screen (p. 194)
1 Set the POWER switch to MEMORY while pressing the small green button. Make sure that the LOCK switch is set to the right (unlock) position.
natural_image
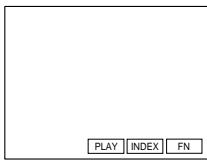
Line drawing of hands holding a digital camera with an open screen (no text or symbols)2 Press PLAY. The last recorded image is displayed.
NOTE
Do not pick up your camcorder by the viewfinder, the LCD panel, the battery pack or the jack cover.
natural_image
Illustration of a handheld video camera with a prohibition symbol (no text or labels)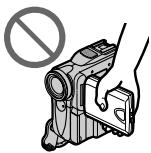
natural_image
Illustration of a hand holding a mechanical device with a no-smoking symbol above (no text or labels)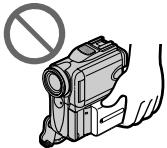
natural_image
Illustration of a hand holding a device with a prohibition symbol above (no text or labels)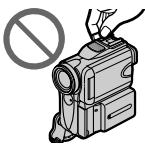
natural_image
Illustration of a handheld device with a prohibition symbol (no text or labels)natural_image
Diagram of a digital camera module with scroll wheel and internal components (no text or labels)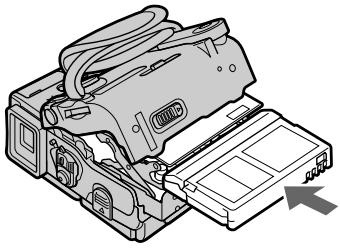
natural_image
Technical illustration of a device housing with internal components and a directional arrow (no text or symbols)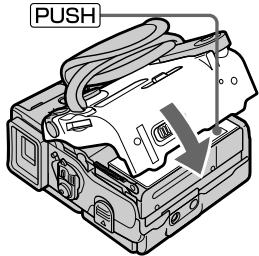
natural_image
Illustration of a hand holding a digital camera with a rotary knob, showing motion arrows (no text or symbols)natural_image
Line drawing of hands holding a digital camera module (no text or symbols visible)ПРИМЕЧАНИЕ
natural_image
Illustration of a digital camera with attached sensor and cable, no text or symbols presentnatural_image
Line drawing of hands holding a digital camera with an open screen (no text or symbols)natural_image
Illustration of a handheld video camera with a prohibition symbol (no text or labels)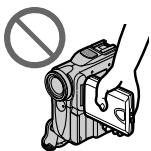
natural_image
Illustration of a hand holding a camera with a no-smoking symbol above (no text or labels)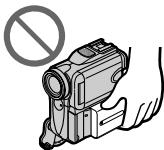
natural_image
Illustration of a hand holding a handheld device with a prohibition symbol above (no text or labels)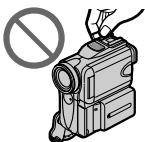
natural_image
Illustration of a handheld device with a prohibition symbol (no text or labels)Using this manual
As you read through this manual, buttons and settings on your camcorder are shown in capital letters.
e.g. Set the POWER switch to CAMERA.
When you carry out an operation, you can hear a beep sound to indicate that the operation is being carried out.
Note on Cassette Memory
Your camcorder is based on the DV format. You can only use mini DV cassettes with your camcorder. We recommend that you use a tape with cassette memory CIII.
The functions which require different operations depending on whether the tape has the cassette memory or not are:
- END SEARCH (p. 50)
- DATE SEARCH (p. 104)
- PHOTO SEARCH (p. 106)
The functions you can operate only with the cassette memory are:
- TITLE SEARCH (p. 102)
– Superimposing a title (p. 139) - Labelling a cassette (p. 145)
For details, see page 282.

You see this mark in the introduction to the features that operate only with cassette memory.
Cassettes with cassette memory are marked by ^ (Cassette Memory).
Note on TV colour systems
TV colour systems differ from country to country. To view your recordings on a TV, you need a PAL system-based TV.
Copyright precautions
Television programmes, films, video tapes, and other materials may be copyrighted.
Unauthorized recording of such materials may be contrary to the provision of the copyright laws.
Precautions on camcorder care
Lens and LCD screen/finder (on mounted models only)
- The LCD screen and the finder are manufactured using extremely high-precision technology, so over 99.99% of the pixels are operational for effective use. However, there may be some tiny black points and/or bright points (white, red, blue or green in colour) that constantly appear on the LCD screen and the finder. These points are normal in the manufacturing process and do not affect the recording in any way.
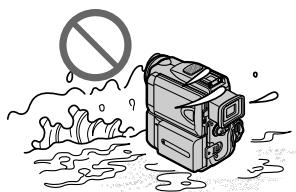
- Do not let your camcorder get wet. Keep your camcorder away from rain and sea water. Letting your camcorder get wet may cause your camcorder to malfunction. Sometimes this malfunction cannot be repaired [a].
- Never leave your camcorder exposed to temperatures above 60^ (140 °F), such as in a car parked in the sun or under direct sunlight [b].
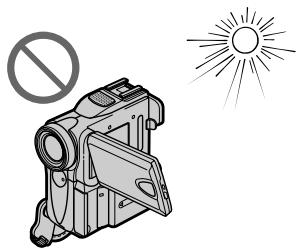
- Be careful when placing your camcorder near a window or outdoors. Exposing the LCD screen, the finder or the lens to direct sunlight for long periods may cause malfunctions [c].
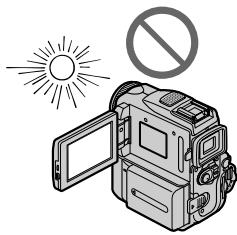
- Do not directly shoot the sun. Doing so might cause your camcorder to malfunction. Take pictures of the sun in low light conditions such as dusk [d].
[a]
natural_image
Illustration of a portable device with a prohibition symbol above it, surrounded by waves and clouds (no text or symbols on the device itself)[c]
natural_image
Illustration of a vintage camera with no prohibition symbol and sun rays (no text or labels)natural_image
Illustration of a car with a parking sign, sun, and no prohibition symbol (no text or labels)[d]
natural_image
Illustration of a digital camera with open door, sun symbol, and prohibition sign (no text or symbols on device)Step 1 Preparing the power supply
Installing the battery pack
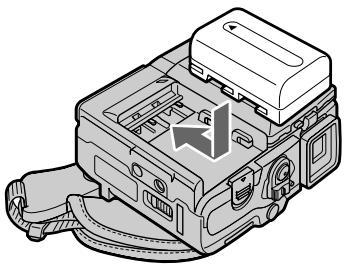
(1) While sliding BATT (battery) release lever in the direction of the arrow ①, slide the battery terminal cover in the direction of the arrow ②.
(2) Insert the battery pack in the direction of the arrow until it clicks.
2
natural_image
Technical line drawing of a mechanical device housing with internal components (no text or symbols)To remove the battery pack
The battery pack is removed in the same way as the battery terminal cover.
natural_image
Diagram of a device with an arrow indicating direction, no text or symbols presentNote on the battery terminal cover
To protect the battery terminals, install the battery terminal cover after the battery pack is removed.
Charging the battery pack
Use the battery pack after charging it for your camcorder.
Your camcorder operates only with the "InfoLITHIUM" battery pack (M series).
See page 285 for details of the “InfoLITHIUM” battery pack.
(1) Install the battery pack on your camcorder.
(2) Open the jack cover and connect the AC power adaptor supplied with your camcorder to the DC IN jack with the plug's ▲ mark facing the Holding Grip.
(3) Connect the mains lead to the AC power adaptor.
(4) Connect the mains lead to a wall socket.
(5) Set the POWER switch to OFF (CHARGE). The CHARGE lamp lights up when the charge begins. After the charge is completed, the CHARGE lamp goes off (full charge).
After charging the battery pack
Disconnect the AC power adaptor from the DC IN jack on your camcorder.
Step 1 Preparing the power supply
While charging the battery pack, the CHARGE lamp flashes in the following cases:
- The battery pack is not installed correctly.
- Something is wrong with the battery pack.
When you use the AC power adaptor
Place the AC power adaptor near a wall socket. If any trouble occurs with this unit, disconnect the plug from a wall socket as soon as possible to cut off the power.
Approximate minutes at 25 ^ ( 77 ^ ) to charge an empty battery pack
The charging time may increase if the battery's temperature is extremely high or low because of the ambient temperature.
Approximate minutes when you use a fully charged battery
* Approximate recording time when you repeat recording, start/stop, zoom and turn the power on/off. The actual battery life may be shorter.
Approximate minutes when you use a fully charged battery
Step 1 Preparing the power supply
Note
Approximate recording time and playing time at 25 ^ ( 77 ^ ). The battery life will be shorter if you use your camcorder in a cold environment.
If the power goes off although the battery remaining indicator indicates that the battery pack has enough power to operate
Charge the battery pack fully again so that the indication on the battery remaining indicator is correct.
Recommended charging temperature
We recommend charging the battery pack in an ambient temperature of between 10 °C to 30 °C ( 50 °F to 86 °F ).
What is "InfoLITHIUM"?
The “InfoLITHIUM” is a lithium ion battery pack which can exchange data such as battery consumption with compatible electronic equipment. This unit is compatible with the “InfoLITHIUM” battery pack (M series). Your camcorder operates only with the “InfoLITHIUM” battery. “InfoLITHIUM” M series battery packs have the InfoLITHIUM ^™ MARK. “InfoLITHIUM” is a trademark of Sony Corporation.
Step 1 Preparing the power supply
Connecting to a wall socket
When you use your camcorder for a long time, we recommend that you power it from a wall socket using the AC power adaptor.
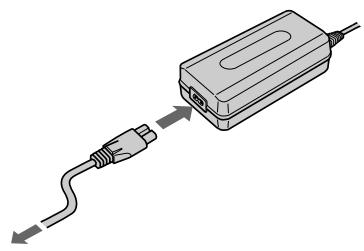
(1) Open the jack cover and connect the AC power adaptor supplied with your camcorder to the DC IN jack on your camcorder with the plug's ▲ mark facing the Holding Grip.
(2) Connect the mains lead to the AC power adaptor.
(3) Connect the mains lead to a wall socket.
natural_image
Diagram of a digital camera with cable connector and internal components, showing no text or symbols2,3
natural_image
Illustration of a USB cable inserted into a device (no text or symbols)PRECAUTION
The set is not disconnected from the AC power source (the mains) as long as it is connected to a wall socket, even if the set itself has been turned off.
ПРЕДОСТЕРЕЖЕНИЕ
Step 1 Preparing the power supply
Notes
- The AC power adaptor can supply power even if the battery pack is attached to your camcorder.
- The DC IN jack has “source priority.” This means that the battery pack cannot supply any power if the mains lead is connected to the DC IN jack, even when the mains lead is not plugged into a wall socket.
- Prevent metallic objects from coming into contact with the metal parts of the DC cable of the AC power adaptor. This may cause a short-circuit, damaging the AC power adaptor.
Using a car battery
Use Sony Car Battery Adaptor (optional). Refer to the operating instructions of the Car Battery Adaptor for further information.
Step 2 Setting the date and time
Set the date and time when you use your camcorder for the first time. “CLOCK SET” will be displayed each time you set the POWER switch to CAMERA or MEMORY unless you set the date and time settings.
If you do not use your camcorder for about three months, the date and time settings may be released (bars may appear) because the built-in rechargeable battery installed in your camcorder will have been discharged (p. 295).
First, set the year, then the month, the day, the hour and the minute.
(1) Set the POWER switch to CAMERA or MEMORY.
(2) Press FN to display PAGE1 (p. 32).
(3) Press MENU to display the menu.
(4) Select ☐ with ↓/↑, and press EXEC.
(5) Select CLOCK SET with ↓/↑, and press EXEC.
(6) Select the desired year with / , and press EXEC.
(7) Set the month, day and hour with the same procedure as step 6.
(8) Set the minute with / , and press EXEC by the time signal. The clock starts to move.
Step 2 Setting the date and time
The year changes as follows:
To return to FN
Press EXIT.
If you do not set the date and time
“----” and “--:-:--” are recorded on the data code of the tape and the “Memory Stick”.
Note on the time indicator
The internal clock of your camcorder uses a 24-hour cycle.
(1) Prepare the power source.
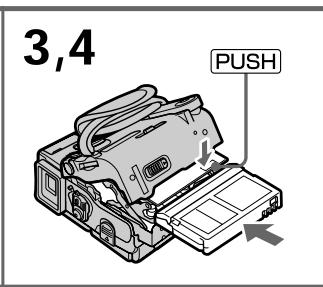
(2) Slide OPEN/▲EJECT in the direction of the arrow and open the lid. The cassette compartment automatically lifts up and opens.
(3) Push the middle portion of the back of the cassette to insert. Insert the cassette in a straight line deeply into the cassette compartment with the window facing out.
(4) Close the cassette compartment by pressing the PUSH mark on the cassette compartment. The cassette compartment automatically goes down.
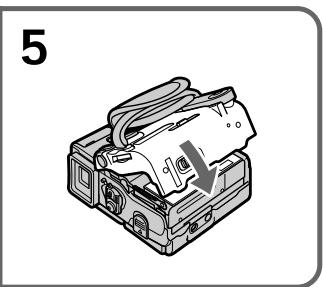
(5) After the cassette compartment goes down completely, close the lid until it clicks.
natural_image
Illustration of a printer with paper being inserted into a case (no text or symbols)To eject a cassette
Follow the procedure above, and take out the cassette in step 3.
Notes
- Do not press the cassette compartment down. Doing so may cause malfunction.
- The cassette compartment may not be closed when you press any part of the compartment other than the PUSH mark.
When you use mini DV cassettes with cassette memory
Read instructions about cassette memory to use this function properly (p. 282).
To prevent accidental erasure
Slide the write-protect tab on the cassette to expose the red mark.
natural_image
Diagram of a device with an arrow pointing to a component, no text or symbols presentStep 4 Using the touch panel
Your camcorder has operation buttons on the LCD screen. Touch the LCD panel directly to operate each function.
(1) Prepare the power source.
(2) Press OPEN to open the LCD panel.
(3) Set the POWER switch to CAMERA or VCR while pressing the small green button.
(4) Press FN. Operation buttons appear on the LCD screen.
(5) Press PAGE2 to go to PAGE2. Operation buttons appear on the LCD screen.
(6) Press a desired operation item. See relevant pages of this manual for each function.
natural_image
Illustration of hands assembling a digital camera module with a curved arrow indicating motion (no text or symbols present)To return to FN
Press EXIT.
To execute settings
Press EXEC or OK. The display returns to PAGE1/PAGE2/PAGE3.
Press ➕ OFF to return to PAGE1/PAGE2/PAGE3.
Notes
- When using the touch panel, press operation buttons with your thumb supporting the LCD screen from the back side of it or press those buttons lightly with your index finger.
- Do not press operation buttons with sharp-pointed objects such as a pen.
- Do not press the LCD screen too hard.
- Do not touch the LCD screen with wet hands.
- If FN is not on the LCD screen, touch the LCD screen lightly to make it appear. You can control the display with DISPLAY/TOUCH PANEL on your camcorder.
- When operation buttons do not work even if you press them, an adjustment is required (CALIBRATION) (p. 296).
- When the LCD screen gets dirty, use the supplied cleaning cloth.
When executing each item
The green bar appears above the item.
If an item is not available
The colour of the items changes to grey.
Touch panel
You can operate with the touch panel using the viewfinder (p. 93).
Press FN to display the following buttons: CAMERA
| PAGE1 | SPOT FOCUS, MENU, FADER, END SCH, SPOT METER, EXPOSURE |
| PAGE2 | SELF TIMER, DIG EFFT, LCD BRT, VOL, MEM MIX |
VCR
| PAGE1 | MENU, LCD BRT, VOL, END SCH |
| PAGE2 | PB ZOOM, DIG EFFT, DATA CODE |
| PAGE3 | V SPD PLAY, A DUB CTRL, REC CTRL |
See page 152 when you set the POWER switch to MEMORY.
Your camcorder automatically focuses for you.
(1) Remove the lens cap and pull the lens cap string to fix it.
(2) Install the power source and insert a cassette. See “Step 1” to “Step 3” for more information (p. 22 to 31).
(3) Pull down the Holding Grip.
Hold your camcorder firmly as illustrated.
(4) Set the POWER switch to CAMERA while pressing the small green button. Your camcorder is in standby.
(5) Press OPEN to open the LCD panel. The picture appears on the LCD panel.
(6) Press START/STOP. Your camcorder starts recording. The REC indicator appears. The camera recording lamp located on the front of your camcorder lights up. To stop recording, press START/STOP again.
Запись изображения
(1) Set the POWER switch to OFF (CHARGE).
(2) Close the LCD panel and set the Holding Grip back to the previous position.
(3) Eject the cassette.
(4) Remove the battery pack.
Notes
- Fasten the grip strap firmly.
- Do not touch the built-in microphone during recording.
- The recording data (date/time or various settings when recorded) are not displayed during recording. However, they are recorded automatically onto the tape. To display the recording data, press DATA CODE during playback. You can also use the Remote Commander for this operation (p. 54).
Note on Recording mode
Your camcorder records and plays back in the SP (standard play) mode and in the LP (long play) mode. Select SP or LP in the menu settings (p. 251). In the LP mode, you can record 1.5 times as long as in the SP mode.
When you record a tape in the LP mode on your camcorder, we recommend playing the tape on your camcorder.
Note on the LOCK switch
When you slide the LOCK switch to the left, the POWER switch can no longer be set to MEMORY accidentally. The LOCK switch is set to the right as a default setting.
To enable smooth transition
Transition between the last scene you recorded and the next scene is smooth as long as you do not eject the cassette even if you turn off your camcorder.
However, check the following:
- Do not mix recordings in the SP mode and in the LP mode on one tape.
- When you change the battery pack, set the POWER switch to OFF (CHARGE).
- When you use a tape with cassette memory, you can make the transition smooth even after ejecting the cassette by using the END SEARCH function (p. 50).
После записи
If you leave your camcorder in tape recording standby for five minutes while the cassette is inserted
Your camcorder automatically turns off. This is to save battery power and to prevent battery and tape wear. To resume tape recording standby, set the POWER switch to OFF (CHARGE), and to CAMERA again. To start recording, press START/STOP again without switching the POWER switch. However, your camcorder does not turn off automatically when the cassette is not inserted.
When you record in the SP and LP modes on one tape or you record in the LP mode
- The transition between scenes is not smooth.
- The playback picture may be distorted or the time code may not be written properly between scenes.
The battery life when you record using the LCD screen
The battery time is slightly shorter than the shooting time using the viewfinder.
Adjusting the LCD screen
The LCD panel moves about 90 degrees to the viewfinder side and about 180 degrees to the lens side.
When closing the LCD panel, set it vertically, and swing it into the camcorder body.
Note
When using the LCD screen except in the mirror mode, the viewfinder automatically turns off.
When you use the LCD screen outdoors in direct sunlight
The LCD screen may be difficult to see. If this happens, we recommend that you use the viewfinder.
When you adjust the angle of the LCD panel Make sure the LCD panel is opened up to 90 degrees.
Adjusting the brightness of the LCD screen
(1) When you set the POWER switch to CAMERA, press FN and select PAGE2. When you set the POWER switch to VCR, press FN to display PAGE1 (p. 32). When you set the POWER switch to MEMORY, press FN and select PAGE3.
(2) Press LCD BRT. The screen to adjust the brightness of the LCD screen appears.
(3) Adjust the brightness of the LCD screen using - / +. - : to dim +: to brighten
(4) Press OK to return to PAGE1/PAGE2/PAGE3.
LCD screen backlight
You can change the brightness of the backlight.
Select LCD B.L. in the menu settings when using the battery pack (p. 248).
Even if you adjust LCD BRT or LCD B.L.
The recorded picture will not be affected.
Adjusting the viewfinder
If you record pictures with the LCD panel closed, check the picture with the viewfinder. Adjust the viewfinder lens to your eyesight so that the indicators in the viewfinder come into sharp focus.
Pull out the viewfinder and move the viewfinder lens adjustment lever.
You can turn the LCD panel over and move it back to your camcorder body with the LCD screen facing out. You can operate with the touch panel using the viewfinder when the POWER switch is set to CAMERA or MEMORY (p. 93).
Viewfinder backlight
You can change the brightness of the backlight. Select VF B.L. in the menu settings when using the battery pack (p. 248).
Even if you adjust VF B.L.
The recorded picture will not be affected.
Using the zoom feature
Move the power zoom lever a little for a slower zoom. Move it further for a faster zoom.
Using the zoom function sparingly results in better-looking recordings.
T: for telephoto (subject appears closer)
W: for wide-angle (subject appears further away)
To zoom greater than 10×
Zoom greater than 10× is performed digitally. To activate the digital zoom, select the digital zoom power in D ZOOM in the menu settings. The digital zoom function is set to OFF as a default setting (p. 247).
The right side of the bar shows the digital zooming zone.
The digital zooming zone appears when you select the digital zoom power in the menu settings./
When you shoot close to a subject
If you cannot get a sharp focus, move the power zoom lever to the “W” side until the focus is sharp. You can shoot a subject that is at least about 80 cm (about 2 feet 5/8 inch) away from the lens surface in the telephoto position, or about 1 cm (about 1/2 inch) away in the wide-angle position.
Notes on digital zoom
- Digital zoom can be set to 20 × or 120 × .
- The picture quality deteriorates as you move the power zoom lever toward the “T” side.
When the POWER switch is set to MEMORY You cannot use the digital zoom.
Shooting with the Mirror Mode
This feature allows the camera subject to view him- or herself on the LCD screen.
The subject can see his or her own image on the LCD screen while you look at the subject in the viewfinder.
Set the POWER switch to CAMERA or MEMORY.
Pull out the viewfinder and rotate the LCD screen 180 degrees.
The ⚙️ indicator appears in the viewfinder and on the LCD screen.
When the POWER switch is set to CAMERA, appears in standby, and appears in recording. Some other indicators appear mirror-reversed and others are not displayed.
Запись изображения
natural_image
Line drawing of a digital camera with open lid and control panel (no text or symbols)Picture in the mirror mode
The picture on the LCD screen is a mirror-image.
However, the picture will be normal when recorded.
During recording in the mirror mode
• ZERO SET MEMORY on the Remote
Commander does not work.
- FN appears mirror-reversed in the viewfinder.
When you press FN
The ⚙️ indicator does not appear on the screen.
Indicators displayed in the recording mode
The indicators are not recorded on the tape.
Remaining battery time indicator during recording
The remaining battery time indicator roughly indicates the continuous recording time. The indicator may not be correct, depending on the conditions in which you are recording. When you close the LCD panel and open it again, it takes about one minute for the correct remaining battery time in minutes to be displayed.
Time code
The time code indicates “0:00:00” (hours : minutes : seconds) in recording and “0:00:00:00” (hours : minutes : seconds : frames) in playback. You cannot rewrite only the time code.
Remaining tape indicator
The indicator may not be displayed accurately depending on the tape.
Recording data
The recording data (date/time or various settings when recorded) are not displayed during recording. However, they are recorded automatically on the tape. To display the recording data, press DATA CODE during playback. You can also use the Remote Commander for this operation (p. 54).
When you shoot a subject with the light source behind the subject or a subject with a light background, use the backlight function.
natural_image
Line drawing of a digital camera with attached strap and control panel (no text or symbols)BACK LIGHT
Set the POWER switch to CAMERA or MEMORY, press BACK LIGHT.
The indicator appears on the screen.
To cancel, press BACK LIGHT again.
During back light function
The backlight function will be cancelled when you press MANUAL (p. 82) in EXPOSURE or SPOT METER (p. 83).
Shooting in the dark - NightShot/Super NightShot/ Colour Slow Shutter
NightShot enables you to shoot a subject in a dark place. For example, you can satisfactorily record the environment of nocturnal animals for observation when you use this function.
Съемка в темноте – NightShot/Super NightShot/Colour Slow Shutter
Set the POWER switch to CAMERA or MEMORY, then slide NIGHTSHOT to ON. The indicator and "NIGHTSHOT" flash on the screen. To cancel NightShot, slide NIGHTSHOT to OFF.
Notes
- Do not use the NightShot function in bright places (e.g. outdoors in the daytime). This may cause your camcorder to malfunction.
- When you keep NIGHTSHOT set to ON in normal recording, the picture may be recorded in incorrect or unnatural colours.
- If focusing is difficult when using the NightShot function, focus manually.
- Do not cover the NightShot Light emitter when using the NightShot function.
While using NightShot, you cannot use the following functions:
- Exposure
- Flexible Spot Meter
- PROGRAM AE (The indicator flashes.)
- White balance
Super NightShot makes subjects more than 16 times brighter than those recorded in NightShot.
(1) Set the POWER switch to CAMERA, then slide NIGHTSHOT to ON. The indicator and “NIGHTSHOT” flash on the screen.
(2) Press SUPER NS. The S◎ indicator and "SUPER NIGHTSHOT" flash on the screen. To cancel Super NightShot, press SUPER NS again.
While using Super NightShot
The shutter speed will be automatically adjusted depending on the brightness of the background. The motion of the moving picture may slow down.
While using Super NightShot, you cannot use the following functions:
- Fader
- Exposure
- Digital effect
- PROGRAM AE
- Recording on a “Memory Stick” in tape recording or tape recording standby
- White balance
- Flexible Spot Meter
When the POWER switch is set to MEMORY You cannot use Super NightShot function.
Using the NightShot Light
The picture will be clearer with the NightShot Light on. To activate NightShot Light, set N.S.LIGHT to ON in the menu settings (p. 246). (The default setting is ON.)
NightShot Light
NightShot Light rays are infrared and so are invisible. The maximum shooting distance using the NightShot Light is about 3 m (10 feet).
Using Colour Slow Shutter
Colour Slow Shutter enables you to record colour images in a dark place.
(1) Set the POWER switch to CAMERA, then slide NIGHTSHOT to OFF.
(2) Press COLOUR SLOW S.
The ◇ indicator and COLOUR SLOW SHUTTER flash on the screen.
To cancel the Colour Slow Shutter function, press COLOUR SLOW S again.
While using Colour Slow Shutter
The shutter speed will be automatically adjusted depending on the brightness of the background. The motion of the moving picture may slow down.
When the POWER switch is set to MEMORY
You cannot use Colour Slow Shutter function.
While using the Colour Slow Shutter function, you cannot use the following functions:
- Fader
- Exposure
- Digital effect
- PROGRAM AE
- Recording on a “Memory Stick” in tape recording or tape recording standby
- Flexible Spot Meter
In total darkness
Colour Slow Shutter may not work properly.
Запись изображения
Self-timer recording
Recording automatically starts in 10 seconds after you set the self-timer. You can also use the Remote Commander for this operation.
(1) In standby, press FN and select PAGE2 (p. 32).
(2) Press SELFTIMER.
The ⏻ (self-timer) indicator appears on the screen.
(3) Press START/STOP.
The self-timer starts counting down from 10 with a beep sound. In the last two seconds of the countdown, the beep sound gets faster, then recording starts automatically.
To stop the count down
Press START/STOP.
To restart the countdown, press START/STOP again.
To cancel self-timer recording
Press SELFTIMER so that the ⭕ (self-timer) indicator disappears from the screen while your camcorder is in standby. You cannot cancel self-timer recording using the Remote Commander.
Self-timer recording is automatically cancelled when:
– Self-timer recording is finished.
- The POWER switch is set to OFF (CHARGE) or VCR.
When the POWER switch is set to MEMORY You can also record images with the self-timer (p. 166, 182).
Примечание
Checking the recording - END SEARCH/ EDITSEARCH/Rec Review
You can use these buttons to check the recorded picture or shot so that the transition between the last recorded scene and the next scene you record is smooth.
flowchart
graph TD
    A["1"] --> B["FN"]
    C["©/- EDIT +"] --> D["Camera"]
END SEARCH
You can go to the end of the recorded section after you record.
(1) In standby, press FN to display PAGE1 (p. 32).
(2) Press END SCH.
The last five seconds of the recorded section are played back and your camcorder returns to standby. You can monitor the sound from the speaker or headphones.
To return to FN
Press EXIT.
To stop searching
Press END SCH again.
END SEARCH
Checking the recording — END SEARCH/EDITSEARCH/ Rec Review
END SEARCH function
When you use a tape without cassette memory, END SEARCH does not work once you eject the cassette after you have recorded on the tape. If you use a tape with cassette memory, END SEARCH works even after you eject the cassette.
If a tape has a blank portion in the recorded sections
END SEARCH may not work correctly.
EDITSEARCH
You can search for the next recording start point.
(1) In standby, press FN to display PAGE1 (p. 32).
(2) Press MENU, then set EDITSEARCH to ON in (p. 247).
(3) Hold down the Ⓞ/−· + side of EDIT. The recorded section is played back.
+ : to go forward ☑/- : to go backward
Release Ⓓ/− · + to stop playback. If you press START/STOP, re-recording begins from the point you released Ⓓ/− · +. You cannot monitor the sound.
Rec Review
You can check the last recorded section.
(1) In standby, press FN to display PAGE1 (p. 32).
(2) Press MENU, then set EDITSEARCH to ON in (p. 247).
(3) Press the ⬇/– side of EDIT momentarily.
The section you have stopped most recently will be played back for a few seconds, and then your camcorder will return to standby. You can monitor the sound from the speaker or headphones.
You can monitor the recorded tape etc. on the LCD screen. If you close the LCD panel, you can monitor the playback picture in the viewfinder. You can also control playback using the Remote Commander supplied with your camcorder.
(1) Prepare the power source and insert the recorded tape.
(2) Set the POWER switch to VCR while pressing the small green button.
(3) Press OPEN to open the LCD panel.
(4) Press ◀◀◀ to rewind the tape.
(5) Press ▶ to start playback.
(6) Adjust the volume following the steps below.
① Press FN to display PAGE1.
② Press VOL. The screen to adjust volume appears.
③ Press -/+ to adjust the volume.
- : to decrease the volume
+: to increase the volume
(7) Press ↩ OK to return to PAGE1.
When monitoring on the LCD screen
You can turn the LCD panel over and move it back to the camcorder body with the LCD screen facing out.
natural_image
Illustration of a device with open lid and transformation arrow (no text or symbols)If you leave the power on for a long time Your camcorder gets warm. This is not a malfunction.
When you open or close the LCD panel Make sure that the LCD panel is set vertically.
Press DISPLAY/TOUCH PANEL on your camcorder or DISPLAY on the Remote Commander supplied with your camcorder. The indicators disappear from the screen. To make the indicators appear, press DISPLAY/TOUCH PANEL or DISPLAY again.
About date/time and various settings
Your camcorder automatically records not only images on the tape but also the recording data (date/time or various settings when recorded) (Data code).
Follow the steps below to display the data code using the touch panel or the Remote Commander.
Using the touch panel
(1) In playback, press FN and select PAGE2 (p. 32).
(2) Press DATA CODE.
Using the Remote Commander
Press the DATA CODE button on the Remote Commander in playback.
The display changes as follows:
date/time → various settings (SteadyShot OFF, exposure, white balance, gain, shutter speed, aperture value) → no indicator
Not to display various settings
Set DATA CODE to DATE in the menu settings (p. 253).
The display changes as follows when you press the DATA CODE button on the Remote
Commander: date/time ↔ no indicator
[a]: Tape counter
[b]: SteadyShot OFF
[c]: Exposure mode
[d]: White balance
[f]: Shutter speed
[g]: Aperture value
Various settings
Various settings shows the camcorder's recording information at the time of recording. In tape recording standby, the various settings will not be displayed.
When you use the data code function, bars (-- -- --) appear if:
– A blank portion of the tape is being played back.
- The tape is unreadable due to tape damage or noise.
- The tape was recorded by a camcorder without the date and time set.
Data code
When you connect your camcorder to a TV, the data code also appears on the TV screen.
Remaining battery time indicator during playback
The indicator indicates the approximate continuous playback time. The indicator may not be correct, depending on the conditions in which you are playing back. When you close the LCD panel and open it again, it takes about one minute for the correct remaining battery time to be displayed.
Various playback modes
To operate video control buttons, set the POWER switch to VCR.
When using the touch panel
(1) Press FN and select PAGE3.
(2) Press V SPD PLAY to display video control buttons.
To view a still image ( playback pause)
Press ▶/□ during playback. To resume playback, press ▶/□ again.
To fastforward the tape
Press ▶▶▶/▶▶ during playback stop. To resume normal playback, press ▶▶▶/▶▶.
To rewind the tape
Press ◀◀◀/◀◀ during playback stop. To resume normal playback, press ▶▶/▶.
To change the playback direction
Press ◀◀◀/◀◀< during playback to reverse the playback direction. Press ▶▶◀◀/◀◀ to pause playback. Press ▶▶◀◀/▶◀ to resume normal playback.
To locate a scene while monitoring the picture (picture search)
Keep pressing ◀◀◀ / ◀◀◀ or ▶▶◀ / ▶▶▶ during playback. To resume normal playback, release the button.
To monitor the high-speed picture while fastforwarding or rewinding the tape (skip scan)
Keep pressing ▶▶/▶▶ while fastforwarding or ◀◀/◀◀ while rewinding the tape. To resume fastforwarding or rewinding, release the button.
To view the picture at slow speed (slow playback)
Press ▶/▶ during playback. For slow playback in the reverse direction, press ◀◀/◀◀<, then press ▶/▶. Press ▶/▶ to pause playback. Press ▶/▶ to resume normal playback.
To view the picture at double speed
Press ×2/×2 during playback. For double speed playback in the reverse direction, press </< , then press ×2/×2 . Press / to pause playback. Press / to resume normal playback.
To view the picture frame-by-frame
Press ▶/>▶ in playback pause. For frame-by-frame playback in the reverse direction, press ◀</◀<. To resume normal playback, press ▶/▶.
To search the last scene recorded (END SEARCH)
Press END SCH on PAGE1 in the stop mode. The last five seconds of the recorded section are played back then the camcorder stop.
Marks on your camcorder are different from those on the Remote Commander supplied with your camcorder.
Your camcorder:
▶ II To play back or pause a tape
To stop a tape
To rewind a tape
▶▶▶▶ To fastforward a tape
▶ To play back a tape slowly
To forward one frame at a time
To rewind one frame at a time
×2 To play back a tape at double speed
Remote Commander:
▶ To play back a tape
II To pause a tape
◀ To rewind a tape
▶▶ To fastforward a tape
▶ To play back a tape slowly
||► To forward one frame at a time
◀II< To rewind one frame at a time
×2 To play back a tape at double speed
In the various playback modes
- Sound is muted.
- The previous picture may remain as a mosaic image during playback.
When playback pause lasts for five minutes Your camcorder automatically enters the stop mode. To resume playback, press ▶/▶.
Slow playback
Slow playback can be performed smoothly on your camcorder. However, this function does not work for an output signal from the i DV Interface.
When you play back a tape in reverse
Horizontal noise may appear at the centre, or the top and bottom of the screen. This is not a malfunction.
Viewing the recording on TV
Connect your camcorder to your TV with the A/V connecting cable supplied with your camcorder to watch the playback pictures on the TV screen. You can operate the playback control buttons in the same way as when you view playback pictures on the LCD screen. When viewing the playback picture on the TV screen, we recommend that you power your camcorder from a wall socket using the AC power adaptor (p. 27). Refer to the operating instructions of your TV.
Open the jack cover. Connect your camcorder to the TV with the A/V connecting cable. Then, set the TV/VCR selector on the TV to VCR.
If your TV is already connected to the VCR
Connect your camcorder to the LINE IN input on the VCR with the A/V connecting cable supplied with your camcorder. Set the input selector on the VCR to LINE.
If your TV or VCR is a monaural type
Connect the yellow plug of the A/V connecting cable to the video input jack and the white or the red plug to the audio input jack on the VCR or the TV. If you connect the white plug, the sound is L (left) signal. If you connect the red plug, the sound is R (right) signal.
If your TV/VCR has a 21-pin connector (EUROCONNECTOR)
- European models only
Use the 21-pin adaptor supplied with your camcorder.
This adaptor is exclusive to an output.
If your TV has an S video jack
Pictures can be reproduced more faithfully by using an S video cable (optional). With this connection, you do not need to connect the yellow (video) plug of the A/V connecting cable. Connect the S video cable (optional) to the S video jacks on both your camcorder and the TV or the VCR.
This connection produces higher quality DV format pictures.
To display the screen indicators on TV Set DISPLAY to V-OUT/LCD in the menu settings (p. 253).
Then press DISPLAY/TOUCH PANEL on your camcorder. To turn off the screen indicators, press DISPLAY/TOUCH PANEL on your camcorder again.
Recording still images on a "Memory Stick" during recording on a tape
You can record still images on a "Memory Stick" in tape recording or tape recording standby.
You can also record still images on a tape (p. 65).
Before operation
- Insert a “Memory Stick” into your camcorder.
- Set PHOTO REC to MEMORY in the menu settings. (The default setting is MEMORY.)
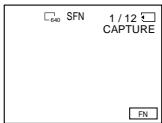
(1) In standby, keep pressing PHOTO lightly until a still image appears. The CAPTURE indicator appears. Recording does not start yet. To change the still image, release PHOTO, select a still image again, and then press and hold PHOTO lightly.
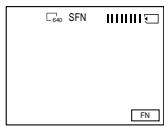
(2) Press PHOTO deeper.
Recording is complete when the bar scroll indicator disappears.
The image displayed on the screen when you pressed PHOTO deeper will be recorded on the “Memory Stick.”
natural_image
Line drawing of a digital camera with attached strap (no text or symbols)1

2

Recording still images on a "Memory Stick" during recording on a tape
Notes
- Do not shake or strike your camcorder when you record still images.
The image may fluctuate. - You cannot record still images on a “Memory Stick” during following operations:
- Wide mode
- Fader
- Picture effect
- Digital effect
- Super NightShot
- Colour Slow Shutter
- END SEARCH
- EDITSEARCH
- MEMORY MIX
"Memory Stick"
For details, see page 148 for more information.
Image size of still images
Image size is automatically set to 640 × 480 .
When you want to record still images in different sizes, use the Memory Photo recording function (p. 161).
When the POWER switch is set to CAMERA You cannot select image quality.
The image quality you selected when the POWER switch was set to MEMORY is used. (The default setting is SUPER FINE.)
During and after recording still images on a "Memory Stick"
Your camcorder continues recording on tape.
When you press PHOTO on the Remote Commander
Your camcorder immediately records the image that is on the screen when you press the button.
Recording still images on a "Memory Stick" during recording on a tape
To record still images on a "Memory Stick" during tape recording
You cannot check an image on the screen by pressing PHOTO lightly. The image when you press PHOTO will be recorded on the “Memory Stick.”
To record images with higher quality
We recommend you use the Memory Photo recording function (p. 161).
Title
You cannot record a title.
Self-timer memory photo recording
You can record still images on a “Memory Stick” with the self-timer. You can also use the Remote Commander for this operation.
Before operation
- Insert a “Memory Stick” into your camcorder.
- Set PHOTO REC to MEMORY in the menu settings. (The default setting is MEMORY.)
(1) In standby, press FN and select PAGE2.
(2) Press SELFTIMER.
The ⚙ (self-timer) indicator appears on the screen.
(3) Press PHOTO deeper.
The self-timer starts counting down from 10 with a beep. In the last two seconds of the countdown, the beep gets faster, then the recording starts automatically.
Recording still images on a "Memory Stick" during recording on a tape
To cancel self-timer recording
Press SELFTIMER so that the ⭕ (self-timer) indicator disappears from the screen while your camcorder is in standby. You cannot cancel self-timer recording using the Remote Commander.
Note
Self-timer recording is automatically cancelled when:
– Self-timer recording is finished.
- The POWER switch is set to OFF (CHARGE) or VCR.
During tape recording
You cannot use self-timer recording.
Recording a still image on a tape - Tape Photo recording
You can record still images such as photographs. You can record about 510 images in the SP mode and about 765 images in the LP mode on a 60-minute tape.
You can also record still images on a “Memory Stick” (p. 61, 161).
(1) In standby, press FN to display PAGE1.
(2) Press MENU, then set PHOTO REC to TAPE in ☐ (p. 247).
(3) Keep pressing PHOTO lightly until a still image appears. The CAPTURE indicator appears. Recording does not start yet. To change the still image, release PHOTO, select a still image again, and then press and hold PHOTO lightly.
(4) Press PHOTO deeper.
The still image displayed on the screen when you pressed PHOTO deeper is recorded for about seven seconds. The sound during those seven seconds is also recorded.
The still image is displayed on the screen until the recording is completed.
Recording a still image on a tape - Tape Photo recording
Recording images with self-timer
(1) Set PHOTO REC to TAPE in ☐ in the menu settings (p. 247).
(2) Follow steps 1 to 3 on page 63.
Notes
- During tape photo recording, you cannot change the mode or setting.
- When recording a still image, do not shake your camcorder. The image may fluctuate.
- The tape photo recording function does not work during following operations:
- Fader
- Digital effect
If you record a moving subject with the tape photo recording function
When you play back the still image on other equipment, the image may fluctuate.
When you press PHOTO on the Remote Commander
Your camcorder immediately records the image that is on the screen when you press the button.
To record still images on a tape during tape recording
You cannot check an image on the screen by pressing PHOTO lightly. Press PHOTO deeper. The still image is recorded for about seven seconds and your camcorder returns to tape recording standby.
To record clear and less fluctuated still images We recommend that you record on “Memory Stick”s.
Adjusting the white balance manually
You can manually adjust and set the white balance. This adjustment makes white subjects look white and allows more natural colour balance. Normally white balance is automatically adjusted.
(1) Set the POWER switch to CAMERA or MEMORY, then press FN to display PAGE1.
(2) Press MENU, then set WHT BAL to the desired mode in ☐ (p. 246).
HOLD:
Recording a single-coloured subject or background
(OUTDOOR):
- Recording a sunset/sunrise, just after sunset, just before sunrise, neon signs, or fireworks
• Under a colour matching fluorescent lamp
(INDOOR):
- When lighting conditions change quickly
- In too bright places such as photography studios
- Under sodium lamps or mercury lamps
To return to the automatic white balance mode
Set WHT BAL to AUTO in the menu settings.
Adjusting the white balance manually
If the picture is being taken in a studio lit by TV lighting
We recommend that you record in the
INDOOR mode.
When you record under fluorescent lighting Use the AUTO or HOLD mode.
Your camcorder may not adjust the white balance correctly in the ⚙INDOOR mode.
In the automatic white balance mode
Point your camcorder at the white subject for about 10 seconds after setting the POWER switch to CAMERA to get better adjustment when:
- You detach the battery for replacement.
- You bring your camcorder from indoors to outdoors holding the exposure, or vice versa.
In HOLD
Set the white balance to AUTO and reset to HOLD after few seconds when:
- You change the PROGRAM AE mode.
- You bring your camcorder from indoors to outdoors, or vice versa.
You can record a 16:9 wide picture to watch on the 16:9 wide-screen TV (16:9WIDE). Black bands appear on the screen during recording in 16:9WIDE mode [a]. The picture during playing back on a normal TV [b] or a wide -screen TV [c] are compressed in the widthwise direction. If you set the screen mode of the wide-screen TV to the full mode, you can watch pictures of normal images [d].
flowchart
graph LR
    A["16:9WIDE"] --> B[" "]
    B --> C[" "]
    C --> D[" "]
(1) In standby, press FN to display PAGE1.
(2) Press MENU, then set 16:9WIDE to ON in (p. 247).
To cancel the wide mode
Set 16:9WIDE to OFF in the menu settings.
In the wide mode, you cannot select the following functions:
- Recording still images on a “Memory Stick” in tape recording or tape recording standby
- OLD MOVIE
- BOUNCE
You cannot select or cancel the wide mode. When you cancel the wide mode, set your camcorder to tape recording standby and then set 16:9WIDE to OFF in the menu settings.
You can fade in or out to give your recording a professional appearance.
When fading in, the picture gradually changes from black-and-white to colour.
When fading out the picture gradually changes from colour to black-and-white.
^1) You can use BOUNCE when D ZOOM is set to OFF in the menu settings.
^2) Fade in only.
MONOTONE
In recording, press FN to display PAGE1.
(2) Press FADER. The screen to select the fader mode appears.
(3) Select a desired mode.
(4) Press ➔ OK to return to PAGE1, and press EXIT to return to FN.
The fader indicator you selected flashes.
(5) Press START/STOP. After the fade in/out is carried out, your camcorder automatically returns to the normal mode.
You cannot use the following functions while using the fader function. Also, you cannot use the fader function while using the following functions:
- Digital effect
- Super NightShot
- Colour Slow Shutter
- Tape photo recording
- Recording on a “Memory Stick” in tape recording or tape recording standby
- Interval recording
- Frame recording
When you select OVERLAP, WIPE or DOT
Your camcorder automatically stores the image stored on a tape. As the image is being stored, the playback picture disappears. At this stage, the picture may not be recorded clearly, depending on the tape condition.
While using BOUNCE, you cannot use the following functions:
- Exposure
- Flexible Spot Meter
- Focus
- Zoom
– Picture effect
Note on BOUNCE
You cannot select BOUNCE in the following mode or functions:
- D ZOOM is activated in the menu settings
- Wide mode
- Picture effect
- PROGRAM AE
During MPEG movie recording
You cannot use the fader function.
Примечание
Using special effects - Picture effect
You can digitally process images to obtain special effects like those in films or on the TV.
NEG. ART [a]: The colour and brightness of the picture are reversed.
SEPIA : The picture is sepia.
B&W : The picture is monochrome (black-and-white).
SOLARIZE [b]: The light intensity is clearer, and the picture looks like an illustration.
PASTEL [c]: The contrast of the picture is emphasized, and the picture looks like an animated cartoon.
MOSAIC [d]: The picture is mosaic.
Using special effects - Picture effect
To return to FN
Press EXIT.
To cancel the picture effect function
Select OFF in P EFFECT in the menu settings.
While using the picture effect function, you cannot use following functions:
- OLD MOVIE
- BOUNCE
- Recording on a “Memory Stick” in tape recording or tape recording standby
When you change the POWER switch to other than CAMERA
The picture effect is automatically cancelled.
Using special effects - Digital effect
You can add special effects to recorded pictures using the various digital functions. The sound is recorded normally.
STILL
You can record a still image so that it is superimposed on a moving picture.
FLASH (FLASH MOTION)
You can record still images successively at regular intervals.
LUMI. (LUMINANCEKEY)
You can swap the brighter area in a still image with a moving picture.
TRAIL
You can record a picture so that an incidental image like a trail is left.
SLOW SHTR (SLOW SHUTTER)
You can slow down the shutter speed. The slow shutter mode is good for recording dark pictures more brightly.
OLD MOVIE
You can add an old movie type atmosphere to pictures. Your camcorder automatically sets the wide mode to ON, the picture effect to SEPIA, and the appropriate shutter speed.
Using special effects - Digital effect
(1) Set the POWER switch to CAMERA, then press FN and select PAGE2.
(2) Press DIG EFFT. The screen to select a desired digital effect mode appears.
(3) Press a desired digital effect mode. In STILL and LUMI., the still image is stored in memory.
(4) Press -/+ to adjust the effect.
Items to adjust
| STILL | The rate of the still image you want to superimpose on the moving picture |
| FLASH | The interval of flash motion |
| LUMI. | The colour scheme of the area in the still image which is to be swapped with a moving picture |
| TRAIL | The vanishing time of the incidental image |
| SLOW SHTR | Shutter speed. The larger the shutter speed number, the slower the shutter speed. |
| OLD MOVIE | No adjustment necessary |
(5) Press OK to return to PAGE2.
The bar appears when setting following digital effect modes: STILL, FLASH, LUMI., TRAIL./
To cancel the digital effect
Press OFF to return to PAGE2.
Notes
- The following functions do not work during digital effect:
- Fader
- Tape photo recording
- Super NightShot
- Colour Slow Shutter
- Recording on a “Memory Stick” in tape recording or tape recording standby
- The PROGRAM AE function does not work in SLOW SHTR.
- The following functions do not work in OLD MOVIE:
- Wide mode
-Picture effect
-PROGRAM AE
When you change the POWER switch to other than CAMERA
The digital effect will be automatically cancelled.
When recording in the slow shutter mode Auto focus may not be effective. Focus manually using a tripod.
Shutter speed
| Shutter speed number | Shutter speed |
| SLOW SHTR 1 | 1/25 |
| SLOW SHTR 2 | 1/12 |
| SLOW SHTR 3 | 1/6 |
| SLOW SHTR 4 | 1/3 |
You can select PROGRAM AE (Auto Exposure) mode to suit your specific shooting requirements.
SPOTLIGHT (Spotlight)
This mode prevents people's faces, for example, from appearing excessively white when shooting subjects lit by strong light in the theatre.
PORTRAIT (Soft portrait)
This mode brings out the subject while creating a soft background for subjects such as people or flowers.
SPORTS (Sports lesson)
This mode minimizes shake on fast-moving subjects such as in tennis or golf.
BEACH&SKI (Beach & ski)
This mode prevents people's faces from appearing dark in strong light or reflected light, such as at a beach in midsummer or on a ski slope.
© SUNSETMOON (Sunset & moon)
This mode allows you to maintain atmosphere when you are recording sunsets, general night views, fireworks displays and neon signs.
LANDSCAPE (Landscape)
This mode is for when you record distant subjects such as mountains. Also it prevents your camcorder from focusing on glass or metal mesh in windows when you record a subject behind glass or a screen.
natural_image
Black-and-white photo of a woman holding flowers, with a small icon in the corner (no text or symbols)
natural_image
Portrait of a smiling person with a small icon in the corner (no text or symbols on the person or background)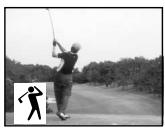
natural_image
Golfer mid-swing on a dirt path with trees in the background (no text or symbols visible)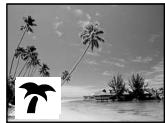
natural_image
Black-and-white beach scene with palm trees and a small island on the water (no text or symbols)
natural_image
Silhouette of palm trees and a crescent moon against a sunset sky (no text or symbols)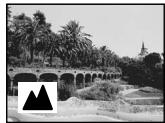
natural_image
Black-and-white photo of a riverside bridge with palm trees and a distant pagoda, featuring a small black triangle icon in the corner (no text or symbols on the main scene)(1) Set the POWER switch to CAMERA or MEMORY, then press FN to display PAGE1.
(2) Press MENU, then set PROGRAM AE to the desired mode in ☐ (p. 246).
To turn the PROGRAM AE off
Select AUTO in PROGRAM AE in the menu settings.
- Because your camcorder is set to focus only on subjects in the middle to far distance, you cannot take close-ups in the following modes:
- SPOTLIGHT
- SPORTS
- BEACH&SKI
- Your camcorder is set to focus only on distant subjects in the following modes:
- SUNSETMOON
- LANDSCAPE
- The following functions do not work in PROGRAM AE:
- Colour Slow Shutter
- SLOW SHTR
- OLD MOVIE
- BOUNCE
- The PROGRAM AE does not work in the following cases (The indicator flashes):
- To set the NIGHTSHOT to ON.
- To record images on a “Memory Stick” using the MEMORY MIX.
- When you set the POWER switch to MEMORY, SPORTS does not work. (The indicator flashes.)
While WHT BAL is set to AUTO in the menu settings
The white balance is adjusted even if the PROGRAM AE is selected.
You can adjust the following functions while using the PROGRAM AE:
- Exposure
If you record under a discharge tube such as a fluorescent lamp, sodium lamp or mercury lamp
Flickering or changes in colour may occur in the following modes. If this happens, turn the PROGRAM AE off:
- PORTRAIT
- SPORTS
- Colour Slow Shutter
- SLOW SHTR
- OLD MOVIE
- BOUNCE
Adjusting the exposure manually
You can adjust and set the exposure. Normally the exposure is automatically adjusted. Adjust the exposure manually in the following cases:
- The subject is backlit
- To shoot a bright subject against a background
- To record dark pictures (e.g. night scenes) faithfully
(1) Set the POWER switch to CAMERA or MEMORY, then press FN to display PAGE1.
(2) Press EXPOSURE. The screen to adjust the exposure appears.
(3) Press MANUAL.
(4) Adjust the exposure using - / + .
- : to dim
+: to brighten
(5) Press OK to return to PAGE1.
To return to FN
Press EXIT.
To return to the automatic exposure mode
Press ↩ AUTO to return to PAGE1.
Note
When you adjust the exposure manually, the following functions do not work:
- Colour Slow Shutter
- BACK LIGHT
Your camcorder automatically returns to the automatic exposure mode:
- If you change the PROGRAM AE mode.
- If you slide NIGHTSHOT to ON.
You can take a picture with the appropriate exposure automatically for just the point you want to focus on and with its exposure fixed. Use the Flexible Spot Meter function in the following cases:
- The subject is backlit.
- When there is strong contrast between the subject and background such as with a subject that is on stage and lit by a spotlight.
(1) Set the POWER switch to CAMERA or MEMORY, then press FN to display PAGE1.
(2) Press SPOT METER. The SPOT METER screen appears.
(3) Press the desired area in the frame on the LCD screen. The SPOT METER indicator flashes on the LCD screen. The exposure of the point you selected is adjusted.
(4) Press OK to return to PAGE1.
To return to the automatic exposure mode
Press ↩ AUTO to return to PAGE1.
The following functions do not work during the Flexible Spot Meter:
- Colour Slow Shutter
- BACK LIGHT
- Exposure
- Spot focus
Flexible Spot Meter is automatically cancelled:
- If you change the PROGRAM AE mode.
- If you slide NIGHTSHOT to ON.
You can gain better results by manually adjusting the focus in the following cases. Normally, focus is automatically adjusted.
- The autofocus mode is not effective when shooting:
- subjects through glass coated with water droplets
- horizontal stripes
– subjects with little contrast with backgrounds such as walls or the sky - When you want to change the focus from a subject in the foreground to a subject in the background
- Shooting a stationary subject when using a tripod
Фокусировка вручную
natural_image
Black-and-white photo showing a woman holding white tulips, with two arrows pointing to the left (no text or symbols)(1) Set the POWER switch to CAMERA or MEMORY, then press FOCUS lightly. The indicator appears.
(2) Turn the focus ring to sharpen focus.
To return to the autofocus mode Press FOCUS lightly to turn off ⏻, ▲ or ◆ indicator.
To record distant subjects
When you press FOCUS down deeper, the focus becomes infinite and the ▲ indicator appears. When you release FOCUS, your camcorder returns to the manual focus mode. Use this mode when your camcorder focuses on near objects even though you are trying to shoot a distant subject.
To focus precisely
It is easier to focus on the subject if you adjust the zoom to shoot at the “W” (wide-angle) position after focusing at the “T” (telephoto) position.
When you shoot close to the subject
Focus at the end of the “W” (wide-angle) position.
changes as follows:
▲ when recording a distant subject
when the subject is too close to focus on
Using the spot focus function - Spot Focus
You can take a picture with the appropriate focus automatically for just the point you want to focus on and with its focus fixed.
(1) Set the POWER switch to CAMERA or MEMORY, then press FN to display PAGE1.
(2) Press SPOT FOCUS. The SPOT FOCUS screen appears.
(3) Press the desired area in the frame on the LCD screen.
The SPOT FOCUS indicator flashes on the LCD screen. The focus of the point you selected is adjusted.
(4) Press ↩ OK to return to PAGE1.
To return to the autofocus mode
Press ↩ AUTO to return to PAGE1.
Note
You cannot use Spot Focus during PROGRAM AE.
You can make a time-lapse recording by setting the camcorder to automatically record and standby sequentially. You can achieve an excellent recording for flowering, emergence, etc. with this function.
[a] REC TIME
[b] INTERVAL
(1) In standby, press FN to display PAGE1.
(2) Press MENU, then set INT. REC to SET in 📄, then press EXEC (p. 247).
(3) Set INTERVAL and REC TIME.
① Press ↓/↑ to select INTERVAL, then press EXEC.
② Press ↓/↑ to select the desired interval time, then press EXEC.
The time: 30SEC ↔ 1MIN ↔ 5MIN ↔ 10MIN
③ Press ↓/↑ to select REC TIME, then press EXEC.
④ Press ↓/↑ to select the desired recording time, then press EXEC.
The time: 0.5SEC ↔ 1SEC ↔ 1.5SEC ↔ 2SEC
⑤ Press ↩ RET.
[a] REC TIME
[b] INTERVAL
natural_image
Line drawing of a digital camera with an open screen and control panel (no text or symbols)3
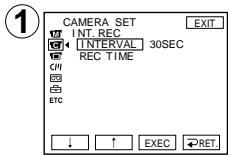
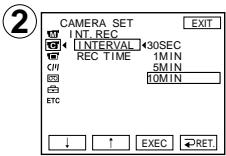
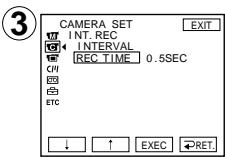
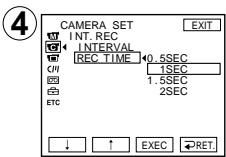
(4) Set INT. REC to ON, then press EXEC.
(5) Press EXIT to return to FN.
The INTERVAL indicator flashes on the screen.
(6) Press START/STOP to start interval recording.
The INTERVAL indicator lights up.
natural_image
Line drawing of a digital camera with open lid and control panel (no text or symbols)4
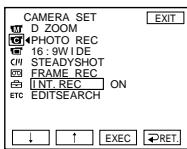
To cancel the interval recording
Perform either of the following:
- Set INT. REC to OFF in the menu settings.
- Set the POWER switch to other than CAMERA.
To perform normal recording during interval recording
Press START/STOP. The INTERVAL indicator flashes, and normal recording starts. Press START/STOP again, then normal recording finishes and returns to the screen in the step 5.
Note
You cannot do interval recording during MPEG movie recording.
Recording time
There may be a discrepancy in recording time of up to +/-6 frames from the selected time.
Frame by frame recording - Frame recording
You can make a recording with a stop-motion animated effect using frame recording. To create this effect, alternately move the subject a little and make a frame recording. We recommend that you use a tripod, and operate the camcorder using the Remote Commander after step 4.
(1) In standby, press FN to display PAGE1.
(2) Press MENU, then set FRAME REC to ON in ☐ (p. 247).
(3) Press EXIT to return to FN.
The FRAME REC indicator lights up.
(4) Press START/STOP to start frame recording. The camcorder makes a recording for about six frames, and returns to standby.
(5) Move the subject, and repeat step 4.
Frame by frame recording
- Frame recording
To cancel frame recording
Perform either of the following:
- Set FRAME REC to OFF in the menu settings.
- Set the POWER switch to other than CAMERA.
Notes
- The proper remaining tape time is not indicated if you use this function continuously.
- You cannot do frame recording during MPEG movie recording.
When using the frame recording function The last recorded frame is longer than other frames.
Покадровая запись
- Покадровая запись
Using the viewfinder
Pull out the viewfinder until it clicks, and then turn the LCD panel over and move it back to your camcorder body with the LCD screen facing out. You can operate with the touch panel using the viewfinder.
Use the viewfinder in the following case:
When operating camera brightness and the fader (only in CAMERA) on the touch panel using the viewfinder.
(1) Set the POWER switch to CAMERA or MEMORY. Pull out the viewfinder until it clicks, and then turn the LCD panel over and move it back to your camcorder body with the LCD screen facing out.
(2) Press ☐ OFF. The message PANEL OFF appears on the screen.
(3) Press OK. The LCD screen is turned off.
(4) Using the viewfinder, press the LCD screen. EXPOSURE, OK, ON and FADER (only in CAMERA) appear.
(5) Select a desired item, then press ↩ OK.
EXPOSURE: adjust the exposure by pressing -/+
FADER: press FADER until the desired fader mode is displayed.
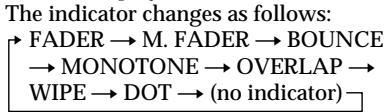
ON: The LCD screen lights up, then becomes Mirror Mode.
To make the buttons on the LCD screen disappear
Press OK.
Notes
- Do not touch the LCD screen with wet hands.
- Do not press the LCD screen with sharp objects such as a pen.
- In VCR or memory playback, you cannot operate with the touch panel using the viewfinder.
To operate the items that are not displayed Set the LCD screen and the viewfinder back to the previous position. Operate the items using the LCD screen.
FN and OFF in the viewfinder
These buttons appear mirror-reversed.
Available recording time
This is the time when you record pictures using the viewfinder (p. 25).
Playing back a tape with picture effect
During playback, you can process a scene using the picture effect functions: NEG.ART, SEPIA, B&W and SOLARIZE.
(1) In playback or playback pause, press FN to display PAGE1.
(2) Press MENU, then set P EFFECT to the desired mode ☐ (p. 246).
See page 74 for details of each picture effect function.
To return to FN
Press EXIT.
To cancel the picture effect function
Set P EFFECT to OFF in the menu settings.
Playing back a tape with picture effect
Notes
- You cannot process externally input scenes using the picture effect function.
- You cannot record images on a tape on your camcorder while you are processing the image using the picture effect function. Record images on a “Memory Stick” (p. 168, 183), or on a VCR using your camcorder as a player.
Pictures processed by the picture effect function
Pictures processed by the picture effect function are not output through the i DV Interface.
When you set the POWER switch to OFF (CHARGE) or stop playing back
The picture effect function is automatically cancelled.
Playing back a tape with digital effect
During playback, you can process a scene using the digital effect functions: STILL, FLASH, LUMI. and TRAIL.
(1) In playback or playback pause, press FN and select PAGE2.
(2) Press DIG EFFT. The screen to select a desired digital effect mode appears.
(3) Select a desired digital effect mode. In STILL or LUMI., the picture that you select the mode is stored in memory as a still image.
(4) Press - / + to adjust the effect. See page 77 for details.
(5) Press OK to return to PAGE2.
Press ➕ OFF to return to PAGE2.
Playing back a tape with digital effect
Notes
- You cannot process externally input scenes using the digital effect function.
- You cannot record images on a tape on your camcorder while you are processing the image using the digital effect function. Record images on a “Memory Stick” (p. 168, 183), or on a VCR using your camcorder as a player.
Pictures processed by the digital effect function
Pictures processed by the digital effect function are not output through the i DV Interface.
When you set the POWER switch to OFF (CHARGE) or stop playing back
The digital effect function is automatically cancelled.
Enlarging images recorded on tapes - Tape PB ZOOM
You can enlarge playback images recorded on tapes. Besides the operation described here, your camcorder can enlarge still images recorded on “Memory Stick”s (p. 203).
(1) In playback or playback pause, press FN and select PAGE2.
(2) Press PB ZOOM. The PB ZOOM screen appears.
(3) Press the area you want to enlarge in the frame on the PB ZOOM screen.
The area you pressed moves to the centre of the screen, and the playback image is enlarged to about twice the size. If you press the other area again, the area moves to the centre of the screen.
(4) Adjust the zoom ratio by the zoom lever. You can select the zoom ratio from approximately 1.1 times up to five times its size.
W: Decrease the zoom ratio.
T: Increase the zoom ratio.
Enlarging images recorded on tapes - Tape PB ZOOM
Notes
- You cannot process externally input scenes using the PB ZOOM function with your camcorder.
- You cannot record images on a tape on your camcorder while you are processing the image using the tape PB ZOOM function. However, you can record images on a VCR using your camcorder as a player.
- You cannot record moving pictures on a “Memory Stick” on your camcorder when you have processed the picture using tape PB ZOOM.
The PB ZOOM function is automatically cancelled when you operate the following functions:
- Set the POWER switch to OFF (CHARGE.)
- Stop playing back.
- Insert a "Memory Stick."
Images in PB ZOOM
Images in the PB ZOOM mode are not output through the i DV Interface and (USB) jack.
In PB ZOOM
If you press DISPLAY/ TOUCH PANEL, the frame on the PB ZOOM screen disappears. You cannot move the part you pressed to the centre of the screen.
Edge of the enlarged image
The edge of the enlarged image cannot be displayed at the centre of the screen.
Quickly locating a scene - ZERO SET MEMORY
Your camcorder automatically searches for a desired scene having a tape counter value of "0:00:00". Use the Remote Commander for this operation.
(1) In playback, press DISPLAY on the Remote Commander if the counter is not on the screen.
(2) Press ZERO SET MEMORY on the Remote Commander at the point you want to locate later. The tape counter shows "0:00:00" and the ZERO SET MEMORY indicator flashes.
(3) Press ■ when you want to stop playback.
(4) Press ◀◀ to rewind the tape to the tape counter's zero point. The tape stops automatically when the tape counter reaches approximately zero. The ZERO SET MEMORY indicator disappears and the time code appears.
(5) Press ▶. Playback starts from the counter's zero point.
Notes
- When you press ZERO SET MEMORY before rewinding the tape, the zero set memory function will be cancelled.
- There may be a discrepancy of several seconds between the time code and the tape counter.
- The ZERO SET MEMORY indicator disappears when you press FN.
If a tape has a blank portion in the recorded sections
ZERO SET MEMORY may not work correctly.
Примечания
Searching the boundaries of recorded tape by title - TITLE SEARCH
CM only
If you use a tape with cassette memory, you can search for the boundaries of a recorded tape by title. Use the Remote Commander for this operation.
Before operation
Set CM SEARCH to ON in the menu settings. (The default setting is ON.)
(1) Set the POWER switch to VCR.
(2) Press SEARCH MODE on the Remote Commander repeatedly, until the TITLE SEARCH indicator appears. The indicator changes as follows:
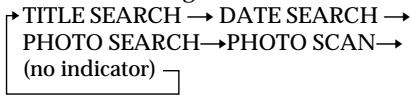
flowchart
graph TD
    A["TITLE SEARCH"] --> B["DATE SEARCH"]
    B --> C["PHOTO SEARCH"]
    C --> D["PHOTO SCAN"]
    D --> E["(no indicator)"]
(3) Press ◀◀◀ or ▶▶◀ on the Remote Commander to select the title for playback.
Your camcorder automatically starts playback of the scene having the title that you selected.
[a]: Actual point you are trying to search for
[b]: Present point on the tape
Searching the boundaries of recorded tape by title - TITLE SEARCH
To stop searching
Press ■ on the Remote Commander.
If you use a cassette without cassette memory You cannot superimpose or search a title.
If a tape has a blank portion between recorded sections TITLE SEARCH may not work correctly.
To superimpose a title See page 139.
Searching a recording by date - DATE SEARCH
Your camcorder automatically searches for the point where the recording date changes and starts playback from that point (DATE SEARCH).
Use a tape with cassette memory for convenience. Use the Remote Commander for this operation.
Use this function to check where recording dates change or to edit the tape at each recording date.
Searching for the date by using cassette memory
Before operation
- You can use this function only when playing back a tape with cassette memory.
- Set CM SEARCH to ON in the menu settings. (The default setting is ON.)
(1) Set the POWER switch to VCR.
(2) Press SEARCH MODE on the Remote Commander repeatedly, until the DATE SEARCH indicator appears.
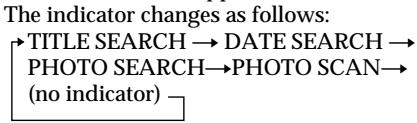
flowchart
graph TD
    A["TITLE SEARCH"] --> B["PHOTO SEARCH"]
    B --> C["PHOTO SCAN"]
    C --> D["(no indicator)"]
(3) Press ◀◀◀ or ▶▶◀ on the Remote Commander to select the date for playback.
Your camcorder automatically starts playback at the beginning of the selected date.
[a]: Actual point you are trying to search for
[b]: Present point on the tape
Searching a recording by date - DATE SEARCH
To stop searching
Press ■ on the Remote Commander.
Note
If one day's recording is less than two minutes, your camcorder may not accurately find the point where the recording date changes.
If a tape has a blank portion between recorded sections
DATE SEARCH may not work correctly.
Cassette memory
The tape cassette memory can hold six recording date data. If you search the date among seven or more data, see “Searching for the date without using cassette memory.”
Searching for the date without using cassette memory
(1) Set the POWER switch to VCR.
(2) Press FN to display PAGE1.
(3) Press MENU, then set CM SEARCH to OFF in CIII (p. 251).
(4) Press SEARCH MODE on the Remote Commander repeatedly, until the DATE SEARCH indicator appears.
(5) Press ◆◀◀ on the Remote Commander to search for the previous date or press ▶▶▶ on the Remote Commander to search for the next date. Your camcorder automatically starts playback at the point where the date changes. Each time you press ◆◀◀ or ▶▶▶, your camcorder searches for the previous or next date.

To stop searching
Press ■ on the Remote Commander or □ on your camcorder.
You can search for a still image you have recorded on a tape (PHOTO SEARCH).
You can also search for still images one after another and display each image for five seconds automatically regardless of the cassette memory (PHOTO SCAN). Use the Remote Commander for these operations.
Use this function to check or edit still images.
Searching for a photo by using cassette memory
Before operation
- You can use this function only when playing back a tape with cassette memory.
- Set CM SEARCH to ON in the menu settings. (The default setting is ON.)
(1) Set the POWER switch to VCR.
(2) Press SEARCH MODE on the Remote Commander repeatedly, until the PHOTO SEARCH indicator appears.
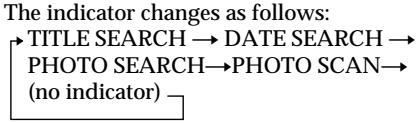
flowchart
graph TD
    A["TITLE SEARCH"] --> B["DATE SEARCH"]
    B --> C["PHOTO SEARCH"]
    C --> D["PHOTO SCAN"]
    D --> E["(no indicator)"]
(3) Press ◆◀◀ or ▶▶◀ on the Remote Commander to select the date for playback. Your camcorder automatically starts playback of the photo having the date that you selected.
Поиск фото – PHOTO SEARCH/ PHOTO SCAN
[a]: Actual point you are trying to search for
[b]: Present point on the tape
Press ■ on the Remote Commander.
Searching for a photo without using cassette memory
(1) Set the POWER switch to VCR.
(2) Press FN to display PAGE1.
(3) Press MENU, then set CM SEARCH to OFF in [CIII] (p. 251).
(4) Press SEARCH MODE on the Remote Commander repeatedly, until the PHOTO SEARCH indicator appears.
(5) Press ◀◀◀ or ▶▶◀ on the Remote Commander to select the photo for playback. Each time you press ◀◀◀ or ▶▶◀, your camcorder searches for the previous or next photo.
Your camcorder automatically starts playback of the photo.

To stop searching
Press ■ on the Remote Commander or □ on your camcorder.
(1) Set the POWER switch to VCR.
(2) Press SEARCH MODE on the Remote Commander repeatedly, until the PHOTO SCAN indicator appears.
The indicator changes as follows:
(3) Press ◀◀◀ or ▶▶◀ on the Remote Commander.
Each photo is played back for about five seconds automatically.

flowchart
graph LR
    A["→"] --> B["DATE SEARCH → PHOTO SEARCH"]
    B --> C["(no indicator) ← PHOTO SCAN"]
Сканирование фото
Press ■ on the Remote Commander or □ on your camcorder.
If a tape has a blank section between recorded sections
PHOTO SEARCH and PHOTO SCAN may not work correctly.
The available number of photos that can be searched using the cassette memory
The available number is up to 12 photos.
However, you can search 13 photos or more using the photo scan function.
Using the A/V connecting cable
You can dub or edit on the VCR connected to your camcorder using your camcorder as a player.
Connect your camcorder to the VCR using the A/V connecting cable supplied with your camcorder.
Before operation
- Set DISPLAY to LCD in the menu settings. (The default setting is LCD.)
- Press the following buttons to make the indicator disappear so that they will not be superimposed on the edited tape:
On your camcorder:
DISPLAY/TOUCHPANEL
On the Remote Commander:
DISPLAY, DATA CODE, SEARCH MODE
(1) Insert a blank tape (or a tape you want to record over) into the VCR, and insert the recorded tape into your camcorder.
(2) Connect the A/V connecting cable to A/V jack. Prepare the VCR for recording, then set the input selector to LINE.
Refer to the operating instructions of the VCR.
(3) Set the POWER switch to VCR on your camcorder.
(4) Play back the recorded tape on your camcorder.
(5) Start recording on the VCR.
Refer to the operating instructions of your VCR.
Перезапись ленты
When you have finished dubbing a tape
Press ■ on both your camcorder and the VCR.
You can edit on VCRs that support the following systems
8 mm 8, Hi8 Hi8, Digital8 1), VHS VHS, S-VHS SVHS, VHSC VHSC, S-VHSC SVHS,
If your VCR is a monaural type
Connect the yellow plug of the A/V connecting cable to the video input jack and the white or the red plug to the audio input jack on the VCR or the TV. When the white plug is connected, the left channel audio is output, and when the red plug is connected, the right channel audio is output.
If your VCR has an S video jack
Pictures can be reproduced more faithfully by using an S video cable (optional).
With this connection, you do not need to connect the yellow (video) plug of the A/V connecting cable.
Connect an S video cable (optional) to the S video jacks of both your camcorder and the VCR.
This connection produces higher quality DV format pictures.
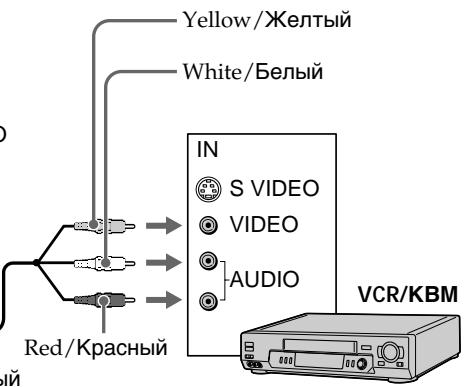
Simply connect the i.LINK cable (optional) to the DV Interface of your camcorder and to DV IN of the DV products. With digital-to-digital connection, video and audio signals are transmitted in digital form for high-quality editing. You cannot dub the titles, display indicators or the contents of cassette memory or letters on the "Memory Stick" index screen. Set the input selector on the VCR to the DV input position if the VCR is equipped with an input selector.
(1) Insert a blank tape (or a tape you want to record over) into the VCR, and insert the recorded tape into your camcorder.
(2) Prepare the VCR for recording, then set the input selector to LINE. Refer to the operating instructions of the VCR.
(3) Set the POWER switch to VCR on your camcorder.
(4) Play back the recorded tape on your camcorder.
(5) Start recording on the VCR. Refer to the operating instructions of the VCR.
When you have finished dubbing a tape
Press ■ on both your camcorder and the VCR.
You can connect one VCR only using the i.LINK cable
See page 288 for more information about i.LINK.
Pictures processed by the picture effect, the digital effect or PB ZOOM function
Pictures processed by the picture effect, the digital effect or PB ZOOM function are not output through the DV Interface.
If you record a paused playback picture with the i, DV Interface
The recorded picture becomes rough. And when you play back the picture using other video equipment, the picture may jitter.
Dubbing only desired scenes - Digital program editing (on tapes)
You can duplicate selected scenes (programmes) for editing onto a tape without operating the VCR.
Scenes can be selected by frame. You can set up to 20 programmes.
Your camcorder can dub on "Memory Stick"s. See page 187 for more information.
Before operating the Digital program editing on tapes recorded on other equipment
Step 1 Connecting to the VCR (p. 114).
Step 2 Setting the VCR to operate (p. 114, 120).
Step 3 Adjusting the synchronisation of the VCR (p. 122).
When you dub using the same VCR again, you can skip steps 2 and 3.
Using the Digital program editing function on tapes recorded on other equipment
Operation 1 Making the programme (p. 124).
Operation 2 Performing Digital program editing (Dubbing a tape) (p. 126).
Dubbing only desired scenes - Digital program editing (on tapes)
Note
When editing digital video, the operation signals to the VCR cannot be sent with LANC.
Step 1: Connecting to the VCR
You can connect either the A/V connecting cable or the i.LINK cable.
When you use the A/V connecting cable, connect the devices as illustrated in page 110. When you use the i.LINK cable, connect the devices as illustrated in page 111.
If you connect using an i.LINK cable
With digital-to-digital connection, video and audio signals are transmitted in digital form for high-quality editing.
Step 2: Setting the VCR to operate with the A/V connecting cable
To edit using the VCR, send the control signal by infrared rays to the remote sensor on the VCR. When you connect using the A/V connecting cable, follow the procedures below, (1) to (4), to send the control signal correctly.
Dubbing only desired scenes - Digital program editing (on tapes)
(1) Setting the IR SETUP code
① Set the POWER switch to VCR on your camcorder.
② Turn the power of the connected VCR on, then set the input selector to LINE. When you connect a video camera recorder, set its power switch to VCR/VTR.
③ Press FN to display PAGE1.
④ Press MENU, then select VIDEO EDIT in ETC, then press EXEC (p. 253).
⑤ Press ↓/↑ to select TAPE, then press EXEC.
⑥ Press EDIT SET.
⑦ Press ↓/↑ to select CONTROL, then press EXEC.
⑧ Press ↓/↑ to select IR, then press EXEC.
⑨ Press ↓/↑ to select IR SETUP, then press EXEC.
⑩ Press ↓/↑ to select the IR SETUP code of your VCR, then press EXEC. Check the code in "About the IR SETUP code" (p. 117).
natural_image
Line drawing of a digital camera with open lid and external camera (no text or symbols)3
FN
4
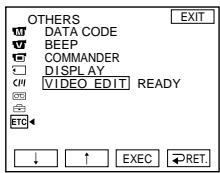
5
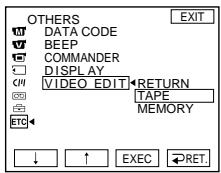
6
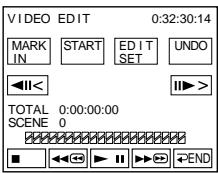
8\~10
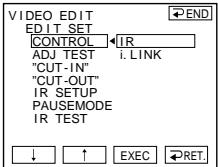

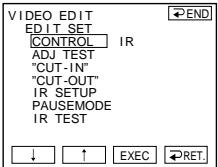
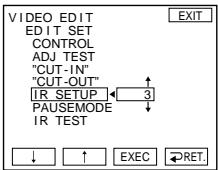

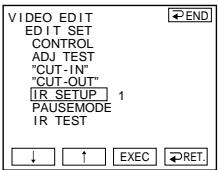
Dubbing only desired scenes - Digital program editing (on tapes)
About the IR SETUP code
The IR SETUP code is stored in the memory of your camcorder. Be sure to set the correct code, depending on your VCR. Default setting is code number 3.
| Brand/Mapka | IR SETUP code/Kođ IR SETUP |
| Sony | 1, 2, 3, 4, 5, 6 |
| Aiwa | 47, 53, 54 |
| Akai | 50, 62, 74 |
| Alba | 73 |
| Amstrad | 73 |
| Baird | 30, 36 |
| Blaupunkt | 11, 83 |
| Bush | 74 |
| CGM | 36, 47, 83 |
| Clatronic | 73 |
| Daewoo | 26 |
| Ferguson | 76, 83 |
| Fisher | 73 |
| Funai | 80 |
| Goldstar | 47 |
| Goodmans | 26, 84 |
| Grundig | 9, 83 |
| Hitachi | 42, 56 |
| ITT/Nokia Instant | 36 |
| JVC | 11, 12, 15, 21 |
| Kendo | 47 |
| Loewe | 16, 47, 84 |
| Luxor | 89 |
| Mark | 26* |
| Matsui | 47, 58*, 60 |
| Mitsubishi | 28, 29 |
* TV/VCR component
Note on the IR SETUP code
Digital program editing is not possible if the VCR does not support IR SETUP codes.
Dubbing only desired scenes - Digital program editing (on tapes)
(2) Setting the modes to cancel the recording pause on the VCR
① Press ↓/↑ to select PAUSEMODE, then press EXEC.
② Press ↓/↑ to select the mode to cancel recording pause on the VCR, then press EXEC.
The correct button depends on your VCR. Refer to the operating instructions of your VCR.
2
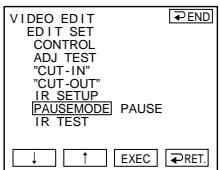
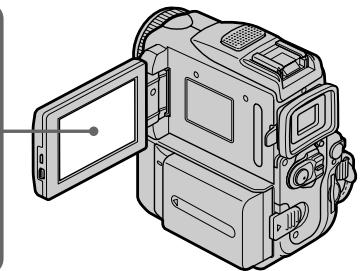
natural_image
Line drawing of a digital camera with an open lid and control panel (no text or symbols)Buttons that cancel recording pause on the VCR
The buttons vary depending on your VCR. To cancel recording pause of your VCR:
- Select PAUSE if the button to cancel recording pause is II .
- Select REC if the button to cancel recording pause is .
- Select PB if the button to cancel recording pause is ▶.
(3) Locate the infrared rays emitter of your camcorder and face it towards the remote sensor of the VCR
Set the devices about 30 cm (12 in.) apart, and remove any obstacles between the devices.
Dubbing only desired scenes - Digital program editing (on tapes)
(4) Confirming the VCR operation
① Insert a recordable tape into the VCR, then set the VCR to recording pause.
② Press ↓/↑ to select IR TEST, then press EXEC.
③ Press ↓/↑ to select EXECUTE, then press EXEC.
If the VCR starts recording, the setting is correct.
The indicator you selected to cancel recording pause on the VCR flashes on the LCD screen.
When finished, the indicator changes to COMPLETE.
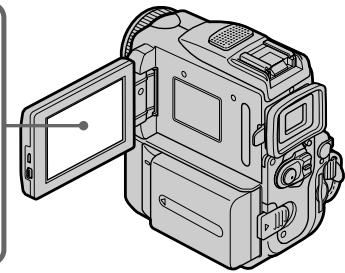
natural_image
Line drawing of a digital camera with an open lid and control panel (no text or symbols)When the VCR does not operate correctly
- After checking the code in "About the IR SETUP" code, set the IR SETUP or the PAUSEMODE again.
- Place your camcorder at least 30 cm (12 in.) away from the VCR.
- Refer to the operating instructions of your VCR.
Step 2: Setting the VCR to operate with the i.LINK cable
When you connect using the i.LINK cable (optional), follow the procedures below.
(1) Set the POWER switch to VCR on your camcorder.
(2) Turn the power of the connected VCR on, then set the input selector to DV input. When you connect a digital video camera recorder, set its power switch to VCR/VTR.
(3) Press FN to display PAGE1.
(4) Press MENU, then select VIDEO EDIT in [ETC], then press EXEC (p. 253).
(5) Press ↓/↑ to select TAPE, then press EXEC.
(6) Press EDIT SET.
(7) Press ↓/↑ to select CONTROL, then press EXEC.
(8) Press ↓/↑ to select i.LINK, then press EXEC.
natural_image
Line drawing of a digital camera with open lid and control panel (no text or symbols)3

4
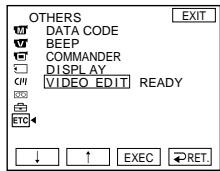
7,8
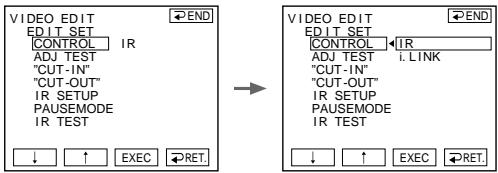
5
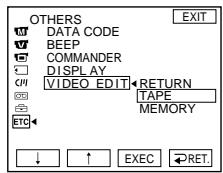
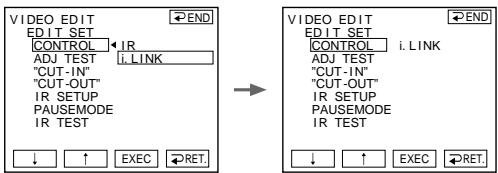
6
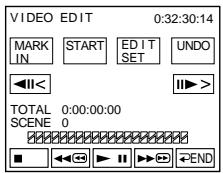
Note
When you connect with an i.LINK cable, you may not be able to operate the dubbing function correctly, depending on the VCR.
Set CONTROL to IR in the menu settings of your camcorder.
When you connect using i.LINK cable
You cannot dub the titles, display indicators.
Примечание
Step 3: Adjusting the synchronisation of the VCR
You can adjust the synchronisation of your camcorder and the VCR.
Prepare a pen and paper for notes.
Before operation, eject a cassette from your camcorder (if inserted).
(1) Insert a recordable tape into the VCR, then set the VCR to recording pause.
When you select i.LINK in CONTROL, the recording pause is not necessary.
(2) Press ↓/↑ to select ADJ TEST, then press EXEC.
(3) Press ↓/↑ to select EXECUTE, then press EXEC.
IN and OUT are recorded on an image for five times each to calculate the numerical values for adjusting the synchronisation.
The EXECUTING indicator flashes on the LCD screen. When finished, the indicator changes to COMPLETE.
(4) Rewind the tape in the VCR, then start slow playback.
Take a note of the opening numerical value of each IN and the closing numerical value of each OUT.
(5) Calculate the average of five opening numerical values of five IN, and the average of all the closing numerical values of each OUT.
(6) Press ↓/↑ to select "CUT-IN", then press EXEC.
(7) Press / to select the average numerical value of IN, then press EXEC.
The calculated start position for recording is set.
(8) Press ↓/↑ to select "CUT-OUT", then press EXEC.
(9) Press / to select the average numerical value of OUT, then press EXEC.
The calculated stop position for recording is set.
(10) Press RET. to execute.
natural_image
Line drawing of a digital camera with an open screen and control panel (no text or symbols)2,3
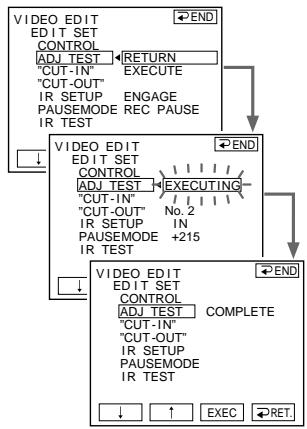
flowchart
graph TD
    A["VIDEO EDIT<br>EDIT SET<br>CONTROL<br>ADJ TEST"] --> B["RETURN"]
    B --> C["CUT-IN"]
    C --> D["EXECUTE"]
    D --> E["CUT-OUT"]
    E --> F["IR SETUP ENGAGE"]
    F --> G["PAUSEMODE REC PAUSE"]
    G --> H["IR TEST"]
    I["VIDEO EDIT<br>EDIT SET<br>CONTROL<br>ADJ TEST"] --> J["EXECUTING"]
    J --> K["CUT-IN"]
    K --> L["CUT-OUT No.2"]
    L --> M["IR SETUP IN"]
    M --> N["PAUSEMODE +215"]
    N --> O["IR TEST"]
    P["VIDEO EDIT<br>EDIT SET<br>CONTROL<br>ADJ TEST"] --> Q["COMPLETE"]
    Q --> R["CUT-IN"]
    R --> S["CUT-OUT"]
    S --> T["IR SETUP PAUSEMODE IR TEST"]
    U["↓"] --> V["↓"]
    V --> W["↑"]
    W --> X["EXEC"] --> Y["RET"]
6,7
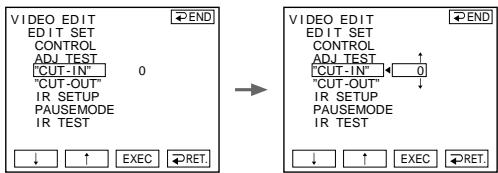
8,9
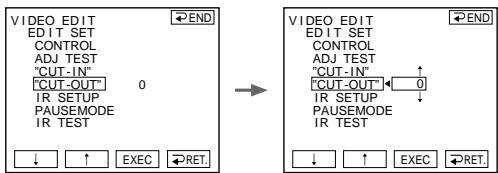
To return to FN
Press ➕ END to return to PAGE1, then press EXIT.
Notes
- When you complete step 3, the image to adjust the synchronisation is recorded for about 50 seconds.
- If you start recording from the very beginning of the tape, the first few seconds of the tape may not be recorded properly. Be sure to allow about 10 seconds' lead before starting the recording.
- When the recording unit cannot be operated properly by the i.LINK cable, leave the connection as it is, and make the A/V connecting cable settings (p. 114). Video and audio are sent by digital signals.
Operation 1: Making the Programme
(1) Insert the tape for playback into your camcorder, and insert a tape for recording into the VCR.
(2) Press FN to display PAGE1.
(3) Press MENU, then select VIDEO EDIT in ETC, then press EXEC (p. 253).
(4) Press ↓/↑ to select TAPE, then press EXEC.
(5) Search for the beginning of the first scene you want to insert using the video control buttons on the LCD screen, then pause playback. You can fine-adjust one frame at a time with □◀◀< / ||▶>.
(6) Press MARK IN on the screen.
The IN point of the first programme is set, and the upper part of the programme mark changes to light blue.
(7) Search for the end of the first scene you want to insert using the video control buttons on the LCD screen, then pause playback. You can fine-adjust one frame at a time with ◀◀◀/▶>.
(8) Press MARK OUT on the screen.
The OUT point of the first programme is set, then the lower part of the programme mark changes to light blue.
(9) Repeat steps 5 to 8.
When one programme is set, the programme mark changes to light blue.
You can set 20 programmes in maximum.
natural_image
Line drawing of a digital camera with an open screen and control panel (no text or symbols)4
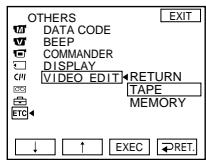

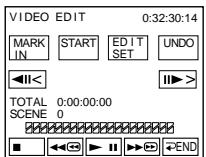
5\~8
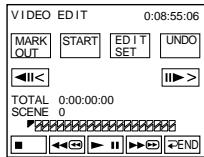

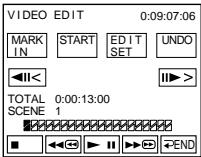

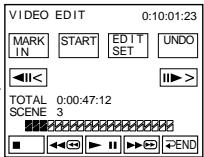
Dubbing only desired scenes - Digital program editing (on tapes)
Erasing the programme you have set
Erase OUT mark first, and then IN mark of the last programme.
(1) Press UNDO.
(2) Press ERASE 1 MARK. The last set programme mark flashes, then DELETE ? appears.
(3) Press EXEC. The last set programme is deleted.
To cancel erasing
Press CANCEL in step 3.
Erasing all programmes
(1) Press MENU, then select VIDEO EDIT in ETC, then press EXEC (p. 253).
(2) Press ↓/↑ to select TAPE, then press EXEC.
(3) Press UNDO.
(4) Press ERASE ALL. All the set programme marks flash, then DELETE ? appears.
(5) Press EXEC. All the set programmes are deleted.
To cancel erasing all programmes
Press CANCEL in step 5.
To finish making programmes
Press ➕ END.
The programme is stored in memory until the tape is ejected.
Note
You cannot operate recording during the Digital program editing.
On a blank portion of the tape
You cannot set IN or OUT.
If there is a blank portion between the IN point and the OUT point on the tape
The time code may not be displayed correctly.
Operation 2: Performing Digital program editing (Dubbing a tape)
Make sure your camcorder and the VCR are connected, and that the VCR is set to recording pause. When you use an i.LINK cable the following procedure is not necessary.
When you use a digital video camera recorder, set the power switch of VCR to VCR/VTR.
(1) Press MENU, then select VIDEO EDIT in ETC, then press EXEC (p. 253).
(2) Press ↓/↑ to select TAPE, then press EXEC.
(3) Press START.
(4) Press EXEC.
Search for the beginning of the first programme, then start dubbing.
The SEARCH indicator appears during search, and the EDITING indicator appears during edit on the LCD screen.
The programme mark changes to light blue after the dubbing is complete.
When the dubbing ends, your camcorder and the VCR automatically stop.
To stop dubbing during editing
Press CANCEL.
To finish the Digital program editing function
Your camcorder stops when the dubbing is complete. Then the display returns to VIDEO EDIT in the menu settings.
Press END to end the video edit function.
Dubbing only desired scenes - Digital program editing (on tapes)
You cannot record on the VCR when:
– The tape has run out.
– The write-protect tab on the cassette is set to lock.
- The IR SETUP code is not correct. (When IR is selected.)
- The button to cancel recording pause is not correct. (When IR is selected.)
CHECK "i.LINK" & REC STATUS appears on the LCD screen when:
– i.LINK is selected but an i.LINK cable is not connected.
- The power of the connected VCR is not turned on. (When i.LINK is selected.)
When the programme has not been set You cannot press START.
Recording video or TV programmes
Using the A/V connecting cable
You can record a tape from another VCR or a TV programme from a TV that has video/audio outputs. Use your camcorder as a recorder.
Before operation
Set DISPLAY to LCD in the menu settings.
(The default setting is LCD.)
(1) Insert a blank tape (or a tape you want to record over) into your camcorder. If you are recording a tape from the VCR, insert a recorded tape into the VCR.
(2) Set the POWER switch to VCR on your camcorder.
(3) Press FN and select PAGE3, then press REC CTRL. And press REC PAUSE.
(4) Press ▶ on the VCR to start playback if you record a tape from VCR. Select a TV programme if you record from TV. The picture from TV or VCR appears on the screen.
(5) Press REC START at the scene where you want to start recording from.
Recording video or TV programmes
When you have finished dubbing a tape
Press ■ on both your camcorder and the VCR.
If your VCR is a monaural type
Connect the yellow plug of the A/V connecting cable to the video output jack and the white or the red plug to the audio output jack on the VCR or the TV. When the white plug is connected, the left channel audio is output, and when the red plug is connected, the right channel audio is output.
If your TV or VCR has an S video jack
Pictures can be reproduced more faithfully by using an S video cable (optional).
With this connection, you do not need to connect the yellow (video) plug of the A/V connecting cable.
Connect an S video cable (optional) to the S video jacks of both your camcorder and the TV or VCR. This connection produces higher quality DV format pictures.
Simply connect the i.LINK cable (optional) to the DV Interface on your camcorder and to DV OUT on the DV products. With digital-to-digital connection, video and audio signals are transmitted in digital form for high-quality editing.
(1) Insert a blank tape (or a tape you want to record over) into your camcorder, and insert a recorded tape into VCR.
(2) Set the POWER switch to VCR on your camcorder.
(3) Press FN and select PAGE3, then press REC CTRL. And press REC PAUSE.
(4) Press ▶ on the VCR to start playback. The picture from the DV products appears on the screen of your camcorder.
(5) Press REC START at the scene where you want to start recording.
Recording video or TV programmes
When you have finished dubbing a tape
Press ■ on both your camcorder and the VCR.
You can connect one VCR only using the i.LINK cable.
See page 288 for more information about i.LINK.
When you dub a picture in digital form
The colour of the display may be uneven.
However, this does not affect the dubbed picture.
If you record a paused playback picture with the i DV Interface
The recorded picture becomes rough. And when you play back the picture using your camcorder, the picture may jitter.
Before recording
Make sure if the DV IN indicator appears on the screen. The DV IN indicator may appear on both equipment.
Inserting a scene from a VCR - Insert editing
You can insert a new scene from a VCR onto your originally recorded tape by specifying the insert start and end points. Use the Remote Commander for this operation. Connections are the same as on page 128 or 130.
Insert a cassette containing the desired scene to insert into the VCR.
[A]: A tape that contains the scene to be superimposed
[B]: A tape before editing
[C]: A tape after editing
(1) Set the POWER switch to VCR.
(2) On the VCR, locate just before the insert start point [a], then set the VCR to playback pause.
(3) On your camcorder, locate the insert end point [c] by pressing ◀◀ or ▶▶. Then set it to playback pause.
(4) Press ZERO SET MEMORY on the Remote Commander. The ZERO SET MEMORY indicator flashes and the end point of the insert is stored in memory. The tape counter shows “0:00:00.”
(5) On your camcorder, locate the insert start point [b] by pressing ◀. Press FN and select PAGE3, then press REC CTRL. And press REC PAUSE.
(6) First press ■ on the VCR, and after a few seconds press REC START on your camcorder to start inserting the new scene.
Inserting automatically stops near the zero point on the tape counter. Your camcorder automatically stops recording.
flowchart
graph TD
    A["4 ZERO SET MEMORY"] --> B["0:00:00 ZERO SET MEMORY"]
    B --> C["5,6 FN REC CTRL"]
    C --> D["REC PAUSE"]
    C --> E["REC START"]
To change the insert end point
Press ZERO SET MEMORY again after step 5 to erase the ZERO SET MEMORY indicator and begin from step 3.
Note
The picture and sound recorded on the section between the insert start and end points will be erased when you insert the new scene.
If you insert scenes on the tape recorded with other camcorder (including other DCR-PC101E)
The picture and sound may be distorted. We recommend that you insert scenes on a tape recorded with your camcorder.
When the inserted picture is played back
The picture and sound may be distorted at the end of the inserted section. This is not a malfunction.
The picture and sound at the start point and the end point may be distorted in the LP mode.
To insert a scene without setting the insert end point
Skip step 3 and 4. Press ■ on the Remote
Commander or □ on your camcorder when you want to stop inserting.
If you press FN
The ZERO SET MEMORY indicator is not displayed.
You can record additional audio to the original sound on a tape by connecting audio equipment or a microphone. If you connect the audio equipment, you can add sound to your tape already recorded in the 12-bit mode by specifying starting and ending points. The original sound will not be erased. Select one of the following connections to add additional audio.
Connecting the microphone with the MIC jack
Аудиоперезапись
You can check the recorded picture and sound by connecting the A/V jack to a TV. The recorded sound is not output from a speaker. Check the sound by using the headphones or TV.
Connecting the microphone to the intelligent accessory shoe
Connecting the A/V connecting cable to the A/V jack
Dubbing with the built-in microphones
No connection is necessary.
Note
When dubbing with the A/V jack or the built-in microphone, pictures are not output through the S VIDEO jack or A/V jack. Check the recorded picture on the screen. You can check the recorded sound by using headphones.
If you make all the connections
The audio input to be recorded will take precedence over others in the following order.
• MIC (PLUG IN POWER) jack
- Intelligent accessory shoe
• A/V jack
• Built-in microphone
Adding an audio sound on a recorded tape
Choose a connection mentioned before, and connect audio equipment or microphone to your camcorder. Then follow the procedure below.
(1) Insert your recorded tape into your camcorder.
(2) Set the POWER switch to VCR.
(3) Locate the recording start point. Press ▶▶▶ to start playing back. To pause playing back, press ▶▶▶ at the recording start point. You can fine adjust the recording start point by pressing ◀◀◀/▶▶.
(4) Press FN, then select PAGE3.
(5) Press A DUB CTRL to display control buttons.
(6) Press AUDIO DUB. The green ⬤‖ appears on the LCD screen.
(7) Press ▶ on your camcorder and at the same time start playing back the audio you want to record.
The new sound is recorded in stereo 2 (ST2) during playback. While recording new sound, the red ● appears on the LCD screen.
(8) Press ■ on your camcorder at the point where you want to stop recording.
To add new sound more precisely Press ZERO SET MEMORY at the point where you want to stop recording later in playback. Carry out step 3. Recording automatically stops at the point where ZERO SET MEMORY was pressed.
Monitoring the new recorded sound
(1) Play back the tape on which you added audio.
(2) Select AUDIO MIX in ☑ in the menu settings, then press EXEC (p. 248).
(3) Press ↓/↑ to adjust the balance between the original sound (ST1) and the new sound (ST2), then press EXEC.
About five minutes after you disconnect the power source or remove the battery pack, the setting of AUDIO MIX returns to the original sound (ST1) only. The default setting is original sound only.
- New sound cannot be recorded on a tape already recorded in the 16-bit mode (32 kHz, 44.1 kHz or 48 kHz) (p. 251).
- New sound cannot be recorded on a tape already recorded in the LP mode.
- You cannot add audio with the i DV Interface.
- New sound cannot be recorded on blank portions of the tape.
If the i.LINK cable (optional) is connected to your camcorder
You cannot add new sound to a recorded tape.
We recommend that you add new sound on a tape recorded with your camcorder
If you add new sound on a tape recorded with another camcorder (including other
DCR-PC101E), the sound quality may become worse.
If you set the write-protect tab of the tape to lock
You cannot record on a tape. Slide the write-protect tab to release the write protection.
Примечания
Superimposing a title
CM only
If you use a tape with cassette memory, you can superimpose the title. When you play back the tape, the title is displayed for about five seconds from the point where you superimposed it.
Наложение титра
CM only
(1) In standby, recording, playback or playback pause, press FN to display PAGE1.
(2) Press MENU, then select TITLE in [CIII], then press EXEC (p. 251).
(3) Press ↓/↑ to select ☐, and then press EXEC.
(4) Press ↓/↑ to select a desired title, and then press EXEC. The title is displayed on the LCD screen.
(5) If necessary, change the colour, size, or position by pressing COLOUR, SIZE, POS ↓ or POS ↑.
(6) Press TITLE OK.
(7) Press SAVE TITLE.
In playback, playback pause or recording: The TITLE SAVE indicator appears on the screen for about five seconds and the title is set.
In standby:
The TITLE indicator appears. And when you press START/STOP to start recording, TITLE SAVE appears on the screen for about five seconds and the title is set.
If you set the write-protect tab to lock You cannot superimpose or erase the title. Slide the write-protect tab to release the write protection.
To use the custom title
If you want to use the custom title, select ☐ in step 3.
On a blank portion of the tape
You cannot superimpose a title on the tape.
If the tape has a blank portion in the middle of the recorded parts
The title may not be displayed correctly.
The titles superimposed with your camcorder
- They are displayed only by DV ^Mini DV format video equipment with index title function.
- The point you superimposed the title may be detected as an index signal when searching a recording with other video equipment.
If the tape has too many index signals
You may not be able to superimpose a title because the memory is full. In this case, delete data you do not need.
Set TITLE DSPL to OFF in the menu settings (p. 251).
Title setting
• The title colour changes as follows:
- The title size changes as follows:
SMALL ↔ LARGE
You cannot input 13 characters or more in LARGE size.
- If you select the title size SMALL, you have nine choices for the title position.
If you select the title size LARGE, you have eight choices for the title position.

flowchart
graph LR
    A["WHITE"] --> B["YELLOW"]
    B --> C["VIOLET"]
    C --> D["RED"]
    D --> E["BLUE"]
    E --> F["CYAN"]
    F --> G["GREEN"]
One cassette can have up to about 20 titles, if one title consists of five characters
However, if the cassette memory is full with date, photo, and cassette label data, one cassette can have only up to about 11 titles with five characters each.
Cassette memory capacity is as follows:
– Six date data (maximum)
- 12 photo data (maximum)
- One cassette label (maximum)
If the "C" FULL" mark appears
The cassette memory is full. Erase any titles you do not need.
(1) Set the POWER switch to CAMERA or VCR.
(2) Press FN to display PAGE1.
(3) Press MENU, then select TITLEERASE in [CIII], then press EXEC (p. 251).
(4) Select the title you want to erase with / , and then press EXEC.
ERASE OK? appears.
(5) Make sure the title is the one you want to erase, and press OK.
ERASING flashes on the screen.
When the title is erased, COMPLETE is displayed.
Стирание титра
Making your own titles
You can make up to two titles and store them in the memory of your camcorder. Each title can have up to 20 characters.
(1) Set the POWER switch to CAMERA or VCR.
(2) Press FN to display PAGE1.
(3) Press MENU, then select TITLE in [CIII], then press EXEC (p. 251).
(4) Select ☐ with ↓/↑, and press EXEC.
(5) Select CUSTOM1 SET or CUSTOM2 SET with ↓/↑, and press EXEC.
(6) Select the desired character. Repeat pressing a key to select the desired character on the key.
(7) Press → to move the cursor for the next character. Repeat the same procedure as step 6 to complete your title.
(8) Press SET. The title is stored in memory.
To change a title you have stored
In step 5, select CUSTOM1 SET or CUSTOM2 SET, depending on which title you want to change, then press EXEC and enter the new title as desired.
If you take five minutes or longer to enter characters in tape recording standby while a cassette is in your camcorder
The power automatically goes off. The characters you have entered remain stored in memory. Set the POWER switch to OFF (CHARGE) once and then to CAMERA again, then start again from step 1.
We recommend setting the POWER switch to VCR or removing the cassette so that your camcorder does not automatically turn off while you are entering title characters.
To erase the title
Press . The last character is erased.
To enter a space
Press →.
To enter the same character on the same button in succession
Press to move the cursor to the next position, and enter the character.
If you use a tape with cassette memory, you can label a cassette. The label can consist of up to 10 characters and is stored in cassette memory. When you insert the labelled cassette and set the POWER switch to CAMERA or VCR, the label is displayed for about five seconds.
(1) Insert the cassette you want to label.
(2) Set the POWER switch to CAMERA or VCR.
(3) Press FN to display PAGE1.
(4) Press MENU, then select TAPE TITLE in [CIII], then press EXEC (p. 251).
(5) Select a desired character. Repeat pressing a key to select the desired character on the key.
(6) Press to move the cursor for the next character. Repeat the same procedure as step 5 to complete the label.
(7) Press SET. The label is stored in memory.
Маркировка кассеты
CM only
To erase the label you have made
Select in step 5, then press SET.
To change the label you have made
Insert the cassette to change the label, and operate in the same way to make a new label.
If you set the write-protect tab to lock You cannot label the cassette. Slide the write-protect tab to release the write protection.
If the tape has too many index signals You may not be able to label a cassette because the memory is full. In this case, delete data you do not need.
If you have superimposed titles in the cassette When the label is displayed, up to four titles also appear.
When the “----” indicator has fewer than 10 spaces
The cassette memory is full.
The “----” indicates the number of characters you can select for the label.
To erase the title
Press . The last character is erased.
To enter a space
Press →.
To enter the same character on the same button in succession
Press to move the cursor to the next position, and enter the character.
Erasing all the data in cassette memory
You can erase all the data in cassette memory at once.
(1) Set the POWER switch to CAMERA or VCR.
(2) Press FN to display PAGE1.
(3) Press MENU, then press ERASE ALL in [CIII], then press EXEC (p. 251).
(4) Select OK with ↓/↑, then press EXEC. OK changes to EXECUTE.
(5) Select EXECUTE with / , and then press EXEC. ERASING flashes on the screen. Once deleting is completed, COMPLETE is displayed.
To return to FN
Press EXIT.
To cancel deleting
Select RETURN in step 5, then press EXEC.
You can record and play back images on a “Memory Stick” supplied with your camcorder. You can easily play back, record or delete images. You can exchange image data with other equipment such as your computer etc., using the USB cable for “Memory Stick” supplied with your camcorder.
File format
Still image (JPEG)
Your camcorder compresses image data in JPEG format (extension .jpg).
Moving picture (MPEG)
Your camcorder compresses picture data in MPEG format (extension .mpg).
Typical image data file name
Still image
100-0001: This file name appears on the screen of your camcorder.
Dsc00001.jpg: This file name appears on the display of your computer.
Moving picture
MOV00001: This file name appears on the screen of your camcorder.
Mov00001.mpg: This file name appears on the display of your computer.
Using a "Memory Stick"
- You cannot record or erase images when the write-protect switch on the “Memory Stick” is set to LOCK.
- The position and shape of the write-protect switch may be different depending on the model.
- We recommend backing up important data on the hard disk of your computer.
- Image data may be damaged in the following cases:
- If you remove the “Memory Stick,” turn the power off or detach the battery for replacement when the access lamp is flashing.
- If you use “Memory Stick” s near magnets or magnetic fields such as those of speakers and televisions.
- Prevent metallic objects or your finger from coming into contact with the metal parts of the connecting section.
- Stick its label on the labelling position.
- Do not bend, drop or apply strong shock to "Memory Stick"s.
- Do not disassemble or modify “Memory Stick”s.
- Do not let "Memory Stick" s get wet.
- Do not use or keep “Memory Stick”s in locations that are:
- Extremely hot such as in a car parked in the sun or under the scorching sun
- Under direct sunlight
- Very humid or subject to corrosive gases
- When you carry or store a “Memory Stick”, put it in its case.
"Memory Stick"s formatted by a computer
"Memory Stick"s formatted by Windows OS or Macintosh computers do not have a guaranteed compatibility with this camcorder.
Notes on image data compatibility
- Image data files recorded on “Memory Stick”s by your camcorder conform with the Design Rules for Camera File Systems universal standard established by the JEITA (Japan Electronics and Information Technology Industries Association).
On your camcorder, you cannot play back still images recorded on other equipment (DCR-TRV890E/TRV900/TRV900E or DSC-D700/D770) that does not conform to this universal standard. (These models are not sold in some areas.) -
If you cannot use the “Memory Stick” that is used with other equipment, format it with this camcorder (p. 250). Note that formatting erases all information on the “Memory Stick.”
-
“Memory Stick” and MEMORY STICK™ are trademarks of Sony Corporation.
- All other product names mentioned herein may be the trademarks or registered trademarks of their respective companies.
Furthermore, “TM” and “®” are not mentioned in each case in this manual.
Inserting a "Memory Stick"
Insert a “Memory Stick” in the “Memory Stick” slot as far as it can go with the ▶ mark facing up as illustrated.
Установка "Memory Stick"
natural_image
Line drawing of a digital camera with attached accessories (no text or symbols)"Memory Stick" slot/ Отсек для "Memory Stick"
Ejecting a "Memory Stick"
Slide MEMORY EJECT in the direction of the arrow.
Извлечение "Memory Stick"
natural_image
Illustration of a digital camera with attached cable and display (no text or symbols)MEMORY EJECT
While the access lamp is lit or flashing Do not shake or strike your camcorder because your camcorder is reading the data from the "Memory Stick" or recording the data on the "Memory Stick." Do not turn the power off, eject a "Memory Stick" or remove the battery pack. Otherwise, image data breakdown may occur.
If “FORMAT ERROR” is displayed Reinsert “Memory Stick” a few times. The “Memory Stick” may be damaged if the indicator is still displayed. If this occurs, use another “Memory Stick.”
Operation buttons for most functions using a "Memory Stick" are displayed on the LCD screen. Press the LCD panel directly to operate each function. (Touch panel operation)
(1) Set the POWER switch to MEMORY. Make sure that the LOCK switch is set to the right (unlock) position.
(2) Press OPEN to open the LCD panel.
Operation buttons appear on the LCD screen.
You can switch the memory playback or
memory camera mode by pressing PLAY/
CAM.
(3) Press FN. Operation buttons appear on the LCD screen.
(4) Press PAGE2 to go to PAGE2. Operation buttons appear on the LCD screen.
(5) Press PAGE3 to go to PAGE3. Operation buttons appear on the LCD screen.
(6) Press a desired operation item. See relevant pages for each function.
Press ➕ OFF to return to PAGE1/PAGE2/PAGE3.
- When using the touch panel, press operation buttons with your thumb supporting the LCD screen from the back side of it or press those buttons lightly with your index finger.
- Do not press them with sharp-pointed objects such as a pen.
- Do not touch the LCD screen with wet hands.
- If FN is not on the LCD screen, touch the LCD screen lightly to make it appear. You can control the display with DISPLAY/TOUCH PANEL on your camcorder.
- When operation buttons do not work even if you press them, an adjustment is required (CALIBRATION) (p. 296).
- When the LCD screen gets dirty, use the supplied cleaning cloth.
When executing each item
The green bar appears above the item.
If the items are not available
The colour of the items changes to grey.
Touch panel
You can operate with the touch panel using the viewfinder (p. 93).
Press FN to display the following buttons:
In memory camera
| PAGE1 | SPOT FOCUS, MENU, PLAY, INDEX, EXPOSURE, SPOT METER |
| PAGE2 | SELFTIMER, PLAY, INDEX, MEM MIX |
| PAGE3 | LCD BRT, PLAY, INDEX, VOL |
In memory playback
| PAGE1 | MENU, CAM, INDEX, DELETE, +, - |
| PAGE2 | PB ZOOM, CAM, INDEX, DATA CODE, +, - |
| PAGE3 | LCD BRT, CAM, INDEX, VOL, +, - |
Примечания
| PAGE1 | SPOT FOCUS, MENU, PLAY, INDEX, EXPOSURE, SPOT METER |
| PAGE2 | SELFTIMER, PLAY, INDEX, MEM MIX |
| PAGE3 | LCD BRT, PLAY, INDEX, VOL |
Selecting still image quality mode
You can select the image quality mode in still image recording. The default setting is SUPER FINE.
(1) Set the POWER switch to MEMORY or VCR. Make sure that the LOCK switch is set to the right (unlock) position.
(2) Press FN to display PAGE1.
(3) Press MENU, then select STILL SET in ☐, then press EXEC (p. 249).
(4) Press / to select QUALITY, then press EXEC.
(5) Press / to select a desired image quality, then press EXEC.
To return to FN
Press EXIT.
Image quality settings
| Setting | Meaning |
| SUPER FINE (SFN) | This is the highest image quality in your camcorder. The number of still images you can record is less than in FINE mode. Super fine images are compressed to about 1/3. |
| FINE (FINE) | Use this mode when you want to record high quality images. Fine images are compressed to about 1/6. |
| STANDARD (STD) | This is the standard image quality. Standard images compressed to about 1/10. |
Note
In some cases, changing the image quality mode may not affect the image quality, depending on the type of images you are shooting.
Differences in image quality mode
Recorded images are compressed in JPEG format before being stored in memory. The memory capacity allocated to each image varies depending on the selected image quality mode and image size. Details are shown in the table below. (You can select 1152 × 864 or 640 × 480 image size in the menu settings.)
1152 × 864 image size
| Image quality | Memory capacity |
| SUPER FINE | About 600 KB |
| FINE | About 300 KB |
| STANDARD | About 200 KB |
640 × 480 image size
| Image quality | Memory capacity |
| SUPER FINE | About 190 KB |
| FINE | About 100 KB |
| STANDARD | About 60 KB |
Image quality mode indicator
The image quality mode indicator is not displayed during playback.
When you select image quality
The number of images you can shoot in the currently selected image quality appears on the screen.
Selecting the image size
You can select either of two image sizes
Still images: 1152 × 864 or 640 × 480 . (When the POWER switch is set to CAMERA or VCR, the image size is automatically set to 640 × 480 .) The default setting is 1152 × 864 .
Moving pictures: 320 × 240 or 160 × 112 . The default setting is 320 × 240 .
(1) Set the POWER switch to MEMORY. Make sure that the LOCK switch is set to the right (unlock) position.
(2) Press FN to display PAGE1.
(3) Press MENU, then select STILL SET (still image) or MOVIE SET (moving picture) in ☐, then press EXEC (p. 249).
(4) Press ↓/↑ to select IMAGESIZE, then press EXEC.
(5) Press ↓/↑ to select the desired image size, then press EXEC.
The indicator changes as follows:
Still images: 1152 ↔ 640 Moving pictures: 320 ↔ 160
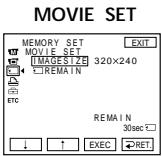
4
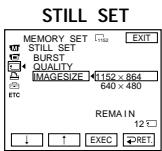
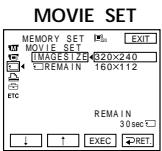
5
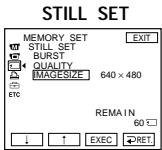
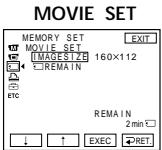
Approximate number of still images you can record on a "Memory Stick"
The number of images you can record varies depending on which image quality mode you select and the complexity of the subject.
If you record a 1152 × 864 still image with your camcorder and attempt to play back the date file on another device that does not support this image size, a part of the image might not be displayed or the image might be displayed in a small size in the centre of the screen.
Примечание
Approximate time of moving pictures you can record on a "Memory Stick"
The time of moving pictures you can record varies depending on which image size you select and the complexity of the subject.
The table above shows approximate number of still images and time of moving pictures you can record on a “Memory Stick” formatted by your camcorder.
Recording still images on "Memory Stick"s - Memory photo recording
You can record still images on "Memory Stick"s.
Before operation
Insert a "Memory Stick" into your camcorder.
(1) Set the POWER switch to MEMORY. Make sure that the LOCK switch is set to the right (unlock) position.
(2) Keep pressing PHOTO lightly. The green ● mark stops flashing, then lights up. The brightness of the image and the focus are adjusted and fixed while your camcorder targets at the middle of the image. Recording does not start yet.
(3) Press PHOTO deeper. Recording is complete when the bar scroll indicator disappears. The image displayed on the screen when you pressed PHOTO deeper will be recorded on the “Memory Stick.”
[a]: Approximate number of images can be recorded on the “Memory Stick”
[b]: Number of recorded images
Recording still images on "Memory Stick"s - Memory photo recording
You can record still images on "Memory Stick"s in tape recording or tape recording standby
For the details, see page 61.
When the POWER switch is set to MEMORY
The following functions do not work:
- Wide mode
- Digital zoom
- SteadyShot function
- Super NightShot
- Colour Slow Shutter
- Fader
- Picture effect
- Digital effect
- Title
- SPORTS of PROGRAM AE (The indicator flashes.)
While you are recording a still image
You cannot turn off the power or press PHOTO.
When you press PHOTO on the Remote Commander
Your camcorder immediately records the image that is on the screen when you press the button.
When you press PHOTO lightly in step 2
The image momentarily flickers. This is not a malfunction.
Recording data
The recording data (date/time or various settings when recorded) are not displayed while recording. However, they are recorded automatically onto the “Memory Stick.” To display the recording data, press DATA CODE during playback. You can also use the Remote Commander for this operation (p. 54).
If you record still images when the POWER switch is set to MEMORY
The angle of view is slightly larger compared with the angle of view when the POWER switch is set to CAMERA.
Recording images continuously
You can record still images continuously. Before recording, select one of the three modes described below in the menu settings.
NORMAL [a]
Your camcorder shoots up to four still images in 1152 × 864 size or 13 still images in 640 × 480 size at about 0.5 sec intervals. (☐)
EXP BRKTG
Your camcorder automatically shoots three images at about 0.5 sec intervals at different exposures. (BRK)
MULTI SCRN [b]
Your camcorder shoots nine still images at about 0.4 sec intervals and displays the images on a single page divided into nine boxes. Still images are recorded in 640 × 480 size. (☐)
[a]
![SONY DCR-PC101E - MULTI SCRN [b] - 1](/content/2020/05/48659/images/9942ee845d4473dcef2d43bd16e32363444c629d9afaa989937efd94eee5e365.jpg)
natural_image
Black-and-white photo collage of four children wearing Sony brand name labels (no text or symbols on subjects)Recording still images on "Memory Stick"s - Memory photo recording
(1) Set the POWER switch to MEMORY. Make sure that the LOCK switch is set to the right (unlock) position.
(2) Press FN to display PAGE1.
(3) Press MENU, then select STILL SET in ☐, then press EXEC (p. 249).
(4) Press ↓/↑ to select BURST, then press EXEC.
(5) Press ↓/↑ to select a desired setting, then press EXEC.
(6) Press EXIT to make the menu settings disappear.
(7) Press PHOTO deeper.
If the "Memory Stick" becomes full
“FULL” appears on the screen, and you cannot record still images on this “Memory Stick.”
Recording still images on "Memory Stick"s - Memory photo recording
The number of still images in continuous shooting
The number of still images you can shoot continuously varies depending on the image size and the capacity of the “Memory Stick.”
During continuous recording of images The flash (optional) does not work.
When shooting with the self-timer or the Remote Commander Your camcorder automatically records up to the maximum number of still images.
If remaining capacity on the "Memory Stick" is less than for three images EXP BRKTG does not work. "☑ FULL" is displayed when you press PHOTO.
The effect of EXP BRKTG
The effect of EXP BRKTG may not be noticeable on the LCD screen.
We recommend viewing images on TV or the computer to recognize the effect.
When selecting NORMAL
Recording continues up to the maximum number of still images during pressing PHOTO deeper. Release PHOTO to stop recording.
Self-timer memory photo recording
You can record images on “Memory Stick”s with the self-timer. You can also use the Remote Commander for this operation.
(1) Set the POWER switch to MEMORY. Make sure that the LOCK switch is set to the right (unlock) position.
(2) Press FN and select PAGE2.
(3) Press SELFTIMER in standby.
The ⏻ (self-timer) indicator appears on the screen.
(4) Press PHOTO deeper.
The self-timer starts counting down from 10 with a beep sound. In the last two seconds of the countdown, the beep sound gets faster, then recording starts automatically.
To cancel self-timer recording
Press SELFTIMER so that the Ⓧ (self-timer) indicator disappears from the screen. You cannot cancel self-timer recording using the Remote Commander.
Recording still images on "Memory Stick"s - Memory photo recording
Note
Self-timer recording is automatically cancelled when:
– Self-timer recording is finished.
- The POWER switch is set to OFF (CHARGE) or VCR.
Recording an image from a tape as a still image
Your camcorder can read moving picture data recorded on a tape and record it as a still image on a “Memory Stick.”
Your camcorder can also take in moving picture data through the input connector and record it as a still image on a “Memory Stick.”
Before operation
- Insert a recorded tape into your camcorder.
- Insert a “Memory Stick” into your camcorder.
(1) Set the POWER switch to VCR.
(2) Press ▶. The picture recorded on the tape is played back.
(3) Keep pressing PHOTO lightly until the picture from the tape freezes. CAPTURE appears on the screen. Recording does not start yet.
To change the still image, release PHOTO, select a still image again, and then press and hold PHOTO lightly.
(4) Press PHOTO deeper. Recording is complete when the bar scroll indicator disappears. The image displayed on the screen when you pressed PHOTO deeper will be recorded on the “Memory Stick.”
Recording an image from a tape as a still image
Image size of still images
Image size is automatically set to 640 × 480 .
When the access lamp is lit or flashing
Do not shake or strike the unit. As well do not turn the power off, eject a “Memory Stick” or remove the battery pack. Otherwise, the image data breakdown may occur.
If "◀" appears on the screen
The inserted “Memory Stick” is incompatible with your camcorder because its format does not conform with your camcorder. Check the format of the “Memory Stick.”
If you press PHOTO lightly in playback
The cassette stops momentarily.
Sound recorded on a tape
You cannot record audio from a tape.
Titles which have already been recorded on tapes
You cannot record the titles on “Memory Stick”s. The title does not appear while you are recording a still image with PHOTO.
Recording date/time
The date/time when it is recorded on a “Memory Stick” is recorded. Various settings are not recorded.
When you press PHOTO on the Remote Commander
Your camcorder immediately records the image that is on the screen when you press the button.
Recording an image from a tape as a still image
Recording a still image from other equipment
Before operation
Set DISPLAY to LCD in the menu settings.
(The default setting is LCD.)
(1) Set the POWER switch to VCR.
(2) Play back the recorded tape, or turn the TV on to see the desired programme.
The image of the other equipment is displayed on the LCD screen or in the viewfinder.
(3) At the point where you want to record, follow the steps 3 and 4 on page 168.
Using the A/V connecting cable
A/V connecting cable (supplied)/
Connect the yellow plug of the A/V connecting cable to the video jack on the VCR or the TV.
If your TV or VCR has an S VIDEO jack
Pictures can be reproduced more faithfully by using an S video cable (optional).
With this connection, you do not need to connect the yellow (video) plug of the A/V connecting cable.
Connect an S video cable (optional) to the
S video jacks of both your camcorder and the TV or VCR.
This connection produces higher quality DV format pictures.
Recording an image from a tape as a still image
In the following instances “☐ REC ERROR” appears and recording cannot be carried out.
Record distortion-free images:
- When recording from a tape in poor condition, for example, a tape worn out from repeated dubbing.
- When attempting to input images distorted by radio wave interference, emanating from a TV tuner, radio set, etc.
Примечание
Superimposing a still image in the "Memory Stick" on an image - MEMORY MIX
You can superimpose a still image you have recorded on a “Memory Stick” on top of the moving picture you are recording. You can record the superimposed images on a tape or a “Memory Stick.” (However, you can record only superimposed still images on the “Memory Stick.”)
M. CHROM (Memory Chromakey)
You can swap only the blue area of a still image such as an illustration or a frame with a moving picture.
M. LUMI (Memory Luminancekey)
You can swap the brighter area of a still image (such as a handwritten illustration or a title) with a moving picture. To use this function, we recommend recording a title on a “Memory Stick” before a trip or event.
C. CHROM (Camera Chromakey)
You can superimpose a moving picture on top of a still image such as an image which can be used as background. Shoot the subject against a blue background. Only the blue area of the moving picture will be swapped with a still image.
M. OVERLAP\* (Memory Overlap)
You can make a moving picture fade in on top of a still image.
* The superimposed image using Memory overlap function can be recorded on tapes only.
Superimposing a still image in the "Memory Stick" on an image - MEMORY MIX
natural_image
Illustration of a stage curtain with tassels and a central knob, labeled 'Blue/Cinney' below (no other text or symbols)
* The superimposed image using Memory overlap function can be recorded on tapes only.
Superimposing a still image in the "Memory Stick" on an image - MEMORY MIX
Recording a superimposed image to tape
Before operation
- Insert a tape for recording into your camcorder.
- Insert a “Memory Stick” recorded with still images into your camcorder.
(1) Set the POWER switch to CAMERA.
(2) In standby, press FN and select PAGE2.
(3) Press MEM MIX. The last image recorded on the “Memory Stick” appears on the right lower part of the screen.
(4) Press - / + on the right lower corner of the screen to select the still image which you want to superimpose. -: to see the previous image +: to see the next image
(5) Press a desired mode. The still image is superimposed on the moving picture.
(6) Press - / + on the left lower corner of the screen to adjust the effect, then press OK to return to PAGE2.
M. CHROM - The colour (blue) scheme of the area in the still image which is to be swapped with a moving image
M. LUMI - The colour (bright) scheme of the area in the still image which is to be swapped with a moving image
C. CHROM - The colour (blue) scheme of the area in the moving image which is to be swapped with a still image
M. OVERLAP - No adjustment necessary
The fewer bars there are on the screen, the stronger the effect.
(7) Press EXIT to return to FN.
(8) Press START/STOP to start recording.
natural_image
Line drawing of a digital camera with open door and control panel (no text or symbols)2
FN
3

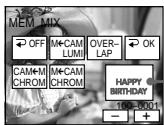
To change the still image to be superimposed
Press - / + on the right lower corner before step 6.
To cancel MEMORY MIX
Follow the steps 2 and 3 on page 174, then press OFF to return to PAGE2.
Notes
- You cannot use the MEMORY MIX function for moving pictures recorded on “Memory Stick”s.
- When the overlapping still image has a large amount of white, the thumbnail image of the picture may not be clear.
- During recording you cannot reselect the mode setting. Press OFF to return to PAGE2.
Superimposing a still image in the "Memory Stick" on an image - MEMORY MIX
Image data modified on your computer or shot with other equipment You may not be able to play back modified images with your camcorder.
To record a still image on a tape as it is In the M. LUMI mode press -/+ to increase the bar indicator to the maximum position.
When you select M. OVERLAP You cannot change the still image or the mode setting.
To record the superimposed image as a still image Press PHOTO deeper in step 8. (You should set PHOTO REC to TAPE in the menu settings beforehand.)
Superimposing a still image in the "Memory Stick" on an image - MEMORY MIX
Recording a superimposed image to "Memory Stick" as a still image
Before operation
Insert a recorded “Memory Stick” into your camcorder.
(1) Set the POWER switch to MEMORY. Make sure that the LOCK switch is set to the right (unlock) position.
(2) In standby, press FN and select PAGE2.
(3) Press MEM MIX. The last image recorded on the “Memory Stick” appears on the left corner of the screen.
(4) Press - / + on the right lower corner of the screen to select the still image which you want to superimpose.
- : to see the previous image
+: to see the next image
(5) Press a desired mode. The still image is superimposed on the moving picture.
(6) Press -/+ on the left lower corner of the screen to adjust the effect, then press OK to return to PAGE2.
M. CHROM - The colour (blue) scheme of the area in the still image which is to be swapped with a moving image
M. LUMI - The colour (bright) scheme of the area in the still image which is to be swapped with a moving image
C. CHROM - The colour (blue) scheme of the area in the moving image which is to be swapped with a still image
The fewer bars there are on the screen, the stronger the effect.
(7) Press EXIT to return to FN.
(8) Press PHOTO deeper to start recording. Recording is complete when the bar scroll indicator disappears. The image displayed on the screen when you pressed PHOTO deeper will be recorded on the “Memory Stick.”
To change the still image to be superimposed
Press - / + on the right lower corner before step 6.
To cancel MEMORY MIX
Follow the steps 2 and 3 on page 177, then press OFF to return to PAGE2.
Superimposing a still image in the "Memory Stick" on an image - MEMORY MIX
Notes
- You cannot use MEMORY MIX function for moving pictures recorded on “Memory Stick”s.
- If the overlapping still image has a large amount of white, the thumbnail image of the picture may not be clear.
- During recording you cannot reselect the mode. Press OFF again to return to PAGE2.
Image size of still images
Image size is automatically set to 640 × 480 .
Image data modified with your computers or shot with other equipment
You may not be able to play them back with your camcorder.
When recording images on a "Memory Stick" using MEMORY MIX
The PROGRAM AE does not work.
(The indicator flashes.)
The "Memory Stick" supplied with your camcorder stores 20 images:
- For M. CHROM: 18 images (such as a frame) 100-0001\~100-0018
- For C. CHROM: two images (such as a background) 100-0019\~100-0020
Sample images
Sample images stored in the “Memory Stick” supplied with your camcorder are protected (p. 207).
Recording moving pictures on "Memory Stick"s - MPEG movie recording
You can record moving pictures with sound on "Memory Stick"s.
The picture and sound are recorded up to the full capacity of “Memory Stick” (MPEG MOVIE EX).
Before operation
Insert a "Memory Stick" into your camcorder.
(1) Set the POWER switch to MEMORY. Make sure that the LOCK switch is set to the right (unlock) position.
(2) Press START/STOP. Your camcorder starts recording. The camera recording lamp located on the front of your camcorder lights up. The picture and sound are recorded up to the capacity of “Memory Stick.” For more information about recording time, see page 160.
[a]: Available recording time on “Memory Stick” is displayed.
[b]: This indicator is displayed for five seconds after pressing START/STOP. This indicator is not recorded.
To stop recording
Press START/STOP.
Recording moving pictures on "Memory Stick"s - MPEG movie recording
Note
Sound is recorded in monaural.
When the POWER switch is set to MEMORY The following functions do not work:
- Wide mode
- Digital zoom
- SteadyShot function
- Super NightShot
- Colour Slow Shutter
- Fader
- Picture effect
- Digital effect
- Title
- SPORTS of PROGRAM AE (The indicator flashes.)
When using an external flash (optional)
Turn the power of the external flash off when recording moving pictures on “Memory Stick”s. Otherwise, the charging sound of the flash may be recorded.
Recording date/time
The date/time are not displayed during recording. However, they are automatically recorded onto the “Memory Stick.” To display the recording date/time, press DATA CODE during playback. Various settings cannot be recorded. You can also use the Remote Commander for this operation (p. 54).
During recording on "Memory Stick"
Do not eject the cassette from your camcorder. While ejecting the cassette, sound is not recorded on the “Memory Stick.”
If you record moving pictures when the POWER switch is set to MEMORY
The angle of view is slightly larger compared with the angle of view when the POWER switch is set to CAMERA.
Recording moving pictures on "Memory Stick"s - MPEG movie recording
Self-timer MPEG movie recording
You can record images on “Memory Stick”s with the self-timer. You can also use the Remote Commander for this operation.
(1) Set the POWER switch to MEMORY. Make sure that the LOCK switch is set to the right (unlock) position.
(2) Press FN and select PAGE2.
(3) Press SELFTIMER in standby.
The ⏻ (self-timer) indicator appears on the screen.
(4) Press START/STOP.
Self-timer starts counting down from 10 with a beep. In the last two seconds of the countdown, the beep gets faster, and recording starts automatically.
To stop the count down
Press START/STOP.
To restart the countdown, press START/STOP again.
To cancel self-timer recording
Press SELFTIMER so that the ⭕ (self-timer) indicator disappears from the screen. You cannot cancel self-timer recording using the Remote Commander.
Note
Self-timer recording is automatically cancelled when:
– Self-timer recording is finished.
- The POWER switch is set to OFF (CHARGE) or VCR.
Recording a picture from a tape as a moving picture
Your camcorder can read moving picture data recorded on a tape and record it as a moving picture on a “Memory Stick.” Your camcorder can also take in moving picture data through the input connector and record it as a moving picture on a “Memory Stick.”
Before operation
- Insert a recorded tape into your camcorder.
- Insert a “Memory Stick” into your camcorder.
(1) Set the POWER switch to VCR.
(2) Press ▶ II. The picture recorded on the tape is played back. And press ▶ II again to pause playback at the scene where you want to start recording from.
(3) Press START/STOP. Images and sound are recorded up to the remaining capacity of the "Memory Stick." For more information about recording time, see page 160.
[a]: Available recording time on the “Memory Stick” is displayed.
[b]: This indicator is displayed for five seconds after pressing START/STOP. This indicator is not recorded.
To stop recording
Press START/STOP.
Recording a picture from a tape as a moving picture
Notes
- Sound recorded in 48 kHz is converted to one in 32 kHz when recording images from a tape to a “Memory Stick.”
- Sound recorded in stereo is converted to monaural sound when recording from a tape.
- You cannot record the image played back using NTSC PB function.
When the access lamp is lit or flashing
Do not shake or strike the unit. As well do not turn the power off, eject a "Memory Stick" or remove the battery pack. Otherwise, the image data breakdown may occur.
Titles have already recorded on tapes
You cannot record the titles on “Memory Stick”s. The title does not appear while you are recording a moving picture with START/STOP.
If "AUDIO ERROR" is displayed
Sound that cannot be recorded by your camcorder has been recorded. Connect the A/V connecting cable to input images played back on an external device (p. 185).
Recording date/time
The date/time when it is recorded on “Memory Stick” is recorded. Various settings are not recorded.
Recording a picture from a tape as a moving picture
Recording a moving picture from other equipment
Before operation
Set DISPLAY to LCD in the menu settings.
(The default setting is LCD.)
(1) Set the POWER switch to VCR.
(2) Play back the recorded tape, or turn the TV on to see the desired programme.
The image of the other equipment is displayed on the LCD screen or in the viewfinder.
(3) Follow the procedure on page 183 from the step 3 onwards at the point where you want to start recording.
Using the A/V connecting cable
If your VCR is a monaural type
Connect the yellow plug of the A/V connecting cable to the video input jack and the white or the red plug to the audio input jack on the VCR or the TV. When the white plug is connected, the left channel audio is output, and when the red plug is connected, the right channel audio is output.
Recording a picture from a tape as a moving picture
If your TV or VCR has an S video jack
Pictures can be reproduced more faithfully by using an S video cable (optional).
With this connection, you do not need to connect the yellow (video) plug of the A/V connecting cable.
Connect an S video cable (optional) to the S video jacks of both your camcorder and the TV or VCR.
In the following instances “☐ REC ERROR” appears and recording is cancelled:
- When recording from a tape in poor condition, for example, a tape worn out from repeated dubbing.
- When attempting to input images distorted by radio wave interference, emanating from a TV tuner, radio set, etc.
- When the input signal is cut off.
Примечание
Recording edited pictures from a tape as a moving picture – Digital program editing (on "Memory Stick"s)
You can duplicate selected scenes (programmes) for editing onto “Memory Stick”s.
Making the programme
(1) Set the POWER switch to VCR.
(2) Insert the tape for playback, and a “Memory Stick” for recording into your camcorder.
(3) Press FN to display PAGE1.
(4) Press MENU, then select VIDEO EDIT in ETC, then press EXEC (p. 253).
(5) Press ↓/↑ to select MEMORY, then press EXEC.
(6) Repeat pressing IMAGESIZE to select the desired size.
(7) Search for the beginning of the first scene you want to insert, then pause playback. You can fine-adjust one frame at a time with ▶/ ▶>.
(8) Press MARK IN.
The IN point of the first programme is set, and the upper part of the programme mark changes to light blue.
(9) Search for the end of the first scene you want to insert, then pause playback. You can fine-adjust one frame at a time with ▶/ ▶>.
(10)Press MARK OUT.
The OUT point of the first programme is set, then the lower part of the programme mark changes to light blue.
(11) Repeat steps 7 to 10, then set the programmes. When one programme is set, the programme mark changes to light blue. You can set 20 programmes in maximum.
Recording edited pictures from a tape as a moving picture - Digital program editing (on "Memory Stick"s)
natural_image
Line drawing of a digital camera with an open screen and control panel (no text or symbols)5
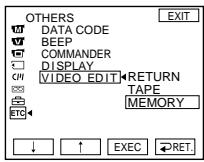

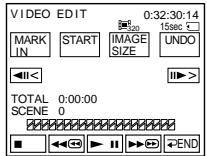
8\~10
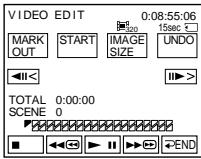

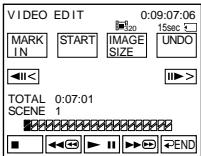

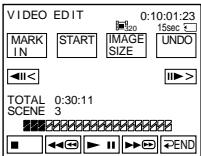
Recording edited pictures from a tape as a moving picture - Digital program editing (on "Memory Stick"s)
Erasing the programme you have set
Erase OUT first and then IN from of the last programme.
(1) Press UNDO.
(2) Press ERASE 1 MARK. The last set programme mark flashes, then DELETE ? appears.
(3) Press EXEC. The last set programme is deleted.
To cancel erasing
Press CANCEL in step 3.
Erasing all programmes
(1) Press MENU, then select VIDEO EDIT in ETC, then press EXEC (p. 253).
(2) Press ↓/↑ to select MEMORY, then press EXEC.
(3) Press UNDO.
(4) Press ERASE ALL. All the set programme marks flash, then DELETE ? appears.
(5) Press EXEC. All the set programmes are deleted.
To cancel erasing all programmes
Press CANCEL in step 5.
To cancel a programme you have set Press END.
The programme is stored in memory until the tape is ejected.
Notes
- You cannot dub the titles, display indicators, or the contents of cassette memory.
- You cannot operate recording during the digital program editing on “Memory Stick”s.
On a blank portion of the tape
You cannot set IN or OUT on a blank portions of the tape.
If there is a blank portion between IN and OUT on the tape
The total time code may not be displayed correctly.
During making a programme
If you eject the cassette, the programme will be erased.
Recording edited pictures from a tape as a moving picture - Digital program editing (on "Memory Stick"s)
Performing the programme (Dubbing a "Memory Stick")
(1) Press MENU, then select VIDEO EDIT in ETC, then press EXEC (p. 253).
(2) Press ↓/↑ to select MEMORY, then press EXEC.
(3) Press START.
(4) Press EXEC.
Your camcorder searches for the beginning of the first programme, then starts dubbing. The programme mark flashes.
The SEARCH indicator appears during search, the EDITING indicator appears during writing of data on your camcorder, and REC appears during dubbing on the screen.
The programme mark changes to light blue after dubbing is complete.
When the dubbing ends, your camcorder automatically stops.
To stop dubbing
Press CANCEL.
The programme you made is recorded on a "Memory Stick" up to the place where you pressed CANCEL.
To end the Digital program editing function
Your camcorder stops when the dubbing ends. Then the display returns to VIDEO EDIT in the menu settings.
Press ➕ END to end the program editing function.
Recording edited pictures from a tape as a moving picture - Digital program editing (on "Memory Stick"s)
When the programme has not been set You cannot press START.
When the available recording time of "Memory Stick" is not enough LOW MEMORY appears on the screen. However, you can record pictures up to the time indicated.
When available recording time is not left on the "Memory Stick" MEMORY FULL appears.
When the "Memory Stick" is not inserted NO MEMORY STICK appears.
When the write-protect switch on the "Memory Stick" is set to LOCK MEMORY STICK LOCKED appears.
Copying still images from a tape - PHOTO SAVE
Using the search function, your camcorder automatically takes in only still images from tapes and record them on a “Memory Stick” in sequence.
Before operation
- Insert a recorded tape into your camcorder and rewind the tape.
- Insert a “Memory Stick” into your camcorder.
(1) Set the POWER switch to VCR.
(2) Press FN to display PAGE1.
(3) Press MENU, then select PHOTO SAVE in ☐, then press EXEC. PHOTO BUTTON appears on the LCD screen (p. 250).
(4) Press PHOTO deeper. The still image from the tape is recorded on the "Memory Stick." The number of still images copied is displayed. END is displayed when copying is completed.
Copying still images from a tape - PHOTO SAVE
To stop copying
Press END.
To return to FN
Press ➕ END to return to PAGE1, then press EXIT.
When the "Memory Stick" is full
MEMORY FULL appears on the LCD screen, and the copying stops. Press ➕ END, insert another “Memory Stick” and repeat the procedure from step 2.
Image size of still images
Image size is automatically set to 640 × 480.
When the access lamp is lit or flashing
Do not shake or strike your camcorder. As well do not turn the power off, eject a "Memory Stick" or remove the battery pack. Otherwise, the image data breakdown may occur.
If the write-protect switch on the "Memory Stick" is set to LOCK
NOT READY appears when you select the item in the menu settings.
When you change "Memory Stick"s in the middle of copying
Your camcorder resumes copying from the last image recorded on the previous “Memory Stick.”
Viewing a still image - Memory photo playback
You can play back still images recorded on a “Memory Stick.” You can also play back six images including moving pictures at a time arranged in the same order of recording on a “Memory Stick” by selecting the index screen.
Before operation
Insert a "Memory Stick" into your camcorder.
(1) Set the POWER switch to MEMORY. Make sure that the LOCK switch is set to the right (unlock) position.
(2) Press PLAY. The last recorded image is displayed.
(3) Press - / + on your camcorder to select the desired still image.
- : to see the previous image
+: to see the next image
To stop memory photo playback
Press CAM.
Note
You may not be able to play back images with your camcorder:
- When playing back image data modified on your computers.
- When playing back image data shot with other equipment.
Notes on the file name
- The directory number may not be displayed and only the file name may be displayed if the structure of the directory does not conform to the DCF standard.
- “☐ → DIRECTORY ERROR” may appear on the LCD screen if the structure of the directory does not conform to the DCF standard. If this message appears, you can play back images but cannot record them on the “Memory Stick.”
- The file name flashes on the LCD screen if the file is corrupted or the file is unreadable.
To play back recorded images on a TV screen
- Connect your camcorder to the TV with the A/V connecting cable supplied with your camcorder before the operation.
- When operating memory photo playback on a TV or on the LCD screen, the image quality may appear to have deteriorated. This is not a malfunction. The image data is as good as ever.
- Turn the audio volume of the TV down before operation, or noise (howling) may be output from the TV speakers.
Still image
You can select still images also with -/+ on PAGE1/PAGE2/PAGE3.
Screen indicators during still image playback
To display the recording data (date/time or various settings when recorded), press DATA CODE during playback. You can also use the Remote Commander for this operation (p. 54).
To make screen indicators disappear Press DISPLAY/TOUCH PANEL.
Данные записи
Playing back six recorded images at a time (index screen)
You can play back six recorded images at a time. This function is especially useful when searching for a particular image.
Before operation
Insert a "Memory Stick" into your camcorder.
(1) Set the POWER switch to MEMORY. Make sure that the LOCK switch is set to the right (unlock) position.
(2) Press INDEX to display the index screen.
A red ▶ mark appears above the image that is displayed before changing to the index screen mode.
← : to display the previous six images
→ : to display the following six images
To return to the normal playback screen (single screen)
Press the image you want to display.
Viewing a still image - Memory photo playback
Note
When displaying the index screen, the number appears above each image. This indicates the order in which images are recorded on the "Memory Stick." These numbers are different from the data file names.
Image data modified with your computers or shot with other equipment
These files may not be displayed on the index screen.
Viewing a moving picture - MPEG movie playback
You can play back moving pictures recorded on a "Memory Stick." You can also play back six images including still images in order of recording on a "Memory Stick" at a time by selecting the index screen.
Before operation
Insert a "Memory Stick" into your camcorder.
(1) Set the POWER switch to MEMORY. Make sure that the LOCK switch is set to the right (unlock) position.
(2) Press PLAY. The last recorded image is displayed.
(3) Press - / + to select the desired moving pictures.
- : To see the previous picture
+: To see the next picture
(4) Press MPEG ▶ II to start playback.
(5) Adjust the volume following the steps below.
① Press FN and select PAGE3.
② Press VOL. The screen to adjust volume appears.
③ Press - / + to adjust the volume.
- : to decrease the volume.
+: to increase the volume.
④ Press ⇌ OK.
You may not be able to play back images with your camcorder:
- When playing back image data modified on your computer.
- When playing back image data shot with other equipment.
To play back recorded images on a TV screen
- Connect your camcorder to the TV with the A/V connecting cable supplied with your camcorder before operation.
- Turn the audio volume of the TV down before operation, or noise (howling) may be output from the TV speakers.
Moving picture
You can select moving pictures also with -/+ on PAGE1/PAGE2/PAGE3.
Примечание
Playback picture from desired part
The moving picture recorded on the “Memory Stick” is divided into 23 parts.
You can select every each one point and playback pictures.
Before operation
Insert a "Memory Stick" into your camcorder.
(1) Set the POWER switch to MEMORY.
Make sure that the LOCK switch is set to the right (unlock) position.
(2) Press PLAY.
The last recorded image is displayed.
(3) Press + / - to select the desired moving pictures.
To see the previous picture, press -.
To see the next picture, press +.
(4) Press / to select the point where you want to play back.
← : to see previous part
→: to see next part
(5) Press MPEG ▶ II to start playback.
(6) Adjust the volume following the steps below.
① Press FN and select PAGE3.
② Press VOL. The screen to adjust volume appears.
③ Press -/+ to adjust the volume.
- : to decrease the volume.
+: to increase the volume.
④ Press ⇌ OK.
To stop MPEG movie playback
Press MPEG ▶ II.
When recording time is too short
The moving picture may not be divided into 23 parts.
Screen indicators during moving picture playback
To display the recording date/time, press DATA CODE during playback. You can also use the Remote Commander for this operation (p. 54).
To make screen indicators disappear Press DISPLAY/TOUCH PANEL.
Дата/время записи
Enlarging still images recorded on "Memory Stick"s - Memory PB ZOOM
You can enlarge still images recorded on a “Memory Stick”. You can select and view a desired part from the enlarged still image. Also, you can copy the desired part of the enlarged still image to tapes or “Memory Stick”s.
Before operation
Insert a “Memory Stick” into your camcorder.
(1) In memory playback, press FN and select PAGE2.
(2) Press PB ZOOM. PB ZOOM screen appears.
(3) Press the area that you want to enlarge in the frame on the PB ZOOM screen.
The area you pressed moves to the centre of the screen, and the playback image is enlarged to about twice the size. If you press the other area, the area moves to the centre of the screen.
(4) Adjust the zoom ratio by the zoom lever. You can select the image from approximately 1.1 times up to five times its size.
W: Decrease the zoom ratio.
T: Increase the zoom ratio.
Enlarging still images recorded on "Memory Stick"s - Memory PB ZOOM
In Memory PB ZOOM
If you press DISPLAY/ TOUCH PANEL, the frame on the Memory PB ZOOM screen disappears. You cannot move the part you pressed to the centre of the screen.
Edge of an enlarged image
The edge of an enlarged image cannot be displayed in the centre of the screen.
Moving pictures recorded on "Memory Stick"s The PB ZOOM function does not work.
To record an image processed by Memory PB ZOOM on "Memory Stick"s
Press PHOTO to record the image processed by PB ZOOM. (Images are recorded at 640 × 480 size.)
Playing back images in a continuous loop - SLIDE SHOW
Your camcorder can automatically play back images in sequence. This function is especially useful when checking recorded images or during a presentation.
Before operation
Insert a "Memory Stick" into your camcorder.
(1) Set the POWER switch to MEMORY. Make sure that the LOCK switch is set to the right (unlock) position.
(2) Press FN to display PAGE1.
(3) Press MENU, then select SLIDE SHOW in ☐, then press EXEC (p. 250).
(4) Press START. Your camcorder plays back the images recorded on a “Memory Stick” in sequence.
Playing back images in a continuous loop - SLIDE SHOW
To stop the slide show
Press END.
To pause during a slide show
Press PAUSE.
To return to FN
Press END.
To start the slide show from a particular image
Select the desired image using -/+ buttons before step 4.
To view the recorded images on TV
Connect your camcorder to a TV with the A/V connecting cable supplied with your camcorder before operation.
If you change "Memory Stick"s during operation
The slide show does not operate. If you change the “Memory Stick,” be sure to follow the steps again from the beginning.
To prevent accidental erasure of important images, you can protect selected images.
Before operation
Insert a "Memory Stick" into your camcorder.
(1) Set the POWER switch to MEMORY. Make sure that the LOCK switch is set to the right (unlock) position.
(2) Press INDEX to display the index.
(3) Press ⬆—MARK. The screen to protect the image appears.
(4) Press the image you want to protect. The “○—” appears on the protected image.
To cancel image protection
Press the image you want to cancel image protection in step 4 again. The “○—” disappears.
Note
Formatting erases all information on the “Memory Stick,” including the protected image data. Check the contents of the “Memory Stick” before formatting.
If the write-protect switch on the "Memory Stick" is set to LOCK
You cannot carry out image protection.
Deleting images - DELETE
You can delete images stored in a “Memory Stick.” You can delete all images or selected images.
Deleting selected images
Before operation
Insert a "Memory Stick" into your camcorder.
(1) Set the POWER switch to MEMORY. Make sure that the LOCK switch is set to the right (unlock) position.
(2) Play back the image you want to delete.
(3) Press FN to display PAGE1.
(4) Press DELETE. DELETE? appears on the screen.
(5) Press OK. The selected image is deleted.
To cancel deleting an image
Press CANCEL in step 5.
Notes
- To delete a protected image, first cancel image protection.
- Once you delete an image, you cannot restore it. Check the images to delete carefully before deleting them.
If the write-protect switch on the "Memory Stick" is set to LOCK
You cannot delete images.
Deleting selected images on the index screen
Before operation
Insert a "Memory Stick" into your camcorder.
(1) Set the POWER switch to MEMORY. Make sure that the LOCK switch is set to the right (unlock) position.
(2) Press INDEX to display the index.
(3) Press DEL. Then press the image you want to delete. The number of the selected image is highlighted.
(4) Press EXEC. DELETE? appears on the screen.
(5) Press OK. The selected images are deleted.
To cancel deleting an image
Press CANCEL in step 5.
Deleting all the images
You can delete all the unprotected images in a "Memory Stick."
Before operation
Insert a “Memory Stick” into your camcorder.
(1) Set the POWER switch to MEMORY. Make sure that the LOCK switch is set to the right (unlock) position.
(2) Press FN to display PAGE1.
(3) Press MENU, then select DELETE ALL in ☐, then press EXEC (p. 250).
(4) Press ↓/↑ to select OK, then press EXEC. OK changes to EXECUTE.
(5) Press ↓/↑ to select EXECUTE, then press EXEC.
DELETING appears on the screen.
When all the unprotected images are deleted,
COMPLETE is displayed.
To cancel deleting all the images in the "Memory Stick"
Select RETURN in step 5, then press EXEC.
While DELETING appears
Do not turn the POWER switch or press any buttons.
You can specify the recorded still image to print out by putting marks. This function is useful for printing out still images later.
Your camcorder conforms with the DPOF (Digital Print Order Format) standard for specifying the still images to print out.
Before operation
Insert a “Memory Stick” into your camcorder.
(1) Set the POWER switch to MEMORY. Make sure that the LOCK switch is set to the right (unlock) position.
(2) Press INDEX to display the index.
(3) Press 📋️ MARK. The screen to write a print mark appears.
(4) Press the image you want to write a print mark. The 📋 appears on the selected image.
To cancel writing print marks
Press the image you want to cancel the print mark in step 4 again. The □ disappears.
If the write-protect switch on the "Memory Stick" is set to LOCK
You cannot write print marks on still images.
Moving pictures
You cannot write print marks on moving pictures.
While the file name is flashing
You cannot write print mark on the still image.
You can use the optional printer on your camcorder to print images on print paper.
For details, refer to the operating instructions of the printer.
There are various ways of printing still images.
The following, however, describes how to print by selecting 📄 in the menu on the touch panel on your camcorder.
Before operation
- Insert a recorded “Memory Stick” into your camcorder.
- Attach the optional printer to your camcorder as illustrated.
Selecting a type of the 9PICS print screen
You can make nine stickers using a 9-cut sticker sheet. To make stickers, print images recorded on a “Memory Stick” in 9PIC PRINT.
(1) Set the POWER switch to MEMORY. Make sure that the LOCK is set to the right (unlock) position.
(2) Press FN to display PAGE1.
(3) Press MENU, then select 9PIC PRINT in ☐, then press EXEC (p. 250).
(4) Press ↓/↑ to select a desired mode, then press EXEC.
SAME PICS
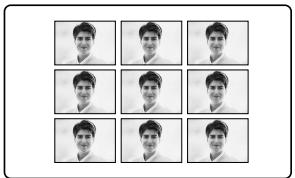
natural_image
Grid of nine identical grayscale portrait photos arranged in 3x3 grid (no text or symbols)* Nine still images with print marks are printed together.
natural_image
Grid of nine black-and-white photos showing people in various settings (no text or symbols visible)You can print the recorded date/time.
(1) Set the POWER switch to MEMORY. Make sure that the LOCK switch is set to the right (unlock) position.
(2) Press FN to display PAGE1.
(3) Press MENU, then select DATE/TIME in ☐, then press EXEC (p. 250).
(4) Press / to select a desired mode, then press EXEC.
DATE
Images recorded in the multi screen mode You cannot print images recorded in the multi screen mode on a 9-cut sticker sheet.
Moving pictures recorded on "Memory Stick" You cannot print moving pictures.
When "Memory Stick" has no files "NO FILE" appears on the screen.
Images processed by 9PIC PRINT You cannot insert a DATE/TIME indicator.
When there are no files with a PRINT MARK "NO PRINT MARK" appears on the screen.
— Viewing images with your computer — Viewing images with your computer - Introduction
There are following ways of connecting your camcorder to your computer in order to view images saved on a “Memory Stick” or recorded on a tape on your computer.
To view images on your computer which has a Memory Stick slot, first eject the “Memory Stick” from the camcorder and then insert it into your computer’s Memory Stick slot.
When connecting to your computer with the USB port, complete installation of the USB driver before connecting your camcorder to your computer. If you connect your camcorder to your computer first, you will not be able to install the USB driver correctly.
For details about your computer's ports and editing software, contact your computer manufacturer.
Viewing images with your computer - Introduction
Viewing images recorded on a tape
When connecting to your computer with the USB port
For details, see page 219.
When connecting to your computer with the DV port
Your computer must have a DV port and editing software installed that can read video signals.
Viewing images recorded on a "Memory Stick"
When connecting to your computer with the USB port
There are two methods of USB connection, NORMAL and PTP. The default setting is NORMAL. Here we explain how to use the camcorder with a standard USB connection (NORMAL).
See page 219 when using Windows and page 238 when using Macintosh.
You can also use a “Memory Stick” Reader/Writer (optional).
When connecting to your computer without a USB port
Use an optional floppy disk adaptor for Memory Stick or a PC card adaptor for Memory Stick. When purchasing an accessory, check its catalog beforehand for the recommended operating environment.
Notes on using your computer
"Memory Stick"
- “Memory Stick” operations on your camcorder cannot be assured if a “Memory Stick” formatted on your computer is used on your camcorder, or if the “Memory Stick” in your camcorder was formatted from your computer when the USB cable was connected.
- Do not compress the data on the “Memory Stick.” Compressed files cannot be played back on your camcorder.
Software
- Depending on your application software, the file size may increase when you open a still image file.
- When you load an image modified using retouching software from your computer to your camcorder or when you directly modify the image on your camcorder, the image format will differ so a file error indicator may appear and you may be unable to open the file.
Connecting to your computer with USB port - For Windows users
Complete installation of the USB driver before connecting your camcorder to your computer. If you connect your camcorder to your computer first, you will not be able to install the USB driver correctly.
When connecting to your computer with the USB port
You must install a USB driver onto your computer in order to connect your camcorder to your computer's USB port. The USB driver can be found on the CD-ROM supplied, along with the application software required for viewing images.
If you connect your camcorder and your computer using the USB cable, you can view pictures live from your camcorder and pictures recorded on a tape on your computer (USB streaming function).
Furthermore, if you download pictures from your camcorder to your computer, you can process or edit them in image processing software and append them to e-mail.
You can also view images recorded on a "Memory Stick" with your computer.
Recommended computer usage environment when connecting USB cable and viewing tape images on the computer
OS:
Microsoft Windows 98 SE, Windows Me, Windows 2000 Professional, Windows XP Home Edition or Windows XP Professional Standard installation is required.
However, operation is not assured if the above environment is an upgraded OS.
You cannot hear sound if your computer is running Windows 98, but you can read still images.
CPU:
Minimum 500 MHz Intel Pentium III or faster (800 MHz or faster recommended)
Application:
DirectX 8.0a or later
Sound system:
16 bit stereo sound card and speakers
Connecting to your computer with USB port - For Windows users
Memory:
64 MB or more
Hard disk:
Available memory required for installation: at least 200MB
Available hard disk memory recommended: at least 1GB (depending on the size of the image files edited)
Display:
4 MB VRAM video card, Minimum 800 × 600 dot Hi colour (16 bit colour, 65,000 colours), Direct Draw display driver capability (At 800 × 600 dot or less, 256 colours and less, this product will not operate correctly.)
Others:
This product is compatible with DirectX technology, so it is necessary to install DirectX.
The USB port must be provided as standard.
You cannot use this function in the Macintosh environment.
Recommended computer usage environment when connecting USB cable and viewing "Memory Stick" images on the computer
OS:
Microsoft Windows 98, Windows 98 SE,
Windows Me, Windows 2000 Professional,
Windows XP Home Edition or Windows XP Professional
Standard installation is required.
However, operation is not assured if the above environment is an upgraded OS.
CPU:
MMX Pentium 200 MHz or faster
The USB port must be provided as standard.
Windows Media Player must be installed (to play back moving pictures).
Connecting to your computer with USB port - For Windows users
Notes
- Operations are not assured for the Windows environment if you connect two or more USB equipment to a single computer at the same time, or when using a hub.
- Some equipment may not operate depending on the type of USB equipment that is used simultaneously.
- Operations are not assured for all the recommended computer environments mentioned above.
- Windows and Windows Media are trademarks or registered trademarks of Microsoft Corporation in the United States and/or other countries.
- Pentium is either trademark or registered trademark of Intel Corporation.
- All other product names mentioned herein may be the trademarks or registered trademarks of their respective companies. Furthermore, “TM” and “®” are not mentioned in each case in this manual.
Installing the USB driver
Start the following operation without connecting the USB cable to your computer. Connect the USB cable according to "Making your computer recognize your camcorder".
If you are using Windows 2000 Professional or Windows XP Home Edition/Professional, log in with permission of administrators.
(1) Turn on your computer and allow Windows to load.
(2) Insert the supplied CD-ROM into the CD-ROM drive of your computer. The application software starts up and the title screen appears.
(3) Move the cursor to "USB Driver" and click.
USB driver installation starts.
(4) Follow the on-screen messages to install the USB driver.
(5) Remove the CD-ROM and then restart your computer following the instructions on the screen.
Connecting to your computer with USB port - For Windows users
Note
If you connect the USB cable before USB driver installation is completed, the USB driver will not be properly registered. Carry out installation again following the steps on page 227.
Windows XP Home Edition/Professional users If you set USBCONNECT to PTP in the menu settings, you can copy "Memory Stick" images from your camcorder onto your computer without installing the USB driver. This is ideal for simply copying images from your camcorder onto your computer. See page 252 for details.
Making your computer recognise your camcorder
Viewing images recorded on a tape on your computer
See page 226 for details on viewing “Memory Stick” images on your computer.
You need to install “PIXELA ImageMixer” to view images recorded on a tape. Install it from the CD-ROM supplied with your camcorder.
To install and use this software in Windows 2000 Professional, you must be authorised as Power Users or Administrators. For Windows XP Home Edition/Professional, you must be authorised as Administrators.
(1) Turn on your computer and allow Windows to load.
If you are using your computer, close all running applications.
(2) Insert the supplied CD-ROM into the CD-ROM drive of your computer.
The application software starts up and the title screen appears. If the title screen does not appear, double-click “My Computer” and then “ImageMixer” (CD-ROM Drive). The title screen appears after a while.
Connecting to your computer with USB port - For Windows users
(3) Move the cursor to "PIXELA ImageMixer" and click.
The Install Wizard programme starts up and the language selection dialog box screen appears.
(4) Select the language for installation.
(5) Follow the on-screen messages.
The installation screen disappears when
installation is completed.
(6) Click DirectX.
Follow the on-screen messages to install DirectX.
Restart your computer when the installation is completed.
(7) Connect the AC power adaptor to your camcorder.
(8) Set the POWER switch to VCR.
(9) Set USB STREAM to ON in ☐ in the menu settings (p. 252).
(10) With the CD-ROM inserted, connect the (USB) jack on your camcorder with the USB port on your computer using the supplied USB cable. Your computer recognises your camcorder, and the Add Hardware Wizard starts.
Connecting to your computer with USB port - For Windows users
(11) Follow the on-screen messages so that the Add Hardware Wizard recognises that the USB drivers have been installed. The Add Hardware Wizard starts three times because three different USB drivers are installed. Be sure to allow the installation to complete without interrupting them.
For Windows 2000 Professional, Windows XP Home Edition/Professional users
(12) After the “File Needed” screen appears: Open “Browse...” → “My Computer” → “ImageMixer” → “Sonyhcb.sys”, and click “OK”.
Connecting to your computer with USB port - For Windows users
Viewing images recorded on "Memory Stick"s on your computer
Before operation
Set USBCONNECT to NORMAL in the menu settings. (The default setting is set to NORMAL.)
(1) Insert a "Memory Stick" into your camcorder.
(2) Connect the AC power adaptor to your camcorder and set the POWER switch to MEMORY.
(3) Connect the (USB) jack on your camcorder with the USB port on your computer using the supplied USB cable.
USB MODE appears on the LCD screen of your camcorder. Your computer recognises the camcorder, and the Add Hardware Wizard starts.
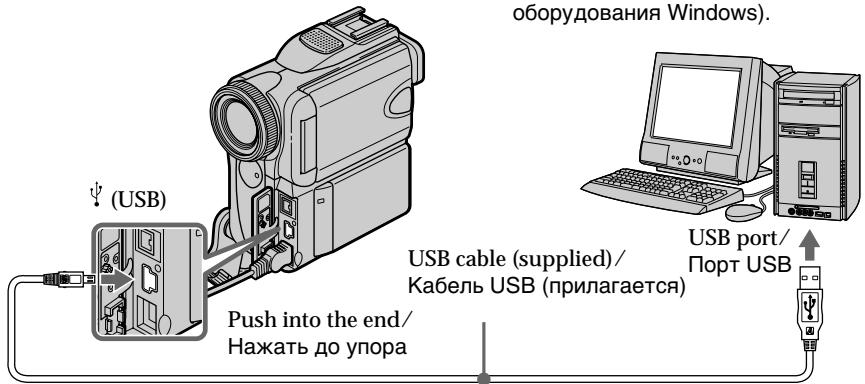
(4) Follow the on-screen messages so that Add Hardware Wizard recognises that the USB drivers have been installed. Add Hardware Wizard starts two times because two different USB drivers are installed. Be sure to allow each installation to complete without interrupting them.
You cannot install the USB driver if a "Memory Stick" is not in your camcorder. Be sure to insert a "Memory Stick" into your camcorder before installing the USB driver.
Connecting to your computer with USB port - For Windows users
If you cannot install the USB driver
The USB driver has been registered incorrectly as your computer was connected to your camcorder before installation of the USB driver was completed. Perform the following procedure to correctly install the USB driver.
Viewing images recorded on a tape
Step 1: Uninstall the incorrect USB driver
① Turn on your computer and allow Windows to load.
② Connect the AC power adaptor to your camcorder, and set the POWER switch to VCR.
③ Connect the (USB) jack on your camcorder with the USB port on your computer using the supplied USB cable.
④ Open your computer's "Device Manager".
Windows XP Home Edition/Professional:
Select "Start" → "Control Panel" → "System"
→ "Hardware", and click the "Device
manager" button.
If there is no "System" inside "Pick a
category" after clicking "Control Panel", click
"Switch to classic view" instead.
Windows 2000 Professional:
Select “My Computer” → “Control Panel” → “System” → “Hardware” tab, and click the “Device Manager” button.
Windows 98 SE, Windows Me:
Select “My Computer” → “Control Panel” → “System”, and click “Device Manager” button.
⑤ Select and delete the underlined devices on the next page.
Connecting to your computer with USB port - For Windows users
Windows 98 SE
Windows Me
Windows 2000 Professional
Windows XP Home Edition/Professional
Connecting to your computer with USB port - For Windows users
⑥ Turn the POWER switch to OFF (CHARGE) on your camcorder, and then disconnect the USB cable.
⑦ Restart your computer.
Step 2: Install the USB driver on the supplied CD-ROM
Perform the entire procedure described in "Installing the USB driver" on page 222.
Viewing images recorded on a "Memory Stick"
Step1: Uninstall the incorrect USB driver
① Turn on your computer and allow Windows to load.
② Insert a “Memory Stick” into your camcorder.
③ Connect the AC power adaptor to your camcorder, and set the POWER switch to MEMORY.
④ Connect the (USB) jack on your camcorder with the USB port on your computer using the supplied USB cable.
⑤ Open your computer's "Device Manager".
Windows 2000 Professional:
Select "My Computer" → "Control Panel" → "System" → "Hardware", and click the "Device Manager" button.
Other OS:
Select "My Computer" → "Control Panel" → "System", and click "Device Manager" button.
⑥ Select “Other devices”.
Select the device prefixed with the “?” mark and delete.
e.g.: (?) Sony Handycam
⑦ Set the POWER switch to OFF (CHARGE) on your camcorder, and then disconnect the USB cable.
⑧ Restart your computer.
Step2: Install the USB driver on the supplied CD-ROM
Perform the entire procedure described in "Installing the USB driver" on page 222.
Viewing images recorded on a tape on your computer - For Windows users
Capturing images with "PIXELA ImageMixer Ver.1.0 for Sony"
You need to install the USB driver and "PIXELA ImageMixer" to view images recorded on a tape on your computer (p. 222).
To install and use this software in Windows 2000 Professional, you must be authorised as Power Users or Administrators. For Windows XP Home Edition/Professional, you must be authorised as Administrators.
Viewing images recorded on a tape
(1) Turn on your computer and allow Windows to load.
(2) Connect the AC power adaptor to your camcorder, and insert a tape into your camcorder.
(3) Set the POWER switch to VCR.
set USB STREAM to ON in ☐ in the menu settings (p. 252).
(4) Select “Start” → “Programs” → “PIXELA”
→ “ImageMixer” → “PIXELA ImageMixer
Ver.1.0 for Sony”.
The “PIXELA ImageMixer Ver.1.0 for Sony”
startup screen appears on your computer.
(5) Click 📋 on the leftmost on the screen.
Viewing images recorded on a tape on your computer – For Windows users
(7) Connect the (USB) jack on your camcorder with the USB port on your computer using the supplied USB cable.
(8) Press ▶ II to start playback. The picture from the tape appears on preview window on your computer.
Viewing images recorded on a tape on your computer – For Windows users
Viewing pictures live from your camcorder
(1) Follow the steps 1, 2 on page 230.
(2) Set the POWER switch to CAMERA.
Set USB STREAM to ON in ☐ in the menu settings (p. 252).
(3) Follow the steps 4 to 7 on page 230 and 231. The picture from your camcorder appears on preview window on your computer.
Capturing still images
(1) Click
(2) Looking at the preview window, move the cursor to 📋 and click it at the point you want to capture.
The still image is captured.
Captured images are displayed in the thumbnail list window.
Capturing moving pictures
Viewing images recorded on a tape on your computer – For Windows users
(1) Click
(2) Looking at the preview widow, move the cursor to ⬙ and click on it at the first scene of the movie you want to capture. ⬙ changes to ⬙.
(3) Looking at the preview window, move the cursor to ☐ and click on it at the last scene you want to capture. The moving picture is captured. Captured images are displayed in the thumbnail list window.
Notes
- The followings may occur while you are using your camcorder, and are not due to any malfunction.
- The image shakes up and down.
- Some images are not displayed correctly due to noise, etc.
- Images of different colour systems to that of your camcorder are not displayed correctly.
- When your camcorder is in tape recording standby with a cassette inserted, it turns off automatically after five minutes.
- We recommend setting DEMO MODE to OFF in the menu settings when your camcorder is in tape recording standby without cassette.
- Indicators in your camcorder LCD screen do not appear on images that are captured into your computer.
If image data cannot be transferred by the USB connection
The USB driver has been registered incorrectly as your computer was connected to your camcorder before installation of the USB driver was completed. Reinstall the USB driver following the procedure on page 227.
If any trouble occurs
Close all running applications, then restart your computer.
Carry out the following operations after quitting the application:
- Disconnect the USB cable.
- Change the POWER switch position to others or set it to OFF (CHARGE).
- Disconnect the USB cable. - Change the POWER switch position to others or set it to OFF (CHARGE).
Viewing images recorded on a tape on your computer – For Windows users
Seeing the on-line help (operating instructions) of "PIXELA ImageMixer Ver.1.0 for Sony"
A “PIXELA ImageMixer Ver.1.0 for Sony” on-line help site is available where you can find the detailed operating method of “PIXELA ImageMixer Ver.1.0 for Sony”.
(1) Click ⑦ located in the upper-right corner of the screen.
The ImageMixer's Manual screen appears.
(2) You can find the information you need from the list of contents.
To close on-line help
Click at the top right of the screen.
If you have any questions about "PIXELA ImageMixer Ver.1.0 for Sony" "PIXELA ImageMixer Ver.1.0 for Sony" is the product of PIXELA corporation. For more information, refer to the instruction manual of the CD-ROM supplied with your camcorder.
Note on using your computer
Communications with your computer
Communications between your camcorder and your computer may not recover after recovering from Suspend, Resume, or Sleep.
Viewing images recorded on a "Memory Stick" on your computer - For Windows users
- You need to install the USB driver to view "Memory Stick" images on your computer (p. 222).
An application such as Windows Media Player must be installed to play back moving pictures in Windows environment. - Set USBCONNECT to NORMAL in the menu settings. (The default setting is NORMAL.)
(1) Turn on your computer and allow Windows to load.
(2) Insert a “Memory Stick” into your camcorder, and connect the AC power adaptor to your camcorder and then to a wall socket.
(3) Set the POWER switch to MEMORY.
(4) Connect the (USB) jack on your camcorder with the USB port on your computer using the supplied USB cable. USB MODE appears on the screen of your camcorder.
(5) Open “My Computer” on Windows and double-click the newly recognized drive (e.g. “Removable Disk (E:)”).
The folders inside the “Memory Stick” are displayed.
(6) Select and double-click the desired image file from the folder.
For the detailed folder and file name, see “Image file storage destinations and image files” (p. 236).
* Copying a file to the hard disk of your computer before viewing it is recommended. If you play back the file directly from the “Memory Stick,” the image and sound may break off.
Image file storage destinations and image files
Image files recorded with your camcorder are grouped in folders by recording mode. The meanings of the file names are as follows. □□□□ stands for any number within the range from 0001 to 9999.
For Windows Me users (The drive recognizing your camcorder is [E:].)
Disconnect the USB cable and eject the "Memory Stick" or set the POWER switch to OFF (CHARGE)
- For Windows 2000 Professional, Windows Me, Windows XP Home Edition/Professional users
To disconnect the USB cable, eject the “Memory Stick” or set the POWER switch to OFF (CHARGE), follow the procedure below.
(1) Move the cursor to the “Unplug or Eject Hardware” icon on the Task Tray and click to cancel the applicable drive.
(2) After the “Safe to remove” message appears, disconnect the USB cable and eject the “Memory Stick” or set the POWER switch to OFF (CHARGE).
Connecting to your computer with USB port - For Macintosh users
When connecting to your computer with the USB port
Before connecting your camcorder to your computer, install the USB driver on your computer. The USB driver is packaged together with application software for viewing images on the CD-ROM supplied with your camcorder.
Recommended Macintosh environment
Mac OS 8.5.1/8.6/9.0/9.1/9.2 or Mac OS X (v10.0/v10.1)
Standard installation is required.
However, note that the upgrade to Mac OS 9.0/9.1 should be used for the following models:
- iMac with the Mac OS 8.6 standard installation and a slot loading type CD-ROM drive
- iBook or Power Mac G4 with the Mac OS 8.6 standard installation
The USB port must be provided as standard.
QuickTime 3.0 or newer must be installed (to play back moving pictures).
Notes
- Operations are not assured for the Macintosh environment if you connect two or more USB equipment to a single computer at the same time, or when using a hub.
- Some equipment may not operate depending on the type of USB equipment that is used simultaneously.
- Operations are not assured for all the recommended computer environments mentioned above.
• Macintosh and Mac OS, QuickTime are trademarks of Apple Computer Inc. - All other product names mentioned herein may be the trademarks or registered trademarks of their respective companies. Furthermore, “TM” and “®” are not mentioned in each case in this manual.
Connecting to your computer with USB port - For Macintosh users
Installing the USB driver
Do not connect the USB cable to your computer before installation of the USB driver is completed.
For Mac OS 8.5.1/8.6/9.0 users
(1) Turn on your computer and allow Mac OS to load.
(2) Insert the supplied CD-ROM into the CD-ROM drive of your computer.
The application software screen appears.
(3) Click the "USB Driver" to open the folder containing the six files related to "Driver."
Connecting to your computer with USB port - For Macintosh users
(4) Select the following two files, and drag and drop them into the System Folder:
- Sony Camcorder USB Driver
- Sony Camcorder USB Shim
(5) When the message appears, click “OK.” The USB driver is installed on your computer.
(6) Remove the CD-ROM from your computer.
(7) Restart your computer.
For Mac OS 9.1/9.2/Mac OS X (v10.0/v10.1)
The USB driver need not be installed. Your Mac is automatically recognized as a driver just by connecting your Mac using the USB cable.
Viewing images recorded on a "Memory Stick" on your computer - For Macintosh users
Viewing images
Before operation
You need to install the USB driver to view
"Memory Stick" images on your computer
(p. 239).
QuickTime 3.0 or newer must be installed to play back moving pictures.
(1) Turn on your computer and allow Mac OS to load.
(2) Insert a “Memory Stick” into your camcorder, and connect the AC power adaptor to your camcorder and then to a wall socket.
(3) Set the POWER switch to MEMORY.
(4) Connect the (USB) jack on your camcorder with the USB port on your computer using the supplied USB cable.
USB MODE appears on the screen of your camcorder.
(5) Double click the “Memory Stick” icon on the desktop.
The folders inside the “Memory Stick” are displayed.
(6) Select and double-click the desired image file from the folder.
* Copying a file to the hard disk of your computer before viewing it is recommended. If you play back the file directly from the “Memory Stick,” the image and sound may break off.
Disconnect the USB cable and eject the "Memory Stick" or set the POWER switch to OFF (CHARGE)
To disconnect the USB cable, eject the “Memory Stick” or set the POWER switch to OFF (CHARGE), follow the procedure below.
(1) Close all running applications. Make sure that the access lamp of your camcorder is not lit.
(2) Drag the “Memory Stick” icon into the “Trash.” Alternatively, select the “Memory Stick” icon by clicking on it, and then select “Eject disk” from the “Special” menu at the top left of the screen.
(3) Disconnect the USB cable or eject the "Memory Stick." Set the POWER switch of your camcorder to OFF (CHARGE).
For Mac OS X (v10.0) users
Shut down your computer, then disconnect the USB cable and eject the “Memory Stick” or set the POWER switch to OFF (CHARGE).
Capturing images from an analog video unit on your computer - Signal convert function
You can capture images and sound from an analog video unit connected to your computer which has the i DV Interface to your camcorder.
Before operation
Set DISPLAY to LCD in the menu settings. (The default setting is LCD.)
(1) Set the POWER switch to VCR.
(2) Press FN to display PAGE1.
(3) Press MENU, then set A/V → DV OUT to ON in ☑ (p. 248).
(4) Start playback on the analog video unit.
(5) Start capturing procedures on your computer. The operation procedures depend on your computer and the software which you use. For details on how to capture images, refer to the instruction manual of your computer and software.
Capturing images from an analog video unit on your computer - Signal convert function
After capturing images and sound
Stop capturing procedures on your computer, and stop playback on the analog video unit.
Notes
- You need to install software which can exchange video signals.
- Depending on the condition of the analog video signals, your computer may not be able to output the images correctly when you convert video signals into digital video signals via your camcorder.
- You can capture images and sound with an S video cable (optional) instead of the A/V connecting cable (supplied).
If your computer has a USB port
You can connect using a USB cable, but images may not be transferred smoothly.
Changing the menu settings
To change the mode settings in the menu settings, select the menu items with ↓/↑. The default settings can be partially changed. First, select the icon, then the menu item and the mode.
(1) In VCR, CAMERA or MEMORY, press FN to display PAGE1.
(2) Press MENU to display the menu.
(3) Press ↓/↑ to select a desired icon, and press EXEC.
(4) Press ↓/↑ to select a desired item, and press EXEC.
(5) Press ↓/↑ to select a desired setting, and press EXEC.
(6) Repeat steps from 3 to 5 if you want to change other items. Press RET. to return to step 3.
For details, see “Selecting the mode setting of each item” (p. 246).
Changing the menu settings
To return to FN
Press EXIT.
Menu items are displayed as the following icons:
TM MANUAL SET
CAMERA SET
VCR SET
LCD/VF SET
MEMORY SET
PRINT SET
CM SET
TAPE SET
SETUP MENU
ETC OTHERS
TM MANUAL SET
CAMERA SET
VCR SET
LCD/VF SET
MEMORY SET
PRINT SET
CM SET
TAPE SET
SETUP MENU
ETC OTHERS
English
Selecting the mode setting of each item ● is the default setting.
Menu items differ depending on the position of the POWER switch.
The LCD screen shows only the items you can operate at the moment.
| Icon/item | Mode | Meaning | POWER switch |
| MANUAL SET | |||
| PROGRAM AE | —— | To suit your specific shooting requirement (p. 79) | CAMERA MEMORY |
| P EFFECT | —— | To add special effects like those in films or on the TV to images (p. 74, 95) | VCR CAMERA |
| FLASH MODE | ● ON | To fire the flash (optional) regardless of the brightness of the surroundings | CAMERA MEMORY |
| AUTO | To fire the flash (optional) automatically | ||
| AUTO ◆ | To fire the flash (optional) before recording to reduce the red-eye phenomenon | ||
| FLASH LVL | HIGH | To make the flash level higher than normal | CAMERA MEMORY |
| ● NORMAL | To use the normal setting | ||
| LOW | To make the flash level lower than normal | ||
| WHT BAL | —— | To adjust the white balance (p. 67) | CAMERA MEMORY |
| N.S. LIGHT | ● ON | To use the NightShot Light function (p. 46) | CAMERA MEMORY |
| OFF | To cancel the NightShot Light function | ||
| AUTO SHTR | ● ON | To automatically activate the electronic shutter when shooting in bright conditions | CAMERA |
| OFF | To not automatically activate the electronic shutter even when shooting in bright conditions | ||
Note on FLASH MODE and FLASH LVL
You can use FLASH MODE and FLASH LVL only when the external flash (optional) is set.
Note on FLASH LVL
You cannot adjust FLASH LVL if the external flash (optional) is not compatible with the flash level.
| Icon/item | Mode | Meaning | POWER switch |
| C CAMERA SET | |||
| D ZOOM | ● OFF | To deactivate the digital zoom. Up to 10× zoom is carried out. | CAMERA |
| 20× | To activate the digital zoom. More than 10× to 20× zoom is performed digitally (p. 40). | ||
| 120× | To activate the digital zoom. More than 10× to 120× zoom is performed digitally. | ||
| PHOTO REC | ● MEMORY | To record still images on “Memory Stick”s when you press PHOTO in tape recording or tape recording standby (p. 61). | CAMERA |
| TAPE | To record still images on tape when you press PHOTO in tape recording or tape recording standby (p. 65). | ||
| 16:9WIDE | ● OFF | Not to record a 16:9wide picture | CAMERA |
| ON | To record a 16:9wide picture (p. 69) | ||
| STEADYSHOT | ● ON | To compensate frame camera-shake | CAMERA |
| OFF | To cancel the SteadyShot function. Natural pictures are produced when shooting a stationary subject with a tripod. | ||
| FRAME REC | ● OFF | To deactivate the frame recording function | CAMERA |
| ON | To activate the frame recording function (p. 91) | ||
| INT. REC | ON | To activate the interval recording function (p. 88) | CAMERA |
| ● OFF | To deactivate the interval recording function | ||
| SET | To set INTERVAL and REC TIME for interval recording function | ||
| EDITSEARCH | ● OFF | Not to display Ⓞ/− · + on the LCD screen | CAMERA |
| ON | To display Ⓞ/− · + on the LCD screen (p. 51) | ||
Notes on the SteadyShot function
- The SteadyShot function will not correct excessive camera-shake.
- Attachment of a conversion lens (optional) may influence the SteadyShot function.
If you cancel the SteadyShot function
The SteadyShot off indicator "OFF" appears. Your camcorder prevents excessive compensation for camera-shake.
Changing the menu settings
| Icon/item | Mode | Meaning | POWER switch |
| VCR SET | |||
| HiFi SOUND | ● STEREO | To play back a stereo tape or dual sound track tape with main and sub sound (p. 284) | VCR |
| 1 | To play back a stereo tape with the left sound or a dual sound track tape with main sound | ||
| 2 | To play back a stereo tape with the right sound or a dual sound track tape with sub sound | ||
| AUDIO MIX | — — | To adjust the balance between stereo 1 and stereo 2 (p. 137) | VCR |
S 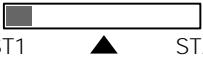 2 2 | |||
| A/V → DV OUT | ● OFF | To output digital images and sound in analog format using your camcorder | VCR |
| ON | To output analog images and sound in digital format using your camcorder (p. 243) | ||
| NTSC PB | ● ON PAL TV | To play back a tape recorded in the NTSC colour system on a PAL system TV | VCR |
| NTSC 4.43 | To play back a tape recorder in the NTSC colour system on a TV with the NTSC 4.43 mode | ||
| LCD/VF SET | |||
| LCD B.L. | ● BRT NORMAL | To set the brightness on the LCD screen normal | VCRCAMERAMEMORY |
| BRIGHT | To brighten the LCD screen | ||
| LCD COLOUR | — — | To adjust the colour on the LCD screen with -/+ | VCRCAMERAMEMORY |
| Low intensityHigh intensity | |||
| VF B.L. | ● BRT NORMAL | To set the brightness on the viewfinder screen to normal | VCRCAMERAMEMORY |
| BRIGHT | To brighten the viewfinder screen | ||
Note on NTSC PB
When you play back a tape on a Multi System TV, select the best mode while viewing the picture on the TV.
Notes on LCD B.L. and VF B.L.
- When you select BRIGHT, battery life is reduced by about 10 percent during recording.
- When you use power sources other than the battery pack, BRIGHT is automatically selected.
Even if you adjust LCD B.L., LCD COLOUR and VF B.L.
The recorded picture will not be affected.
| Icon/item | Mode | Meaning | POWER switch |
| MEMORY SET | |||
| STILL SET | |||
| BURST | ● OFF | Not to record continuously | MEMORY |
| NORMAL | To record from four to 13 images continuously (p. 163) | ||
| EXP BRKTG | To record three images continuously with different exposure | ||
| MULTI SCRN | To record nine images continuously, display the images on a single page divided into nine boxes. | ||
| QUALITY | ● SUPER FINE | To record still images in the finest image quality mode (p. 155) | VCR MEMORY |
| FINE | To record still images in the fine image quality mode | ||
| STANDARD | To record still images in the standard image quality mode | ||
| IMAGESIZE | ● 1152 × 864 | To record still images in 1152 × 864 size (p. 158) | MEMORY |
| 640 × 480 | To record still images in 640 × 480 size | ||
| MOVIE SET | |||
| IMAGESIZE | ● 320 × 240 | To record moving pictures in 320 × 240 size (p. 158) | VCR MEMORY |
| 160 × 112 | To record moving pictures in 160 × 112 size | ||
| REMAIN | ● AUTO | To display the remaining capacity of the “Memory Stick” in the following cases:for five seconds after setting the POWER switch to VCR or MEMORY and inserting a “Memory Stick”when the remaining capacity of the “Memory Stick” is less than one minute after setting the POWER switch to MEMORYfor five seconds from the start of moving picture recordingfor five seconds after completing moving picture recording | VCR MEMORY |
| ON | To always display the remaining capacity of the “Memory Stick” | ||
When you select image quality
The number of images you can shoot in the currently selected image quality appears on the screen.
| Icon/item | Mode | Meaning | POWER switch |
| MEMORY SET | |||
| SLIDE SHOW | — — | To play back images in a continuous loop (p. 205) | MEMORY |
| PHOTO SAVE | — — | To copy still images on a tape onto a “Memory Stick”(p. 192) | VCR |
| FILE NO. | ● SERIES | To assign numbers to file in sequence even if the “Memory Stick” is changed | VCR MEMORY |
| RESET | To reset the file numbering each time the “Memory Stick” is changed | ||
| DELETE ALL | — — | To delete all the unprotected images (p. 210) | MEMORY |
| FORMAT | ● RETURN | To cancel formatting | MEMORY |
| OK | To format an inserted “Memory Stick.” Formatting erases all information on the “Memory Stick.” Check the contents of the “Memory Stick” before formatting. 1. Select FORMAT with ↓/↑, then press EXEC. 2. Press ↓/↑ to select OK, then press EXEC. 3. After EXECUTE appears, press EXEC. FORMATTING flashes during formatting. COMPLETE appears when formatting is finished. | ||
| PRINT SET | |||
| 9PIC PRINT | ● RETURN | To stop 9PICS print | MEMORY |
| SAME | To execute SAME PICS print (p. 213) | ||
| MULTI | To execute MULTI PICS print | ||
| MARKED | To print images with print mark arranging them in order of recording | ||
| DATE/TIME | ● OFF | To make prints without the recording date and time | MEMORY |
| DATE | To make prints with the recording date (p. 214) | ||
| DAY&TIME | To make prints with the recording date and time | ||
Notes on formatting
- Do not do any of the following while FORMATTING is displayed:
- Change the POWER switch position to others
- Operate buttons
- Eject the "Memory Stick"
- The “Memory Stick” supplied with your camcorder has been formatted at factory. Formatting with your camcorder is not required.
- You cannot format the “Memory Stick” if the write-protect switch on the “Memory Stick” is set to LOCK.
- Format the “Memory Stick” if “FORMAT ERROR” appears.
- Formatting erases protected image data on the “Memory Stick.”
Note on PRINT SET
9PIC PRINT and DATE/TIME are displayed only when an external printer (optional) is connected to the intelligent accessory shoe.
| Icon/item | Mode | Meaning | POWER switch |
| CM SET | |||
| TITLE | — | To superimpose a title or make your own title (p. 139, 143) | VCR CAMERA |
| TITLEERASE | — | To erase the title you have superimposed (p. 142) | VCR CAMERA |
| TITLE DSPL | ● ON | To display the title you have superimposed | VCR |
| OFF | Not to display the title (p. 141) | ||
| CM SEARCH | ● ON | To search using cassette memory (p. 102, 104, 106) | VCR |
| OFF | To search without using cassette memory (p. 105, 107) | ||
| TAPE TITLE | — | To label a cassette (p. 145) | VCR CAMERA |
| ERASE ALL | — | To erase all the data in cassette memory (p. 147) | VCR CAMERA |
| TAPE SET | |||
| REC MODE | ● SP | To record in the SP (Standard Play) mode | VCR CAMERA |
| LP | To increase the recording time to 1.5 times the SP mode | ||
| AUDIO MODE | ● 12BIT | To record in the 12-bit mode (two stereo sounds) | VCR CAMERA |
| 16BIT | To record in the 16-bit mode (the one stereo sound with high quality) | ||
| REMAIN | ● AUTO | To display the remaining tape:for about eight seconds after setting the POWER switch to VCR or CAMERA and inserting a cassette, then your camcorder calculates the remaining amount of tapefor about eight seconds after setting the POWER switch to VCR or CAMERA and DISPLAY/TOUCH PANEL is pressedfor about eight seconds after setting the POWER switch to VCR and ▶ is pressed | VCR CAMERA |
| ON | To always display the remaining tape indicator | ||
Notes on the LP mode
- When you record a tape in the LP mode on your camcorder, we recommend playing the tape on your camcorder. When you play back the tape on other camcorders or VCRs, noise may occur in pictures or sound.
- When you record in the LP mode, we recommend using a Sony Excellence/Master mini DV cassette so that you can get the most out of your camcorder.
- You cannot make audio dubbing on a tape recorded in the LP mode. Use the SP mode for the tape to be audio dubbed.
- When you record in the SP and LP modes on one tape or you record some scenes in the LP mode, the playback picture may be distorted or the time code may not be written properly between scenes.
Notes on AUDIO MODE
- You cannot dub audio sound on a tape recorded in the 16-bit mode.
- When playing back a tape recorded in the 16-bit mode, you cannot adjust the balance in AUDIO MIX.
| Icon/item | Mode | Meaning | POWER switch |
| SETUP MENU | |||
| CLOCK SET | —— | To set the date or time (p. 29) | CAMERA MEMORY |
| USB STREAM | ● OFF | To deactivate the USB streaming function | VCR CAMERA |
| ON | To activate the USB streaming function | ||
| USBCONNECT | ● NORMAL | To connect and recognize the “Memory Stick” drive. | MEMORY |
| PTP | To connect and only copy a “Memory Stick” image from your camcorder to a computer (only with Windows XP Home Edition/Professional or Mac OS X)1 Press ↓/↑ to select USBCONNECT, then press EXEC.2 Press ↓/↑ to select PTP, then press EXEC.3 Insert a “Memory Stick” into your camcorder, and connect the camcorder to your computer using a USB cable. Copy Wizard will automatically start up. | ||
| LANGUAGE | ● ENGLISH | To display the following information indicators in English: min, STBY, REC, CAPTURE, VOL, END SEARCH and START | VCR CAMERA MEMORY |
| FRANÇAIS ^1) | To display the information indicators in French | ||
| ESPAÑOL ^1) | To display the information indicators in Spanish | ||
| PORTUGUÊS ^1) | To display the information indicators in Portuguese | ||
| DEUTSCH ^1) | To display the information indicators in German | ||
| ITALIANO ^1) | To display the information indicators in Italian | ||
| ΕΛΛΗΝΙΚΑ ^1) | To display the information indicators in Greek | ||
| 中文[COMP] ^2) | To display the information indicators in Chinese (traditional) | ||
| 中文[SIMP] ^2) | To display the information indicators in Chinese (simplified) | ||
| DEMO MODE | ● ON | To make the demonstration appear | CAMERA |
| OFF | To cancel the demonstration mode | ||
^1) European models only
2) The other country's models only
Notes on DEMO MODE
- You cannot select DEMO MODE when a cassette or a “Memory Stick” is inserted in your camcorder.
- DEMO MODE is set to STBY (Standby) at the default setting and the demonstration starts about 10 minutes after you have set the POWER switch to CAMERA without a cassette and “Memory Stick” inserted.
To cancel the demonstration, insert a cassette, set the POWER switch to other than CAMERA, or set DEMO MODE to OFF. To set to STBY (Standby) again, leave the DEMO MODE at ON in the menu settings, turn the POWER switch OFF (CHARGE), and return the POWER switch to CAMERA.
- If you press the touch panel during the demonstration, the demonstration stops for a while, and it starts again after about 10 minutes.
- When NIGHTSHOT is set to ON, the “NIGHTSHOT” indicator appears on the screen and you cannot select DEMO MODE in the menu settings.
| Icon/item | Mode | Meaning | POWER switch |
| ETC OTHERS | |||
| DATA CODE(On the Remote Commander) | ● DATE/CAM | To display date, time and various settings during playback when you press the DATA CODE button on the Remote Commander (p. 54) | VCR MEMORY |
| DATE | To display date and time during playback when you press the DATA CODE button on the Remote Commander | ||
| WORLD TIME | — — | To set the clock to the local time. Press ↓/↑ to set a time difference. The clock changes by the time difference you set here. If you set the time difference to 0, the clock returns to the originally set time. | CAMERA MEMORY |
| BEEP | ● MELODY | To output the melody when you start/stop recording or when an unusual condition occurs on your camcorder | VCR CAMERA MEMORY |
| NORMAL | To output the beep instead of the melody | ||
| OFF | To cancel melody, the beep sound and shutter sound | ||
| COMMANDER | ● ON | To activate the Remote Commander supplied with your camcorder | VCR CAMERA MEMORY |
| OFF | To deactivate the Remote Commander to avoid remote control misoperation caused by other VCR's remote control | ||
| DISPLAY | ● LCD | To show the display on the LCD screen and viewfinder | VCR CAMERA MEMORY |
| V-OUT/LCD | To show the display on the TV screen, LCD screen and viewfinder | ||
| REC LAMP | ● ON | To light up the camera recording lamp at the front of your camcorder | CAMERA MEMORY |
| OFF | To turn the camera recording lamp off so that the person is not aware of the recording | ||
| VIDEO EDIT | ● RETURN | To cancel video editing | VCR |
| TAPE | To make programmes and perform video editing (p. 113) | ||
| MEMORY | To make programmes and perform MPEG editing (p. 187) | ||
Note
If you press DISPLAY/TOUCH PANEL with DISPLAY set to V-OUT/LCD in the menu settings, the picture from a TV or VCR will not appear on the LCD screen even when your camcorder is connected to the output jacks on the TV or VCR.
When recording a close subject
When REC LAMP is set to ON, the red camera recording lamp on the front of your camcorder may reflect on the subject if it is close. In this case, we recommend you set REC LAMP to OFF.
In more than five minutes after removing the power source
The PROGRAM AE, FLASH LVL, AUDIO MIX, WHT BAL, HiFi SOUND and COMMANDER items are returned to their default settings.
Other menu items are held in memory even when the battery is removed.
Русский
Types of trouble and how to correct trouble
If you run into any problem using your camcorder, use the following table to troubleshoot the problem. If the problem persists, disconnect the power source and contact your Sony dealer. If "C:□□:□□" appears on the screen, the self-diagnosis display function has activated. See page 269.
In recording
| Symptom | Cause and/or Corrective Actions |
| START/STOP does not operate. | The POWER switch is not set to CAMERA.→ Set it to CAMERA (p. 34).The tape has run out.→ Rewind the tape or insert a new one (p. 31, 56).The write-protect tab is set to expose the red mark.→ Use a new cassette or slide the tab (p. 31).The tape is stuck to the drum (moisture condensation).→ Remove the cassette and leave your camcorder for at least one hour to acclimatize (p. 291). |
| The power goes off. | While being operated in CAMERA, your camcorder has been in tape recording standby for more than five minutes.→ Set the POWER switch to OFF (CHARGE) and then to CAMERA.The battery pack is dead or nearly dead.→ Install a fully charged battery pack. |
| You cannot record still images on a “Memory Stick” when you set the POWER switch to CAMERA. | PHOTO REC is set to TAPE in the menu settings.→ Set it to MEMORY (p. 247). |
| Tape photo recording does not work. | PHOTO REC is set to MEMORY in the menu settings.→ Set it to TAPE (p. 247). |
| The image on the viewfinder screen is not clear. | Viewfinder is not extended to the end.→ Pull out the viewfinder (p. 39).The viewfinder lens is not adjusted.→ Adjust the viewfinder lens (p. 39). |
| The SteadyShot function does not work. | STEADYSHOT is set to OFF in the menu settings.→ Set it to ON (p. 247). |
| The autofocusing function does not work. | The setting is the manual focus.→ Press FOCUS to set to the autofocus (p. 85).Shooting conditions are not suitable for autofocus.→ Adjust to focus manually (p. 85). |
| The picture does not appear in the viewfinder. | The LCD panel is open.→ Close the LCD panel (p. 37). |
| A vertical band appears when you shoot a subject such as lights or a candle flame against a dark background. | The contrast between the subject and background is too high.This is not a malfunction. |
| A vertical band appears when you shoot a very bright subject. | This is not a malfunction. |
| Some tiny spots in white, red, blue or green appear on the screen. | SLOW SHTR, Super NightShot or Colour Slow Shutter is activated. This is not a malfunction. |
| An unknown picture is displayed on the screen. | If 10 minutes elapse after you set the POWER switch to CAMERA or DEMO MODE is set to ON in the menu settings without a cassette and a “Memory Stick” inserted, your camcorder automatically starts the demonstration.→ Insert a cassette and a “Memory Stick” or press the LCD screen. The demonstration stops. You can also cancel DEMO MODE (p. 252). |
| The picture is recorded in incorrect or unnatural colours. | NIGHTSHOT is set to ON.→ Set it to OFF (p. 45). |
| Picture appears too bright, and the subject does not appear on the screen. | NIGHTSHOT is set to ON in a bright place.→ Set it to OFF (p. 45).BACK LIGHT is active.→ Set it off (p. 44). |
| The click of the shutter does not sound. | BEEP is set to OFF in the menu settings.→ Set it to MELODY or NORMAL (p. 253). |
| Black bands appear when you record a TV screen or computer screen. | → Set STEADYSHOT to OFF in the menu settings (p. 247). |
| An external flash (optional) does not work. | The power of the external flash (optional) is off or the power source is not installed.→ Turn on the external flash (optional) or install the power source.Two or more external flashes (optional) are attached.→ Only one external flash (optional) can be attached. |
(continued on the following page)
In playback
| Symptom | Cause and/or Corrective Actions |
| Playback is not possible. | The tape has run out.→ Rewind the tape (p. 52). |
| There are horizontal lines on the picture or the playback picture is not clear or does not appear. | The video head may be dirty.→ Clean the head using the cleaning cassette (optional) (p. 292). |
| No sound or only a low sound is heard when playing back a tape. | The stereo tape is played back with HiFi SOUND set to 2 in the menu settings.→ Set it to STEREO (p. 248).Volume is turned to minimum.→ Turn up the volume (p. 52).AUDIO MIX is set to ST2 in the menu settings.→ Adjust AUDIO MIX (p. 248). |
| Displaying the record date, the date search function does not work. | The tape has no cassette memory.→ Use a tape with cassette memory (p. 104).CM SEARCH is set to OFF in the menu settings.→ Set it to ON (p. 251).The tape has a blank portion in the recorded portion (p. 105). |
| The title search function does not work. | The tape has no cassette memory.→ Use a tape with cassette memory (p. 103).CM SEARCH is set to OFF in the menu settings.→ Set it to ON (p. 251).There is no title in the tape.→ Superimpose the titles (p. 139).The tape has a blank portion in the recorded portion (p. 103). |
| New sound added to the recorded tape is not heard. | AUDIO MIX is set to ST1 side in the menu settings.→ Adjust AUDIO MIX (p. 248). |
| The title is not displayed. | TITLE DSPL is set to OFF in the menu settings.→ Set it to ON (p. 251). |
In recording and playback
| Symptom | Cause and/or Corrective Actions |
| The power does not turn on. | The battery pack is not installed, or is dead or nearly dead.→ Install a charged battery pack (p. 22, 23).The AC power adaptor is not connected to a wall socket.→ Connect the AC power adaptor to a wall socket (p. 27). |
| END SEARCH does not work. | The tape was ejected after recording when using a cassette without cassette memory (p. 51).You have not recorded on the new cassette yet (p. 50). |
| END SEARCH does not work correctly. | The tape has a blank portion in the beginning or middle. (p. 51). |
| The battery pack is quickly discharged. | The temperature of the environment is too low.The battery pack is not fully charged.→ Charge the battery pack fully again (p. 23).The battery pack is completely dead, and cannot be recharged.→ Replace with a new battery pack (p. 22). |
| The battery remaining indicator does not indicate the correct time. | You have used the battery pack in an extremely hot or cold environment for a long time.The battery pack is completely dead, and cannot be recharged.→ Replace with a new battery pack (p. 22).The battery is not fully charged.→ Install a charged battery pack (p. 22, 23).A deviation has occurred in the remaining time.→ Charge the battery pack fully again so that the indication on the battery remaining indicator is correct (p. 23). |
| The power goes off although the battery remaining indicator indicates that the battery pack has enough power to operate. | A deviation has occurred in the remaining battery time.→ Charge the battery pack fully again so that the indication on the battery remaining indicator is correct (p. 23). |
| The cassette cannot be removed from the holder. | The power source is disconnected.→ Connect it firmly (p. 22, 27).The battery is dead.→ Use a charged battery pack (p. 22, 23). |
| The □ and ▲ indicators flash and no functions except for cassette ejection work. | Moisture condensation has occurred.Remove the cassette and leave your camcorder for at least one hour to acclimatize (p. 291). |
| CIII indicator does not appear when using a tape with cassette memory. | The gold-plated connector of the tape is dirty or dusty.→ Clean the gold-plated connector (p. 284). |
| Remaining tape indicator is not displayed. | The REMAIN is set to AUTO in the menu settings.→ Set it to ON to always display the remaining tape indicator (p. 251). |
(continued on the following page)
When operating using a "Memory Stick"
| Symptom | Cause and/or Corrective Actions |
| The “Memory Stick” does not function. | · The POWER switch is not set to MEMORY.→ Set it to MEMORY (p. 161).· A “Memory Stick” is not inserted.→ Insert a “Memory Stick” (p. 151). |
| Recording does not function. | · The “Memory Stick” has already been recorded to its full capacity.→ Delete unnecessary images and record again (p. 208).· The “Memory Stick” formatted incorrectly is inserted.→ Format the “Memory Stick” using your camcorder or use another “Memory Stick” (p. 150, 250).· The write-protect switch on the “Memory Stick” is set to LOCK.→ Release the lock (p. 149). |
| The image cannot be deleted. | · The image is protected.→ Cancel image protection (p. 207).· The write-protect switch on the “Memory Stick” is set to LOCK.→ Release the lock (p. 149). |
| You cannot format the “Memory Stick.” | · The write-protect switch on the “Memory Stick” is set to LOCK.→ Release the lock (p. 149). |
| Deleting all the images cannot be carried out. | · The write-protect switch on the “Memory Stick” is set to LOCK.→ Release the lock (p. 149). |
| You cannot protect the image. | · The write-protect switch on the “Memory Stick” is set to LOCK.→ Release the lock (p. 149).· INDEX screen is not displayed.→ Press INDEX to display the index screen then protect the image (p. 207). |
| You cannot write a print mark on the still image. | · The write-protect switch on the “Memory Stick” is set to LOCK.→ Release the lock (p. 149).· INDEX screen is not displayed.→ Press INDEX to display the index screen, then write a print mark (p. 211).· You are trying to write a print mark on a moving picture.→ Print marks cannot be written to a moving picture. |
| The photo save function does not work. | · The write-protect switch on the “Memory Stick” is set to LOCK.→ Release the lock (p. 149). |
| You cannot play back images in actual size. | · You may not be able to play back images in actual size when you try to play back images recorded by other equipment. This is not a malfunction. |
| You cannot play back image data. | · Your camcorder cannot play back some images processed with your computer. (The file name flashes.)· If you record images with any other equipment, the images may not play back normally on your camcorder. |
Others
| Symptom | Cause and/or Corrective Actions |
| A title is not recorded. | The cassette has no cassette memory.→ Use a cassette with cassette memory (p. 139).The cassette memory is full.→ Erase unnecessary title (p. 142).The cassette is set to prevent accidental erasure.→ Slide the write-protect tab so that red portion is not visible (p. 31).The tape has a blank portion in the recorded portion.→ Superimpose the title to the recorded position (p. 139). |
| A cassette label is not recorded. | The tape has no cassette memory.→ Use a tape with cassette memory (p. 145).The cassette memory is full.→ Erase unwanted data (p. 142).The tape is set to prevent accidental erasure.→ Slide the write-protect tab so that red portion is not visible (p. 31). |
| Digital program editing to a tape does not function. | The input selector on the VCR is not set correctly.→ Set the selector correctly, and check the connection between the VCR and your camcorder (p. 114).The camcorder is connected to DV equipment of other than Sony using the i.LINK cable.→ Set it to IR (p. 120).Setting programme on a blank portion of the tape is attempted.→ Set the programme again on a recorded portion (p. 124).The synchronisation of your camcorder and the VCR is not adjusted.→ Adjust the synchronisation of the VCR (p. 122).The IR SETUP code is incorrect.→ Set the correct code (p. 117). |
| Digital program editing to a “Memory Stick” does not function. | Setting programme on a blank portion of the tape is attempted.→ Set the programme again on a recorded portion (p. 187). |
| The Remote Commander supplied with your camcorder does not work. | COMMANDER is set to OFF in the menu settings.→ Set it to ON (p. 253).Something is blocking the infrared rays.→ Remove the obstacle.The batteries are inserted in the battery holder with the + - polarities incorrectly matching the + - marks.→ Insert the batteries with the correct polarity (p. 311).The batteries are dead.→ Insert new ones (p. 311). |
| The picture from a TV or VCR does not appear even when your camcorder is connected to the outputs on the TV or VCR. | DISPLAY is set to V-OUT/LCD in the menu settings.→ Set it to LCD (p. 253). |
(continued on the following page)
| Symptom | Cause and/or Corrective Actions |
| The melody or beep sounds for five seconds. | Moisture condensation has occurred.Remove the cassette and leave your camcorder for at least one hour to acclimatize (p. 291).Some troubles have occurred in your camcorder.Remove the cassette and insert it again, then operate your camcorder. |
| No function works though the power is on. | Disconnect the AC power adaptor from a wall socket or remove the battery, then reconnect it in about one minute. Turn the power on. If the functions still do not work, press the RESET button using a sharp-pointed object. (If you press the RESET button, all the settings including the date and time return to the default) (p. 22, 27, 308). |
| When you set the POWER switch to VCR or OFF (CHARGE), if you move your camcorder, you may hear a clattering sound from inside your camcorder. | This is because some functions use a linear mechanism. Your camcorder is not malfunctioning. |
| While charging the battery pack, the CHARGE lamp does not light up. | Charging is completed.The battery pack is not properly installed.Install it properly (p. 22). |
| You cannot charge the battery pack. | The POWER switch is not set to OFF (CHARGE).Set it to OFF (CHARGE) (p. 23). |
| While charging the battery pack, the CHARGE lamp flashes. | The battery pack is not properly installed.Install it properly (p. 22).Something is wrong with the battery pack.Please contact your Sony dealer or local authorized Sony service facility. |
| The buttons do not appear on the touch panel. | DISPLAY/TOUCH PANEL is pressed.Press the LCD screen lightly.Press DISPLAY/TOUCH PANEL on your camcorder or DISPLAY on the Remote Commander (p. 54). |
| The buttons on the LCD screen do not work. | Adjust the screen (CALIBRATION) (p. 296). |
| The indicators appear mirror-reversed in the viewfinder. | The mirror mode is activated.This is not a malfunction (p. 41). |
| Image data cannot be transferred by the USB connection. | The USB cable was connected before installation of the USB driver was completed.Uninstall the incorrect USB driver and re-install the USB driver (p. 222, 227).USBCONNECT is set to PTP when the POWER switch is set to MEMORY.Set it to NORMAL. (p. 252). |
| A cassette cannot be removed even if the cassette lid is open. | Moisture condensation has started to condense in your camcorder (p. 291). |
Self-diagnosis display
Your camcorder has a self-diagnosis display function.
This function displays the current condition of your camcorder as a 5-digit code (a combination of a letter and figures) on the screen. If a 5-digit code is displayed, check the following code chart. The last two digits (indicated by □□) will differ depending on the state of your camcorder.
LCD screen or Viewfinder
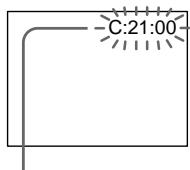
Self-diagnosis display
• C: □□: □□
You can service your camcorder yourself.
• E: □□: □□
Contact your Sony dealer or local authorized Sony facility.
| 5-digit display | Cause and/or Corrective Actions |
| C:04:□□ | You are using a battery pack that is not an “InfoLITHIUM” battery pack.→ Use an “InfoLITHIUM” battery pack (p. 26, 285). |
| C:21:□□ | Moisture condensation has occurred.Remove the cassette and leave your camcorder for at least one hour to acclimatize (p. 291). |
| C:22:□□ | The video heads are dirty.→ Clean the heads using the cleaning cassette (optional) (p. 292). |
| C:31:□□ | A malfunction other than the above that you can service has occurred.→ Remove the cassette and insert it again, then operate your camcorder.→ Disconnect the mains lead of the AC adaptor or remove the battery pack. After reconnecting the power source, operate your camcorder. |
| E:20:□□ | A malfunction that you cannot service has occurred.→ Contact your Sony dealer or local authorized Sony service facility and inform them of the 5-digit code. (e.g. E:61:10) |
| E:61:□□ | |
| E:62:□□ |
If you are unable to rectify the problem even if you try corrective actions a few times, contact your Sony dealer or local authorized Sony service facility.
Warning indicators and messages
If indicators and messages appear on the screen, check the following: See the page in parentheses “( )” for more information.
Warning indicators
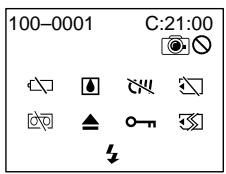
100-0001 Warning indicator as to file Slow flashing:
- The file is corrupted.
- The file is unreadable.
- You are trying to carry out MEMORY MIX function on moving picture (p. 175).
C:21:00 Self-diagnosis display (p. 269)
The battery is dead or nearly dead Slow flashing:
- The battery is nearly dead. Depending on operational, environmental or battery conditions the ⏻ indicator may flash, even if there are approximately five to 10 minutes remaining.
Fast flashing:
- The battery is dead.
Moisture condensation has occurred* Fast flashing:
- Eject the cassette, turn off your camcorder, and leave it for about one hour with the cassette compartment open (p. 291).
Warning indicator as to cassette memory*
Slow flashing:
- No cassette with cassette memory is inserted (p. 282).
Warning indicator as to "Memory Stick"* Slow flashing:
- No "Memory Stick" is inserted.
- The write-protect switch on the “Memory Stick” is set to LOCK (p. 149).
Fast flashing:
- The “Memory Stick” is not readable with your camcorder (p. 149).
- The image cannot be recorded on “Memory Stick.”
Warning indicator as to "Memory Stick" formatting*
Fast flashing:
- “Memory Stick” is not formatted correctly (p. 250).
- The “Memory Stick” data is corrupted (p. 150).
Warning indicator as to tape
Slow flashing:
• The tape is near the end.
- No tape is inserted.*
- The write-protect tab of the cassette is effective (red) (p. 31).*
Fast flashing:
- The tape has run out.*
▲ You need to eject the cassette*
Slow flashing:
- The write-protect tab of the cassette is effective (red) (p. 31).
Fast flashing:
- Moisture condensation has occurred (p. 291).
• The tape has run out. - The self-diagnosis display function is activated (p. 269).
The image is protected*
Slow flashing:
• The image is protected (p. 207).
- The write-protect switch on the “Memory Stick” is set to LOCK (p. 149).
⚠ Warning indicator as to the flash (optional) Slow flashing:
- During charging*
Fast flashing:
- There is something wrong with the external flash (optional).
Warning indicator as to still image recording
Slow flashing:
- The still image cannot be recorded on a tape or "Memory Stick."
* You hear the melody or beep sound.
Warning messages
| CLOCK SET | Set the date and time (p. 29). |
| FOR “InfoLITHIUM”BATTERY ONLY | Use an “InfoLIHIUM” battery pack (p. 26). |
| CLEANING CASSETTE | The video heads are dirty (p. 292).The indicator and “CLEANING CASSETTE” message appear one after another on the screen. |
| COPY INHIBIT | You tried to record a picture that has a copyright control signal (p. 283).* |
| FULL | The cassette memory is full (p. 141).* |
| 16BIT | AUDIO MODE is set to 16BIT.* You cannot dub new sound (p. 251). |
| REC MODE | REC MODE is set to LP.* You cannot dub new sound (p. 251). |
| TAPE | There is no recorded portion on the tape.* You cannot dub new sound. |
| “i.LINK” CABLE | i.LINK cable is connected.* You cannot dub new sound (p. 138). |
| FULL | The “Memory Stick” is full (p. 164).* |
| ○— | The write-protect switch on the “Memory Stick” is set to LOCK (p. 149).* |
| NO FILE | No image is recorded on the “Memory Stick.”* |
| NO MEMORY STICK | No “Memory Stick” is inserted.* |
| NO STILL IMAGE FILE | You select MULTI in 9PIC PRINT in the menu settings using a “Memory Stick” containing no still image.* |
| AUDIO ERROR | You are trying to record an image with sound that cannot be recorded by your camcorder on “Memory Stick” (p. 184).* |
| MEMORY STICK ERROR | The “Memory Stick” data is corrupted.* |
| FORMAT ERROR | The “Memory Stick” is not recognized (p. 151, 250).*Check the format. |
| ○— DIRECTORY ERROR | There is more than two same directories (p. 195).* |
| PLAY ERROR | The image is distorted and cannot be played back.* |
| REC ERROR | Check the input signal, then record again.* |
| ▲ TAPE END | The tape has reached the end of the tape.* |
| NO TAPE | Insert a cassette.* |
| NO PRINT MARK | You selected MARKED in 9PIC PRINT in the menu settings using a “Memory Stick” contains no image with a print mark (p. 214).* |
| DELETING | You press the PHOTO button on your camcorder while deleting data in a “Memory Stick.”* |
| FORMATTING | You press the PHOTO button on your camcorder while formatting a “Memory Stick.”* |
| NOW CHARGING | Charging an external flash (optional) does not work correctly.* |
Русский
Selecting cassette types
You can use the mini DV Mini DV cassette only.* You cannot use any other 8 mm Ⓑ, Hi8 HiB, Digital8 Ⓒ, VHS VH5, VHSC VH5C, S-VHS SVHS, S-VHSC SVHSC, Betamax B, DV DV or MICRO MV MICROMW cassette.
* There are two types of mini DV cassettes: with cassette memory and without cassette memory. Tapes with cassette memory have CIII (Cassette Memory) mark. We recommend that you use cassettes with cassette memory.
IC memory is mounted on this type of cassette. Your camcorder can read and write data such as dates of recording or titles, etc. to this memory.
The functions using the cassette memory require successive signals recorded on the tape. If the tape has a blank portion at the beginning or between recorded portions, titles may not be displayed properly or the search functions may not work properly. Perform the following to prevent a blank portion from being made on the tape.
Press END SEARCH to go to the end of the recorded portion before you begin the next recording if you operate the following:
- You have ejected the cassette during recording.
- You have played back the tape.
- You have used EDITSEARCH.
If there is a blank portion or discontinuous signal on your tape, re-record from the beginning to the end of the tape as described above.
The same result may occur when you record using a digital video camera recorder without a cassette memory on a tape recorded by one with the cassette memory.
CIII4K mark on the cassette
The memory capacity of tapes marked with CIII4K is 4K bits. Your camcorder can accommodate up to 16K bits. 16K bits tape is marked with CIII16K.
Mini DV Digital Video Cassette This is the Mini DV mark.
Circuit Cassette Memory This is the Cassette Memory mark.
These are trademarks.
Выбор типа кассет
Playing back an NTSC-recorded tape
You can play back tapes recorded in the NTSC video system on the LCD screen, if the tape is recorded in the SP mode.
Copyright signal
When you play back
If the tape you play back on your camcorder contains copyright signals, you cannot copy it with another video camera connected to your camcorder.
When you record
You cannot record software on your camcorder that contains copyright control signals for copyright protection of software. COPY INHIBIT appears on the screen, or on the TV screen if you try to record such software. Your camcorder does not record copyright control signals on the tape when it records.
Audio mode
12-bit mode: The original sound can be recorded in stereo 1, and the new sound in stereo 2 in 32 kHz. The balance between stereo 1 and stereo 2 can be adjusted by selecting AUDIO MIX in the menu settings during playback. Both sounds can be played back.
16-bit mode: A new sound cannot be recorded but the original sound can be recorded in high quality. Moreover, it can also play back sound recorded in 32 kHz, 44.1 kHz or 48 kHz. When playing back a tape recorded in the 16-bit mode, 16BIT indicator appears on the screen.
При воспроизведении
When you play back a dual sound track tape
When you play back a dual sound track tape recorded in a stereo system, set HiFi SOUND to the desired mode in the menu settings (p. 248).
Sound from speaker
| HiFi Sound Mode | Playing back a stereo tape | Playing back a dual sound track tape |
| STEREO | Stereo | Main sound and sub sound |
| 1 | Lch | Main sound |
| 2 | Rch | Sub sound |
You cannot record dual sound programmes on your camcorder.
Notes on the cassette
When affixing a label on the cassette
Be sure to affix a label only on the locations as illustrated below [a] so as not to cause malfunction of your camcorder.
After using the cassette
Rewind the tape to the beginning, put the cassette in its case, and store it in an upright position.
When the cassette memory function does not work
Reinsert a cassette. The gold-plated connector of mini DV cassettes may be dirty or dusty.
Cleaning gold-plated connector
If the gold-plated connector on the cassette is dirty or dusty, the remaining tape indicator is sometimes not displayed correctly, and you may not be able to operate functions using cassette memory. Clean up the gold-plated connector with a cotton-wool swab, about every 10 times ejection of a cassette. [b]
natural_image
Diagram of a physical electronic device showing internal components (no text or labels)[a]
Do not affix a label around this border./
natural_image
Line drawing of a mechanical device with no text or symbols[b]
About the "InfoLITHIUM" battery pack
What is the "InfoLITHIUM" battery pack?
The “InfoLITHIUM” battery pack is a lithium-ion battery pack that has functions for communicating information related to battery conditions between your camcorder and an optional AC adaptor/charger. The “InfoLITHIUM” battery pack calculates the power consumption according to the operating conditions of your camcorder, and displays the remaining battery time in minutes. With an AC adaptor/charger (optional), the remaining battery time and charging time are displayed.
Charging the battery pack
- Be sure to charge the battery pack before you start using your camcorder.
- We recommend charging the battery pack in an ambient temperature of between 10^ to 30^ (50°F to 86°F) until the CHARGE lamp goes off. If you charge the battery outside of this temperature range, you may not be able to efficiently charge the battery pack.
- After charging is completed, either disconnect the cable from the DC IN jack on your camcorder or remove the battery pack.
Effective use of the battery pack
- Battery pack performance decreases in low-temperature surroundings. So, the time that the battery pack can be used becomes shorter. We recommend the following to use the battery pack longer:
- Put the battery pack in a pocket to warm it up, and insert it in your camcorder immediately before you start taking shots.
- Use the large capacity battery pack (NP-FM70/QM71/FM90/FM91/QM91, optional).
About the "InfoLITHIUM" battery pack
- Frequently using the LCD panel or frequently operating playback, fast forward or rewind wears out the battery pack faster. We recommend using the large capacity battery pack (NP-FM70/QM71/FM90/FM91/QM91, optional).
- Be certain to turn the POWER switch to OFF (CHARGE) when not taking shots or playing back on your camcorder. The battery pack is also consumed when your camcorder is in tape recording standby or playback pause.
- Have spare battery packs handy for two or three times the expected recording time, and make trial recordings before taking the actual recording.
- Do not expose the battery pack to water. The battery pack is not water resistant.
Remaining battery time indicator
- If the power goes off although the remaining battery time indicator indicates that the battery pack has enough power to operate, charge the battery pack fully again so that the indication on the remaining battery time indicator is correct. Note, however, that the correct battery indication sometimes will not be restored if it is used in high temperatures for a long time or left in a fully charged state, or the battery pack is frequently used. Regard the remaining battery time indication as the approximate shooting time.
- The mark indicating little remaining battery time sometimes flashes depending on the operating conditions or ambient temperature and environment even if the remaining battery time is about five to 10 minutes.
About the "InfoLITHIUM" battery pack
How to store the battery pack
- If the battery pack is not used for a long time, do the following procedure once per year to maintain proper function.
-
Fully charge the battery.
-
Discharge on your electronic equipment.
-
Remove the battery from the equipment and store it in a dry, cool place.
- To use the battery pack up on your camcorder, leave your camcorder in tape recording standby until the power goes off without a cassette inserted.
Battery life
- The battery life is limited. Battery capacity drops little by little as you use it more and more, and as time passes. When the available battery time is shortened considerably, a probable cause is that the battery pack has reached the end of its life. Please buy a new battery pack.
- The battery life varies depending on how it is stored and operating conditions and environment for each battery pack.
The DV Interface on this unit is an i.LINK-compliant DV input/output Interface. This section describes the i.LINK standard and its features.
What is i.LINK?
i.LINK is a digital serial interface for handling digital video, digital audio and other data in two directions between equipment having the i.LINK, and for controlling other equipment.
i.LINK-compatible equipment can be connected by a single i.LINK cable. Possible applications are operations and data transactions with various digital AV equipment. When two or more i.LINK-compatible equipment are connected to this unit in a daisy chain, operations and data transactions are possible with not only the equipment that this unit is connected to but also with other devices via the directly connected equipment.
Note, however, that the method of operation sometimes varies according to the characteristics and specifications of the equipment to be connected, and that operations and data transactions are sometimes not possible on some connected equipment.
Note
Normally, only one piece of equipment can be connected to this unit by the i.LINK cable. When connecting this unit to i.LINK-compatible equipment having two or more DV Interfaces, refer to the instruction manual of the equipment to be connected.
About the name "i.LINK"
i.LINK is a more familiar term for IEEE 1394 data transport bus proposed by SONY, and is a trademark approved by many corporations. IEEE 1394 is an international standard standardized by the Institute of Electrical and Electronics Engineers.
i.LINK's maximum baud rate varies according to the equipment. Three maximum baud rates are defined:
S100 (approx. 100Mbps*)
S200 (approx. 200Mbps)
S400 (approx. 400Mbps)
The baud rate is listed under “Specifications” in the instruction manual of each equipment. It is also indicated near the i.LINK on some equipment.
The maximum baud rate of equipment on which it is not indicated such as this unit is “S100.”
When units are connected to equipment having a different maximum baud rate, the baud rate sometimes differs from the indicated baud rate.
*What is Mbps?
Mbps stands for megabits per second, or the amount of data that can be sent or received in one second. For example, a baud rate of 100Mbps means that 100 megabits of data can be sent in one second.
i.LINK functions on this unit
For details on how to dub when this unit is connected to other video equipment having DV Interface, see pages 120 and 130.
This unit can also be connected to other i.LINK (DV Interface) compatible equipment made by SONY (e.g. VAIO series personal computer) other than video equipment.
Before connecting this unit to your computer, make sure that application software supported by this unit is already installed on your computer.
For details on precautions when connecting this unit, also refer to the instruction manuals for the equipment to be connected.
Required i.LINK Cable
Use the Sony i.LINK 4-pin-to-4-pin cable (during DV dubbing).
i.LINK and i are trademarks.
Using your camcorder abroad
Using your camcorder abroad
You can use your camcorder in any country or area with the AC power adaptor supplied with your camcorder within 100 V to 240 V AC, 50/60 Hz.
Your camcorder is a PAL system based camcorder. If you want to view the playback picture on a TV, it must be a PAL system based TV with AUDIO/VIDEO input jack. The following shows TV colour systems used overseas.
PAL system
Australia, Austria, Belgium, China, Czech Republic, Denmark, Finland, Germany, Holland, Hong Kong, Hungary, Italy, Kuwait, Malaysia, New Zealand, Norway, Poland, Portugal, Singapore, Slovak Republic, Spain, Sweden, Switzerland, Thailand, United Kingdom, etc.
PAL-M system
Brazil
PAL-N system
Argentina, Paraguay, Uruguay
NTSC system
Bahama Islands, Bolivia, Canada, Central America, Chile, Colombia, Ecuador, Guyana, Jamaica, Japan, Korea, Mexico, Peru, Surinam, Taiwan, the Philippines, the U.S.A., Venezuela, etc.
SECAM system
Bulgaria, France, Guiana, Iran, Iraq, Monaco, Russia, Ukraine, etc.
Simple setting of clock by time difference
You can easily set the clock to the local time by setting a time difference. Select WORLD TIME in the menu settings. See page 253 for more information.
Maintenance information and precautions
Moisture condensation
If your camcorder is brought directly from a cold place to a warm place, moisture may condense inside your camcorder, on the surface of the tape, or on the lens. In this condition, the tape may stick to the head drum and be damaged or your camcorder may not operate correctly. If there is moisture inside your camcorder, the beep sounds and the ④ indicator flashes. When the
▲ indicator flashes at the same time, the cassette is inserted in your camcorder. If moisture condenses on the lens, the indicator will not appear.
If moisture condensation has occurred
None of the functions except cassette ejection will work. Eject the cassette, turn off your camcorder, and leave it for about one hour with the cassette lid open. Your camcorder can be used again if the □ or ▲ indicator does not appear when the power is turned on again.
If moisture starts to condense, your camcorder sometimes cannot detect condensation. If this happens, the cassette is sometimes not ejected for ten seconds after the cassette lid is opened. This is not a malfunction. Do not close the cassette lid until the cassette is ejected.
Note on moisture condensation
Moisture may condense when you bring your camcorder from a cold place into a warm place (or vice versa) or when you use your camcorder in a hot place as follows:
- You bring your camcorder from a ski slope into a place warmed up by a heating device.
- You bring your camcorder from an air-conditioned car or room into a hot place outside.
- You use your camcorder after a squall or a shower.
- You use your camcorder in a high temperature and humidity place.
How to prevent moisture condensation
When you bring your camcorder from a cold place into a warm place, put your camcorder in a plastic bag and tightly seal it. Remove the bag when the air temperature inside the plastic bag has reached the surrounding temperature (after about one hour).
Maintenance information and precautions
Maintenance information
Cleaning the video head
To ensure normal recording and clear pictures, clean the video head. The video head may be dirty when:
- mosaic-pattern noise appears on the playback picture.
- playback pictures do not move.
- playback pictures do not appear.
- the ✗ indicator and “↓ CLEANING CASSETTE” message appear one after another or the ✗ indicator flashes on the screen during recording.
If the above problem, [a], [b] or [c] occurs, clean the video heads for 10 seconds with the Sony DVM-12CLD cleaning cassette (optional). Check the picture and if the above problem persists, repeat cleaning.
natural_image
Black-and-white photo of two white flowers with blurred background (no text or symbols)If the video heads get dirtier, the entire screen becomes blue [c].
[b]
natural_image
Black and white photo of striped fabric with cloud-like patterns and tree shadows (no text or symbols)[c]

natural_image
Blank gray rectangle with no visible text, symbols, or featuresMaintenance information and precautions
Note on the video head
The video head suffers from wear after long use. If you cannot obtain a clear image even after using a cleaning cassette, it might be because the video head is worn. Please contact your Sony dealer or local authorised Sony service facility to have the video head replaced.
Cleaning the LCD screen
If fingerprints or dust make the LCD screen dirty, we recommend using a LCD cleaning cloth (supplied) to clean the LCD screen. When you use the LCD Cleaning Kit (optional), do not apply the cleaning liquid directly to the LCD screen. Clean the LCD screen with cleaning paper moistened with the liquid.
Maintenance information and precautions
Removing dust from inside the viewfinder
(1) Pull out the viewfinder in the direction of the arrow ①.
Remove the two screws in the direction of the arrow ② with a screwdriver (optional).
Remove the eyecup in the direction of the arrow ③.
(2) Remove dust from inside the eyecup and viewfinder with a commercially available blower.
(3) In the reverse way of (1), attach the eyecup.
Caution
Do not remove any other screws. You may remove only the screw to remove the eyecup.
Notes
- Do not drop or bend the eyecup shaft.
- Be careful when handling the eyecup.
- Do not drop or bend the eyecup shaft. - Be careful when handling the eyecup.
Maintenance information and precautions
Charging the built-in rechargeable battery
Your camcorder has a built-in rechargeable battery so that the date, time and other settings are retained even when the POWER switch is turned off. The built-in rechargeable battery is always charged as long as you are using your camcorder. The battery, however, will get discharged gradually if you do not use your camcorder. It will be completely discharged in about three months if you do not use your camcorder at all. Even if the built-in rechargeable battery is not charged, it will not affect the camcorder operation. To retain the date and time, etc., charge the battery if the battery is discharged.
Charging the built-in rechargeable battery
- Connect your camcorder to the mains using the AC adaptor supplied with your camcorder, and leave your camcorder with the POWER switch turned off for more than 24 hours.
- Or install the fully charged battery pack in your camcorder, and leave your camcorder with the POWER switch set to OFF (CHARGE) for more than 24 hours.
Maintenance information and precautions
Adjusting the LCD screen (CALIBRATION)
The buttons on the touch panel may not work correctly. If this happens, follow the procedure below.
(1) Set the POWER switch to OFF (CHARGE).
(2) Eject the tape from your camcorder, then disconnect any connecting cable from your camcorder.
(3) Set the POWER switch to VCR while pressing DISPLAY/TOUCH PANEL on your camcorder, then keep pressing DISPLAY/TOUCH PANEL for about five seconds.
(4) Follow the procedure below using an object such as the corner of a “Memory Stick.”
① Touch × at the upper left corner.
② Touch × at the lower right corner.
③ Touch × in the middle of the screen.
If you do not press the right spot, ✗ always returns to the position at the upper left corner. In this case, start from step 4 again.
Примечание
- Operate your camcorder on 7.2 V (battery pack) or 8.4 V (AC adaptor).
- For DC or AC operation, use the accessories recommended in this operating instructions.
- If any solid object or liquid get inside the casing, unplug your camcorder and have it checked by a Sony dealer before operating it any further.
- Avoid rough handling or mechanical shock. Be particularly careful of the lens.
- Keep the POWER switch set to OFF (CHARGE) when you are not using your camcorder.
- Do not wrap your camcorder with a towel, for example, and operate it. Doing so might cause heat to build up inside.
- Keep your camcorder away from strong magnetic fields or mechanical vibration.
- Do not press the LCD screen with a sharp-pointed object.
- If your camcorder is used in a cold place, a residual image may appear on the LCD screen. This is not a malfunction.
- While using your camcorder, the back of the LCD screen may heat up. This is not a malfunction.
On handling tapes
- Do not insert anything into the small holes on the rear of the cassette. These holes are used to sense the type and thickness of the tape and if the recording tab is in or out.
- Do not open the tape protect cover or touch the tape.
- Avoid touching or damaging the terminals. To remove dust, clean the terminals with a soft cloth.
Maintenance information and precautions
Camcorder care
- Remove the tape, and periodically turn on the power, operate the CAMERA and VCR sections and play back a tape for about three minutes when your camcorder is not to be used for a long time.
- Clean the lens with a soft brush to remove dust. If there are fingerprints on the lens, remove them with a soft cloth.
- Clean the camcorder body with a dry soft cloth, or a soft cloth lightly moistened with a mild detergent solution. Do not use any type of solvent which may damage the finish.
- Do not let sand get into your camcorder. When you use your camcorder on a sandy beach or in a dusty place, protect it from the sand or dust. Sand or dust may cause your camcorder to malfunction, and sometimes this malfunction cannot be repaired.
AC power adaptor
- Unplug the unit from a wall socket when you are not using the unit for a long time. To disconnect the mains lead, pull it out by the plug. Never pull the mains lead itself.
- Do not operate the unit with a damaged lead or if the unit has been dropped or damaged.
- Do not bend the mains lead forcibly, or place a heavy object on it. This will damage the lead and may cause fire or electrical shock.
- Prevent metallic objects from coming into contact with the metal parts of the connecting section. If this happens, a short may occur and the unit may be damaged.
- Always keep metal contacts clean.
- Do not disassemble the unit.
- Do not apply mechanical shock or drop the unit.
- While the unit is in use, particularly during charging, keep it away from AM receivers and video equipment. AM receivers and video equipment disturb AM reception and video operation.
- The unit becomes warm during use. This is not a malfunction.
- Do not place the unit in locations that are:
-Extremely hot or cold - Dusty or dirty
- Very humid
- Vibrating
Maintenance information and precautions
About care and storage of the lens
- Wipe the surface of the lens clean with a soft cloth in the following instance:
- When there are fingerprints on the lens surface
- In hot or humid locations
- When the lens is used in environments such as the seaside
- Store the lens in a well-ventilated location subject to little dirt or dust.
To prevent mould from occurring, periodically perform the above.
We recommend turning on and operating the video camera recorder about once per month to keep the video camera recorder in an optimum state for a long time.
Battery pack
- Use only the specified charger or video equipment with the charging function.
- To prevent an accident from a short circuit, do not allow metal objects to come into contact with the battery terminals.
- Keep the battery pack away from fire.
- Never expose the battery pack to temperatures above 60^ (140 °F), such as in a car parked in the sun or under direct sunlight.
- Store the battery pack in a cool, dry place.
- Do not expose the battery pack to any mechanical shock.
- Do not disassemble nor modify the battery pack.
- Attach the battery pack to the video equipment securely.
- Charging while some capacity remains does not affect the original battery capacity.
Maintenance information and precautions
Note on dry batteries
To avoid possible damage from battery leakage or corrosion, observe the following:
- Be sure to insert the batteries with the + - polarities matched to the + - marks.
– Dry batteries are not rechargeable. - Do not use a combination of new and old batteries.
- Do not use different types of batteries.
- Current flows from batteries when you are not using them for a long time.
- Do not use leaking batteries.
If batteries are leaking
- Wipe off the liquid in the battery compartment carefully before replacing the batteries.
- If you touch the liquid, wash it off with water.
- If the liquid get into your eyes, wash your eyes with a lot of water and then consult a doctor.
If any problem occurs, unplug your camcorder and contact your nearest Sony dealer.
Video camera recorder
System
Video recording system
2 rotary heads
Helical scanning system
Audio recording system
2 rotary heads, PCM system
Quantization: 12 bits (Fs 32 kHz,
stereo 1, stereo 2), 16 bits
(Fs 48 kHz, stereo)
Video signal
PAL colour, CCIR standards
Usable cassette
Mini DV cassette with the MiniDV
mark printed
Tape speed
SP: Approx. 18.81 mm/s
LP: Approx. 12.56 mm/s
Recording/playback time
(using cassette DVM60)
SP: 1 hour
LP: 1.5 hours
Fastforward/rewind time
(using cassette DVM60)
When using the battery pack:
Approx. 2 min. and 30 seconds
When using the AC power adaptor:
Approx. 1 min. and 45 seconds
Viewfinder
Electric viewfinder (colour)
Image device
3.8 mm (1/4.7 type) CCD
(Charge Coupled Device)
Gross: Approx. 1 070 000 pixels
Effective (still): Approx. 1 000 000
pixels
Effective (moving): Approx. 690 000
pixels
Lens
Carl Zeiss
Combined power zoom lens
Filter diameter 30 mm. (1 3/16 in.)
10× (Optical), 120× (Digital)
F=1.8 - 2.0
Focal length
3.7 - 37 mm (5/32 - 1 1/2 in.)
When converted to a 35 mm still
camera
In CAMERA:
50 - 500 mm (2 - 19 3/4 in.)
In MEMORY:
42 - 420 mm (1 11/16 - 16 5/8 in.)
Colour temperature
Auto, HOLD (Hold), -Indoor
(3 200K), ⚙ Outdoor (5 800K)
Minimum illumination
7 lx (lux) (F 1.8)
0 lx (lux) (in the NightShot mode)*
* Objects unable to be seen due to the dark can be shot with infrared lighting.
Input/Output connectors
S video input/output
4-pin mini DIN
Luminance signal: 1 Vp-p,
75 Ω (ohms), unbalanced, sync
negative
Chrominance signal: 0.3 Vp-p,
75 Ω (ohms), unbalanced
A/V (Audio/Video) input/output
AV MINI JACK, input/output auto switch
Video signal: 1 Vp-p, 75 Ω (ohms),
unbalanced, sync negative
Audio signal: 327 mV, (at output
impedance more than 47 kΩ
(kilohms)
Input impedance with more than
47 kΩ (kilohms)
Output impedance with less than
2.2 kΩ (kilohms)
DV input/output
4-pin connector
Headphone jack
Stereo minijack (ø 3.5 mm)
LANC jack
Stereo mini-minijack (ø 2.5 mm)
USB jack
mini-B
MIC jack
Minijack, 0.388 mV low impedance
with 2.5 to 3.0 V DC, output
impedance 6.8 kΩ (kilohms)
(ø 3.5 mm)
Stereo type
LCD screen
Picture
6.2 cm (2.5 type)
50.3 × 37.4 ~mm (2 × 1 1/2 in.)
Total dot number:
211 200 (960 × 220)
General
Power requirements
7.2 V (battery pack)
8.4 V (AC power adaptor)
Average power consumption
(when using the battery pack)
During camera recording using
LCD: 3.9 W
Viewfinder: 3.2 W
Operating temperature
0^ to 40^ (32 °F to 104 °F)
Storage temperature
-20^ to +60^ (-4^ to +140^)
Dimensions (approx.)
55 × 105 × 99 ~mm
(2 1/4 × 4 1/4 × 4 in.) (w/h/d)
Mass (approx.)
480 g (1 lb 0 oz)
excluding the battery pack and
cassette
580 g (1 lb 4 oz)
including the battery pack,
NP-FM50, cassette DVM60 and lens
cap
Supplied accessories
See page 3.
AC power adaptor
Power requirements
100 - 240 V AC, 50/60 Hz
Power consumption
23 W
Output voltage
DC OUT: 8.4 V, 1.5 A during
operation
Operating temperature
0 °C to 40 °C (32 °F to 104 °F)
Storage temperature
-20^ to +60^ (-4^ to +140^)
Dimensions (approx.)
125 × 39 × 62 mm
(5 × 1 9/16 × 2 1/2 in.) (w/h/d)
excluding projecting parts
Mass (approx.)
280 g (9.8 oz)
excluding mains lead
Battery pack
Maximum output voltage
DC 8.4 V
Output voltage
DC 7.2 V
Capacity
8.5 Wh (1 180 mAh)
Dimensions (approx.)
38.2 × 20.5 × 55.6 ~mm
(1 9/16 × 13/16 × 2 1/4 in.)
(w/h/d)
Mass (approx.)
76 g (2.7 oz)
Type
Lithium ion
"Memory Stick"
Memory
Flash memory
8MB: MSA-8A
Operating voltage
2.7-3.6V
Power consumption
Approx. 45mA during operation
Approx. 130μA in tape recording standby
Dimensions (approx.)
50 × 2.8 × 21.5 ~mm
(2× 1 / 8× 7 / 8 in.) (w / h / d)
Mass (approx.)
4 g (0.14 oz)
Design and specifications are subject to change without notice.
Identifying the parts and controls
1 Lens cap (p. 34)
② LCD screen/Touch panel (p. 32, 37, 152)
③ OPEN button (p. 34)
4 CHARGE lamp (p. 23)
5 Battery pack/Battery terminal cover (p. 22)
6 Eyecup
7 Viewfinder (p. 39)
8 LOCK switch (p. 35)
9 POWER switch (p. 34)
10 START/STOP button (p. 34)
11 BATT (battery) release lever (p. 22)
12 MIC (PLUG IN POWER) jack (red) (p. 134) Connect an external microphone (optional). This jack also accepts a “plug-in-power” microphone.
13 A/V (AUDIO/VIDEO) jack (yellow)
(p. 59, 110, 170, 243)
14 (LANC) jack (blue)
LANC stands for Local Application Control Bus System. The control jack is used for controlling the tape transport of video equipment and other peripherals connected to the video equipment. This jack has the same function as the jack indicated as CONTROL L or REMOTE.
15 FOCUS button (p. 85)
16 S VIDEO jack (p. 59, 110, 170, 243)
17 Jack cover
18 Holding Grip (p. 34)
About the Holding Grip
Grasp the Holding Grip firmly as illustrated.
natural_image
Illustration of a hand holding a digital camera with a strap (no text or symbols)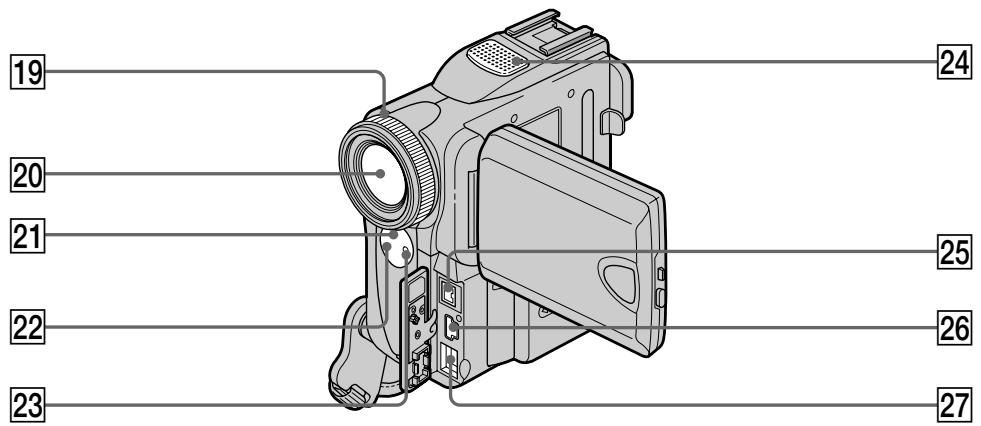
19 Focus ring (p. 85)
20 Lens
21 Infrared rays emitter (p. 45, 118)
22 Remote sensor
23 Camera recording lamp (p. 34)
24 Microphone
25 i. DV Interface (p. 111, 130, 171, 186, 243) The i. DV Interface is i.LINK compatible.
26 ♂ (USB) jack (p. 215)
27 DC IN jack (p. 23, 27)
Note on the Carl Zeiss lens
Your camcorder is equipped with a Carl Zeiss lens which can reproduce a fine image. The lens for your camcorder was developed jointly by Carl Zeiss, in Germany, and Sony Corporation. It adopts the MTF* measurement system for video camera and offers a quality as the Carl Zeiss lens.
* MTF is an abbreviation of Modulation Transfer Function. The value number indicates the amount of light of a subject penetrating into the lens.
28 NIGHTSHOT switch (p. 45)
29 SUPER NS/COLOUR SLOW S button (p. 46, 47)
30 Intelligent accessory shoe
31 BACK LIGHT button (p. 44)
32 Speaker
33 Ⓞ (headphones) jack (green)
When you use headphones, the speaker on your camcorder is muted.
34 PHOTO button (p. 61, 65, 161)
35 Power zoom lever (p. 40, 99, 203)
36 DISPLAY/TOUCH PANEL button (p. 54)
37 RESET button (p. 268)
38 Access lamp (p. 151)

Intelligent Accessory Shoe
Notes on the intelligent accessory shoe
- The intelligent accessory shoe supplies power to optional accessories such as a video light or microphone.
- The intelligent accessory shoe is linked to the POWER switch, allowing you to turn the power supplied by the shoe on and off. Refer to the operating instructions of the accessory for further information.
- The intelligent accessory shoe has a safety device for fixing the installed accessory securely. To connect an accessory, press down and push it to the end, and then tighten the screw.
- To remove an accessory, loosen the screw, and then press down and pull out the accessory.
i Intelligent Accessory Shoe
39 Grip Strap
40 "Memory Stick" slot
41 Viewfinder lens adjustment lever (p. 39)
42 Cassette lid (p. 31)
43 MEMORY EJECT lever (p. 151)
44 OPEN/▲EJECT lever (p. 31)
45 Tripod receptacle
Make sure that the length of the tripod screw is less than 5.5 mm (7/32 inch). Otherwise, you cannot attach the tripod securely and the screw may damage your camcorder.
Fastening the grip strap
Fasten the grip strap firmly.
Buttons that share the same name on the camcorder and Remote Commander share the same function.
1 PHOTO button (p. 61, 65, 161)
② DISPLAY button (p. 54)
3 SEARCH MODE button (p. 102, 104, 106)
4 ◀◀/▶▶I buttons (p. 102, 104, 106)
5 Video control buttons (p. 56)
6 Transmitter
Point toward the remote sensor to control your camcorder after turning on your camcorder.
7 ZERO SET MEMORY button (p. 101)
8 START/STOP button (p. 34)
⑨ DATA CODE button (p. 54)
10 Power zoom button (p. 40)
To prepare the Remote Commander
Insert 2 R6 (size AA) batteries by matching the + and - polarities on the batteries to the +- marks inside the battery compartment.
natural_image
Illustration of a handheld device with battery and switch, showing a close-up of its internal components (no text or symbols)Notes on the Remote Commander
- Point the remote sensor away from strong light sources such as direct sunlight or overhead lighting. Otherwise, the Remote Commander may not function properly.
- Your camcorder works in the commander mode VTR 2. Commander modes 1, 2 and 3 are used to distinguish your camcorder from other Sony VCRs to avoid remote control misoperation. If you use another Sony VCR in the Commander mode VTR 2, we recommend changing the commander mode or covering the sensor of the VCR with black paper.
Operation indicators
① Cassette memory (p. 20, 282)
2 Remaining battery time (p. 42)
3 Zoom (p. 40)/Exposure (p. 82)/Data file name (p. 196)
4 Digital effect (p. 76, 97)/
MEMORY MIX (p. 172)/FADER (p. 71)
5 16:9WIDE (p. 69)
6 Picture effect (p. 74, 95)
7 Data code (p. 54)
8 Date (p. 42)
⑨ PROGRAM AE (p. 79)
10 BACK LIGHT (p. 44)
11 SteadyShot off (p. 247)
12 Manual focus/Infinity (p. 85)
13 Recording mode (p. 42)
Identifying the parts and controls
14 Self-timer (p. 48, 63, 66, 166, 182)
15 STBY/REC (p. 42)/Video control mode (p. 56)/Image size (p. 158)/Image quality mode (p. 155)
16 NIGHTSHOT (p. 45)/
SUPER NIGHTSHOT (p. 46)/
COLOUR SLOW SHUTTER (p. 47)
17 Warning (p. 270)
18 Tape counter (p. 42, 55)/Time code (p. 42)/Self-diagnosis (p. 269)/Photo mode (p. 65, 161)/Image number (p. 196)
19 Remaining tape (p. 42)/Memory playback (p. 194)
20 ZERO SET MEMORY (p. 101)
21 END SEARCH (p. 50)
22 A/V → DV (p. 243)/DV IN
23 Audio mode (p. 251)
24 Data file name (p. 174)/Time (p. 42)
25 Flash
This indicator appears when you use the video flash light (optional).
26 Continuous photo recording (p. 163)
CALIBRATION 296
Camera chromakey 172
Cassette memory 20, 282
Charging battery 23
Charging manganese-lithium battery 295
CLEANING CASSETTE ..... 292
Clock set 29
Colour Slow Shutter 47
Data code 54
Date search 104
DEMO MODE 252
DIGITAL EFFECT ...... 76, 97
Digital program editing .... 113, 187
DISPLAY 54
DOT 71
Dual sound track tape ...... 284
E
EDITSEARCH 50
END SEARCH 50
EXP BRKTG 163
Exposure 82
F, G, H
Fade in/out 72
FLASH MOTION 76
Flexible Spot Meter 83
FOCUS 85
Format 150,250
FRAME REC 91
Full charge 23
Grip strap 309
Headphone jack 308
Heads 292
HiFi SOUND 248
Holding Grip 306
I, J, K, L
i.LINK 288
i.LINK cable
..... 111, 130, 171, 186, 243
Image protection 207
Image quality mode ...... 155
Image size 158
Index screen 197
"InfoLITHIUM" battery .... 26, 285
Infrared rays emitter 307
Intelligent accessory shoe 135, 308
Interval recording 88
JPEG 148
Labelling a cassette .... 145
LANC jack 306
LUMINANCEKEY 76
M, N
Main sound 284
Manual focus 85
Memory Chromakey ...... 172
Memory Luminancekey ...... 172
MEMORY MIX 172
Memory Overlap 172
Memory PB ZOOM 203
"Memory Stick" 148
Menu settings 245
Mirror mode 41
Moisture condensation ...... 291
MONOTONE 71
MOSC.FADER 71
MPEG 148
Multi screen mode ...... 163
NIGHTSHOT 45
NORM.FADER 71
O, P, Q
OLD MOVIE 76
OVERLAP 71
PAL system 290
Photo save 192
Photo scan 108
Photo search 106
PICTURE EFFECT ...... 74, 95
Picture search 56
Playback time 25
Print mark 211
PROGRAM AE 79
PTP 252
R
Recording time 25
Rec Review 51
Remaining battery time indicator 42
Remaining tape indicator ..... 42
Remote commander .... 310
Remote sensor 307
RESET 268,308
S
Self-diagnosis display ...... 269
Self-timer recording
..... 48, 63, 66, 166, 182
Signal convert function ...... 243
Skip scan 57
Slide show 205
SLOW SHUTTER 76
SPOT FOCUS 87
STEADYSHOT 247
Stereo tape 284
STILL 76
Sub sound 284
SUPER NIGHTSHOT 46
S VIDEO jack
..... 59, 110, 128, 170, 185, 243
T, U, V
Tape counter 42
Tape PB ZOOM 99
Tape Photo recording 65
Telephoto 40
Time code 42
Title 139
Title search 102
Touch panel 32
TRAIL 76
Transition 35
TV colour systems 290
USB jack 215
USB streaming 219
W, X, Y, Z
Warning indicators 270
Warning messages 271
White balance 67
Wide-angle 40
Wide mode 69
WIPE 71
WORLD TIME 253
Write-protect switch 149
Write-protect tab 31
Zero set memory ...... 101
Zoom 40
Printed on recycled paper
- Digital Video Camera Recorder Mini D V Digital Video Cassette
- Operating Instructions
- English
- Welcome!
- WARNING
- Memory Stick
- N50
- NOTICE ON THE SUPPLIED AC POWER ADAPTOR FOR THE CUSTOMERS IN THE UNITED KINGDOM
- For the customers in Europe ATTENTION
- Notice
- For the customers in Germany
- Русский
- Добро пожаловать!
- Checking supplied accessories
- Other uses
- Functions to adjust exposure in recording
- Functions to give images more impact
- Functions to give a natural appearance to your recordings
- Functions to use after recording
- Прочие применения
- Getting started
- Recording - Basics
- Playback - Basics
- Advanced Recording Operations
- Advanced Playback Operations
- Editing
- "Memory Stick" Operations
- Viewing images with your computer
- Customising Your Camcorder
- Troubleshooting
- Additional Information
- Quick Reference
- Quick Start Guide - Recording on a tape
- Connecting the mains lead (p. 27)
- Inserting a cassette (p. 31)
- 3
- Recording a picture (p. 34)
- Viewfinder
- 4
- Monitoring the playback picture on the LCD screen (p. 52)
- NOTE
- Quick Start Guide – Recording on a "Memory Stick"
- Inserting a "Memory Stick" (p. 151)
- Recording a still image on a "Memory Stick" (p. 161)
- Monitoring the still image on the LCD screen (p. 194)
- ПРИМЕЧАНИЕ
- Using this manual
- Note on Cassette Memory
- Note on TV colour systems
- Copyright precautions
- Precautions on camcorder care
- Lens and LCD screen/finder (on mounted models only)
- Step 1 Preparing the power supply
- Installing the battery pack
- To remove the battery pack
- Charging the battery pack
- After charging the battery pack
- Connecting to a wall socket
- PRECAUTION
- ПРЕДОСТЕРЕЖЕНИЕ
- Notes
- Using a car battery
- Step 2 Setting the date and time
- To return to FN
- To eject a cassette
- Step 4 Using the touch panel
- To execute settings
- When executing each item
- If an item is not available
- Touch panel
- Запись изображения
- Note on Recording mode
- Note on the LOCK switch
- To enable smooth transition
- После записи
- Adjusting the LCD screen
- When you use the LCD screen outdoors in direct sunlight
- Adjusting the brightness of the LCD screen
- Adjusting the viewfinder
- Viewfinder backlight
- Even if you adjust VF B.L.
- Using the zoom feature
- To zoom greater than 10×
- When you shoot close to a subject
- Notes on digital zoom
- Shooting with the Mirror Mode
- Picture in the mirror mode
- During recording in the mirror mode
- When you press FN
- Indicators displayed in the recording mode
- Remaining battery time indicator during recording
- Time code
- Remaining tape indicator
- Recording data
- During back light function
- Shooting in the dark - NightShot/Super NightShot/ Colour Slow Shutter
- Съемка в темноте – NightShot/Super NightShot/Colour Slow Shutter
- While using NightShot, you cannot use the following functions:
- While using Super NightShot
- While using Super NightShot, you cannot use the following functions:
- Using the NightShot Light
- NightShot Light
- Using Colour Slow Shutter
- While using Colour Slow Shutter
- When the POWER switch is set to MEMORY
- While using the Colour Slow Shutter function, you cannot use the following functions:
- In total darkness
- Self-timer recording
- To stop the count down
- To cancel self-timer recording
- Checking the recording - END SEARCH/ EDITSEARCH/Rec Review
- END SEARCH
- To stop searching
- Checking the recording — END SEARCH/EDITSEARCH/ Rec Review
- END SEARCH function
- EDITSEARCH
- Rec Review
- About date/time and various settings
- Using the touch panel
- Using the Remote Commander
- Not to display various settings
- Various settings
- When you use the data code function, bars (-- -- --) appear if:
- Data code
- Remaining battery time indicator during playback
- Various playback modes
- When using the touch panel
- To view a still image ( playback pause)
- To fastforward the tape
- To rewind the tape
- To change the playback direction
- To locate a scene while monitoring the picture (picture search)
- To monitor the high-speed picture while fastforwarding or rewinding the tape (skip scan)
- To view the picture at slow speed (slow playback)
- To view the picture at double speed
- To view the picture frame-by-frame
- To search the last scene recorded (END SEARCH)
- Your camcorder:
- Remote Commander:
- In the various playback modes
- Slow playback
- When you play back a tape in reverse
- Viewing the recording on TV
- If your TV is already connected to the VCR
- If your TV or VCR is a monaural type
- If your TV/VCR has a 21-pin connector (EUROCONNECTOR)
- Recording still images on a "Memory Stick" during recording on a tape
- Before operation
- Image size of still images
- When the POWER switch is set to CAMERA You cannot select image quality.
- During and after recording still images on a "Memory Stick"
- When you press PHOTO on the Remote Commander
- Self-timer memory photo recording
- During tape recording
- Recording a still image on a tape - Tape Photo recording
- Recording images with self-timer
- Adjusting the white balance manually
- HOLD:
- (OUTDOOR):
- (INDOOR):
- To return to the automatic white balance mode
- To cancel the wide mode
- MONOTONE
- When you select OVERLAP, WIPE or DOT
- While using BOUNCE, you cannot use the following functions:
- Note on BOUNCE
- During MPEG movie recording
- Using special effects - Picture effect
- To cancel the picture effect function
- Using special effects - Digital effect
- STILL
- FLASH (FLASH MOTION)
- LUMI. (LUMINANCEKEY)
- TRAIL
- SLOW SHTR (SLOW SHUTTER)
- OLD MOVIE
- To cancel the digital effect
- When you change the POWER switch to other than CAMERA
- SPOTLIGHT (Spotlight)
- PORTRAIT (Soft portrait)
- SPORTS (Sports lesson)
- BEACH&SKI (Beach & ski)
- © SUNSETMOON (Sunset & moon)
- LANDSCAPE (Landscape)
- To turn the PROGRAM AE off
- While WHT BAL is set to AUTO in the menu settings
- You can adjust the following functions while using the PROGRAM AE:
- If you record under a discharge tube such as a fluorescent lamp, sodium lamp or mercury lamp
- Adjusting the exposure manually
- To return to the automatic exposure mode
- Фокусировка вручную
- To record distant subjects
- To focus precisely
- When you shoot close to the subject
- Using the spot focus function - Spot Focus
- To return to the autofocus mode
- To cancel the interval recording
- To perform normal recording during interval recording
- Recording time
- Frame by frame recording - Frame recording
- Frame by frame recording
- - Frame recording
- To cancel frame recording
- Покадровая запись
- - Покадровая запись
- Using the viewfinder
- To make the buttons on the LCD screen disappear
- Playing back a tape with picture effect
- Pictures processed by the picture effect function
- When you set the POWER switch to OFF (CHARGE) or stop playing back
- Playing back a tape with digital effect
- Pictures processed by the digital effect function
- Enlarging images recorded on tapes - Tape PB ZOOM
- The PB ZOOM function is automatically cancelled when you operate the following functions:
- Images in PB ZOOM
- In PB ZOOM
- Edge of the enlarged image
- Quickly locating a scene - ZERO SET MEMORY
- Примечания
- Searching the boundaries of recorded tape by title - TITLE SEARCH
- CM only
- Searching a recording by date - DATE SEARCH
- Searching for the date by using cassette memory
- Cassette memory
- Searching for the date without using cassette memory
- Searching for a photo by using cassette memory
- Поиск фото – PHOTO SEARCH/ PHOTO SCAN
- Searching for a photo without using cassette memory
- Сканирование фото
- Using the A/V connecting cable
- Перезапись ленты
- When you have finished dubbing a tape
- You can edit on VCRs that support the following systems
- If your VCR is a monaural type
- If your VCR has an S video jack
- Dubbing only desired scenes - Digital program editing (on tapes)
- Before operating the Digital program editing on tapes recorded on other equipment
- Using the Digital program editing function on tapes recorded on other equipment
- Step 1: Connecting to the VCR
- Step 2: Setting the VCR to operate with the A/V connecting cable
- Setting the IR SETUP code
- About the IR SETUP code
- Note on the IR SETUP code
- Setting the modes to cancel the recording pause on the VCR
- Buttons that cancel recording pause on the VCR
- Locate the infrared rays emitter of your camcorder and face it towards the remote sensor of the VCR
- Confirming the VCR operation
- When the VCR does not operate correctly
- Step 2: Setting the VCR to operate with the i.LINK cable
- Step 3: Adjusting the synchronisation of the VCR
- Operation 1: Making the Programme
- Erasing the programme you have set
- To cancel erasing
- Erasing all programmes
- To cancel erasing all programmes
- To finish making programmes
- On a blank portion of the tape
- If there is a blank portion between the IN point and the OUT point on the tape
- Operation 2: Performing Digital program editing (Dubbing a tape)
- To stop dubbing during editing
- To finish the Digital program editing function
- You cannot record on the VCR when:
- CHECK "i.LINK" & REC STATUS appears on the LCD screen when:
- Recording video or TV programmes
- If your TV or VCR has an S video jack
- Inserting a scene from a VCR - Insert editing
- To change the insert end point
- Connecting the microphone with the MIC jack
- Аудиоперезапись
- Connecting the microphone to the intelligent accessory shoe
- Connecting the A/V connecting cable to the A/V jack
- Dubbing with the built-in microphones
- If you make all the connections
- Adding an audio sound on a recorded tape
- Monitoring the new recorded sound
- Superimposing a title
- Наложение титра
- To use the custom title
- If the tape has a blank portion in the middle of the recorded parts
- The titles superimposed with your camcorder
- If the tape has too many index signals
- Title setting
- One cassette can have up to about 20 titles, if one title consists of five characters
- If the "C" FULL" mark appears
- Стирание титра
- Making your own titles
- To change a title you have stored
- Маркировка кассеты
- To erase the label you have made
- To change the label you have made
- Erasing all the data in cassette memory
- To cancel deleting
- File format
- Still image (JPEG)
- Moving picture (MPEG)
- Typical image data file name
- Using a "Memory Stick"
- "Memory Stick"s formatted by a computer
- Notes on image data compatibility
- Inserting a "Memory Stick"
- Установка "Memory Stick"
- Ejecting a "Memory Stick"
- Извлечение "Memory Stick"
- If the items are not available
- Press FN to display the following buttons:
- Selecting still image quality mode
- Differences in image quality mode
- Image quality mode indicator
- When you select image quality
- Selecting the image size
- Approximate number of still images you can record on a "Memory Stick"
- Approximate time of moving pictures you can record on a "Memory Stick"
- Recording still images on "Memory Stick"s - Memory photo recording
- You can record still images on "Memory Stick"s in tape recording or tape recording standby
- If you record still images when the POWER switch is set to MEMORY
- Recording images continuously
- NORMAL [a]
- EXP BRKTG
- MULTI SCRN [b]
- If the "Memory Stick" becomes full
- Recording an image from a tape as a still image
- Recording a still image from other equipment
- Superimposing a still image in the "Memory Stick" on an image - MEMORY MIX
- CHROM (Memory Chromakey)
- LUMI (Memory Luminancekey)
- CHROM (Camera Chromakey)
- OVERLAP\* (Memory Overlap)
- Recording a superimposed image to tape
- To change the still image to be superimposed
- To cancel MEMORY MIX
- Recording a superimposed image to "Memory Stick" as a still image
- Recording moving pictures on "Memory Stick"s - MPEG movie recording
- To stop recording
- When the POWER switch is set to MEMORY The following functions do not work:
- When using an external flash (optional)
- Recording date/time
- During recording on "Memory Stick"
- If you record moving pictures when the POWER switch is set to MEMORY
- Self-timer MPEG movie recording
- Recording a picture from a tape as a moving picture
- When the access lamp is lit or flashing
- Titles have already recorded on tapes
- If "AUDIO ERROR" is displayed
- Recording a moving picture from other equipment
- Recording edited pictures from a tape as a moving picture – Digital program editing (on "Memory Stick"s)
- Making the programme
- Recording edited pictures from a tape as a moving picture - Digital program editing (on "Memory Stick"s)
- Performing the programme (Dubbing a "Memory Stick")
- To stop dubbing
- To end the Digital program editing function
- Copying still images from a tape - PHOTO SAVE
- To stop copying
- When the "Memory Stick" is full
- Viewing a still image - Memory photo playback
- To stop memory photo playback
- Notes on the file name
- To play back recorded images on a TV screen
- Still image
- Screen indicators during still image playback
- Данные записи
- Playing back six recorded images at a time (index screen)
- To return to the normal playback screen (single screen)
- Viewing a moving picture - MPEG movie playback
- Moving picture
- Playback picture from desired part
- To stop MPEG movie playback
- Screen indicators during moving picture playback
- Дата/время записи
- Enlarging still images recorded on "Memory Stick"s - Memory PB ZOOM
- Playing back images in a continuous loop - SLIDE SHOW
- To stop the slide show
- To pause during a slide show
- To start the slide show from a particular image
- To cancel image protection
- Deleting images - DELETE
- Deleting selected images
- To cancel deleting an image
- Deleting selected images on the index screen
- Deleting all the images
- To cancel deleting all the images in the "Memory Stick"
- To cancel writing print marks
- Selecting a type of the 9PICS print screen
- — Viewing images with your computer — Viewing images with your computer - Introduction
- Viewing images with your computer - Introduction
- Viewing images recorded on a tape
- When connecting to your computer with the USB port
- When connecting to your computer with the DV port
- Viewing images recorded on a "Memory Stick"
- When connecting to your computer without a USB port
- Notes on using your computer
- "Memory Stick"
- Software
- Connecting to your computer with USB port - For Windows users
- Recommended computer usage environment when connecting USB cable and viewing tape images on the computer
- OS:
- CPU:
- Application:
- Sound system:
- Memory:
- Hard disk:
- Display:
- Others:
- Recommended computer usage environment when connecting USB cable and viewing "Memory Stick" images on the computer
- Installing the USB driver
- Making your computer recognise your camcorder
- Viewing images recorded on a tape on your computer
- Viewing images recorded on "Memory Stick"s on your computer
- If you cannot install the USB driver
- Step 2: Install the USB driver on the supplied CD-ROM
- Step2: Install the USB driver on the supplied CD-ROM
- Viewing images recorded on a tape on your computer - For Windows users
- Capturing images with "PIXELA ImageMixer Ver.1.0 for Sony"
- Viewing images recorded on a tape on your computer – For Windows users
- Viewing pictures live from your camcorder
- Capturing still images
- Capturing moving pictures
- If image data cannot be transferred by the USB connection
- If any trouble occurs
- Carry out the following operations after quitting the application:
- Seeing the on-line help (operating instructions) of "PIXELA ImageMixer Ver.1.0 for Sony"
- Note on using your computer
- Communications with your computer
- Viewing images recorded on a "Memory Stick" on your computer - For Windows users
- Image file storage destinations and image files
- For Windows Me users (The drive recognizing your camcorder is [E:].)
- Disconnect the USB cable and eject the "Memory Stick" or set the POWER switch to OFF (CHARGE)
- Connecting to your computer with USB port - For Macintosh users
- Recommended Macintosh environment
- Viewing images recorded on a "Memory Stick" on your computer - For Macintosh users
- Viewing images
- Capturing images from an analog video unit on your computer - Signal convert function
- After capturing images and sound
- If your computer has a USB port
- Changing the menu settings
- Selecting the mode setting of each item ● is the default setting.
- Notes on the SteadyShot function
- If you cancel the SteadyShot function
- Note on NTSC PB
- Notes on LCD B.L. and VF B.L.
- Notes on formatting
- Note on PRINT SET
- Notes on the LP mode
- Notes on AUDIO MODE
- Notes on DEMO MODE
- When recording a close subject
- In more than five minutes after removing the power source
- Types of trouble and how to correct trouble
- Self-diagnosis display
- Warning indicators and messages
- Warning indicators
- Selecting cassette types
- Выбор типа кассет
- Playing back an NTSC-recorded tape
- Copyright signal
- When you play back
- When you record
- Audio mode
- При воспроизведении
- When you play back a dual sound track tape
- Notes on the cassette
- When affixing a label on the cassette
- After using the cassette
- When the cassette memory function does not work
- Cleaning gold-plated connector
- About the "InfoLITHIUM" battery pack
- What is the "InfoLITHIUM" battery pack?
- Effective use of the battery pack
- Remaining battery time indicator
- How to store the battery pack
- Battery life
- What is i.LINK?
- About the name "i.LINK"
- i.LINK functions on this unit
- Required i.LINK Cable
- Using your camcorder abroad
- PAL system
- PAL-M system
- PAL-N system
- NTSC system
- SECAM system
- Simple setting of clock by time difference
- Maintenance information and precautions
- Moisture condensation
- If moisture condensation has occurred
- Note on moisture condensation
- How to prevent moisture condensation
- Maintenance information
- Cleaning the video head
- Note on the video head
- Cleaning the LCD screen
- Removing dust from inside the viewfinder
- Caution
- Charging the built-in rechargeable battery
- Adjusting the LCD screen (CALIBRATION)
- On handling tapes
- Camcorder care
- AC power adaptor
- About care and storage of the lens
- Battery pack
- Note on dry batteries
- If batteries are leaking
- Video camera recorder
- System
- Input/Output connectors
- LCD screen
- General
- Identifying the parts and controls
- Note on the Carl Zeiss lens
- Intelligent Accessory Shoe
- Notes on the intelligent accessory shoe
- i Intelligent Accessory Shoe
- To prepare the Remote Commander
- Notes on the Remote Commander
- Operation indicators
- E
- F, G, H
- I, J, K, L
- M, N
- O, P, Q
- R
- S
- T, U, V
- W, X, Y, Z
Brand : SONY
Model : DCR-PC101E
Category : Camcorder