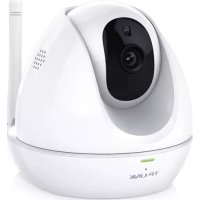
NC450 - Surveillance Camera TP-LINK - Free user manual and instructions
Find the device manual for free NC450 TP-LINK in PDF.



| Product Type | IP Surveillance Camera |
| Brand | TP-Link |
| Model | NC450 |
| Video Resolution | HD 720p |
| Night Vision | Yes |
| Connectivity | Wi-Fi 802.11n, Ethernet 10/100 Mbps (via PoE injector) |
| Audio | Two-way (built-in microphone and speaker) |
| Motion Detection | Yes, with push alerts |
| App | tpCamera (iOS/Android) |
| Storage | TP-Link Cloud |
| Mounting | On flat surface or wall (mounting kit included) |
| Power Supply | Passive PoE injector (12V DC, 1A) |
| Power Consumption | Max 5 W |
| Operating Temperature | 0 °C to 40 °C |
| Humidity | 10% to 90% non-condensing |
| Dimensions (approx.) | 105 x 75 x 70 mm |
| Weight (approx.) | 200 g |
| Package Contents | Camera, passive PoE injector, Ethernet cable, mounting kit, quick installation guide |
| Warranty | 3-year limited |
| Care and Cleaning | Clean with a soft, dry cloth. Do not use chemicals. |
| Safety Instructions | Avoid water, fire, humidity and hot environments. Do not disassemble. |
Frequently Asked Questions - NC450 TP-LINK
User questions about NC450 TP-LINK
0 question about this device. Answer the ones you know or ask your own.
Ask a new question about this device
Download the instructions for your Surveillance Camera in PDF format for free! Find your manual NC450 - TP-LINK and take your electronic device back in hand. On this page are published all the documents necessary for the use of your device. NC450 by TP-LINK.
USER MANUAL NC450 TP-LINK
TP-Link Technologies Co., Ltd.
South Building(floors 1,3,4,5) and 28(floors 1-4), Central Science & Technology Park, Shennan Rd, Nanshan, Shenzhen, China
Unit 2 & 3 Riverview (142-144), Cardiff Road, Reading, RG1 8EW
TP-Link Italia S.r.l.
TP-Link Netherlands B.V.
Archimedesbaan 18, 3439 ME Nieuwegein
TP-Link (Nordic) AB
Forumvägen 14, Plan 13, 131 53 Nacka, Sweden
TP-Link Hellas Ltd.
Marathonodromou 77, Marousi 151 24, Greece
NWS.TP-Link Portugal, Unipessoal, Lda.
Specifications are subject to change without notice. TP-Link is a registered trademark of TP-Link Technologies Co., Ltd. Other brands and product names are trademarks or registered trademarks of their respective holders.
No part of the specifications may be reproduced in any form or by any means or used to make any derivative such as translation, transformation, or adaptation without permission from TP-Link Technologies Co., Ltd. Copyright © 2017 TP-Link Technologies Co., Ltd. All rights reserved.
www.tp-link.com
MADE IN CHINA
7106507520 REV2.0.1
Quick Installation Guide
Wi-Fi Camera
Images may differ from actual products.
CONTENTS
1 / Deutsch
6 / English
11 / Español
16 / Ελληνικά
21 / Français
26 / Italiano
31 / Português
36 / Suomi
41 / Nederlands
46 / Svenska
51 / Norsk
56 / Dansk
61 / Türkçe
Kameraeinrichtung
natural_image
Simple line drawing of a device with a handle and circular top (no text or symbols)
natural_image
Icon of a stylized eye inside a blue square frame with a downward arrow, no text or symbols present.WPS (Wi-Fi Protected Setup):
How to set up the camera
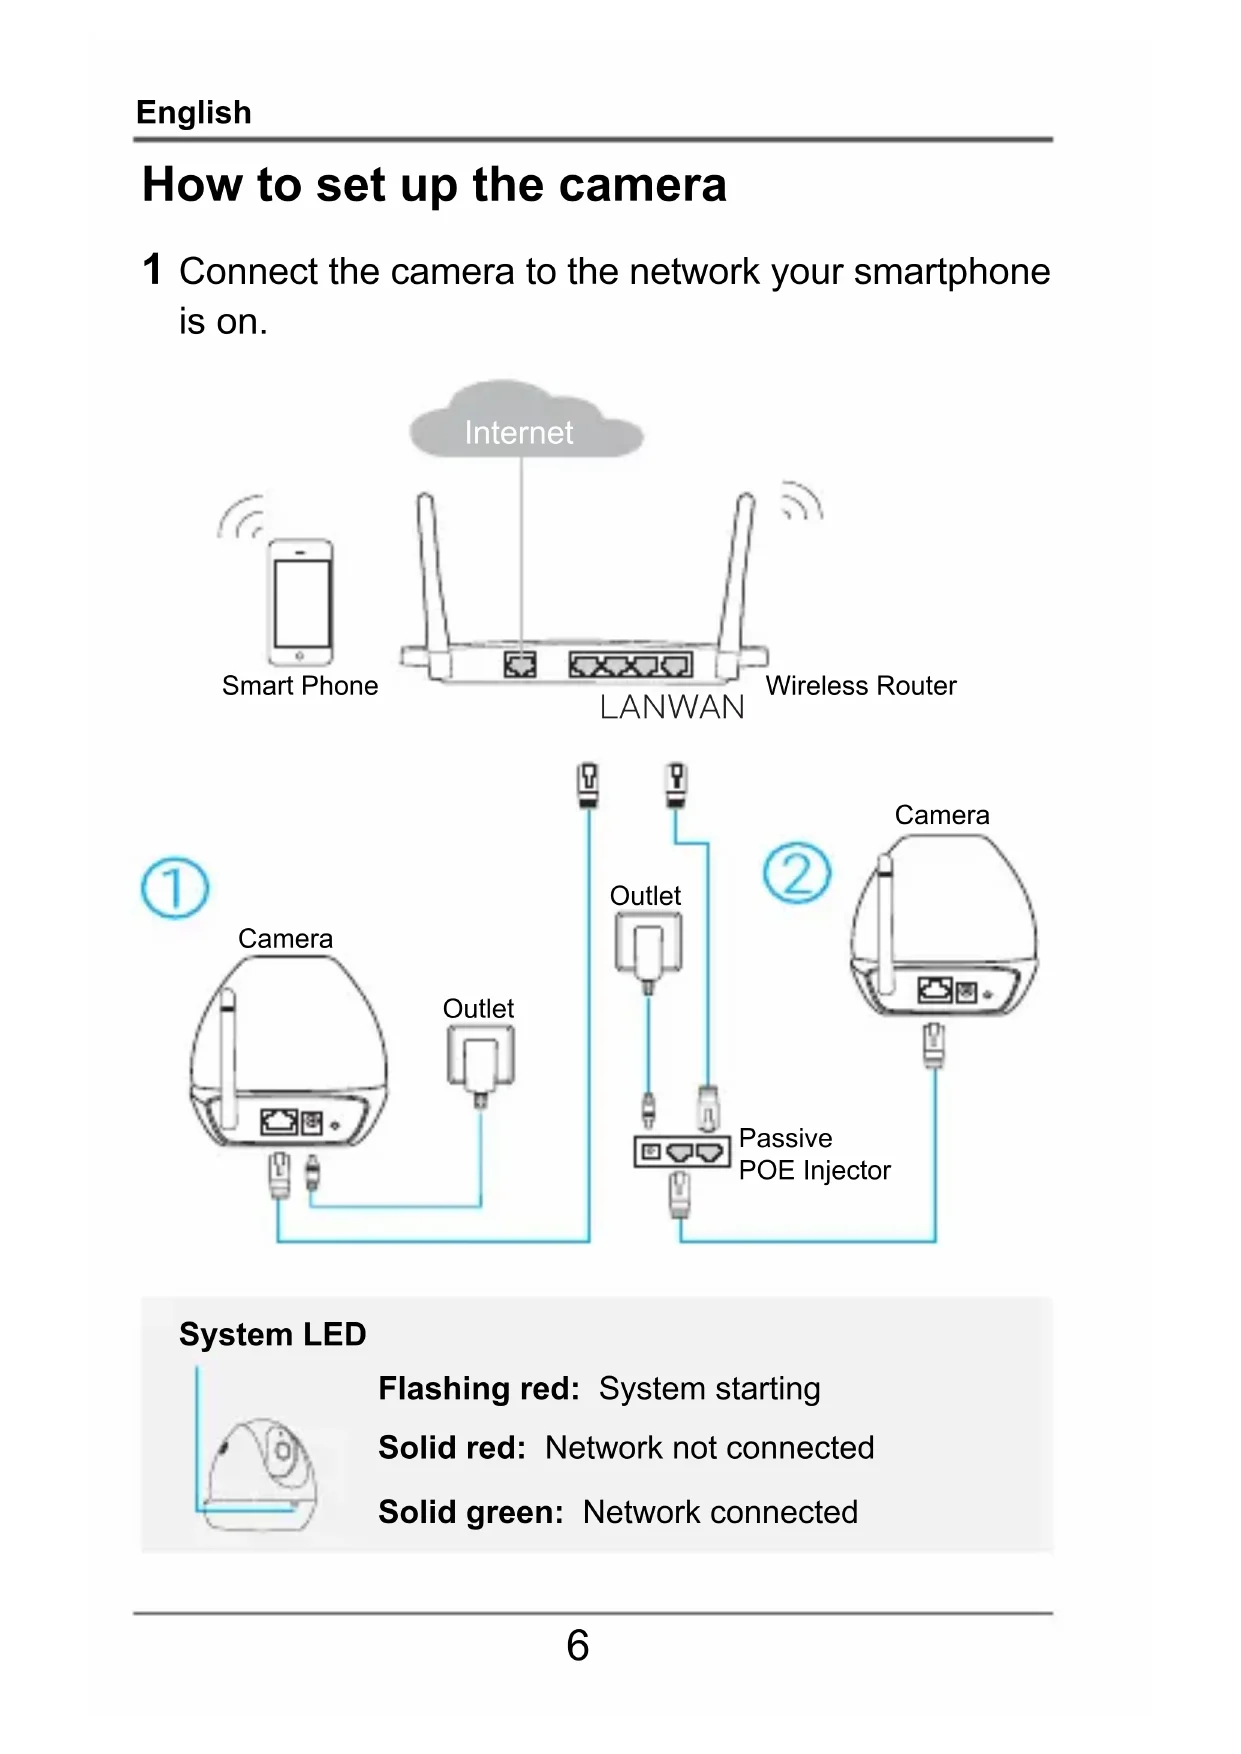
1 Connect the camera to the network your smartphone is on.
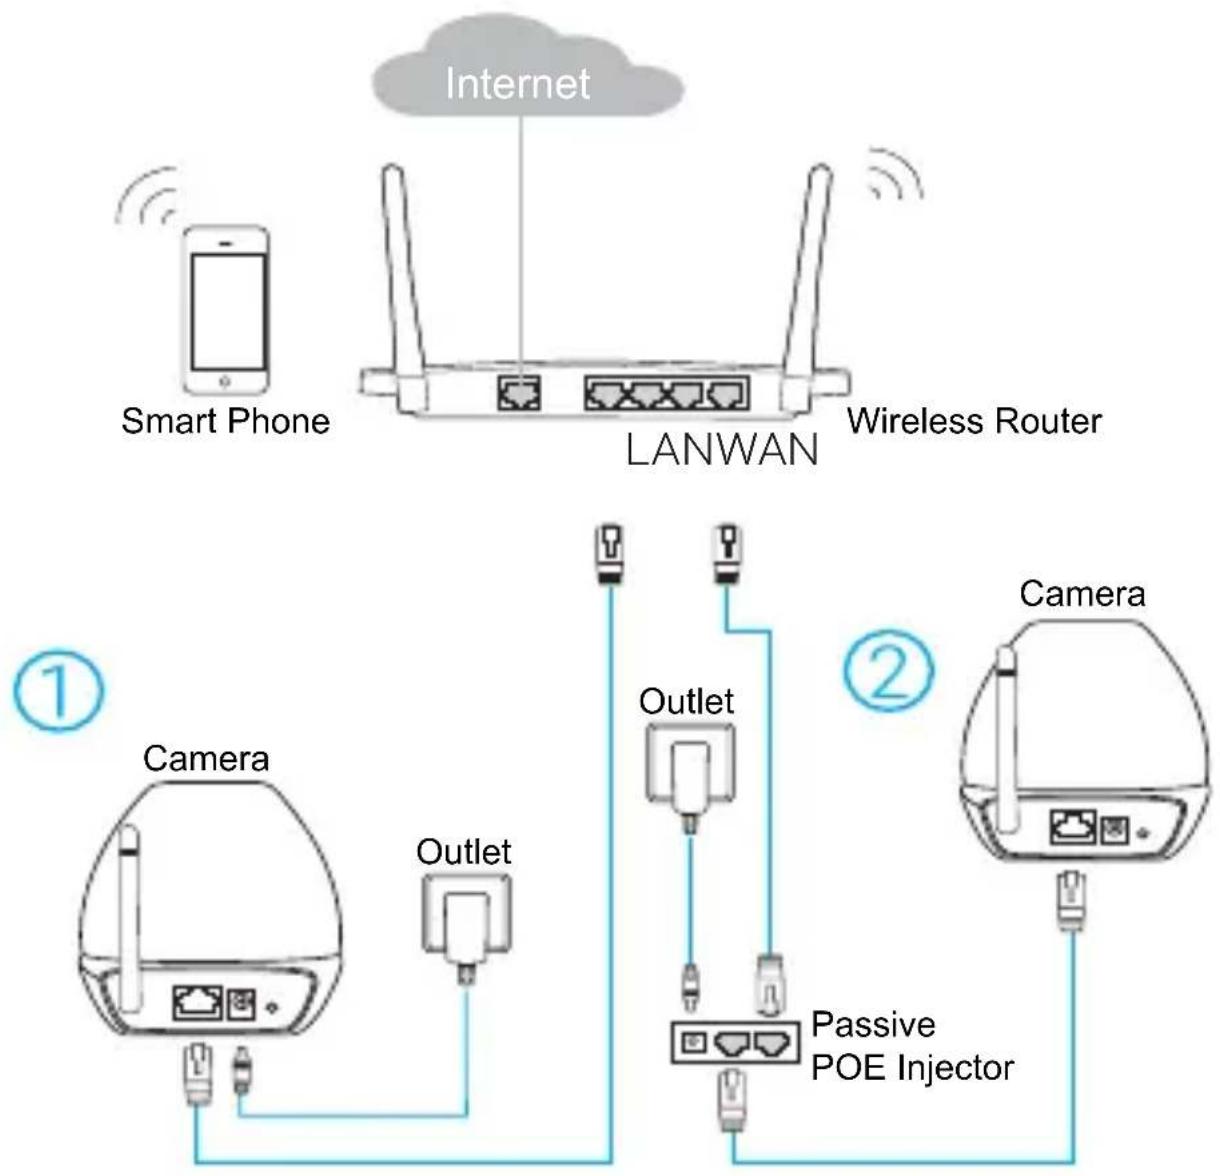
flowchart
graph TD
    A["Smart Phone"] -->|Wireless Signal| B["LANWAN"]
    C["Internet"] -->|Wireless Signal| B
    D["Camera"] -->|Direct/Vertical Connection| E["Passive POE Injector"]
    F["Camera"] -->|Direct/Vertical Connection| E
    B --> G["Outlet"]
    E --> H["Outlet"]
    style B fill:#f9f,stroke:#333
    style E fill:#bbf,stroke:#333
    style F fill:#bfb,stroke:#333
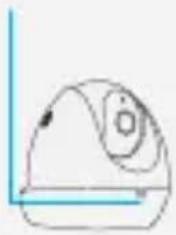
System LED
natural_image
Simple line drawing of a mechanical component or device with no visible text or symbolsFlashing red: System starting
Solid red: Network not connected
Solid green: Network connected
2 Download and install the tpCamera app.
OR
↓

natural_image
Stylized icon of a camera lens with white cloud on blue background (no text or symbols)3 Launch tpCamera, log in to your TP-Link ID or create one, then follow the app instructions to set up your new camera.
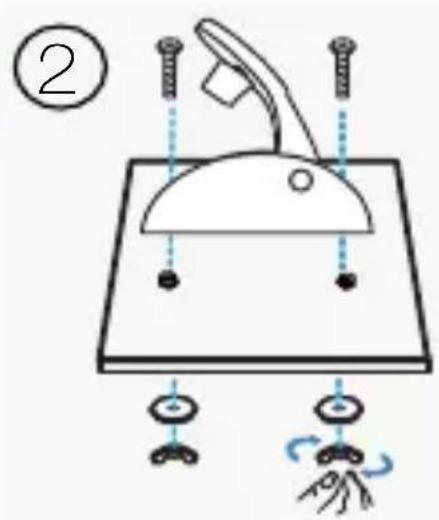
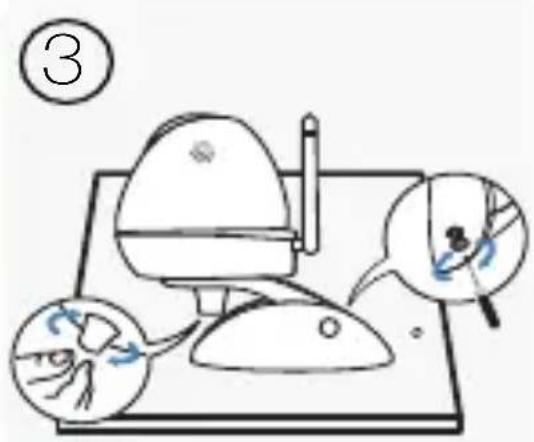
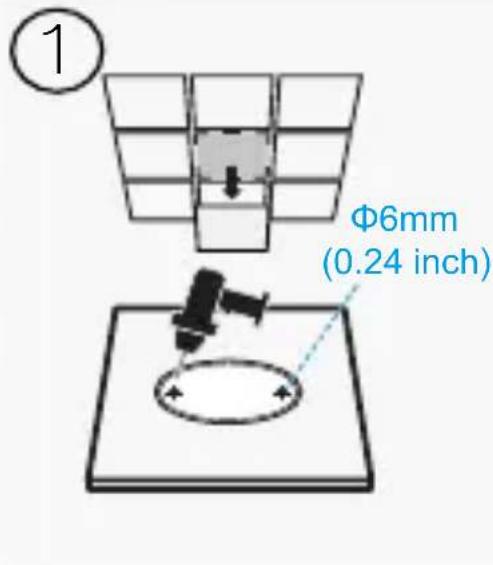
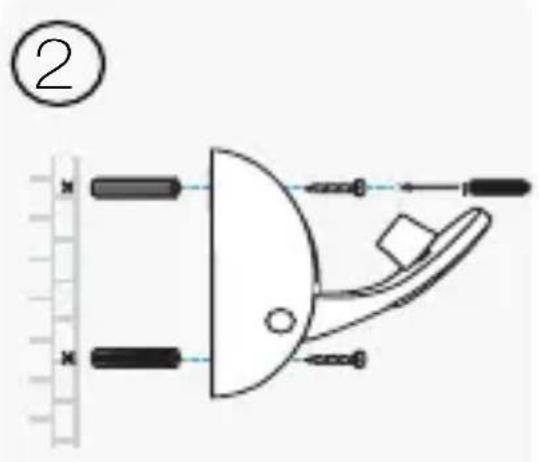
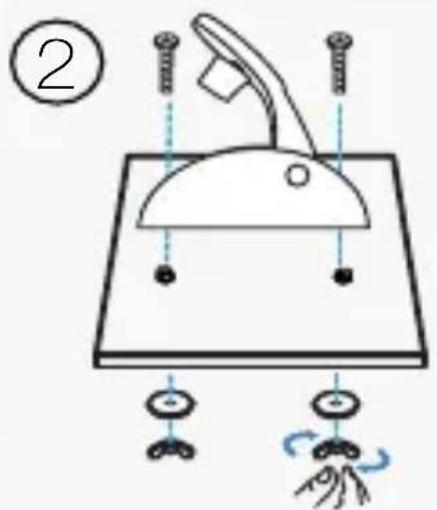
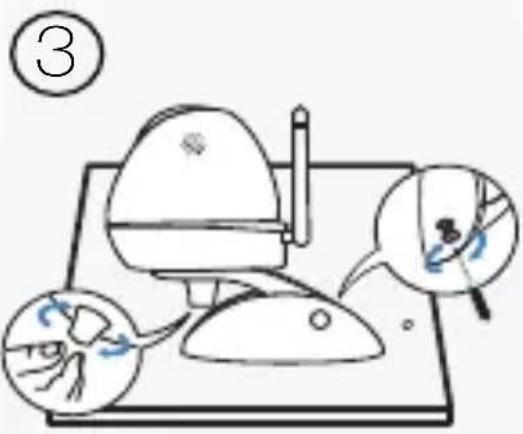
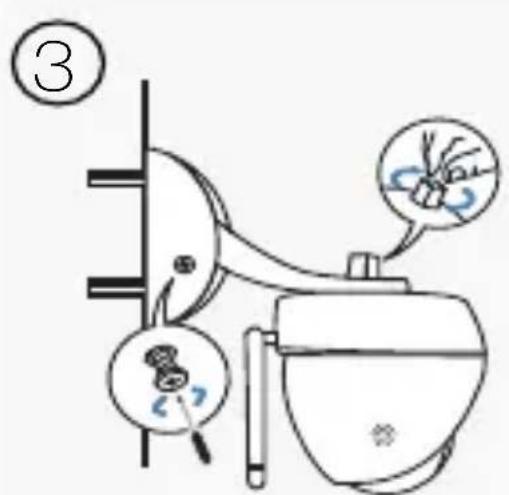
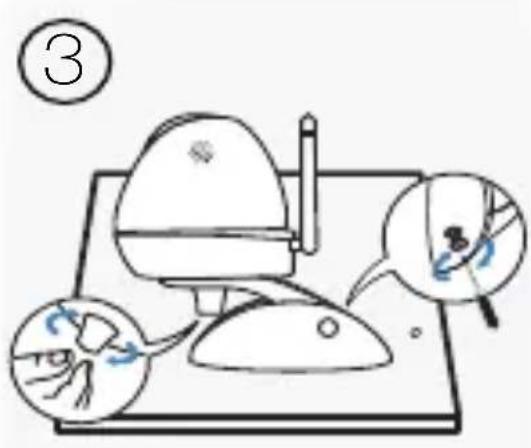
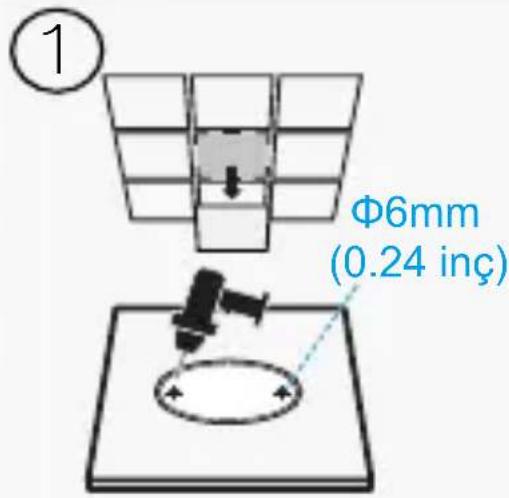
4 Relocate the camera to your desired location. You can simply place it on a flat surface or mount it with the screws.
Wall Mounting
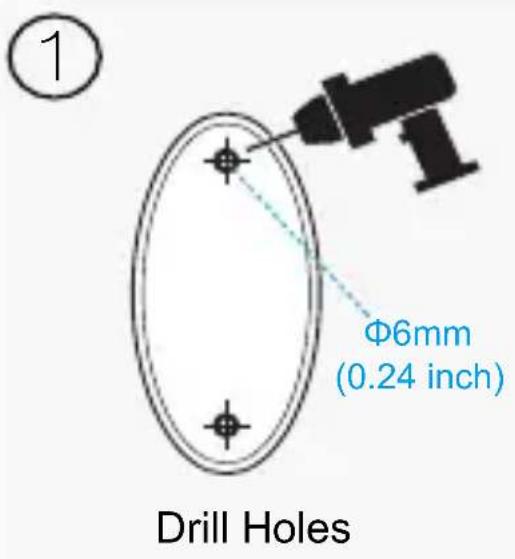
Ceil Mounting
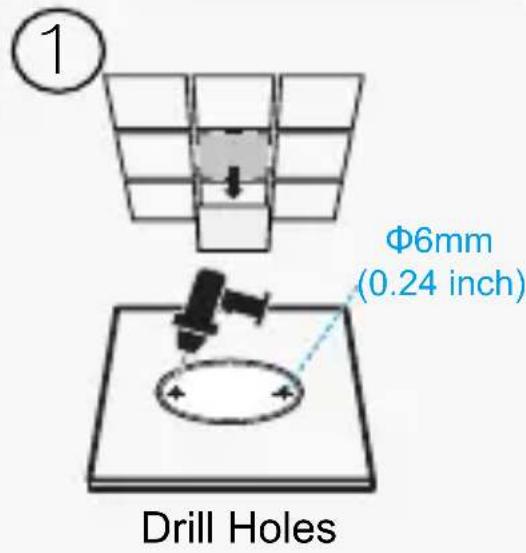
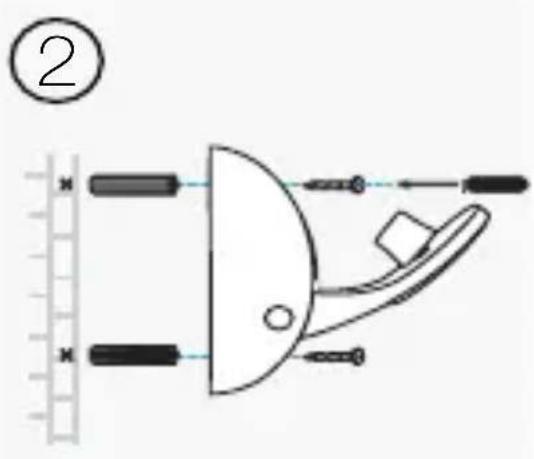
Mount Base Mount Base
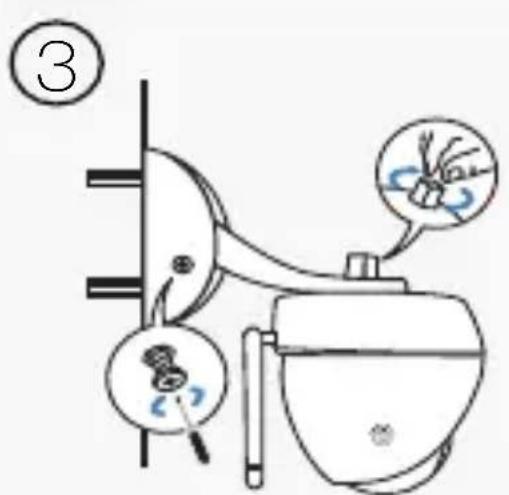
Secure Camera Secure Camera
How to view the camera
Via Smartphone:
On the My Cam screen, tap your camera to view the live video.
Via Computer:
Log in to the TP-Link Cloud Website
(https://www.tplinkcloud.com), and click your camera to view the live video.
How to use the WPS/RESET Button
WPS (Wi-Fi Protected Setup):
If your Wi-Fi router or access point supports WPS, you can connect the camera to your Wi-Fi network using WPS. For details, see the camera's User Guide.
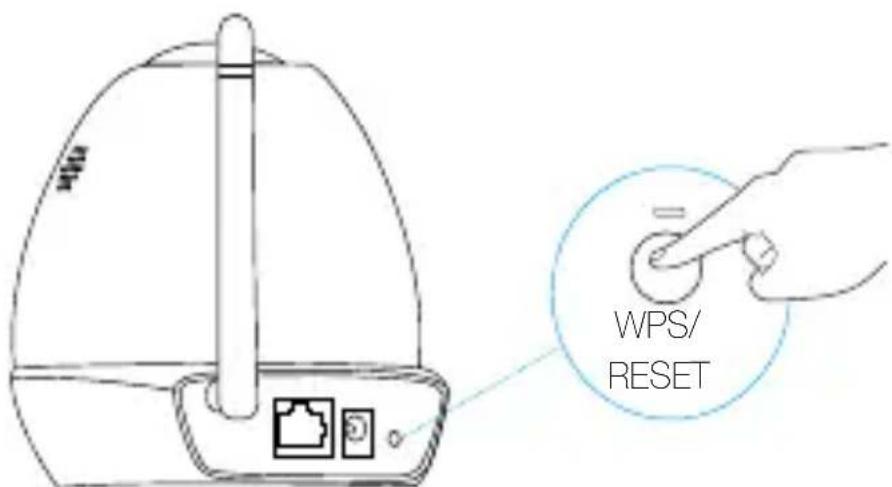
Short Press to trigger WPS and Press and hold for 5 seconds to trigger Reset.
Get more with the camera
More functions with tpCamera

Get notifications when motion is detected, and view alerts history.
Stay in touch with 2-way audio.
View all of your cameras on one screen
Download and install the TP-Link Camera Control utility to view and manage multiple cameras on one screen. For details, see the Camera Control User Guide.
Downloads
For related user guides, Camera Control utility, camera firmware, and other support, please visit the product page at http://www.tp-link.com.
natural_image
Simple line drawing of a device with a handle and circular top (no text or symbols)WPS (Wi-Fi Protected Setup):
natural_image
Simple line drawing of a mechanical component or device (no text or symbols)WPS (Wi-Fi Protected Setup):
natural_image
Simple line drawing of a mechanical component or device with no visible text or symbolsMontage au plafond
WPS (Wi-Fi Protected Setup):
Come impostare la telecamera
natural_image
Simple line drawing of a stylized object resembling a helmet or device, with no text or symbols present.
natural_image
Icon of a stylized eye inside a blue square frame with a downward arrow, no text or symbols present.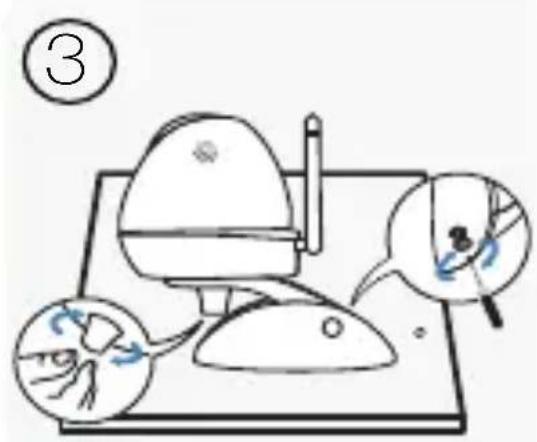
Fissate la telecamera Fissate la telecamera
WPS (Wi-Fi Protected Setup):
natural_image
Simple line drawing of a mechanical component or device (no text or symbols)natural_image
Diagram of a mechanical device with springs and a curved component, no text or symbols present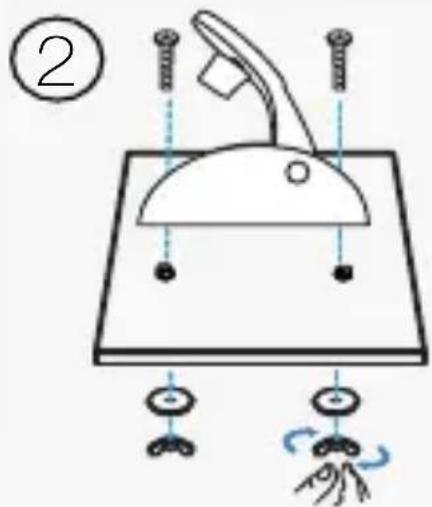
WPS (Wi-Fi Protected Setup):
natural_image
Simple line drawing of a stylized object resembling a helmet or device (no text or symbols)

natural_image
Stylized eye icon with white cloud on blue background (no text or symbols)WPS (Wi-Fi Protected Setup):
natural_image
Simple line drawing of a stylized object resembling a helmet or device (no text or symbols)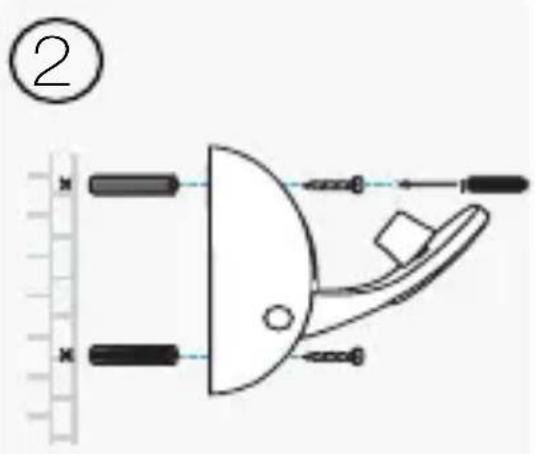
Monteer basis Monteer basis
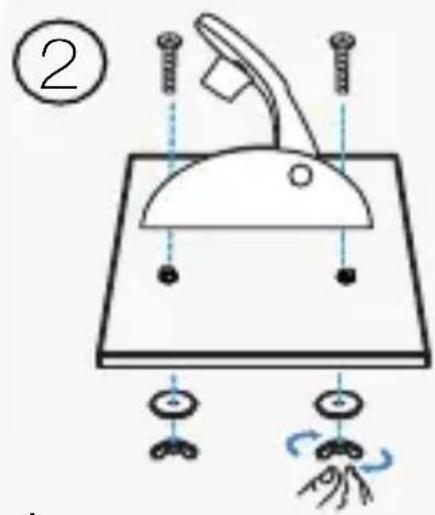
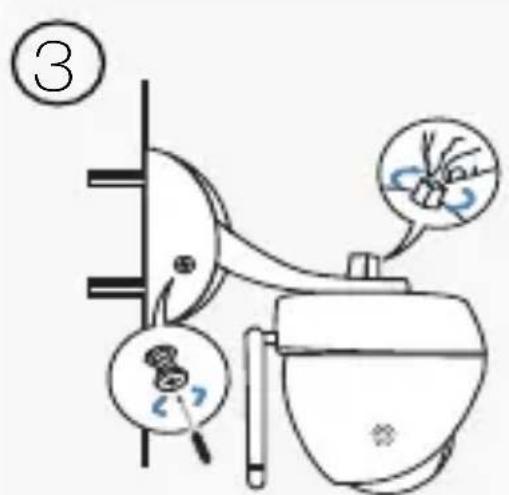
Bevestig Camera Bevestig Camera
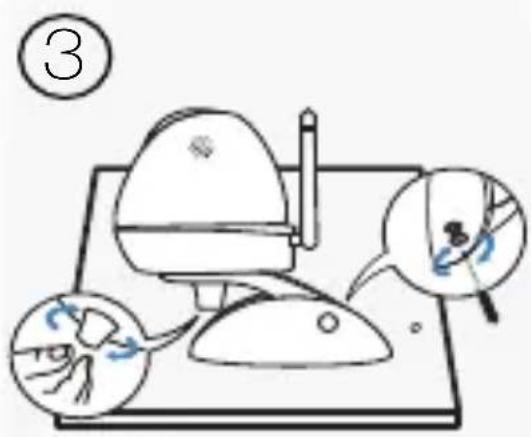
WPS (Wi-Fi Protected Setup):
Installera kameran
natural_image
Simple line drawing of a stylized object resembling a helmet or device, with no text or symbols present.Blinkande rött: Systemstart

natural_image
Icon of a stylized eye inside a blue square frame with a downward arrow, no text or symbols present.Slik konfigurer du kameraet
natural_image
Simple line drawing of a mechanical component or device with no visible text or symbolsBlinker rødt: Systemet starter opp

natural_image
Blue square icon with a white circular eye and cloud, no text or symbols present.Monter base Monter base
Skru fast kamera Skru fast kamera
Slik ser man kameraet
Via smarttelefon:
WPS (Wi-Fi Protected Setup):
natural_image
Simple line drawing of a stylized object resembling a helmet or device (no text or symbols)Blinker rødt: Systemet starter

natural_image
Icon of a stylized eye inside a blue square frame with a downward arrow, no text or symbols present.WPS (WiFi Protected Setup):
natural_image
Simple line drawing of a mechanical component or device with no visible text or symbolsTavana montaj
Deutsch
- Keep the device away from water, fire, humidity or hot environments.
- Do not attempt to disassemble, repair, or modify the device.
- Do not use damaged charger or USB cable to charge the device.
- Do not use any other chargers than those recommended.
- Do not use the device where wireless devices are not allowed.
- Adapter shall be installed near the equipment and shall be easily accessible.
Please read and follow the above safety information when operating the device. We cannot guarantee that no accidents or damage will occur due to improper use of the device. Please use this product with care and operate at your own risk.
TP-Link Three Years Limited Product Warranty
For TP-Link Branded Products Only.
THIS WARRANTY GIVES YOU SPECIFIC LEGAL RIGHTS, AND YOU MAY HAVE OTHER RIGHTS THAT VARY FORM STATE TO STATE (OR BY COUNTRY OR PROVINCE).
TO THE EXTENT ALLOWED BY LOCAL LAW, THIS WARRANTY AND THE REMEDIES SET FORTH ARE EXCLUSIVE AND IN LIEU OF ALL OTHER WARRANTIES, REMEDIES AND CONDITIONS.
TP-Link warrants the TP-Link branded hardware product contained in the original
packaging against defects in materials and workmanship when used normally in according with TP-Link's guidelines for a period of THREE YEARS form the date of original retail purchase by the end-user purchaser.
Español
EU Declaration of Conformity
Deutsch
TP-Link hereby declares that this device is in compliance with the essential requirements and other relevant provisions of directives 2014/53/EU, 2009/125/EC and 2011/65/EU.
The original EU declaration of conformity may be found at
http://www.tp-link.com/en/ce.
Español


- TP-Link Technologies Co., Ltd.
- TP-Link Italia S.r.l.
- TP-Link Netherlands B.V.
- TP-Link (Nordic) AB
- TP-Link Hellas Ltd.
- NWS.TP-Link Portugal, Unipessoal, Lda.
- Quick Installation Guide
- CONTENTS
- Kameraeinrichtung
- WPS (Wi-Fi Protected Setup):
- How to set up the camera
- How to view the camera
- Via Smartphone:
- Via Computer:
- How to use the WPS/RESET Button
- Get more with the camera
- More functions with tpCamera
- View all of your cameras on one screen
- Downloads
- Come impostare la telecamera
- Installera kameran
- Slik konfigurer du kameraet
- Slik ser man kameraet
- Via smarttelefon:
- WPS (WiFi Protected Setup):
- Deutsch
- TP-Link Three Years Limited Product Warranty
- Español
- EU Declaration of Conformity
Brand : TP-LINK
Model : NC450
Category : Surveillance Camera