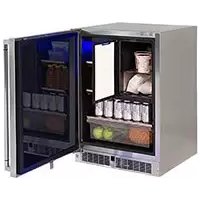
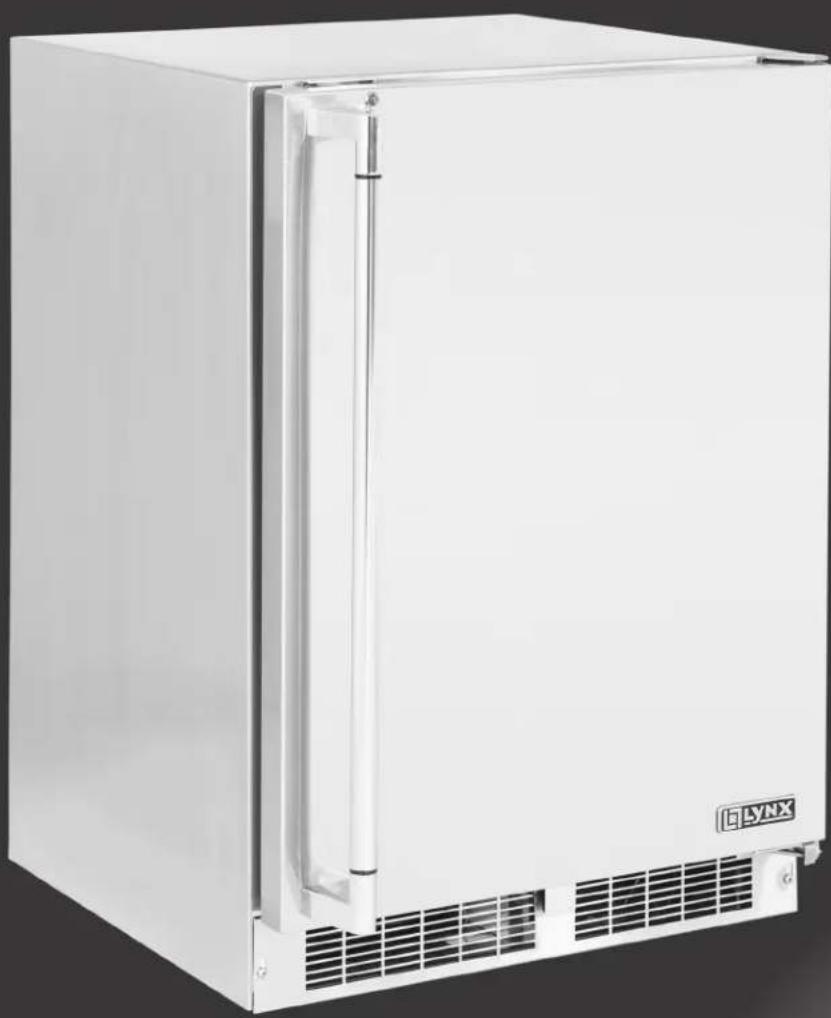
LM24REFCL - Refrigerator LYNX - Free user manual and instructions
Find the device manual for free LM24REFCL LYNX in PDF.



| Product Type | Outdoor Refrigerator-Freezer |
| Brand | Lynx |
| Model | LM24REFCL |
| Width | 61 cm (24 in) |
| Height (adjustable) | 85.7 to 88.3 cm |
| Power Supply | 115 V, 15 A, dedicated grounded circuit |
| Refrigerator Temperature Range | 1.2°C to 5.7°C (34°F to 42°F) |
| Freezer Temperature Range | -21°C to -14°C (-6°F to 6°F) |
| Ice Production (with optional kit) | 2.7 to 3 kg per day |
| Vacation / Shabbat Mode | Yes |
| Automatic Defrost | Yes |
| Interior Lighting | LED |
| Control Lock | Yes |
| Alerts | Door ajar, power failure, excessive temperature |
| Exterior Material | Stainless Steel |
| Removable Front Grille | Yes, for condenser cleaning |
| Leveling Feet | Yes, adjustable at front and rear |
| Warranty | 1 year (parts and labor) |
| Compliance | California Proposition 65 |
| Maintenance | Interior cleaning with mild soapy water; stainless steel with non-abrasive cleaner |
Frequently Asked Questions - LM24REFCL LYNX
User questions about LM24REFCL LYNX
0 question about this device. Answer the ones you know or ask your own.
Ask a new question about this device
Download the instructions for your Refrigerator in PDF format for free! Find your manual LM24REFCL - LYNX and take your electronic device back in hand. On this page are published all the documents necessary for the use of your device. LM24REFCL by LYNX.
USER MANUAL LM24REFCL LYNX
Unpacking your appliance 3
Warranty registration 3
Installing your appliance 4
Cabinet clearances 4
Leveling the appliance 4
Electrical connection 5
Installing the water supply 6
Optional ice-maker operation 7
Product dimensions 8
Starting your appliance 10
Using your Electronic control 10
Sleep mode 10
Turning your appliance "ON" or "OFF" 11
Adjusting the temperature 11
Temperature mode 11
Control lock 12
Temperature sensor error codes 12
Alarms 12
Door ajar 12
Power failure 13
Temperature alarm 13
Vacation mode 13
Shelving configurations 14
Shelf removal 15
Care and cleaning 16
Long term storage/winterization 16
Energy saving tips 19
Stainless steel maintenance 20
Obtaining service 20
Troubleshooting 21
Troubleshooting ice-maker 22
The Lynx Story 23
Important Safety Instructions
Warnings and safety instructions appearing in this guide are not meant to cover all possible conditions and situations that may occur. Common sense, caution, and care must be exercised when installing, maintaining, or operating this appliance.
Recognize Safety Symbols, Words, and Labels.
Death or serious injury could result if...

WARNING
WARNING - You can be killed or seriously injured if you do not follow these instructions.

CAUTION
CAUTION-Hazards or unsafe practices which could result in personal injury or property / product damage.
NOTE
NOTE-Important information to help assure a problem free installation and operation.

WARNING
State of California Proposition 65 Warning:
This product contains one or more chemicals known to the State of California to cause cancer.

WARNING
State of California Proposition 65 Warni
This product contains one or more chemicals known to the State of California to cause birth defects or other reproductive harm.
UNPACKING YOUR APPLIANCE

WARNING
EXCESSIVE WEIGHT HAZARD
Use two or more people to move product. Failure to do so can result in personal injury.
Remove Interior Packaging
Your appliance has been packed for shipment with all parts that could be damaged by movement securely fastened.
Remove internal packing materials and any tape holding internal components in place. The owners manual is shipped inside the product in a plastic bag along with the warranty registration card, and other accessory items.
Important
Keep your carton and packaging until your appliance has been thoroughly inspected and found to be in good condition. If there is damage, the packaging will be needed as proof of damage in transit. Afterwards please dispose of all items responsibly.

WARNING
WARNING - Dispose of the plastic bags which can be a suffocation hazard.
Note to Customer
This merchandise was carefully packed and thoroughly inspected before leaving our plant. Responsibility for its safe delivery was assumed by the retailer upon acceptance of the shipment. Claims for loss or damage sustained in transit must be made to the retailer.
NOTE
DO NOT RETURN DAMAGED MERCHANDISE TO THE MANUFACTURER - FILE THE CLAIM WITH THE RETAILER.

CAUTION
If the appliance was shipped, handled, or stored in other than an upright position for any period of time, allow the appliance to sit upright for a period of at least 24 hours before plugging in. This will assure oil returns to the compressor. Plugging the appliance in immediately may cause damage to internal parts.
Warranty Registration
It is important you send in your warranty registration card immediately after taking delivery of your appliance or you can register online at:
www.lynxgrills.com/support/registration
The following information will be required when registering your appliance.
Service/Model Number
Serial Number
Date of Purchase
Dealer's name and address
The service/model number and serial number can be found on the serial plate which is located inside the cabinet on the left side near the top. (See Figure 1).
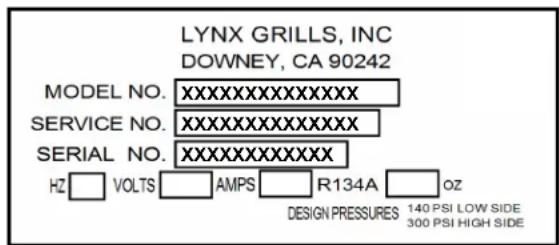
Figure 1

WARNING
WARNING - Help Prevent Tragedies
Child entrapment and suffocation are not problems of the past. Junked or abandoned refrigerators are still dangerous - even if they sit out for "just a few hours".
If you are getting rid of your old refrigerator, please follow the instructions below to help prevent accidents.
Before you throw away your old refrigerator or freezer:
Take off the doors or remove the drawers.
- Leave the shelves in place so children may not easily climb inside.
INSTALLING YOUR APPLIANCE
Select Location
The proper location will ensure peak performance of your appliance. We recommend a location where the unit will be out of direct sunlight and away from heat sources. To ensure your product performs to specifications, the recommended installation location temperature range is from 55 to 115^ (13 to 46^ ).
Cabinet Clearance
Ventilation is required from the bottom front of the appliance. Keep this area open and clear of any obstructions. Adjacent cabinets and counter top can be installed around the appliance as long as the front grille remains unobstructed.
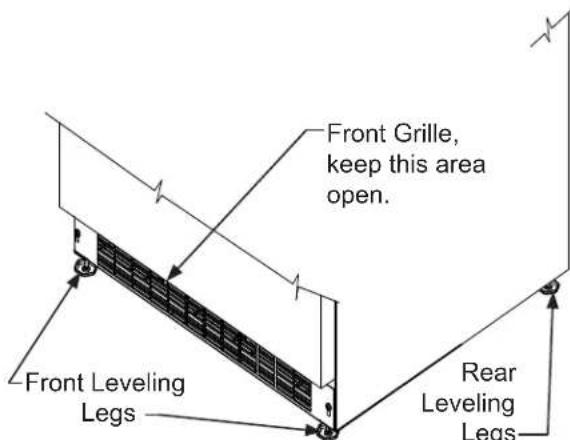
Figure 2
Leveling Legs
Adjustable legs at the front and rear corners of the appliance should be set so the unit is firmly positioned on the floor and level from side to side and front to back. The overall height of your appliance may be adjusted between the minimum, 3314 (85.7 cm), by turning the leveling leg in (CW ) and the maximum, 3414 (88.3 cm) by turning the leveling leg out (CCW ).
To adjust the leveling legs, place the appliance on a solid surface and protect the floor beneath the legs to avoid scratching the floor. With the assistance of another person, lean the appliance back to access the front leveling legs. Raise or lower the legs to the required dimension by turning the legs. Repeat this process for the rear by tilting the appliance forward using caution. On a level surface check the appliance for levelness and adjust accordingly.
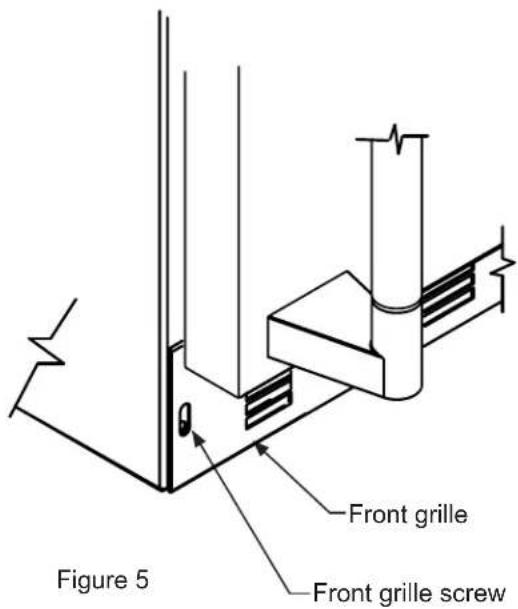
The front grille screws may be loosened and the grille adjusted to the desired height. When adjustment is complete tighten the two front grille screws. (See Figure 5).

CAUTION
FrontGrille
Do not obstruct the front grille. The openings within the front grille allow air to flow through the condenser heat exchanger. Restrictions to this air flow will result in increased energy usage and loss of cooling capacity. For this reason it is important this area not be obstructed and the grille openings kept clean. Lynx Grills does not recommend the use of a custom made grille as air flow may be restricted. (See Figure 2).
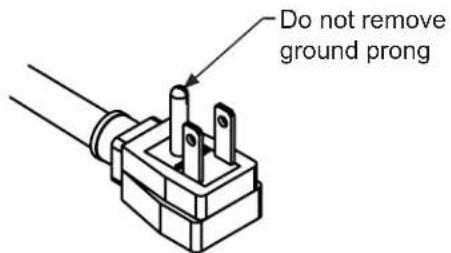
Figure 3
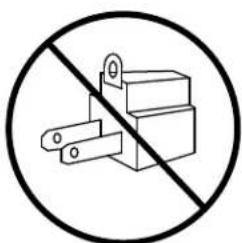
Figure 4

WARNING
Electrical Shock Hazard
- Do not use an extension cord with this appliance. They can be hazardous and can degrade product performance.
- This appliance should not, under any circumstances, be installed to an un-grounded electrical supply.
- Do not remove the grounding prong from the power cord. (See Figure 3).
- Do not use an adapter. (See Figure 4).
- Do not splash or spray water from a hose on the appliance. Doing so may cause an electrical shock, which may result in severe injury or death.
Electrical Connection
A grounded 115 volt, 15 amp dedicated circuit is required.
This product is factory equipped with a power supply cord that has a three-pronged, grounded plug. It must be plugged into a mating grounding type receptacle in accordance with the National Electrical Code and applicable local codes and ordinances (see Figure 6). If the circuit does not have a grounding type receptacle, it is the responsibility and obligation of the customer to provide the proper power supply. The third ground prong should not, under any circumstances, be cut or removed.
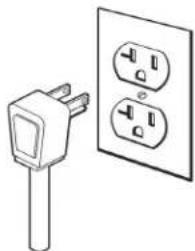
Figure 6
NOTE
Ground Fault Circuit Interrupters (GFCI) are prone to nuisance tripping which will cause the appliance to shut down. GFCI's are generally not used on circuits with power equipment that must run unattended for long periods of time, unless required to meet local building codes and ordinances.
INSTALLING THE WATER SUPPLY MODEL LM24RFEFC WITH OPTIONAL ICE-MAKER KIT
NOTE
An optional ice-maker kit (part number S42418151) is available for model LM24REFC which includes all of the necessary parts for installation. The kit can be obtained from Lynx Grills customer service by calling (888)-289-5969.
Water Supply

CAUTION
Observe and follow all local building codes when installing this appliance.
Use 14 "copper tubing for your water supply which is available at any local hardware or plumbing supply store. Bend the 14 "copper tubing to suit your installation being sure not to kink the tubing. Purchase enough copper tubing length and coil it behind the unit to form a "service loop" which will allow the appliance to be pulled out from the installation for servicing or cleaning. Connect the copper tubing to the "top side" of a cold water pipe to prevent the ice-maker from plugging with sediment.
A shutoff valve is recommended on the water supply line to ease servicing the appliance. NOTE: A SELF-PIERCING TYPE VALVE IS NOT RECOMMENDED as they are prone to clogging with sediment which will create pressure drop reducing the water supply to the unit.
Connect the copper tubing water supply to the brass union with the compression nut fitting provided. (See Figure 7).
Water pressure must be at a minimum of 20 psi for proper operation and a maximum of 120 psi.
Make certain all water connections are watertight after installation. Form the tubing so that it will not vibrate against the cabinet body or kink when your appliance is set in position.
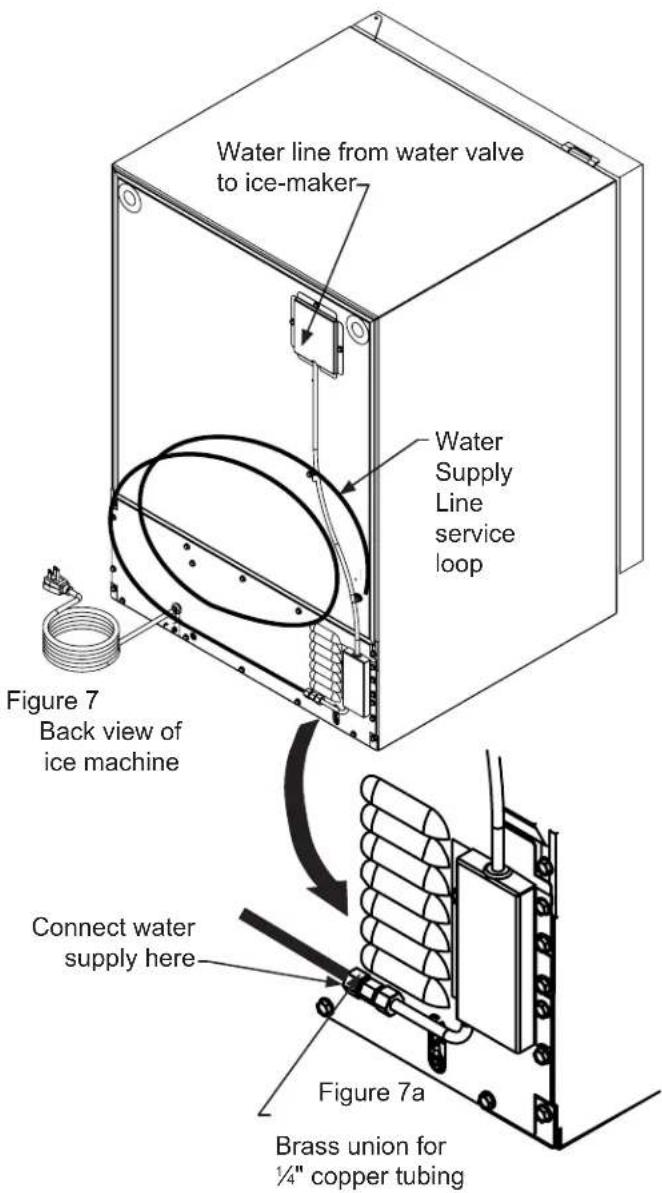
NOTE
- Do not use any thread sealers on these water line fittings.
- Reverse osmosis, softened water, and de-ionized water are not recommended as they will adversely affect the quality of the ice.
OPTIONAL ICE-MAKER OPERATION

CAUTION
The water supply to the ice-maker must be turned on prior to turning the ice-maker on. Failure to do so will cause rapid dry cycling of the ice-maker mold heater resulting in temperature control issues in the freezer compartment.
Ice-maker operation
- The unit must be installed level for proper ice-maker operation.
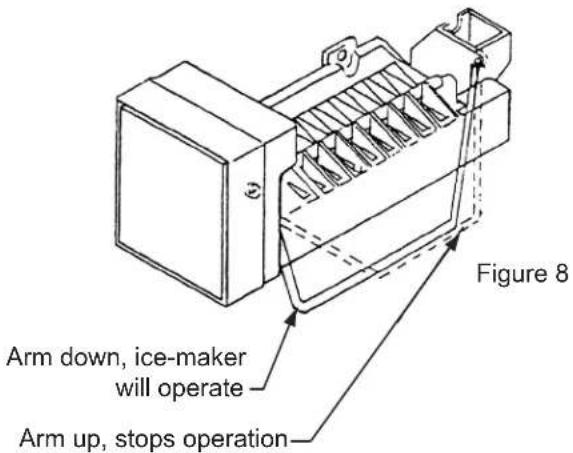
- The shutoff arm wire must be down in its lowest position for the ice-maker to operate. (See Figure 8).
- When the freezer section and ice-maker unit has sufficiently cooled, the ice-maker will harvest ice cubes automatically.
- When the ice bucket is full, the ice-maker will automatically shut off.
- You may manually stop the ice-maker by raising the shut off arm to the locking position at the up most position. (See Figure 8).
NOTE
It is recommended the ice-maker is shut off when removing the bucket, or ice may be dispensed onto the freezer compartment floor.
If the ice is not used regularly, it will clump together with time. For best ice results, discard ice in the bin as required and allow the ice-maker to make a new fresh batch of ice. Shut-off the ice-maker by raising the shut-off arm before removing the bucket.
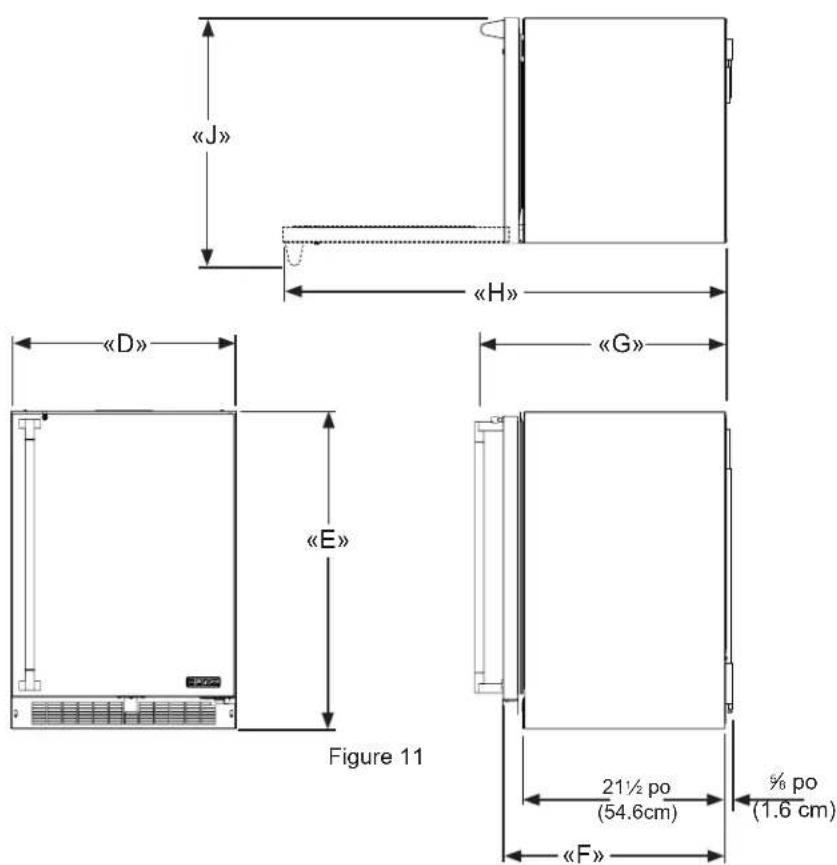
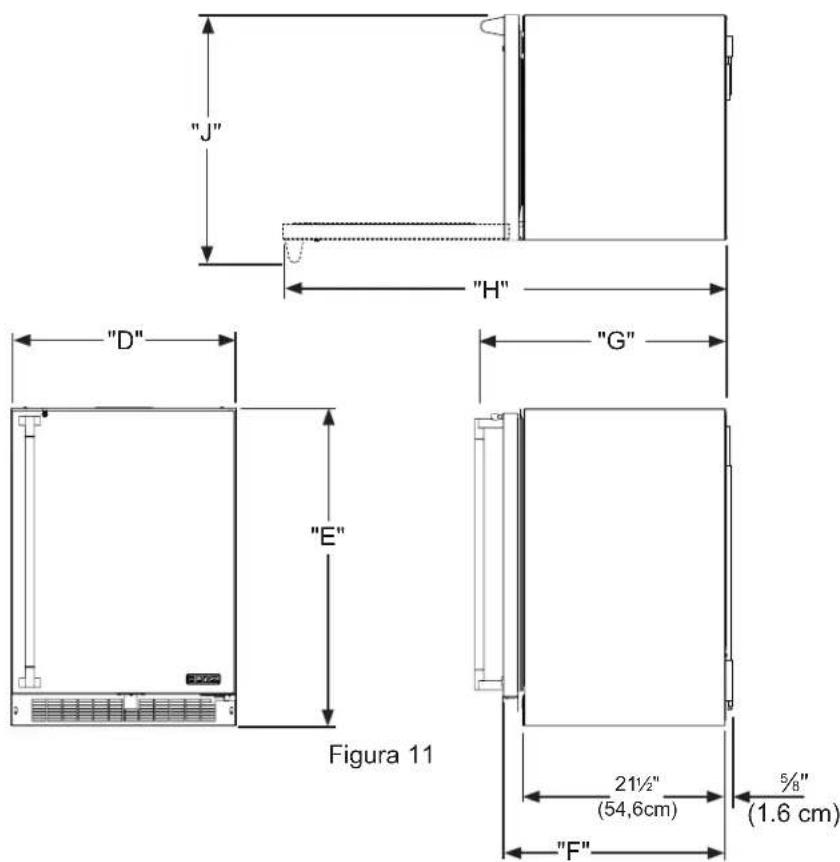
PRODUCT DIMENSIONS
| MODEL | ROUGH-IN OPENING DIMENSIONS CABINET DIMENSIONS | ||||||||
| "A" | "B" | "C" | "D" | "E" | "F" | "G" | "H" | "J" | |
| LM24REFC | 24"(61 cm) | **34" to 35"(86.4 to 88.9 cm) | * | 23%"(60.7 cm) | 33%" to 34%"(85.7 to 88.3 cm) | 23½%"(60.2 cm) | 26%"(67.9 cm) | 46½%(117.9 cm) | 26%"(67.9 cm) |
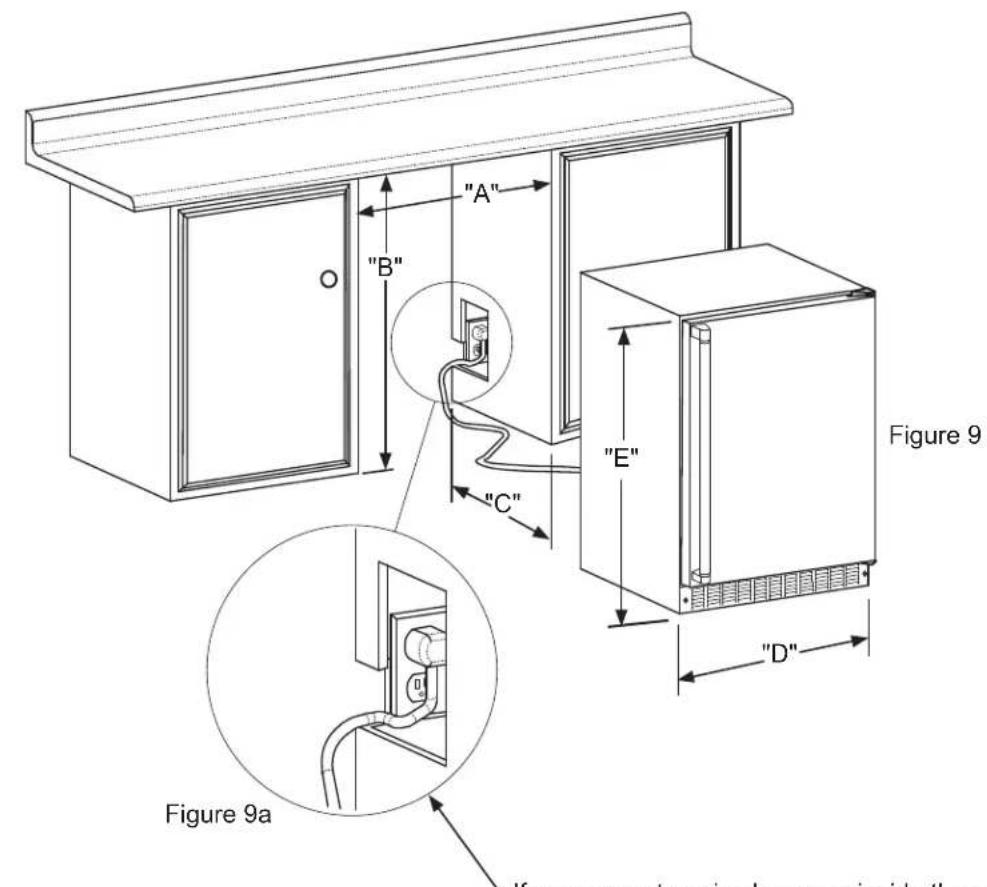
-If necessary to gain clearance inside the rough-in opening a hole can be cut through the adjacent cabinet and the power cord routed through this hole to a power outlet. Another way to increase the available opening depth is to recess the power outlet into the rear wall to gain the thickness of the power cord plug. Not all recessed outlet boxes will work for this application as they are too narrow, but a recessed outlet box equivalent to Arlington #DVFR1W is recommended for this application, (see Figure 10).
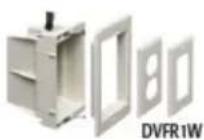
Figure 10
PRODUCT DIMENSIONS
| MODEL | PRODUCT DATA | |
| ELECTRICAL REQUIREMENTS # | PRODUCT WEIGHT | |
| LM24REFC 115 | V/60Hz/15A | 140 lbs (63.6 kg) |
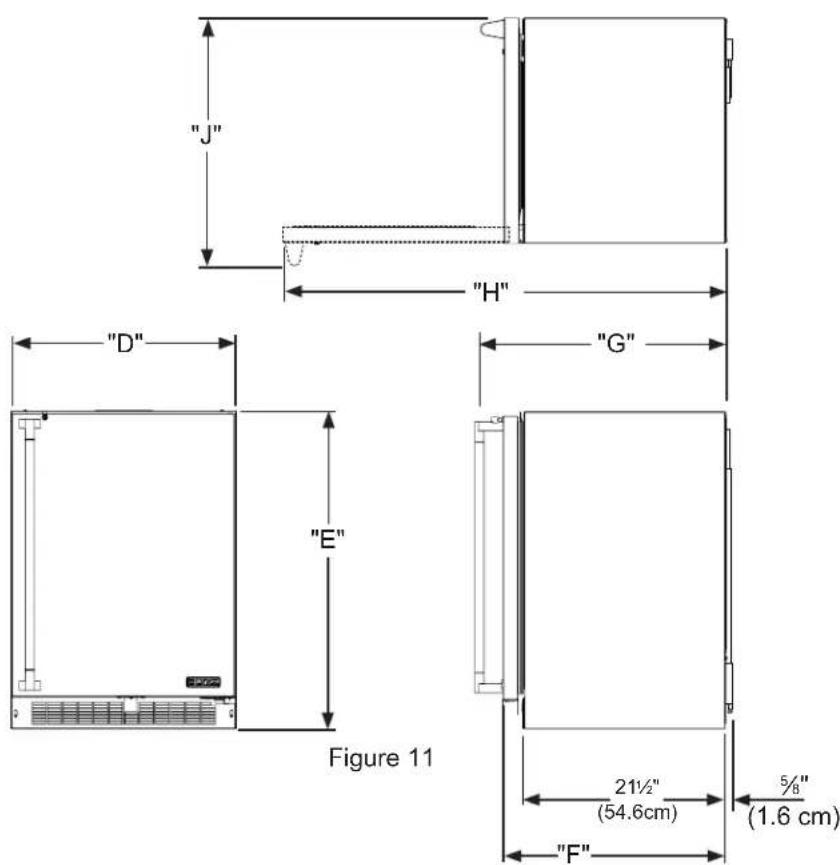
- Depth dimension of rough-in opening may vary depending on each individual installation. To recess entire door "F" dimension plus 1" (2.5 cm) for thickness of power cord plug.
** Minimum rough-in opening required is to be larger than the adjusted height of the cabinet.
A grounded 15 amp dedicated circuit is required. Follow all local building codes when installing electrical and appliance.
STARTING YOUR APPLIANCE

Starting your appliance
Plug the appliance power cord into a 115 volt wall outlet. Your appliance is shipped from the factory in the "On" position and will begin start-up of cooling as soon as power is supplied. If the appliance does not start, confirm that the wall outlet has power, and that the control is in the "On" position, (See "Turning your appliance On and Off" below).
The control display is covered with a clear plastic film. This film may be removed by carefully lifting the film at a corner.
On initial power up, the control display will indicate a "Power Failure" alarm. This is a normal condition as the appliance was powered-up at the factory for quality inspection and then removed from power. A momentary press of the "On/Off" keypad will reset this alarm condition. (See Alarms section on page 12).
NOTE
Your product has an automatic defrost feature that utilizes an electric heater element. Periodically during defrost you may observe the following:
Water dripping and running sounds as a result of the frost melt
- Sizzling and popping sounds from water dripping on the heater element
- A faint reddish glow in the freezer compartment from the electric heater element
These are all "normal" operating characteristics related to refrigeration product incorporating automatic defrost. They do not represent any product fault or safety issue.
Using your electronic control

Sleep mode
If no keystads are pressed for 60 seconds, the display will enter sleep mode to conserve power. The control panel will go dark with the exception of the system status "OK" indicator which will remain enabled. Alarm conditions will wake the display, (see alarms on page 12).
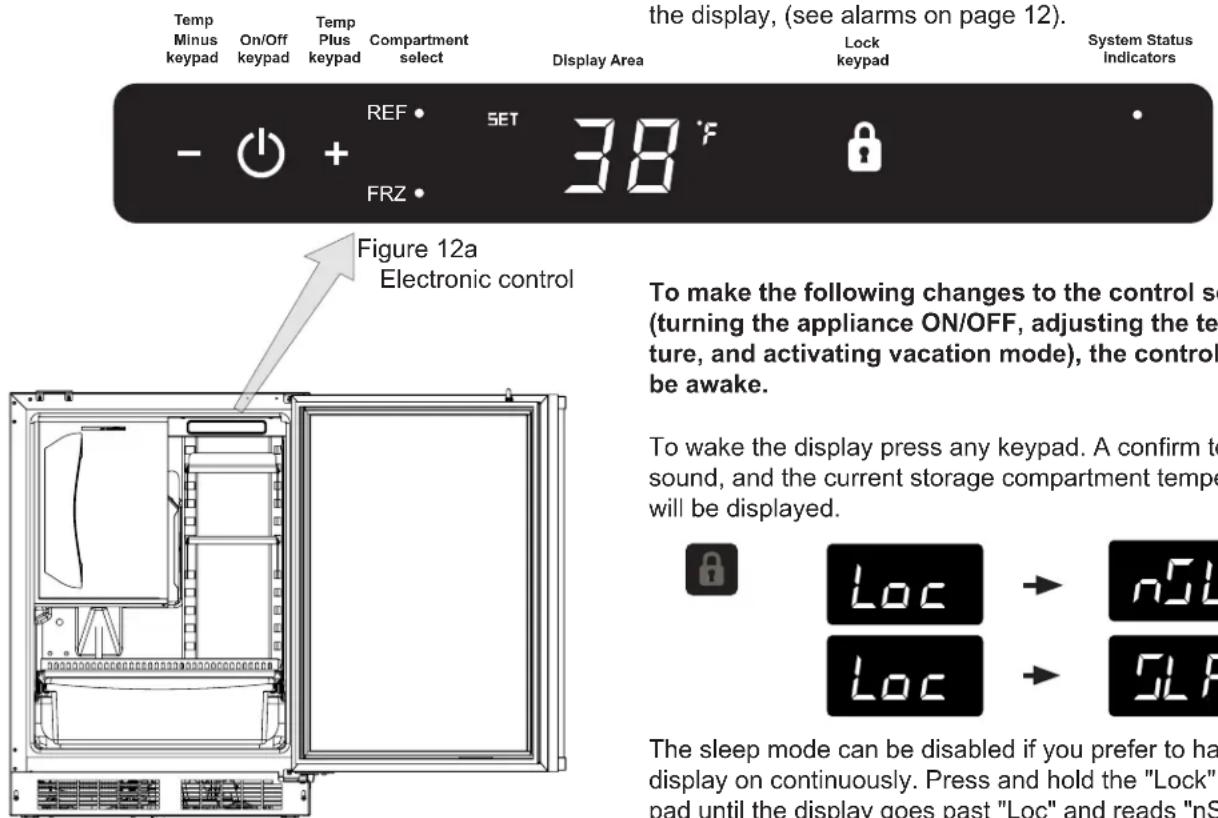
Figure 12
To make the following changes to the control settings (turning the appliance ON/OFF, adjusting the temperature, and activating vacation mode), the control must be awake.
To wake the display press any keypad. A confirm tone will sound, and the current storage compartment temperature will be displayed.
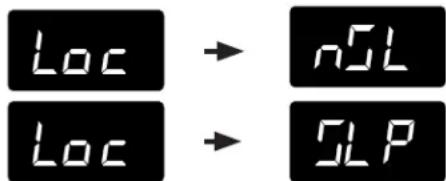
The sleep mode can be disabled if you prefer to have the display on continuously. Press and hold the "Lock" keypad until the display goes past "Loc" and reads "nSL". To enable the sleep mode, repeat the instruction, again going past "Loc" until the display reads "SLP".
USING YOUR ELECTRONIC CONTROL

Turning your appliance ON and OFF
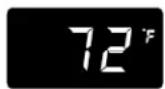
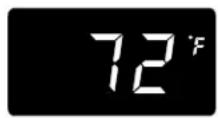
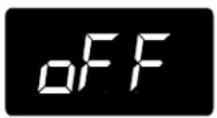
If the appliance is "On", (and out of sleep mode) the temperature will be shown in the display area of the control. To turn the appliance "Off", press and hold the "On/Off" keypad for 4-seconds. "OFF" will now be displayed on the control.

To turn the appliance "On", press and hold the "On/Off" keypad for 4-seconds.
Adjusting the temperature
NOTE
Loading warm contents may trigger a temperature alarm, see temperature alarm page 13. Depending on the quantity and/or weight of warm contents, it may take 48 hours for the compartment temperature to stabilize.
When making temperature set-point changes, it may take up to 24-hours for the stored contents to stabilize at your new set-point temperature.
Factors that affect the storage compartment stabilized temperature:
Changes to temperature setting.
- Room temperature changes.
- Temperature of stored contents.
- Loading warm contents.
- Cold content load will delay the change to a warmer set-point temperature.
- Warm content load will delay the change to a colder set-point temperature.
Usage, (number and duration of the door openings).
- Installation of the appliance in direct sunlight or next to a heat source.
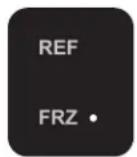
Freezer compartment selected
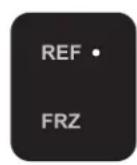
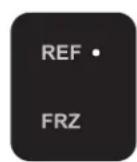
Refrigerator compartment selected
Temperatures can be set for each individual compartment (refrigerator or freezer / ice-maker). To do so you must first select the compartment you want to set the temperature for.
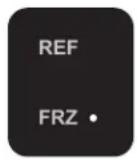
You do so by pressing the refrigerator (REF) or freezer (FRZ) button on the display. When pressed the LED light will be illuminated for the respective display.


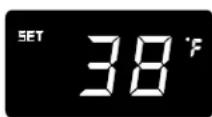

To change the set temperature for a particular compartment, with the compartment enabled and out of sleep mode, press the "-" or "+" keypads. "SET" will be indicated on the user interface panel and the current set-point temperature will display and flash. Subsequent presses of the "-" or "+" keypads will adjust the temperature colder or warmer respectively. When you have reached your desired set-point temperature, press the "On/Off" keypad to accept, or do nothing and the "Set" mode will time-out in 10-seconds accepting the displayed temperature as the new set-point.
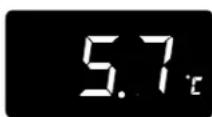
The available set-point temperature range for your appliance is -6^ (-21^) to 6^ (-14^) for the freezer compartment (ice-maker) and 34^ (1.2^) to 42^ (5.7^) for the refrigerator compartment. If you attempt to adjust the temperature outside of these ranges you will receive an audible notification.


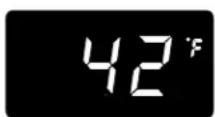
Temperature mode
The temperature mode is preset from the factory in Fahrenheit (^) but you have the option to change it to Centigrade (^) . To change the mode, press and hold the "-" keypad, while pressing the "+" keypad, then release the "-" keypad. The temperature will now be displayed in Centigrade (^) . Repeat the procedure to change the temperature mode back to Fahrenheit (^) .
USING YOUR ELECTRONIC CONTROL


Control lock
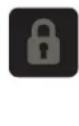
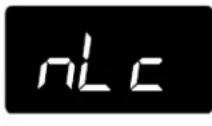
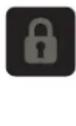
The control panel can be locked to avoid unintentional changes. To lock the control, press and hold the "Lock" keypad until the display reads "Loc" then immediately release your finger from the keypad. The lock icon will flash 3-times and then continuously illuminate. When the control panel is locked, only the Lock keypad, System Status OK indicator, and the Alarm indicator are active. To unlock the control panel, repeat this instruction until the display reads "nLc" then immediately release your finger from the keypad.
NOTE

If the control lock is active (illuminated lock icon) the control will have to be unlocked before using the keypad to reset an alarm condition. See page 12
(Control Lock) for instructions for unlocking the control.
Alarms
The control will alert you to conditions that could adversely affect the performance of the appliance.
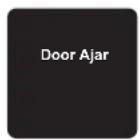
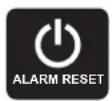
- Door ajar - If the door is open, or not closed properly, for more than 5-minutes the System Status OK indicator will turn-off, the "Door Ajar" indicator will flash, and a tone will sound every 60 seconds. Additionally, an "ALARM RESET" indicator will be displayed below the "On/Off" keypad.
NOTE

The audible alarm can be muted, for each occurrence, by pressing the lock keypad.
This alarm condition can be reset by closing the door or momentarily pressing the "On/Off" keypad, (i.e.-if you are cleaning the storage compartment, etc.). The alarm will recur in 5-minutes if the alarm condition persists.
Temperature Sensor Error Codes
The temperature sensors are monitored continuously. Any OPEN or SHORTED circuit condition will initiate an ERROR CODE as listed below:
| Temperature Sensor Error Codes | |||
| Sensor Displayed Code Error | Description Action to Take | ||
| Refrigerator Temperature Sensor | Eu | Failed temperature sensor in the refrigerator compartment. Can lead to unwanted storage temperatures and/or spoiled perishable goods. | Call service to have the temperature sensor replaced and remove all perishable goods from compartment to prevent spoilage. |
| Freezer Temperature Sensor | EL | Failed temperature sensor in the freezer compartment. Can lead to unwanted storage temperatures and/or spoiled perishable goods. | Call service to have the temperature sensor replaced and remove all perishable goods from compartment to prevent spoilage. |
| Defrost Sensor | Ed | Failed defrost temperature sensor. Causes unit to not defrost properly and can create large frost build-up. Can lead to water damage to the unit and surrounding floor. | Unplug the power cord immediately and call service to have the defrost sensor replaced. |
USING YOUR ELECTRONIC CONTROL
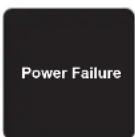
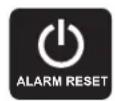
- Power failure - If power to the appliance is interrupted the System Status indicator will turn-off and the "Power Failure" indicator will flash. Additionally, an "ALARM RESET" indicator will be displayed below the "On/Off" keypad. No audible tone will sound. This alarm condition can be reset by momentarily pressing the "On/Off" keypad. If this alarm occurs, it is recommended that you check the condition of any perishables, even if the appliance is operating normally and the temperature has recovered, as prolonged power outages could result in excessive temperature excursions which may spoil perishables.
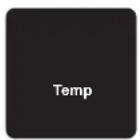
- Temperature alarm - If the storage compartment temperature deviates excessively from your set-point temperature for an extended period of time, the "TEMP" indicator will flash, and an audible tone will sound every 60 seconds. Additionally, an "ALARM RESET" indicator will be displayed below the "ON/OFF" keypad.
NOTE
After a high temperature alarm condition, check all perishables to ensure they are safe for consumption.
NOTE
The temperature alarm may occur as a result of high usage or introduction of warm contents to the storage compartment. If the temperature alarm continues to occur, your unit may require service.
NOTE

The audible alarm can be muted, for each occurrence, by pressing the lock keypad.
This alarm condition can be reset by momentarily pressing the "On/Off" keypad. If this alarm occurs it is recommended that you check the condition of your stored contents, even though the appliance is operating normally and the temperature has recovered, as prolonged temperature excursions could spoil perishables.
NOTE
Multiple alarms are possible, i.e.- "Door Ajar" for a prolonged period may trigger a "Temp" alarm, in which case both "Door Ajar" and "Temp" indicators will activate.
Vacation mode
This operating mode can be used to save energy during high cost energy periods, or when you won't be using your appliance for an extended period of time by disabling the lights, alarm tones, and keypad entry tones. Vacation mode also serves as a Sabbath mode, disabling functions and its controls in accordance with the weekly Sabbath and religious holidays observed within the Orthodox Jewish community. When used as Sabbath mode, you may open or close the door at any time to access contents without concern of directly turning on or off any lights, digital read-outs, solenoids, fans, valves, compressor, icons, tones, or alarms.
When activated, the display, alarm indicators and tones, keypad touch tones, interior lights, and all options are disabled. All keypad functions are disabled, with the exception of the "On/Off" keypad which is required to exit Vacation-mode. Storage compartment temperatures are monitored and controlled at the settings prior to entering Vacation mode.
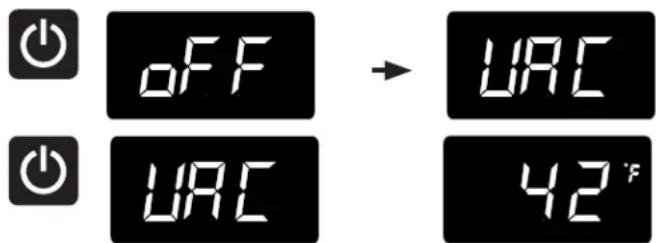
To enter Vacation Mode (with the control out of sleep mode), press and hold the "On/Off" keypad until the display goes past "OFF" and reads "VAC". The display will flash "VAC" 3-times to acknowledge your request, then will display "VAC" continuously until Vacation mode is exited. A power outage will not exit Vacation mode, exiting can only be accomplished manually. To exit Vacation mode and return to normal operation, press and hold the "On/Off" keypad until the control displays the temperature.
SHELVING CONFIGURATIONS
Refrigerator / Freezer
24" (61 cm) wide see Figure 13:
Refrigerator:
(2) Half width cantilever adjustable shelf. see Figure 14
(1) Full width fixed position glass shelf
(1) Roller glide clear crisper drawer
Freezer:
(1) Fixed position metal shelf, see Figure 15.
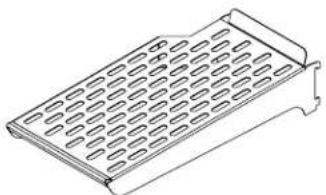
Figure 14
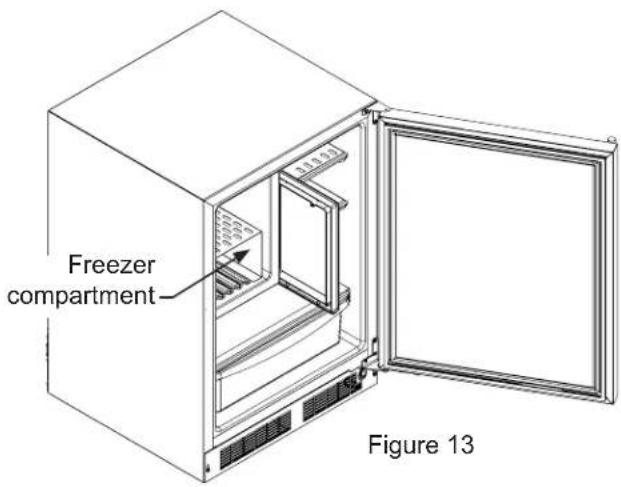
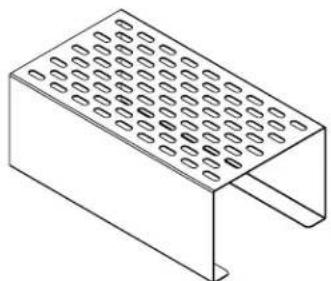
Figure 15 Freezer shelf
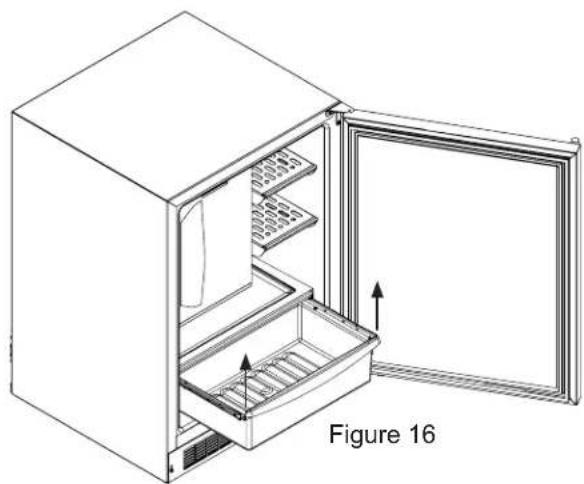
To remove the crispers :
Pull out until it stops. Lift up on the front of the pan, and remove it from the frame.
SHELF REMOVAL
To Add or Remove a Shelf
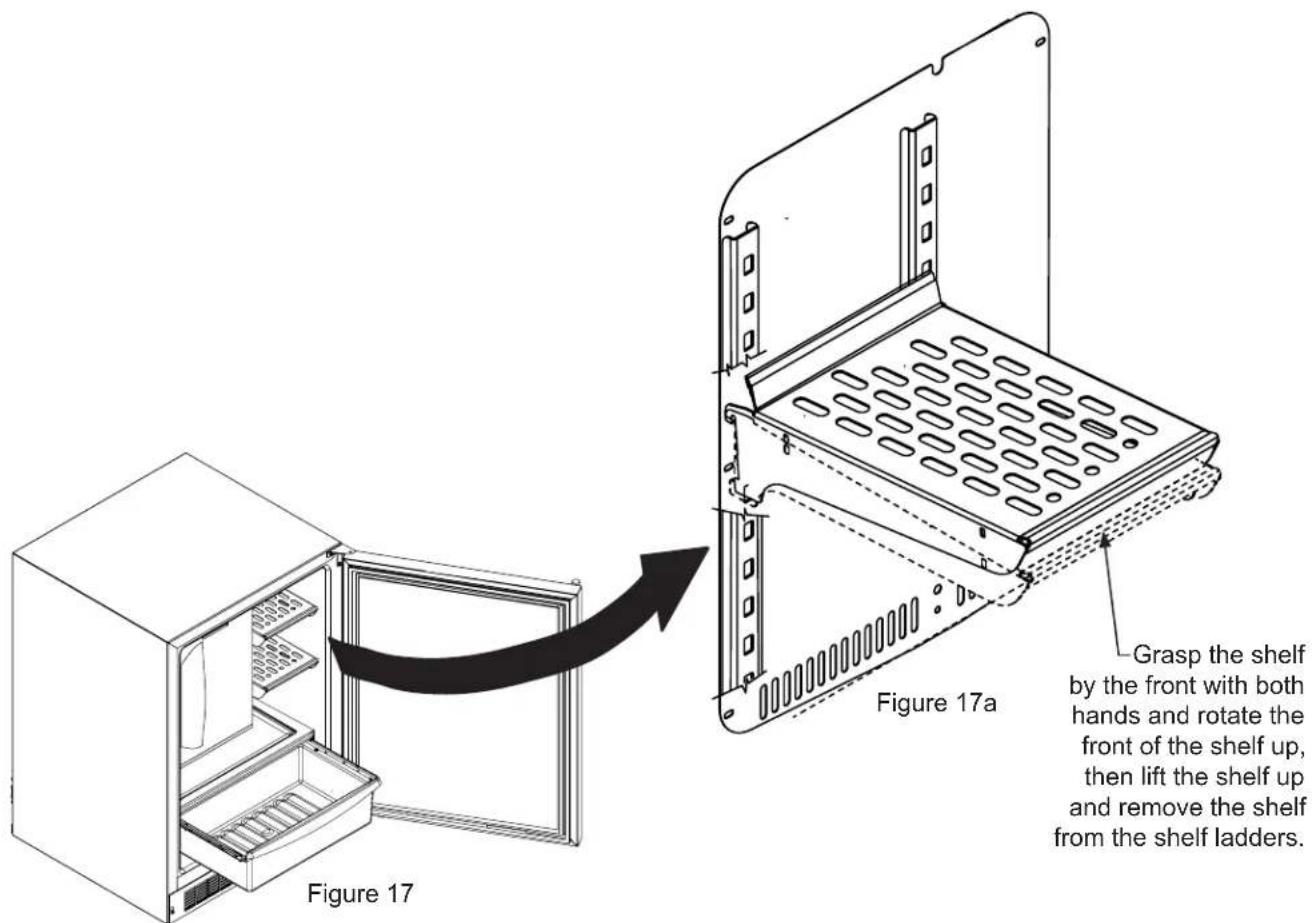
Remove stored product from the shelf. Do not try to remove a loaded shelf from the appliance. Grasp the shelf front with both hands, rotate the front upward and lift out. (See Figure 17a). To install a shelf insert the shelf in the appliance and insert the top hooks into the shelf support slots and drop the shelf down so the hooks drop over the bottom of the slots.

CAUTION
Make sure your cantilever shelf is secure on the shelf supports by pressing down on the shelf before loading.

CAUTION
Never try to move a loaded shelf, remove everything from the shelf before moving. Use both hands when moving the shelf.
CARE AND CLEANING
FrontGrille
Be sure that nothing obstructs the required air flow openings in front of the cabinet. At least once or twice a year, brush or vacuum lint and dirt from the front grille area (see page 4).

CAUTION
SHOCK HAZARD: Disconnect electrical power from the appliance before cleaning with soap and water.
Cabinet
The painted cabinet can be washed with either a mild soap and water and thoroughly rinsed with clear water. NEVER use abrasive scouring cleaners.
Interior
Wash interior compartment with mild soap and water. Do NOT use an abrasive cleaner, solvent, polish cleaner or undiluted detergent.
Care of Appliance
- Avoid leaning on the door, you may bend the door hinges or tip the appliance.
- Exercise caution when sweeping, vacuuming or mopping near the front of the appliance. Damage to the grille can occur.
- Periodically clean the interior of the appliance as needed.
- Periodically check and/or clean the front grille as needed.
In the Event of a Power Failure
If a power failure occurs, try to correct it as soon as possible. Minimize the number of door openings while the power is off so as not to adversely affect the appliance's temperature.
Light Assembly Replacement
All models use LED lamps to illuminate the interior of the appliance. This component is very reliable, but should one fail, contact a qualified service technician for replacement of the LED.
Long Term Storage/Winterization
(LM24REFC refrigerator freezer):
- Time to Winterize, when the daily low ambient temperature is at or below 38^ (3.3^)

CAUTION
Operation of the unit at ambient temperatures below the recommended Winterization temperature will void your warranty.
- Turn unit off, (see page 11)
- Remove all contents.
- If necessary, move the unit so you can gain access to the rear of the product.
- Unplug the unit from the power outlet.
- It is also recommended that the power to the outlet be turned-off if the circuit is not required for other items during the Winter season.
- When cleaning unit pay particular attention to any cracks and crevices that may have accumulated dirt and debris.
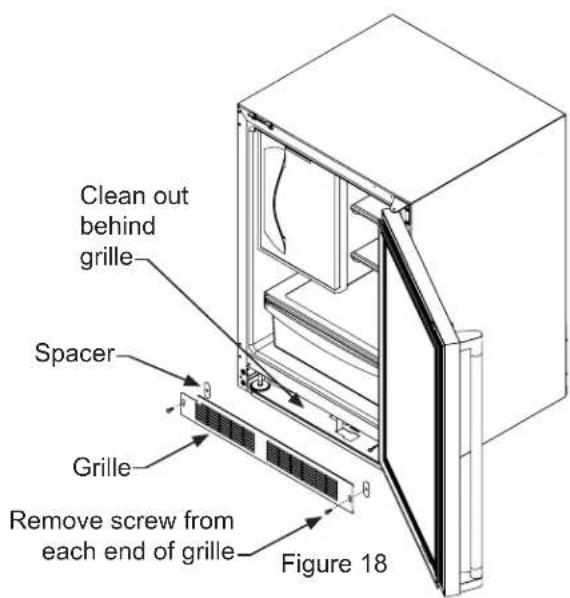
- Remove the front toe-grille, (see Figure 18), and use a brush and vacuum to clean dirt and debris from beneath the unit.
- Thoroughly clean the toe-grille and re-install on the unit. (See Figure 18).
-
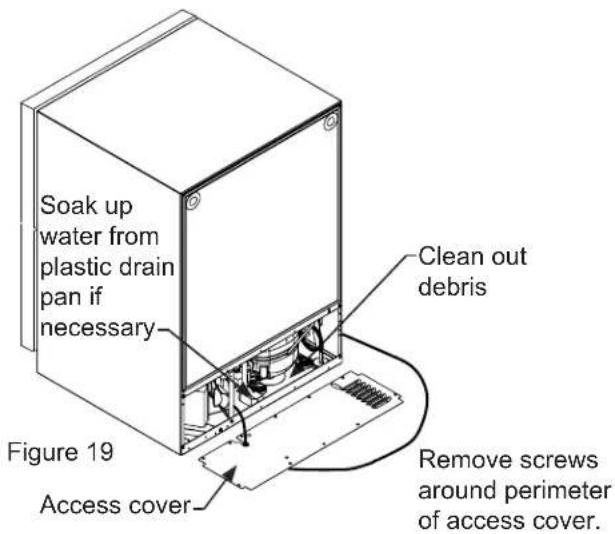
Remove the rear access cover, (see Figure 19), and use a brush and vacuum to clean dirt and debris from the machine compartment.
-
If the plastic defrost drain pan located under the compressor contains water, use a sponge to remove as much water as possible.
-
Thoroughly clean the rear access cover and re-install on the unit.
- Wipe down all interior surfaces with anti-bacterial cleaner to be followed with clean rinse water to remove any residual chemicals which could cause staining. Do not use any abrasive cleaners or scouring pads.
- Leave the door open and allow to completely dry out before closing the door.
- Thoroughly clean the door gasket with anti-bacterial cleaner to be followed with clean rinse water to remove any residual chemicals.
- Thoroughly clean the exterior with a cleaner approved for stainless steel. Do not use any abrasive cleaners or scouring pads. See "Stainless Steel Maintenance" on page 20.
- Any mounting hardware / fasteners that are showing signs of corrosion should be replaced.
CARE AND CLEANING
- Once the exterior has been thoroughly cleaned, you may want to apply a coating of car wax to help protect against spotting from moisture, dirt, and debris that may accumulate on the surfaces during the Winterization period.
- Do not place a cover on the unit, as this can trap condensation.
After completion of the above, you may choose to store the unit indoors, although this is not required.
Start-Up After Long-Term Storage
- If stored outside, it is recommended that the unit again be thoroughly inspected per the storage instructions above to address any dirt or debris from the weather and/or animals/insects.
- Connect the unit to electrical power.
- Turn unit on and confirm your desired control settings.
- Allow 24-hrs for the unit to stabilize before loading contents.
Long Term Storage/Winterization
(LM24REFC, with optional ice maker):
- Time to Winterize, when the daily low ambient temperature is at or below 38^ (3.3^)

CAUTION
Operation of the unit at ambient temperatures below the recommended Winterization temperature will void your warranty.
- Raise the bail arm of the ice maker ( see Figure 8 on page 7) to stop ice production.
- Turn the water supply to the unit off.
- If necessary, move the unit so you can gain access to the rear of the product.
- Disconnect the water supply line from the water fill valve located on the back of the unit, (see page 6).
- Be sure the exterior water supply line is drained or blown out to prevent freezing and cracking of the supply line.
- We recommend a cap be placed on the water supply line to prevent dirt and insects from plugging the line.
- Empty the ice bucket and replace the ice bucket in unit.
- Lower the ice maker bail arm to allow the unit to operate until ice is dispensed from ice maker to empty the ice maker mold.
- Raise the bail arm and remove the ice bucket and clean thoroughly with warm water and dish soap.
- Turn unit off to defrost ice storage compartment, see page 11).
- Unplug the unit from the power outlet.
- It is also recommended that the power to the outlet is turned-off if the circuit is not required for other items during the winter season.
- When cleaning the unit pay particular attention to any cracks and crevices that may have accumulated dirt and debris.
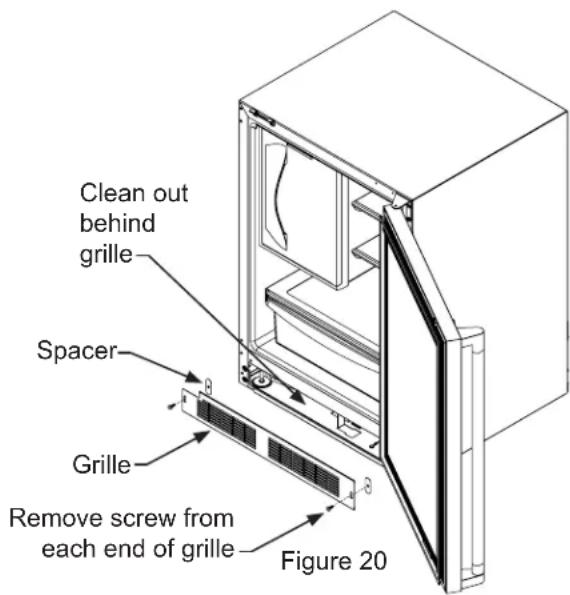
- Remove the front toe-grille, (see Figure 20), and use a brush and vacuum to clean dirt and debris from beneath the unit.
- Thoroughly clean the toe-grille and re-install on the unit. (See Figure 20).
-
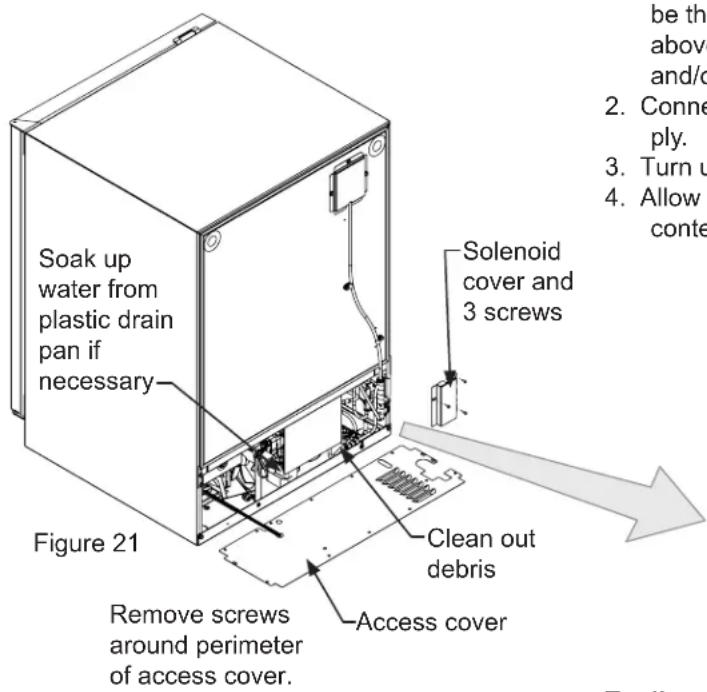
Remove the solenoid cover and 3 screws. (see Figure 21). Remove the rear access cover, (see Figure 21), and use a brush and vacuum to clean dirt and debris from the machine compartment.
-
If the plastic defrost drain pan located under the compressor contains water, use a sponge to remove as much water as possible.
-
Disconnect the plastic water line from the bottom of the solenoid valve (see Figure 21a) and drain. Reconnect the water line.
-
Thoroughly clean the rear access cover and re-install on the unit.
- Wipe down all interior surfaces with anti-bacterial cleaner to be followed with clean rinse water to remove any residual chemicals which could cause staining. Do not use any abrasive cleaners or scouring pads.
- Leave the door open and allow to completely dry out before closing the door.
- Thoroughly clean the door gasket with anti-bacterial cleaner to be followed with clean rinse water to remove any residual chemicals.
- Thoroughly clean the exterior with a cleaner approved for stainless steel. Do not use any abrasive cleaners or scouring pads. See "Stainless Steel Maintenance" on page 20.
- Any mounting hardware / fasteners that are showing signs of corrosion should be replaced.
- Once the exterior has been thoroughly cleaned, you may want to apply a coating of car wax to help protect against spotting from moisture, dirt, and debris that may accumulate on the surfaces during the Winterization period.

CAUTION
The water supply to the ice-maker must be turned on prior to turning the ice-maker on. Failure to do so will cause rapid dry cycling of the ice-maker mold heater resulting in temperature control issues in the freezer compartment.
Energy saving tips
The following suggestions will minimize the cost of operating your refrigeration appliance.
- Do not install your appliance next to a hot appliance (cooker, dishwasher, etc.), heating air duct, or other heat sources.
- Install product out of direct sunlight.
- Ensure the front grille vents at front of appliance beneath door are not obstructed and kept clean to allow ventilation for the refrigeration system to expel heat.
- Plug your appliance into a dedicated power circuit. (Not shared with other appliances).
- When initially loading your new product, or whenever large quantities of warm contents are placed within refrigerated storage compartment, minimize door openings for the next 12 hours to allow contents to pull down to compartment set temperature.
Start-Up After Long-Term Storage
- If stored outside, it is recommended that the unit again be thoroughly inspected per the storage instructions above to address any dirt or debris from the weather and/or animals/insects.
- Connect the unit to electrical power and the water supply.
- Turn unit on and confirm your desired control settings.
- Allow 24-hrs for the unit to stabilize before loading contents.

Figure 21a
Plastic outlet
water line
To disconnect the water outlet line: Push up on the white collar and pull the plastic water line from the bottom of the water valve.
To reconnect the water outlet line: Simply insert the plastic tubing into the white collar and push until it stops (about 12 , 12 mm, of water line will enter the valve).
- Maintaining a relatively full storage compartment will require less appliance run time than an empty compartment.
- Ensure door closing is not obstructed by contents stored in your appliance.
- Allow hot items to reach room temperature before placing in product.
- Minimize door openings and duration of door openings.
- Use the warmest temperature control set temperature that meets your personal preference and provides the proper storage for your stored contents.
- When on vacation or away from home for extended periods, set the appliance to warmest acceptable temperature for the stored contents.
- Set the control to the "off" position if cleaning the appliance requires the door to be open for an extended period of time.
STAINLESS STEEL MAINTENANCE OBTAINING SERVICE
Background
Stainless steel does not stain, corrode, or rust as easily as ordinary steel, but it is not stain or corrosion proof. Stainless steels can discolor or corrode if not maintained properly.
Stainless steels differ from ordinary carbon steels by the amount of chromium present. It is this chromium that provides an invisible protective film on the surface called chrome-oxide. This protective chrome-oxide film on the surface can be damaged or contaminated, which may result in discoloration, staining, or corrosion of the base metal.
Care & Cleaning
Routine cleaning of the stainless steel surfaces will serve to greatly extend the life of your product by removing contaminants. This is especially important in coastal areas which can expose the stainless to severe contaminants such as halide salts, (sodium chloride).
It is strongly recommended to periodically inspect and thoroughly clean crevices, weld points, under gaskets, rivets, bolt heads, and any locations where small amounts of liquid could collect, become stagnant, and concentrate contaminants. Additionally, any mounting hardware that is showing signs of corrosion should be replaced.
Frequency of cleaning will depend upon the installation location, environmental, and usage conditions.
Choosing a Cleaning Product
The choice of a proper cleaning product is ultimately that of the consumer, and there are many products from which to choose. Depending upon the type of cleaning and the degree of contamination, some products are better than others.
Typically the most effective and efficient means for routine cleaning of most stainless steel products is to give the surfaces a brisk rubbing with a soft cloth soaked in warm water and a gentle detergent, or mild mixture of ammonia. Rubbing should, to the extent possible, follow the polish lines of the steel, and always insure thorough rinsing after cleaning.
Although some products are called "stainless steel cleaners," some may contain abrasives which could scratch the surface, (compromising the protective chrome-oxide film), and some many contain chlorine bleach which will dull, tarnish or discolor the surface if not completely removed.
After the stainless surfaces have been thoroughly cleaned, a good quality car wax may be applied to help maintain the finish.
NOTE
Stainless steel products should never be installed, or stored in close proximity to chlorine chemicals.
Whichever cleaning product you chose, it should be used in strict accordance with the instructions of the cleaner manufacturer.
If Service is Required
- If the product is within the first year warranty period please contact your dealer or call Lynx Grills Customer Service at 888.289.5969 for directions on how to obtain warranty coverage in your area.
- If the product is outside the first year warranty period, Lynx Grills Customer Service can provide recommendations of service centers in your area.
- In all correspondence regarding service, be sure to give the service/model number, serial number, and proof of purchase.
- Try to have information or description of nature of the problem, how long the appliance has been running, the room temperature, and any additional information that may be helpful in quickly solving the problem.
- Table "A" is provided for recording pertinent information regarding your product for future reference.
Table A
| For Your Records | |
| Date of Purchase | |
| Dealer's name | |
| Dealer's Address | |
| Dealer's City | |
| Dealer's State | |
| Dealer's Zip Code | |
| Appliance Serial Number | |
| Appliance Service/Model Number | |
| Date Warranty Card Sent (Must be within 10 days of purchase). | |
Before You Call for Service
If the appliance appears to be malfunctioning, read through this manual first. If the problem persists, check the troubleshooting guide below. Locate the problem in the guide and refer to the cause and its remedy before calling for service. The problem may be something very simple that can be solved without a service call. However, it may be required to contact your dealer or a qualified service technician.

CAUTION
In the unlikely event you lose cooling in your unit, do not unplug the product from the electric supply, but do call a qualified service technician immediately. It is possible that the loss of cooling capacity is a result of excessive frost build-up on the evaporator cooling coil. In this case, removing power to the unit will result in the melting of this excessive quantity of ice, which could generate melt water that exceeds the capacity of the defrost drain system and could result in water damage to your home. The end-user will be ultimately responsible for any water damage caused by prematurely turning the unit off without appropriately managing the excess water run-off.
NOTE
Your product has an automatic defrost feature that utilizes an electric heater element. Periodically during defrost you may observe the following:
Water dripping and running sounds as a result of the frost melt.
- Sizzling and popping sounds from water dripping on the heater element.
- A faint reddish glow in the freezer compartment from the electric heater element.
These are all "normal" operating characteristics related to refrigeration product incorporating automatic defrost. They do not represent any product fault or safety issue.

WARNING
Electrocution Hazard
- Never attempt to repair or perform maintenance on the appliance until the main electrical power has been disconnected. Turning the appliance control "OFF" does not remove electrical power from the unit's wiring.
- Replace all parts and panels before operating.
| Problem Possible Cause Remedy | ||
| Appliance not cold enough (See "Adjusting the temperature" on page 11) | • Control set too warm • Content temperature not stabilized. | • Adjust temperature colder. Allow 24 hours for temperature to stabilize. |
| • Excessive usage or prolonged door openings. | • Allow temperature to stabilize for at least 24 hours. | |
| • Airflow to front grille blocked. | • Airflow must not be obstructed to front grille. See "clearances" on page 4. | |
| • Door gasket not sealing properly. | • Replace door gasket. | |
| Appliance too cold (See "Adjusting the Temperature" on page 11) | • Control set too cold | • Adjust temperature warmer. Allow 24 hours for temperature to stabilize. |
| • Door gasket not sealing properly. | • Replace door gasket. | |
| No interior light. | • Failed LED light assembly or light switch. | • Contact a qualified service technician. |
| Light will not go out when door is closed • Door not activating light switch. | • Appliance not level, level appliance, (See page 4, "leveling legs") | |
| • Failed light switch | • Contact a qualified service technician. | |
| Noise or Vibration • Appliance not level | • Level appliance, see "Leveling Legs" on page 4. | |
| • Fan hitting tube obstruction. | • Contact a qualified service technician. | |
| Appliance will not run. • Appliance turned off | • Turn appliance on. See "Starting your appliance" on page 10. | |
| • Power cord not plugged in. | • Plug in power cord. | |
| • No power at outlet. | • Check house circuit. | |
TROUBLESHOOTING OPTIONAL ICE-MAKER
| Problem Possible Cause | e Remedy | |
| Unit operates but produces little or no ice. | ·The unit has just been started and it has been less than 24 hours. | ·Typical ice production is 6 to 7 pounds per day. Allow for the freezer section to reach temperature and the ice-maker to cycle and accumulate ice. |
| ·Water supply is not turned on. | ·Turn on water supply to the unit. | |
| ·Inadequate water pressure to unit. | ·Water pressure to the unit must be at a minimum of 20 psi. | |
| ·The ice-maker shut off arm is in the uppermost / off position. | ·When the ice-maker shut off arm is in the uppermost position, the ice-maker is off. Flip the shut off arm down to turn on the ice maker. | |
| ·Freezer section has not reached temperature. | ·Allow the freezer section to reach temperature. | |
| ·Thermostat control set too warm. | ·Turn the temperature control to a higher number to allow the unit to run colder. Allow 24 hours before readjusting the temperature control. | |
| ·Condenser fan air flow is restricted. | ·Make certain the grille in front of the unit is free and open for air circulation. Clean grille as required. | |
| ·Room and/or water temperature is too warm. | ·Move the unit to an area where ambient temperature is below 115°F. The unit should not be placed next to a heat source such as an oven. Check for cold water connection. | |
| ·The water pressure is to low. | ·The water supply line is kinked. Sediment build-up in supply line. | |
| Small ice cubes · Water input may require adjustment. | ·Due to differing water pressures, the ice-maker water input may require adjustment. Contact a qualified service technician. | |
| Ice cubes are sticking together. · Ice consumption is low. | ·Ice will stick together if stored for long periods of time. | |
| ·Hollow ice cubes with liquid centers that break when dispensed into the bucket. | ·Ice-maker malfunction, call for service. | |
THE LYNX STORY
Lynx began with a vision.
A small group of manufacturing engineers with over a century of collective experience had a dream. They dared to take their extensive commercial manufacturing know-how and create a line of outdoor cooking products that offer commercial elegance and performance to the consumer market.
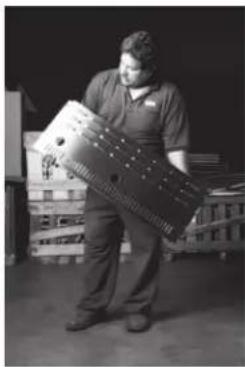
Lynx has taken the quality, workmanship, service and innovation of the commercial market and incorporated it into the Lynx Professional Grills line of consumer and commercial products. The combination of creative design, superior materials and exceptional craftsmanship elevates Lynx products to a class of their own.
Lynx original commercial products are used every day in restaurants, hotels and theme parks across the USA:
Lynx Satisfied Customers
TGI Fridays
Applebee's
- Houston's
Red Lobster
Hard Rock Café
Wolfgang Puck's
- Cheesecake Factory
Red Robin
Planet Hollywood
Hilton
Hyatt
Four Seasons Marriott Le Meridian
- Sheraton
- Conrad International
Bellagio
New York New York
MGM Grand - Treasure Island
Mirage
Paris - Venetian
- Excalibur
Mandalay Bay
Riviera
Desert Inn
Hard Rock Hotel - Disney World

The best outdoor kitchen products come from: Lynx Grills, Inc. 7300 Flores Street Downey, CA 90242
Service: (888)-289-5969 Fax: (562) 299-6789
www.lynxgrills.com
PROFITEZ AU MAXIMUM DE VOTRE
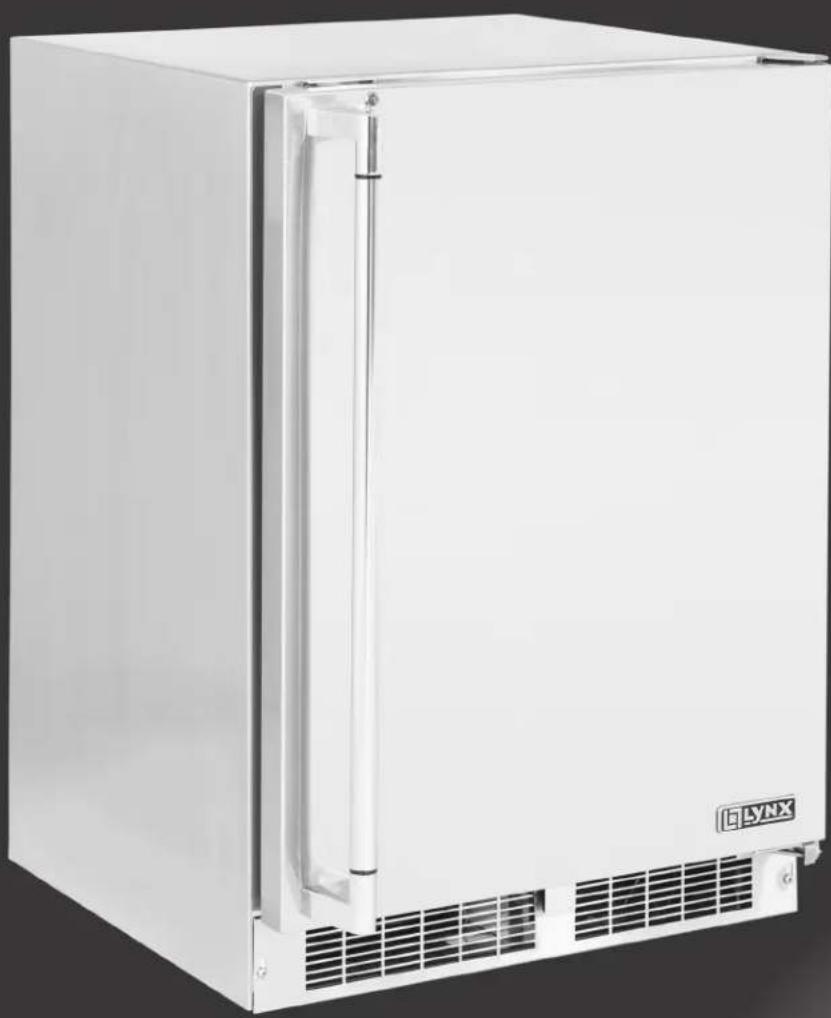
LM24REFC
DIMENSIONS DU PRODUIT
| DIMENSIONS D'OUVERTURE BRUTE DIM | ENSIENCES D'ARMOIRE | ||||||||
| MODELE «A» | «B» «C» «D» | «E» «F» «G» «H» «J» | |||||||
| LM24REFC | 24po (61 cm) | **34 po à 35 po (86,4 à 88,9 cm) | * | 23½ po (60,7 cm) | 33¼ po à 34¾ po (85,7 à 88,3 cm) | 23½/32po (60,2 cm) | 26¾ po (67,9 cm) | 46½/32po (117,9 cm) | 26¾ po (67,9 cm) |
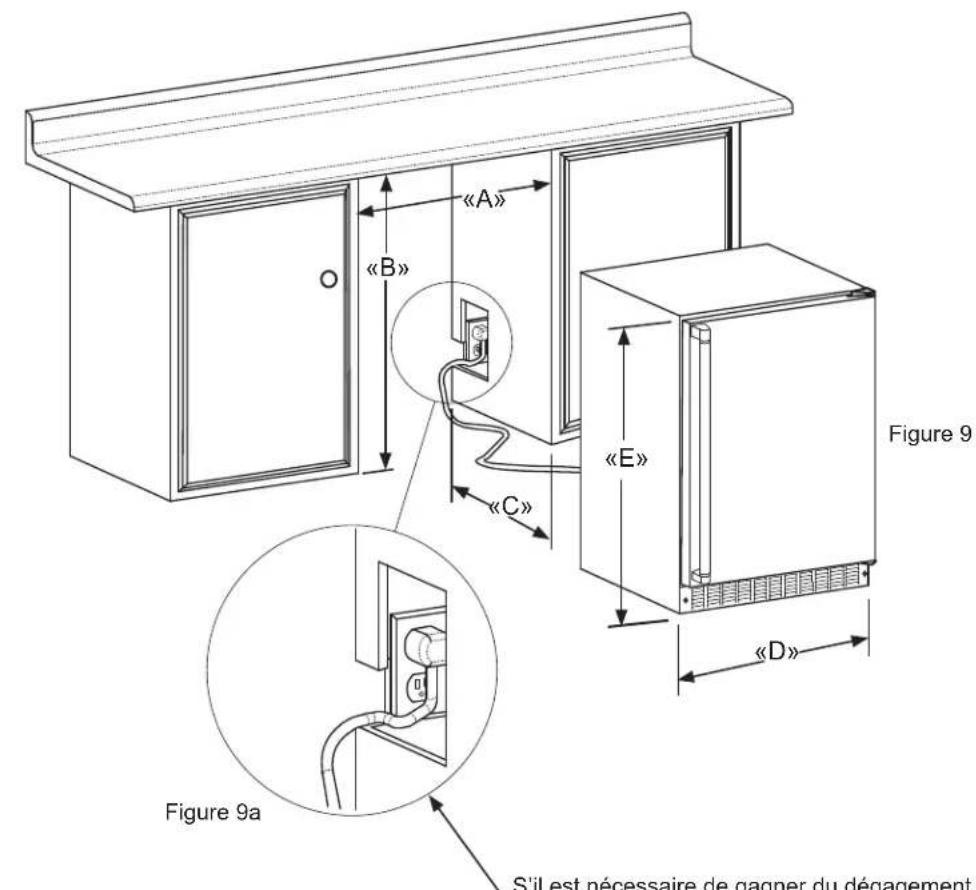
DIMENSIONS DU PRODUIT
| DONNÉES DE PRODUIT | ||
| MODELE | BESOINS ÉLECTRIQUES # | POIDS DU PRODUIT |
| LM24REFC 115V | /60Hz/15A | 140 lb (63,6 kg) |
Compartment
congélateur
seLECTIONné
TGI Fridays
Applebee's
- Houston's
Red Lobster
Hard Rock Café
Wolfgang Puck's
- Cheesecake Factory
Red Robin
Planet Hollywood
Hilton
Hyatt
Four Seasons Marriott Le Meridian
- Sheraton
Conrad International
Bellagio
New York New York
MGM Grand
- Treasure Island
- Mirage
Paris
- Venetian
- Excalibur
Mandalay Bay
Riviera
Desert Inn
Hard Rock Hotel
- Disney World
LesILA
Lynx Grills, Inc. 7300 Flores Street Downey, CA 90242
Service: (888)-289-5969 Fax: (562) 299-6789
www.lynxgrills.com
APROVECHE AL MAXIMO DE SU
LM24REFC
REFRIGERADOS / CONGELADORS EXTERIOR
MANTENIMIENTO Y OPERATION / INSTALLACION
INDICE
Indices
Indices:
DIMENSIONES DEL PRODUCTO
| MODELO | DIMENSIONES DE LA ABERTURA DE INSTALLACION pulgadas (cm) DIMEN$IONES DEL GABINETE pulgadas (cm) | ||||||||
| "A" | "B" | "C" | "D" | "E" | "F" | "G" | "H" | "J" | |
| LM24REFC | 24"(61 cm) | **34" a 35"(86,4 a 88,9 cm) | * | 23¾"(60,7 cm) | 33¾" a 34¾"(85,7 a 88,3 cm) | 23½"(60,2 cm) | 26¾"(67.9 cm) | 46½¾"(117,9 cm) | 26¼"(67.9 cm) |
DIMENSIONES DEL PRODUCTO
| MODELO | DATOS DEL PRODUCTO | |
| REQUISITOS ELECTRICOS # | PESO DEL PRODUCTO | |
| LM24REFC 115V/60Hz/15A | 140 lbs (63,6 kg) | |
If Service is Required
TGI Fridays
Applebee's
- Houston's
Red Lobster
Hard Rock Café
Wolfgang Puck's
- Cheesecake Factory
Red Robin
Planet Hollywood
Hilton
Hyatt
Four Seasons Marriott Le Meridian
- Sheraton
- Conrad International
Bellagio
New York New York
MGM Grand - Treasure Island
- Mirage
Paris - Venetian
- Excalibur
Mandalay Bay
Riviera
Desert Inn
Hard Rock Hotel - Disney World
Los最好的 productos de casa exteriores provienen de: Lynx Grills, Inc. 7300 Flores Street Downey, CA 90242
Servicio: (888)-289-5969 Fax: (562) 299-6789
www.lynxgrills.com

- Important Safety Instructions
- UNPACKING YOUR APPLIANCE
- WARNING
- EXCESSIVE WEIGHT HAZARD
- Remove Interior Packaging
- Important
- Note to Customer
- NOTE
- CAUTION
- Warranty Registration
- WARNING - Help Prevent Tragedies
- INSTALLING YOUR APPLIANCE
- Select Location
- Cabinet Clearance
- Leveling Legs
- FrontGrille
- Electrical Shock Hazard
- Electrical Connection
- INSTALLING THE WATER SUPPLY MODEL LM24RFEFC WITH OPTIONAL ICE-MAKER KIT
- Water Supply
- OPTIONAL ICE-MAKER OPERATION
- Ice-maker operation
- PRODUCT DIMENSIONS
- STARTING YOUR APPLIANCE
- Using your electronic control
- Sleep mode
- Turning your appliance ON and OFF
- Adjusting the temperature
- Temperature mode
- Control lock
- Alarms
- Temperature Sensor Error Codes
- Vacation mode
- SHELVING CONFIGURATIONS
- Refrigerator / Freezer
- 24" (61 cm) wide see Figure 13:
- Refrigerator:
- Freezer:
- To remove the crispers :
- SHELF REMOVAL
- To Add or Remove a Shelf
- CARE AND CLEANING
- Cabinet
- Interior
- Care of Appliance
- In the Event of a Power Failure
- Light Assembly Replacement
- Long Term Storage/Winterization
- (LM24REFC refrigerator freezer):
- Start-Up After Long-Term Storage
- (LM24REFC, with optional ice maker):
- Energy saving tips
- The following suggestions will minimize the cost of operating your refrigeration appliance.
- STAINLESS STEEL MAINTENANCE OBTAINING SERVICE
- Background
- Care & Cleaning
- Choosing a Cleaning Product
- If Service is Required
- Before You Call for Service
- Electrocution Hazard
- TROUBLESHOOTING OPTIONAL ICE-MAKER
- THE LYNX STORY
- Lynx Satisfied Customers
- PROFITEZ AU MAXIMUM DE VOTRE
- DIMENSIONS DU PRODUIT
- APROVECHE AL MAXIMO DE SU
- INDICE
- Indices
- Indices:
- DIMENSIONES DEL PRODUCTO
Brand : LYNX
Model : LM24REFCL
Category : Refrigerator