
IFP2410 - Monitor VIEWSONIC - Free user manual and instructions
Find the device manual for free IFP2410 VIEWSONIC in PDF.

| Product Type | Interactive touch display (smart display) |
| Brand | ViewSonic |
| Model | IFP2410 |
| Screen Size | 23.8 inches (approx. 60 cm) |
| Resolution | 1920 x 1080 pixels (Full HD) |
| Display Technology | TFT LCD with touch screen |
| Built-in Webcam | 5.0 megapixels |
| Built-in Microphone | Yes |
| Connectivity | HDMI (in/out), RJ45 (Ethernet), USB Type-A x4, USB Type-B, MiniUSB OTG, headphone jack, mic input, SD slot |
| Wireless Network | Built-in Wi-Fi |
| Operating System | Android |
| Power Supply | AC adapter 110-127V or 220-240V, 50/60 Hz |
| Power Consumption | Standby mode: < 0.5 W (estimated) |
| Operating Temperature | 0°C to 35°C |
| Main Functions | Touch screen, myViewBoard (annotation), vCastReceiver (wireless presentation), Zoom, Chromium browser |
| Maintenance and Cleaning | Unplug before cleaning; use a soft, dry cloth; avoid solvents |
| Safety | Use only the provided adapter; do not expose to moisture; leave at least 15 cm ventilation space |
| Weight | Approx. 8 kg (estimated) |
| Dimensions (with stand) | Approx. 58 x 40 x 20 cm (estimated) |
| Package Contents | Main unit, AC adapter, power cord, quick start guide |
| Repairability | Contact ViewSonic customer service; no spare parts specified in the manual |
Frequently Asked Questions - IFP2410 VIEWSONIC
User questions about IFP2410 VIEWSONIC
0 question about this device. Answer the ones you know or ask your own.
Ask a new question about this device
Download the instructions for your Monitor in PDF format for free! Find your manual IFP2410 - VIEWSONIC and take your electronic device back in hand. On this page are published all the documents necessary for the use of your device. IFP2410 by VIEWSONIC.
USER MANUAL IFP2410 VIEWSONIC
Please read before proceeding
- Use only the batteries and power adapter provided by the manufacturer. The use of unauthorized accessories may void your warranty.
- Do not store your device in temperatures higher than 50^ (122°F).
• The operating temperature for this device is from 0°C (32°F) to 35°C (95°F).
Connect the power cord from the unit to a grounded AC outlet. Ensure that the power source is within the operating voltage of the display. The operating voltage can be found on the device label. The device uses either 110 to 127 volts alternating voltage or 220 to 240 volts alternating voltage and 50/60 Hz.
CAUTION: To avoid damage to the unit, be sure to use only the power cord that came with the unit.
CE Conformity for European Countries

The device complies with the relevant section of the Low Voltage Directive 2014/35/EC, Eco-Design Directive 2009/125/EC, RoHS Directive 2011/65/EU, WEEE Directive 2012/19/EU, and Radio Equipment Directive 2014/53/EU
European Union Regulatory Conformance
The equipment complies with the RF Exposure Requirement 2014/53/EU, Council Recommendation of 12 June 2014 on the limitation of exposure of the general public to electromagnetic fields (0-300 GHz). This equipment meets the following conformance standards: EN301489-1, EN301489-17, EN55022/24, EN60950-1, EN300328.
Declaration of RoHS2 Compliance
This product has been designed and manufactured in compliance with Directive 2011/65/EU of the European Parliament and the Council on restriction of the use of certain hazardous substances in electrical and electronic equipment (RoHS2 Directive) and is deemed to comply with the maximum concentration values issued by the European Technical Adaptation Committee (TAC) as shown below:
| Substance Proposed Maximum Concentration | Actual Concentration | |
| Lead (Pb) 0.1% < 0.1% | ||
| Mercury (Hg) 0.1% < 0.1% | ||
| Cadmium (Cd) 0.01% < 0.01% | ||
| Hexavalent Chromium ( Cr^6+ ) 0.1% < 0.1% | ||
| Polybrominated biphenyls (PBB) 0.1% < 0.1% | ||
| Polybrominated diphenyl ethers (PBDE) 0.1% | < 0.1% | |
| Bis(2-ethylhexyl) phthalate (DEHP) 0.1% < 0.1% | ||
| Butyl benzyl phthalate (BBP) 0.1% < 0.1% | ||
| Dibutyl phthalate (DBP) 0.1% < 0.1% | ||
| Diisobutyl phthalate (DIBP) 0.1% < 0.1% |
Certain components of products as stated above are exempted under the Annex III of the RoHS2 Directives as noted below: Examples of exempted components are:
- Lead in glass of fluorescent tubes not exceeding 0.2% by weight.
- Lead as an alloying element in aluminium containing up to 0.4% lead by weight.
- Copper alloy containing up to 4% lead by weight.
- Lead in high melting temperature type solders (i.e. lead-based alloys containing 85% by weight or more lead).
- Electrical and electronic components containing lead in a glass or ceramic other than dielectric ceramic in capacitors, e.g. piezoelectronic devices, or in a glass or ceramic matrix compound.
Product disposal at end of product life
ViewSonic respects the environment and is committed to working and living green. Thank you for being part of Smarter, Greener Computing. Please visit ViewSonic website to learn more.
USA & Canada: http://www.viewsonic.com/company/green/recycle-program/
Europe: http://www.viewsoniceurope.com/eu/support/call-desk/
Taiwan: http://recycle.epa.gov.tw/
Copyright Information
Android, Google, Google Play, the Google Play logo and other marks are trademarks of Google Inc.
Caution
IC Caution:
This device complies with Industry Canada licence-exempt RSS standard(s).
Operation is subject to the following two conditions:
(1) This device may not cause interference, and
(2) This device must accept any interference,
including interference that may cause undesired operation of the device.
CAN ICES-3 (B)/NMB-3(B)
FCC Caution:
This device complies with part 15 of the FCC Rules. Operation is subject to the condition that this device does not cause harmful interference (1) this device may not cause harmful interference, and (2) this device must accept any interference received, including interference that may cause undesired operation.
Any changes or modifications not expressly approved by the party responsible for compliance could void the user's right to operate the equipment.
NOTE: This equipment has been tested and found to comply with the limits for a Class B digital device, pursuant to Part 15 of the FCC Rules. These limits are designed to provide reasonable protection against harmful interference in a residential installation. This equipment generates, uses and can radiate radio frequency energy and, if not installed and used in accordance with the instructions, may cause harmful interference to radio communications. However, there is no guarantee that interference will not occur in a particular installation.
If this equipment does cause harmful interference to radio or television reception, which can be determined by turning the equipment off and on, the user is encouraged to try to correct the interference by one or more of the following measures:
- Reorient or relocate the receiving antenna.
- Increase the separation between the equipment and receiver.
- Connect the equipment into an outlet on a circuit different from that to which the receiver is connected.
- Consult the dealer or an experienced radio/TV technician for help.
The device has been evaluated to meet general RF exposure requirement. The device can be used in portable exposure condition without restriction.
FCC ID: GSS-VS16340
Europe: http://www.viewsoniceurope.com/eu/support/call-desk/
Taiwan: http://recycle.epa.gov.tw/
Informations de copyright
Thank you for purchasing this IFP2410. This Start-up Guide describes how to operate and use this product safely. Before operating, please read this guide carefully for important safety information. Please also keep this guide handy as a quick reference should you encounter any difficulties when using this product.
You can find the full user guide on the home screen of your device once powered on.
A. Getting Started
■ Before using this product, please ensure that the following items are included:
Main unit x 1 AC Adapter x 1
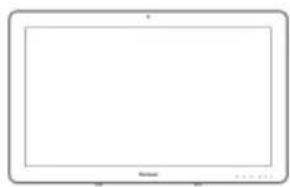
natural_image
Blank tablet screen with no visible text, numbers, or symbols on the screen area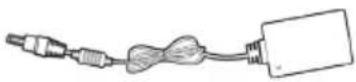
Power cable
* Plug types by country

Quick Start Guide x 1
Items supplied with this product
■ Please ensure that the serial number on this product is identical to that on the product warranty.
■ If any parts are missing or broken, please contact your store of purchase.

To use this product safely
Even though this product is designed with safety in mind, improper use of this product may cause fire or electric shock that can lead to injuries or death. To prevent such accidents, please comply with the following recommendations:
■ Observe safety precautions
Please read and follow all safety precautions as indicated.
■ Stop using the product if it malfunctions
In the event of a malfunction, please contact ViewSonic Customer Care for support.
■ If the following events occur, then follow the recommendations
- Smoke is detected
- Strange sound or odor is observed
• If water gets inside this product
• This product is dropped or damaged

- Turn off the power
- Unplug the AC adapter cable and USB cable
- Please contact ViewSonic Customer Care for service support.
Safety warning indications
Attention Sign Prohibition Signs Instruction Signs

Attention


Prohibited Disassembly is prohibited


Keep dry Handle with dry hands

Disconnect the plug
B. Product Overview
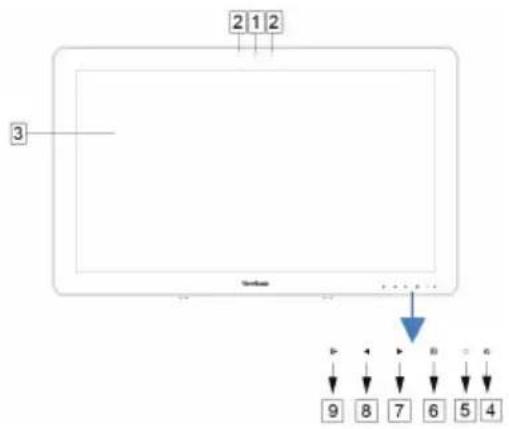
Basic Operations and Front View
① Built-in Webcam (5.0MP)
② Built-in Microphone
③ Display with touch panel function
About LCD display:
This product uses a TFT LCD display. Note that some pixels may always appear off (black) while some are always on (orange, green, or blue). Depending on the viewing angle, uneven color or uneven brightness may be observed. Please note that these are natural characteristics of TFT LCD and should not be regarded as defects.
flowchart
graph TD
    A["2"] --> B["1"]
    B --> C["2"]
    D["3"] --> E["End"]
    F["9"] --> G["8"]
    H["7"] --> I["6"]
    J["5"] --> K["4"]
④ Power button
⑤ LED indicator
⑥ OSD Menu / Exit
⑦ Arrow Button (Up/Right)
⑧ Arrow Button (Down/Left)
⑨ Input Signal Switch / OSD Menu Select
Back View
LEFT SIDE
① LAN port (RJ-45)
② HDMI-OUT jack
③ HDMI-IN jack
④ Headset jack
⑤ Microphone IN
⑥ SD Card Slot
⑦ MiniUSB port (OTG)
⑧ DC-in jack
RIGHT SIDE
① USB Type-A x 4
② USB Type-B

Please do not use AC adapters other than the one supplied in this product package to prevent fire and electric shock.
Please do not place objects on the AC adapter, or cover it with anything. Overheating of the AC adapter may lead to a fire.
C. Installation precautions
Installation Environment Health precautions

Viewing computer monitor displays for extended periods of time may result in tiredness, numbness in the hands and feet, blurry vision, etc. Please see the picture below as a guide for extended use conditions.
Safety precautions
• Install this product in a well-ventilated location to eliminate exposure to high humidity conditions that may lead to condensation on or in the product.
- For proper heat dissipation, allow a gap of at least 6" (15cm) between this product and the wall during installation.

Regarding lightning hazards
Where lightning strikes are expected, it is advised to turn off the computer, and unplug any cable or cord connected to this product
Ideal installation and proper posture

D. Installation and Connection
1) Open the stand in the direction of the arrow.
Place face down on a clean, flat surface and avoid any objects that could damage the display.
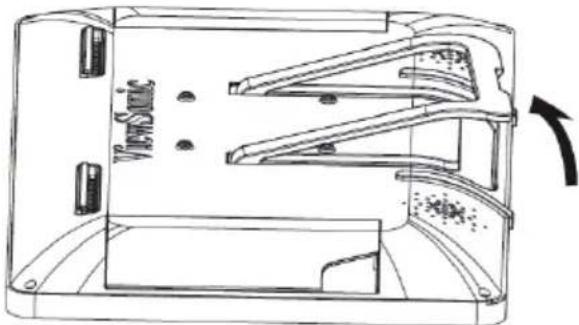
natural_image
Technical line drawing of a device casing with internal components and a directional arrow indicating rotation (no text or symbols)2) Connect the power
① Connect one end of the supplied AC adapter to the DC-in jack at the back of the unit.
② Connect the power cord to the other end of the AC adapter.
③ Connect the power plug to the outlet.

3) Place the unit upright on a stable, flat surface.
E. Start-up and initial setting
Turn on the Power


1) Make sure the power cable and AC adapter are connected.
2) Press and hold the power switch until the status LED turns blue.
Shut Down

Power off

Reboot
1) Press and hold the power button until you see "Power off" appears on the screen.
2) When the screen appears as shown on the left, tap "OK" to shut down the power.

If the power button is pressed quickly, the screen shuts off and goes into power saving mode. When the power button is held down about 8 seconds, the product is forced to shut down.
F. Power saving mode and Returning to operation
Entering Power Saving Mode
While product is in operation, briefly press the power button to put the unit into power saving mode.
Returning from Power Saving Mode
While the power LED is orange, briefly press the power button to return from power saving mode
G. Basic Operation
Home Screen
After powering on the IFP2410, the main display window is shown below.
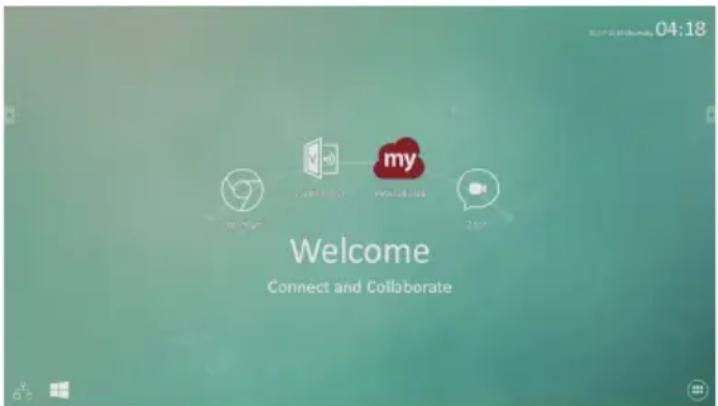
The launcher page contains a main page with default apps which include the most commonly use apps.
myViewBoard: Annotation app
vCastReceiver: Wireless presentation and collaboration app
Zoom: Cloud platform for video and audio conferencing
Chromium: Browser to access the Internet
H. Network Setting
Connecting to Wireless LAN
1) Tap "All applications" – "Settings".
2) Turn "Wi-Fi" to ON by dragging "OFF" to the right.

3) When Wi-Fi is turned on, a list of all available wireless LAN access points will be shown on the right side of the screen. Tap the desired Wireless LAN access point for the connection.
4) If a password is required, enter it and tap "Connect" to connect to the wireless LAN.
Connecting with RJ45
Simply plug in your Ethernet cable to the RJ45 port to connect to a LAN. No set-up or configuration is required.
I. Restore to Factory
Resetting Your Smart Display

Restore to factory will delete all of your data created and installed apps after purchase (including system and application settings, downloaded applications, etc.)
1) Tap "All applications" – "Settings".
2) Tap "Back up & reset".
3) Tap "Factory data reset".
4) Confirm all onscreen instructions and tap "reset".
5) Again, confirm all onscreen instructions and tap "Delete All". Restoring will begin shortly.
※ System will reboot several times during restore.
J. Use as HDMI Display
Depending on the mode selected, this product may be used as an HDMI display.
Android Mode Can be used as an Android device.
HDMI Mode Connect to HDMI source to use as a Monitor device.
Switching to HDMI Mode
1) Connect this display and an HDMI source with the HDMI cable. Optional accessory may not be included with this product package in some regions.
2) Tap the SELECT icon [→] to switch to HDMI mode.
Switching to Android Mode
1) Tap the SELECT icon to switch to Android mode.
K. Troubleshooting and Q&A
Q. Power does not turn on.
A. ● Check if the AC adapter and power cord are properly connected.
- Reconnect the AC adapter and power cord, and turn the power on.
- Press and hold the power button for 8 seconds, and turn the power on again.
Q. I would like to receive support from application markets like Aptoide store for my downloaded applications.
A. We do not provide any support. Please contact the developers of your downloaded applications for assistance.
Q. "Compatible Zoom" is shown when an application is started.
A. "Compatible Zoom" is a feature that can enlarge the size of a fixed size application.
Use Compatible Zoom to view your applications in enlarged sizes.
Q. The device is frozen.
A. "Power Off" - Press and hold the power button 6\~8 seconds to force Power Off in the event of a look-up caused by software error that prevents normal power off or restart.
Introduction
natural_image
Blank tablet screen with blank screen area (no text or symbols)natural_image
Technical line drawing of a mechanical device casing with internal components and a rotation arrow (no text or symbols)natural_image
Blank whiteboard with faint border and 'No text or symbols' labels (no readable document content)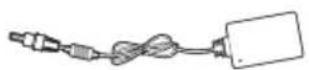
natural_image
Technical line drawing of a device casing with internal components and a rotation arrow (no text or symbols)Open Source Licenses Notice
The firmware/software included in this product contains some copyrighted software that is licensed under the GPL v2. A copy of that license is included in the product by going to Settings > About Tablet > Legal Information > Open Source Licenses. You may obtain the complete Corresponding Source code from us for a period of three years after our last shipment of this product, which will be no earlier than 2016-09-30, by sending a money order or check for \$5 to the following addresses and an additional shipping charge which may vary from different areas shall be paid upon your receipt:
North America:
GPL Compliance Division
14035 Pipeline Ave. Chino, CA 91710, USA
Europe:
ViewSonic Europe Limited
Level 10, Tower 42, 25 Old Broad Street, London, EC2N 1HQ, UK
Rest countries:
Sequel Technology Inc.
ViewSonic_Parts Logistic Center Dept.
3F, No 38, Lane 148, Li-De St., Jhonghe Dist., New Taipei City 235, Taiwan. R.O.C.
Please write "source for IFP2410" in the memo line of your payment.
You may also find a copy of the source at
http://www.viewsonic.com/support/downloads/drivers/IFP2410_Source_Code.zip
This offer is valid to anyone in receipt of this information.

中国
http://www.viewsonic.com.cn
电话:4008 988 188
香港
http://www.hk.viewsonic.com
電話:(852)-3102-2900
澳門
http://www.hk.viewsonic.com
電話:(853)-2833-8407
台灣
http://www.viewsonic.com.tw
電話:0800 899 880
한국
http://ap.viewsonic.com/kr/
Phone: 080 333 2131
Singapore/Malaysia/Thailand
http://www.viewsonic.com.sg
Phone: 65 6461 6044
India
http://www.in.viewsonic.com
Phone: 1800 266 0101
Europe
www.viewsoniceurope.com
Australia/New Zealand
http://www.viewsonic.com.au
Phone: 1800 880 818 (AUS)
0800 008 822 (NZ)
United States
Phone: 1-800-688-6688
customerservice@viewsonic.com
Canada
Phone: 1-866-463-4775
customerservice@viewsonic.com
South Africa
http://ap.viewsonic.com/za/
Puerto Rico & Virgin Islands
http://www.viewsonic.com/la/
natural_image
Three birds perched on a branch, wearing black-and-white striped caps (no text or symbols visible)ViewSonic®
- Please read before proceeding
- CE Conformity for European Countries
- European Union Regulatory Conformance
- Declaration of RoHS2 Compliance
- Product disposal at end of product life
- Copyright Information
- Caution
- IC Caution:
- FCC Caution:
- Informations de copyright
- Getting Started
- Items supplied with this product
- To use this product safely
- Safety warning indications
- Product Overview
- Basic Operations and Front View
- Back View
- LEFT SIDE
- RIGHT SIDE
- Installation precautions
- Installation Environment Health precautions
- Safety precautions
- Regarding lightning hazards
- Ideal installation and proper posture
- Installation and Connection
- 1) Open the stand in the direction of the arrow.
- 2) Connect the power
- Start-up and initial setting
- Turn on the Power
- Shut Down
- Power saving mode and Returning to operation
- Entering Power Saving Mode
- Returning from Power Saving Mode
- Basic Operation
- Home Screen
- Network Setting
- Connecting to Wireless LAN
- Connecting with RJ45
- Restore to Factory
- Resetting Your Smart Display
- Use as HDMI Display
- Switching to HDMI Mode
- Switching to Android Mode
- Troubleshooting and Q&A
- Power does not turn on.
- I would like to receive support from application markets like Aptoide store for my downloaded applications.
- "Compatible Zoom" is shown when an application is started.
- The device is frozen.
- Introduction
- Open Source Licenses Notice
- North America:
- Europe:
- Rest countries:
Brand : VIEWSONIC
Model : IFP2410
Category : Monitor