CTVNE230A - Wine cellar LA SOMMELIERE - Free user manual and instructions
Find the device manual for free CTVNE230A LA SOMMELIERE in PDF.
Download the instructions for your Wine cellar in PDF format for free! Find your manual CTVNE230A - LA SOMMELIERE and take your electronic device back in hand. On this page are published all the documents necessary for the use of your device. CTVNE230A by LA SOMMELIERE.
USER MANUAL CTVNE230A LA SOMMELIERE
www.lasommeliere.com26 For your own safety and for the proper utilisation of the appliance, read this manual carefully, including the warnings and recommendations, before installing the appliance and using it for the first time. In order to avoid damage to the appliance and/or personal injury, persons using the appliance should be fully familiar with its operation and safety functions. Keep these recommendations close to the appliance, for future reference, and ensure that the document is transferred with the appliance, if it is sold or in the case of moving. This will ensure optimum operation of the appliance. To avoid any risk of injury, keep this manual. The manufacturer declines any liability whatsoever in the case of operating/handling errors concerning the appliance. Safety of children and other vulnerable persons
- This appliance may be used by children aged 8 years and above, and by persons who are physically, sensorially or mentally handicapped, or who have not learned to use the appliance, providing they are supervised by a person familiar with the appliance and who is aware of the risks involved. Children should not be allowed to play with the appliance. User cleaning and servicing operations should not be carried out by children, unless they are more than 8 years old and are supervised.
- Keep all packaging out of the reach of children, as there is a risk of suffocation.
- If you decide to scrap the appliance, disconnect it from the wall socket, cut the connection cable (as close to the appliance as possible) and remove the door, in order to prevent children playing with it, with the resulting risk of electric shock or being trapped inside.
- If an appliance with a magnetic door seal is being replaced by another appliance with a latch on the door or on the seal, ensure that the latch is disabled before selling or scrapping the old appliance. This will prevent the appliance from being transformed into a trap for children.
- Keep the appliance and its power cable out of reach of children less than 8 years old.27 General safety CAUTION — This appliance is designed for home use. CAUTION — Never store inflammable substances, such as aerosols, inside the appliance, as they could leak or release fluids. CAUTION — A damaged power cable should be immediately replaced by the manufacturer or by a qualified retailer, in order to avoid any risk of electric shock. CAUTION — Do not damage the refrigerating circuit. CAUTION — Do not use electrical appliances inside the compartment, unless they are tolerated by the manufacturer. CAUTION — The refrigerating and insulating systems contain inflammable gases. When the appliance is scrapped, it should be deposited at an accredited collection centre. Do not expose the appliance to fire. Refrigerating fluid The refrigerating circuit in the appliance uses refrigerating isobutane (R600a), which is a highly inflammable natural gas and is therefore dangerous for the environment. When transporting or installing the appliance, ensure that no element of the refrigerating circuit is damaged. The refrigerating fluid (R600a) is inflammable. Caution: Fire risk If the refrigerating circuit is damaged: - Avoid open flames or any source of combustion. - Ensure that the room in which the appliance is installed is well ventilated. It is dangerous to change the specification of the appliance in any way whatsoever. Damage to the power cable may cause a short circuit and/or electric shock.28 Electrical safety
- We decline any liability in respect of incidents caused by poor electrical installation.
- Do not extend the power cable. Do not use an extension cable, or adapter, or multi-way socket.
- Check that the wall socket is not damaged. A wall socket in poor condition may cause the appliance to overheat and explode.
- Check that the wall socket used for the appliance is properly accessible.
- Never pull on the main power cable.
- Ensure that the appliance is always electrically earthed.
- If the wall socket is loose, do not connect the cable, as there is a risk of electric shock or fire.
- Do not use the appliance if the interior lighting cover is not installed.
- Disconnect the appliance before replacing the lighting bulb.
- The appliance operates on a single phase 220~240 V / 50 Hz power supply. The appliance must be connected to an earthed wall socket, in accordance with applicable recommendations.
- Do not attempt to replace a damaged power cable, contact your after-sales service.
- The power socket must be easily accessible but out of reach of children. In case of doubt, contact your installation technician. Daily utilisation
- Do not store inflammable substances or fluids inside the appliance. This would create a risk of explosion.
- Do not operate other electrical equipment inside the appliance (mixers, whirling rotor for ice cream, etc.).
- When disconnecting the appliance, grip the plug firmly and do not pull on the cable.
- Do not expose the appliance to direct sunlight.
- Keep the appliance away from candles, luminaires and open flames, in order to avoid fire risk.29
- This appliance is only designed to store wines and drinks. • The appliance is heavy. Be careful when moving it.
- If your appliance is equipped with castors, remember that these are only designed to facilitate minor movements. Do not move the appliance over long distances.
- Do not lean or climb on the appliance or its elements.
- In order to avoid falling objects and to prevent damage to the appliance, do not overload the compartments of the appliance. Caution! Cleaning and servicing
- Before carrying out servicing, switch off the power supply and disconnect the appliance.
- When cleaning the appliance, do not use metal objects, steam systems, volatile fluids, organic solvents or abrasive substances.
- Do not use sharp or pointed objects to remove ice. Use a plastic scraper. Important information concerning installation!
- To ensure proper electrical connection, follow the recommendations given in the present manual.
- Unpack the appliance and visually check that it is not damaged. Do not connect a damaged appliance. Inform your retailer or point of sale of any damage. In such a case, keep the packaging.
- It is recommended that the appliance be allowed to settle for at least 4 hours before connecting the electrical power supply, so that the compressor fluid feed is correct.
- Proper air circulation is necessary to avoid overheating. To ensure sufficient ventilation, observe the installation recommendations provided.
- In order to avoid fire risk, wherever possible, ensure that the appliance is not in contact with walls or with any hot element (compressor, condenser). Observe the installation recommendations.
- The appliance should not be placed close to radiators or cooking hot plates or gas rings.30
- Check that electrical sockets remain accessible when the appliance is installed. POWER SAVING To limit the electricity consumption of your appliance:
- Install it in an appropriate place (see “Installing your appliance”).
- Leave the doors open as little time as possible.
- Do not put food that is still hot into the appliance.
- To ensure that the appliance operates properly, clean the condenser regularly (see “Routine servicing of your appliance”).
- Regularly inspect the door seals and ensure that they are still closing properly. If this is not the case, contact your after-sales service. Trouble shooting
- Any electrical work should be carried out by a qualified and skilled technician.
- The appliance should be repaired by an accredited repair centre, using only manufacturer’s original spare parts. The appliance is designed for home use only. The manufacturer declines any liability whatsoever in the case of other utilisation.31
This appliance meets the requirements of all applicable European directives and their amendments.
Caution: Do not obstruct the ventilation grills on the appliance.
Caution: Do not store explosive substances, such as aerosol cans containing an inflammable propellant, in the appliance.
Caution: Do not damage the refrigerating circuit in the appliance.
Caution: The refrigerating units use isobutane (R600a), and should not be placed close to ignition sources (for example, electrical contacts that are exposed or open contacts that could be closed by the refrigerating fluid in the event of a leak). The refrigerating fluid type is specified on the power cabinet identification plate.
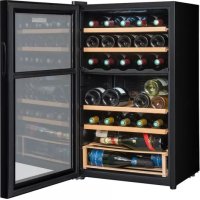
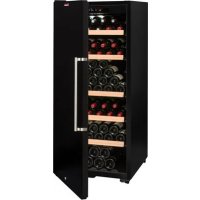
Caution: Do not use electrical equipment in the compartments of the appliance, unless they are of the type recommended by the manufacturer.32 I - FEATURES OF YOUR WINE COOLER
Appliance dimensions These products are not intended to be built-in, it’s for free standing only. Please make sure you let enough space around the cellar to evacuate the hot air and make that the cellar is at its best performance.33
II - INSTALLATION INSTRUCTIONS
Before using your wine cooler
- Remove all exterior and interior packing.
- Before connecting the Wine Cooler to the power source, let it stand upright for approximately 24 hours.
- This will reduce the possibility of a malfunction in the cooling system caused by handling during transportation.
- Clean the interior surface with lukewarm water using a soft cloth. Installation of your wine cooler
- This device is only intended to be installed in free standing, in no case it must be installed in a built-in or embeddable way.
- The appliance should be positioned in a well-ventilated, dry room.
- Place your Wine Cooler on a position that is strong enough to support it when it is fully loaded. To level your Wine Cooler, adjust the front leveling leg at the bottom of the Wine Cooler.
- This appliance must be fixed at the top and the bottom using the rail provided for the purpose in order to avoid any risk of tipping when the shelves are slid out
- Locate the Wine Cooler away from direct sunlight and sources of heat (stove, heater, radiator, etc.). Direct sunlight may affect the acrylic coating and heat sources may increase electrical consumption. Extreme cold ambient temperatures may also cause the unit not to perform properly.
- Plug the Wine Cooler into an exclusive, easily accessible plug socket. Any questions concerning power and/or earthing should be directed towards a qualified electrician or an authorized products service centre.
- To prevent the appliance from heating up, ensure that an adequate ventilation gap is retained and install a suitable thermal insulation panel. An adequate flow of air to and from the cooling system must be ensured.
- The appliance must be installed to all electrical, plumbing, water and drain connections in accordance with state and local codes. Please note in first time use, there will be alarming right after plugging which is caused by wrong humidity and temperature. Without running power, the humidity and temperature may be out of the setting range (40-80%, 5-20 degree). You can press any key to stop the alarm. Room temperature The climate class is stated on the name plate. This specifies the optimum room temperature. Wine coolers with winter position, however, function at room temperatures as low as 5°C. Climate class Optimum room temperature
+18℃~+43℃34 Handle installation Before installing the handle, you must remove the door seal on a game. This does not affect a seal if you take care to remove it properly. Peel off the seal from the corner of the door to the level needed and turn it into the slot to get to the corner. Front Back Screws Handle Handle Screws
Active carbon filter When the unit is equipped with a charcoal filter, it is better to change it once a year to renew the effectiveness (filter odors, residues, ...). Why pull the filter from the inside and replace the new filter in the same way.35 Lock and key You can lock / unlock the door by turning the key in the lock of 90 ° C.
Adjustable feet Horizontal arrangement of wine cooler is very important, but for some reason, you put wine cooler on some uneven place, then you need to adjust the adjustable feet stood to ensure stability; of course, if the place is flat and wine cooler can stand stably, you don't need to adjust the adjustable feet. Adjustment method: rotate right, adjustable feet go up; rotate left, adjustable foot go down.36 Fixed shelves installation The notch wood must be at the rear. For wire shelves, the wood panel must be in the front.
Presentation shelves installation (accessories option) Position the shelf presentation on the level above a fixed shelf. Being less deep, it will allow you to position your bottles on the fixed shelf and let it rest on the edge of the shelf presentation. Sliding shelves installation (accessories option)
1. Place the rack in the right direction.
2. Install the shelf with two rails in molded from the basement to the bottom supports.
3. Set the bar at the bottom between the shelf and molding the above, this will block the rails on the
sides and thus to be able to slide the shelf37 Loading bottles The maximum number of bottles able to be stored which is given, is only given as an indication, done in factory and is not contractual. This indication (as with the capacity in liters of a refrigerator) is to give a quick estimation of the size of the product. This indication corresponds to tests done with a standard bottle: the bottle type “Bordeaux tradition 75 cl” (the standardized classification contains for each bottle a geographic origin (Bordeaux, Bourgogne, Provence,…), and a type (traditional, heavy, light, flute,…) each with its own specific height and diameter. In fact, one could store more bottles by stacking a single type of bottle. But a “varied” cabinet is made up of a large variety of bottles and the “practical” side of the daily use of a cabinet limits the number of bottles stored. Most probably, a few less bottles will be stored than the indicated amount. For example, if the cellar is filled only with bottles of burgundy, there will be approximately 30% fewer bottles than the initial quantity calculated for Bordeaux Any added shelf will decrease the loading capacity.38
III – USE INSTRUCTIONS
If the ambient temperature is above or below the recommended ambient temperature range, the performance of the unit may be affected. For example, placing your unit in extreme cold or hot conditions may cause interior temperatures to fluctuate. Note:
- When you use the Wine Cooler for the first time or restart the Wine Cooler after having been shut off for a long time, there could be a few degrees variance between the temperature you select and the one indicated on the LED readout. This is normal and it is due to the length of the activation time. Once the Wine Cooler is running for a few hours everything will be back to normal.
- If the unit is unplugged, power lost, or turned off, you must wait 3 to 5 minutes before restarting the unit. If you attempt to restart before this time delay, the Wine Cooler will not start. Main functions Display temperature and humidity; Control temperature automatically; Control lighting; Alarm when temperature exceeds temperature limit, degrees Fahrenheit and Celsius transformation Technical parameters
1. On / Off: press and hold on/off key for 5 seconds to cut off the system; press the on/off key again to display the
set temperature value. After delay, the cold system starts to work.
2. Lighting: permanent light: Press lighting key to turn on the light icon is displayed on the screen; When the light is
on, press the lighting key again, the light is off icon is disappearing from the screen.
3. Adjust the controlling temperature (users set): press button to enter room temperature regulating state, press the
upward key or downward key to change the controlling temperature (the default is 12 ℃). Press the button again to confirm or not press any button in 5 seconds, the number of temperature will be displayed on the screen.
4. Fan control: when fan starts to work, the icon of fan will appear in the screen. When the compressor or heating start
to work, the fan is on. Fan stops when compressor or heating stops.39
5. Display of temperature value: in normal state, the set temperature value is displayed on the screen. Press “lock” key
for taking a look of actual temperature value.
6. Display of humidity value:
When the humidity level is under 40%, the screen will display 40% and alarm will work. The warning icon will appear. When the humidity level is between 40%(including 40%)and 80%(including 80%), LED displays the actual humidity value. When the humidity level is above 80%, LED will display 80% and the alarm will work. The warning icon will appear 7. Lock : press and hold lock key for 3s, the screen will display the icon of lock. Disappearing of this icon means release lock. None of the parameter is allowed to be modified or examined in the state of lock. Remove the locked state, then press the lock button for 3 seconds.
8. Expiration (graphite stopper reminder): press the set key and the lighting button at the same time, show
using time for 10 seconds, as the chart shows that the use of time D (day), H (Hour), M (minutes) will be displayed, each will be displayed for 5 seconds. For example when viewing, detect carbon plug using time is 360 days 11 hours 22 minutes, then the first 5 seconds, the display 360 of this figure (Table 1), and then displays the two numbers 11 and 22 for 5 seconds (Table2) . Press the set key and lighting button at the same time for 3 seconds, the using time will be reset and carbon Icon will disappear from the screen. The icon of reminding you to change Carbon filter will appear and the alarm will work if it is used for more than 365 days.
9. Degrees Fahrenheit and Celsius transformation: press up and down button at the same time for 3 seconds.40
Description of indicator light Indicator light Symbol Status Meaning Refrigeration indicator light
Light on Compressor works Light off Compressor stops Fan indicator light
Light on Fan works Light off Fan stops Heat indicator light
Light on Start heating Light off Stop heating High-temp alarming
Light on High-temp alarming Light off Alarm releasing Low-temp alarming
Light on Low-temp alarming Light off Alarm releasing Low-humidity alarming
Light on Low-humidity alarming Light off Alarm releasing High-humidity alarming
Light on High-humidity alarming Light off Alarm releasing Probe exceeds highest temperature or short circuit
Light on Probe exceeds highest temperature or short circuit alarming Light off Alarm releasing Probe exceeds lowest temperature or open circuit
Light on Probe exceeds lowest temperature or open circuit alarming Light off Alarm releasing Humidity probe error alarming
Light on Humidity probe error Light off Alarm releasing Graphite stopper filter needs changing
Light on Graphite stopper filter needs changing Light off Alarm releasing Screen locked
Light on Keyboard locked Light off Keyboard lock releasing41
Refrigeration control When measured temp is above (so warmer than requested), compressor should turn ON When measured temp is below (so cooler than requested) compressor should turn OFF Heating control (winter system) According to initial information as soon as real temp is 2°C below the set value, heating system starts to operate. The heater is going to stop working in winter if the surrounding temperature of the wine cabinet is or above 12℃. Attention: the compressor and the heater strip are going to run at least 1 minutes after set on. Fan control The fan starts to work when the compressor or the heater works. The fan stops to work when the compressor or the heater stops. Alarming The alarms will turn on 1 minute after detecting an abnomal temperature. To stop alarm ringing: press a touch on the display (whatever the touch), the alarm will stop ringing. Humidity turn on/off display content To change hygrometry alarm status, press at the same time both touch “SET” and “UP” for 3 seconds. When turn on the humidity voice alarm,on the display humidity place will display ON for seconds,this mean the humidity voice alarm will work. When turn off the humidity voice alarm, on the display humidity place will display OF for seconds,this mean the humidity voice alarm will stop work。 Back light energy-saving mode The LED will display for 30 seconds. The back light will be turned off if no keys are operated in energy-saving mode (But in this state, we still can see the message from the screen). If there is no any operation, the screen will not light, until there is a press, the back light will be turned on. When internal system is set to be permanent light, screen will be permanent light. Humidity maintenance system The humidity regulates itself between 50-80%. But if the humidity is too low, you can use the box to lava that came with the device. Fill with water, lava will spread moisture regularly in the basement. Be sure to fill from time to time and make sure the box is flat and will not fall over in your basement.42 Optional accessories Customize your appliance and find our accessories from our partners, or on the www.vinokado.com site or our store www.lasommeliere.com All below accessories are compatible with the following cellars:
Ref. FCA04. Active carbon filter
Ref. CLATRAD09. Fixed wire shelf with wooden front
Ref. CLAPRE04. Presentation shelf43
The maximum recommended loading quantities for bottles are given as guidelines and are indicative only; they provide a quick estimate of the size of the appliance (similar to the capacity of a refrigerator expressed in liters). They correspond to tests conducted with a standard bottle: the standard “75 cl light Bordeaux” bottle -standards apply the geographical origin of each bottle shape (Bordeaux, Burgundy, Provence, etc.) and a type (traditional, heavy, light, flute, etc.), each with its own diameter and height. In reality and in extreme cases, you could store more bottles by stacking the same type of bottle without using shelves, but a varied cellar comprises a wide variety of bottles and the practical aspect of everyday cellar management limits its capacity. You will therefore probably load the appliance a little less than the recommended maximum. Types of bottle: We see here 4 kinds of 75 cl wine bottles: Burgundy and Bordeaux wine bottles of different dimensions. There are many others of all shapes and sizes. You will note the storage differences depending on bottle heights, diameters and alternating position method. For example, if a wine cellar is loaded only with Burgundy wine bottles, there will be approximately 30% fewer bottles than the initial quantity calculated for Bordeaux bottles.
Top-to-bottom neck-to-neck:
Note the difference in depth!
Top-to-bottom neck between bottle bodies: Increased loading.44 Examples of serving temperatures Opinions vary, and the ambient temperature too, but many people agree on the following: Prestigious Bordeaux wines – Reds 16 – 17°C Prestigious Burgundy wines – Reds 15 – 16°C Prestigious dry white vintages 14 – 16°C Light, young, fruity reds 11 – 12°C Provence rosés, primeur wines 10 – 12°C Dry whites and vin de pays reds 10 – 12°C Vin de pays whites 8 – 10°C Champagnes 7 – 8°C Sweet wines 6°C
VI - CARE AND MAINTENANCE
Before cleaning the cabinet (this must be done regularly), disconnect it either by unplugging it or by removing the fuse. It is suggested that before first use and then regularly, the cabinet be cleaned both inside and out (front, sides and on top) with a mixture of warm water and gentle cleaning fluid. Rinse with water and let dry completely before reconnecting. Do not use solvents or abrasive products. Clean the shelves with a gentle detergent then dry with a soft dry cloth. At the moment of the first use, some odours can persist. In this case, make functioning the appliance at the coldest temperatures, empty, during a few hours. The cold will cancel all these possible odours. In case of a power cut Most power outages are resolved in a short time. An outage of 1 or 2 hours will not affect the temperatures in your cabinet. In order to protect the wines during the outage, open the door as little as possible. For outages that are very long, take necessary steps to protect the wine. In the event of a power interruption, the unit can remember the previous temperature settings, and when the power is recovery, the cabinet temperature will go back the same setting temperature as power off. Storing the cabinet If the cabinet is going to be unused for a short period of time. Leave the control panel with the normal settings. In case of prolonged un-use - Remove the bottles from the cabinet - Unplug the cabinet - Clean both the inside and the outside of the cabinet - Leave the door open to avoid condensation, odours and mold. Moving your wine cooler
- Securely tape down all loose items (shelves) inside your appliance.
- Turn the adjustable leg up to the base to avoid damage.
- Be sure the appliance stays secure in the upright position during transportation. Also protect outside of appliance with a blanket, or similar item.45 Energy saving tips
- The Wine Cooler should be located in the coolest area of the room, away from heat producing appliances, and out of the direct sunlight.
- Ensure that the unit is adequately ventilated. Never cover air vents.
- Only open the door for as long as necessary. In case of breakdown Despite the care we bring to our production, a breakdown can never be totally excluded. Before contacting the After-Sales department of your store, please check: - the cabinet is properly plugged in - there is not a power outage - the fault does not have as an origin one of those described in the following table WARNING ! Unplug the cabinet before cleaning or repairing the cabinet !46
VII – TROUBLESHOOTING GUIDE
You can solve many common Wine Cooler problems easily, saving you the cost of a possible service call. Try the suggestions below to see if you can solve the problem before calling customer service. Alarming info and some measures: Alarming code Meaning Measures
Indoor temperature is above the high limit Press any key to cancel alarm sound. Immediately cut off the power supply Please connect the manufacturer to fix it.
Indoor temperature is below the lower limit Press any key to cancel alarm sound. Immediately cut off the power supply. Please connect the manufacturer to fix it.
Alarming for low humidity Press any key to cancel alarm sound. Add water to the wine cabinet.
Alarming for high humidity Press any key to cancel alarm sound. Move the water from the groove with clean cloth.
Probe of indoor temperature exceeds the limit of high temperature or short circuit Press any key to cancel alarm sound and cut off the power of the wine cabinet. Please connect the manufacturer to fix it.
Probe of indoor temperature exceeds the limit of low temperature or open circuit Press any key to cancel alarm sound. Please connect the manufacturer to fix it.
Alarming of the probe of indoor temperature Press any key to cancel alarm sound. Please connect the manufacturer to fix it.
Graphite stopper filter needs changing Press any key to cancel alarm sound and change graphite stopper. Press “SET” And “ON/OFF” Simultaneously, LCD will display the using time for 10s, then press the two keys for 5s to eliminate the using time and turn off the alarming and the icon.47 PROBLEM POSSIBLE CAUSE Wine Cooler does not operate. Not plugged in. The appliance is turned off. The circuit breaker tripped or a blown fuse. Wine Cooler is not cold enough. Check the temperature control setting. External environment may require a higher setting. The door is opened too often. The door is not closed completely. The door gasket does not seal properly. Turns on and off frequently. The room temperature is hotter than normal. A large amount of contents has been added to the Wine Cooler. The door is open too often. The door is not closed completely. The temperature control is not set correctly. The door gasket does not seal properly. The light does not work. Not plugged in. The circuit breaker tripped or a blown fuse. Vibrations. Check to assure that the Wine Cooler is level. The Wine Cooler seems to make too much noise. The rattling noise may come from the flow of the refrigerant, which is normal. As each cycle ends, you may hear gurgling sounds caused by the flow of refrigerant in your Wine Cooler. Contraction and expansion of the inside walls may cause popping and crackling noises. The Wine Cooler is not level. The door will not close properly. The Wine Cooler is not level. The door was reversed and not properly installed. The gasket is dirty. The shelves are out of position. Display “A1” or “A2” or “A3”. The sensor is failed.
Please note in first time use, there will be alarming right after plugging which is caused by wrong humidity and temperature. Without running power, the humidity and temperature may be out of the setting range(40-80%, 5-20 degree). You can press any key to stop the alarm.48
This appliance is marked according to the European directive 2012/19/CE on Waste Electrical and Electronic Equipment (WEEE). By ensuring this product is disposed of correctly, you will help prevent potential negative consequences for the environment and human health, which could otherwise be caused by inappropriate waste handling of this product. The symbol on the product, or on the documents accompanying the product, the Crossed Out Wheelie Bin, indicates that this appliance may not be treated as household waste. Instead it shall be handed over to the applicable collection point for the recycling of electrical and electronic equipment, or, if you are buying an equivalent product, to the retailer of the new product. The user is responsible for taking the appliance to the appropriate collection center at the end of its useful life. Selective and appropriate collection for the recycling of no longer used appliances and their disposal and destruction in an environmentally friendly manner, helps to prevent potential negative effects on the environment and health, and encourages the recycling of materials used to make the product. For more detailed information about treatment, recovery and recycling of this product, please contact your local authority, your household waste disposal service or the retailer where you purchased the product.
As we continuously improve our products for the benefit of our customers, we reserve the right to modify technical characteristics without notice. Warranties for LA SOMMELIERE brand products are offered exclusively by selected retailers. No part of these instructions may be considered as a supplementary guarantee. FRIO ENTREPRISE cannot be held liable for errors or technical or editorial omissions in this document. Non-binding document.49
according to the regulations (UE) N°1060/2010
Energy consumption (kwh/year)
The energy consumption is calculated on the basis of results obtained over 24 hours in standardized test conditions. Actual energy consumption depends on conditions of use and the location of the appliance. Net volume 290 L 370 L 450 L Temperature range 5°C – 20°C Climatic class (requested ambient temperature) SN-T (10-43°C) SN-ST (10-38°C) SN-T (10-43°C) SN-ST (10-38°C) SN-T (10-43°C) SN-ST (10-38°C) Defrost Automatic Acoustic emissions in air in db(A) re 1
This appliance is intended exclusively for the storage of wine.