
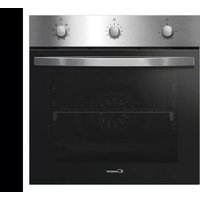
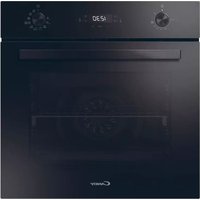
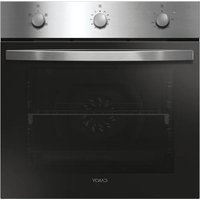
R1006BA - Built-in oven CANDY - Free user manual and instructions
Find the device manual for free R1006BA CANDY in PDF.


| Product Type | Built-in Oven |
| Brand | Candy |
| Model | R1006BA |
| Power Supply | 220-240 V, 50/60 Hz |
| Maximum Power | 3000 W (supergrill) |
| Cooking Functions | Natural convection, forced air, soft cook, bottom heat, grill, supergrill, turbo-grill, grill + rotisserie, pizza, sprinter, defrost |
| Cleaning Type | Catalytic (optional) - self-cleaning panels with microporous enamel |
| Lighting | Incandescent bulb or U-See system (14 white LEDs) |
| Safety | Automatic shut-off, child safety (lock), rack stop system |
| Accessories Included | Simple rack, rack holder, drip tray, rotisserie (depending on model) |
| Programming Types | Timer, end of cooking, fully automatic (start and end) |
| Display | Electronic clock with icons |
| Thermostat | Electronically adjustable (programmable type A model) |
| Door | Wide Door (large glass surface, better thermal insulation) |
| Recommended Maintenance | Clean after each use with warm soapy water; avoid abrasive products |
Frequently Asked Questions - R1006BA CANDY
User questions about R1006BA CANDY
0 question about this device. Answer the ones you know or ask your own.
Ask a new question about this device
Download the instructions for your Built-in oven in PDF format for free! Find your manual R1006BA - CANDY and take your electronic device back in hand. On this page are published all the documents necessary for the use of your device. R1006BA by CANDY.
USER MANUAL R1006BA CANDY
Safety Instructions 12 1. General Warnings 13 1.1 Declaration Of Compliance 13 1.2 Safety Hints 13 1.3 Installation 13 1.4 Fitting The Oven Into The Kitchen Unit 13 1.5 Important 13 1.6 Connecting To The Power Supply 13 1.7 Oven Equipment (according To The Model) 13 2. Useful Tips 14 2.1 Shelf Safety System 14 2.2 Grilling 14 2.3 The U-cook Models 14 2.4 According To The Model U-see 14 2.5 Cooking Time 14 2.6 Self-cleaning Oven With Catalytic 14 2.7 Cleaning And Maintenance 14 2.8 Service Centre 14 3. Use Of Analogue Clock/programmer 15 3.1 General Operation 15 3.2 Setting The Timer 15 3.3 Manual Cooking 15 3.4 Setting The Minute Minder 15 3.5 Semi Automatic Cooking: Switch Off At A Set End Time 15 3.6 Fully Automatic Cooking 15 3.7 Blackout Indication (optional) 15 4. Operating Instructions 16 5. Tables Of Cooking Times.. 17-18
CONTENTS
FR
SAFETY INSTRUCTIONS 33 General recommendations 34 1.1 Declaration of conformity 34 1.2 Safety instructions 34 1.3 Installation 34 1.4 Installing the oven in the kitchen cabinet 34 1.5 Important 34 1.6 Additional oven equipment 34 2 Useful tips 35 2.1 Shelf safety system 35 2.2 Grilling 35 2.3 U-COOK models 35 2.4 Replacing the bulb in U-SEE models 35 2.5 Cooking time 35 2.6 Catalytic self-cleaning oven 35 2.7 Care and cleaning 35 2.8 Service center 35 3. Using the analogue clock/programmer 36 3.1 General operating instructions 36 3.2 Setting the clock (current time) 36 3.3 Cooking in manual mode 36 3.4 Programming the timer 36 3.5 Cooking in semi-automatic mode 36 3.6 Cooking in fully automatic mode 36 3.7 Mains failure indicator 36
- OPERATING INSTRUCTIONS 37
- RECOMMENDATIONS FOR COOKING 38-39
- CONTENTS
BG
SAFETY INSTRUCTIONS 48 1. General recommendations 49 1.1 Declaration of conformity 49 1.2 Safety instructions 49 1.3 Installation 49 1.4 Installing the oven in the kitchen cabinet 49 1.5 Electrical connection 49 1.6 Additional oven equipment 49 2. Useful tips 50 2.1 Shelf safety system 50 2.2 Grilling 50 2.3 U-COOK models 50 2.4 Replacing the bulb in U-SEE models 50 2.5 Cooking time 50 2.6 Catalytic self-cleaning oven 50 2.7 Cleaning and maintenance 50 2.8 Service center 50 3. Using the analogue clock/programmer 51 3.1 General operating instructions 51 3.2 Setting the clock (current time) 51 3.3 Cooking in manual mode 51 3.4 Programming the timer 51 3.5 Cooking in semi-automatic mode 51 3.6 Cooking in fully automatic mode 51 3.7 Mains failure indicator 51 4. Operating instructions 52 5. Cooking recommendations 53-54
CONTENTS
PL
WARNING: The appliance and its accessible parts become hot during use. Care should be taken to avoid touching heating elements.
WARNING: The appliance and its accessible parts become hot during use. Care should be taken to avoid touching heating elements.
Children under 8 years of age must be kept away from the appliance unless they are continuously supervised. This appliance can be used by children aged from 8 years and above and persons with reduced physical, sensory or mental capabilities or lack of experience and knowledge if they have been given supervision or instruction concerning use of the appliance in a safe way and understand the hazards involved. Children must not play with the appliance. Cleaning and user maintenance shall not be made by children without supervision. During use the appliance becomes hot. Care should be taken to avoid touching heating elements inside the oven.
WARNING: Accessible parts may become hot during use. Young children must be kept away. Do not use harsh abrasive cleaners or sharp metal scrapers to clean the oven door glass since they can scratch the surface, which may result in shattering of the glass. The oven must be switched off before removing the guard; after cleaning, the guard must be replaced in accordance with the instructions. Only use the temperature probe recommended for this oven. Do not use a steam cleaner for cleaning operations. WARNING: Avoid possibility of electric shock - ensure the appliance is switched off before replacing the lamp. The means for disconnection must be incorporated in the fixed wiring in accordance with the wiring rules. The instructions state the type of cord to be used, taking into account the temperature of the rear surface of the appliance. If the supply cord is damaged, it must be replaced by a special cord or assembly available from the manufacturer or its service agent. CAUTION: In order to avoid a hazard due to inadvertent resetting of the thermal cutout, this appliance must not be supplied through an external switching device, such as a timer, or connected to a circuit that is regularly switched on and off by the utility. CAUTION: Accessible parts may be hot when the grill is in use. Young children must be kept away. Excess spillage must be removed before cleaning. During self-cleaning pyrolytic operation the surfaces may get hotter than usual and children MUST be kept away.
1. GENERAL WARNINGS
Thank you for choosing one of our products. To get the most out of your oven we recommend that you:
- Read the notes in this manual carefully: they contain important instructions on how to install, use and service this oven safely.
- Keep this booklet in a safe place for easy, future reference.
All accessible parts are hot when the appliance is in operation, take care to not touch these elements.
When the oven is first switched on it may give out acrid smelling fumes. This is because the bonding agent for insulating panels around the oven has been heated up for the first time.
This is a completely normal occurrence; if it does occur, you merely have to wait for the fumes to clear before putting the food into the oven.
An oven by its very nature becomes very hot, especially the glass of the oven door.
1.1 DECLARATION OF COMPLIANCE
The parts of this appliance that may come into contact with foodstuffs comply with the provisions of EEC Directive 89/109.
CE Appliance complies with European Directives 73/23/EEC and 89/336/EEC, replaced by 2006/95/EC and 2004/108/EC, and subsequent amendments.
When you have unpacked the oven, make sure that it has not been damaged in any way. If you have any doubts at all, do not use it: contact a professionally qualified person. Keep packing materials such as plastic bags, polystyrene, or nails out of the reach of children because they are dangerous for children.
1.2 SAFETY HINTS
- The oven must be used only for the purpose for which it was designed: it must only be used for cooking food. Any other use, e.g. as a form of heating, is an improper use of the oven and is therefore dangerous.
The manufacturers cannot be held responsible for any damage caused by improper, incorrect or unreasonable use. When using any electrical appliance you must follow a few basic rules.
- Do not pull on the power cable to remove the plug from the socket.
- Do not touch the oven with wet or damp hands or feet.
- Do not use the oven unless you are wearing something on your feet.
- It is not generally a good idea to use adapters, multiple sockets for several plugs, and cable extensions.
- If the oven breaks down or develops a fault, switch it off at the mains and do not touch it.
- If the cable is at all damaged, it must be replaced promptly.
When replacing the cable, follow these instructions. Remove the power cable and replace it with one of the H05RRF, H05VV-F, or H05V2V2-F type. The cable must be able to bear the electrical current required by the oven. Cable replacement must be carried out by properly qualified technicians. The earthing cable (yellow-green) must be 10 mm longer than the power cable.
Use only an approved service centre for repairs and ensure that only original parts are used. If the above instructions are not adhered to, the manufacturers cannot guarantee the safety of the oven.
- Do not line the oven walls with aluminium foil or single-use protection available from stores. Aluminium foil or any other protection, in direct contact with the hot enamel, risks melting and deteriorating the enamel of the insides.
1.3 INSTALLATION
Installation is the customer's responsibility. The manufacturers have no obligation to carry this out. If the assistance of the manufacturer is required to rectify faults arising from incorrect installation, this assistance is not covered by the guarantee.
The installation instructions for professionally qualified personnel must be followed. Incorrect installation may cause harm or injury to people, animals, or belongings. The manufacturer cannot be held responsible for such harm or injury.
1.4 FITTING THE OVEN INTO THE KITCHEN UNIT
Fit the oven into the space provided in the kitchen unit; it may be fitted underneath a work top or into an upright cupboard. Fix the oven in position by screwing into place, using the four fixing holes in the frame. (Fig. on last page).
To locate the fixing holes, open the oven door and look inside. To allow adequate ventilation, the measurements and distances indicated in the diagram on the last page must be adhered to when fixing the oven.
Note: For ovens that are combined with a hob unit, the instructions contained in the manual for the hob unit must be followed.
1.5 IMPORTANT
If the oven is to work properly, the kitchen housing must be suitable. The panels of the kitchen unit that are next to the oven must be made of a heat-resistant material. Ensure that the glues of units made of veneered wood can withstand temperatures of at least 120°C. Plastics or glues that cannot withstand such temperatures will melt and deform the unit. Once the oven has been lodged inside the unit, the electrical parts must be completely insulated. This is a legal safety requirement. All guards must be firmly fixed into place so that it is impossible to remove them without using special tools.
Remove the back of the kitchen unit to ensure an adequate current of air circulates around the oven. The hob must have a rear gap of at least 45 mm.
1.6 CONNECTING TO THE POWER SUPPLY
Plug into the power supply. Ensure first that there is a third contact that acts as earthing for the oven. The oven must be properly earthed. If the model of oven is not fitted with a plug, fit a standard plug to the power cable. It must be able to bear the power supply indicated on the specifications plate. The earthing cable is yellow-green. The plug must be fitted by a properly qualified person. If the socket and the plug are incompatible, the socket must be changed by a properly qualified person. A properly qualified person must also ensure that the power cables can carry the current required to operate the oven.
An ON/OFF switch may also be connected to the power supply. The connections must take account of the current supplied and must comply with current legal requirements. The yellow-green earthing cable must not be governed by the ON/OFF switch. The socket or the ON/OFF switch used for connecting to the power supply must be easily accessible when the oven has been installed.
Important: During installation, position the power cable in such a way that it will not be subjected to temperatures of above 50°C at any point. The oven complies with safety standards set by the regulatory bodies. The oven is safe to use only if it has been adequately earthed in compliance with current legal requirements on wiring safety. You must ensure that the oven has been adequately earthed.
The manufacturers cannot be held responsible for any harm or injury to persons, animals, or belongings caused by failure to properly earth the oven.
WARNING: the voltage and the supply frequency are shown on the rating plate (fig. on last page).
The cabling and wiring system must be able to bear the maximum electric power required by the oven. This is indicated on the specifications plate. If you are in any doubt at all, use the services of a professionally qualified person.
1.7 OVEN EQUIPMENT (according to the model)
It is necessary to do an initial cleaning of the equipment before the first use of each of them. Wash them with a sponge. Rinse and dry off.
The simple shelf can take moulds and dishes.
The tray holder shelf is especially good for grilling things. Use it with the drip tray.
The special profile of the shelves means they stay horizontal even when pulled right out. There is no risk of a dish sliding or spilling.
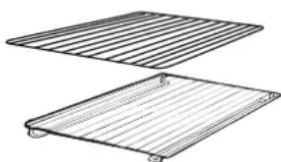
The drip tray catches the juices from grilled foods. It is only used with the Grill, Rotisserie, or Fan Assisted Grill; remove it from the oven for other cooking methods.
Never use the drip tray as a roasting tray as this creates smoke and fat will spatter your oven making it dirty.
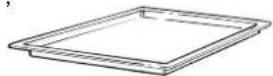
The pizza set is designed for pizza cooking. In order to obtain the best results the set must be used together with Pizza function.
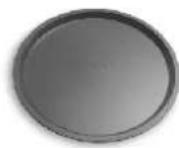
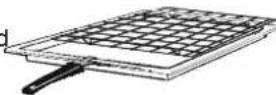
The tray holder
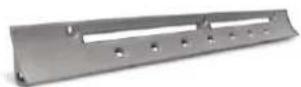
The tray holder shelf is ideal for grilling. Use it in conjunction with the drip tray. A handle is included to assist in moving the both accessories safely. Do no leave the handle inside the oven.
2. USEFUL TIPS
2.1 SHELF SAFETY SYSTEM
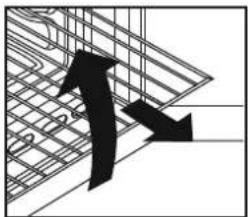
The oven features a new shelf safety system.
This allows you to pull out the oven shelves when inspecting the food without danger of food spillages or shelves falling accidentally out of the oven.
To remove the shelves pull out and lift.
2.2 GRILLING
Grilling makes it possible to give food a rich brown colour quickly. For browning we recommend that you insert the grill onto the fourth level, depending on the proportions of the food (see fig. page 7).
Almost all food can be cooked under the grill except for very lean game and meat rolls.
Meat and fish that are going to be grilled should first be lightly doused with oil.
2.3 The U-COOK MODELS
U-COOK Ovens have an electronic control of the fan speed, called and patented VARIOFAN. During the cooking, this system changes automatically the speed of the fan (in multifunction mode) in order to optimize the air flow and the internal temperature in the cavity of the oven.

All U-COOK ovens feature the Soft func
This allows a management of the distribution of moisture and temperature. It reduces the loss of humidity of the 50 %, which guarantees the food remains tender and tastes better. This a delicate cooking is recommended for the baking of the bread and pastry.

It reduces the time of preheating of ovens: only 8 minutes to reach 200 degrees Celsius.

It gives the possibility of setting level and intensity of grilling, up to 50% more power in comparison with a traditional multifunction oven.
Some ovens are equipped with the new door "WIDE DOOR" which has a bigger window area, this allows better maintenance and a improved thermal insulation.
2.4 According to the model
U·See
Is an illumination system which replaces the traditional « light bulb ».
14 LED lights are integrated within the door. These produce white high quality illumination which enables to view the inside of the oven with clarity without any shadows on all the shelves.
Advantages :
U.S. System, besides providing excellent illumination inside the oven, lasts longer than the traditional light bulb, is easier to maintain, and most of all saves energy. Optimum view - Long life illumination - Very low energy consumption, -95% in comparison with the traditional illumination High
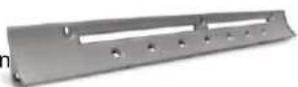
Appliance with white light LED of the 1M Class according to IEC 60825-1:1993 + A1:1997 + A2:2001 (equivalent to EN 60825-1:1994
- A1: 2002 + A2: 2001); the maximum light power emitted at 459nm < 150uW.
Not observed directly with optical instruments.
2.5 COOKING TIME
For recommended cooking times and temperatures the first time you use the oven, refer to the tables on pages 7, 8. You may then wish to vary these times and settings in the light of your own experience.
2.6 SELF-CLEANING OVEN WITH CATALYTIC
Special self-cleaning panels covered in a micro-porous coating are available as optional extras for all models. If they are fitted, the oven no longer needs to be cleaned by hand.
The fat that is splattered onto the sides of the oven during roasting is eliminated by the microporous coating which breaks the fat down by catalysis and transforms it into gas.
Excessive splattering may nevertheless block the pores and therefore hinder self-cleaning. The self-cleaning capacity may be restored by switching on the empty oven to maximum for about 10-20 minutes. Do not use abrasive products, metal cleaning wads, sharp objects, rough cloths, or chemical products and detergents that may permanently damage the catalytic lining.
It is a good idea to use deep roasting trays to roast fatty foods such as joints of meat etc. and to put a tray underneath the grill to catch surplus fat. If the walls of the oven are so thickly coated in grease that the catalytic lining is no longer effective remove surplus grease with a soft cloth or sponge soaked in hot water.
The lining must be porous for self-cleaning to be effective.
N.B.: All catalytic linings currently on the market have a working life of about 300 hours. They should therefore be replaced after about 300 hours.
2.7 CLEANING AND MAINTENANCE
Clean the stainless steel and enamelled surfaces with warm, soapy water or with suitable brand products. On no account use abrasive powders that may damage surfaces and ruin the oven's appearance. It is very important to clean the oven each time that it is used. Melted fat is deposited on the sides of the oven during cooking. The next time the oven is used this fat could cause unpleasant odours and might even jeopardise the success of the cooking. Use hot water and detergent to clean; rinse out thoroughly.
To make this chore unnecessary, all models can be lined with catalytic self-cleaning panels: these are supplied as an optional extra (see the section SELF-CLEANING OVEN WITH CATALYTIC LINING).
Use detergents and abrasive metal pads like "brillo pads" for the stainless steel grills.
The glass surfaces such as the top, oven door, and warming compartment door must be cleaned when they are cold. Damage that occurs to them because this rule was not adhered to is not covered by the guarantee.
To replace the interior light:
- Switch off the mains power supply and unscrew the bulb. Replace it with an identical bulb that can withstand very high temperatures.
2.8 SERVICE CENTRE
Before calling the Service Centre
If the oven is not working, we recommend that:
You check that the oven is properly plugged into the power supply. If the cause of the fault cannot be detected:
Disconnect the oven from the mains, do not touch the oven, and call the after-sales service.
Before calling the Service Centre, remember to make a note of the serial number on the specifications plate (see fig. on last page).
The oven is supplied with a guarantee certificate that ensures that it will be repaired free of charge by the Service Centre.
3. USE OF ANALOGUE CLOCK/PROGRAMMER
| end | STOP |
| TIMER | |
| CLOCK | |
| start | START |
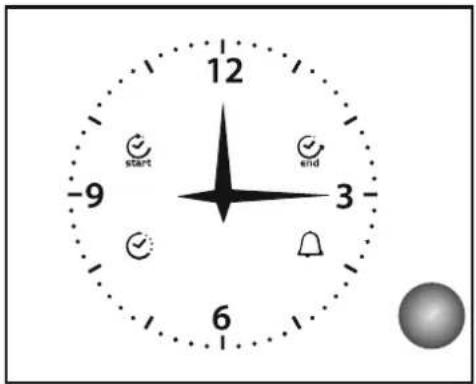
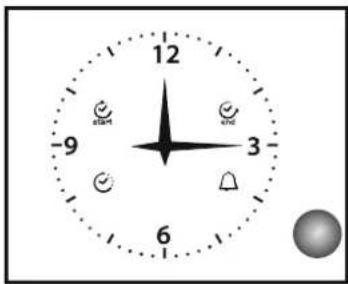
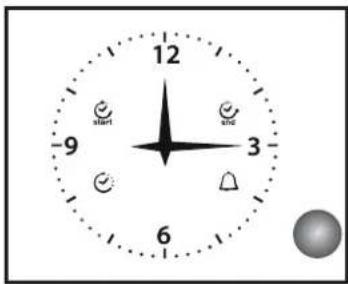
The analogue clock programmer displays the time and operation of the oven. By pushing the control knob, you can: adjust the time, program the start and end time of cooking, or set the Minute Minder alarm.
3.2 SETTING THE TIMER
To adjust the time on the clock, press the knob 4 times until the "CLOCK" symbol flashes. To adjust the time, turn the control knob either clockwise or counterclockwise. After adjustment is complete, wait for 10 seconds and the electronic timer will automatically set the time.
3.3 MANUAL COOKING
In the default mode, the timer allows manual operation of the oven using the main oven switch (external to the timer).
ATTENTION: When power is supplied to the oven timer, there is a delay of a few seconds.
3.4 SETTING THE MINUTE MINDER
Minute Minder programming enables you to set an audible alarm to sound after a scheduled time without activating the cooking.
To set an "alarm" (Minute Minder Mode), press the knob 3 times until the symbol "ALARM" flashes. Minute minder setting is identical to end of cooking timer settings (see corresponding paragraph).
It is only possible to use the Minute Minder when no other cooking program is active.
3.5 SEMI AUTOMATIC COOKING: SWITCH OFF AT A SET END TIME
End of cooking programming enables you to start cooking immediately and stop cooking automatically at a set time.
To program the end of cooking time, press the knob twice until the "END TIME" symbol flashes. To increase or decrease the cooking time, turn the knob either clockwise or counterclockwise. The "END TIME" symbol continues to flash for a few seconds after the last rotation. The program is confirmed by pressing the knob.
Upon confirmation of the program, cooking starts and the alarm is automatically activated. Cooking stops when the programmed "END TIME" is achieved.
To view the program, press and release the knob and the timer will show the selected program.
When cooking stops, the "END TIME" symbol flashes and the alarm beeps. The alarm will beep for 1 minute and the "END TIME" symbol will remain flashing until the knob is pressed.
To cancel the program, press the knob for a few seconds and the program will be cancelled, and the timer will return to manual cooking mode.
3.6 FULLY AUTOMATIC COOKING
Cooking start programming enables you to start and stop cooking automatically based on the scheduled time.
To program the cooking start time, press the knob once until the "START TIME" symbol flashes.
Increase or decrease the cooking start time by turning the knob clockwise or counterclockwise. The "START TIME" symbol will continue to flash for a few seconds after the last rotation. If within this time you do not turn or press the knob, the hands will automatically return to display the time and the program is cancelled. If you press the knob, the cooking start time is stored ("START TIME" symbol is turned on) and the timer switches to cooking end programming (the "END TIME" symbol flashes).
The cooking time end programming will follow the procedure in the preceding section.
Cooking will begin when "Programmed Start Time equals Preset Time".
3.7 BLACKOUT INDICATION (OPTIONAL)
The "Clock" symbol will flash when the power supply has been interrupted.
To stop it flashing, briefly press the control knob.
4. OPERATING INSTRUCTIONS
| Function dial | Temperature pre-set and setting. (Model with electronic programmer) (Type A) | Thermostat dial | Function |
| Turns on the oven lightThis will automatically activate the cooling fan (on fan cooled models only) | |||
| DefrostingWhen the dial is set to this position. The fan circulates air at room temperature around the, frozen food so that it defrosts in a few minutes without the protein content of the food being changed or altered. | |||
| Sprinter= | MAX | MAX | Super GrillThis function allows to set food crunchiness. The Super Grill function is characterized by a 50% power increase in comparison to the standard grill. |
| 22050÷240 | 50÷MAX | Natural convectionBottom and top oven elements are used. This is the traditional form of baking and roasting. It is ideal for roasting joints of meat and game, baking biscuits and apples and making the food nice and crunchy. | |
| 20050÷230 | 50÷MAX | Fan cookingBoth top and bottom heating elements are used with the fan circulating the air inside the oven. We recommend you use this method for poultry, pastries, fish and vegetables. Heat penetrates into the food better and both the cooking and preheating times are reduced. You can cook different foods at the same time with or without the same preparation in one or more positions. This cooking method gives even heat distribution and the smells are not mixed. Allow about ten minutes extra when cooking foods at the same time. | |
| Soft cook | 20050÷230 | - | Soft Cook (a)Soft Cook is the function for the confectionery and the bread. Thanks to its reduced fan speed, this function increases oven internal damp. The increased damp creates the ideal conditions of cooking for those foods that need to maintain an elastic consistence while they are cooking (ex. cakes, bread, biscuits) avoiding surface breakages. |
| 16050÷220 | 50÷MAX | Fan plus lower elementThis function is ideal for delicate dishes (pies-souffle). | |
| Level 41÷4 | 50÷MAX | GRILL: use the grill with the door closed. The top heating element is used alone and you can adjust the temperature. Five minutes preheating is required to get the elements red-hot. Success is guaranteed for grills, kebabs and gratin dishes. White meats should be put at a distance from the grill; the cooking time is longer, but the meat will be tastier. You can put red meats and fish fillets on the shelf with the drip tray underneath. | |
| Super grill | Level 41÷4 | 50÷MAX | SUPER GRILL: the oven has two grill positionsGrill : 2200 W Grill SUPER : 3000 W |
| 190180÷200 | 50÷200 | FAN ASSISTED GRILL (a): use the turbo-grill with the door closed. The top heating element is used with the fan circulating the air inside the oven. Preheating is necessary for red meats but not for white meats. Ideal for cooking thick food items, whole pieces such as roast pork, poultry, etc. Place the food to be grilled directly on the shelf centrally, at the middle level. Slide the drip tray under the shelf to collect the juices. Make sure that the food is not too close to the grill. Turn the food over halfway through cooking. | |
| Level 41÷4 | 50÷200 | Grill/spit element.This is used for roasting on the spit. | |
| 220 | 50÷MAX | Function PizzaThis function with hot air circulated in the oven ensure perfect result for dishes such as pizza or focaccia. |
- Tested in accordance with the CENELEC EN 60350-1 ** Tested in accordance with the CENELEC EN 60350-1 used for definition of energy class.
5. TABLES OF COOKING TIMES
The overall suggested cooking times set out below are intended as a rough guide only. They may in fact vary according to the quality, the freshness, the size and the thickness of the food cooked and of course cooking time is also partly a matter of taste. Let the food stand for a few minutes before serving because the ingredients continue cooking after they have been removed from the oven.

HANDY TIP: Lower the temperature so as to avoid the surface of the food becoming hard and dry.
| Static electric oven | Electric fan oven | |||||||
| Food | Quantity | Shelf | Time of cooking in minutes | Oven temperature | Shelf | Time of cooking in minutes | Oven temperature | Remarks |
| · Pasta | ||||||||
| Lasagne | Kg 3,5 | 2 | 70 + 75 | 220 | 2 | 60 + 65 | 200 | Put the lasagne into an unheated oven |
| Cannelloni | Kg 1,8 | 2 | 50 + 60 | 220 | 2 | 40 + 50 | 200 | Put the cannelloni into an unheated oven |
| Oven baked pasta | Kg 2,5 | 2 | 55 + 60 | 220 | 2 | 45 + 50 | 200 | Put the oven baked pasta into an unheated oven |
| · Baking (not cakes) | ||||||||
| Bread | Kg 1 di pasta | 2 | 35 10(pre-heating) | 200 | 2 | 30 + 35 10(pre-heating) | 180 | Form the dough into a loaf and make a cross with a knife on top of the dough leave the dough to rise for at least 2 hours. Grease the baking tin and put the dough in the middle of it. |
| Pizza | Kg 1 | 1 | 25 + 35 | 190 | 1 | 20 + 25 | 190 | Warm the oven for 15 minutes and place the pizzas on the greased baking tray. Garnish them with tomatoes, mozzarella, ham, oil, salt and origano. |
| Pastry (frozen) vol au vents | n° 24 | 1 | 30 + 35 | 220 | 2 | 25 + 30 | 200 | Place 24 vol au vents in the oven and bake. |
| Focaccia (n° 4) | gr. 200 of dough each | 2 | 25 + 30 | 200 | 2 | 20 + 25 | 180 | Warm the oven for 15 minutes, grease the baking tray, season the 4 focaccia with oil and salt and leave them to rise at room temperature for at least 2 hours before put ting them in the oven. |
| · Meat | ||||||||
| All meats can be roasted in shallow or deep roasting trays.It is advisable to cover the shallow trays to avoid splattering the sides of the oven with grease.The roasting times are the same whether the meat has been covered up or not. | ||||||||
| Whole joint of beef | Kg 1 | 3 | 70 + 80 | 220 | 3 | 50 + 60 | 200 | Put the meat into a deep Pyrex dish and season with salt and pepper; turn the meat half way through cooking. |
| Joint of deboned | Kg 1 | 2 | 100 + 110 | 220 | 2 | 80 + 90 | 200 | Cook the meat in a covered Pyrex dish with herbs, spice, oil and butter. |
| Joint of deboned veal | Kg 1,3 | 1 | 90 + 110 | 220 | 2 | 90 + 100 | 200 | Cook as indicated above |
| Joint of fillet of beef | Kg 1 | 2 | 80 + 90 | 220 | 2 | 80 + 90 | 200 | Cook as indicated above. |
| · Fish | ||||||||
| Trout | 3 whole trout or / Kg 1 | 2 | 40 + 45 | 220 | 2 | 35 + 40 | 200 | Cover the trout with salt, oil and onions and cook in a Pyrex dish. |
| Salmon | 700 g 2,5 cm slice | 2 | 30 + 35 | 220 | 2 | 30 + 25 | 200 | Cook the salmon in an open Pyrex dish with salt, pepper and oil. |
| Sole | Kg 1 | 2 | 40 + 45 | 220 | 2 | 35 + 40 | 200 | Cook the sole with salt and a spoonful of oil. |
| Bream | 2 whole ones | 2 | 40 + 45 220 | 2 | 35 + 40 | 200 | Cook the bream in oil and salt in a covered dish. | |
5. TABLES OF COOKING TIMES
| Static electric oven | Electric fan oven | |||||||
| Food | Quantity | Shelf | Time of cooking in minutes | Oven temperature | Shelf | Time of cooking in minutes | Oven temperature | Remarks |
| Rabbits and Poultry | ||||||||
| Guinea fowl | Kg 1-1,3 | 2 | 60 ÷ 80 | 220 | 2 | 60 ÷ 70 | 200 | Place the guinea fowl in a deep Pyrex o pottery dish with very little oil and season with herbs and spices. |
| Chicken | Kg 1,5-1,7 | 2 | 110 ÷ 120 | 220 | 2 | 100 ÷ 110 | 200 | Follow the procedure for cooking the guinea fowl. |
| Rabbit pieces | Kg 1-1,2 | 2 | 55 ÷ 65 | 220 | 2 | 50 ÷ 60 | 200 | Put all the pieces of the same size in the glazed tray. Season with herbs and spices. Turn the pieces as and when required. |
| Cakes | ||||||||
| Coconut cake baked in a tin | 1 | 55 | 180 | 1 | 50 | 160 | Use a tin that is 22 cm deep. Pre-heat for 10 mins. | |
| Sponge cake | 1 | 55 | 175 | 1 | 40 ÷ 45 | 160 | Use a tin that is 22 cm deep. Pre-heat for 10 mins. | |
| Carrot cake baked in a tin | 1 | 65 | 180 | 1 | 50 ÷ 60 | 160 | Use a tin that is 22 cm deep. Pre-heat for 10 mins. | |
| Apricot pie | 700 gr | 1 | 40 | 200 | 2 | 30 ÷ 35 | 180 | Use a tin that is 22 cm deep. Pre-heat for 10 mins. |
| Vegetable | ||||||||
| Fennel | 800 gr | 1 | 70 ÷ 80 | 220 | 1 | 60 ÷ 70 | 200 | Cut the fennel into four pieces, add butter, salt and potatoes if required and place in a Pyrex face up. Cover the dish |
| Courgettes | 800 gr | 1 | 70 | 220 | 1 | 60 ÷ 70 | 200 | Slice the courgettes, place in a Pyrex dish and add butter and salt. |
| Potatoes | 800 gr | 2 | 60 ÷ 65 | 220 | 2 | 60 ÷ 65 | 200 | Cut the potatoes into equal parts and place in a Pyrex dish. Season with salt, origano and rosemary. Cook in oil. |
| Carrots | 800 gr | 1 | 80 ÷ 85 | 220 | 1 | 70 ÷ 80 | 200 | Slice the carrots, place in a Pyrex dish and cook. |
| Fruit | ||||||||
| Whole apples | Kg 1 | 1 | 45 ÷ 55 | 220 | 2 | 45 ÷ 55 | 200 | Bake the fruit in an open Pyrex or earthen- ware dish. Leave it to cool inside the oven. |
| Pears | Kg 1 | 1 | 45 ÷ 55 | 220 | 2 | 45 ÷ 55 | 200 | Follow procedure above. |
| Peaches | Kg 1 | 1 | 45 ÷ 55 | 220 | 2 | 45 ÷ 55 | 200 | Follow procedure above. |
| Grilling | ||||||||
| Place the food to be grilled underneath the infra-red grill. Warning: When the grill is on it takes on a bright red colour. Place the tray underneath the grill to collect juices and fat from the food being grilled. | ||||||||
| Squares of bread for toasting | 4 pieces | 4 | 5 (5 to heat up grill) | Grill Grill | 4 | 5 (10 to heat up grill) | Lay the bread on the grill tray. When one side of the bread has been toasted, turn over and toast the other side. Remember: keep the toast warm at the bottom of the oven until you are ready to serve it. | |
| Toasted sandwiches | 4 | 3 | 10 (10 to heat up grill) | Grill Grill | 3 | 5/8 (10 to heat up grill) | Lay the bread on the grill tray. When one side of the sandwich has been toasted, turn over and toast the other side. | |
| Sausages | n°6 / Kg 0,9 | 4 | 25/30 (5 to heat up grill) | Grill Grill | 4 | 15/20 (10 to heat up grill) | Cut the sausages in half and lay them face down on the grill. Half way through grilling turn them over. Every so often, check that they are being cooked equally all over. (If this is not happening, turn and reposition the ones being cooked ether less or more than the others. | |
| Ribs of beef | n°4 / Kg 1,5 | 4 | 25 (5 to heat up grill) | Grill Grill | 4 | 15/20 (10 to heat up grill) | Make sure that the ribs of beef are exposed to the full effect on the main grill. | |
| Chicken legs | n°4 / Kg 1,5 | 3 | 50/60 (5 to heat up grill) | Grill Grill | 3 | 50/60 (10 to heat up grill) | Turn them over twice during grilling | |
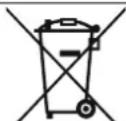
This appliance is marked according to the European directive 2012/19/EU on Waste Electrical and Electronic Equipment (WEEE). WEEE contains both polluting substances (which can cause negative consequences for the environment) and basic components (which can be reused). It is important to have WEEE subjected to specific treatments, in order to remove and dispose properly all pollutants, and recover and recycle all materials.
Individuals can play an important role in ensuring that WEEE does not become an environmental issue; it is essential to follow some basic rules: - WEEE shall not be treated as household waste. WEEE shall be handed over to the relevant collection points managed by the municipality or by registered companies. In many countries, for large WEEE, home collection could be present. - When you buy a new appliance, the old one may be returned to the retailer who has to collect it free of charge on a one-to-one basis, as long as the equipment is of equivalent type and has the same functions as the supplied equipment.
INSTRUCTIONS FOR SAFE USE
1.1 DECLARATION OF CONFORMITY:
1.4 INSTALLATION OF THE OVEN IN ITS CABINET
1.8 OVEN EQUIPMENT
(EQUIPMENT VARIES ACCORDING TO OVEN TYPE)
All packaging materials, such as plastic bags, polystyrene, or nails, should be kept out of reach of children, as they represent a danger to them.
All accessible parts become hot during operation of the appliance, be careful and do not touch them. At first switch-on, a slight smell may appear. This happens at the first heating of the oven and is considered normal. After the smell stops, you can place food in the oven for cooking.
The oven heats up strongly during operation, especially the glass of the door.
In accordance with the requirements of Federal Law N261-FZ of 23.11.09 and Government Decree RF N222 of 31.12.09, this product is supplied with information in Russian about the energy efficiency class in the form of a special label, which must be placed on the front part of the appliance at the point of sale to consumers.
1.1 Declaration of Conformity.
- Parts of this appliance that come into direct contact with food products comply with the provisions of Directive CEE
89/109. The appliance complies with European Directives 73/23/EEC and 89/336/EEC, replaced by 2006/95/EC and 2004/108/EC with subsequent amendments.
1.2 SAFETY INSTRUCTIONS
The appliance is intended for household use only, that is, for preparing food in domestic conditions. Using the appliance for any other purposes (for example, for heating a room) is considered use not in accordance with its intended purpose, and therefore poses a danger.
The manufacturer is not liable for damage that may arise as a result of using this appliance not for its intended purpose and as a result of violating the rules of its operation.
When using electrical appliances, you should follow the basic safety rules.
All accessible parts become very hot during operation of the appliance, be careful and do not touch them. - Do not pull the power cord to unplug the appliance from the outlet. Do not touch the appliance with wet or damp hands or feet. Do not use the appliance if it is faulty. - It is not recommended to use adapters, extension cords. In case of malfunction or deviation from normal operation, the appliance should be turned off and not attempt to repair it yourself. In case of damage to the cord, it should be replaced without delay.
Open the cover of the terminal box, disconnect the cord and replace it with a new cord of the required length (type H05RR-F, H05VV-F, H05V2V2-F), corresponding to the power of the appliance. This operation must be performed by a qualified specialist. The ground wire (yellow-green) must be approximately 10 mm longer than the other wires.
If repair is necessary, you should contact a service center using original spare parts. Failure to comply with the above may lead to a violation of the safety of the appliance.
The appliance must have exactly the specified technical characteristics; it is impossible to make changes. - Do not use appliances that operate under high pressure. - Do not place flammable objects in the appliance. When turned on, they may catch fire. Do not block the ventilation openings on the top of the appliance. Do not place the appliance in a cabinet or use it with additional equipment without special gloves.
Do not cover the internal surfaces of the appliance with aluminum foil or other packaging materials sold in household stores. Aluminum foil or other packaging material in contact with the hot surface of the appliance may melt and damage the internal enameled surface of the appliance.
1.3 INSTALLATION
Installation of the appliance is carried out by the buyer. The manufacturer is not responsible for this service. Repairs that may be caused by incorrect installation are not covered by the warranty, and the manufacturer does not compensate for them.
Installation must be carried out in accordance with the instructions by a qualified specialist. Incorrect installation of the appliance can lead to injury to people and animals, as well as damage to property, for which the manufacturer will not be liable.
The furniture into which the appliance is to be built must be made of materials resistant to high temperatures.
The appliance can be installed either on a countertop or in a column. Installation: It is necessary to provide good ventilation of the room where the appliance is installed, to ensure normal air circulation, necessary for cooling the internal parts.
For this purpose, it is necessary to provide special openings (see last page).
1.4 Installation of the oven in a kitchen unit
Place the oven in the space intended for it; it can be placed either on a countertop or in a vertical cabinet. Secure the oven by screwing it through the special holes for fastening to the frame (see figure on the last page). To access the fastening points, open the door and look inside. To ensure the necessary ventilation, the distances indicated in the diagram on the last page must be strictly observed during installation. Attention: For ovens combined with a microwave, it is necessary to follow the instructions for the microwave.
1.5 Electrical connection
The installation of the oven must be carried out by an employee of an authorized service center or by a specialist with the appropriate qualification. The appliance data must be installed in accordance with current standards and regulations.
In case of non-compliance with these standards, the manufacturer does not bear any responsibility.
The oven complies with the safety requirements provided by the standards and must be equipped with a power cord with a grounding plug, ensuring reliable grounding.
For electrical connection, it is necessary to provide the installation of appropriate protection and use a cable with a cross-section suitable for the normal functioning of the oven.
Connection:
The appliance is equipped with a power cord and must be connected only to an electrical outlet with a voltage of 230 V - between phases or between phase and neutral.
Before connection, check:
The voltage indicated on the electrical plate, the presence of an automatic circuit breaker.
The grounding wire (yellow-green) of the oven must be connected to the grounding system of the house's electrical equipment. The reliability of the grounding system of the house's electrical equipment must be checked by a qualified electrician before electrical connection.
Note: Do not forget that the need for technical maintenance of the appliance may arise, which must be carried out by a service center. Therefore, it is necessary to ensure easy access to the appliance. Replacement of the power cord must be carried out by an employee of the service center or a qualified specialist. For replacement, follow the specified characteristics of the appliance. Class I protection against electric shock.
1.6 Additional oven equipment
Before using the additional equipment for the first time, wash it with a sponge. Then rinse thoroughly with clean water and dry.
A simple rack is used to place dishes and baking trays.
The rack with a drip tray is used, in particular, for cooking on the grill, as the tray is attached to collect the fat that drips during cooking.
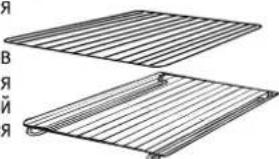
Special telescopic guides ensure horizontal positioning of the racks when removing them from the oven, which prevents the dishes from tipping over.
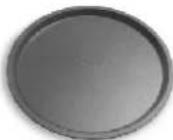
The manufacturer has developed a special baking tray. To get the best results, it must be used together with the special tray.
Grill rack. Designed for cooking on the grill. Use together with the tray for collecting drippings. The set includes a handle, with which you can safely move the rack during cooking. Do not leave the handle inside the oven.

If the additional equipment is not used, it should be removed from the oven.
2. USEFUL TIPS
2.1 SHELF SAFETY SYSTEM
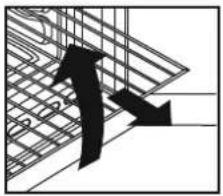
The oven is equipped with a shelf safety system. It allows you to pull out the shelves for checking the food without the risk of them sliding or accidentally falling out of the oven. To fully remove the shelf, lift it towards you and upwards.
2.2 COOKING ON THE GRILL
Using the grill, you can quickly cook meat, fish, and poultry. When grilling, it is recommended to set the rack on the fourth level, depending on the size of the food (see page 65). Practically all products can be cooked on the grill, except for very thin slices of meat.
Meat should be brushed with oil before cooking on the grill.
2.3 MULTI-COOK
The MOeU-COOK ovens are equipped with electronic convection speed control, the patented design of which belongs to Vario Fan. During cooking, the system automatically adjusts the convection speed (in the multifunction model) to optimize the air flow and internal temperature of the oven.
All ovens and cookers are equipped with the Soft function. Thanks to this, it is possible to control the distribution of humidity and temperature. This reduces moisture loss by 50%, which preserves the juiciness and taste of dishes. This is a delicate cooking method recommended for baking bread and confectionery. SprenterF reduces the preheating time of the oven: 200 degrees Celsius is reached in just 8 minutes. It makes it possible to set the level and intensity of browning, up to 50% more power compared to a traditional multifunction oven.
Some ovens are equipped with a new design door WIDE DOOR, the glass of which is larger, which allows you to better monitor the oven and provides better thermal insulation.
2.4 Replacing the lighting in U·S∈E models
This is a lighting system that replaces the usual light bulb. 14 LEDs are built into the door. They shine with white light, which allows you to clearly see the interior of the oven without darkening and at all levels.
Advantages:
The U.S.E.E. system, in addition to excellent illumination, is distinguished by a long service life compared to a conventional light bulb, it is easy to maintain and it is more economical in energy consumption.
-Excellent visibility -Durability -Low energy consumption, 95% less than a conventional light bulb -High quality
The device complies with the requirements of IEC 60825-1:1993+A1:1997+A2:2001 (equivalent to EN 60825-1:1994+A1:2002+A2:2001; maximum output power 459m < 150uW.
Do not look directly at the light source using optical instruments.
2.5 Cooking time
When using the oven for the first time, to calculate the cooking time, you should refer to the table on pages 65-66. Subsequently, you can change this time depending on your preferences.
2.6 Catalytic self-cleaning oven
Special panels, covered with enamel with a microporous structure, sold as additional equipment for all models, eliminate the need to clean the oven manually.
Fat that settles on the walls of the oven during cooking is decomposed by the enamel through a catalytic oxidation process and converted into a harmless substance.
The self-cleaning properties of the coated panels can be restored by heating the empty oven for 10-20 minutes at maximum temperature. Do not use abrasive cleaning agents, scouring pads, sharp objects, acidic or alkaline substances, or other cleaning agents that could permanently damage the enamel. It is also recommended to use high-sided baking trays when preparing particularly greasy dishes (fried food, etc.) and when frying on the grill. If, due to the specific nature of the contamination, the above-mentioned methods are insufficient, it is recommended to remove grease with a soft cloth or sponge soaked in hot water. Regular cleaning is the main condition for ensuring a self-cleaning effect. N.B. Please note: all self-cleaning panels present in the oven are designed for approximately 300 hours of oven operation. After this period, the panels should be replaced.
2.7 CLEANING THE OVEN
- Before cleaning the appliance, wait until it has cooled down.
Do not use abrasive cleaning agents, scouring pads made of metal wire, or sharp objects that could damage the enamel surface.
- Use a mild detergent or ammonia-based cleaning agents. The oven should be thoroughly washed after each use. During cooking, grease deposits on the oven walls. During subsequent use, this grease may emit unpleasant odors and may affect the quality of the food. To clean the oven, use water and a mild detergent, rinsing thoroughly with clean water. Glass parts
After each use of the oven, wipe the glass door with a damp cloth. If grease or food residues remain on the surface, clean them with a sponge and a mild detergent. Rinse with clean water and dry. Do not use abrasive cleaning agents or sharp objects. The door gasket should be cleaned with a sponge and a mild detergent.
ADDITIONAL CLEANING
Clean with a sponge soaked in soapy water, then rinse with clean water and dry.
Drip tray
After cooking on the grill, remove the drip tray from the oven. Empty its contents into a container, wash it with hot water and a mild detergent using a sponge, then rinse with clean water and dry. To remove burnt-on food residues, soak the tray in water with a mild detergent. The drip tray can be washed in a dishwasher or with special cleaning agents available in stores. Never leave a dirty drip tray in the oven. Oven lamp
Before each cleaning or replacement of the lamp, disconnect the oven from the power supply. The lamp is made of materials resistant to high temperatures.
Technical characteristics of the lamp:
230V-25W-E14-300°C
If it is necessary to replace a faulty lamp, remove the protective glass cover, unscrew the lamp, replace it with a new one of the same type, and install the protective glass cover back.
2.8 SERVICING
How to contact the service center.
If the oven does not work, we recommend you:
- Check that the plug is correctly inserted into the socket; if you cannot find the cause of the malfunction:
Turn off the appliance, do not attempt to repair it yourself, and contact an authorized service center. When contacting an authorized service center, you must provide the model name and serial number, which you can find on the warranty certificate or on the rating plate. The appliance comes with a warranty certificate, on the basis of which it will be repaired free of charge at an authorized service center during the warranty period.
The serial number consists of 16 digits. The first 8 digits are the model code. The next 4 digits are the production date (year, week). The last 4 digits are the factory numbers.
3. USING ANALOG CLOCKS/PROGRAMMER
*All dishes were prepared at 1 level
BAKING AND CONFECTIONERY PRODUCTS
Avoid using baking tins, as they reflect heat, and the top of the product may burn. If the product browns too quickly, cover it with paper for baking or aluminum foil.
Note: Place the foil on the correct side; the shiny side must be turned towards the product, otherwise the heat will be reflected and will not penetrate inside the product.
Try not to open the oven during the first 20-25 minutes of baking, because all confectionery products that need to rise during cooking, such as cakes, buns, etc., will immediately fall. To check the cooking process, insert a wooden toothpick or a knife blade into the product. If it comes out clean, the product is ready and you can turn off the oven. If the blade is wet or dough sticks to it, continue cooking, slightly reducing the temperature so that the top of the product does not burn.
If the appliance is not used for a long time, it must be unplugged from the socket.
2. USEFUL TIPS AND ADVICE
2.1 SAFETY SYSTEM FOR THE PLATE
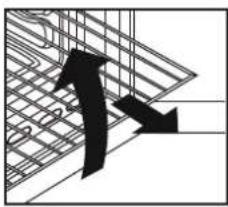
The oven is equipped with a safety system for the plate. It allows you to remove the plate for checking the thermostat without the risk of it turning on or the plate falling off the oven. To remove the plate, pull it towards you and upwards.
2.2 ROTBETE HA TPNJ
PnH3N0N3BaHeto Ha rpnH, MoKte Da npnroBtne 6bp3o acTHe c npeneHc HOpN4a 3aMnHaHeto npnpOBbAme da NoctBaTe DpeIeKATA Ha YETBbDPTOT HA B.3ABNCMOCT DTaMeDAHcDa
PpAKTcUeCKN BcKaKbN PPOyKTN MORAT Da CE rOTBt HA rPNIOCBEN MECTHn pONETA NOCdo6HN.
Mecoto n pnbata npdei npirotoBHeTo Ha rpi, Tp8Ba da 6daT Hama3aHn Cma3HnHa.
2.3 MoDen U-COOK
MoDenrteU-COOK ca obopydBaHn c enektpoHNO ynpabHeHne Ha cKOpOCTT ha KOHBeknnaTeHOBaHOTMe HA KoTe e Vario Fan. No Bpeme Ha rotBeHETo Ta3n CNTeMa ABTOmatuH NO pOMEHa cKOpOCTTa H KOHBeknna(B MHOro FyHKUNOHAnHeMeDeJI), 3a Da ONTMNImpa NOTOKa Ha Bb3dyxa N BbTrePwHata TEmpeHpTa H cyPhTa).
BcHnФypHnU·COOKcaobopyBaHn cΦyHKnIaTcook

BnaorapenHe Ha ToBa, MoKe da ce ynpabnBa pa3npedeHneTo HbAaXHOCTra n Tempepatpata.ToBa hAmnRa 3ary6nBe Ha Bnara c 50% KOeTo oE3neuaba HEKHOHTOINHEBVC HA RCTnTa.TOba eDenNKATEMeTOp 3a nproTBeHa Xn86 N TeCTEHnDnN.

HamaJraBa BpeMeTo 3a npedBapnteHNo 3arpaBaHe Ha cyphata:200°Cce doctirat 3a8MH.

Ppabn Bb3MOxHO HAcTPOKaTa Ha BnBOTo INHTeH3MBHOCCTTA Ha neHeHTo Ha rpn -do 50% NOBcE MoUuHocB CpaBHeHc cTpaDnUHHaT MHOrOfoHyKuOHAnHa FpyHa.
WIDE DOOR,
2.43aHaHaOcBETnEHnToB Moena U.SE E
Ta3n CNTema 3a OCBETHeHne, KOrTO 3aMeHr OBuayauHnte NaMnE c 14 CBTeODINOBA BrpaDEHN BbB BpaTata. Te CBeTc rApk 6Rn CzBt, No3BOJRAuBa Da CE BnDfT BCNUK HNBa Ha Ha Fpyhata 6e3aTbMHRBaHe. PnenmuIeCTBa: CCTeMaTa U.SEE,OCBENo6pO OCBETBaHe,OCNpyraHIMHOrblc pOK Ha EKcnnoataaCnBpaBeHNHe C06NIKOBEHNHaTaNAMNa,NECHO cNOCTbA H e OCO6EHNOIKOHOMNHAA.
OTNnUHaBnDnMoCT
-AbnbrXHBOT -Hncko ehepronotpe6neHHe,95% no MaJIKOOTOBIKHOBHeHHaIaMna
Safety class 1M according to IEC 60825-1:1993+A1:1997+A2:2001 (equivalent to EN 60825-1:1994+A1:2002+A2:2001). Maximum output optical power <150 mW. Do not look directly into the light source or view it with optical instruments.
2.5 COOKING TIME
When first using the oven, follow the time given in the recipe books. Afterwards, you can change it depending on your personal preferences and experience.
2.6 SELF-CLEANING CATALYTIC LINING
Special linings, coated with a dark microporous structure, improve the quality of the additional equipment for all models. They facilitate the cleaning of the oven.
The fats, deposited on the lining of the oven during cooking, are broken down by a catalytic process of oxidation and are converted into gaseous substances.
Residues from fat can ignite and in this way damage the self-cleaning lining. This property of the protective lining can be restored by heating the empty oven for 10-20 minutes at maximum temperature. Do not use abrasive cleaning agents, sharp objects, metal sponges, chemical substances or other cleaning agents that could irreparably damage the lining. We also recommend cleaning the oven with high temperature, especially when preparing for home use, and when cleaning the grill, the tray for the grill should be placed underneath.
If the special character of the self-cleaning lining is damaged, the above measures are not sufficient. We recommend stopping the use of the linings with the help of a cloth or brush, soaked in hot water. Regular cleaning is the main condition for the safety of the self-cleaning effect.
N.B. Note: All self-cleaning linings, linings for purchase are designed for about 300 hours of oven operation. After this period, they must be replaced.
2.7 CLEANING AND MAINTENANCE
If you do not manage to fix the fault
Turn off the device, do not attempt to repair it yourself, and contact an authorized service center.
When contacting the service center, you must always state the model of the device and the serial number (you can find them on the warranty card or on the nameplate of the device). The product comes with a warranty card, on the basis of which the device will be repaired free of charge during the warranty period.
The serial number consists of 16 digits. The first 8 digits are the model code. The last 4 - the date of production (year, week).
IocneHnTe 4 uΦpnca 3aBoDcKHe Homepa.
3. USE OF THE ANALOG TIMER / PROGRAMMER
| end | CTOП |
| ТАМЕР | |
| ЧАСОВНИК | |
| start | CTAPT |
OPERATION
3.1 OPERATING INSTRUCTIONS
The timer can be used as a clock (with hands) and controls the operation of the oven (by pressing the button for adjustment and the indicator lights).
With the adjustment button you can: set the cooking duration, the cooking program and the end time of cooking, as well as set the time for the warning signal (reminder of the cooking time).
3.2 SETTING THE TIME (CURRENT TIME)
To set the time, press the adjustment button 4 times. Then the display will show the "CLOCK" indicator.
To increase or decrease the time value, turn the adjustment button clockwise or counterclockwise.
10 seconds after the last adjustment, the electronic timer automatically exits the time setting mode.
3.3 COOKING IN THE OVEN MODE
In the oven mode, cooking (set by the knob) can be done in the oven mode, using the oven function (works independently of the timer).
ATTENTION: The timer is activated only when the oven is supplied with power.
Cooking starts when the "Programmed cooking start time = current time"
3.7 INDICATION OF INCORRECT SUPPLY VOLTAGE (OPTIONAL)
The device is protected against overvoltage by means of a fuse on the "CONDITIONER" symbol.
To disable this signaling, press the button briefly for adjustment.
- Each part is prepared 1 level
NEUBA NCLAOKAPCKN3DEENIA
To avoid the formation of mold, the oven door should be opened slightly, and the top part of the oven may be covered. If the oven is heated quickly, cover it with baking paper or aluminum foil.
Attention: the flat side of the baking tray must be facing the oven, otherwise the heat will be reflected and the product will not cook properly.
Try not to open the door during the first 20-25 minutes of baking, when all the pastries are rising and need to be baked properly, such as soufflés, cakes, etc. The oven is hot. To control the baking process, insert a toothpick into the cake. If the dough does not stick to the toothpick, it is done and you can turn off the oven. If there is sticky dough, continue baking, slightly lowering the temperature to avoid burning the top.
| Ястne | Начи на пригорьке | КолочECTBO | Tempepatура °C | Вреем за пригорьке | Съваимуо | |
| Кифлички | Принuddителна конвекця | 800 rp | 200 °C | 40 мINH | ||
| Пай | Принuddителна конвекця | 40 napчета | 190 °C | 1/3 | 2 тави | |
| Осoba за торта | Принuddителна конвекця | 3a 6 души | 180-220 °C | 20-30 мINH | 1 | Ø 27 |
| Пай ot варен Тесто | Принuddителна конвекця | 6 napчета | 200 °C | 15-20 мINH | 1 | |
| Целови | Конвекця с дolerен наразва对接ец elementent* | 1 taba | 80-85 °C | 4 часа 30 мINH | 1 | |
| Плodoba торта | Конвекця с дoleren наразва对接ец elementent* | 3a 6 души | 220 °C | 35-40 мINH | 1 | |
| Пай Can Onope | Конвекця с дoleren наразва对接ец elementent* | 6 napчета | 190 °C | 1 |
*For the "Convection with bottom heating element" mode, we recommend preheating with convection to save time.
| INSTALLAZIONE | IT |
| INSTALLATION | GB |
| INSTALACION | ES |
| Инстап�gia | БГ |
| INSTALLATION | FR |
| YCTAHOBKA | RU |
| INSTALACJA | PL |
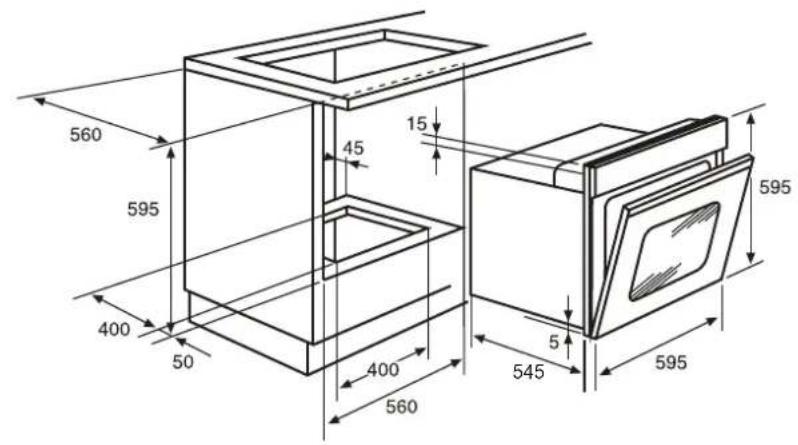
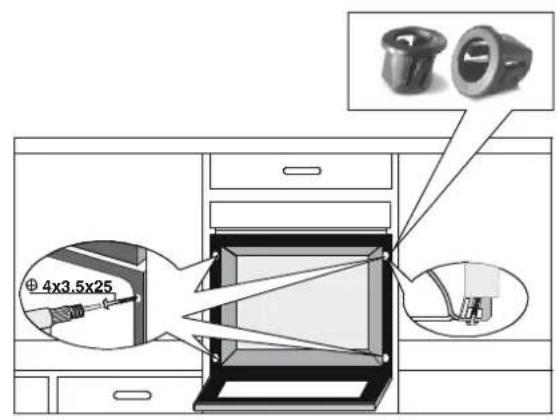
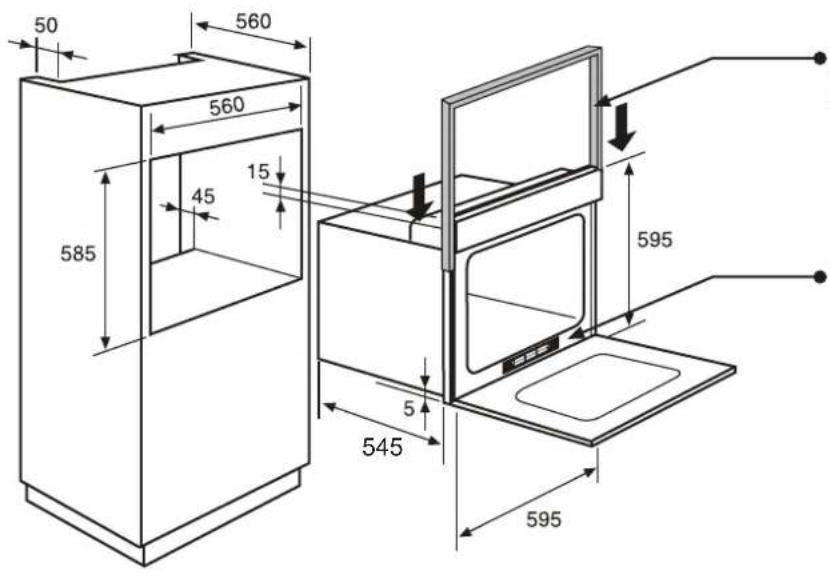
- Protection trim (supplied with the oven when necessary)
- Protection trim (supplied with the oven when necessary) IT Targhetto matricola GB Rating plate ES Tarjeta matricula FR Plaque signalitique RU Маркировочная табличка БГ Табелка с данни PL Tabliczka znamionowa
IT
The manufacturer will not be responsible for any inaccuracy resulting from printing or transcript errors contained in this brochure. We reserve the right to carry out modifications to products as required, including the interests of consumption, without prejudice to the characteristics relating to safety or function.
ES
- CONTENTS
- FR
- SAFETY INSTRUCTIONS 33 GENERAL RECOMMENDATIONS 34 1.1 DECLARATION OF CONFORMITY 34 1.2 SAFETY INSTRUCTIONS 34 1.3 INSTALLATION 34 1.4 INSTALLING THE OVEN IN THE KITCHEN CABINET 34 1.5 IMPORTANT 34 1.6 ADDITIONAL OVEN EQUIPMENT 34 2 USEFUL TIPS 35 2.1 SHELF SAFETY SYSTEM 35 2.2 GRILLING 35 2.3 U-COOK MODELS 35 2.4 REPLACING THE BULB IN U-SEE MODELS 35 2.5 COOKING TIME 35 2.6 CATALYTIC SELF-CLEANING OVEN 35 2.7 CARE AND CLEANING 35 2.8 SERVICE CENTER 35 3. USING THE ANALOGUE CLOCK/PROGRAMMER 36 3.1 GENERAL OPERATING INSTRUCTIONS 36 3.2 SETTING THE CLOCK (CURRENT TIME) 36 3.3 COOKING IN MANUAL MODE 36 3.4 PROGRAMMING THE TIMER 36 3.5 COOKING IN SEMI-AUTOMATIC MODE 36 3.6 COOKING IN FULLY AUTOMATIC MODE 36 3.7 MAINS FAILURE INDICATOR
- BG
- PL
- GENERAL WARNINGS
- DECLARATION OF COMPLIANCE
- SAFETY HINTS
- INSTALLATION
- FITTING THE OVEN INTO THE KITCHEN UNIT
- IMPORTANT
- CONNECTING TO THE POWER SUPPLY
- OVEN EQUIPMENT (ACCORDING TO THE MODEL)
- THE TRAY HOLDER
- USEFUL TIPS
- SHELF SAFETY SYSTEM
- GRILLING
- THE U-COOK MODELS
- ACCORDING TO THE MODEL
- U·SEE
- ADVANTAGES
- COOKING TIME
- SELF-CLEANING OVEN WITH CATALYTIC
- CLEANING AND MAINTENANCE
- SERVICE CENTRE
- USE OF ANALOGUE CLOCK/PROGRAMMER
- SETTING THE TIMER
- MANUAL COOKING
- SETTING THE MINUTE MINDER
- SEMI AUTOMATIC COOKING: SWITCH OFF AT A SET END TIME
- FULLY AUTOMATIC COOKING
- BLACKOUT INDICATION (OPTIONAL)
- OPERATING INSTRUCTIONS
- TABLES OF COOKING TIMES
- INSTRUCTIONS FOR SAFE USE
- DECLARATION OF CONFORMITY
- INSTALLATION OF THE OVEN IN ITS CABINET
- OVEN EQUIPMENT
- (EQUIPMENT VARIES ACCORDING TO OVEN TYPE)
- SAFETY INSTRUCTIONS
- INSTALLATION OF THE OVEN IN A KITCHEN UNIT
- ELECTRICAL CONNECTION
- CONNECTION
- ADDITIONAL OVEN EQUIPMENT
- COOKING ON THE GRILL
- MULTI-COOK
- REPLACING THE LIGHTING IN U·S∈E MODELS
- CATALYTIC SELF-CLEANING OVEN
- CLEANING THE OVEN
- DRIP TRAY
- SERVICING
- USING ANALOG CLOCKS/PROGRAMMER
- BAKING AND CONFECTIONERY PRODUCTS
- USEFUL TIPS AND ADVICE
- SAFETY SYSTEM FOR THE PLATE
- ROTBETE HA TPNJ
- MODEN U-COOK
- AHAHAOCBETNEHNTOB MOENA U.SE E
- SELF-CLEANING CATALYTIC LINING
- USE OF THE ANALOG TIMER / PROGRAMMER
- OPERATION
- SETTING THE TIME (CURRENT TIME)
- COOKING IN THE OVEN MODE
- INDICATION OF INCORRECT SUPPLY VOLTAGE (OPTIONAL)
- NEUBA NCLAOKAPCKN3DEENIA
- IT
- ES
Brand : CANDY
Model : R1006BA
Category : Built-in oven